


My Lazy Caesar Salad Dressing Recipe
/
Call me basic but I am a sucker for a good caesar salad. I know all about how the dramatic tableside-tossed caesar salad spectacle was invented in Mexico but to me, the best caesar salads are the ones that are served up at nice pizza spots—they have to be good so that people actually enjoy eating them instead of just ordering them out of obligation to have something leafy and green to go with their pizza. I love the ones where a nice, thick, anchovy-based dressing is evenly coating every lettuce leaf before being dusted in freshly grated parmesan cheese, and I actually look forward to them just as much as I look forward to the pizza!
The original caesar salad dressing allegedly wasn’t all that thick and didn’t even contain anchovies, but for once, I have to argue that time and adaptations have improved the recipe. So, the dressing I’m paying tribute to here is the modern version that most Americans are probably more familiar with nowadays.
The bottled caesar salad dressings from the grocery store just don’t cut it for me, though. They just don’t have the same special umami. So, I always make my own. But keep in mind that I am really quite lazy. Salads are a go-to for weekday lunches at my place but in those instances I am most definitely not busting out a mortar and pestle for pounding an anchovy paste nor any sort of food processor/immersion blender to make a thick emulsion, nor do I wish to clean any of those instruments thereafter. So, this is my lazy cheater version of a caesar salad dressing that I am willing to throw together on weekdays, and I finally really tried to get the measurements right so I could share it with you.

The secret ingredient in my cheater caesar dressing recipes is fish sauce. It’s my secret ingredient in a lot of recipes, really, but I don’t think it could be any more fitting than in this one. After all, caesar dressing gets its distinct umami undercurrent from salted anchovies getting turned into a paste—fish sauce is exactly that same flavor in convenient bottled liquid form! I thought I was pretty dang clever when I first came up with this hack.
Rather than having to worry about combining egg and oil just right to create a thick emulsion, my other cheat is to use yogurt to get a nice thick dressing. Some recipes use a jarred mayo, but yogurt is perhaps a bit healthier (and less off-putting for mayo haters like my spouse). I always have some Greek yogurt in my fridge, and including it in any dressing guarantees a nice creamy and thick consistency. The resulting dressing does not taste identical to the kind I love at nice pizza joints but rather like a good yogurty version of it. For quick weekday lunches, it does the trick and is plenty tasty!
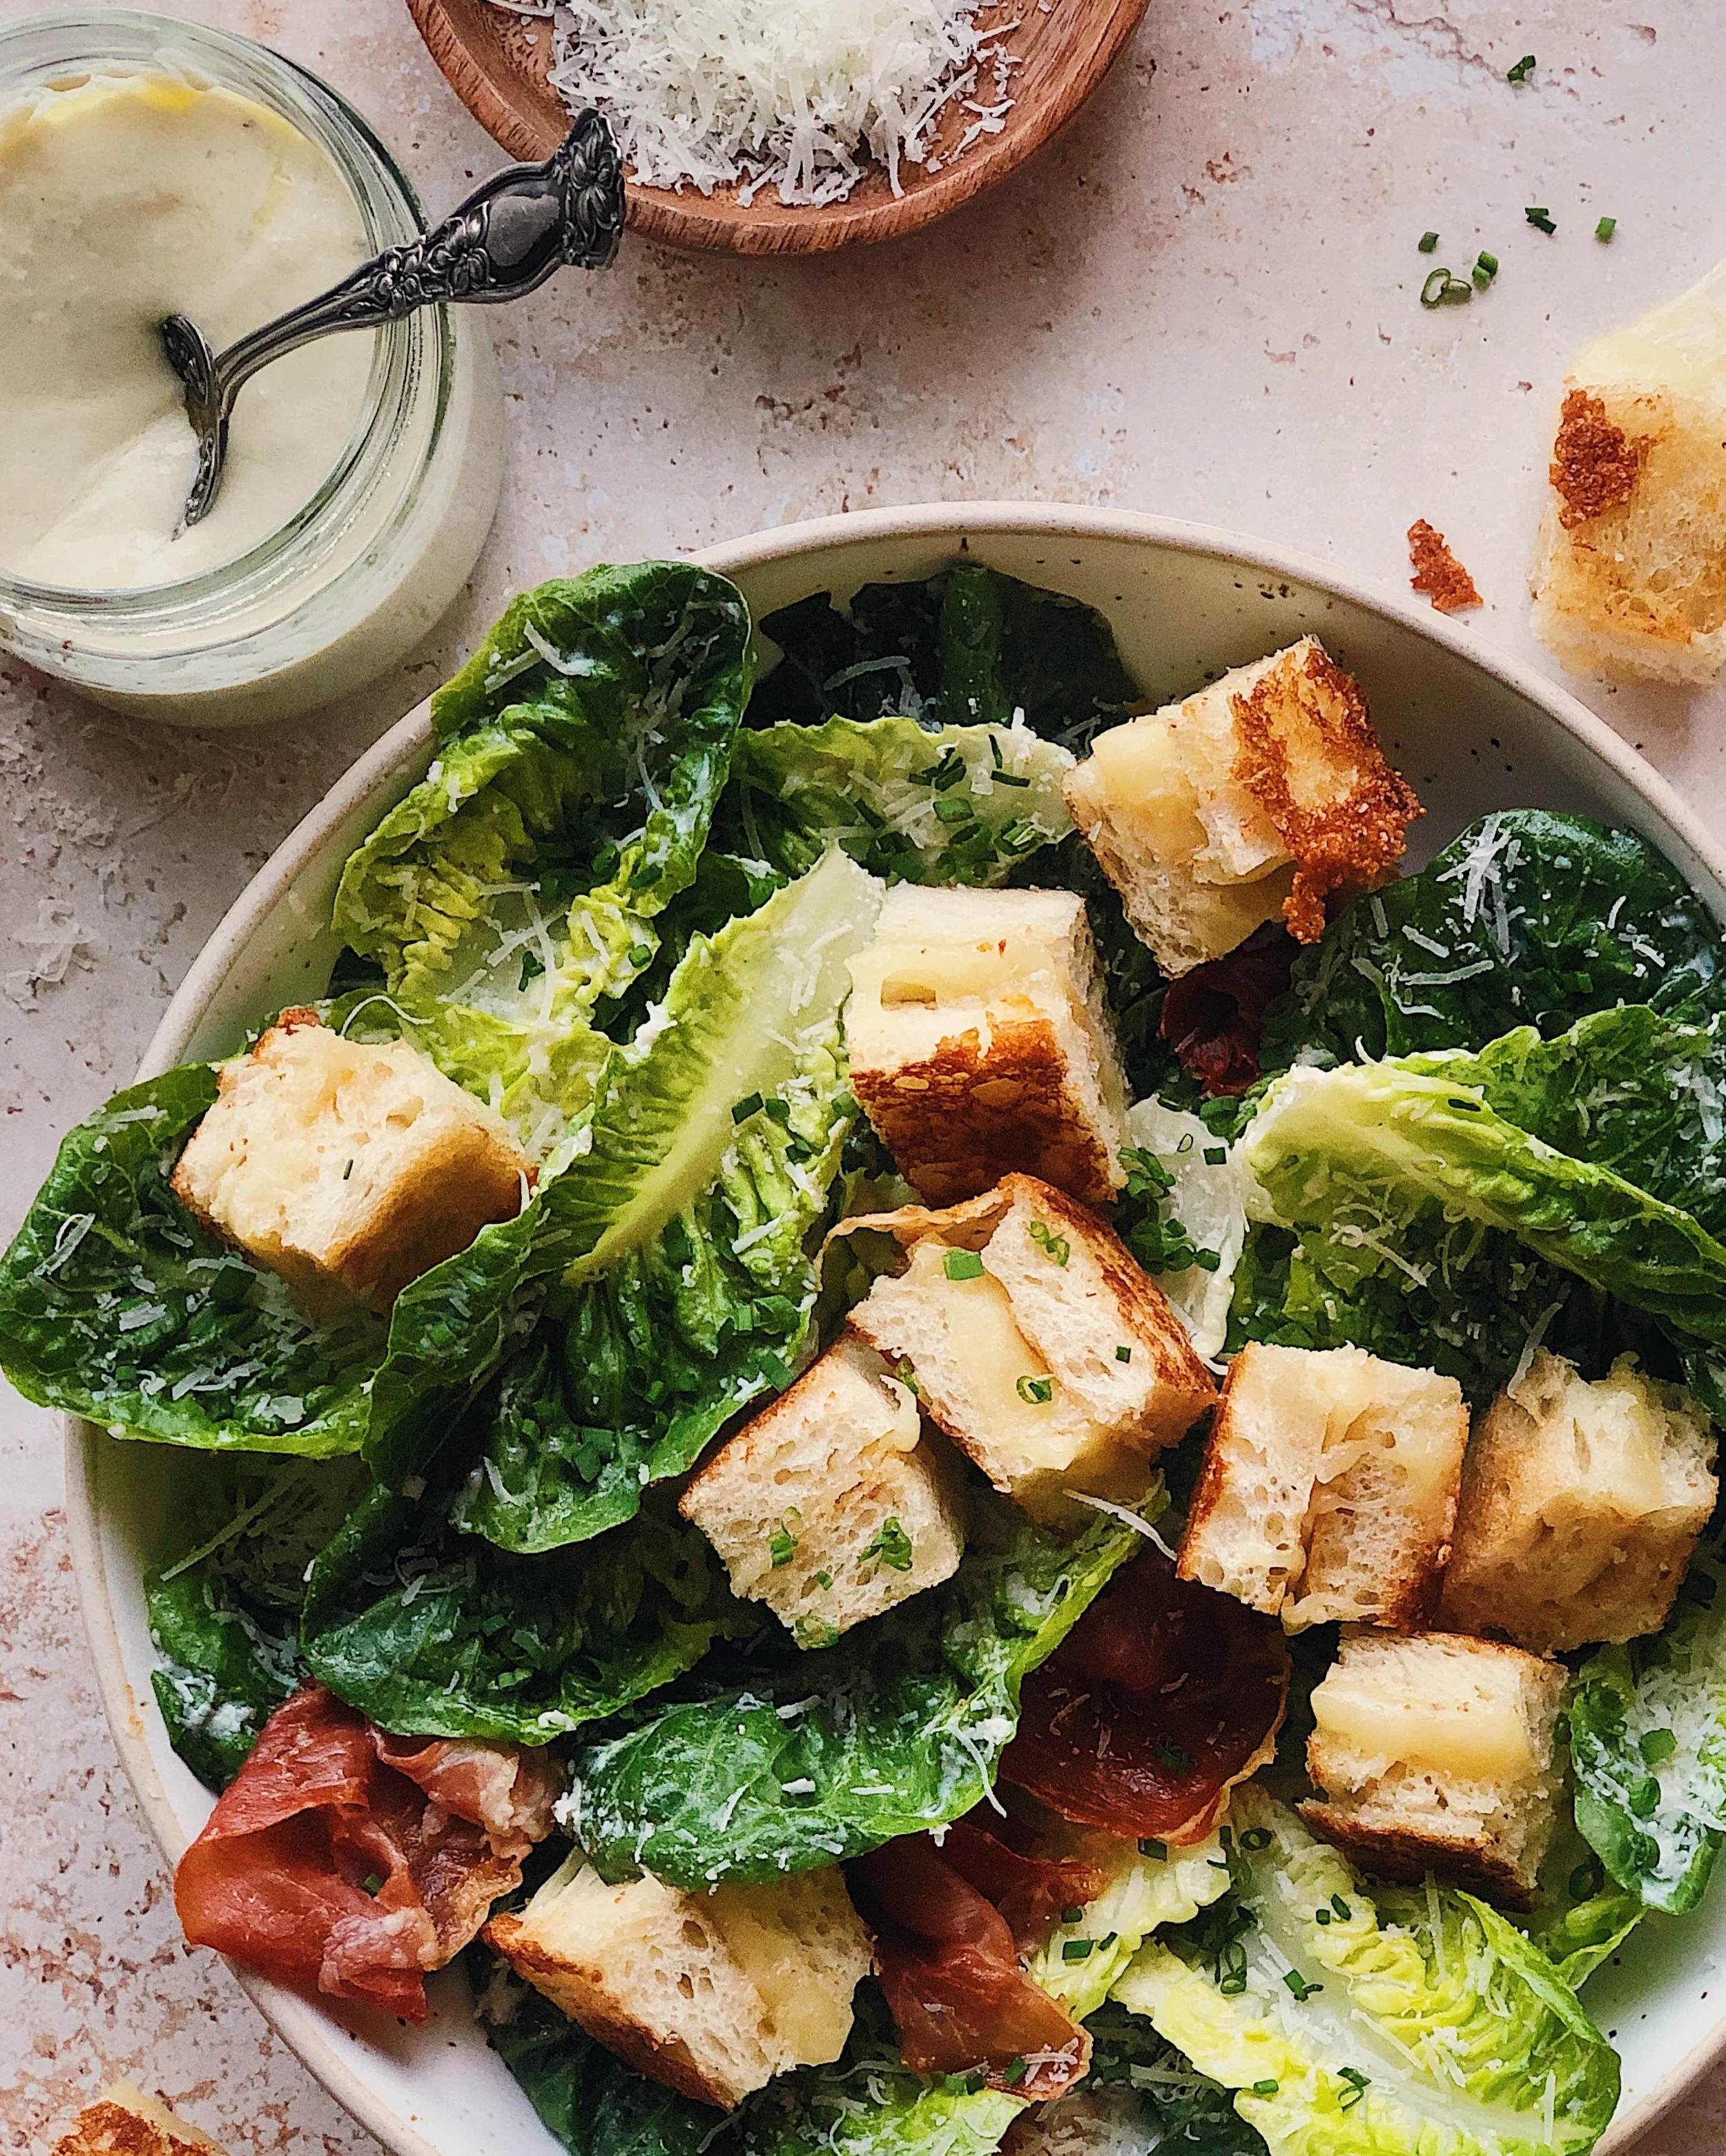
To make the salad shown in the photos, I tossed baby gems lettuce leaves with enough dressing to thinly and evenly coat the leaves and then tossed the dressed leaves with lots and lots of freshly grated parm. I made crispy prosciutto by baking twisted up slices of prosciutto on a parchment-lined tray at 425°F for 10 minutes. Then, I made grilled cheese sandwich with a cheddar and gruyere blend and cut it up into 1-inch cubes to use as croutons. A sprinkle of chopped chives and more grated parm were the finishing touches.

How I Make My Lazy Caesar Salad Dressing
Ingredients
2 cloves garlic, pressed or microplaned
3 tbsp lemon juice (from about 1 lemon)
1 tsp apple cider vinegar
1 tbsp fish sauce
1/2 cup + 2 tbsp Greek yogurt
1 tsp dijon mustard
1/4 cup extra virgin olive oil
freshly cracked black pepper, to taste
1/2 cup freshly grated parmesan cheese
Procedure
Combine the garlic, lemon juice, vinegar, fish sauce, yogurt, and mustard in a bowl. Whisk thoroughly to combine. Add the olive oil and pepper and whisk again until homogenous. Finally, add the parmesan cheese and whisk thoroughly once again.
(This recipe makes enough dressing for 4–6 two-person meal salads. Add dressing to prepared lettuce leaves one tablespoon at a time and toss thoroughly after each addition until leaves are evenly and thinly coated. Then toss dressed leaves with extra freshly grated parmesan to taste. Serve with chunky croutons on top, or go crazy and add whatever you like!)