


Recipe: Mushroom and Caramelized Onion Mini Pot Pies
/These mini pot pies filled with caramelized onions and an umami-loaded medley of mushrooms are the thing to make when you want a meatless dinner that is still hearty and comforting. Onions are cooked low and slow while the mushrooms are roasted to concentrate all their flavors, and then they are brought together with a California Chardonnay and a splash of cream before being tucked under a pastry crust.
This recipe was developed in partnership with California Wines. I will be traveling in Asia for the second half of December and won’t be having any sort of traditional Western-style Christmas feast this year, so while I am at home, I am celebrating the holiday season by making even my weeknight dinners a little extra special. Any time I cook with wine, Spouse and I will open up a bottle that we are also happy to sip; that instant wine pairing that comes from using the same wine in the pan and as in our glasses makes a comfy night staying in feel as special as dining out. We both love an oaky Chardonnay that has creamy or butterscotch-y notes; unlike other whites that might only seem to fit with warmer weather, I think a rich Chardonnay like this works so well all year. Living so close to the California wine country, we’re always stocked up on locally grown wines for little occasions like these and are happy to support local farmers and farmworkers in this way.
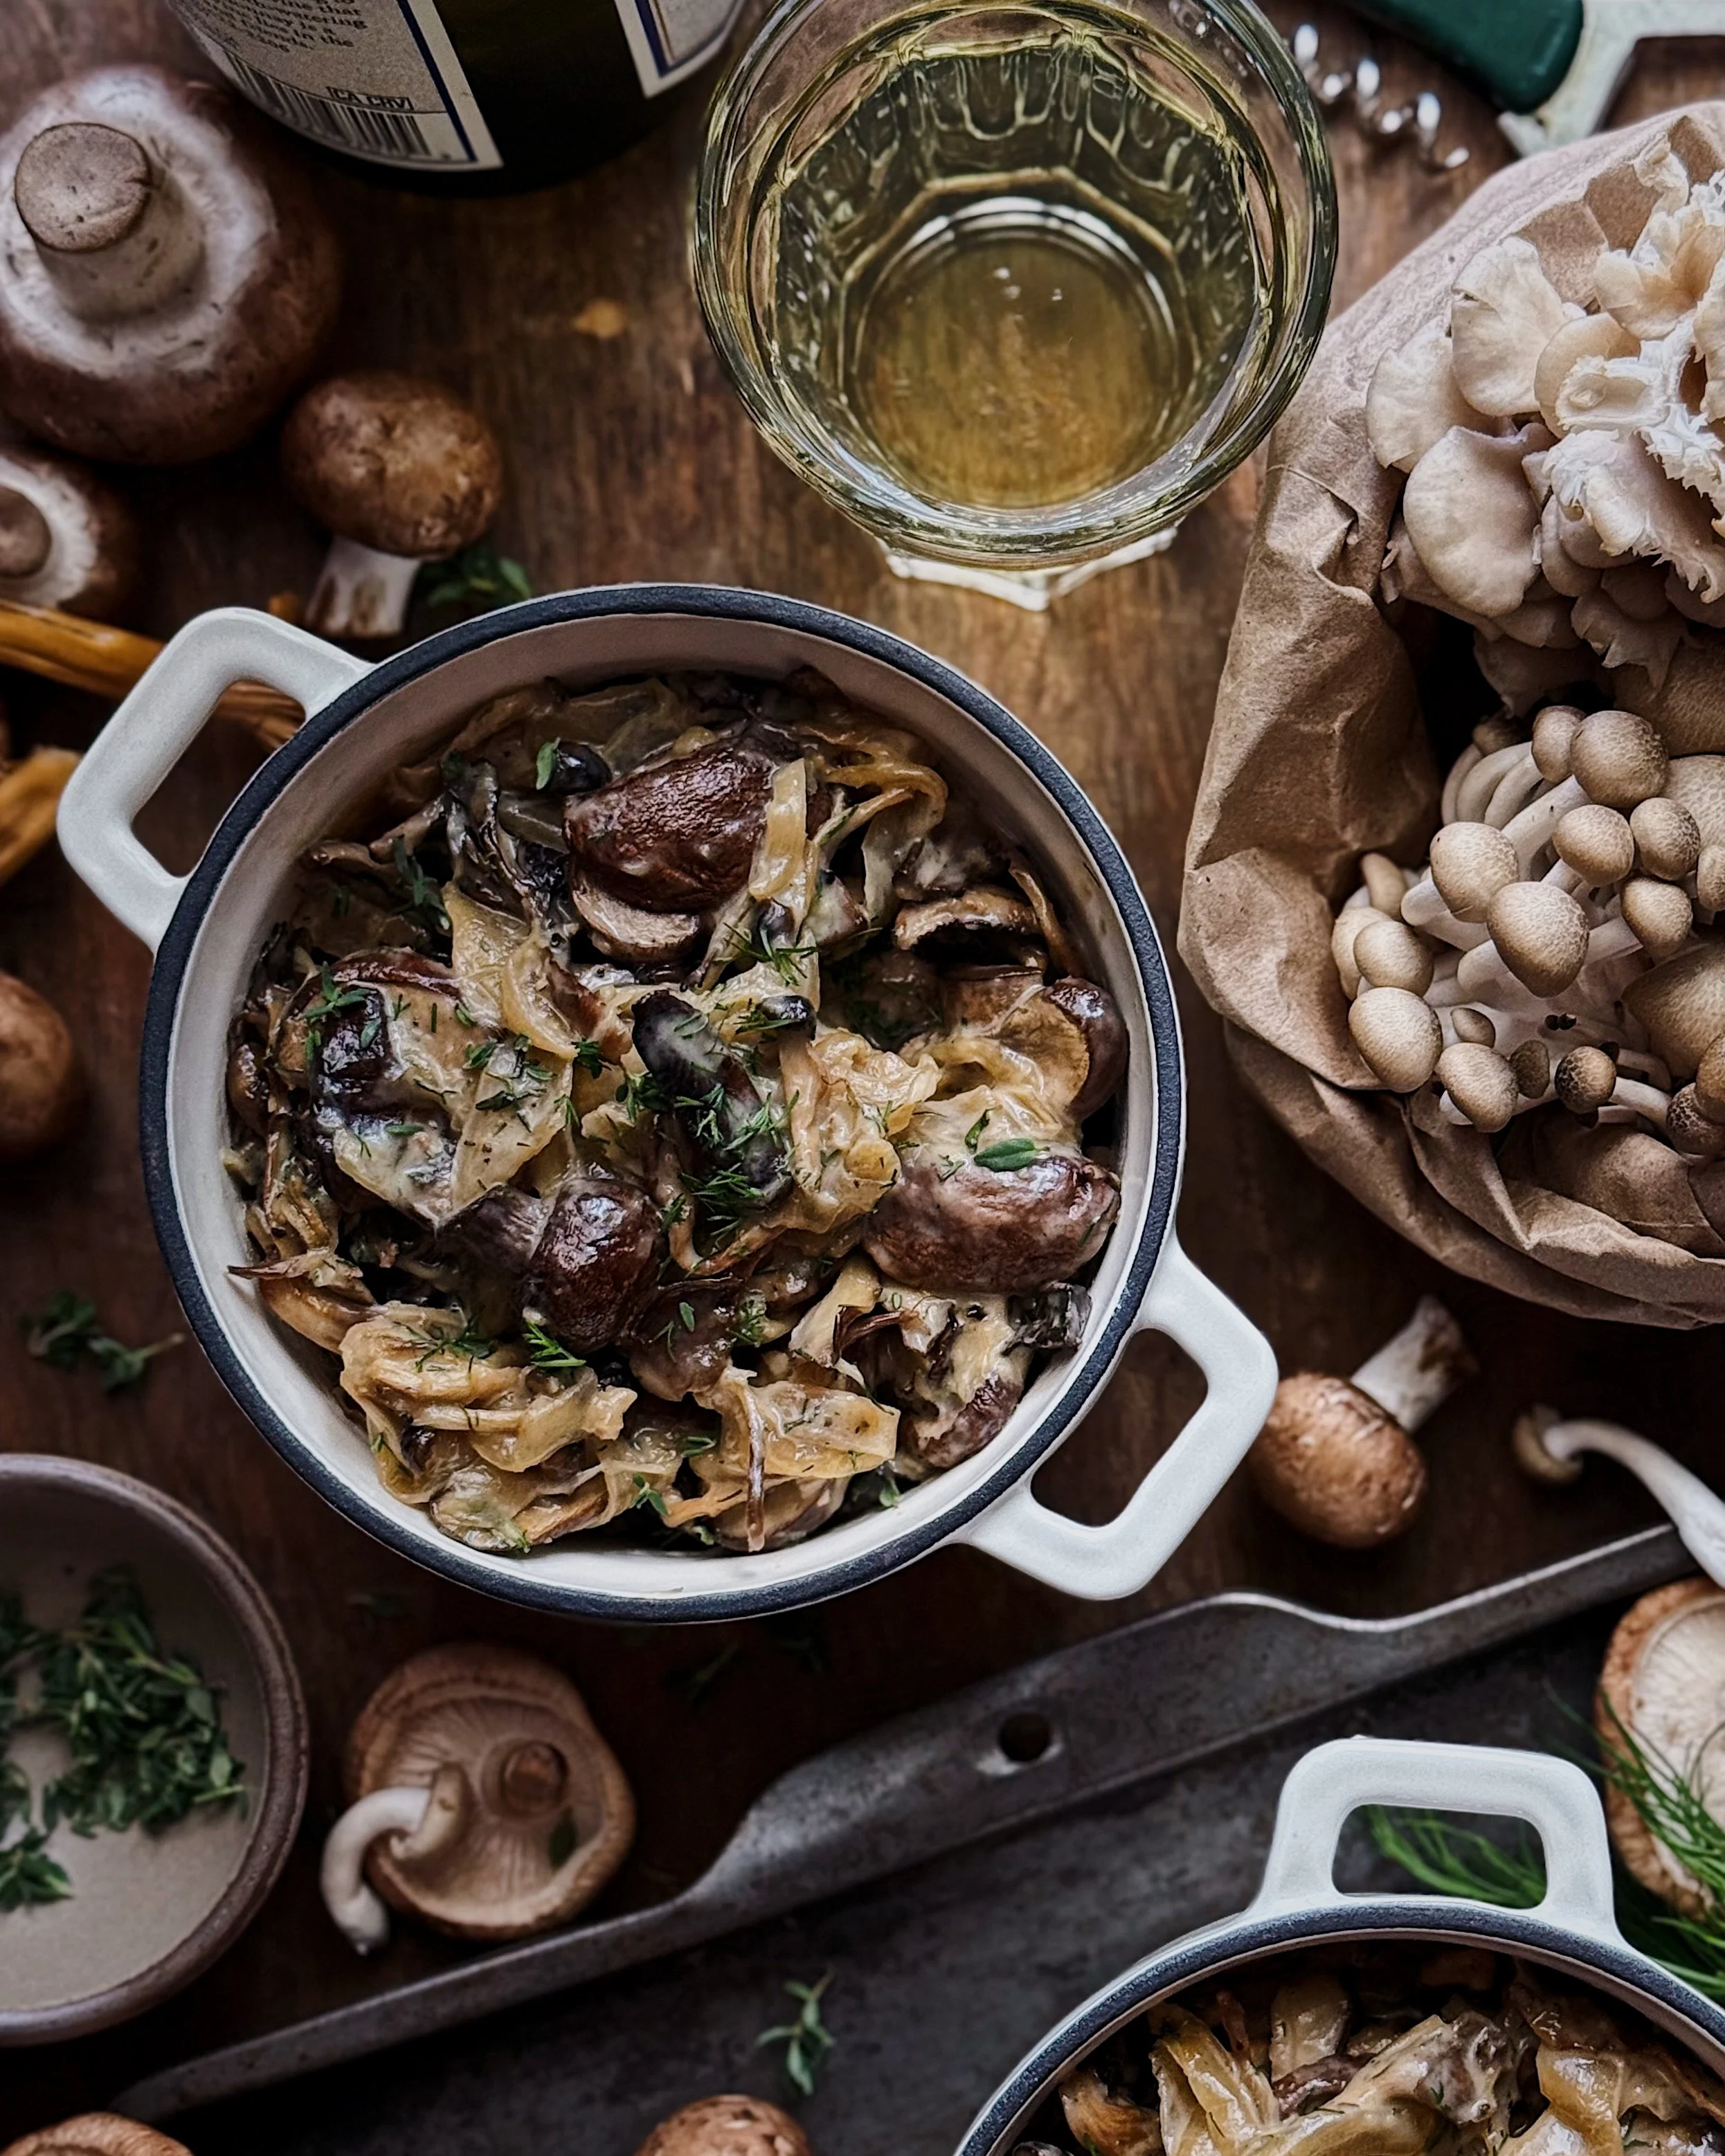
The bulk of the filling for these mini pot pies is made with California-grown onions and mushrooms. I’ve lived my whole life in California and one of my favorite things about my home state is its agricultural abundance. I love shopping at farmers markets and local grocery co-ops where so much of the beautiful produce that I see is grown right here in California, and I definitely took advantage of that when shopping for ingredients to make this recipe. The original idea I had for these was combining the flavors of French onion and cream of mushroom soups, but the wine brightens things up and makes the combination taste wholly different from their old-school inspirations. While many pot pies do have a soup-like filling with a lot of liquid, this filling is a celebration of texture from the jammy onions and chunks of mushrooms.
Notes about the main ingredients for Mushroom and Caramelized Onion Mini Pot Pies
Onions: These will be cooked on low heat in some butter to slowly bring out their natural sweetness. It may seem like a lot of onions when you start, but their volume will reduce significantly, down to about 20% of what you started with. Their jammy texture will make the filling of the pot pies feel rich and thick.
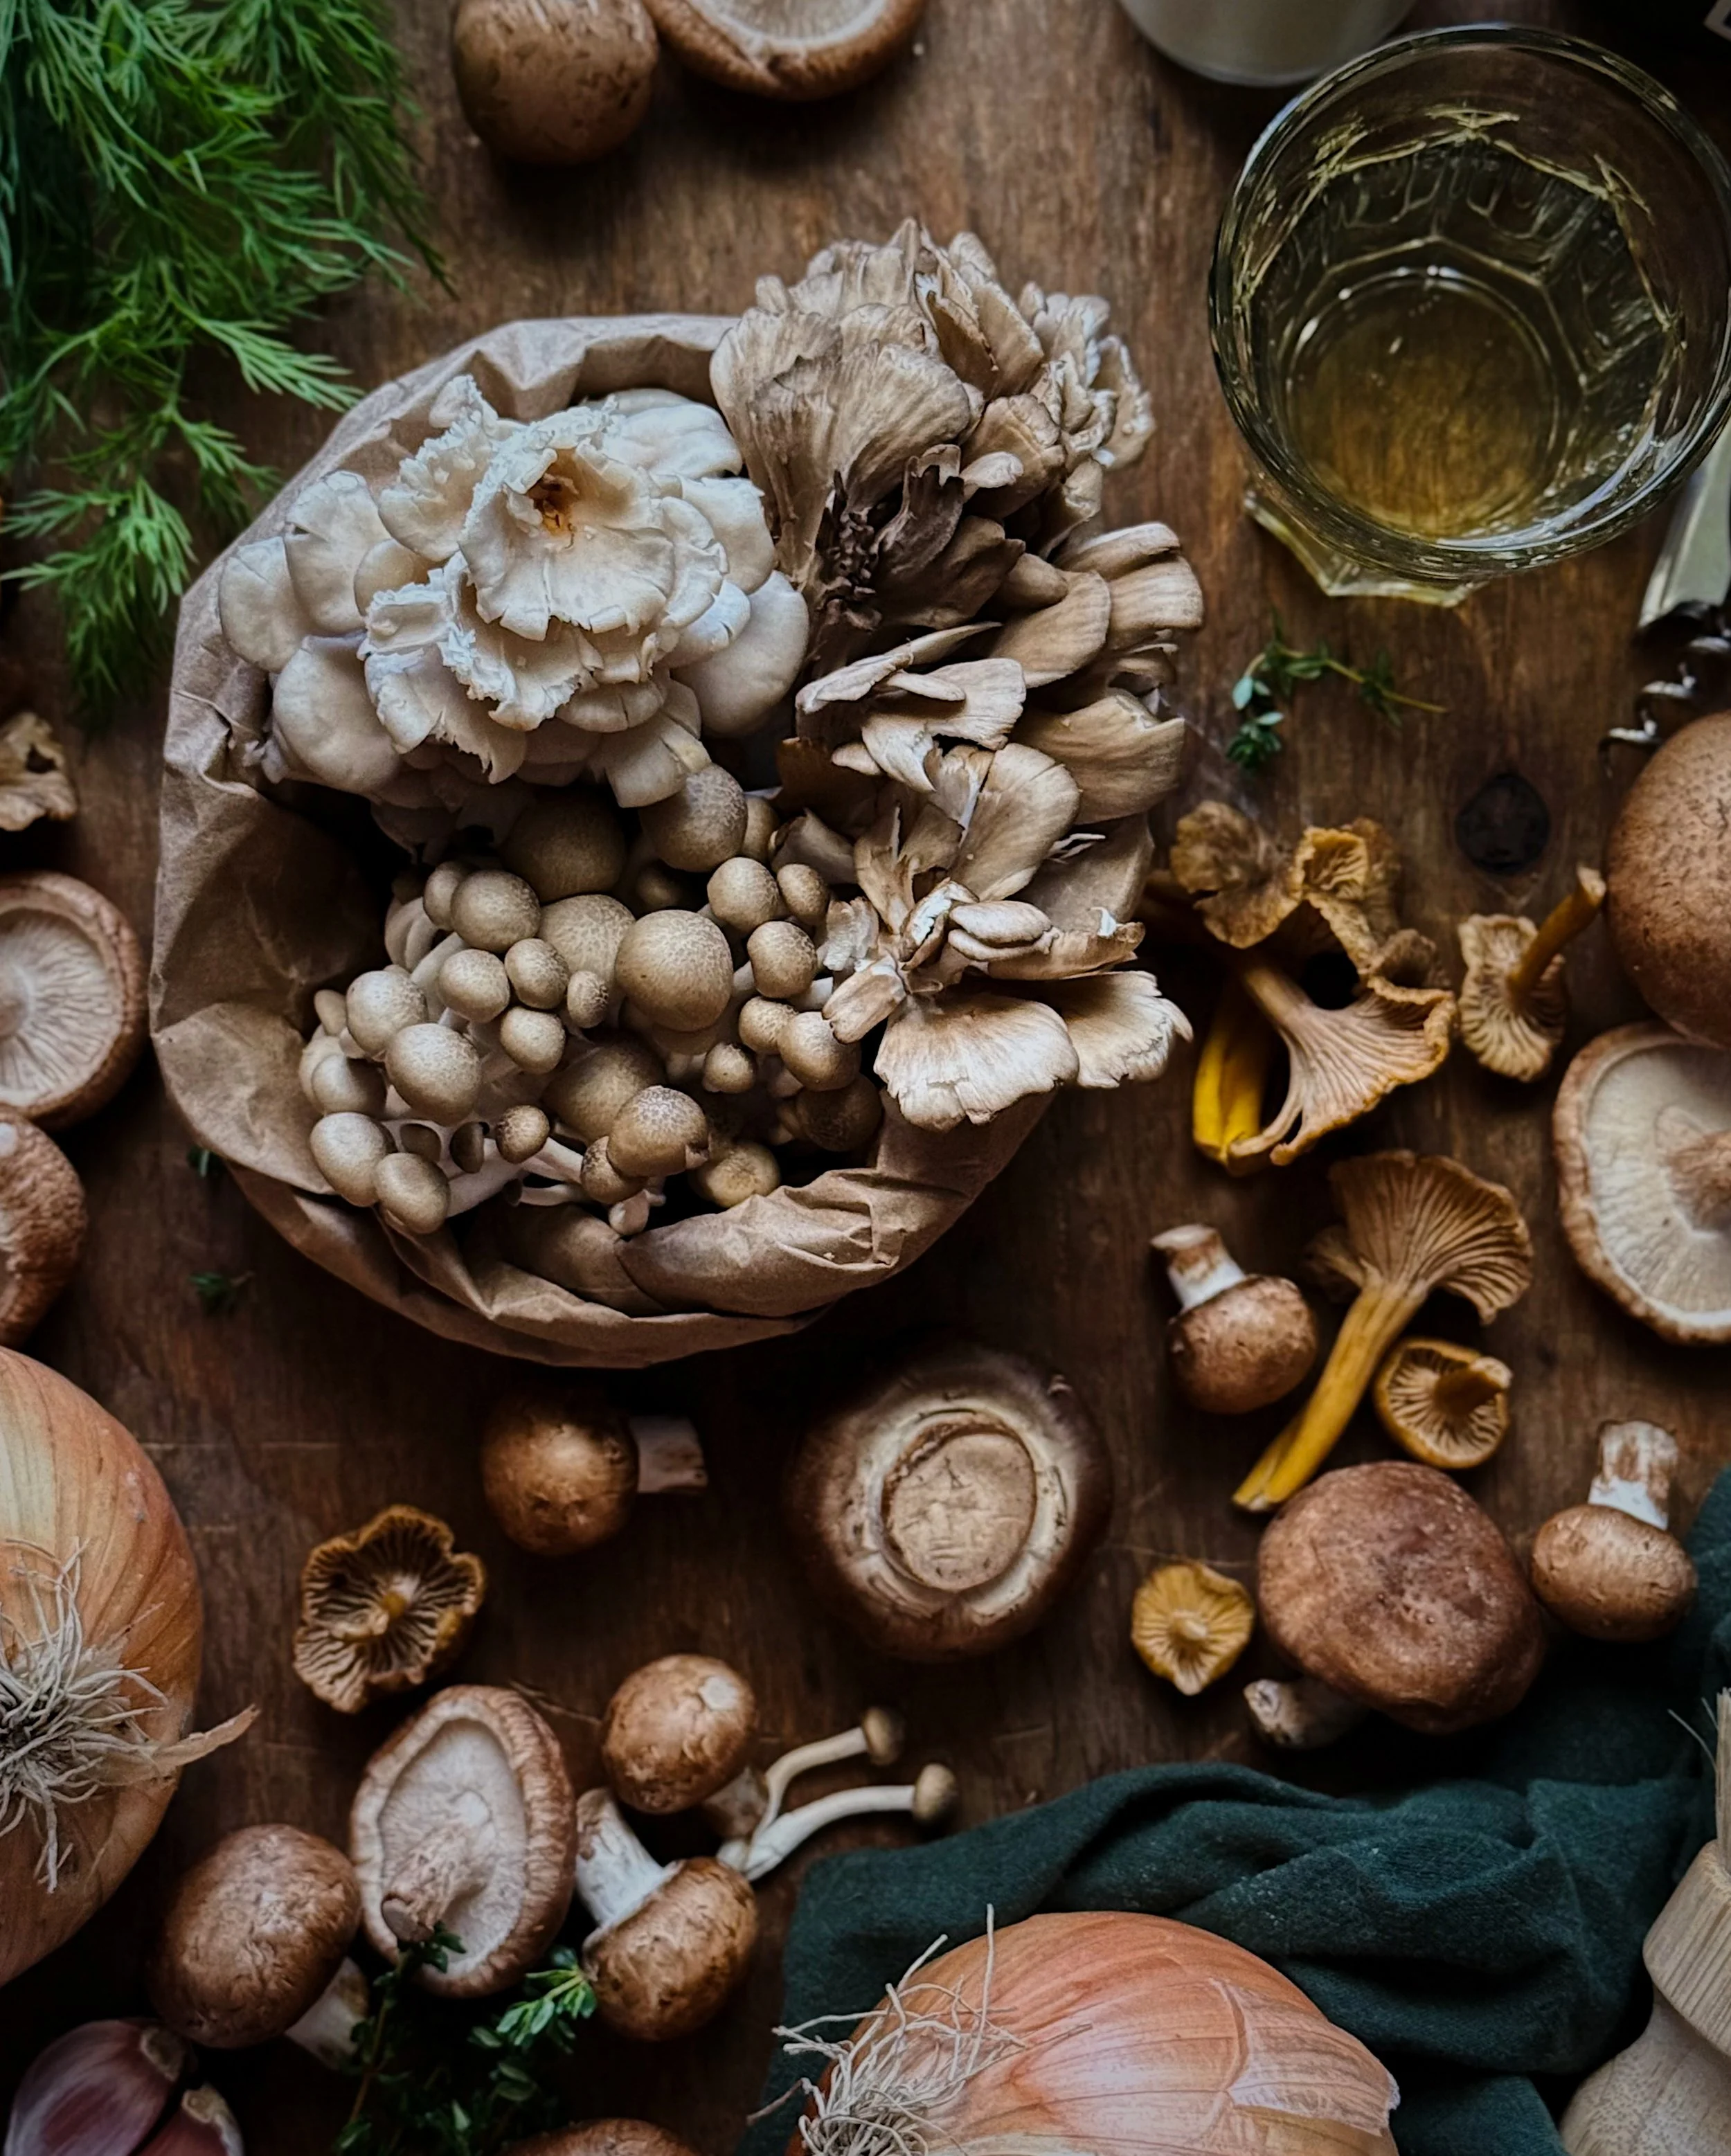
Mushroom Medley: In the written recipe below, I note that you’ll need about 1.5 pounds of mushrooms to make the two half-quart pies. I encourage a combination of baby bella mushrooms for their meatiness plus at least one other type of mushroom in order to add flavor and texture complexity to your pot pie filling. I think that the more varieties you use, the more interesting the filling will be, so go for a few different types if you can! I can never resist stopping by the mushroom vendors at farmers markets to see what is grown here in California. To make these pot pies, I used baby bella, shiitake, maitake (hen of the woods), oyster, shimeji (beech), and yellowfoot mushrooms.
California Chardonnay: A white wine from California with a bright aroma and underlying notes of vanilla, oak, and butterscotch is perfect for tying together the savory-sweet caramelized onions and the earthy roasted mushrooms. Over 80% of U.S. wine is produced in California, so even if you don’t live just a bridge toll away from the wine country like I do, it’s easy to get a great wine from California at your nearby grocer or wine shop, order directly from a winery, or visit a wine bar or tasting room to connect with experts who can help you choose a bottle or two.
Heavy Cream: Heavy cream helps make the sauce silky and luxurious, and allows it to cling to all the crevices of the roasted mushrooms.
Oyster Sauce (or Vegetarian Oyster Sauce): No matter the type of recipe, my Chinese roots have a strong presence in my pantry and my cooking instincts always have me reaching for one of those pantry staples when I am seasoning my dishes. Chinese oyster sauce helps to enhance the natural umami of the mushrooms and brings a little extra savory complexity to this pie filling. If you wish to keep your pot pies vegetarian, there is “vegetarian oyster sauce” which is made from mushrooms and does not actually contain any oysters; it can be used as a substitute for the oyster sauce in this recipe.
Pie Dough: To keep things easy, I used a store-bought frozen pie dough to make the pastry toppers for my mini pot pies. This recipe is all about making something that feels like comfort food but is uncomplicated enough for a weeknight dinner, and frozen pie dough is one of my favorite shortcuts. Use the pie dough of your choosing and make sure it’s pre-thawed when you are ready to make this recipe. Note that the baking temps and times in the recipe are what I’ve tested with my favorite store-bought dough, but these may vary depending on your dough. Even if you are using a dough that comes pre-rolled, I suggest folding it up into layers and rerolling it out into a size that is just big enough to cover your mini pot pies, for a thicker, heartier crust. You can use the scraps to make decorations for the tops of your pot pies too, if you wish!
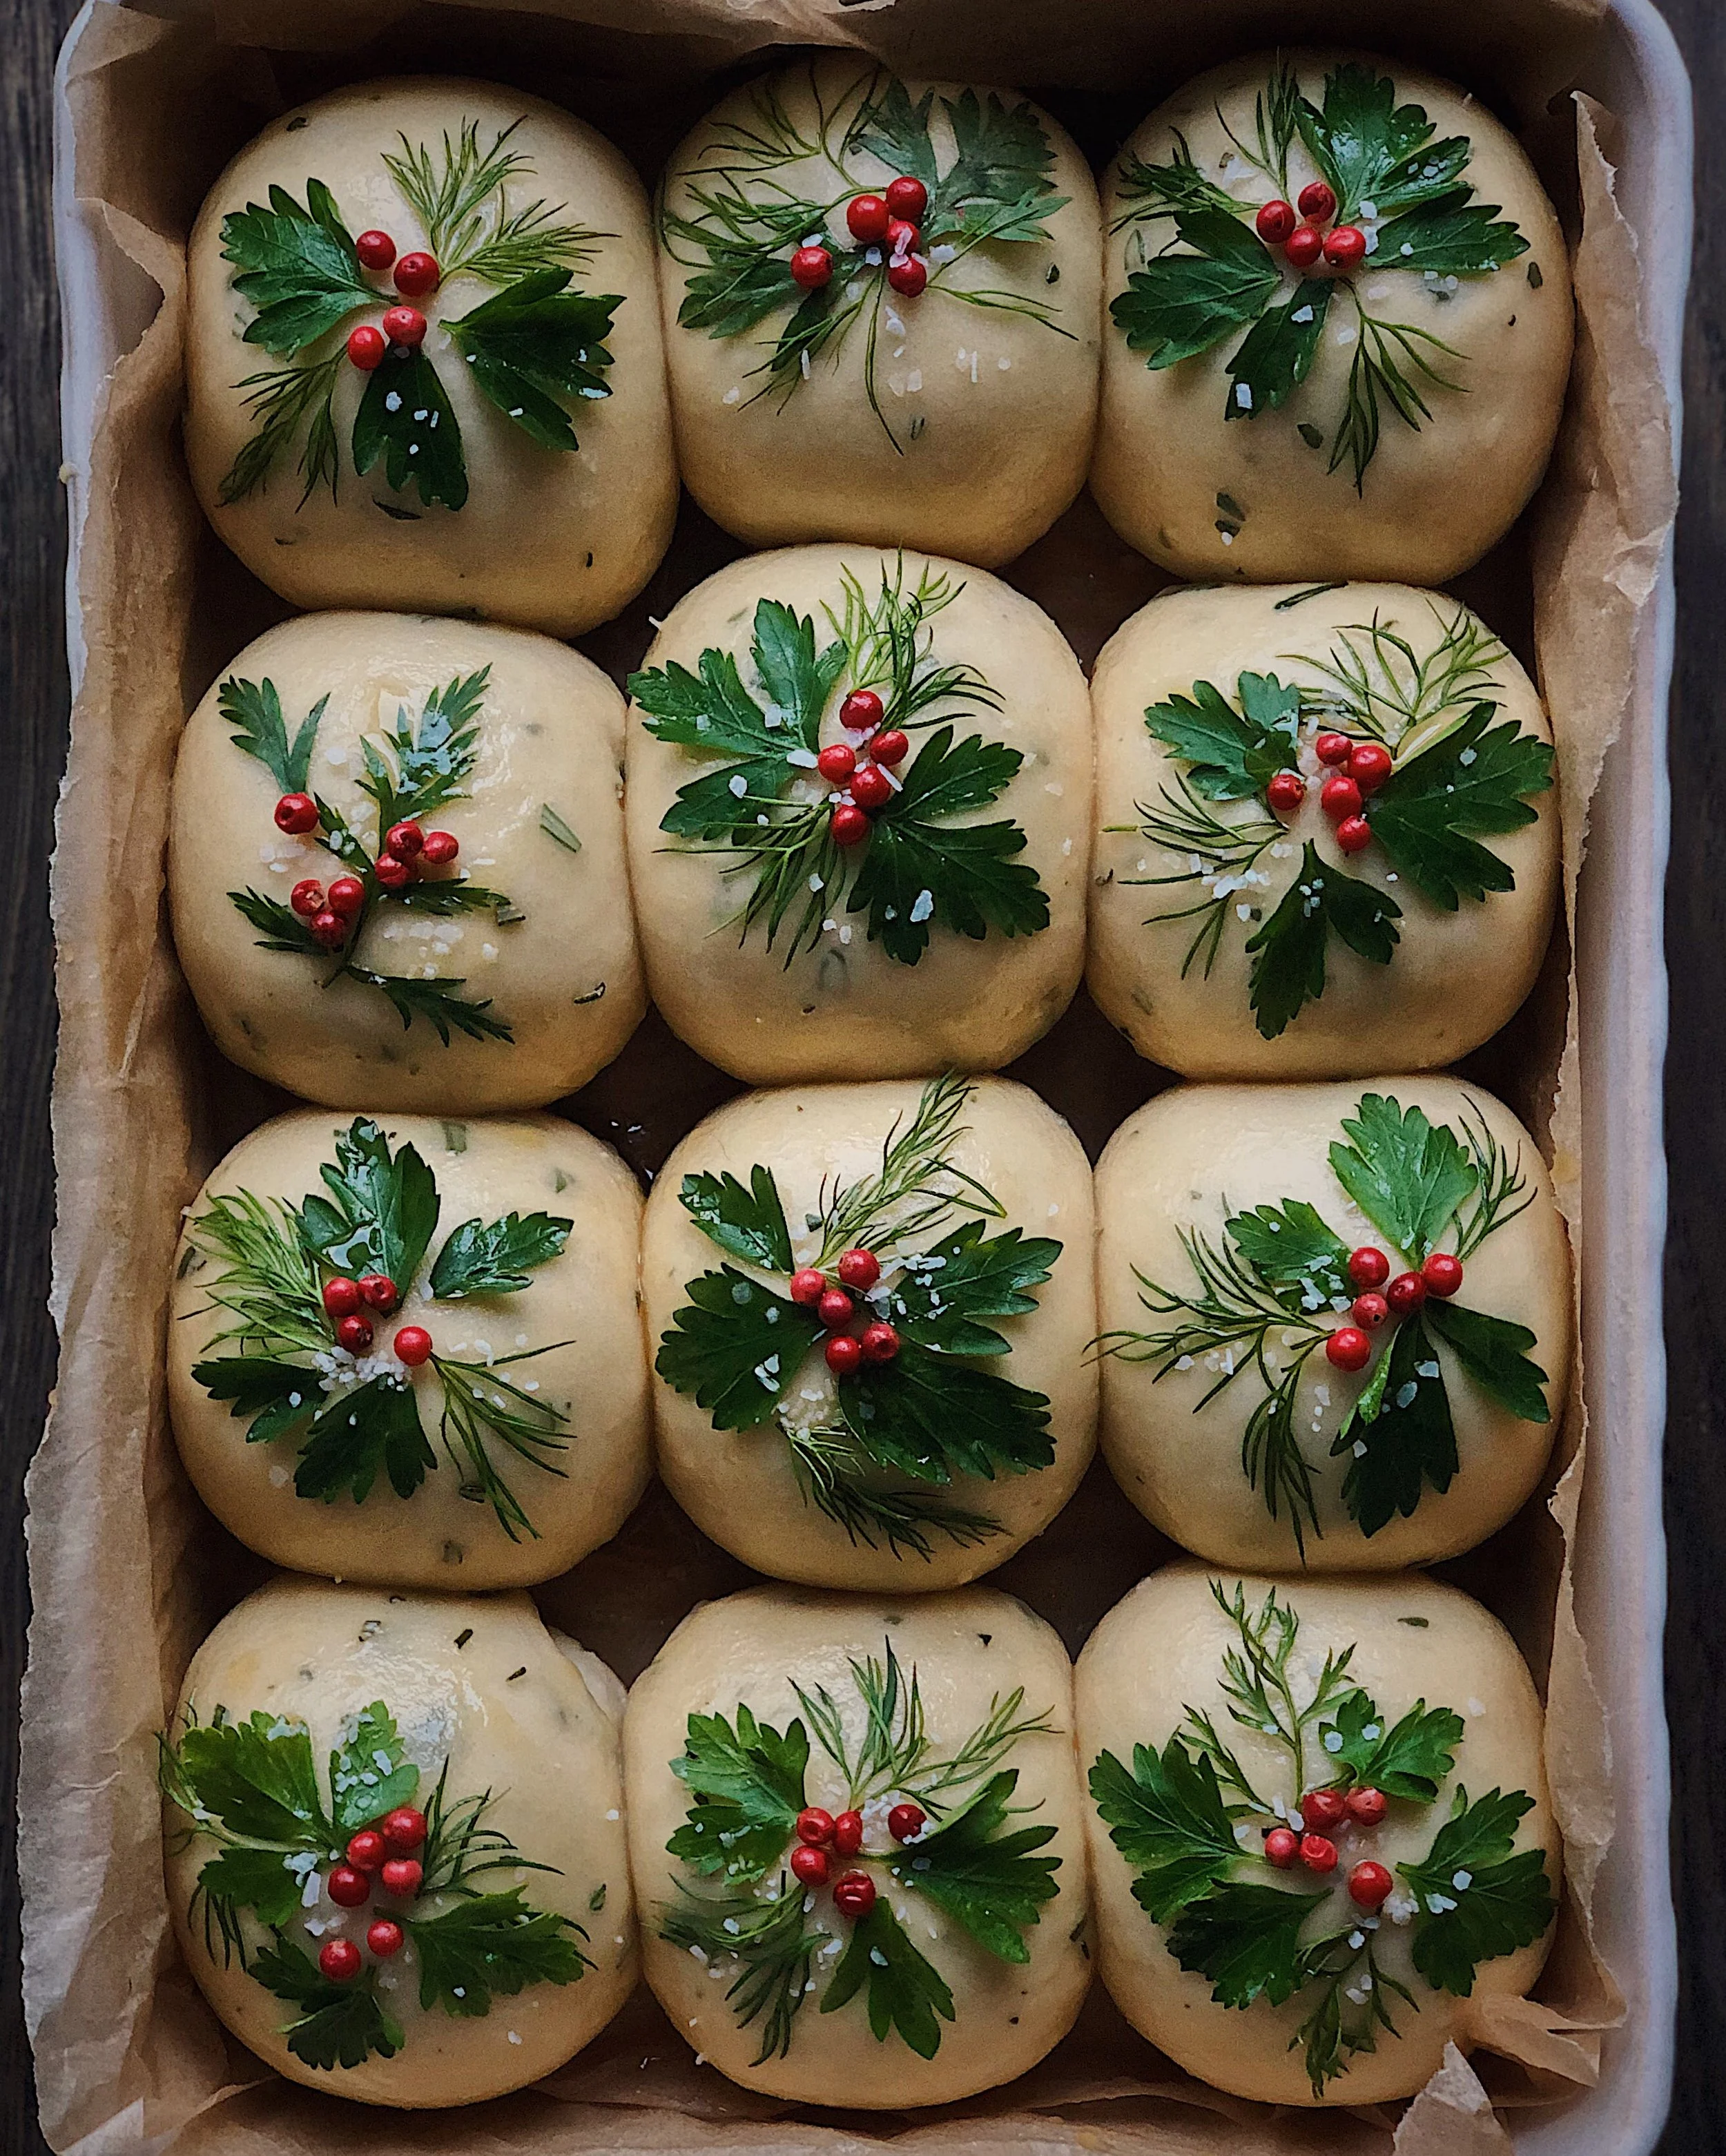
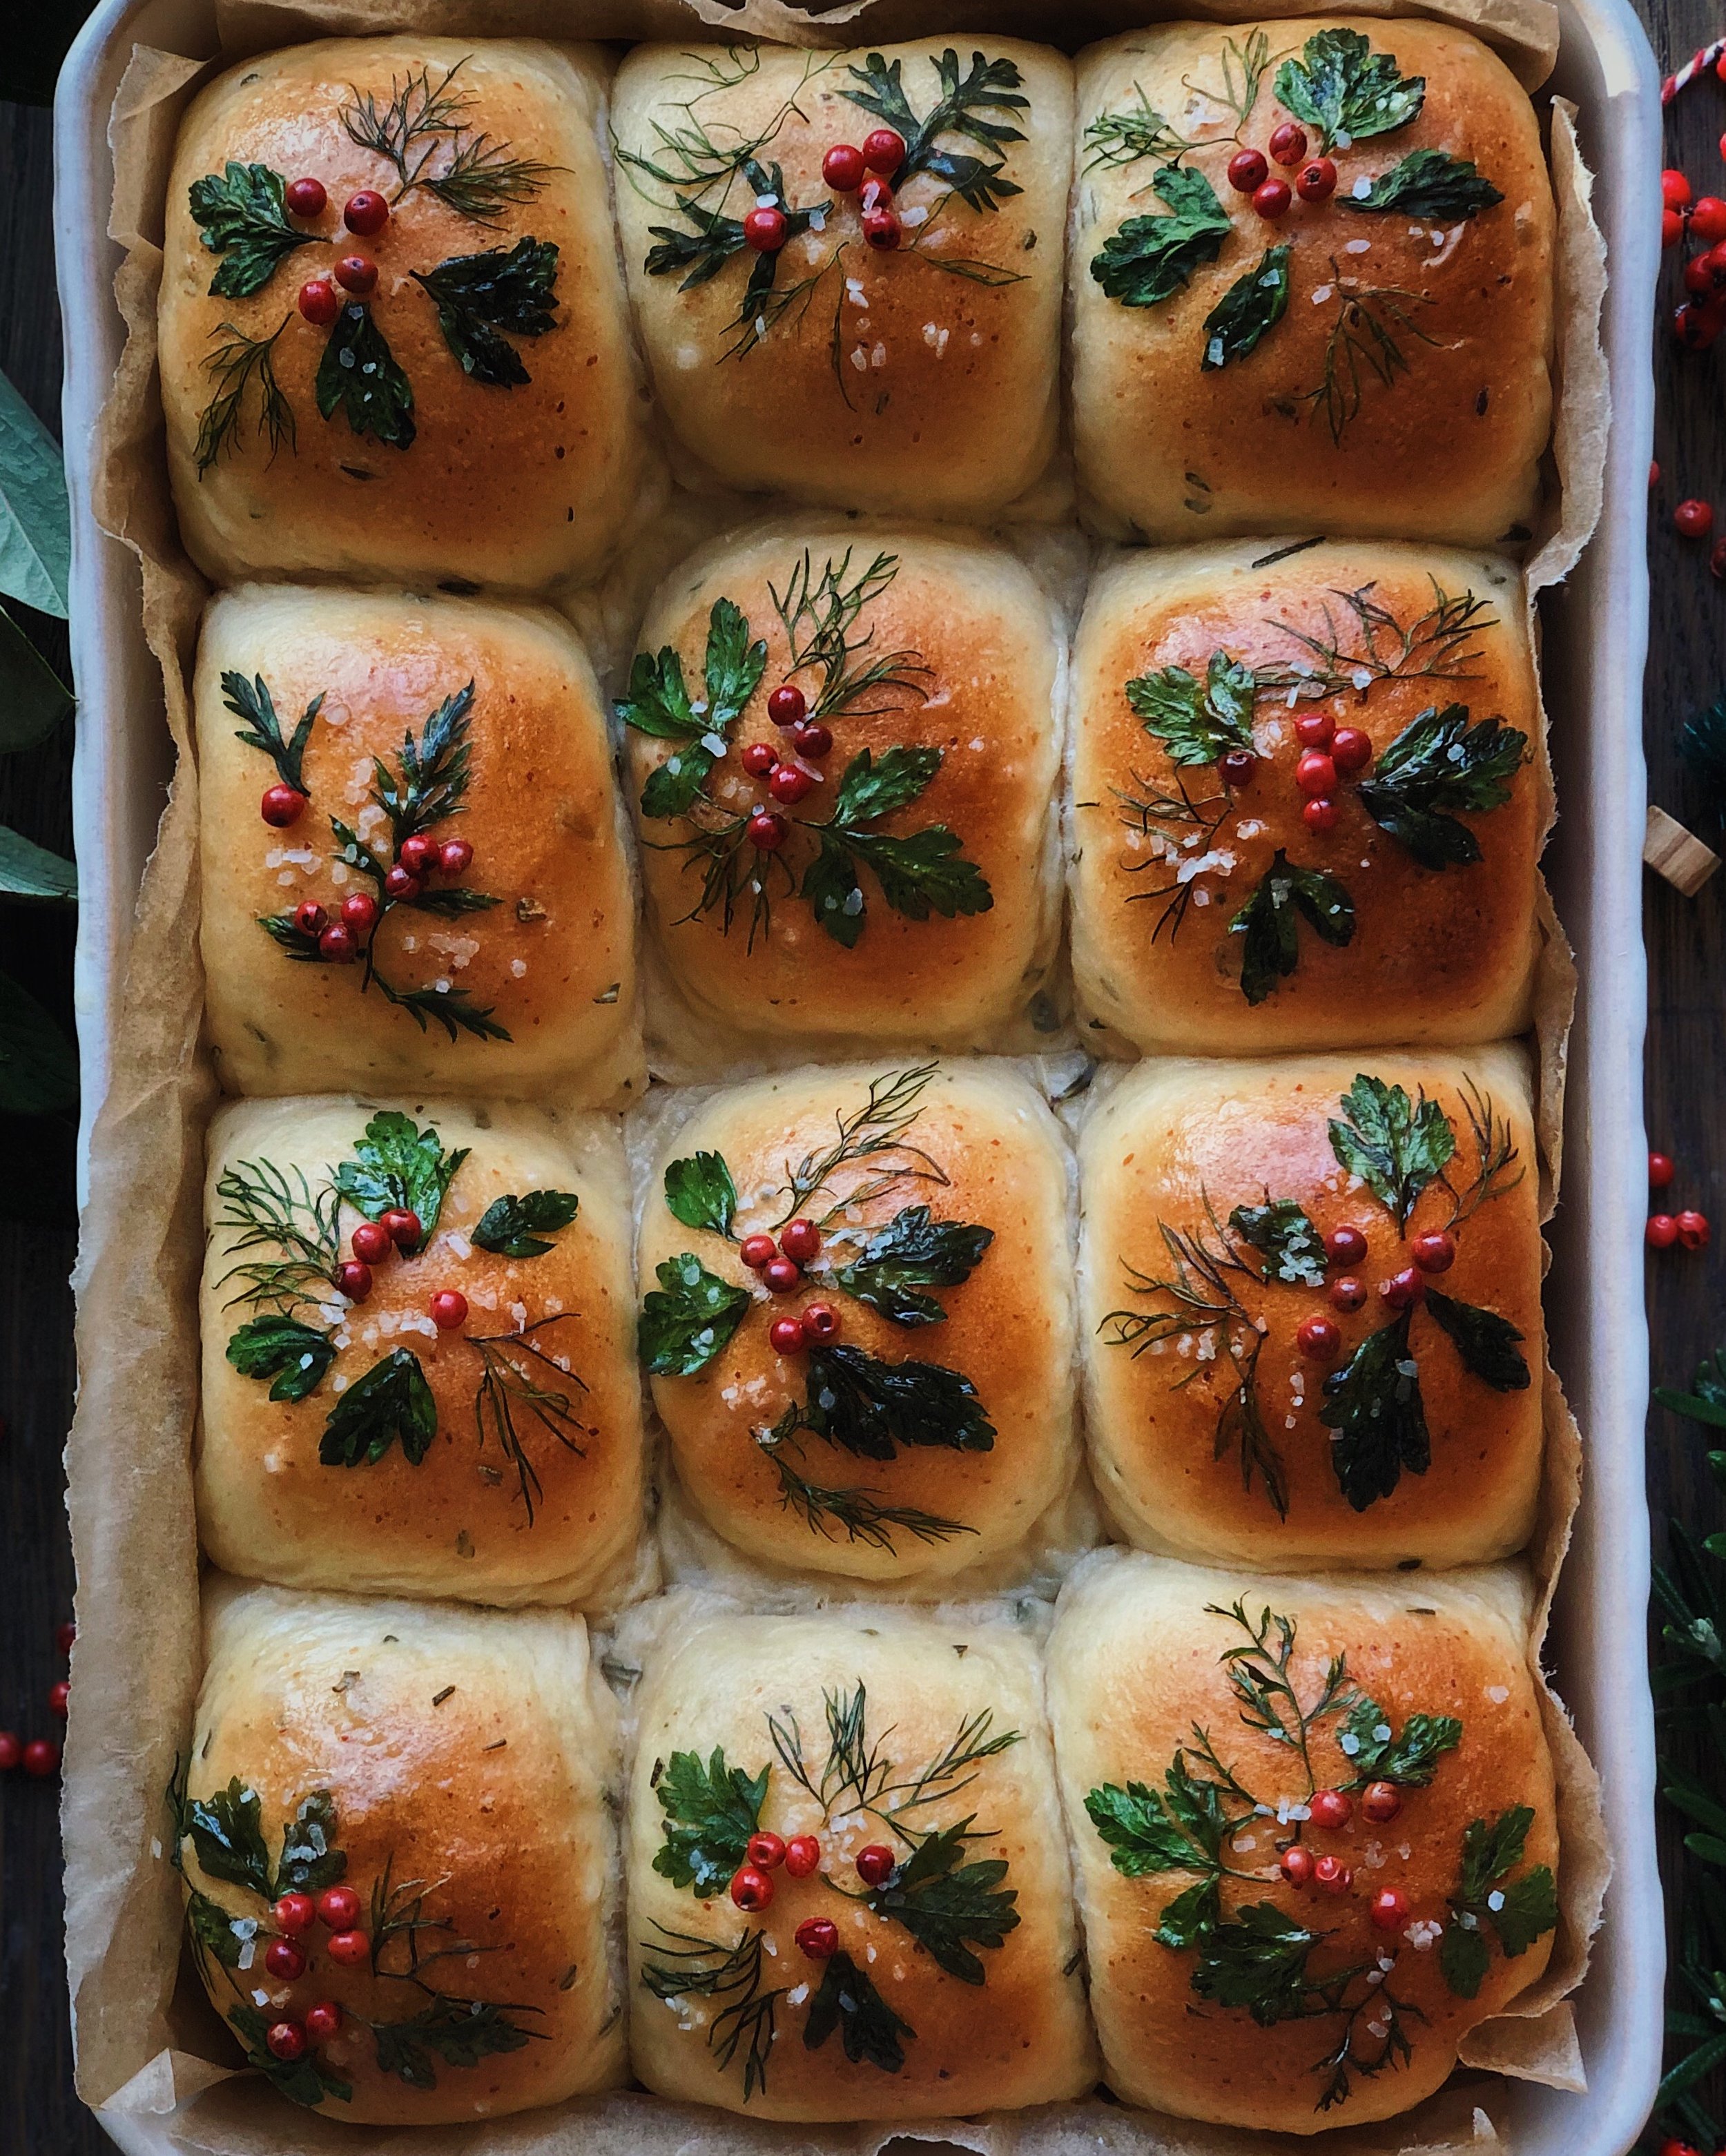
How to Decorate Mini Pot Pies for the Holidays
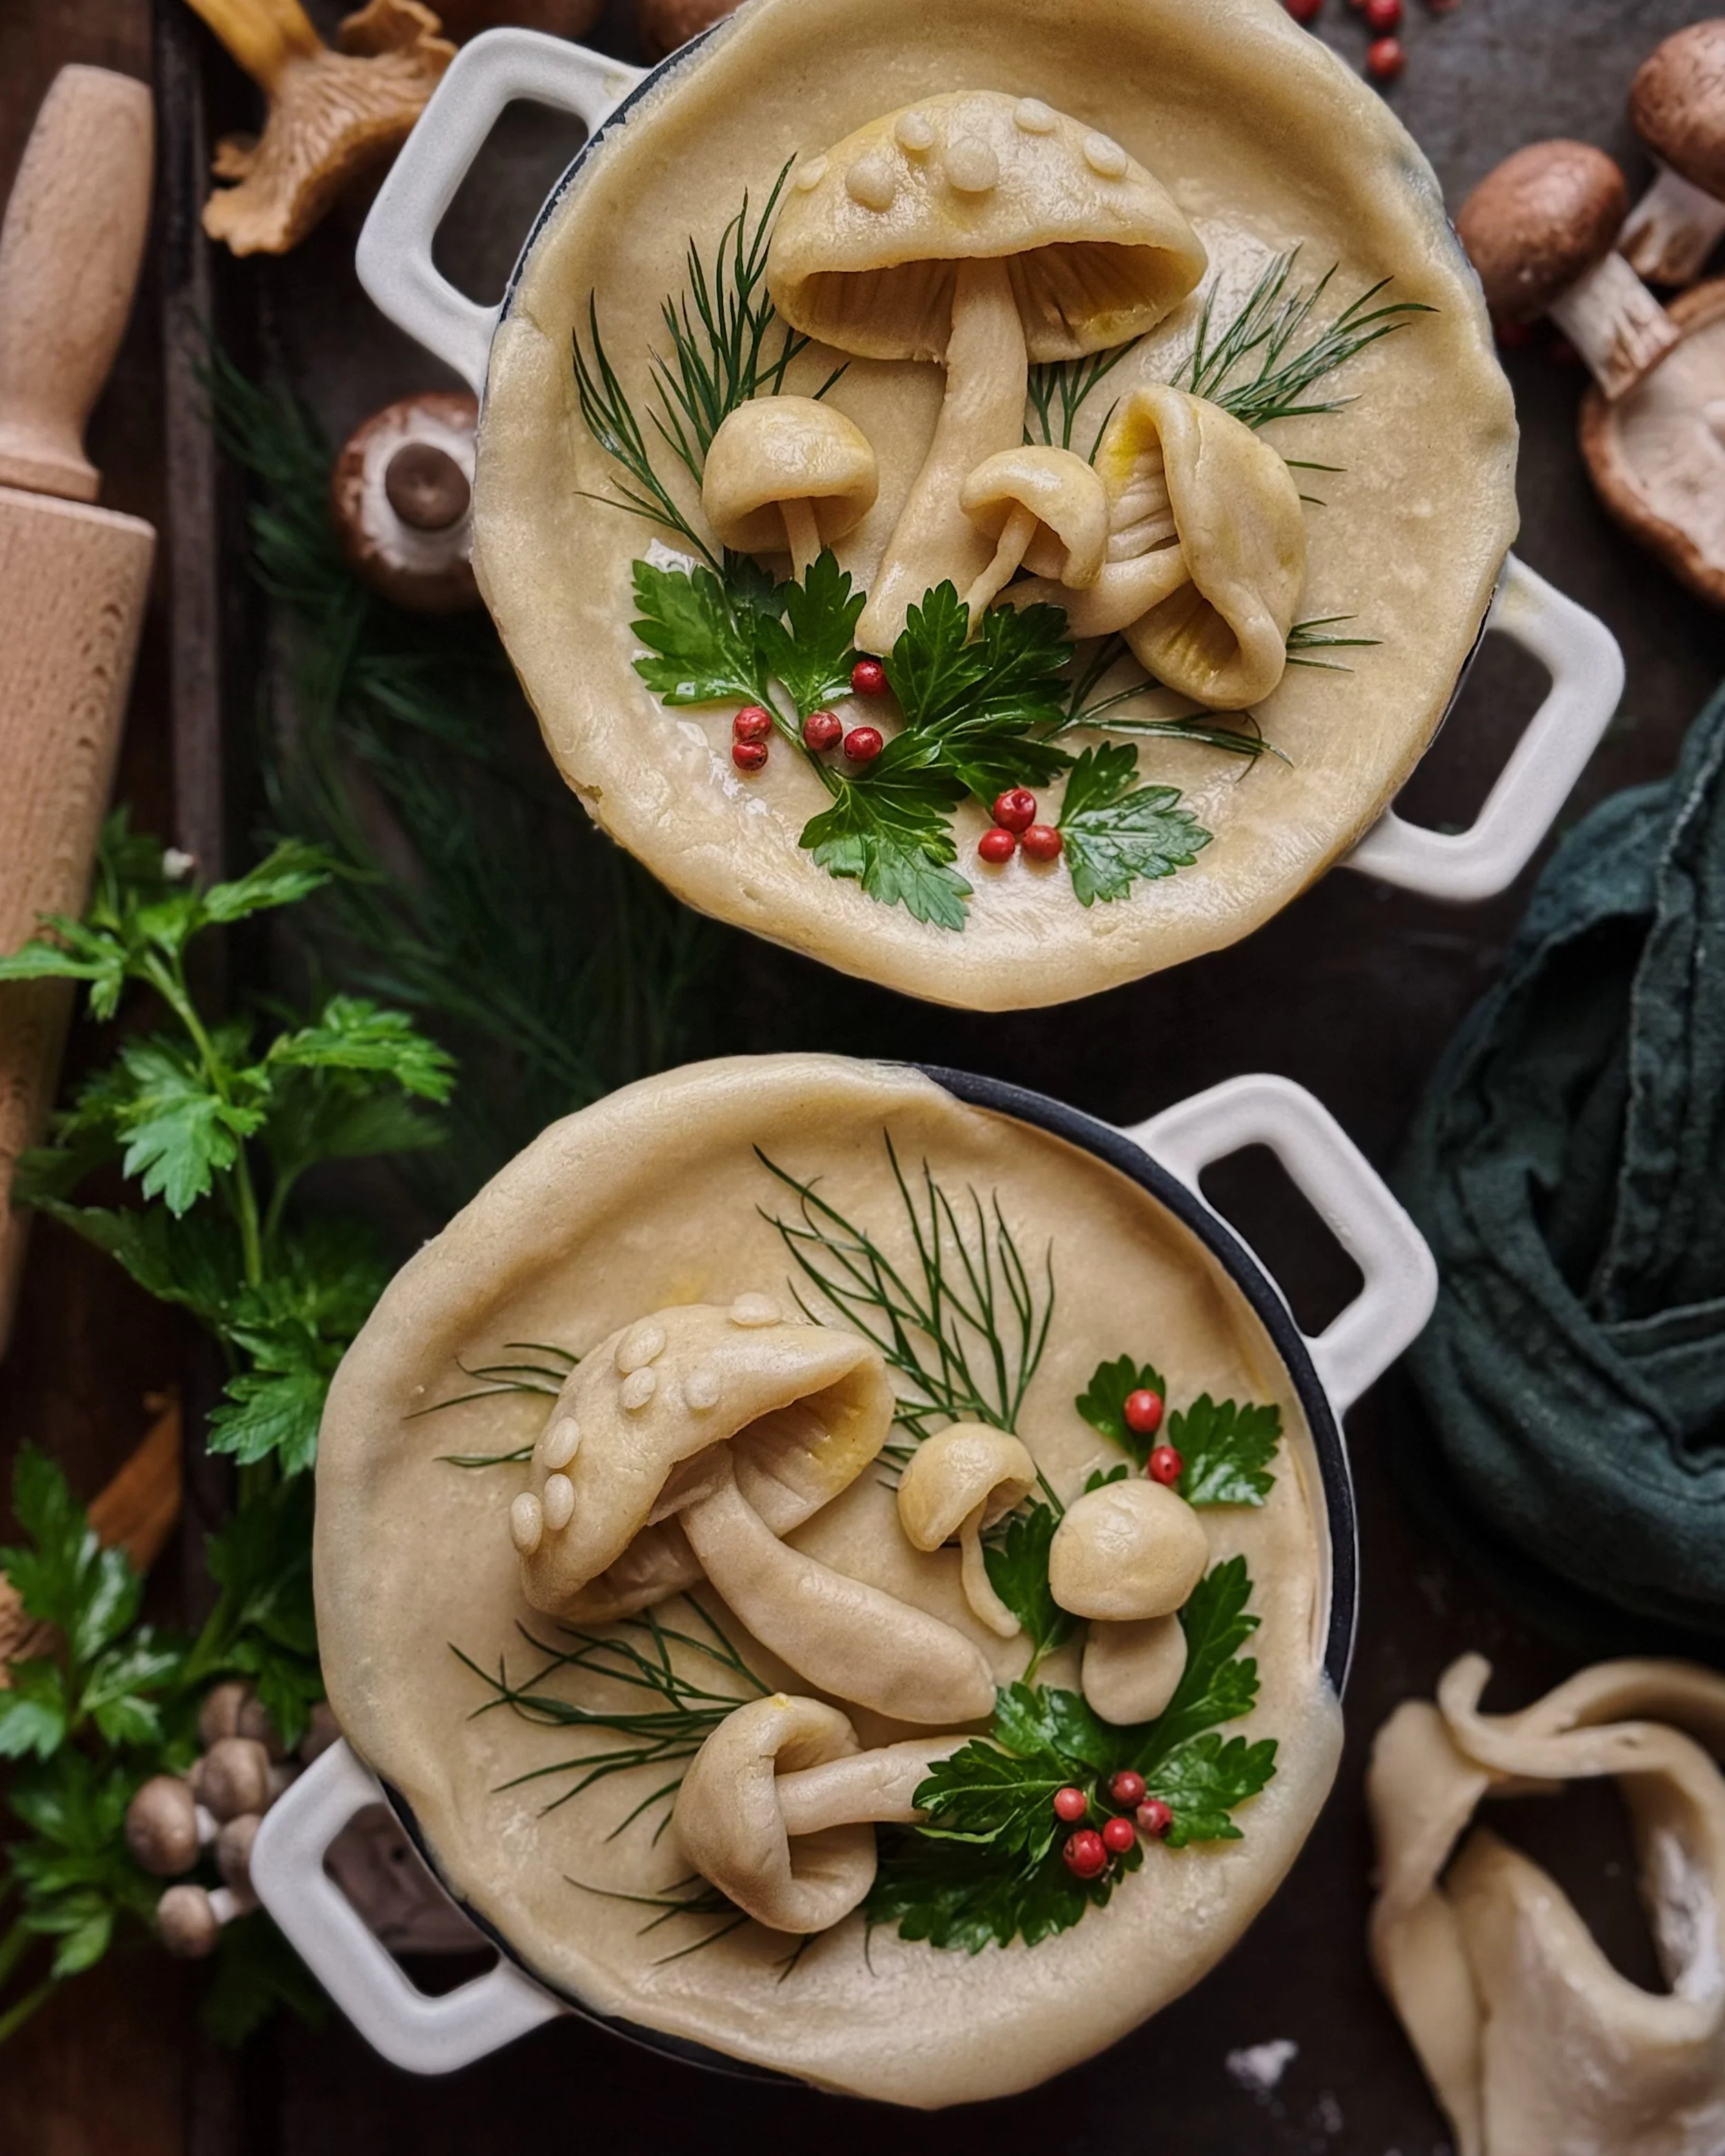
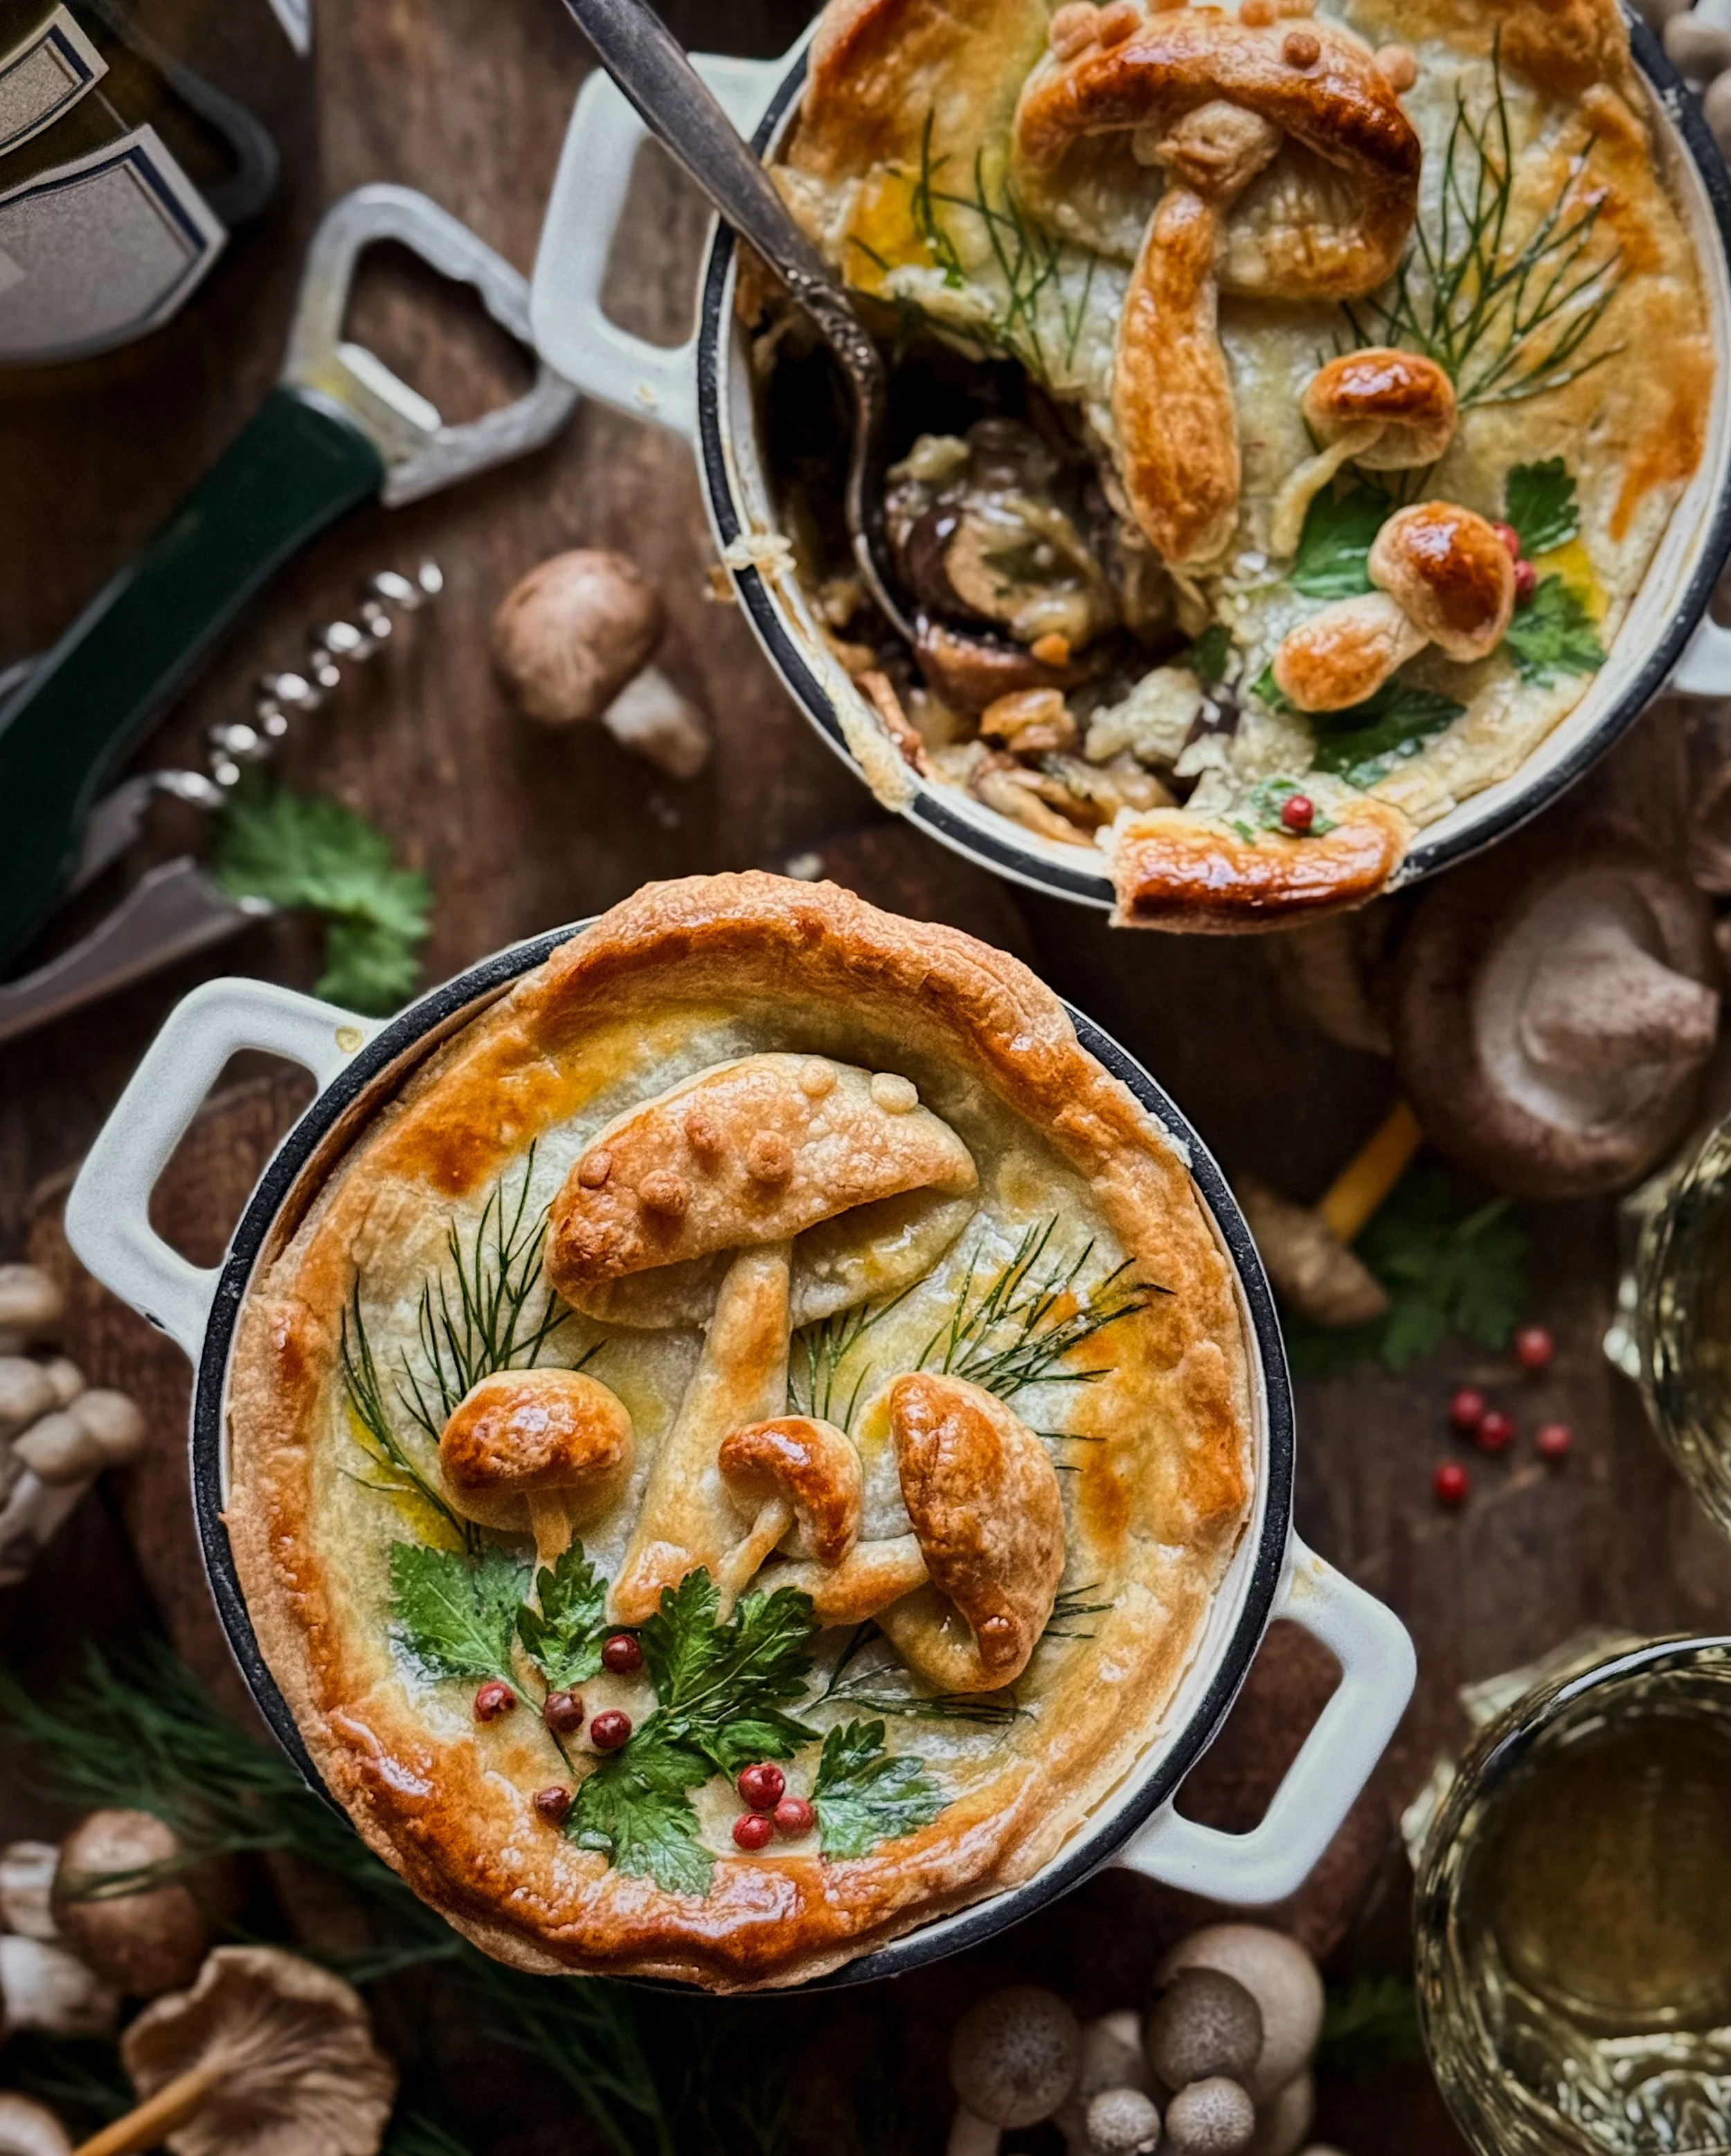
My easy trick for turning any savory baked good into something fit for the festive season is to make a little decoration on top using dill, parsley, and pink peppercorns. I think this works so well because the dill gives the look of miniature fir or pine boughs and the combination of parsley and pink peppercorns resembles miniature holly. Since dill and parsley are soft herbs, they hold up well in the oven; just adhere them with some eggwash so they are in full contact with the surface of the pastry dough and this will keep them from burning up during the bake. I think that adding this simple decorative touch instantly turned these pot pies into a holiday meal.
For a more advanced decoration, you could use some of the pie dough to sculpt little pastry mushrooms to go on top of your pies. If you choose to do this, I recommend to make these pieces ahead of starting the main recipe and keep them in the freezer until it is time to decorate your pies. This will help them maintain their shape and definition when baked. When it’s time, use eggwash to glue the sculpted pieces onto the main pie lid, and don’t forget to give them a brush of eggwash after that so they get nice and shiny.
Decorating is, of course, completely optional! You honestly don’t even need to do an eggwash on top if you don’t have a use for the rest of the egg; the pastry will bake up fine, just not shiny. What’s most important is that they taste delicious, which is exactly what you’ll get with this recipe, even with no decoration at all. I hope you like it, and that it tastes just as yummy and comforting for you as it did for me.
How to Make Mushroom and Caramelized Onion Mini Pot Pies
(Makes 2 half-quart pies)
Ingredients for Pot Pies
1 1/2 lbs mixed mushrooms, cleaned
2 large onions, peeled and sliced
2 tbsp butter
1/2 tsp kosher salt
6 cloves garlic, minced
3/4 cup California Chardonnay
2 tbsp oyster sauce
3/4 cup heavy cream
1/8 tsp cracked black pepper
2 tbsp dill, chopped
1 tsp thyme leaves
1 sheet pie dough, thawed
Flour, for dusting
< 1 egg, beaten (optional, for eggwash only)
Ingredients for Decorating (Optional, See Decorating Notes Above)
pie dough scraps
dill
parsley
pink peppercorns
Procedure
Preheat the oven to 425°F.
Prepare mushrooms for roasting by cutting them down into coarse chunks. For baby bella, shiitake, or button mushrooms, slice them into 1/4-inch pieces. For clustered mushrooms like maitake, oyster, or shimeji, simply pull them apart into similarly sized pieces. Lay mushroom pieces out as a single layer on parchment-lined baking sheets.
In a large, wide skillet, combine the onions, butter, and salt, and set the heat to medium. Cook for about 15 minutes, stirring occasionally, until the onions begin to soften. Then turn the heat down to low and cook for an additional 15–20 minutes, stirring often, until the onions are golden and jammy, and have reduced down to about 20% of their original volume.
While the onions are caramelizing, dry roast the mushrooms in the oven for about 17–20 minutes. The mushrooms should look wrinkled and feel dry but still be tender, not crisp. Remove from the oven and set aside until it is time to add them to the pan. Set the oven to 450°F*. (*Note: Baking temperatures and timings for prepared pie doughs may vary. Consult package instructions where relevant.)
When onions are reduced, add the garlic to the pan. Keep stirring and cooking the mixture until the garlic becomes fragrant, about 2 minutes. Stir in the wine and oyster sauce. Turn up the heat to medium-low and cook until the liquid has mostly evaporated. Add the roasted mushrooms and cream and keep stirring and cooking until everything is incorporated and excess liquid has evaporated. Stir in the pepper, dill, and thyme, and turn off the heat. Allow the mixture to cool slightly before transferring into mini oven-safe ramekins or cocottes.
On a floured worksurface, prepare the pastry dough. Cut into pieces that will fit over the serving pots and trim as desired. Brush pastry dough with a thin layer of eggwash if a shiny look is desired. If decorating, arrange the decorations on top of the dough lid at this point, using more eggwash as needed to adhere the decorations, then brush another layer of eggwash over the final arrangement. Bake mini pot pies for 20–25 minutes, or until pastry is crisp and golden.
Enjoy the pot pies paired with the same California Chardonnay as was used in the filling!
Thank you so much to California Wines for sponsoring this recipe!