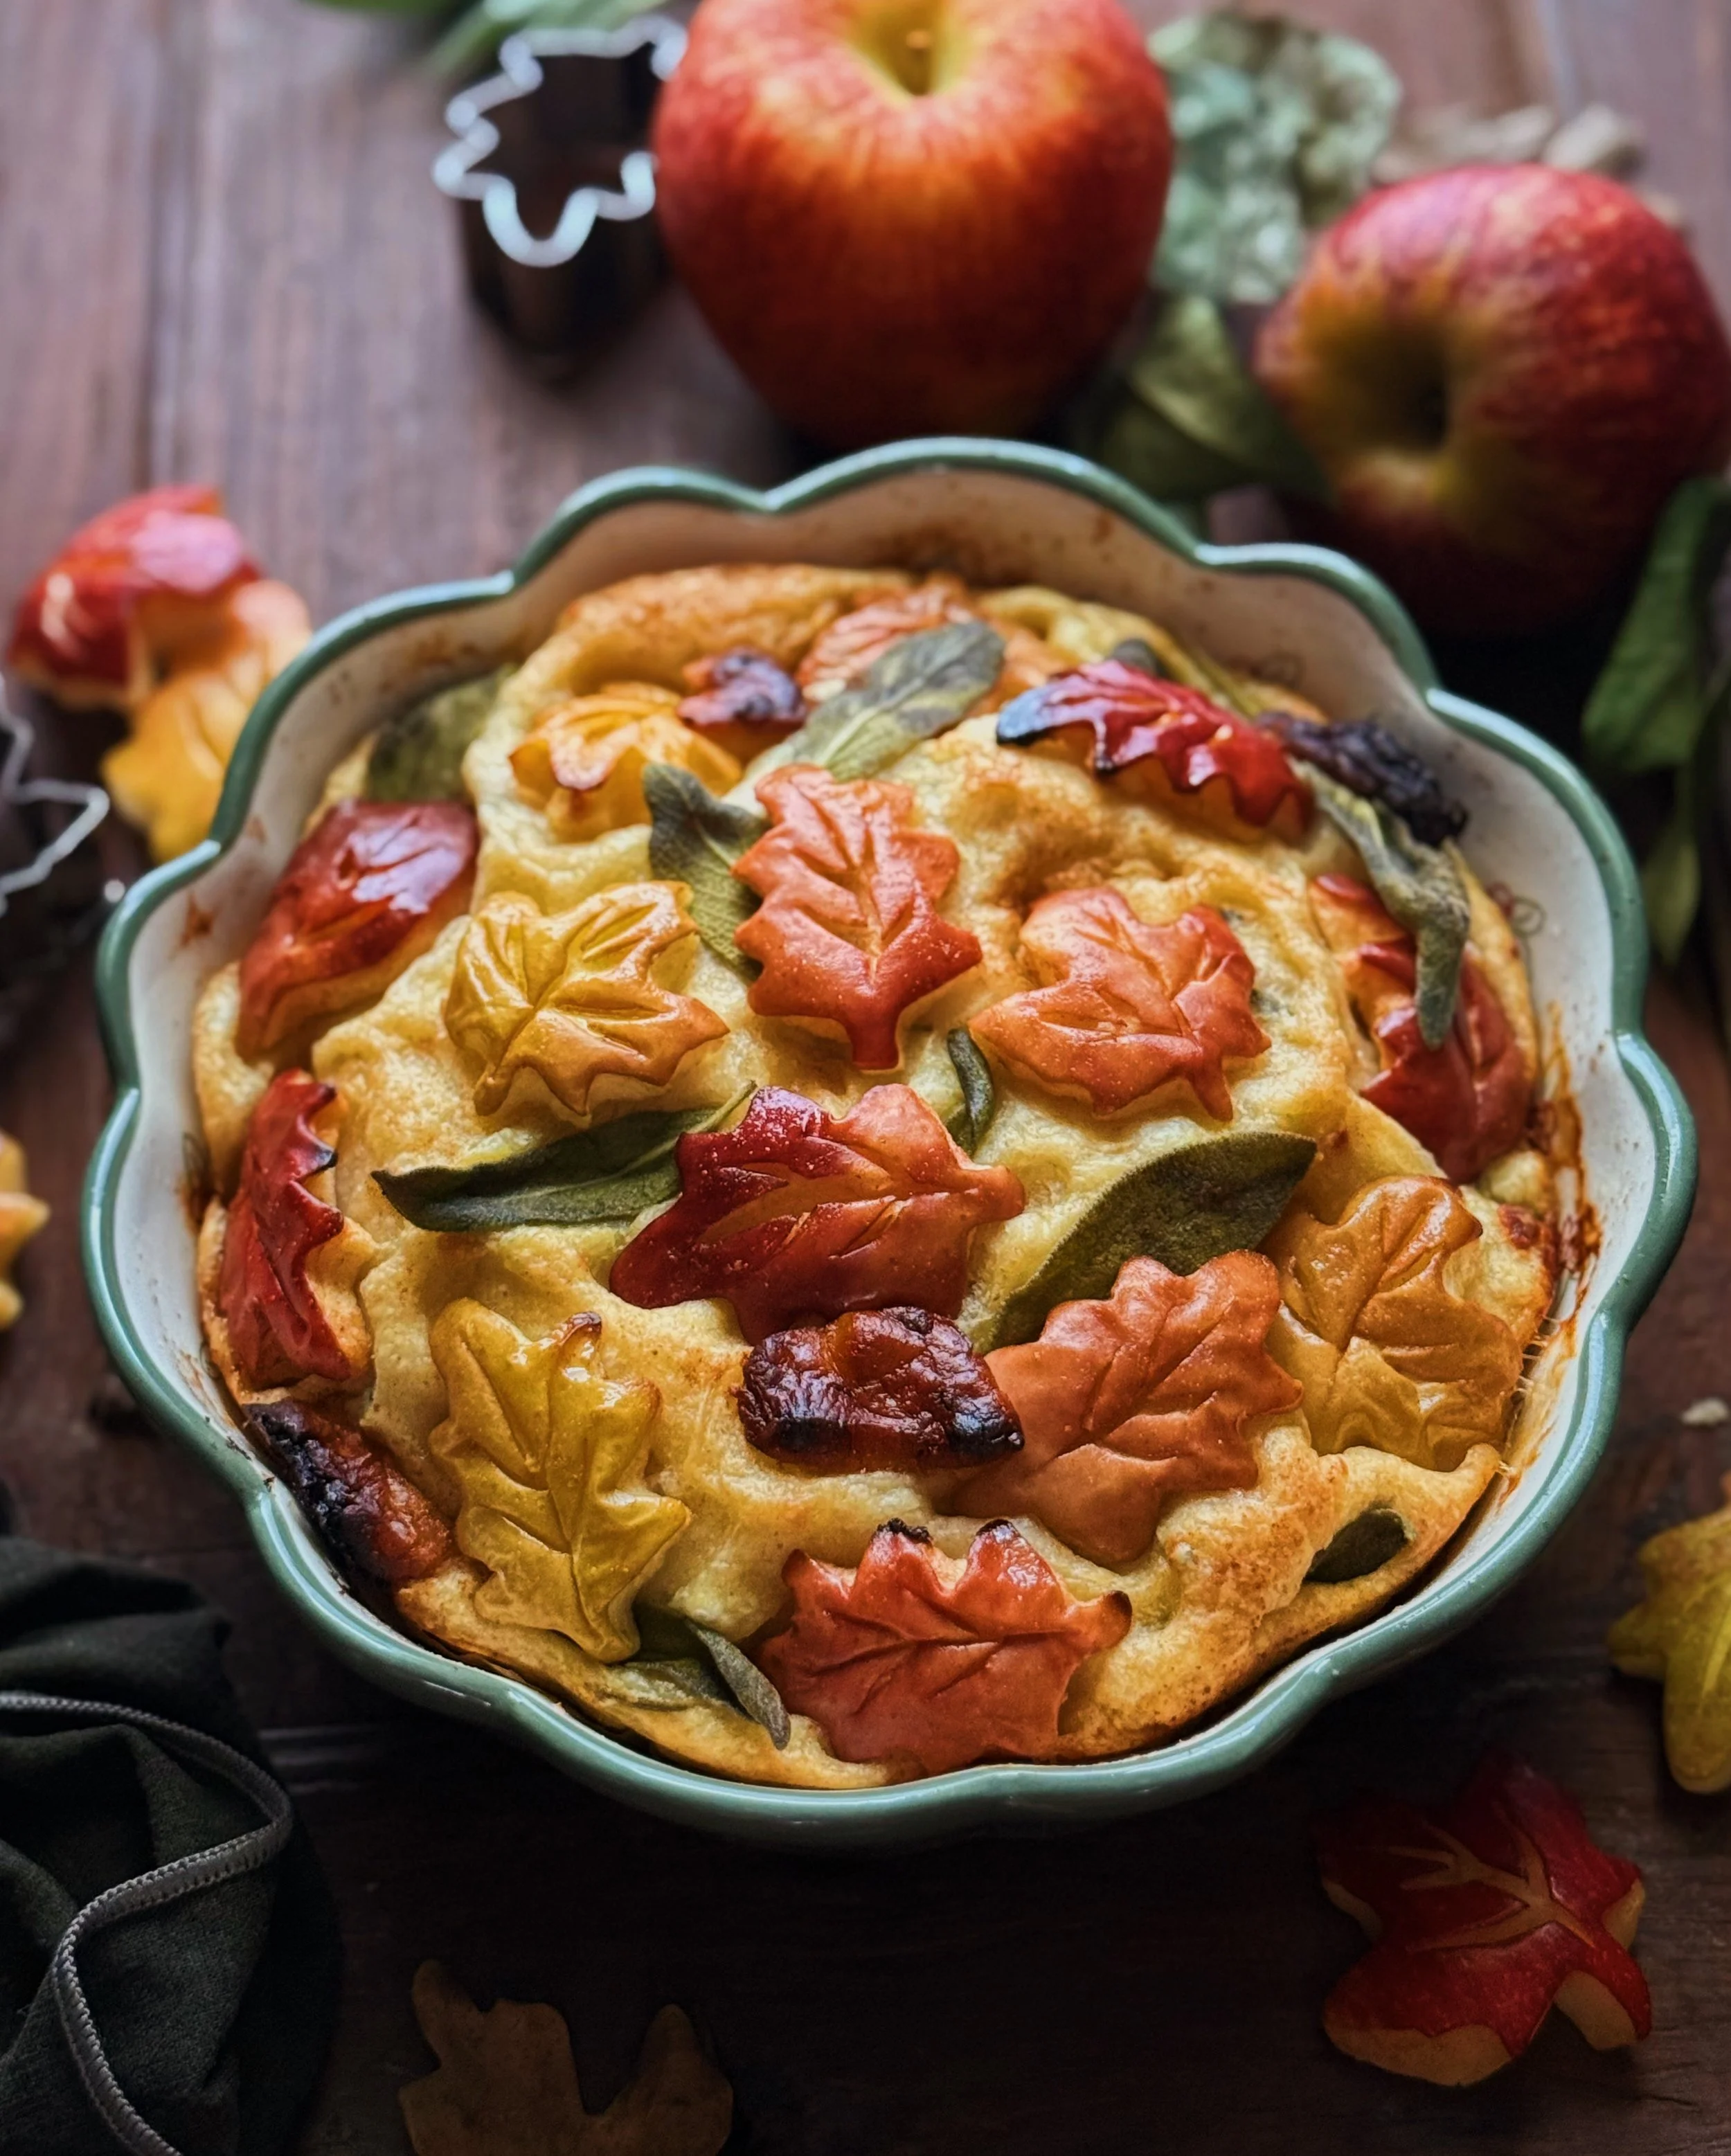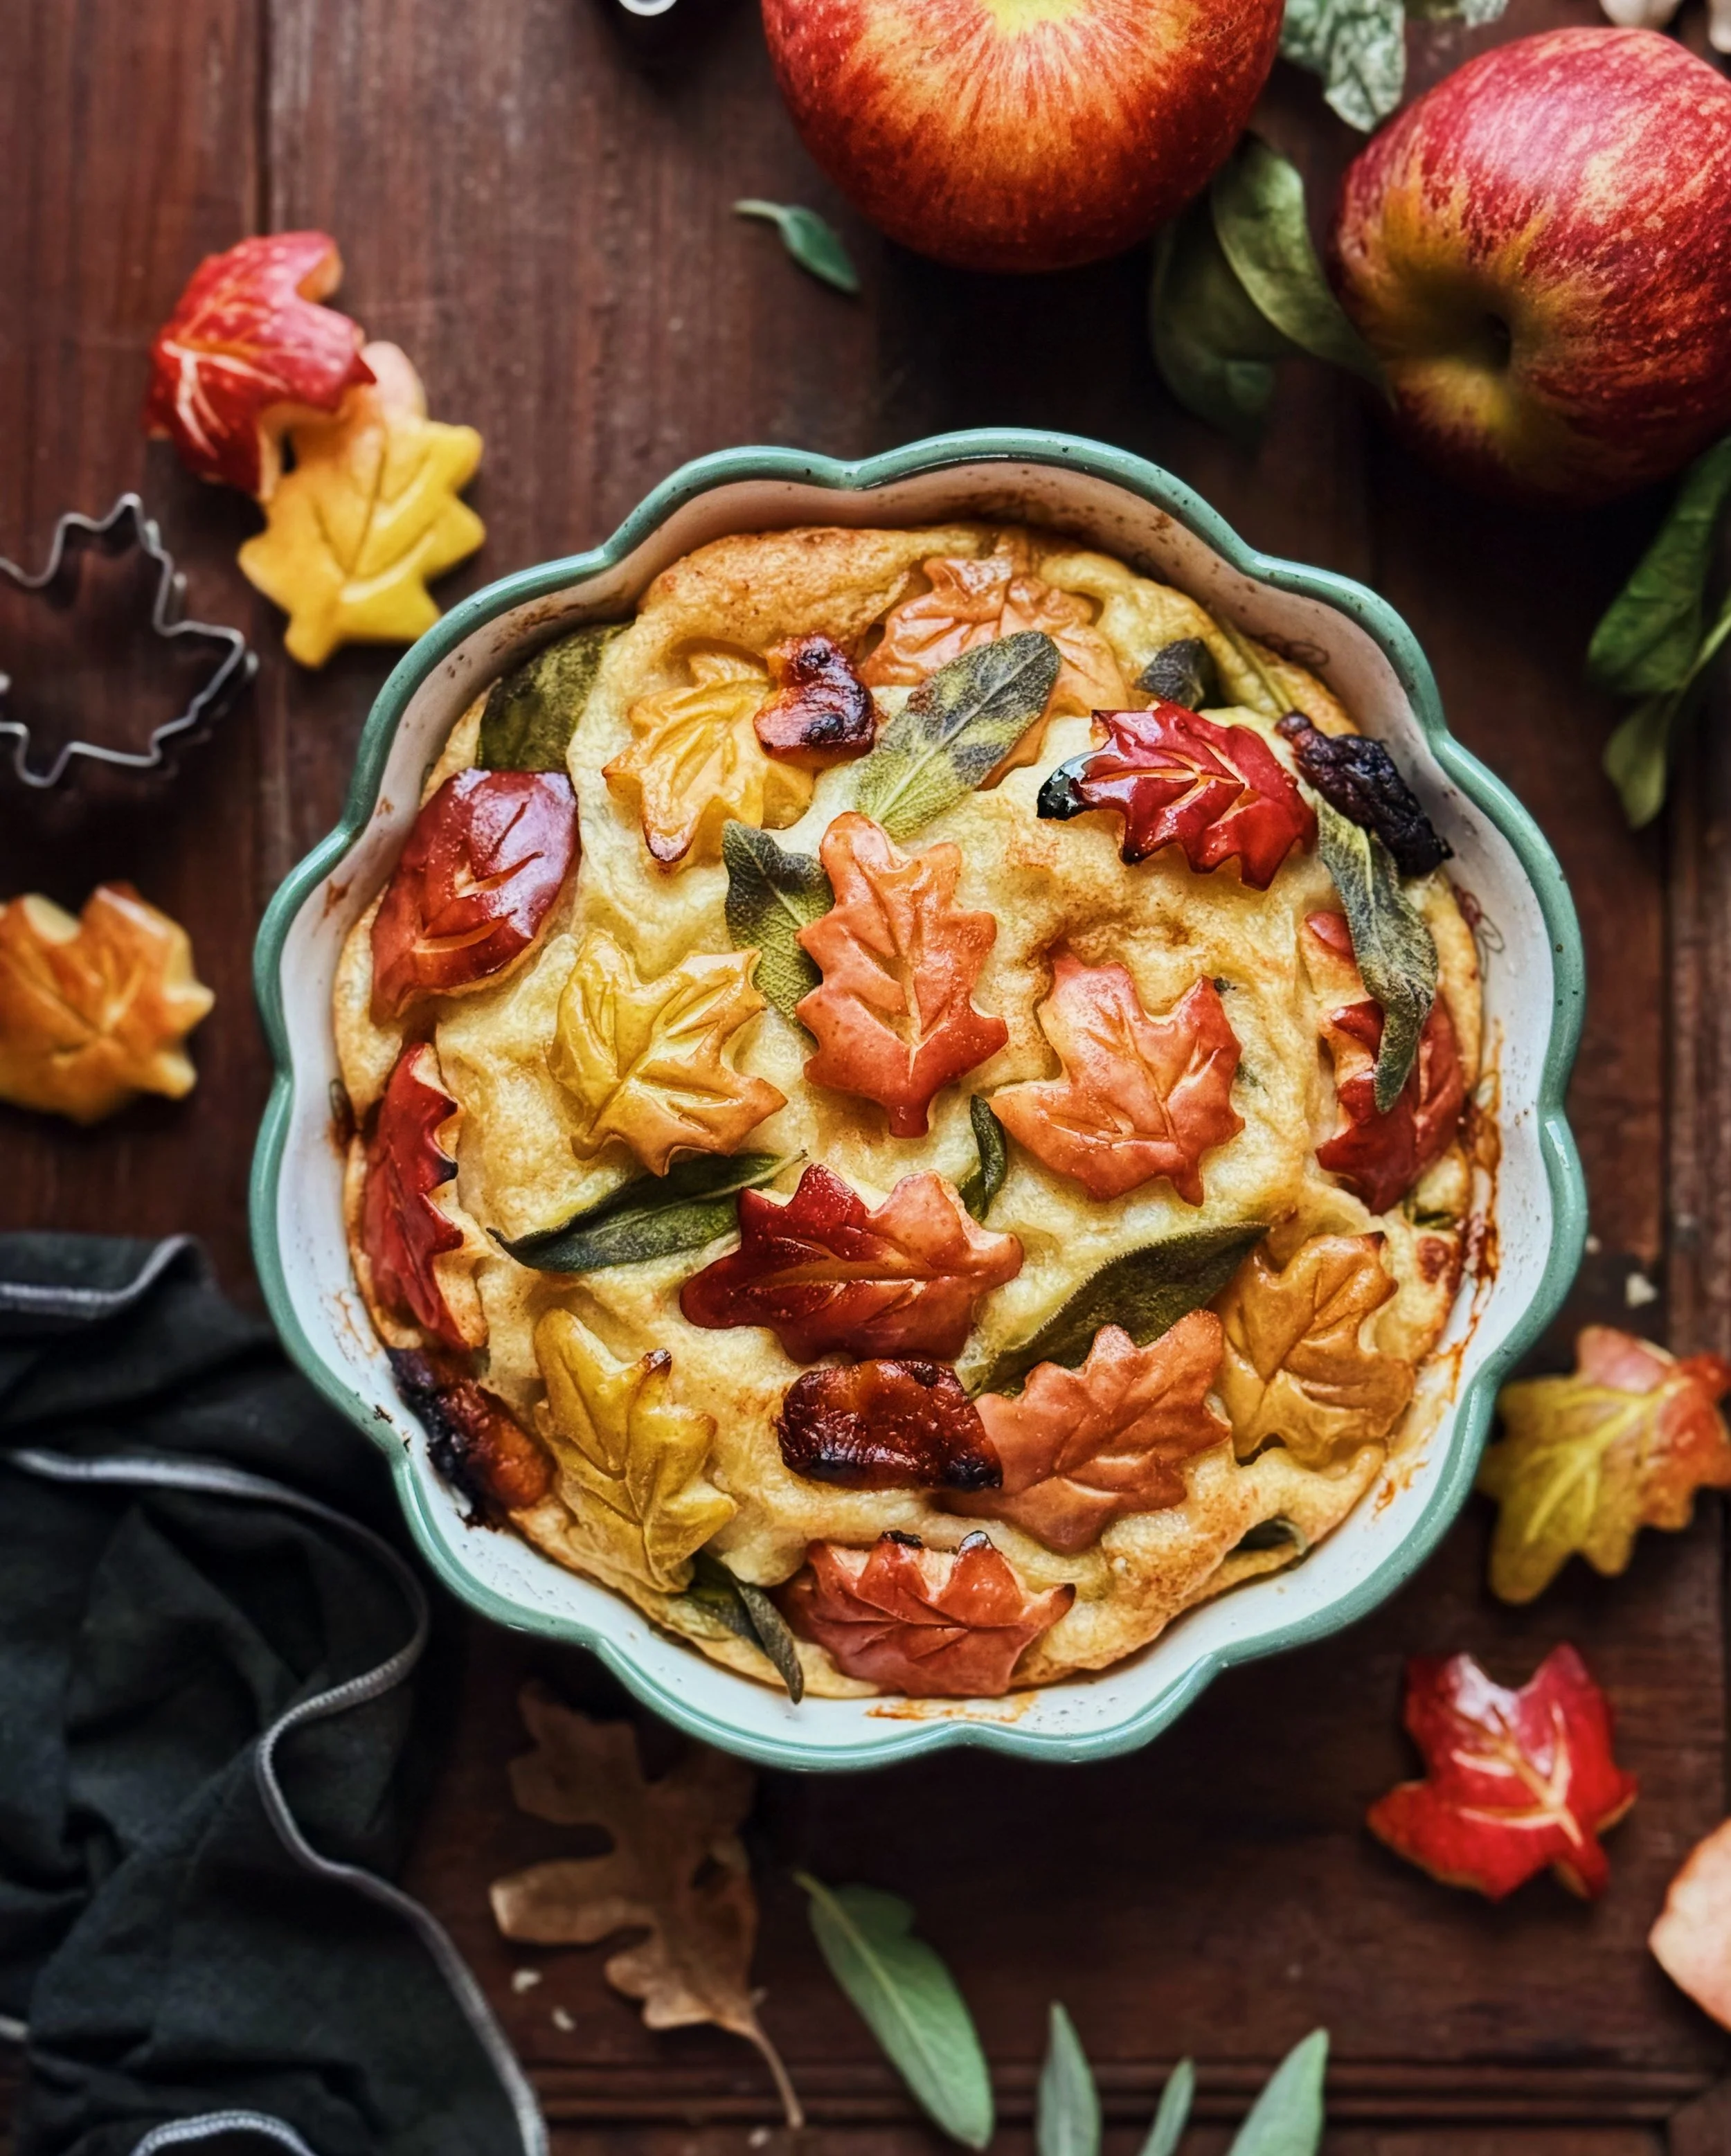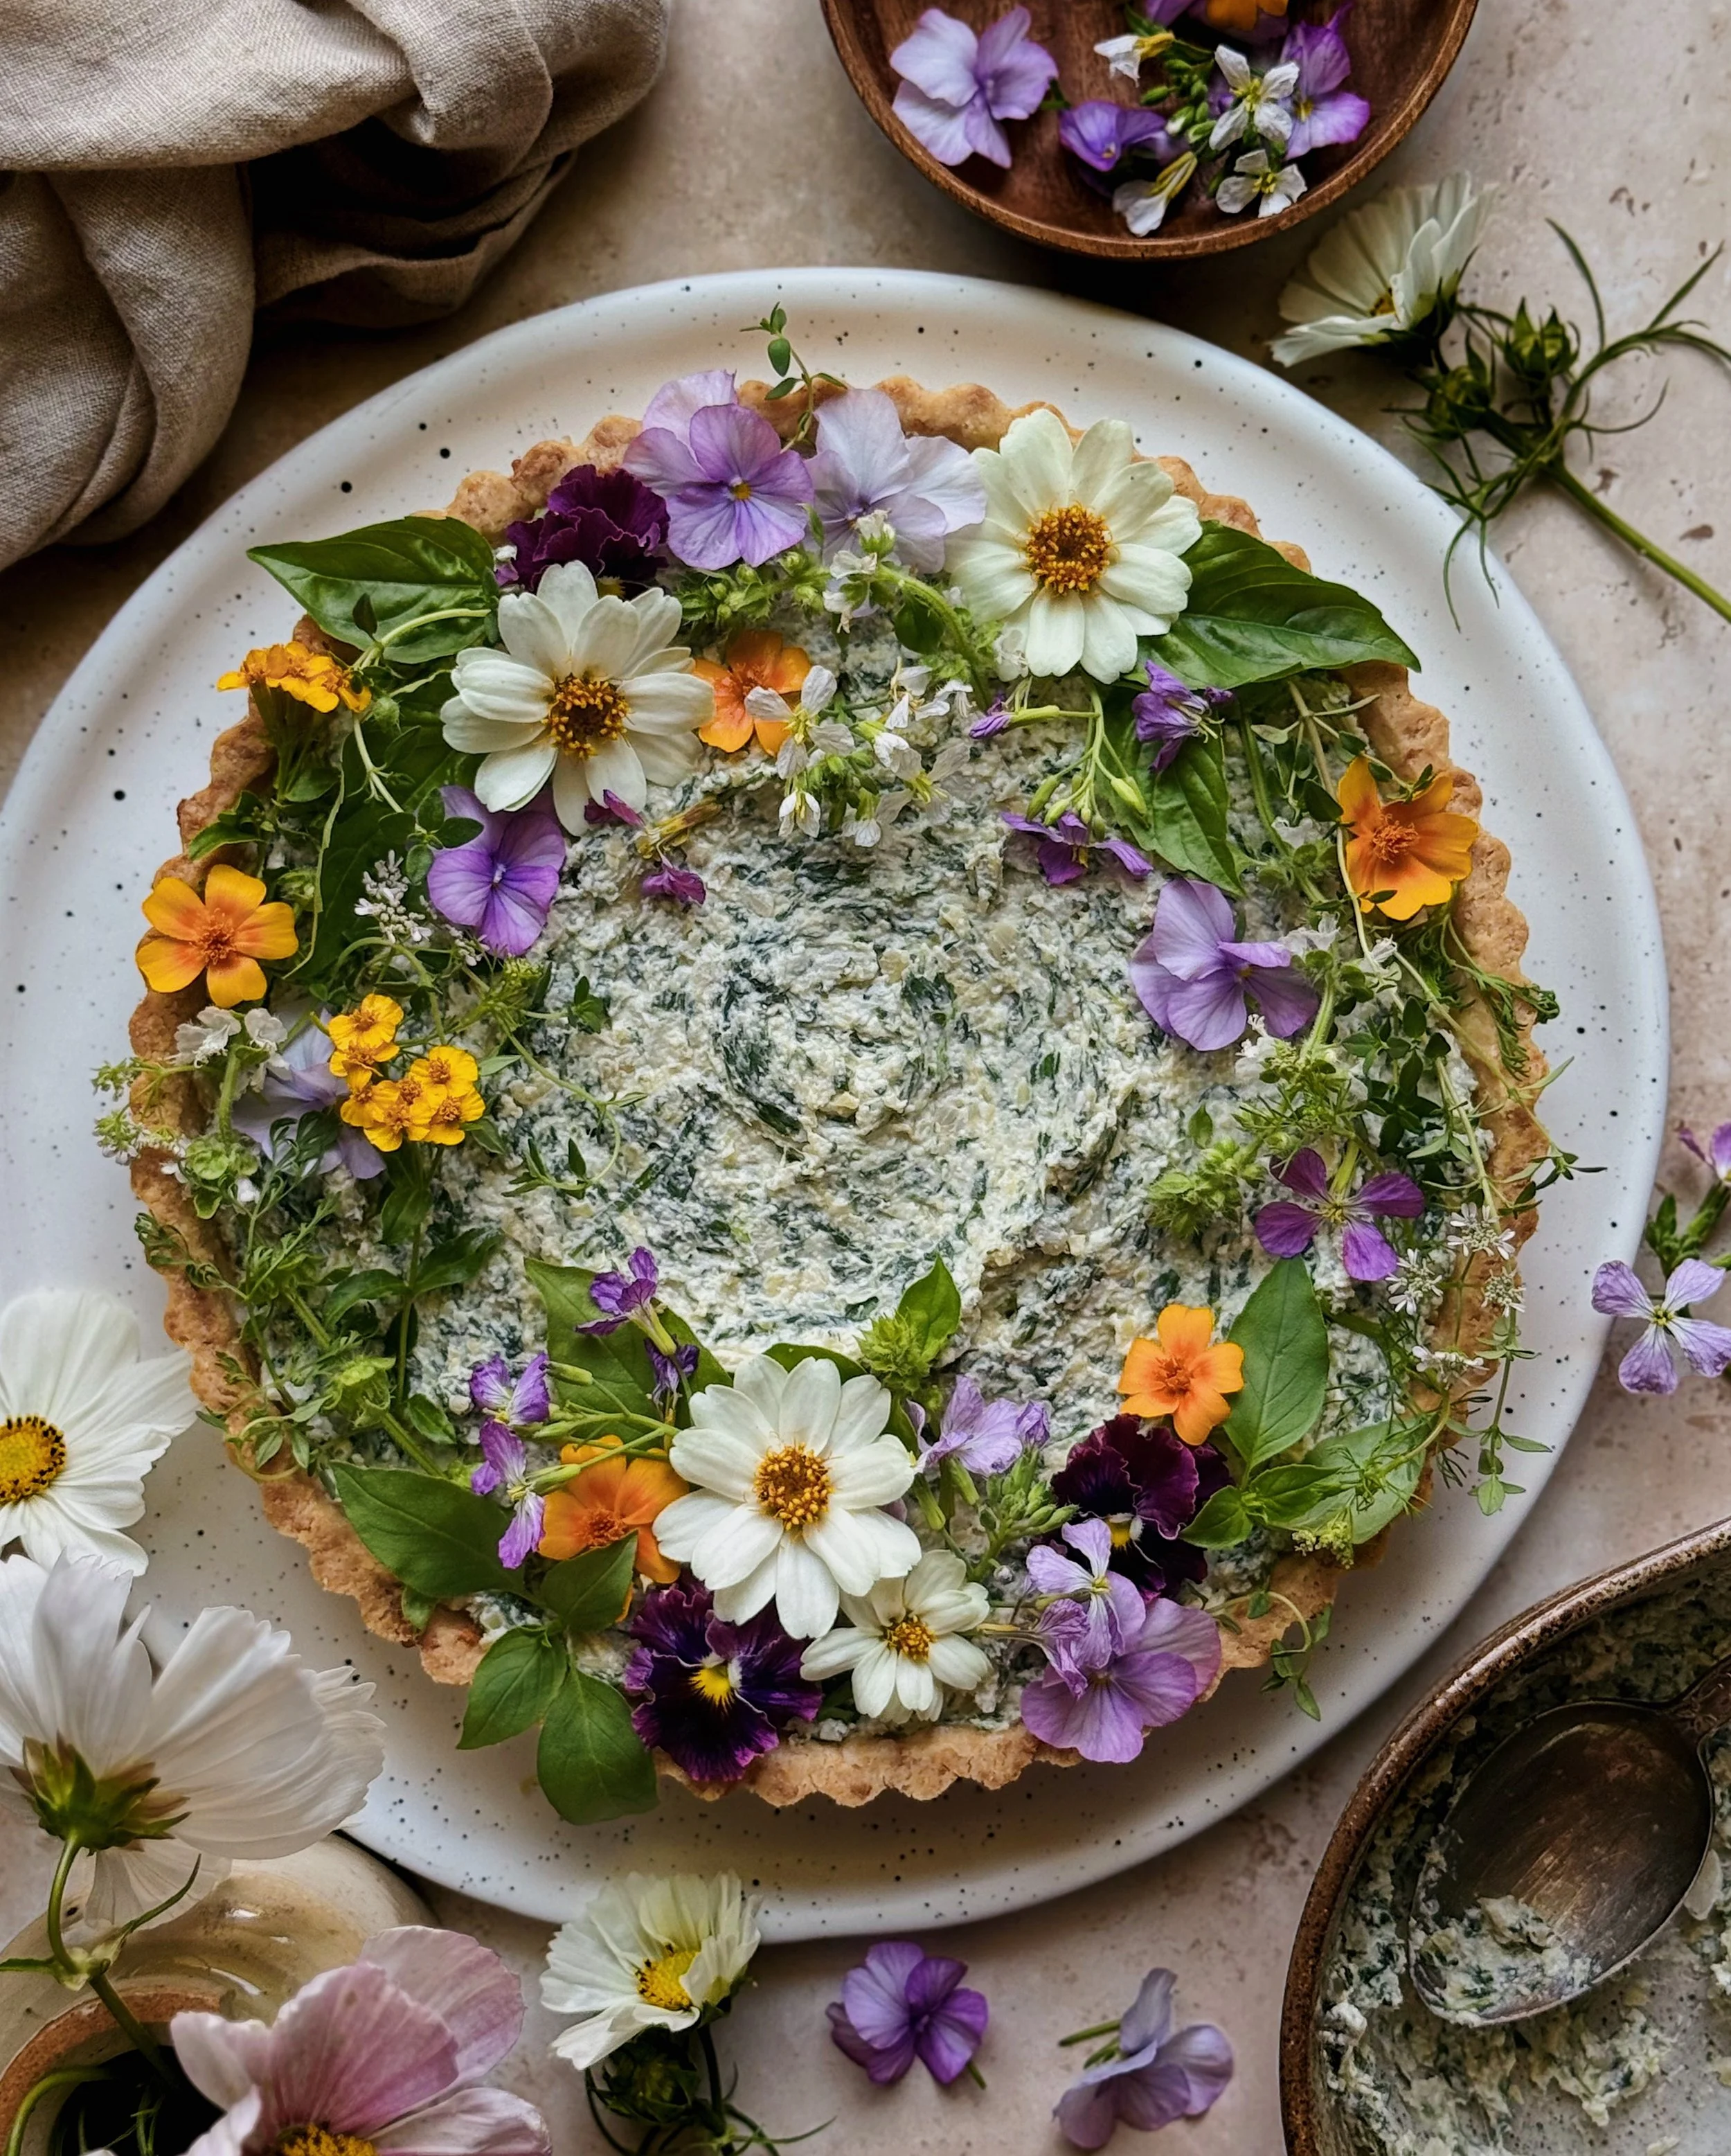


Recipe: Spinach Artichoke Dip Tart with Pepper Jack Crust
/This centerpiece-worthy tart features a savory, cheesy pepper jack crust, serving as a vessel for what may seem to be the classic spinach and artichoke dip that we all know and crave—but there’s actually more to it. Its dairy base is largely made with Real California Milk cottage cheese; blended until completely smooth, this twist to the usual creamy base adds richness and extra protein while maintaining the decadent texture that makes spinach artichoke dip so irresistible. Finished off with fresh herbs and pretty edible flowers, this unique take on shareable party food is perfect for summer garden entertaining or treating yourself to leftovers that continue to feel special on days when it’s too hot to turn on the oven.
I’m always craving creamy dips and trying to find ways to make it socially acceptable to have them be main courses. That’s why I invented the dip tart! Instead of dunking bread or crackers into a bowl of dip, I make a snappy, savory shortbread crust which becomes the giant cracker-like vessel for the dip itself. It looks beautiful and sophisticated while still actually being an excuse to eat your favorite dip as a meal. The key to success for this concept is making a dip that is thick enough to translate into a sliceable tart filling; you definitely don’t want something that runs off the crust when you serve the tart or the jig is up!
This recipe was developed in partnership with Real California Milk. Living my whole life in California, the iconic happy dairy cows have always been a picturesque sight of countryside drives. But with the current popular (and for once, actually good-for-you) trend of finding ways to incorporate more protein into our eating, it’s worth noting that Real California Milk has always been a real source of protein—no filler, flavors or powders required. Look for the seal to know that your dairy products are made with that wonderful Real California Milk! Since Real California Milk cottage cheese especially is naturally rich in real protein, using it for the spinach artichoke dip not only ensures a thick tart filling that holds together perfectly, but it means getting some good protein too.
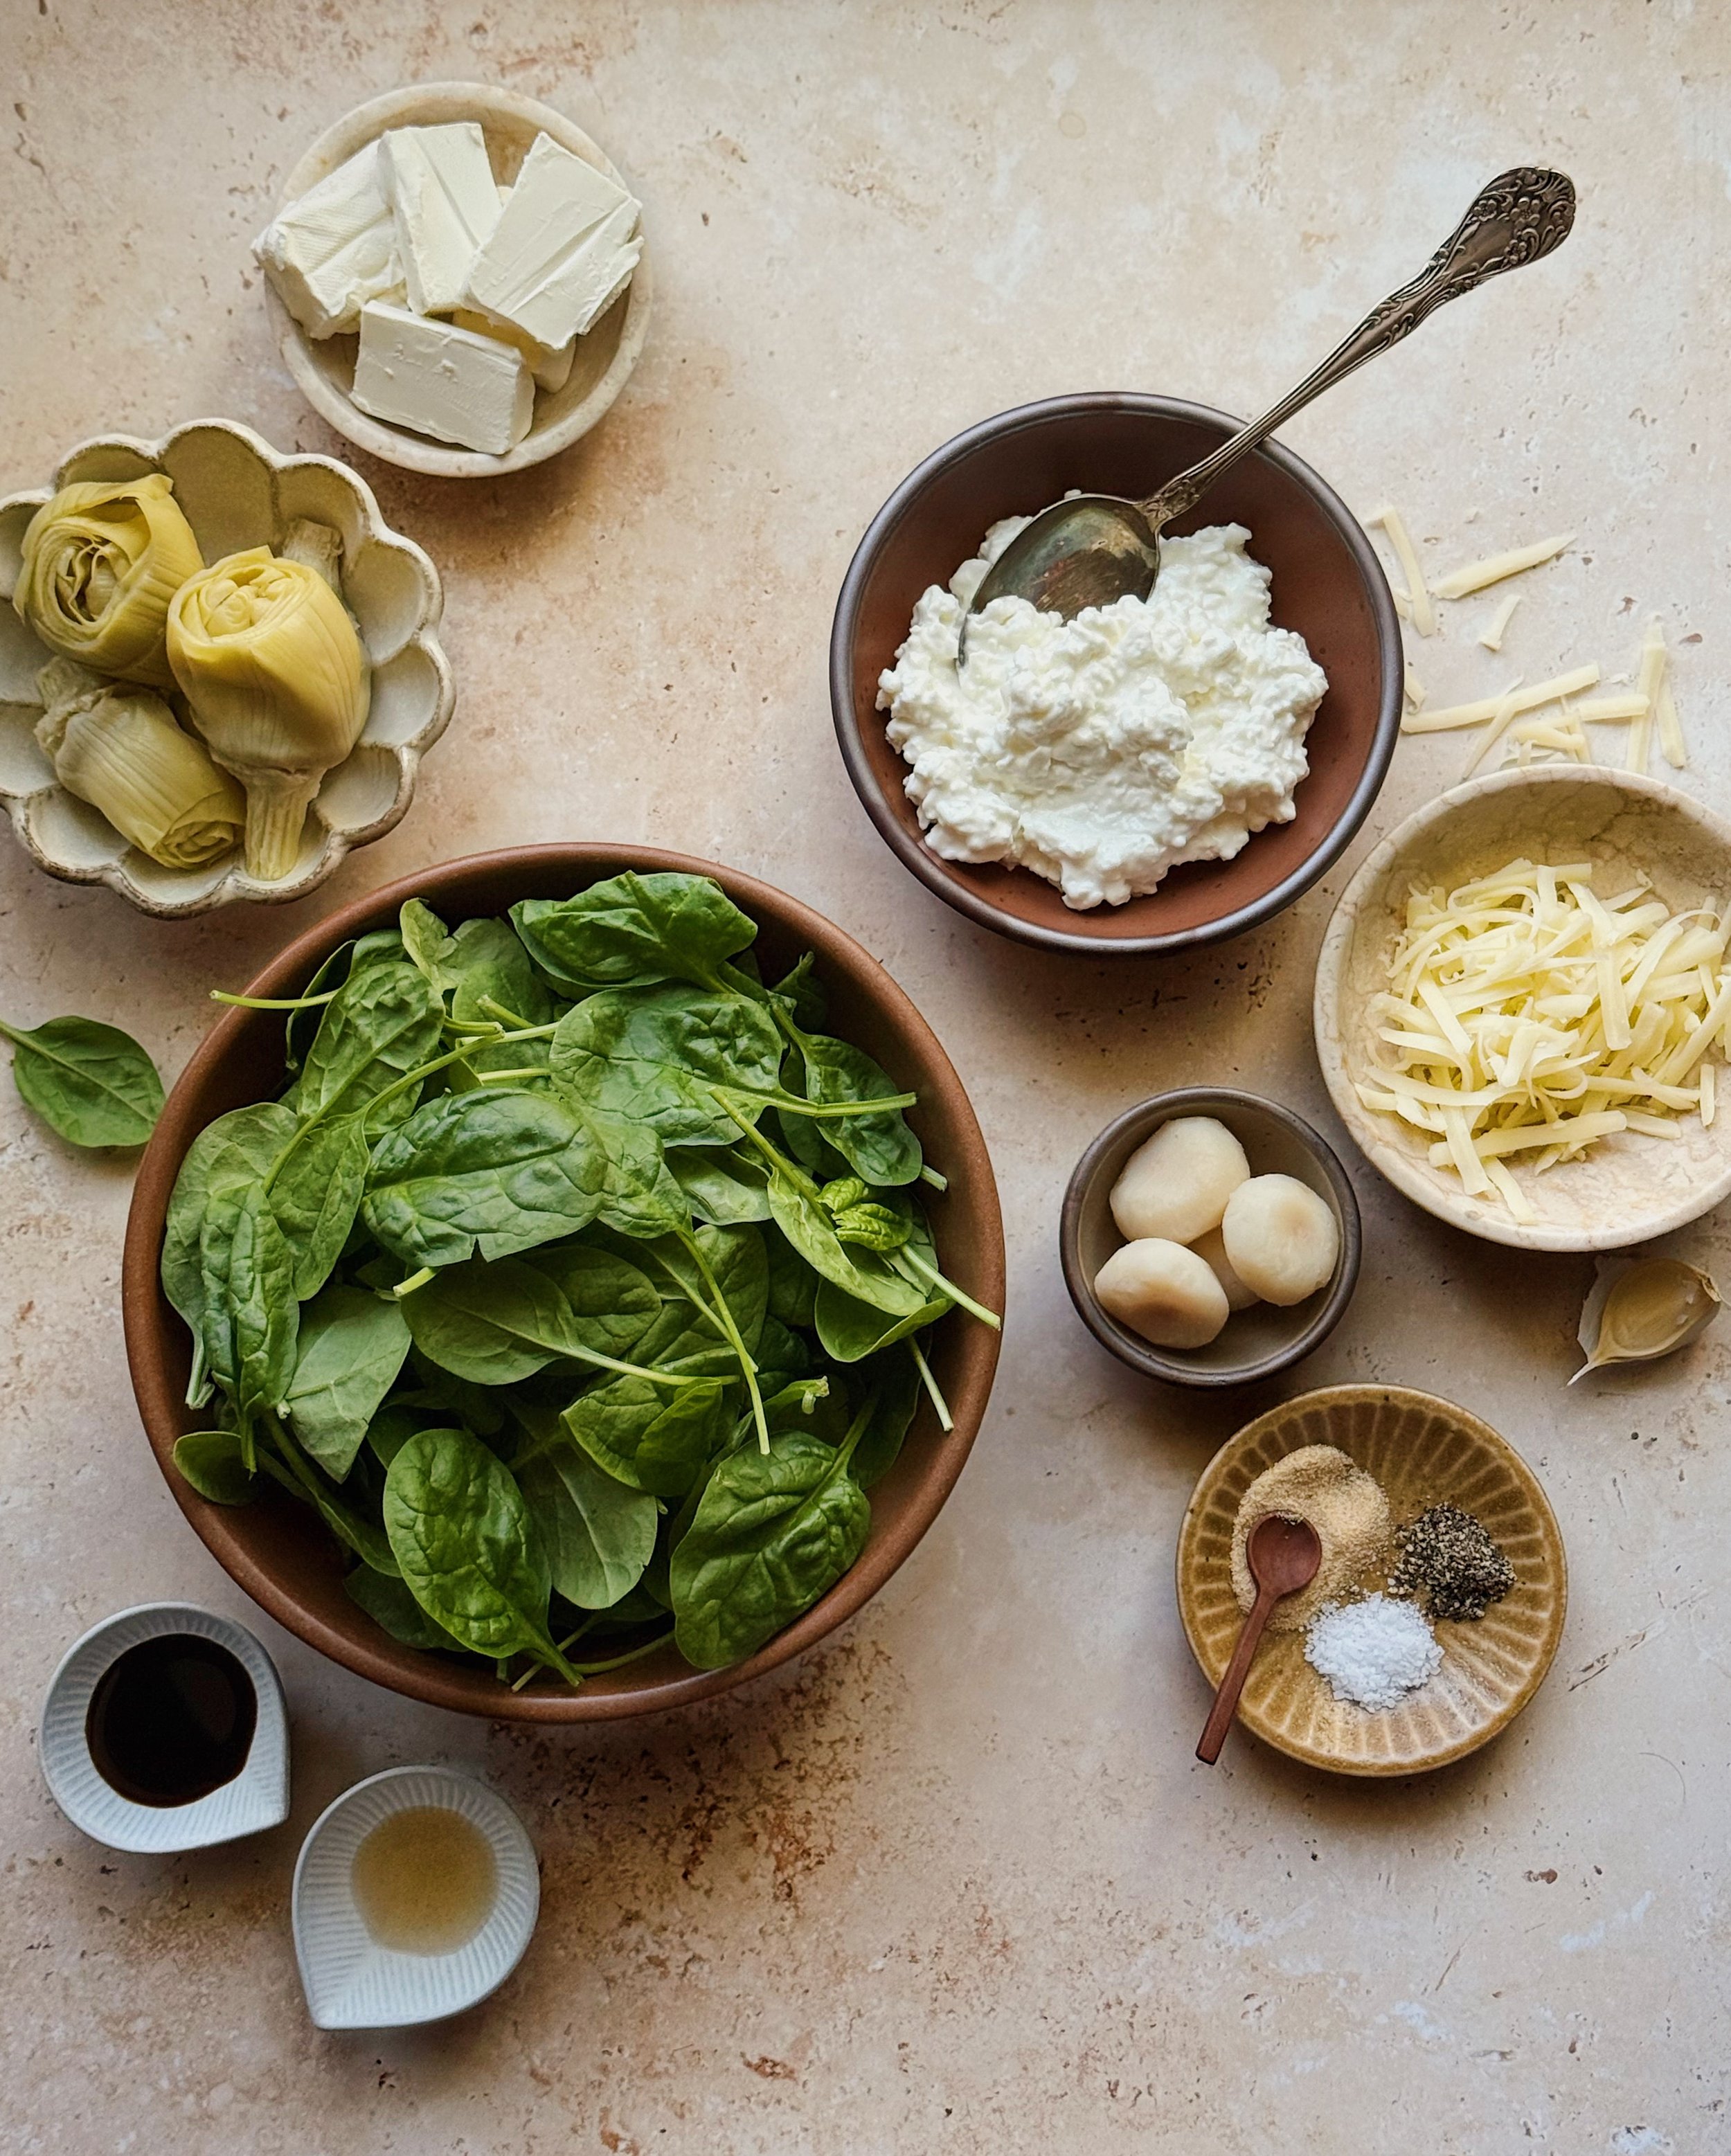
Notes about the key ingredients for the spinach artichoke dip filling
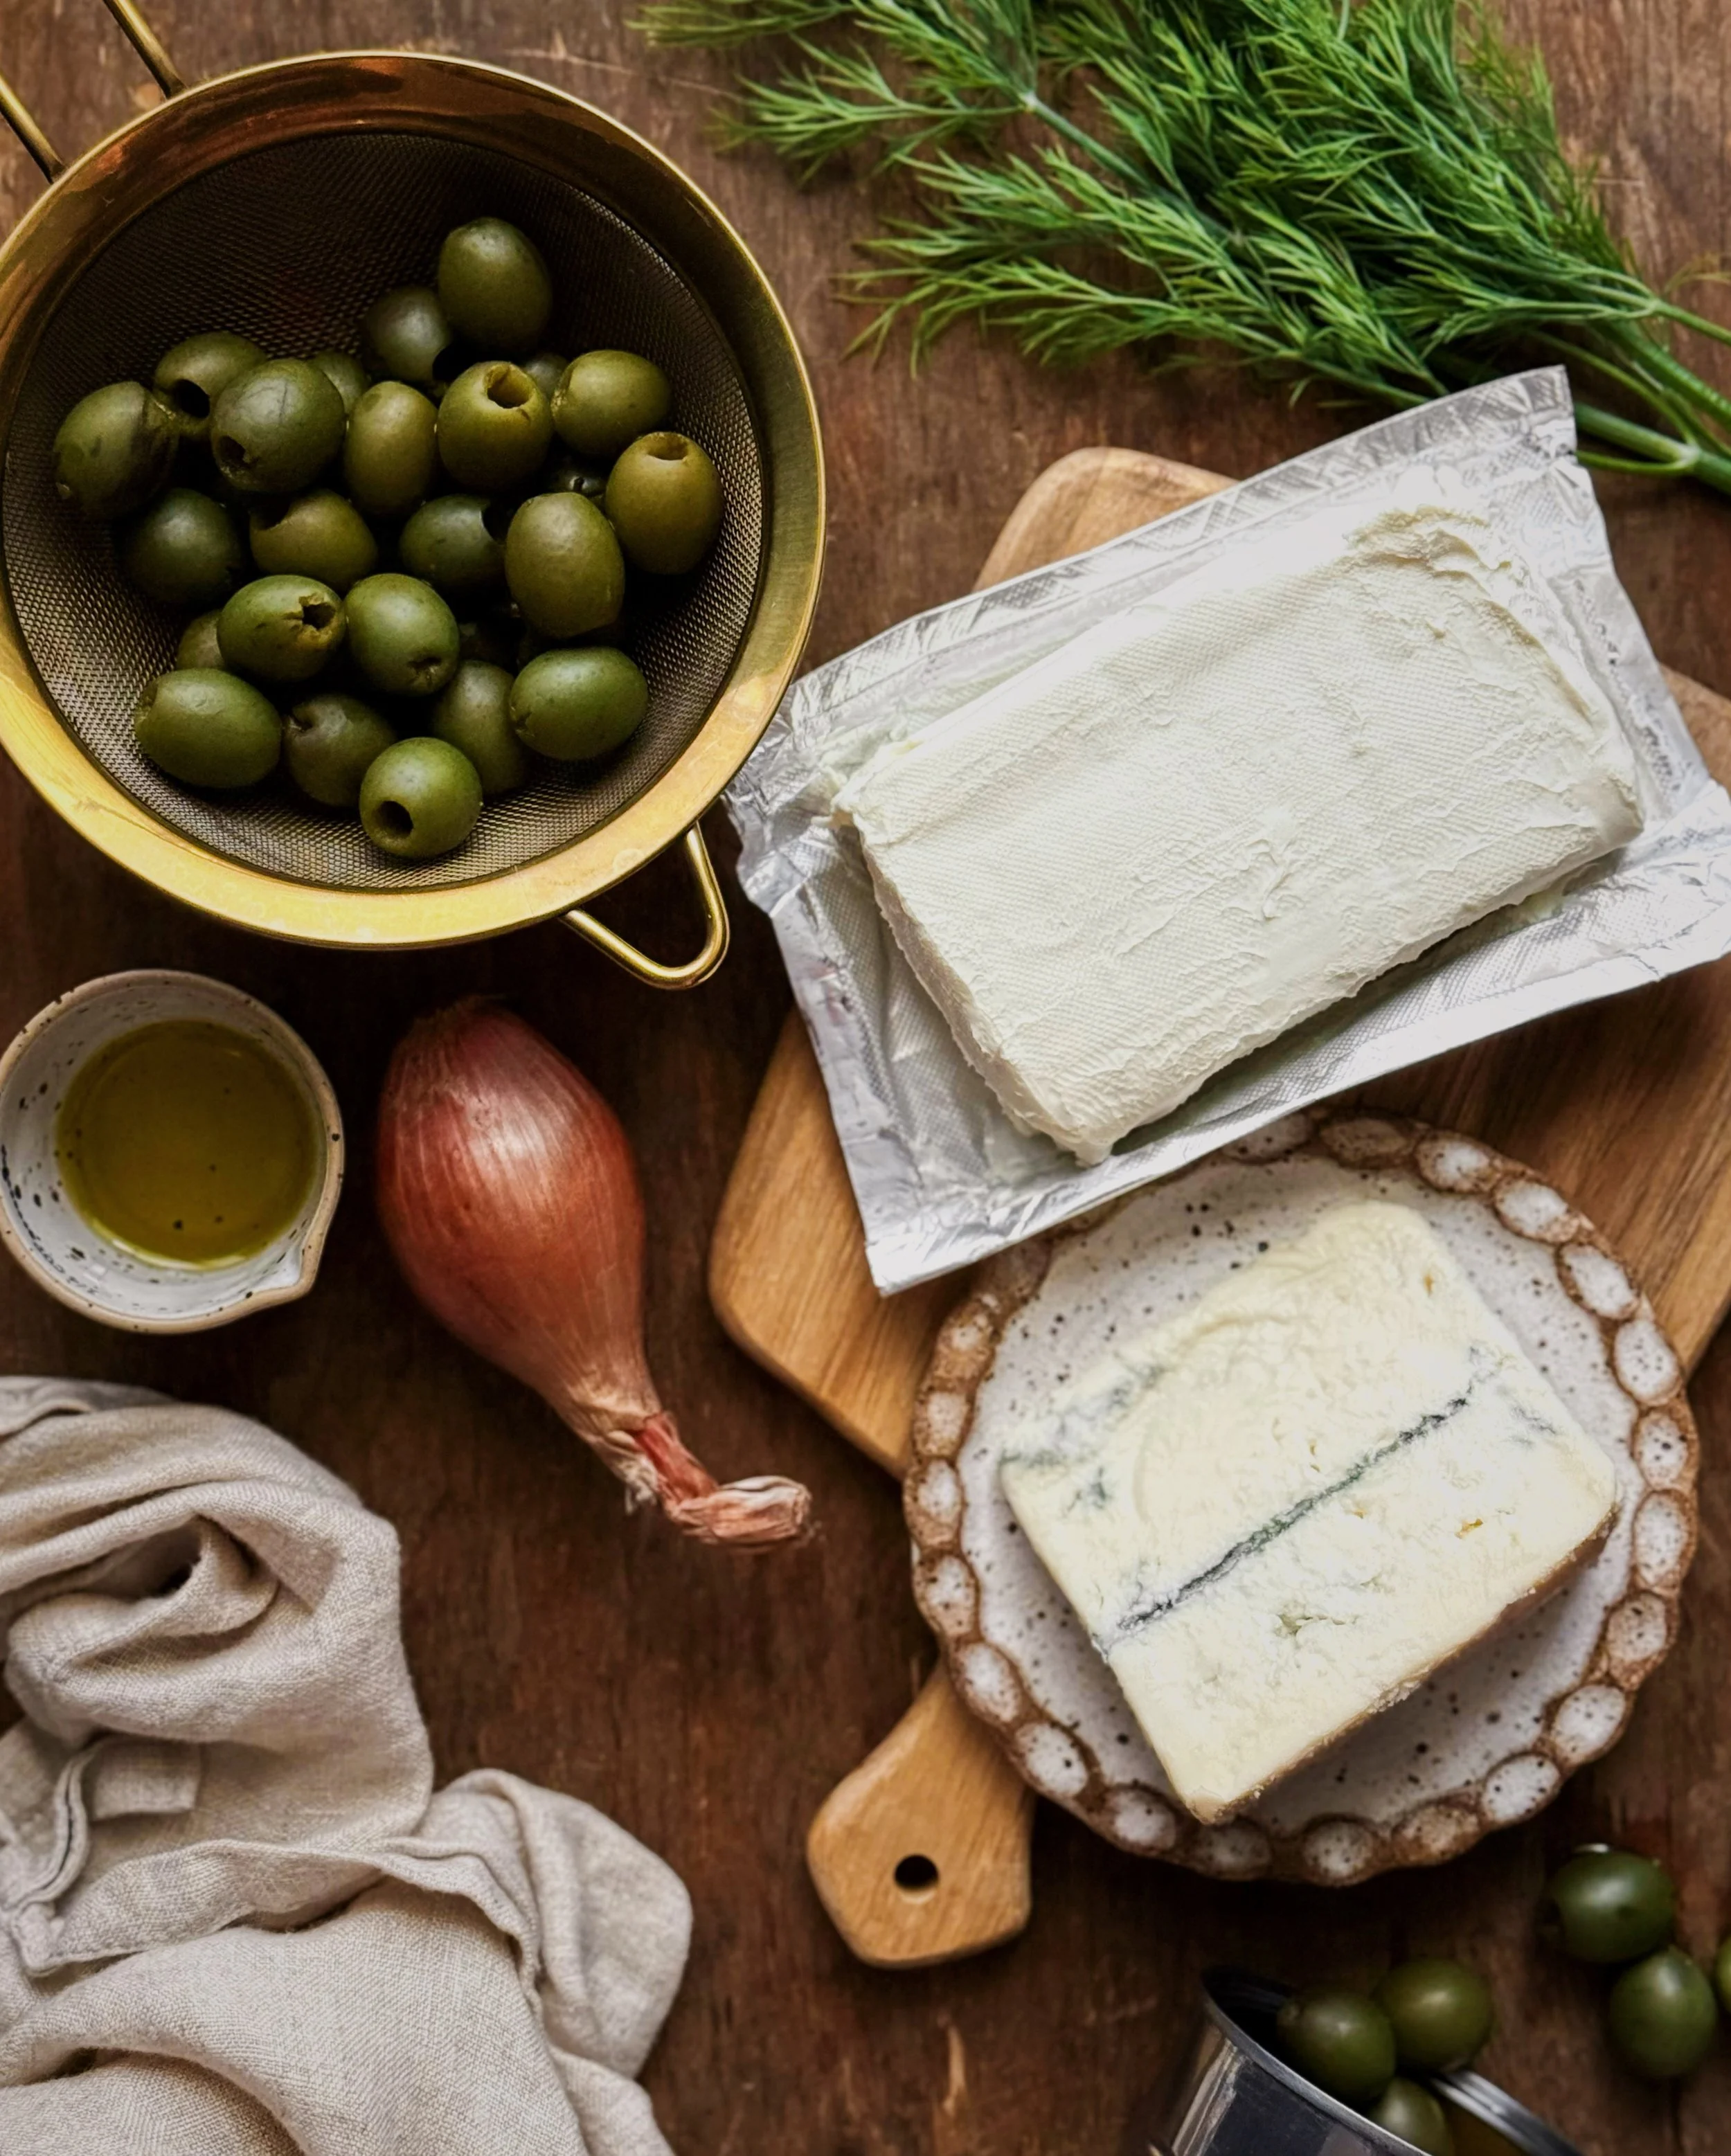
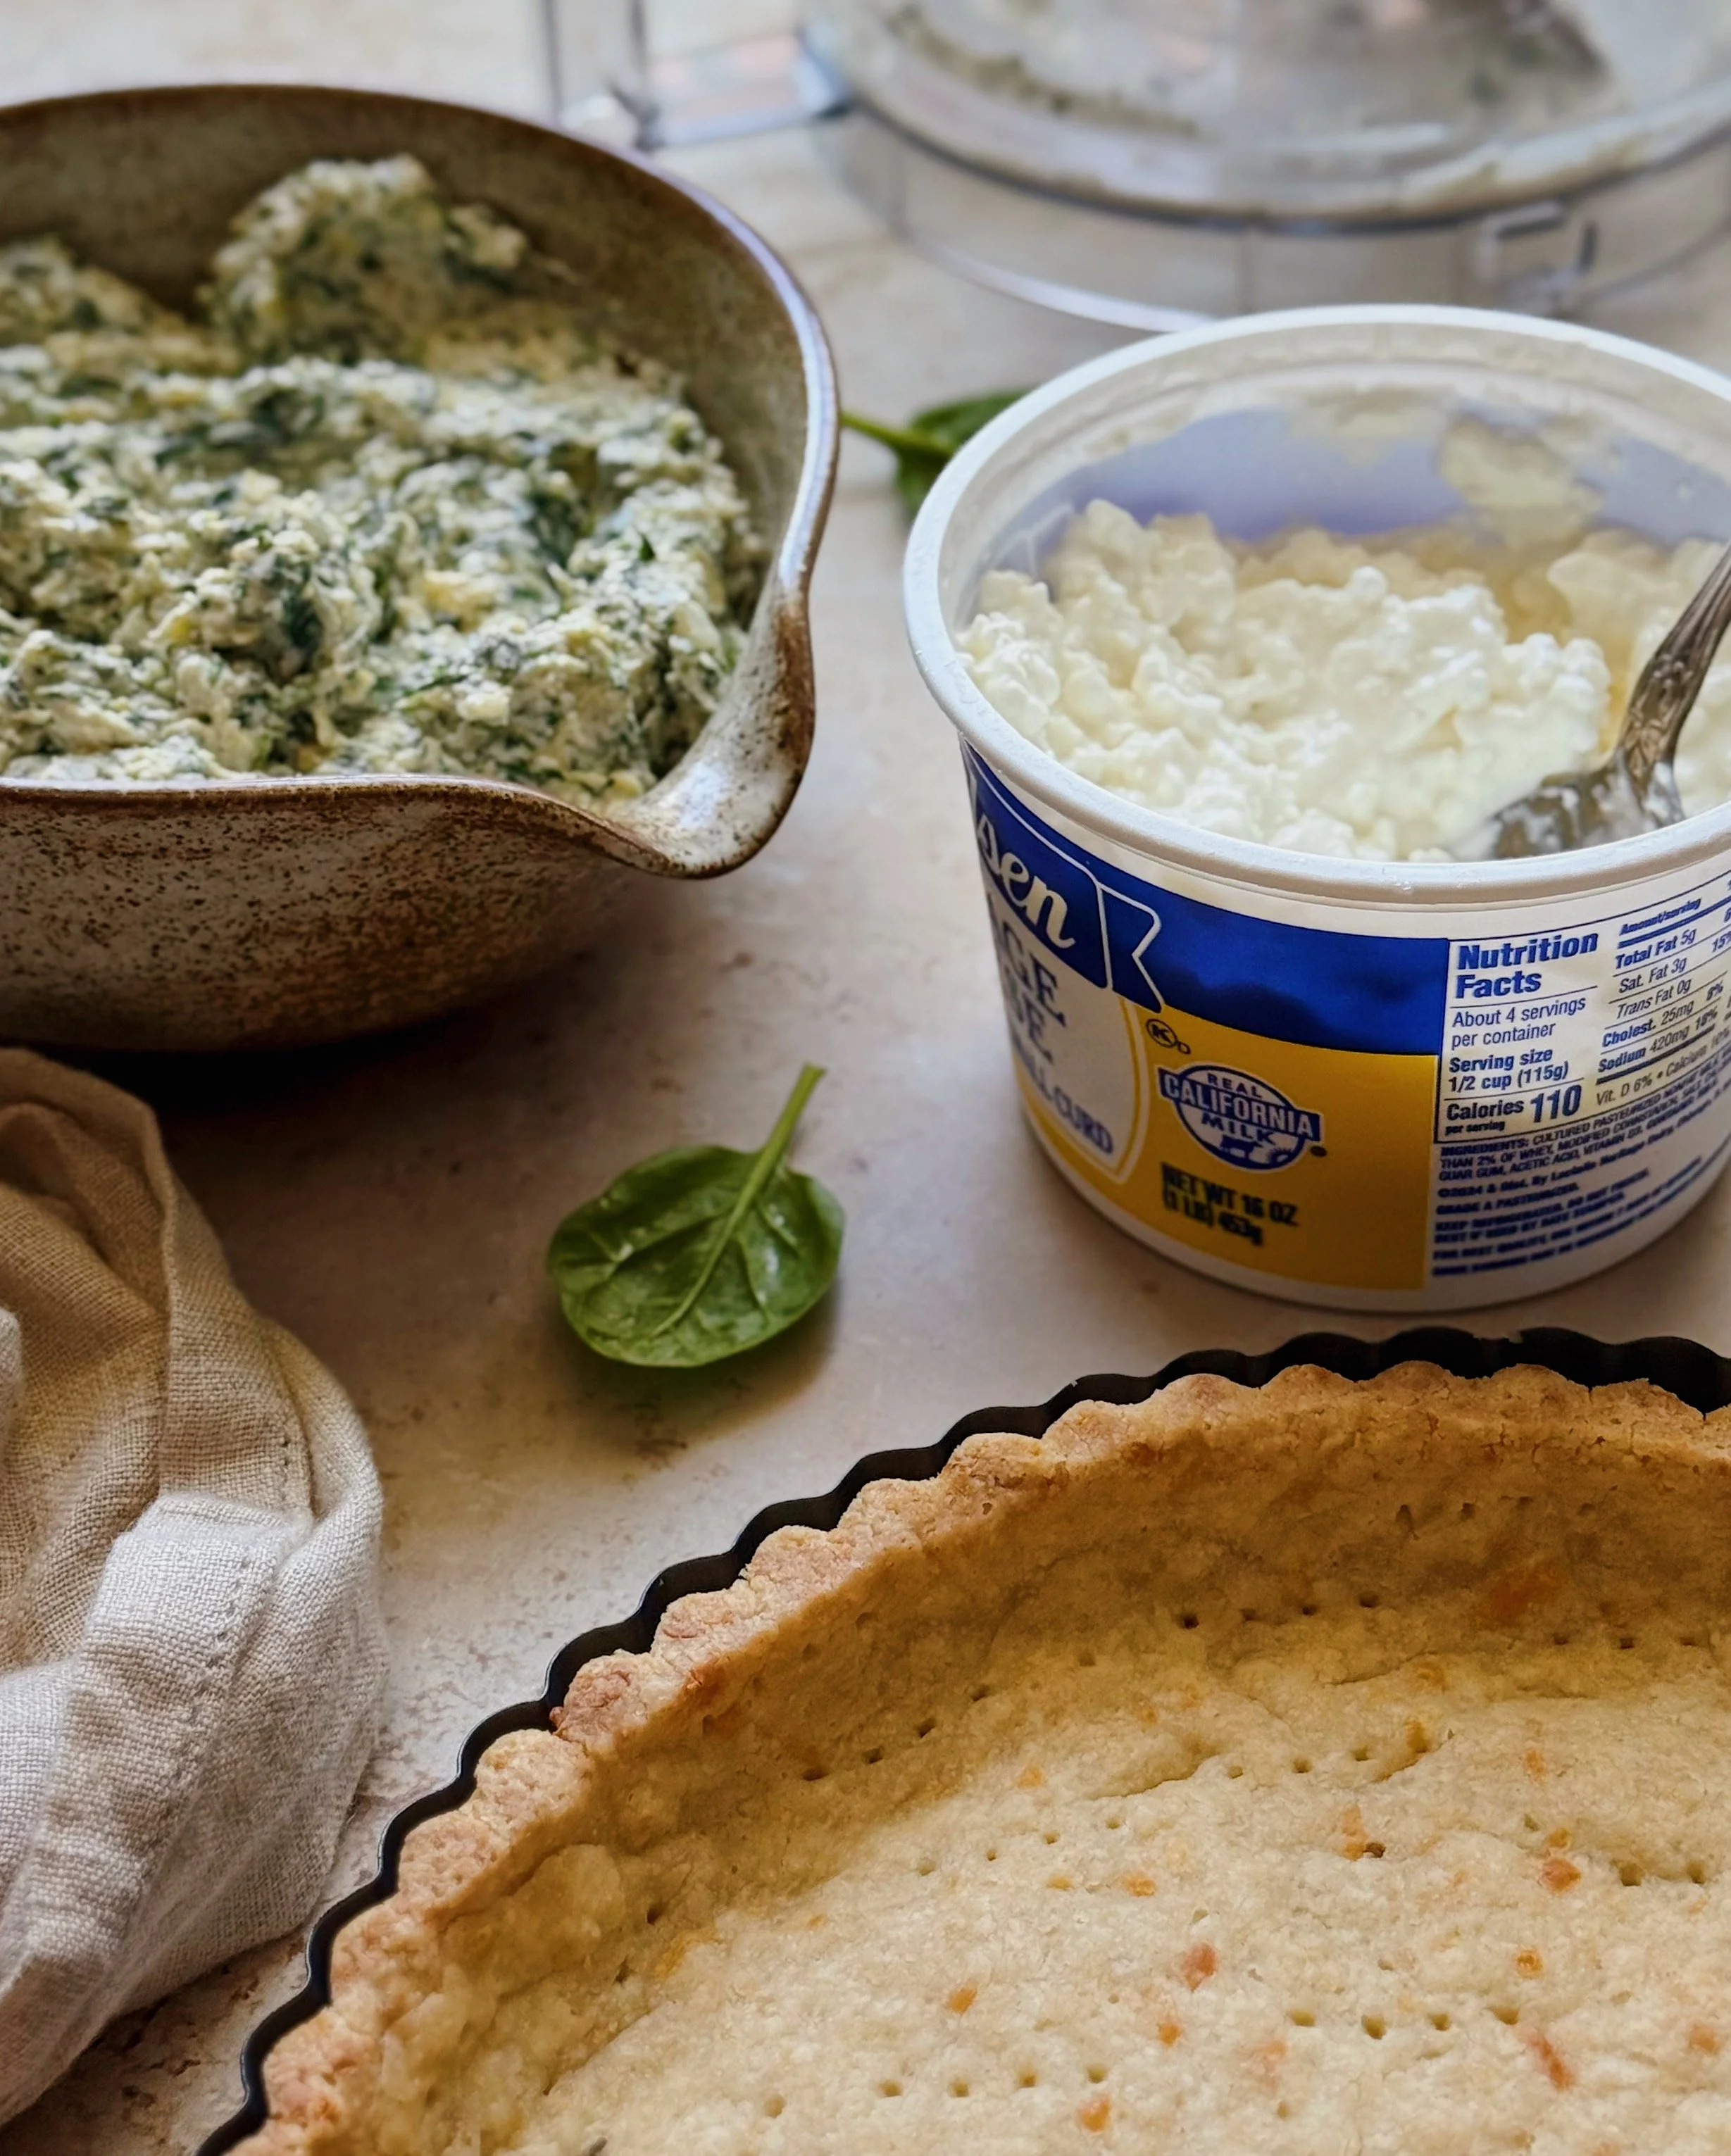
Real California Milk Cottage Cheese: Real California Milk has always been a real source of protein and cottage cheese is especially packed with the good stuff because it is made up of concentrated curds of that protein-rich milk. For this recipe, we’ll use a food processor to turn Real California Milk cottage cheese into a tangy, creamy, smooth foundation for this tart filling to make something just as craveable as a classic spinach artichoke dip but with that added protein. I used small curd full-fat cottage cheese for an extra creamy experience, but low-fat cottage cheese would also be fine here.
Real California Milk Cream Cheese: Cream cheese made from that tasty Real California Milk helps keep the dairy base nice and thick, ensuring that the spinach artichoke dip will hold together well as a tart filling when the tart is sliced.
Real California Milk Mozzarella Cheese: A little bit of mozzarella cheese adds body to the tart filling while keeping to the creamy, tangy flavor profile of cheeses made with delicious Real California dairy. For this recipe, you will want low-moisture mozzarella, like the kind you’d use for grating, and not the fresh mozzarella that comes submerged in liquid.
Baby Spinach: I prefer starting with fresh baby spinach and cooking it down but you can certainly use blanched or frozen spinach. No matter which, you’ll need to wring it out well to prevent the dip mixture from being waterlogged. Once wrung, you will want about 1/3 cup of concentrated spinach.
Artichoke Hearts: For convenience, I’m using canned artichoke hearts. These, too, should be squeezed to eliminate excess moisture. Be sure to get the canned artichokes in brine and not the marinated artichokes in oil that usually come in a jar. You can certainly also steam fresh artichokes and prepare the hearts yourself if you desire. Just be sure to squeeze them out.
Water Chestnuts: For me, this retro ingredient is essential for a good spinach artichoke dip! I think it is because this is a common ingredient in Chinese-American food, and when I was young it felt like one of the only throughways between the food I had at home and the more novel cheesy American foods I longed for. These come pre-peeled in cans and you can typically find them in the “Asian foods” aisle at major supermarkets. Pat them dry before incorporating them into the dip mixture.
Garlic: Rarely do I write a recipe with only one clove of garlic but since it will be going in raw and pulsed into this dip, I felt that one was sufficient for not overpowering the tart filling. You can certainly add more to your taste.
Other seasonings: White wine vinegar, worcestershire sauce, onion powder, salt, and pepper will help bring together the main ingredients and transform the mixture as a whole into a craveable, flavorful way to consume lots of veggies and protein!
Notes about making the crust
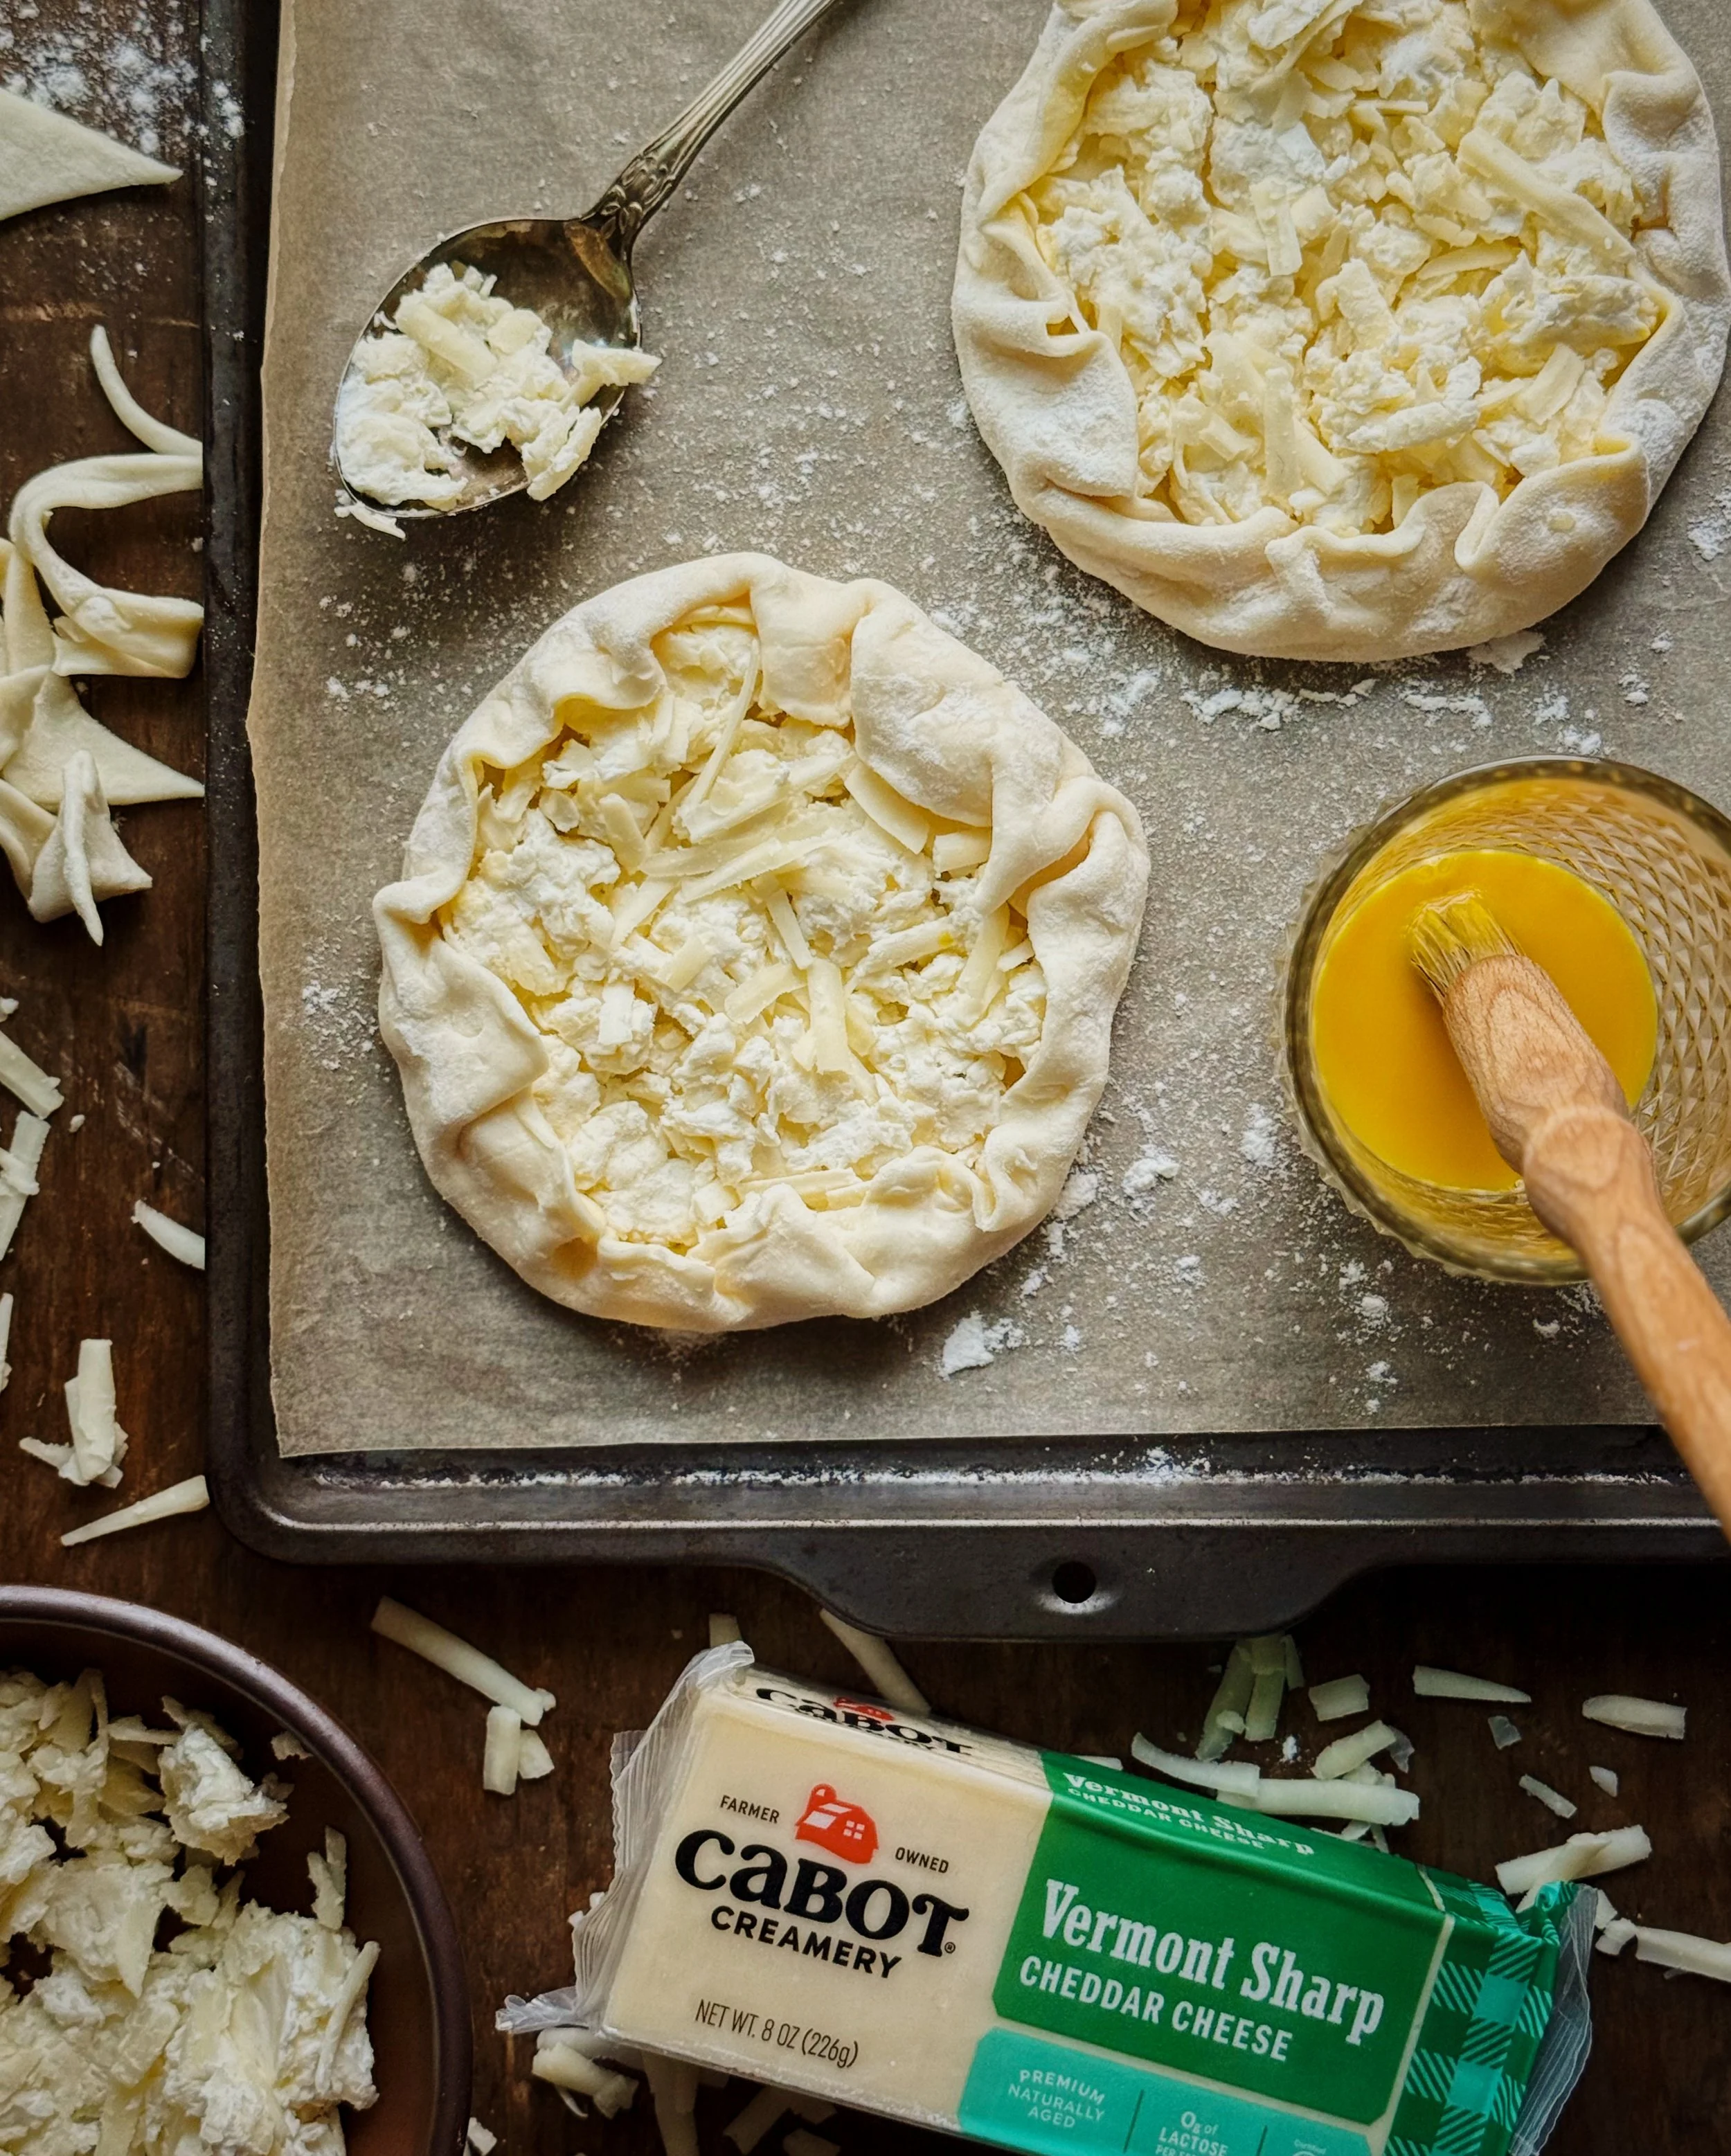
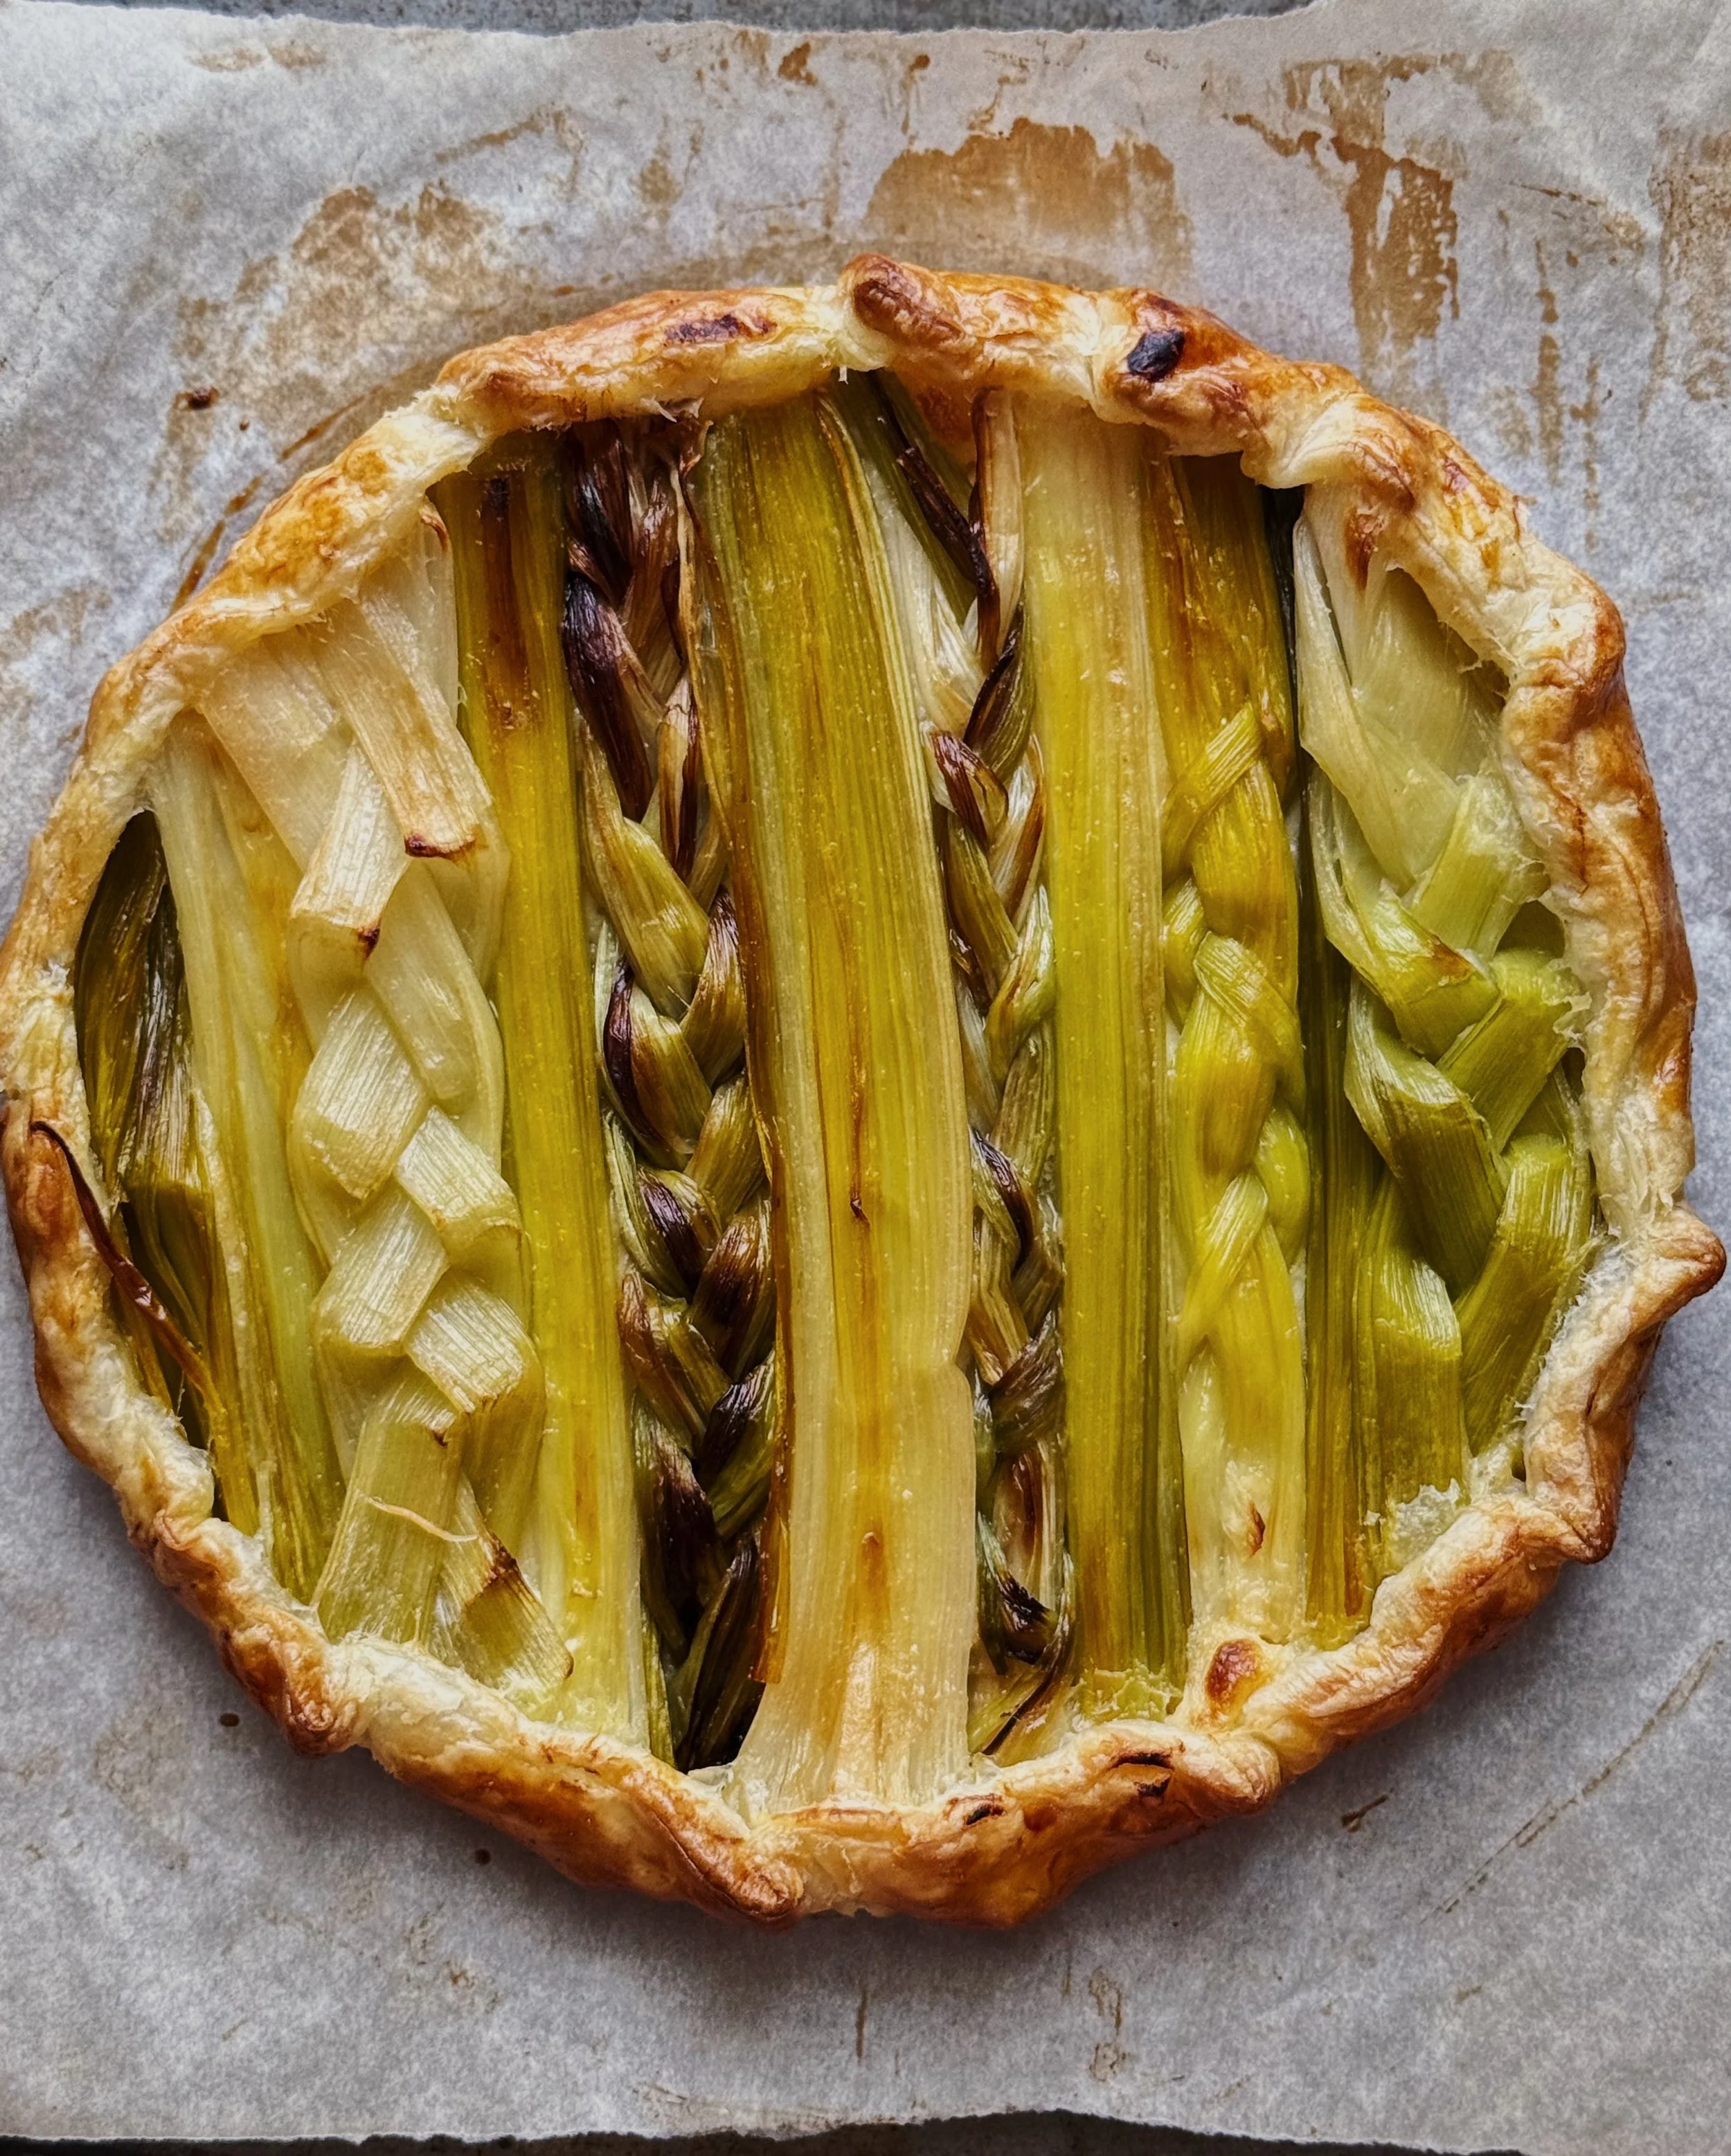
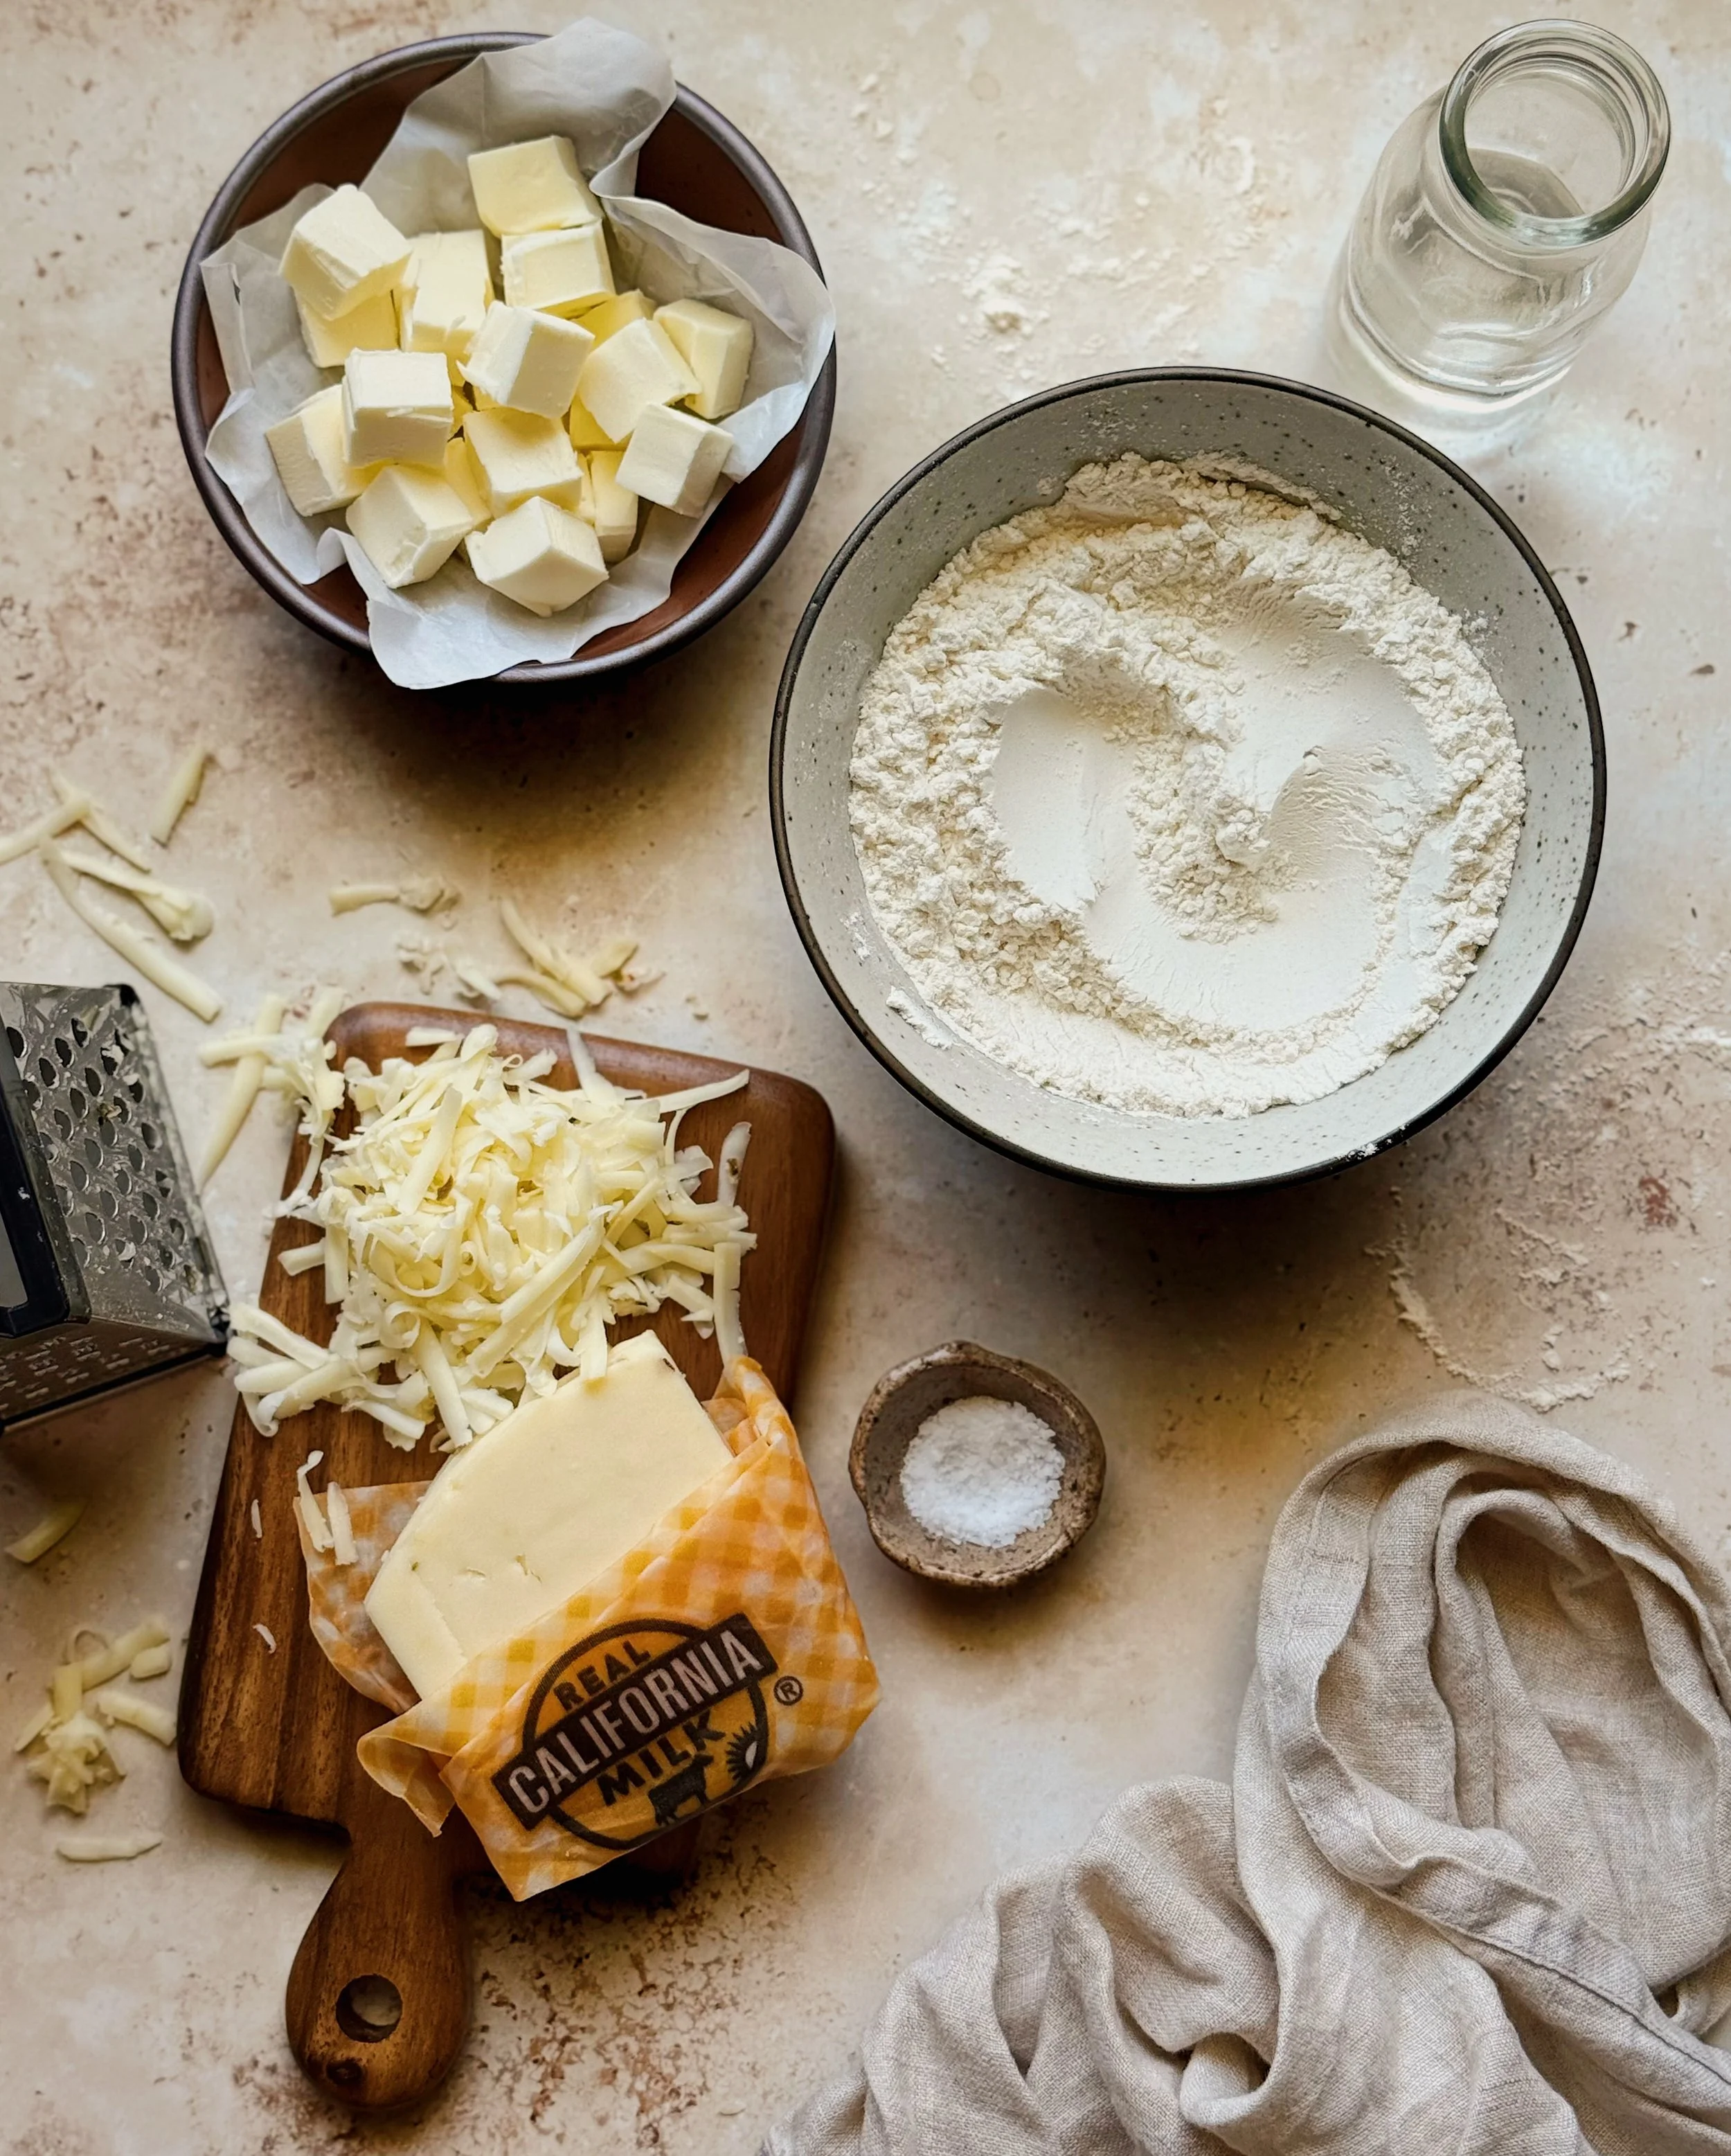
This tart recipe includes making a delicious cheesy crust from scratch. A 9-inch or 9 1/2-inch tart pan with a removable bottom that pops up is recommended for this recipe. With the texture of a savory shortbread, this tart shell is buttery, crisp, and snappy and the subtle inclusion of chilies via Real California Milk Pepper Jack cheese is the perfect pairing with the spinach and artichoke dip filling. The crust gets fully baked before it’s filled and I have some key tips for achieving the perfect edible vessel.
Use good butter and freeze it beforehand. Look for the “Real California Milk” seal to choose a high-quality butter for this buttery shortbread crust. Cut it into small cubes and freeze it beforehand to ensure that your crust will be crisp and snappy without feeling greasy.
Use chilled vodka—not water—to bring your dough together. Add a little vodka at a time to the butter and dry ingredients, until they just start to hold together. Because that liquid evaporates easily in the oven, it’s my special trick for keeping the tart shell super crispy. I’ve previously tested making a shortbread tart shell with just chilled water and it definitely wasn’t the ideal crispness.
Use Real California Milk cheese. This crust isn’t just a vessel for serving your delicious dip; it needs to taste just as delicious too! Look for tasty pepper jack made with Real California Milk to bake that craveable cheesy flavor right into the crust.
Keep everything cold. I can’t emphasize enough how keeping such a buttery dough cold is key to baking up a beautiful and sturdy vessel for your creamy dip. Because the dough mixture is so low-moisture, it may take a bit of effort to make sure it evenly gets pressed into your tart pan. If you find that the butter is starting to feel greasy under your warm fingertips, stop what you’re doing and pop everything in the fridge for a few minutes to (literally) chill out before resuming with shaping your tart shell.
Make it ahead. For best results, make and mold the shortcrust dough the night before and let it chill overnight. Pop it into the oven the following day and let it cool before filling it with the cold spinach artichoke dip.
Assembling and decorating the tart
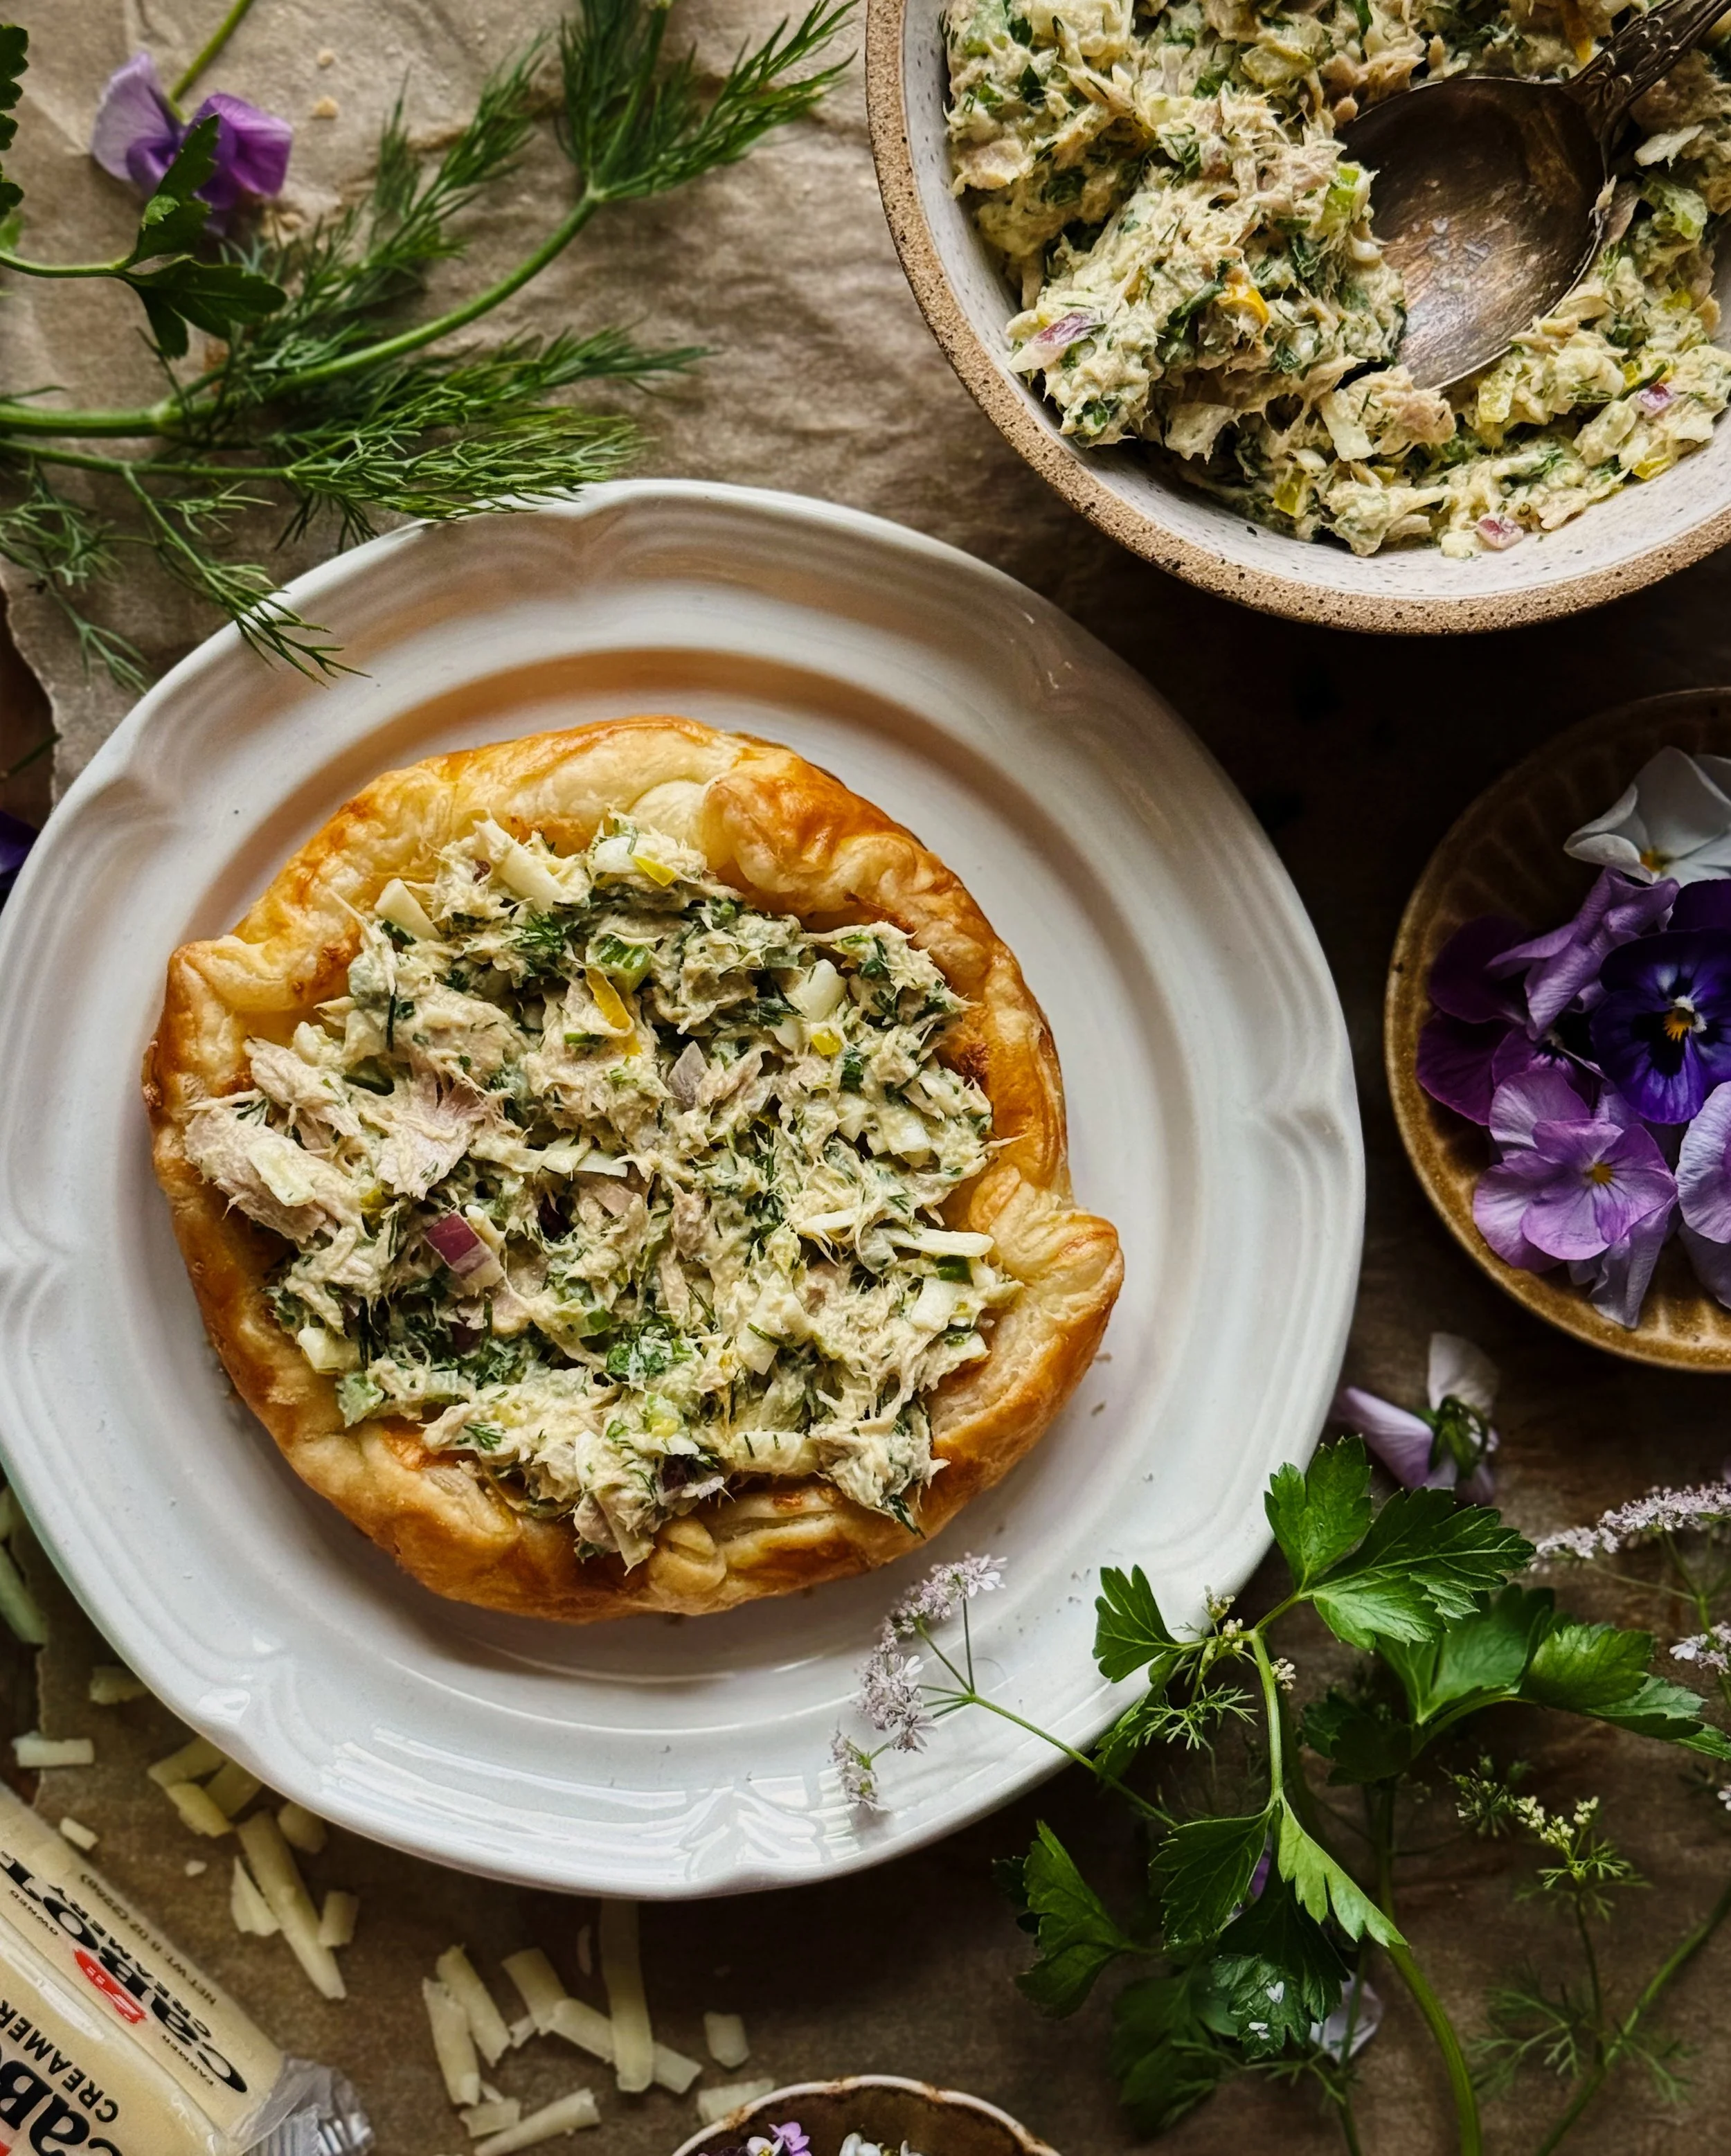
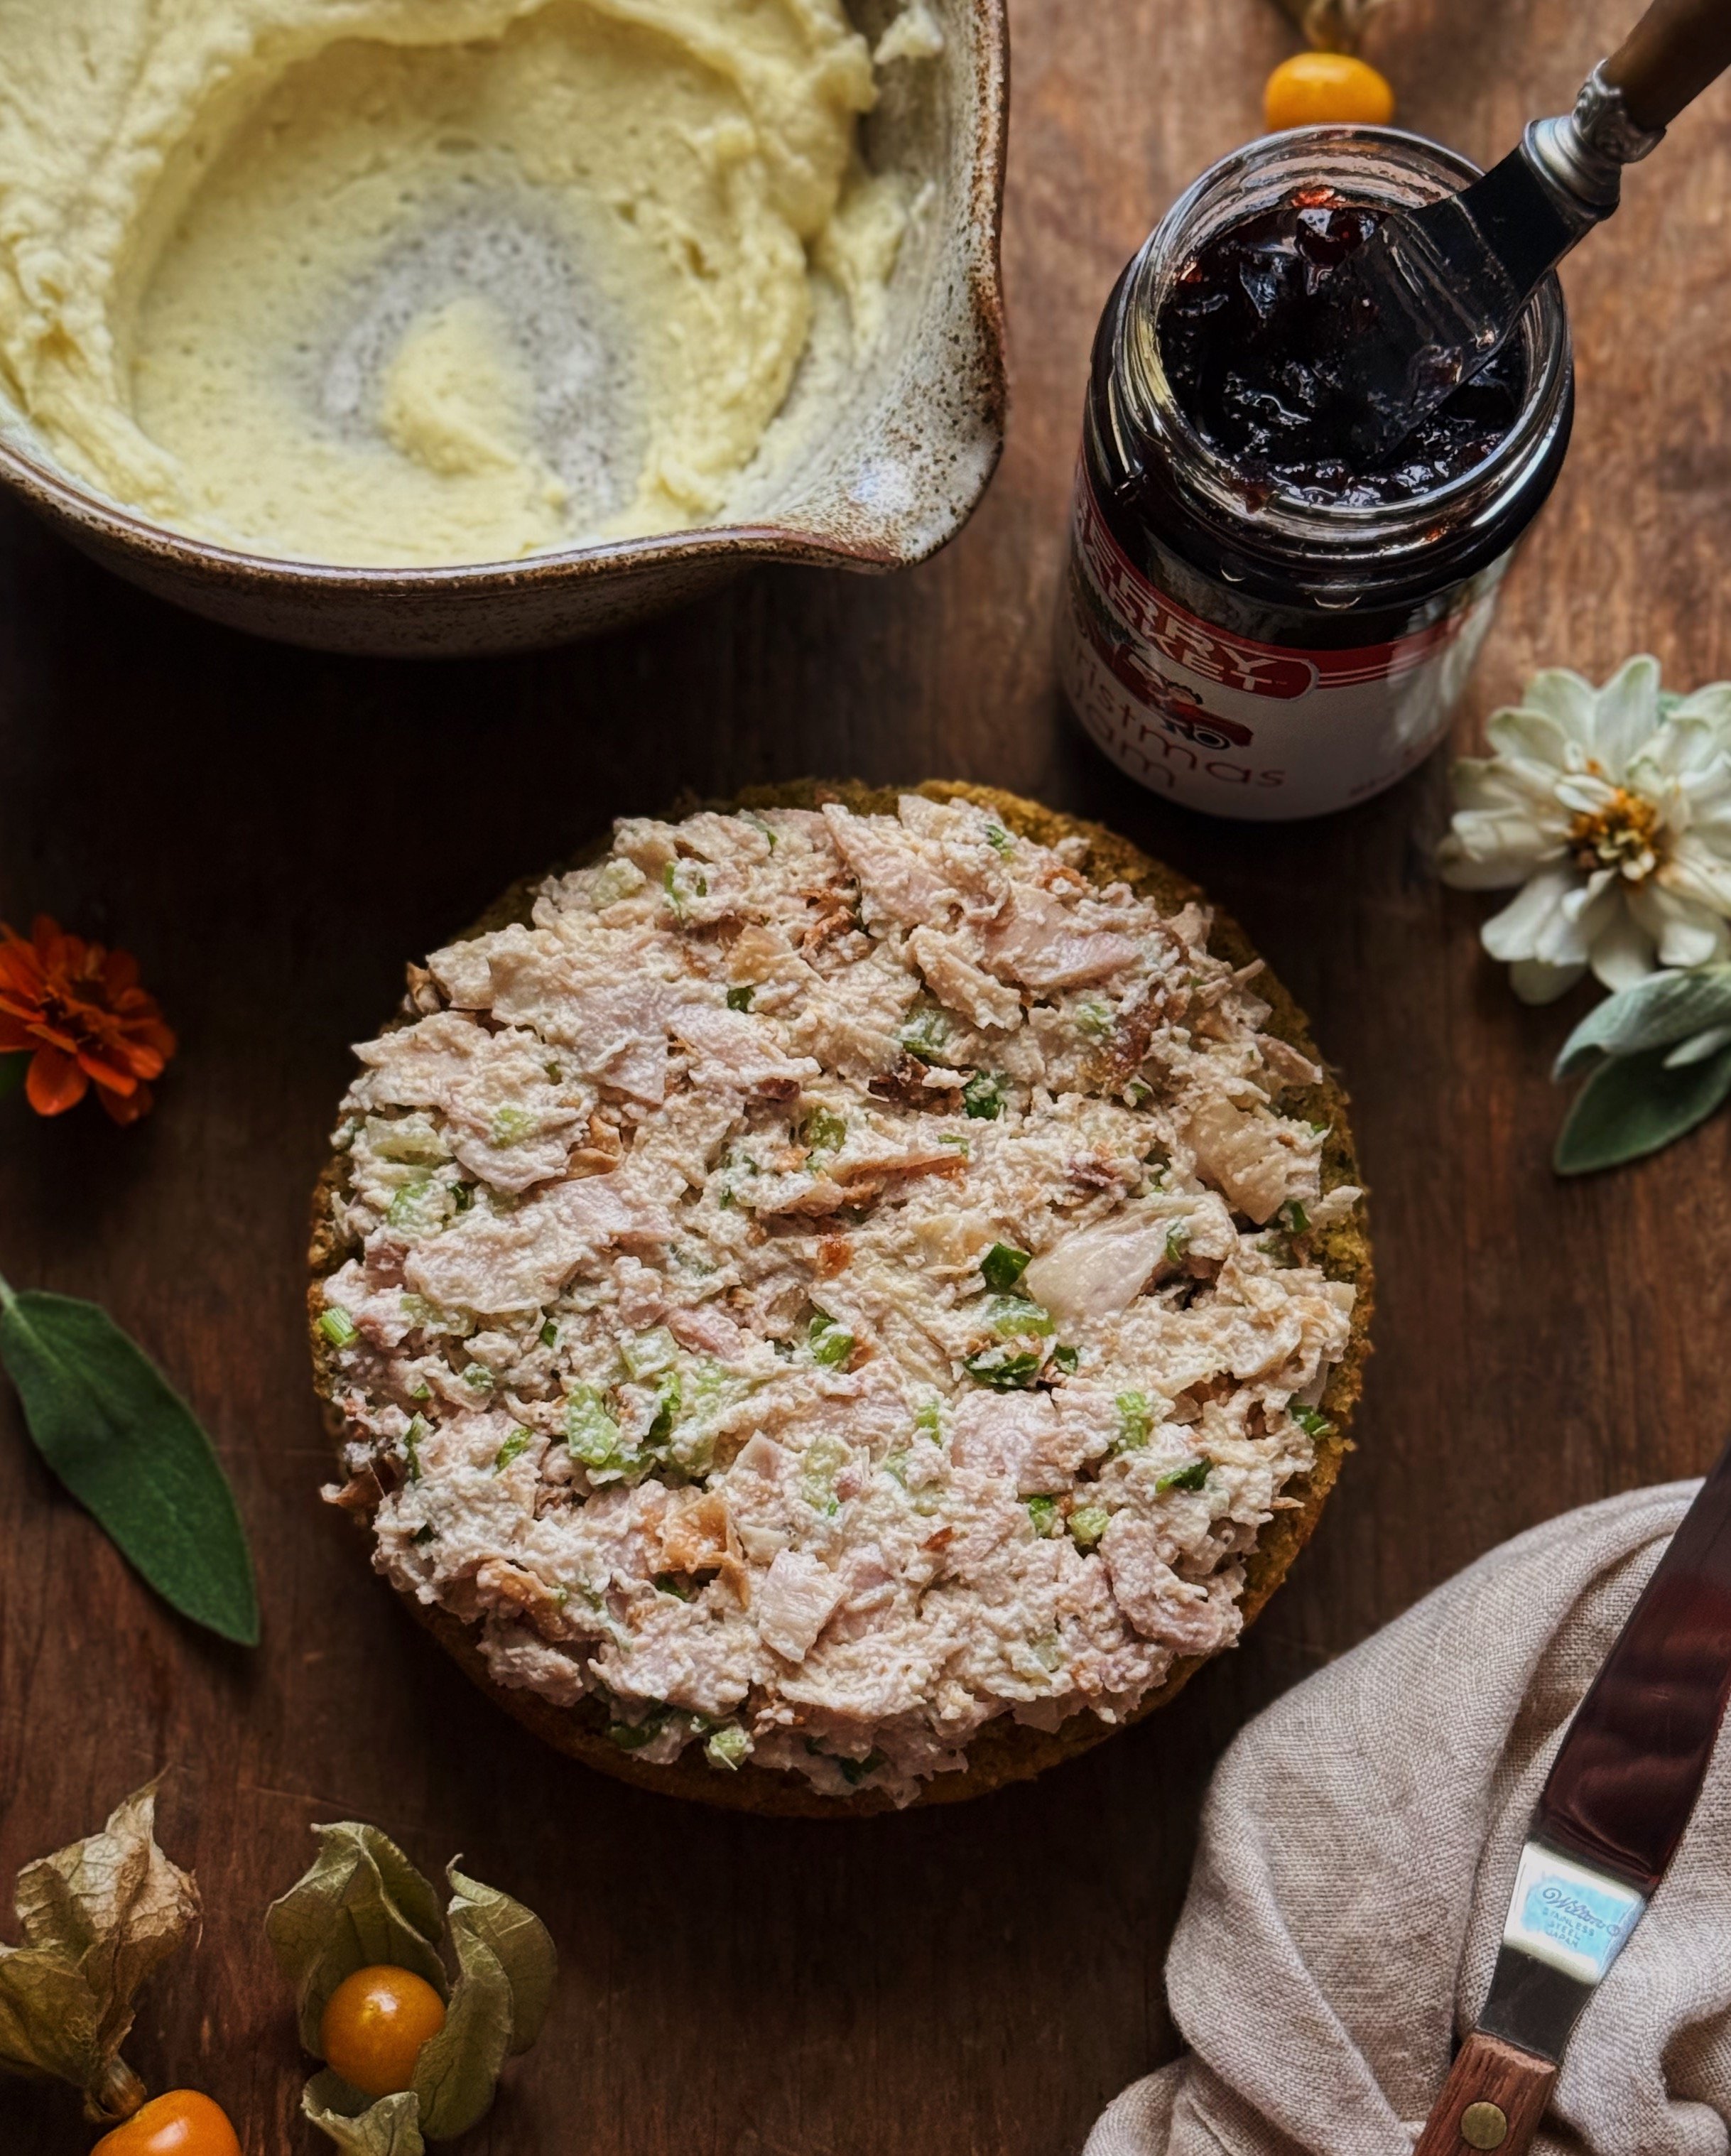
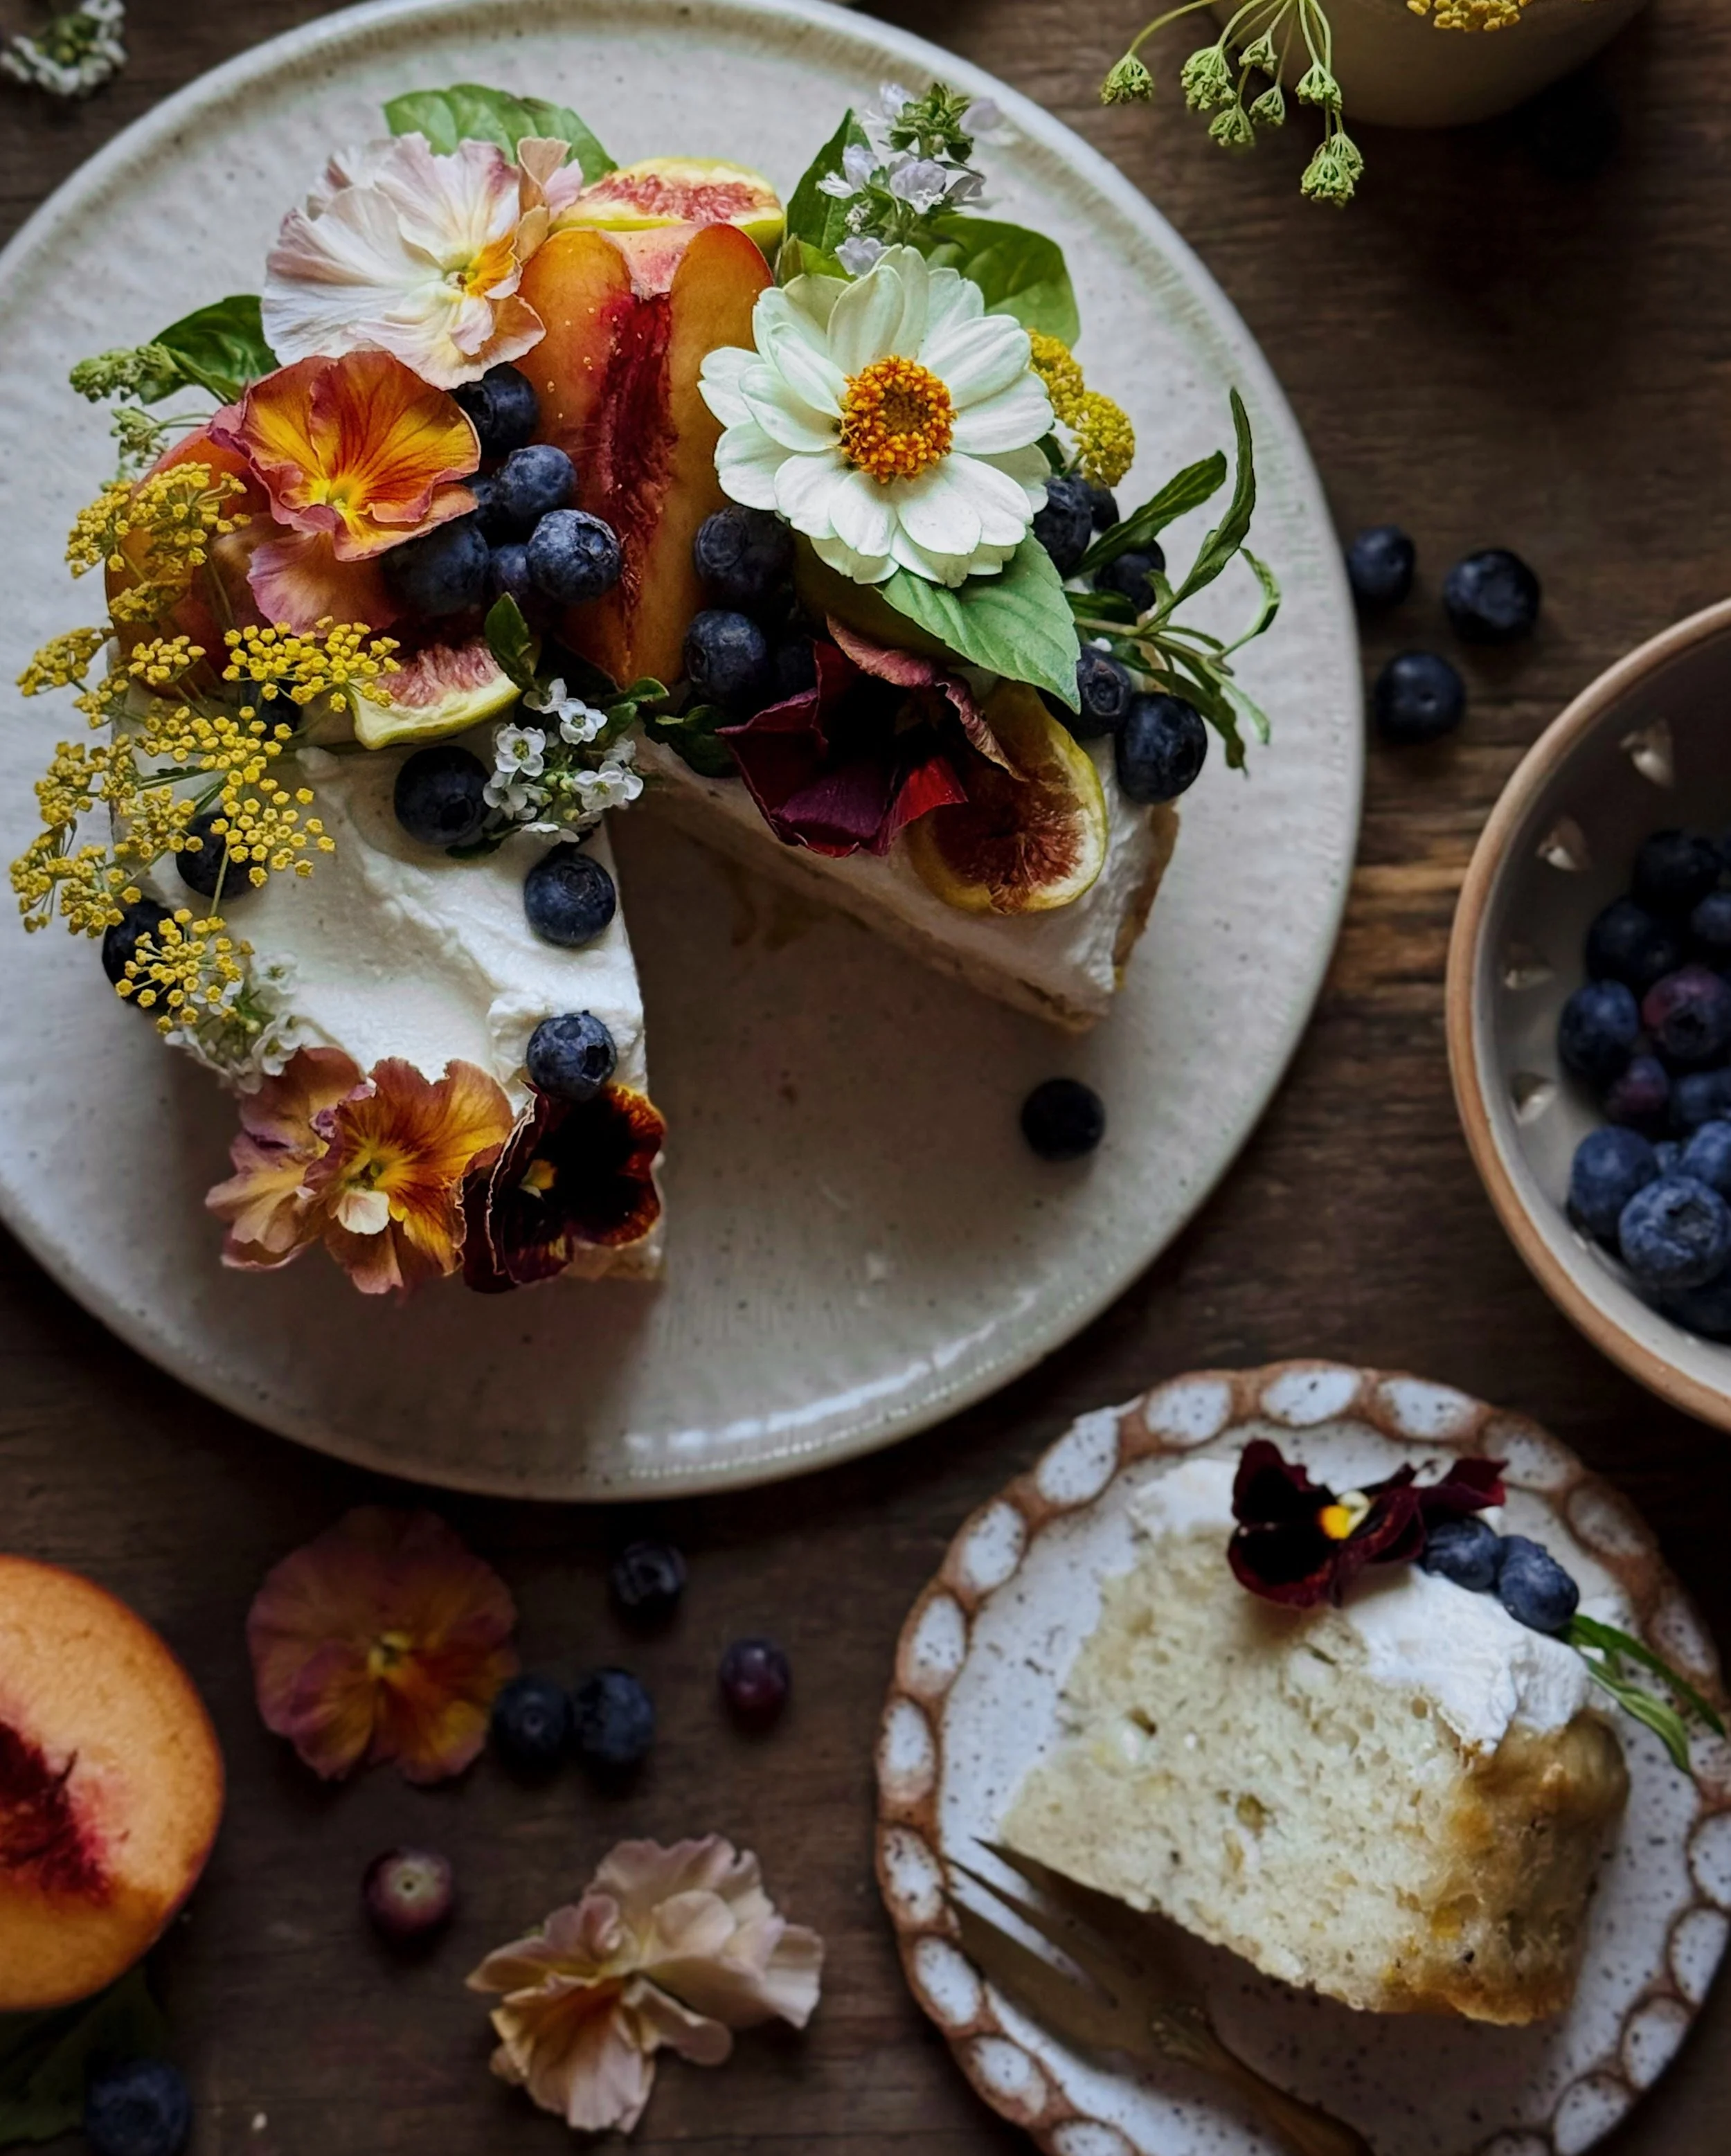
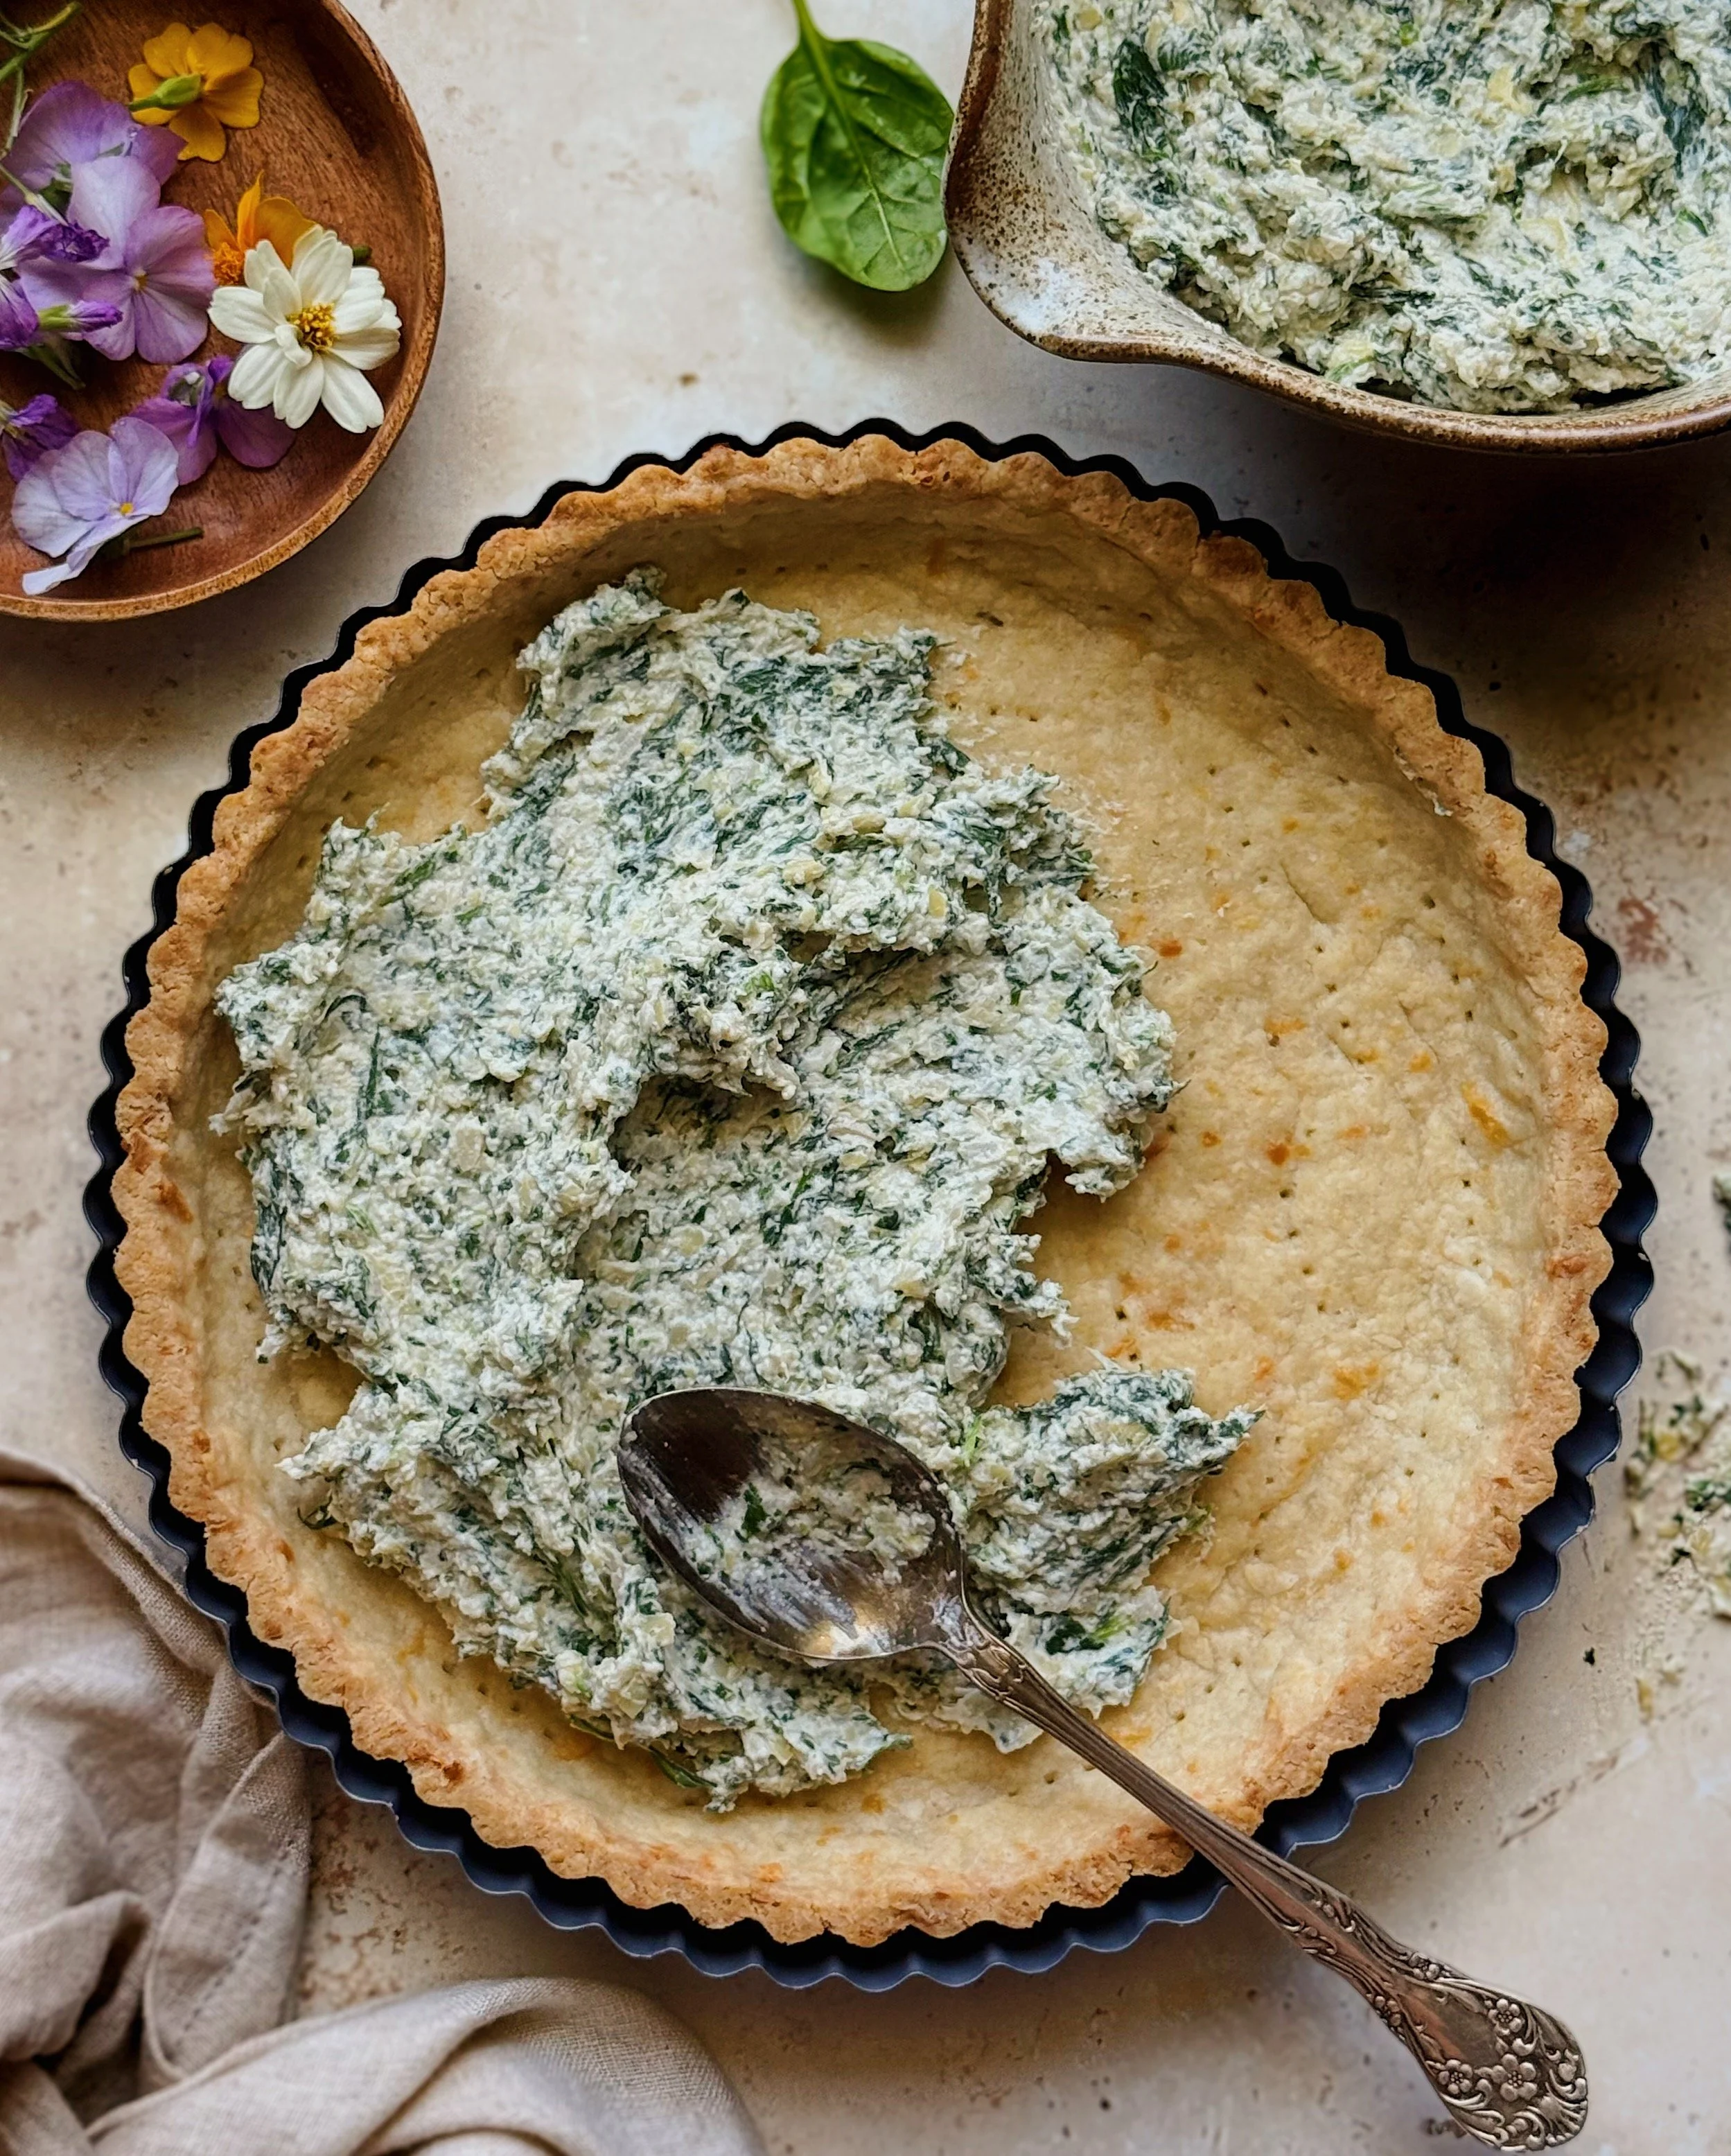
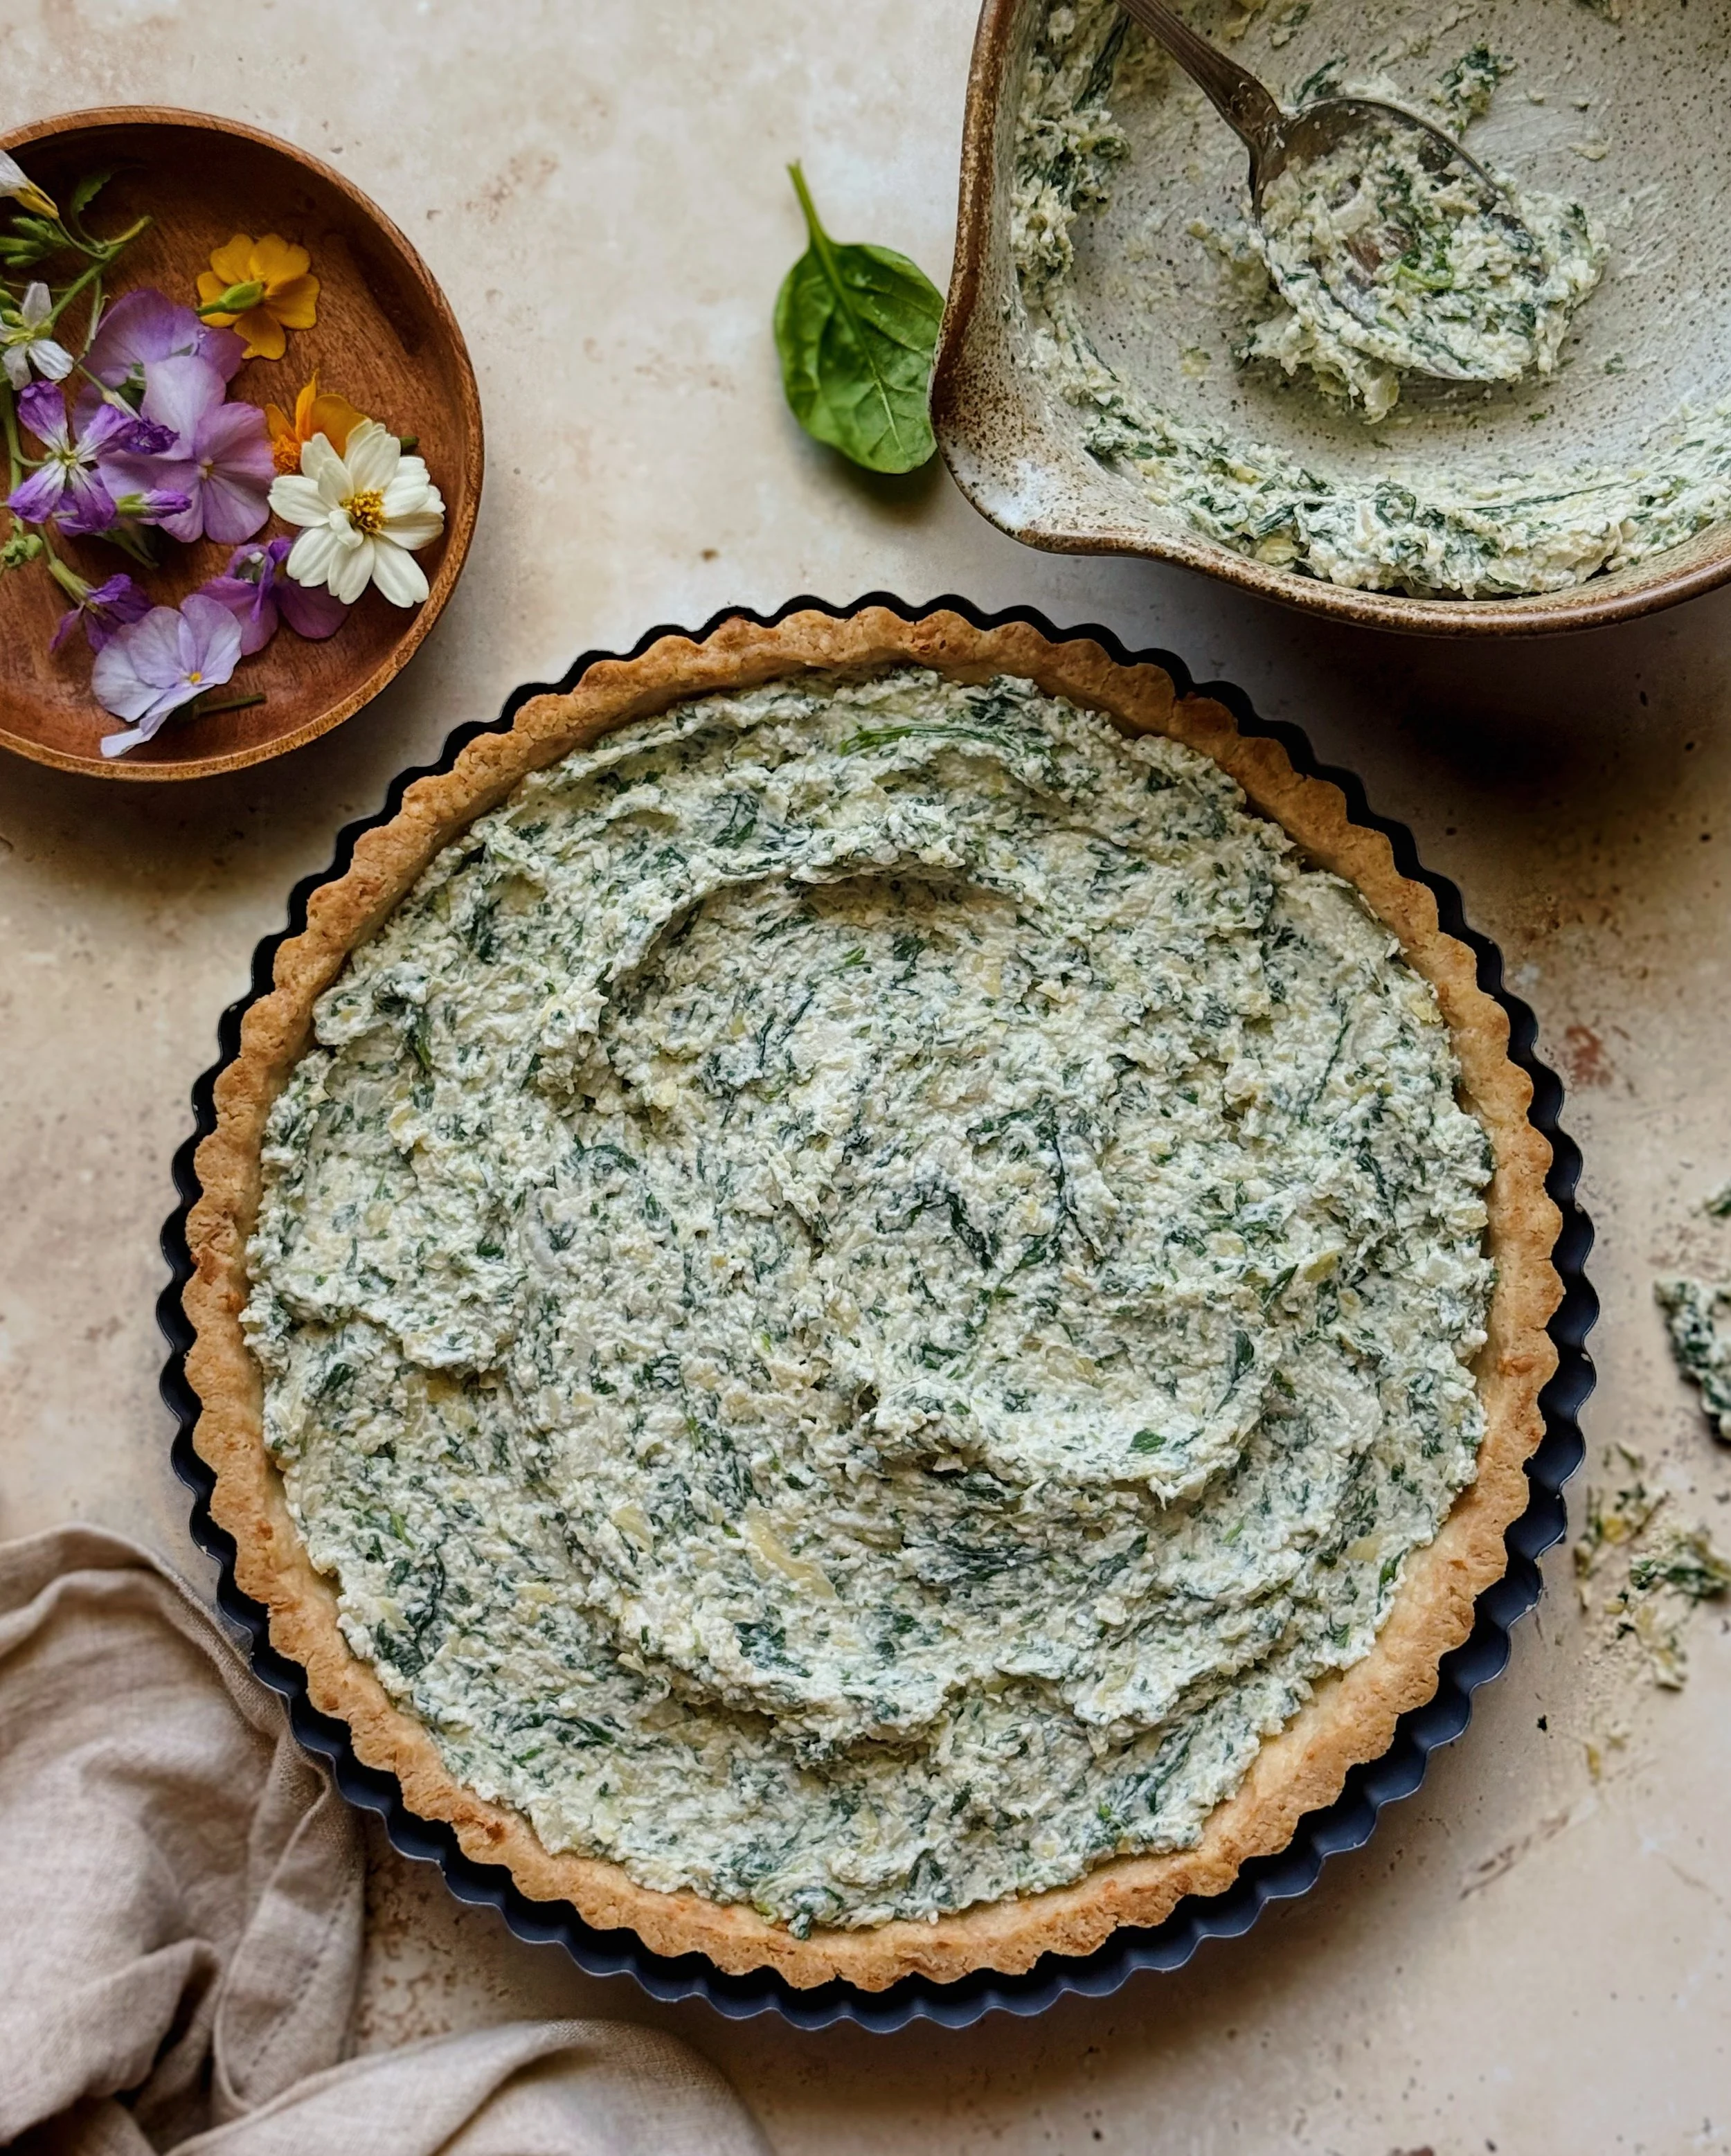
To assemble the dip tart, let the baked crust cool to room temperature and fill it with your prepared spinach artichoke dip. It’s that easy!
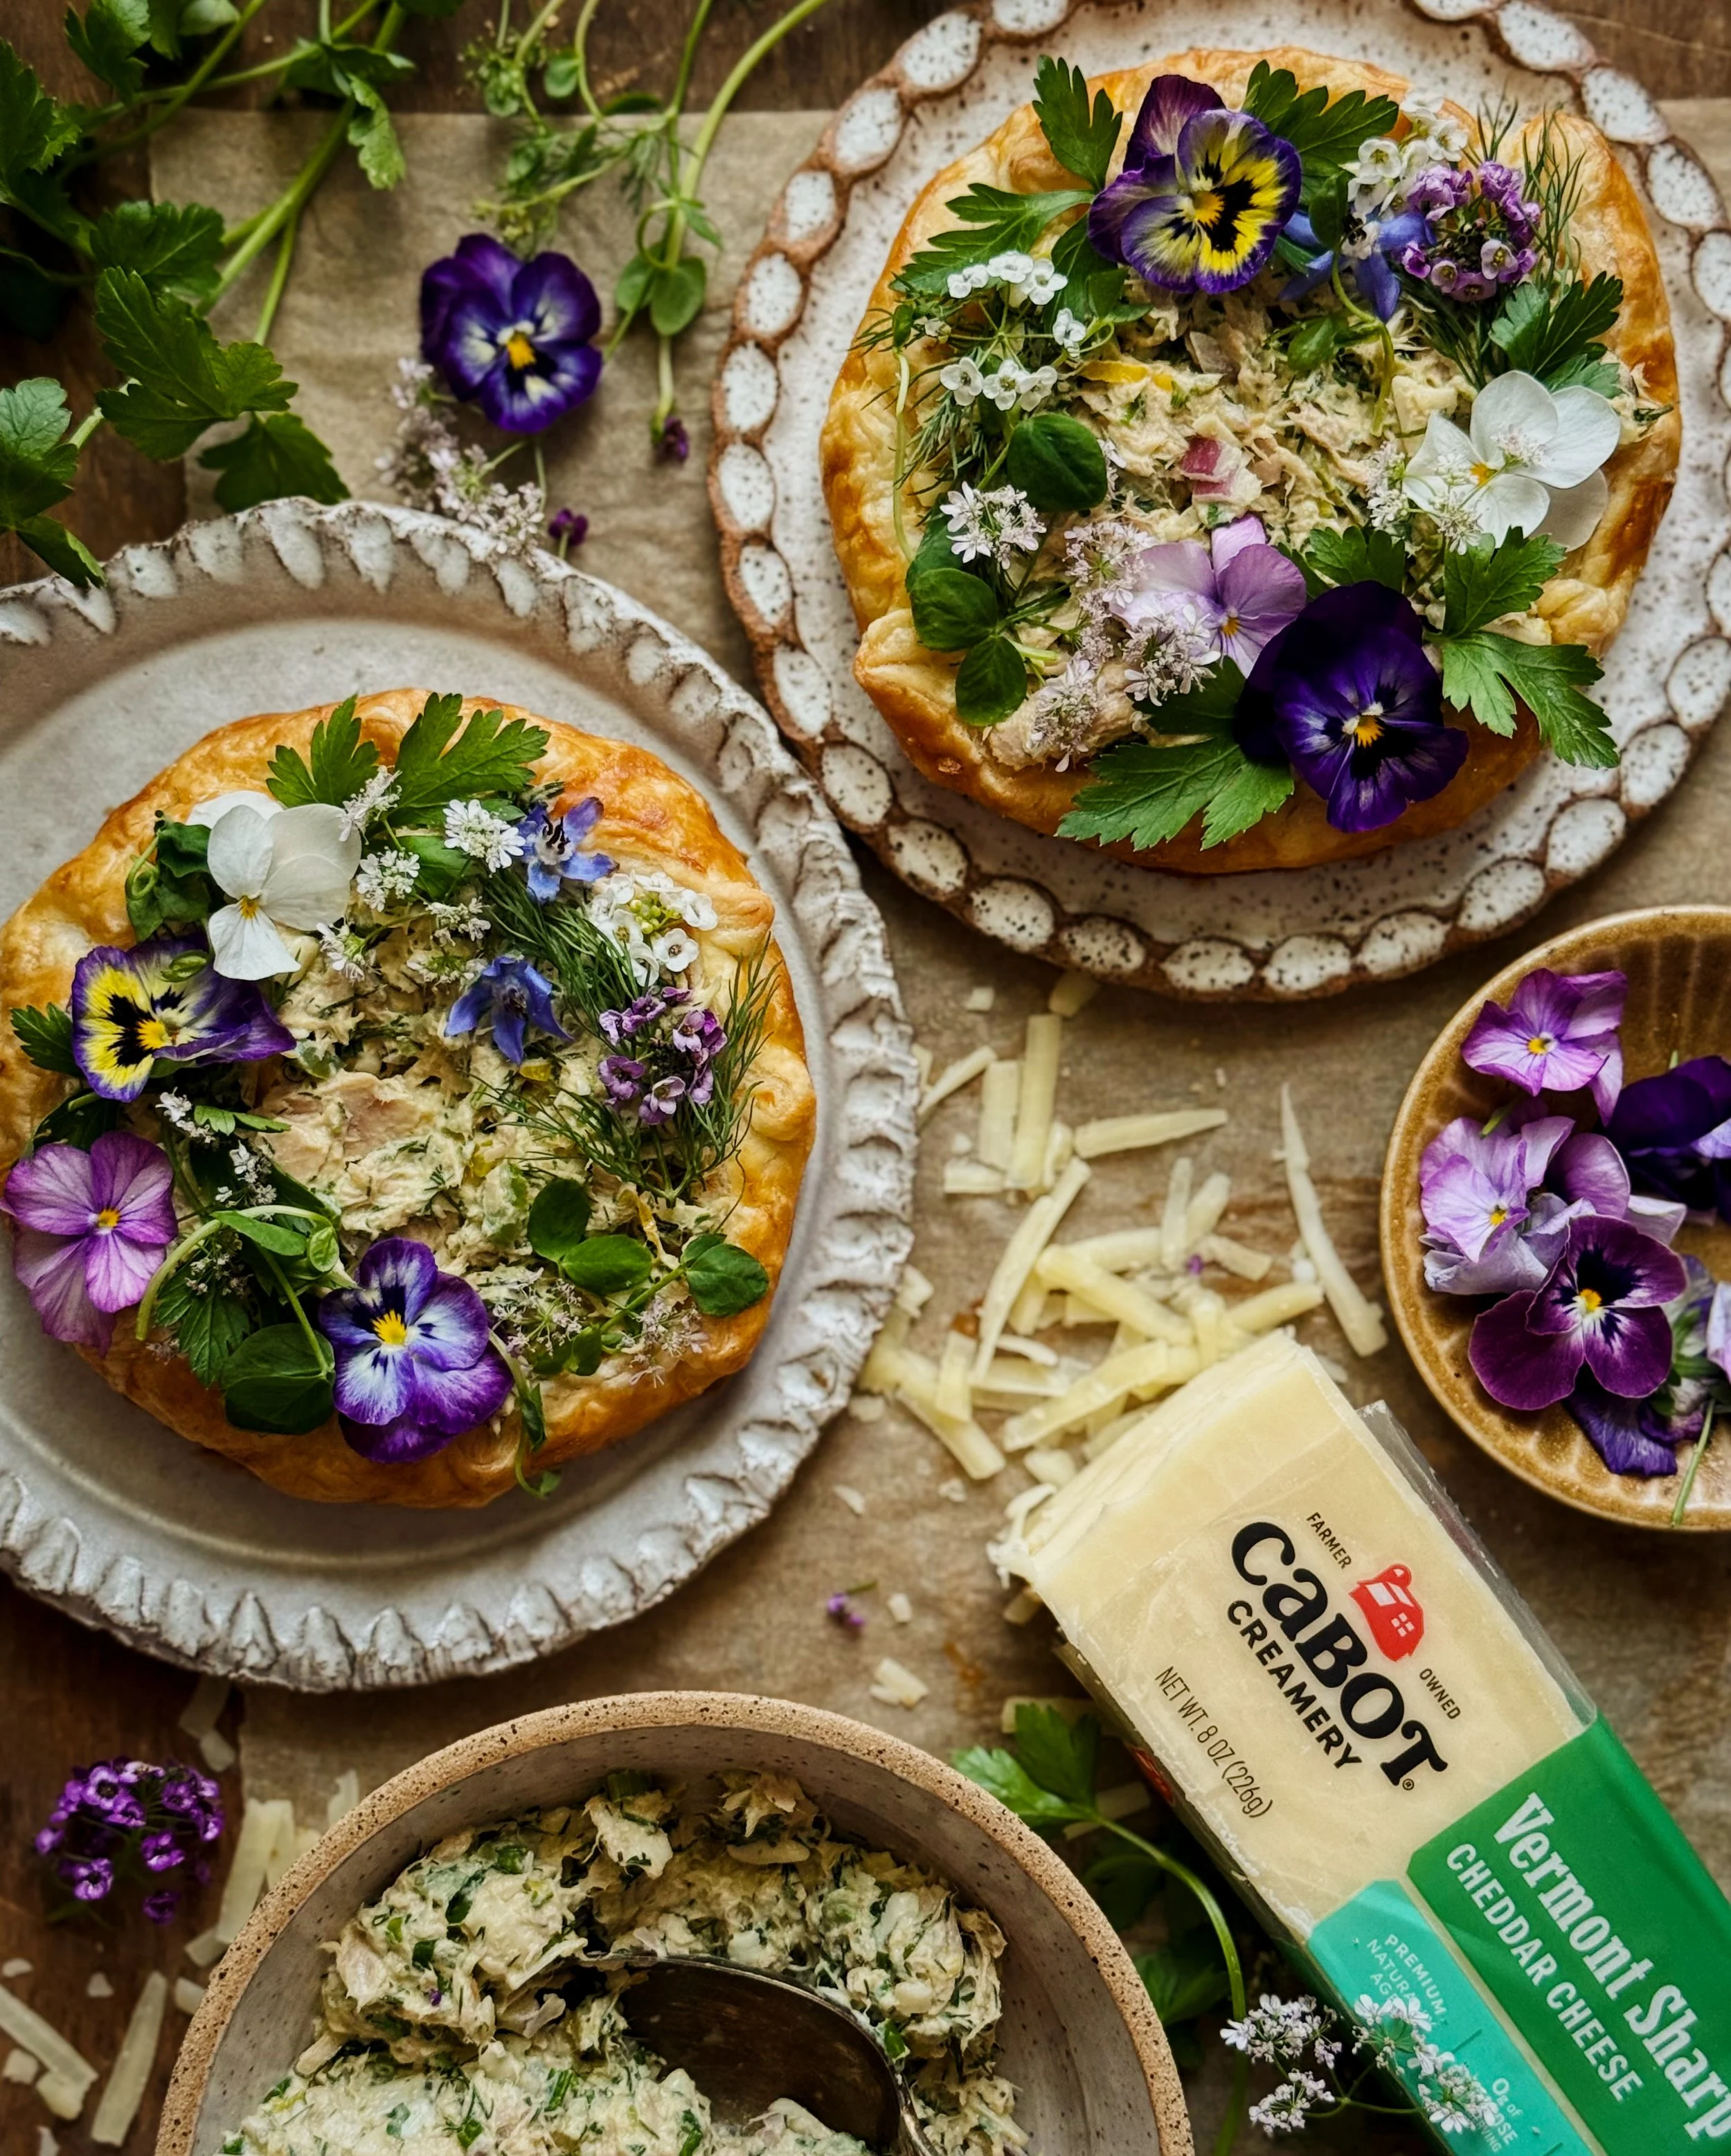
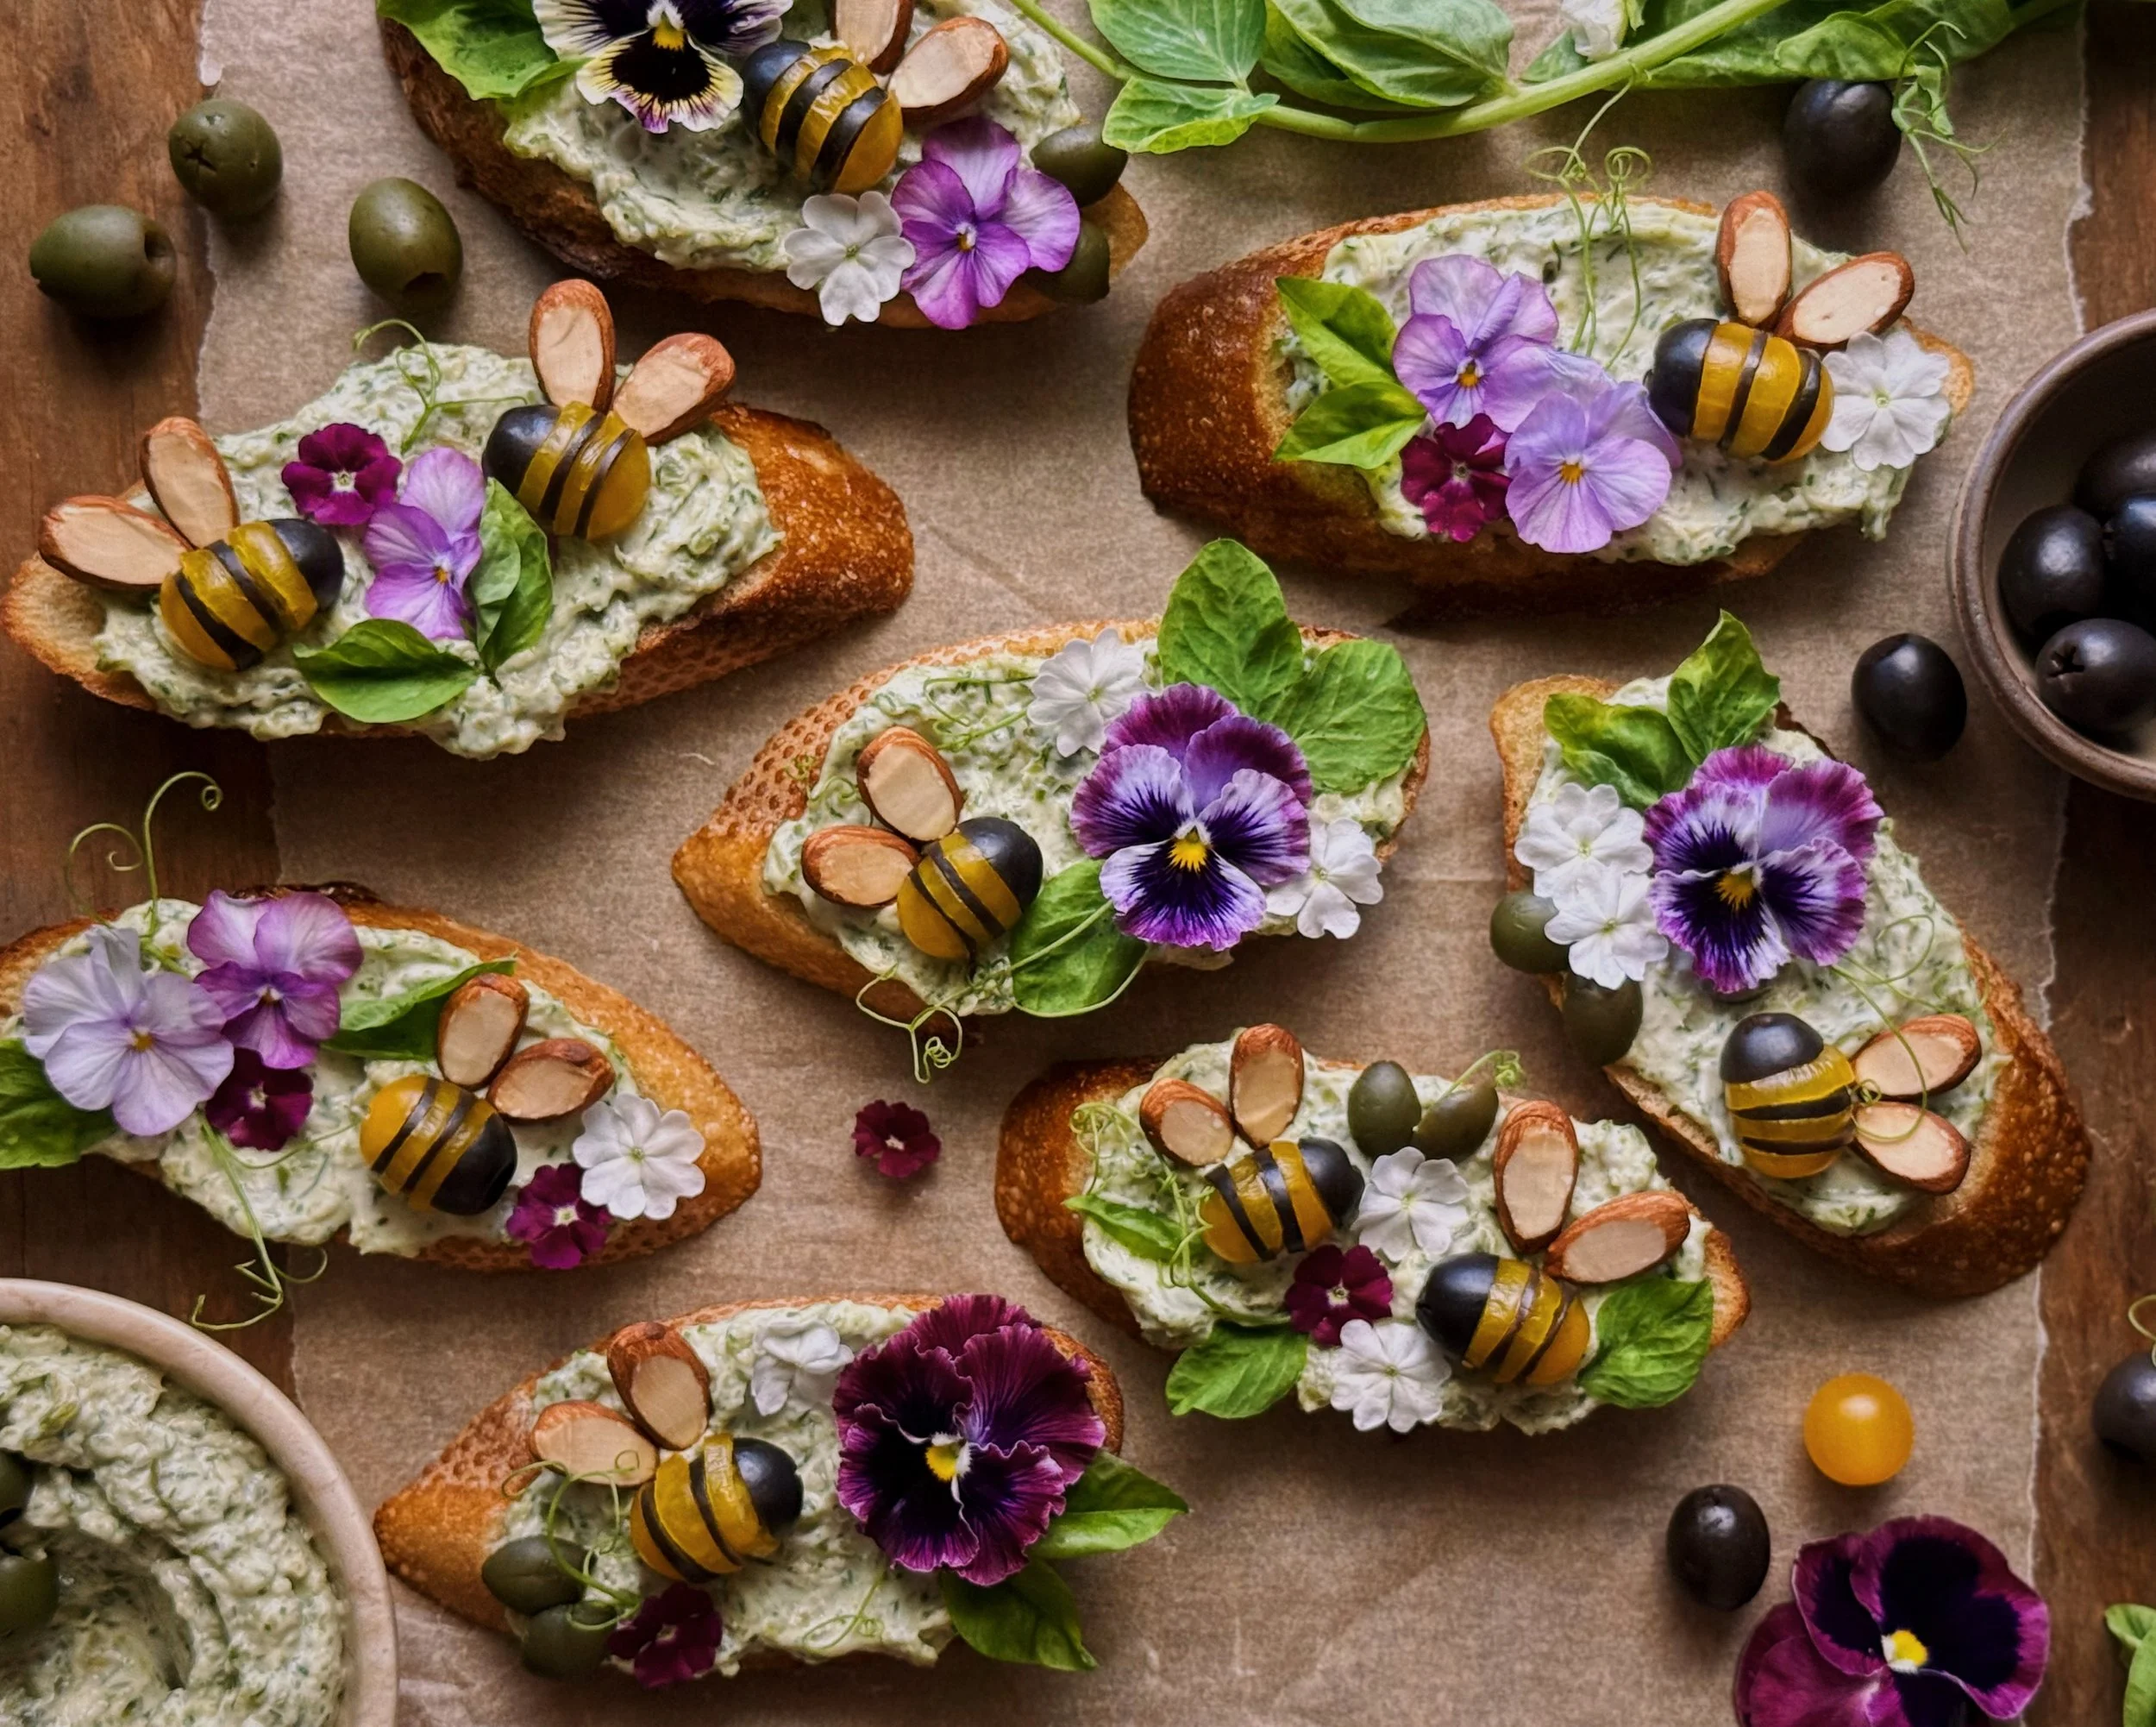
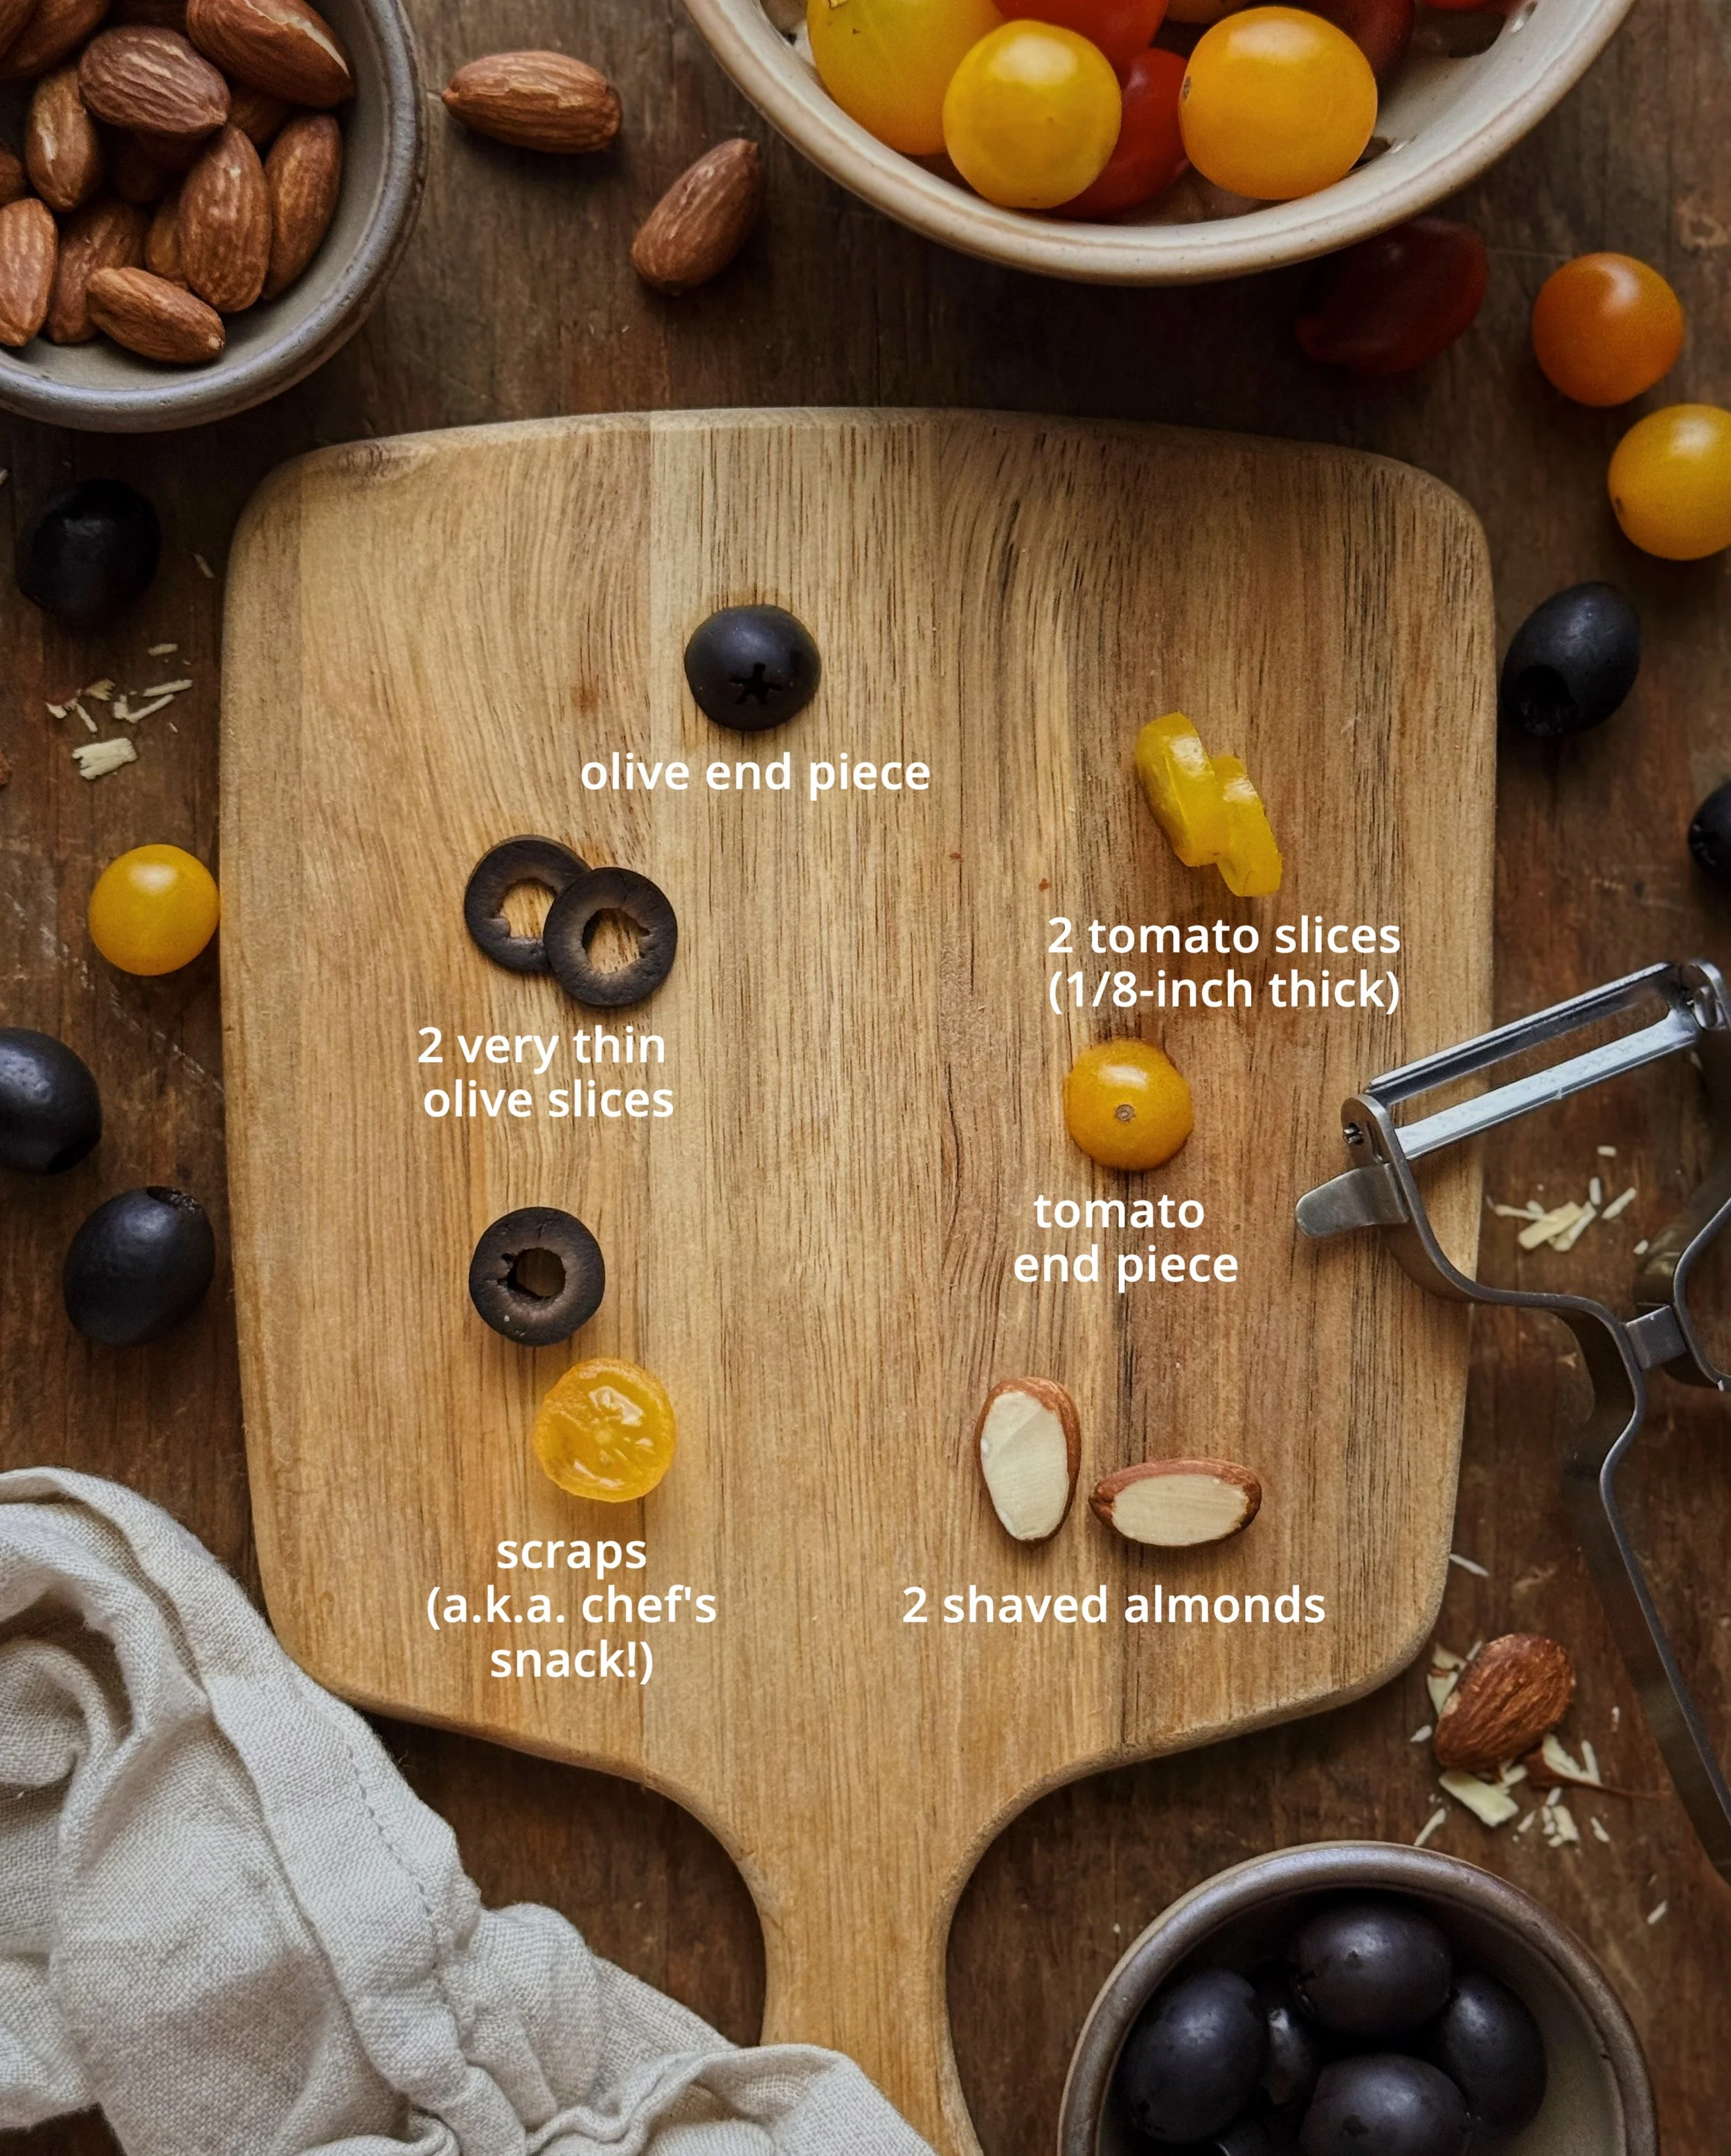
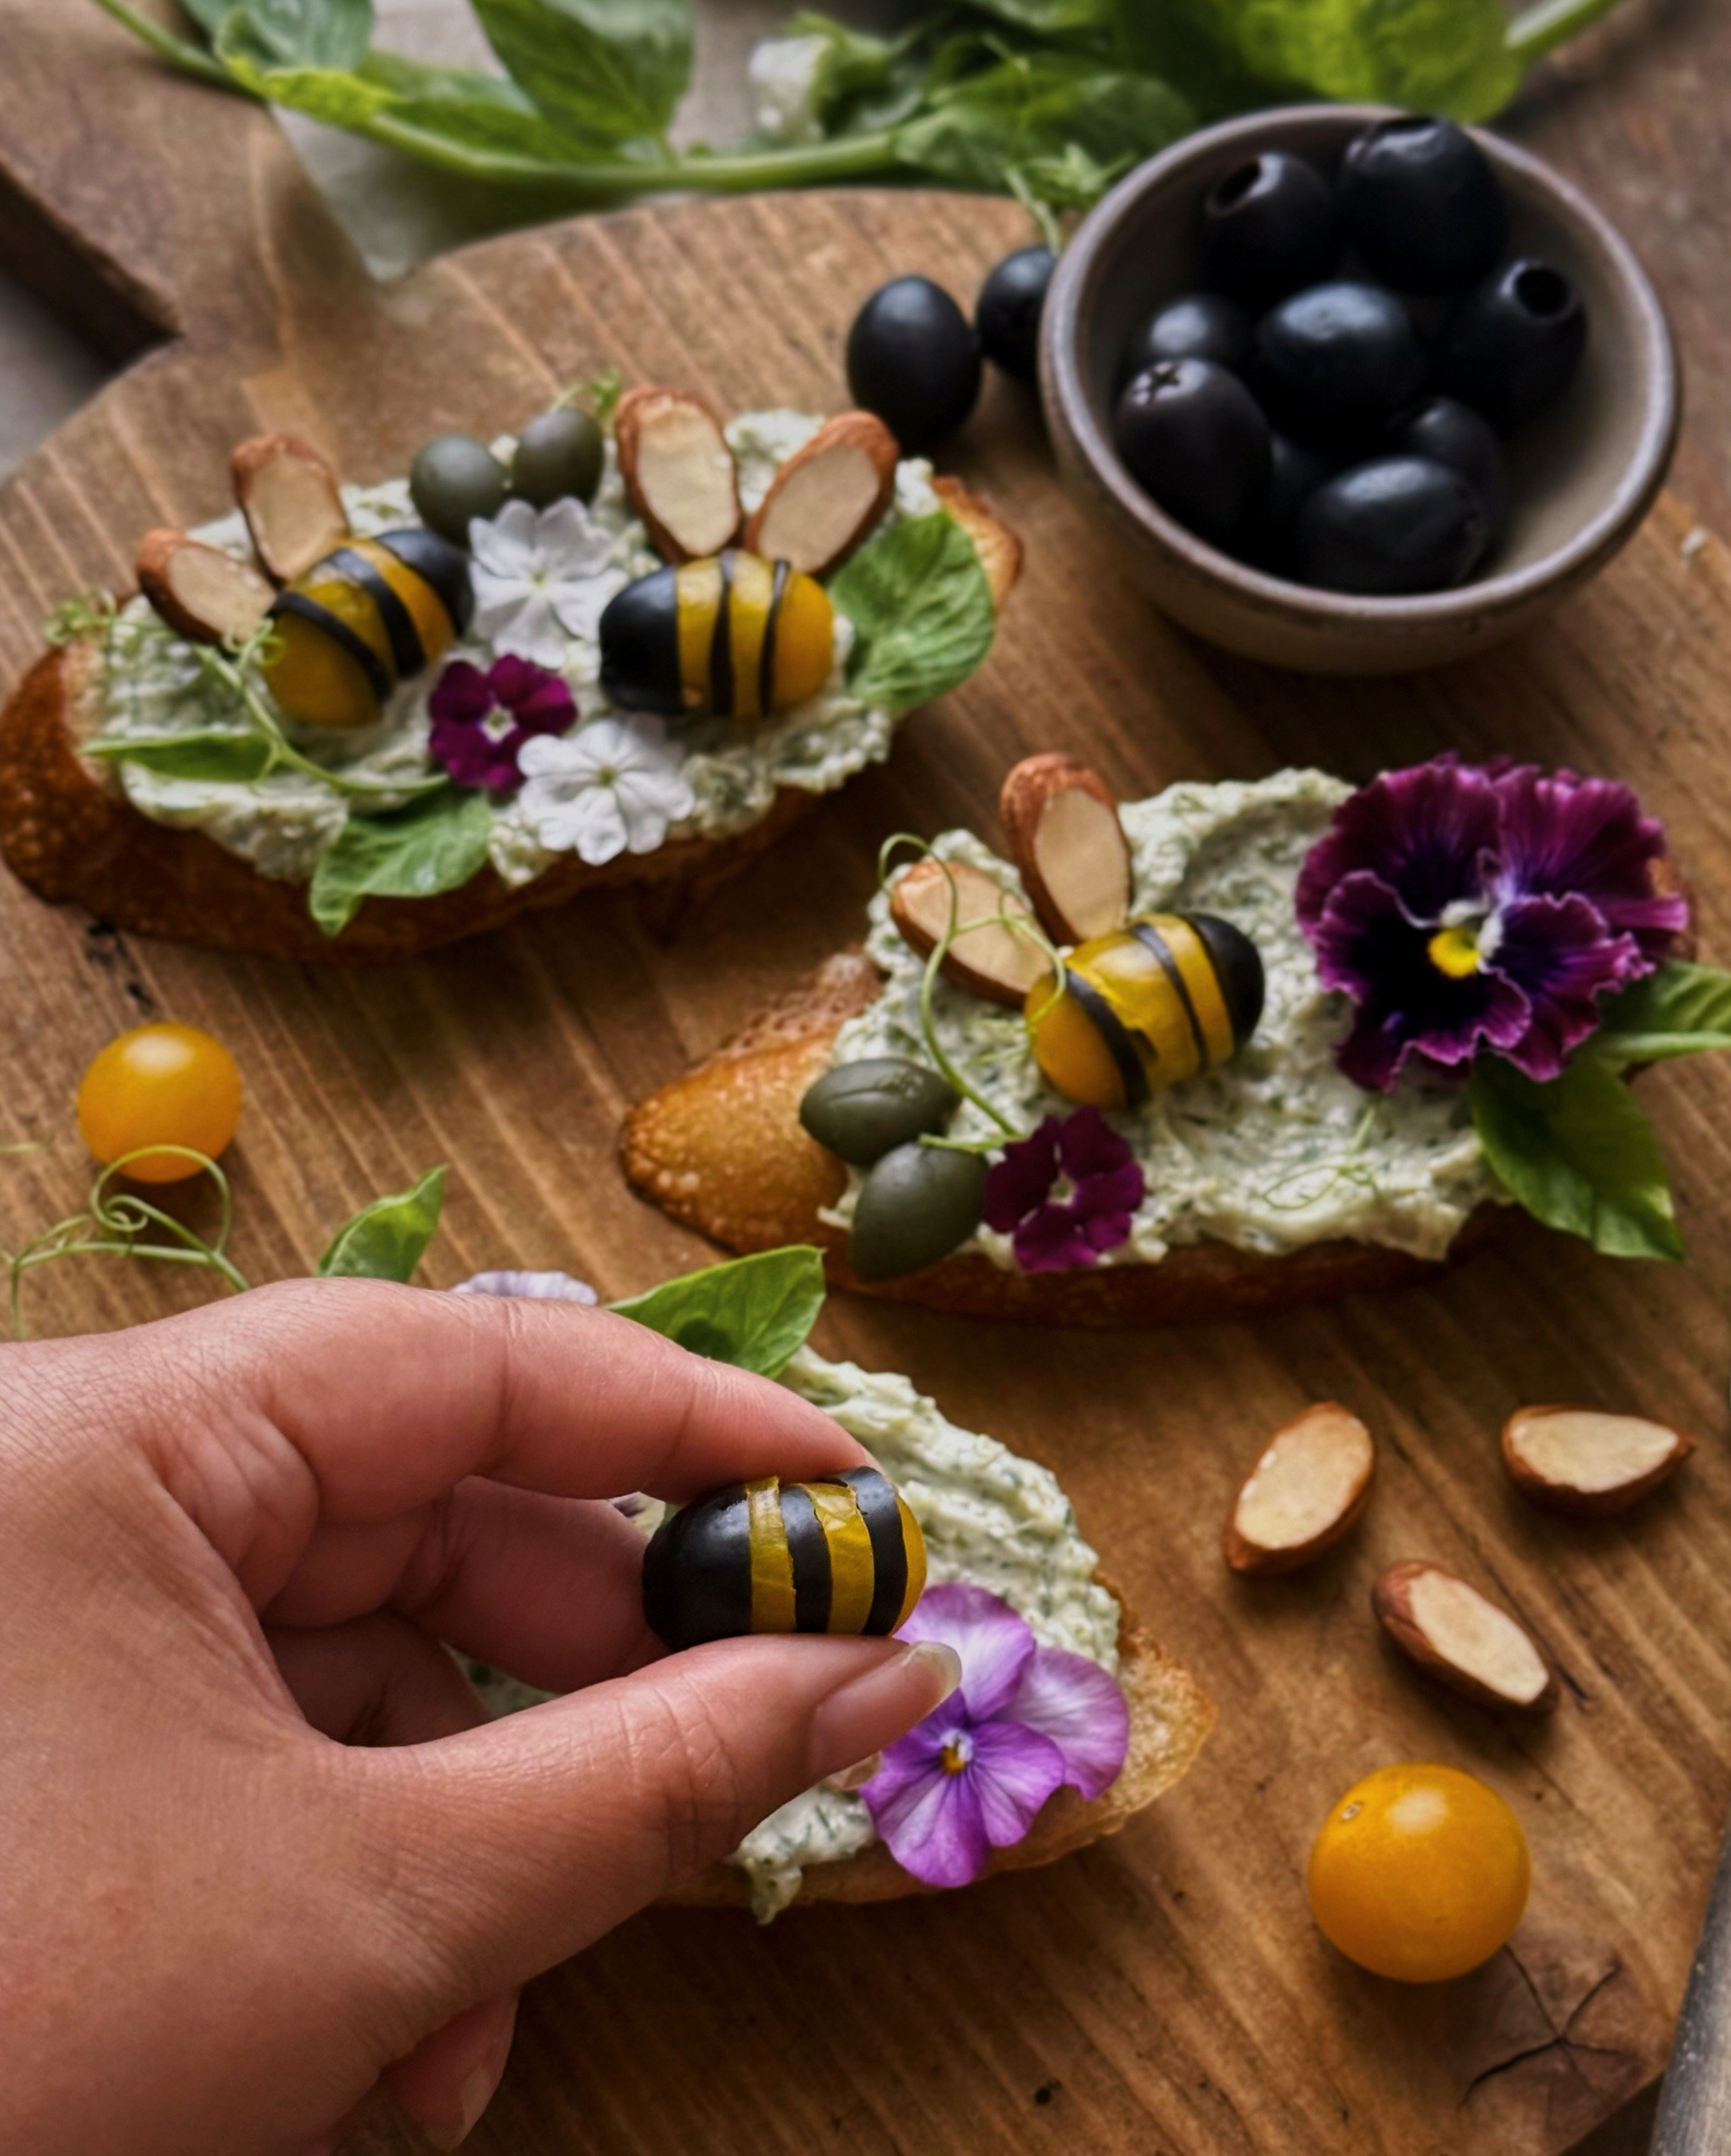
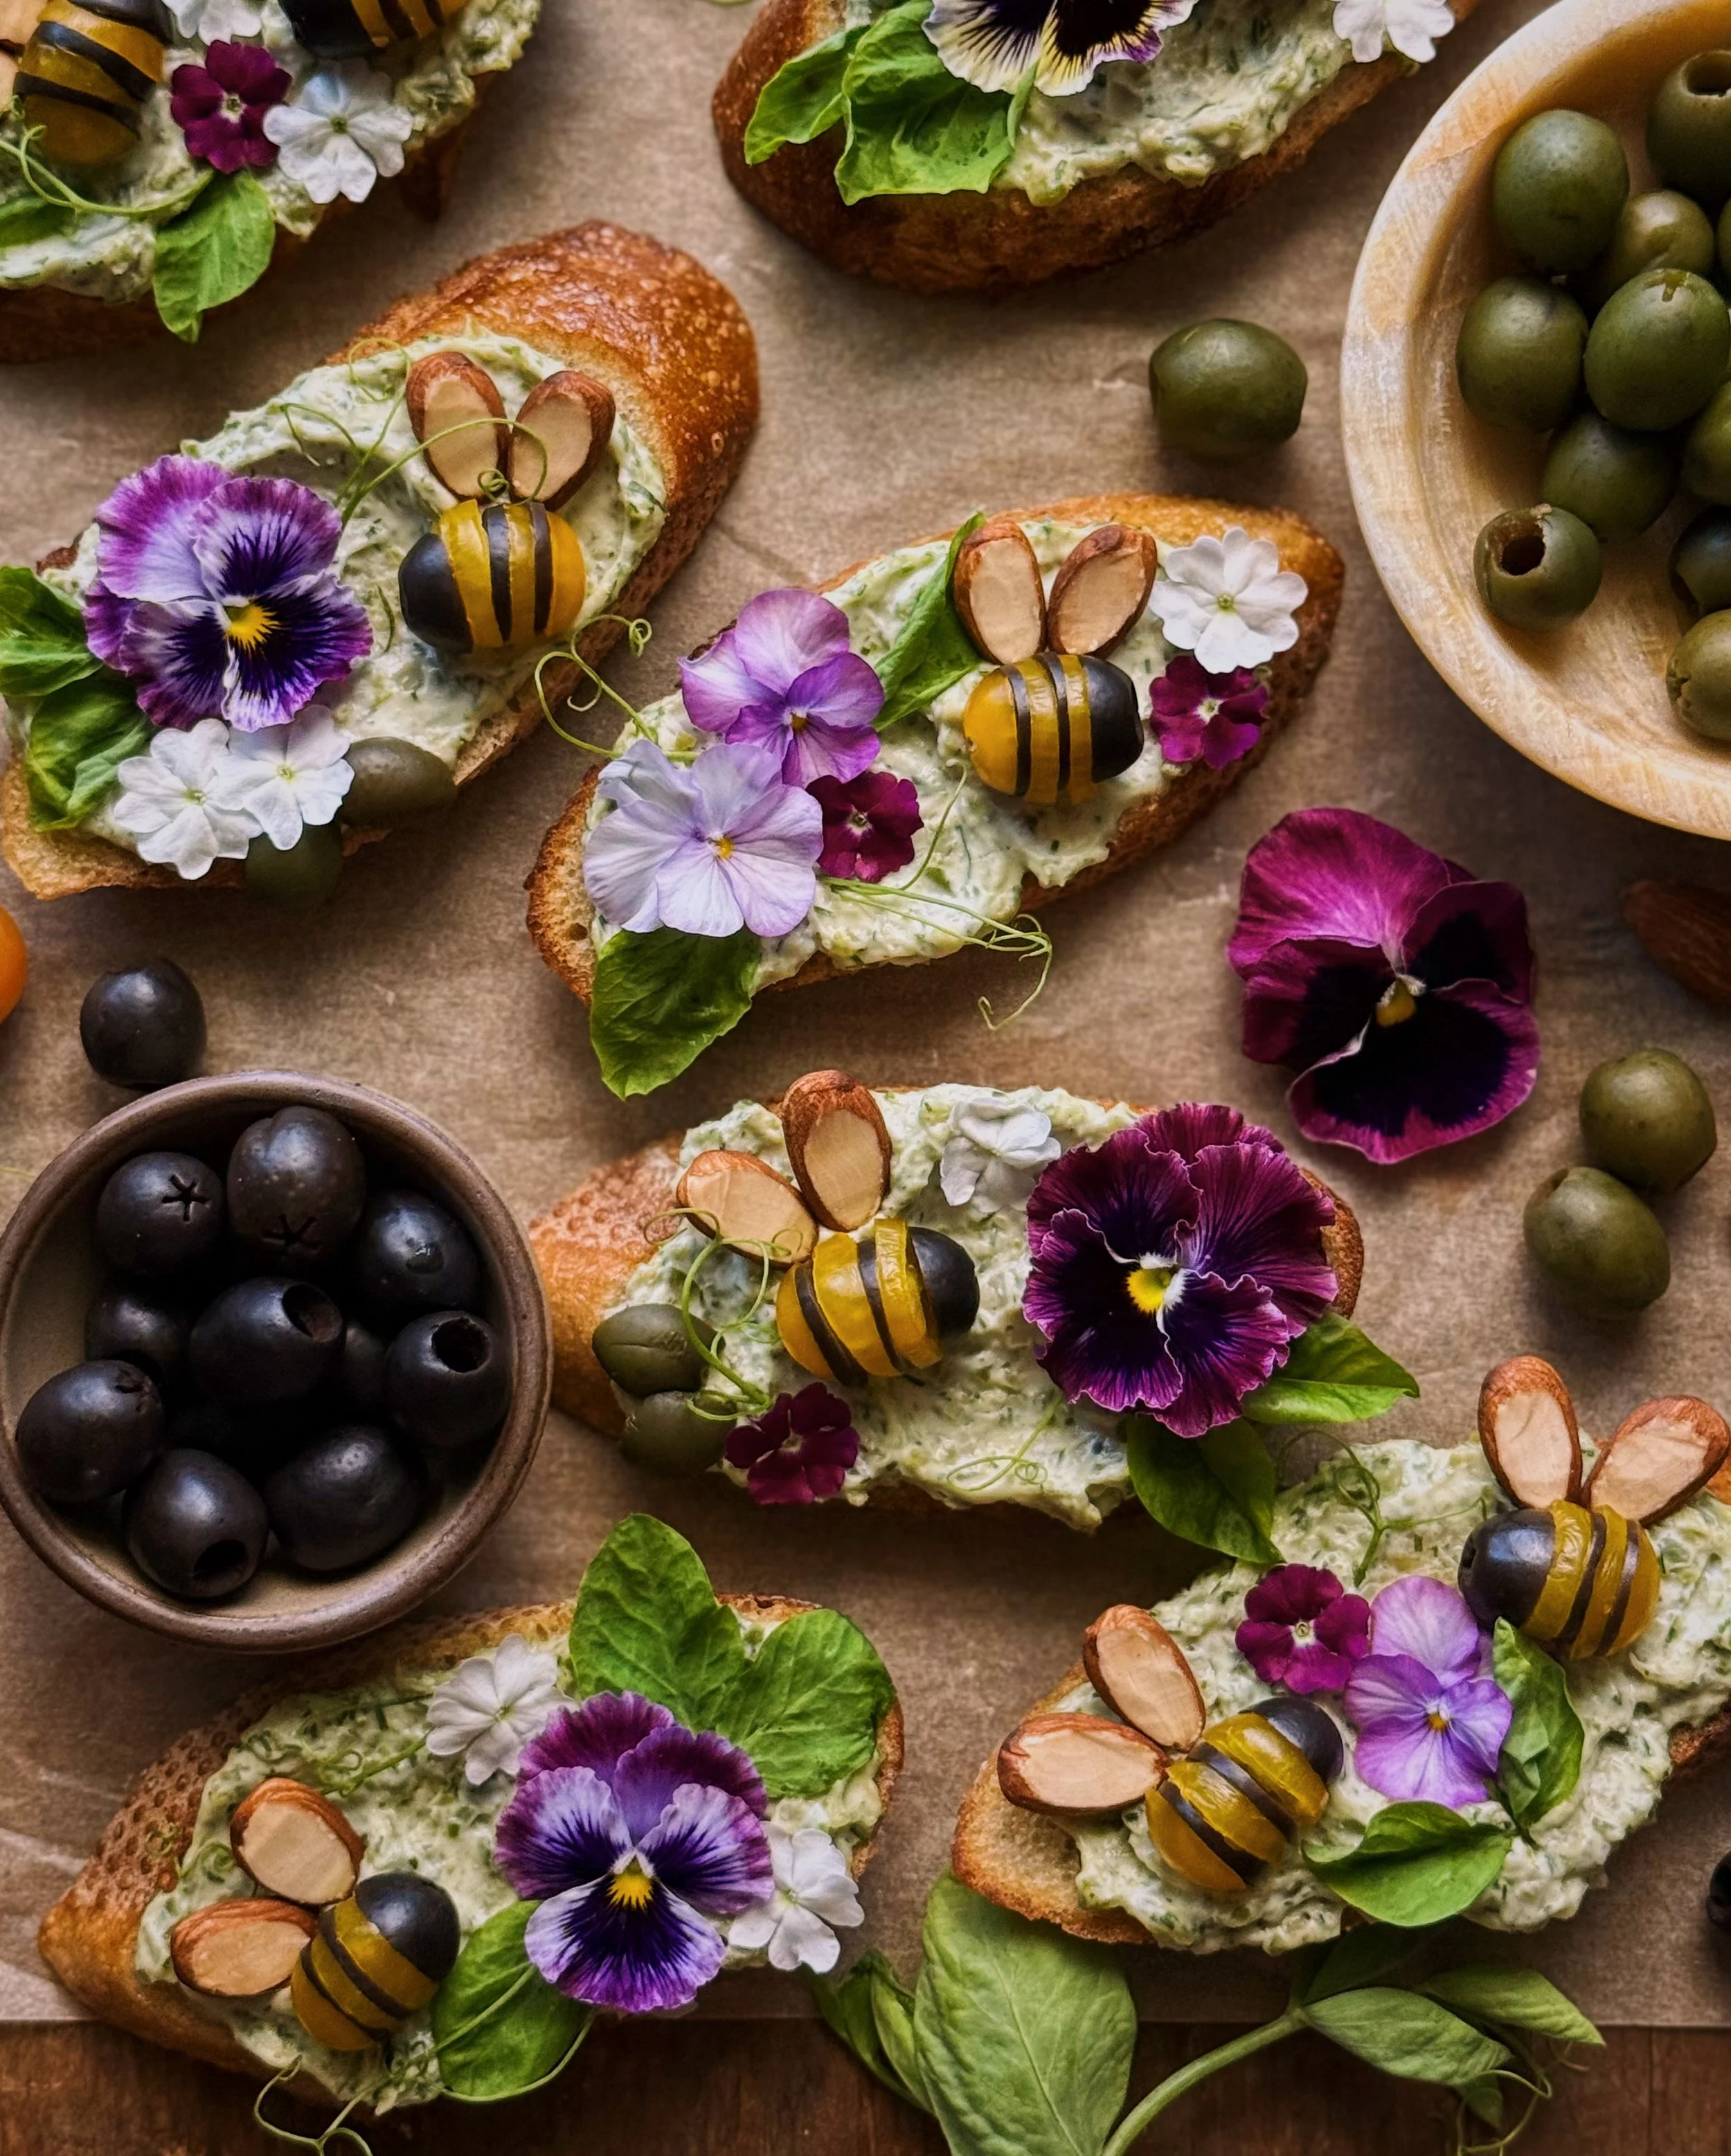
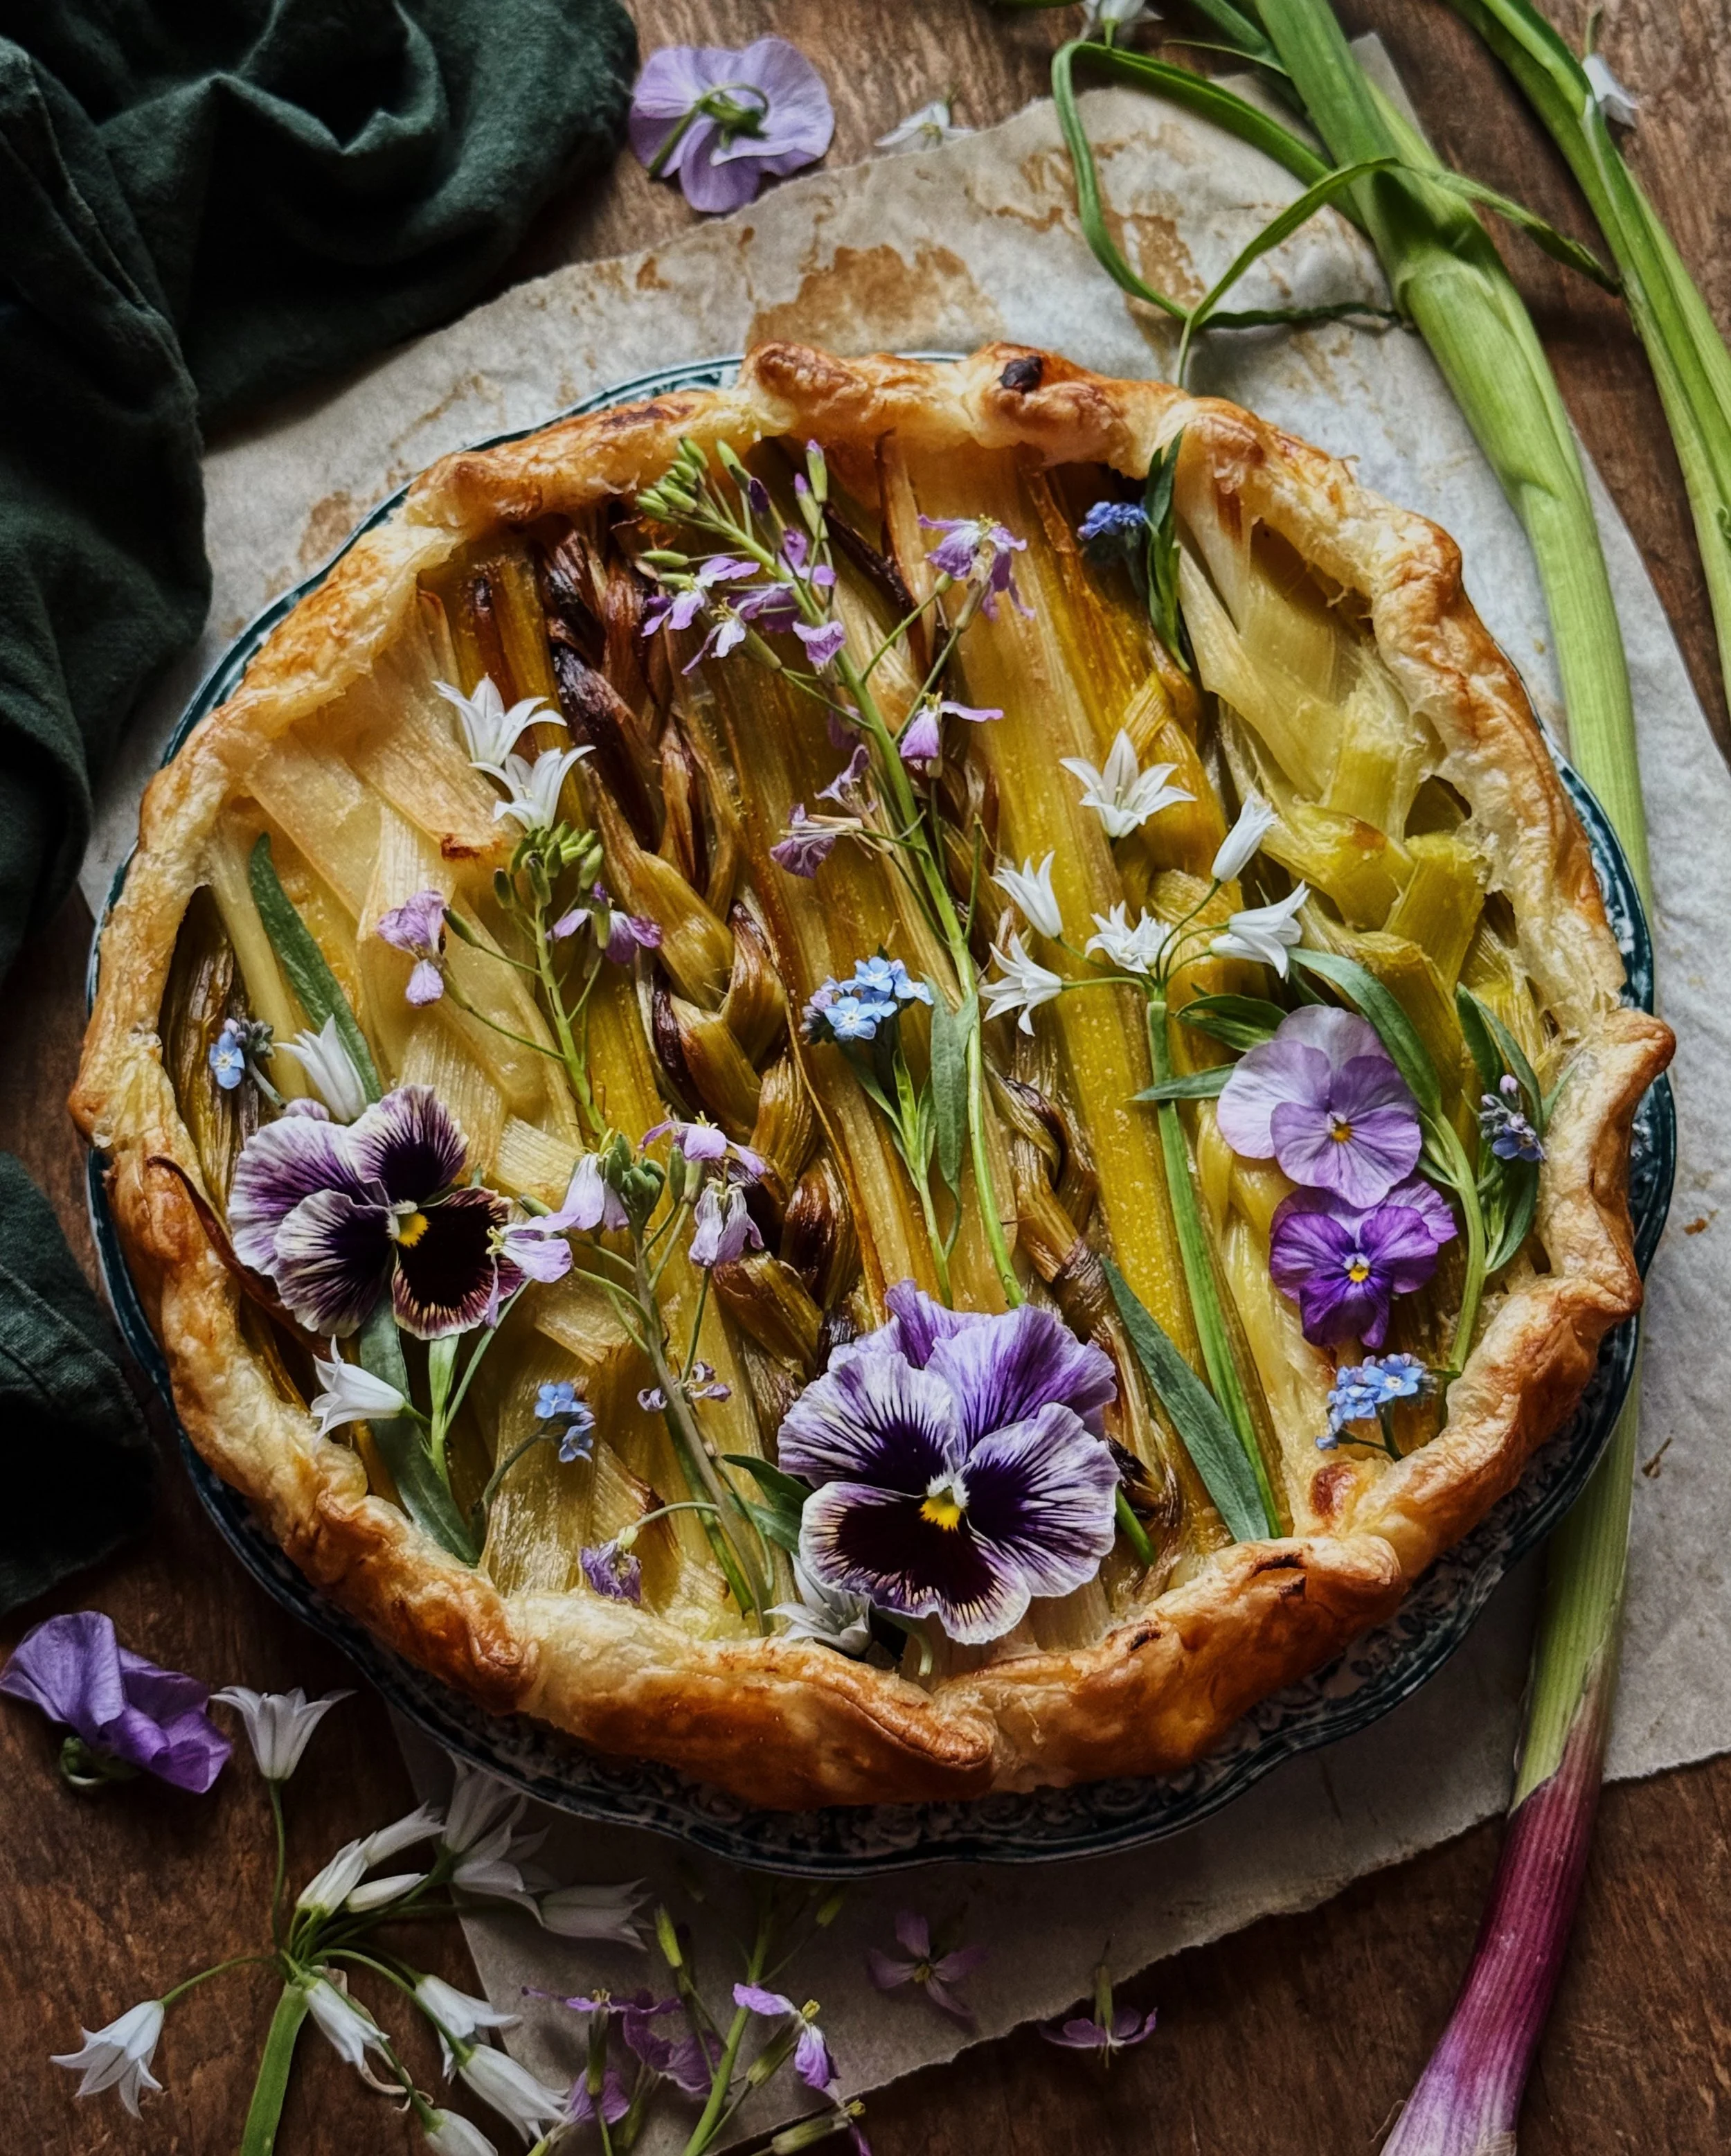
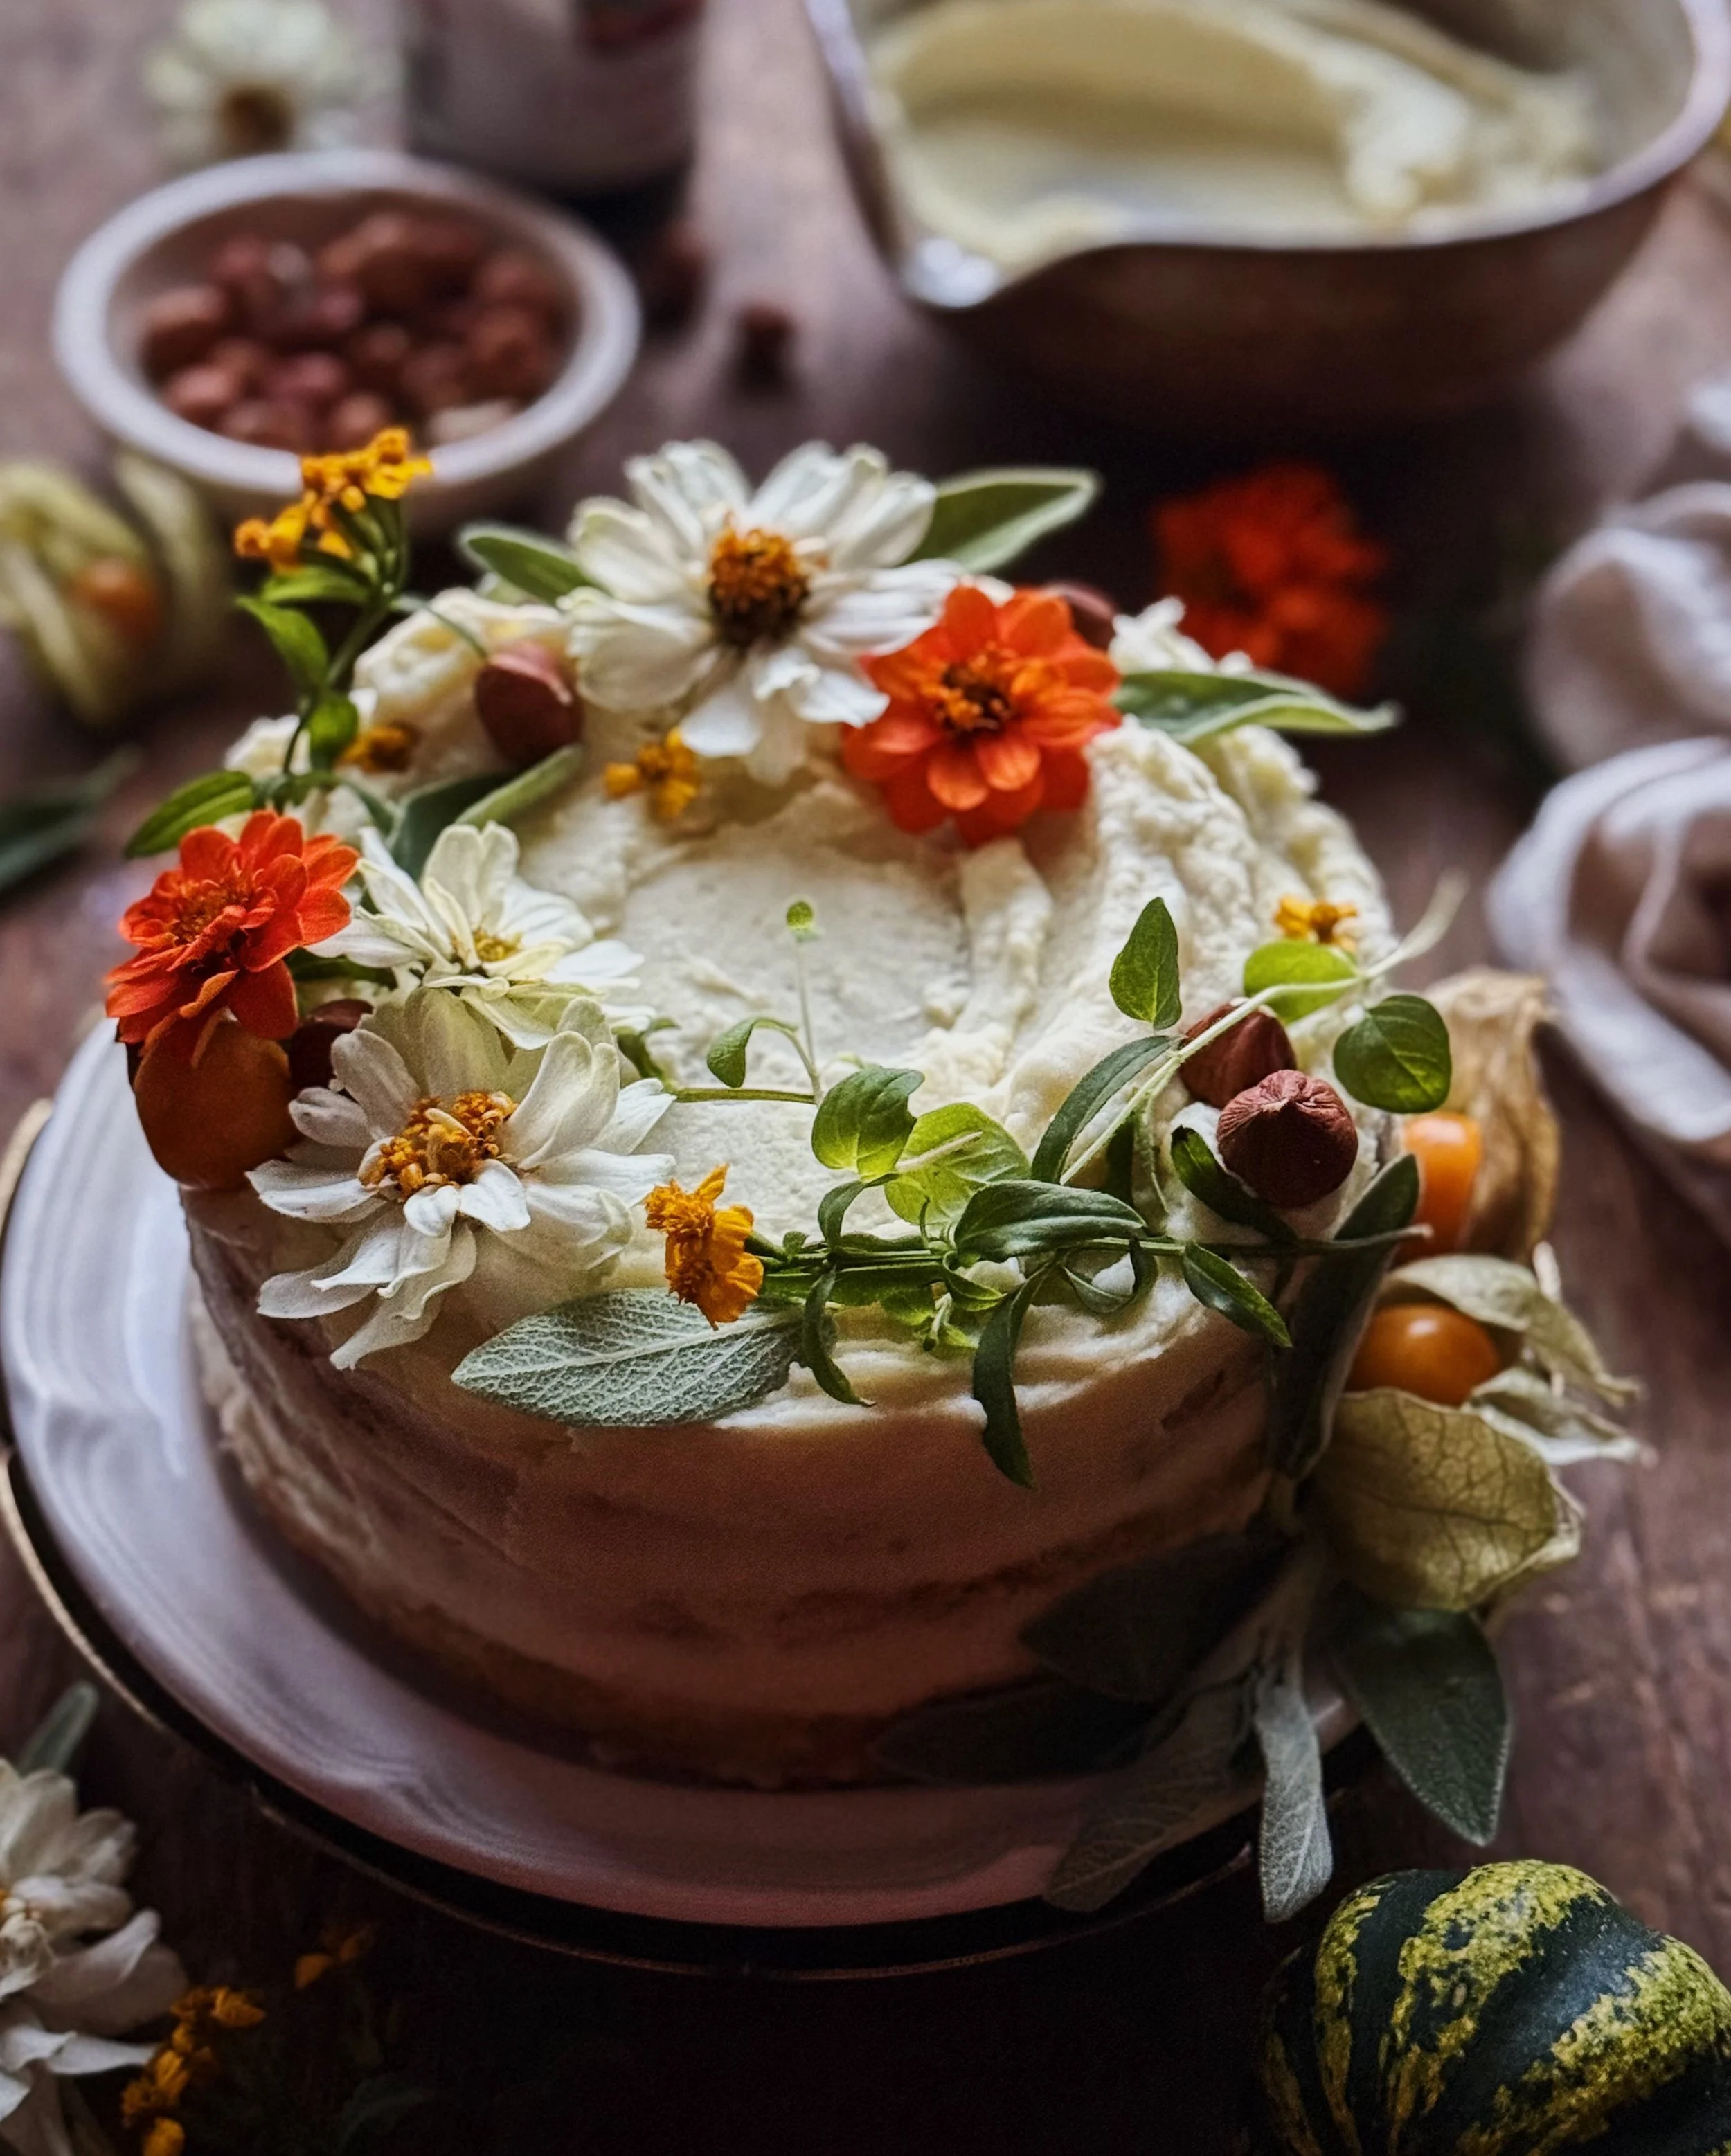
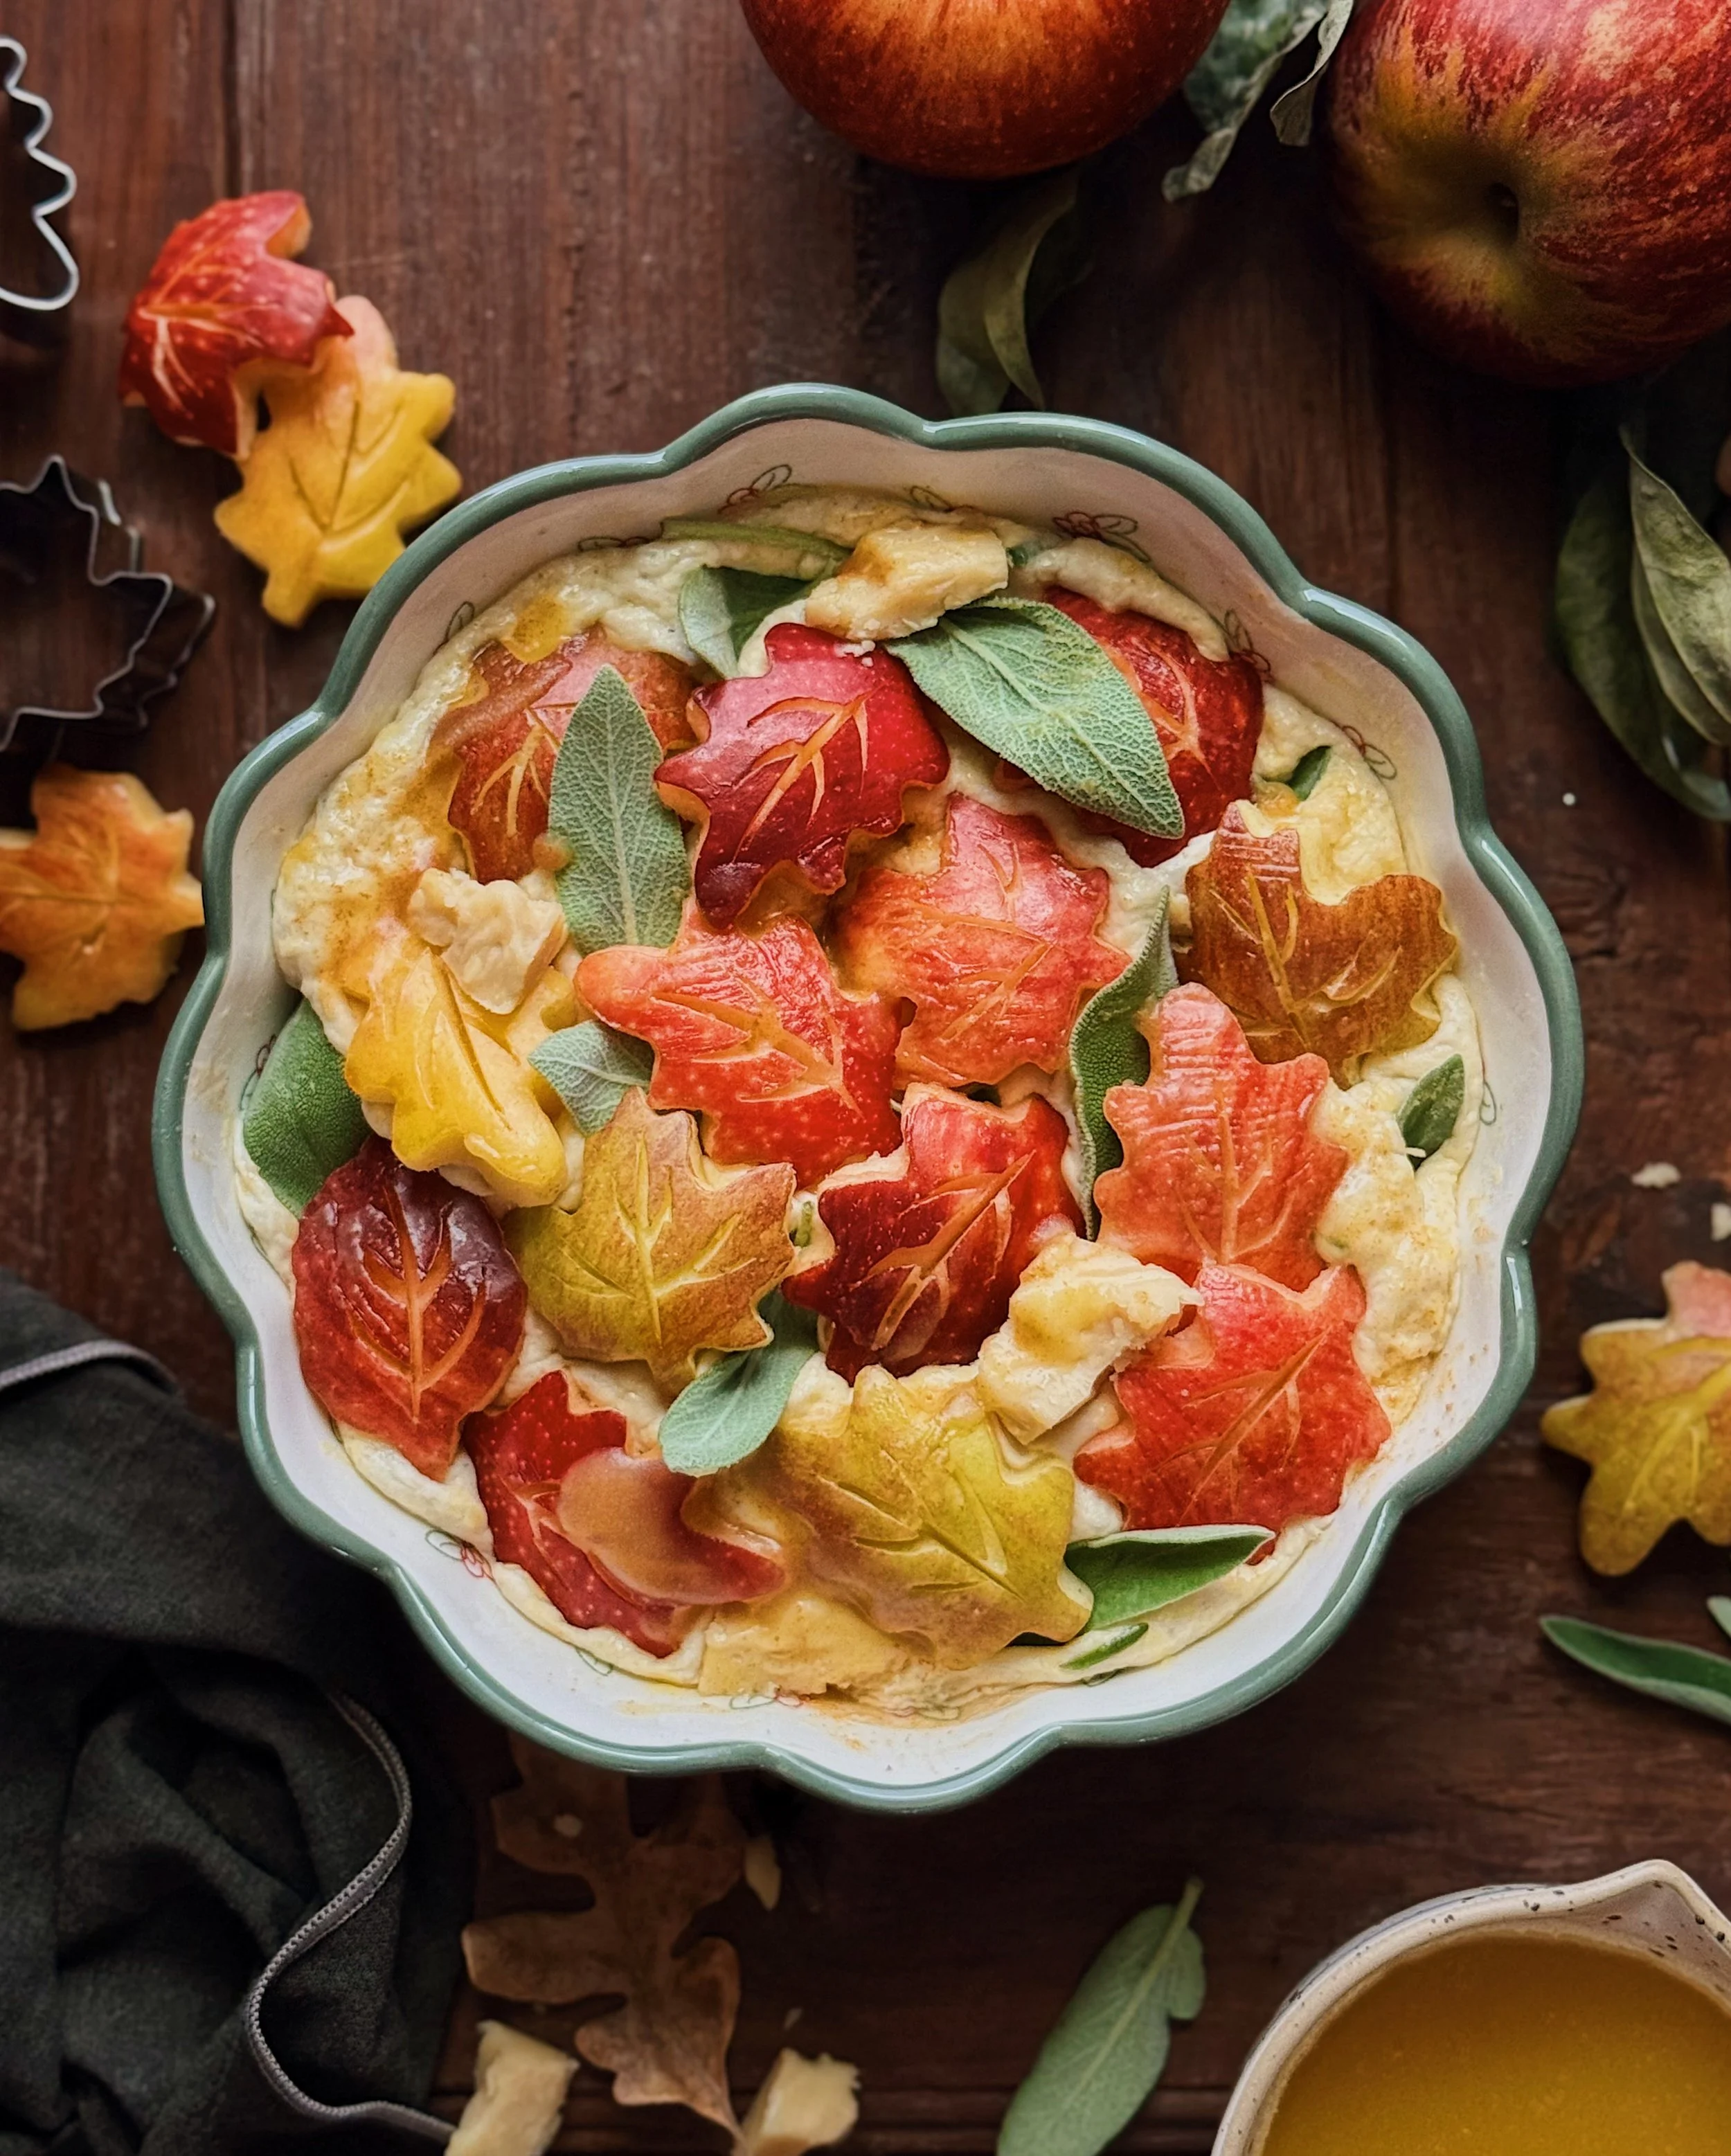
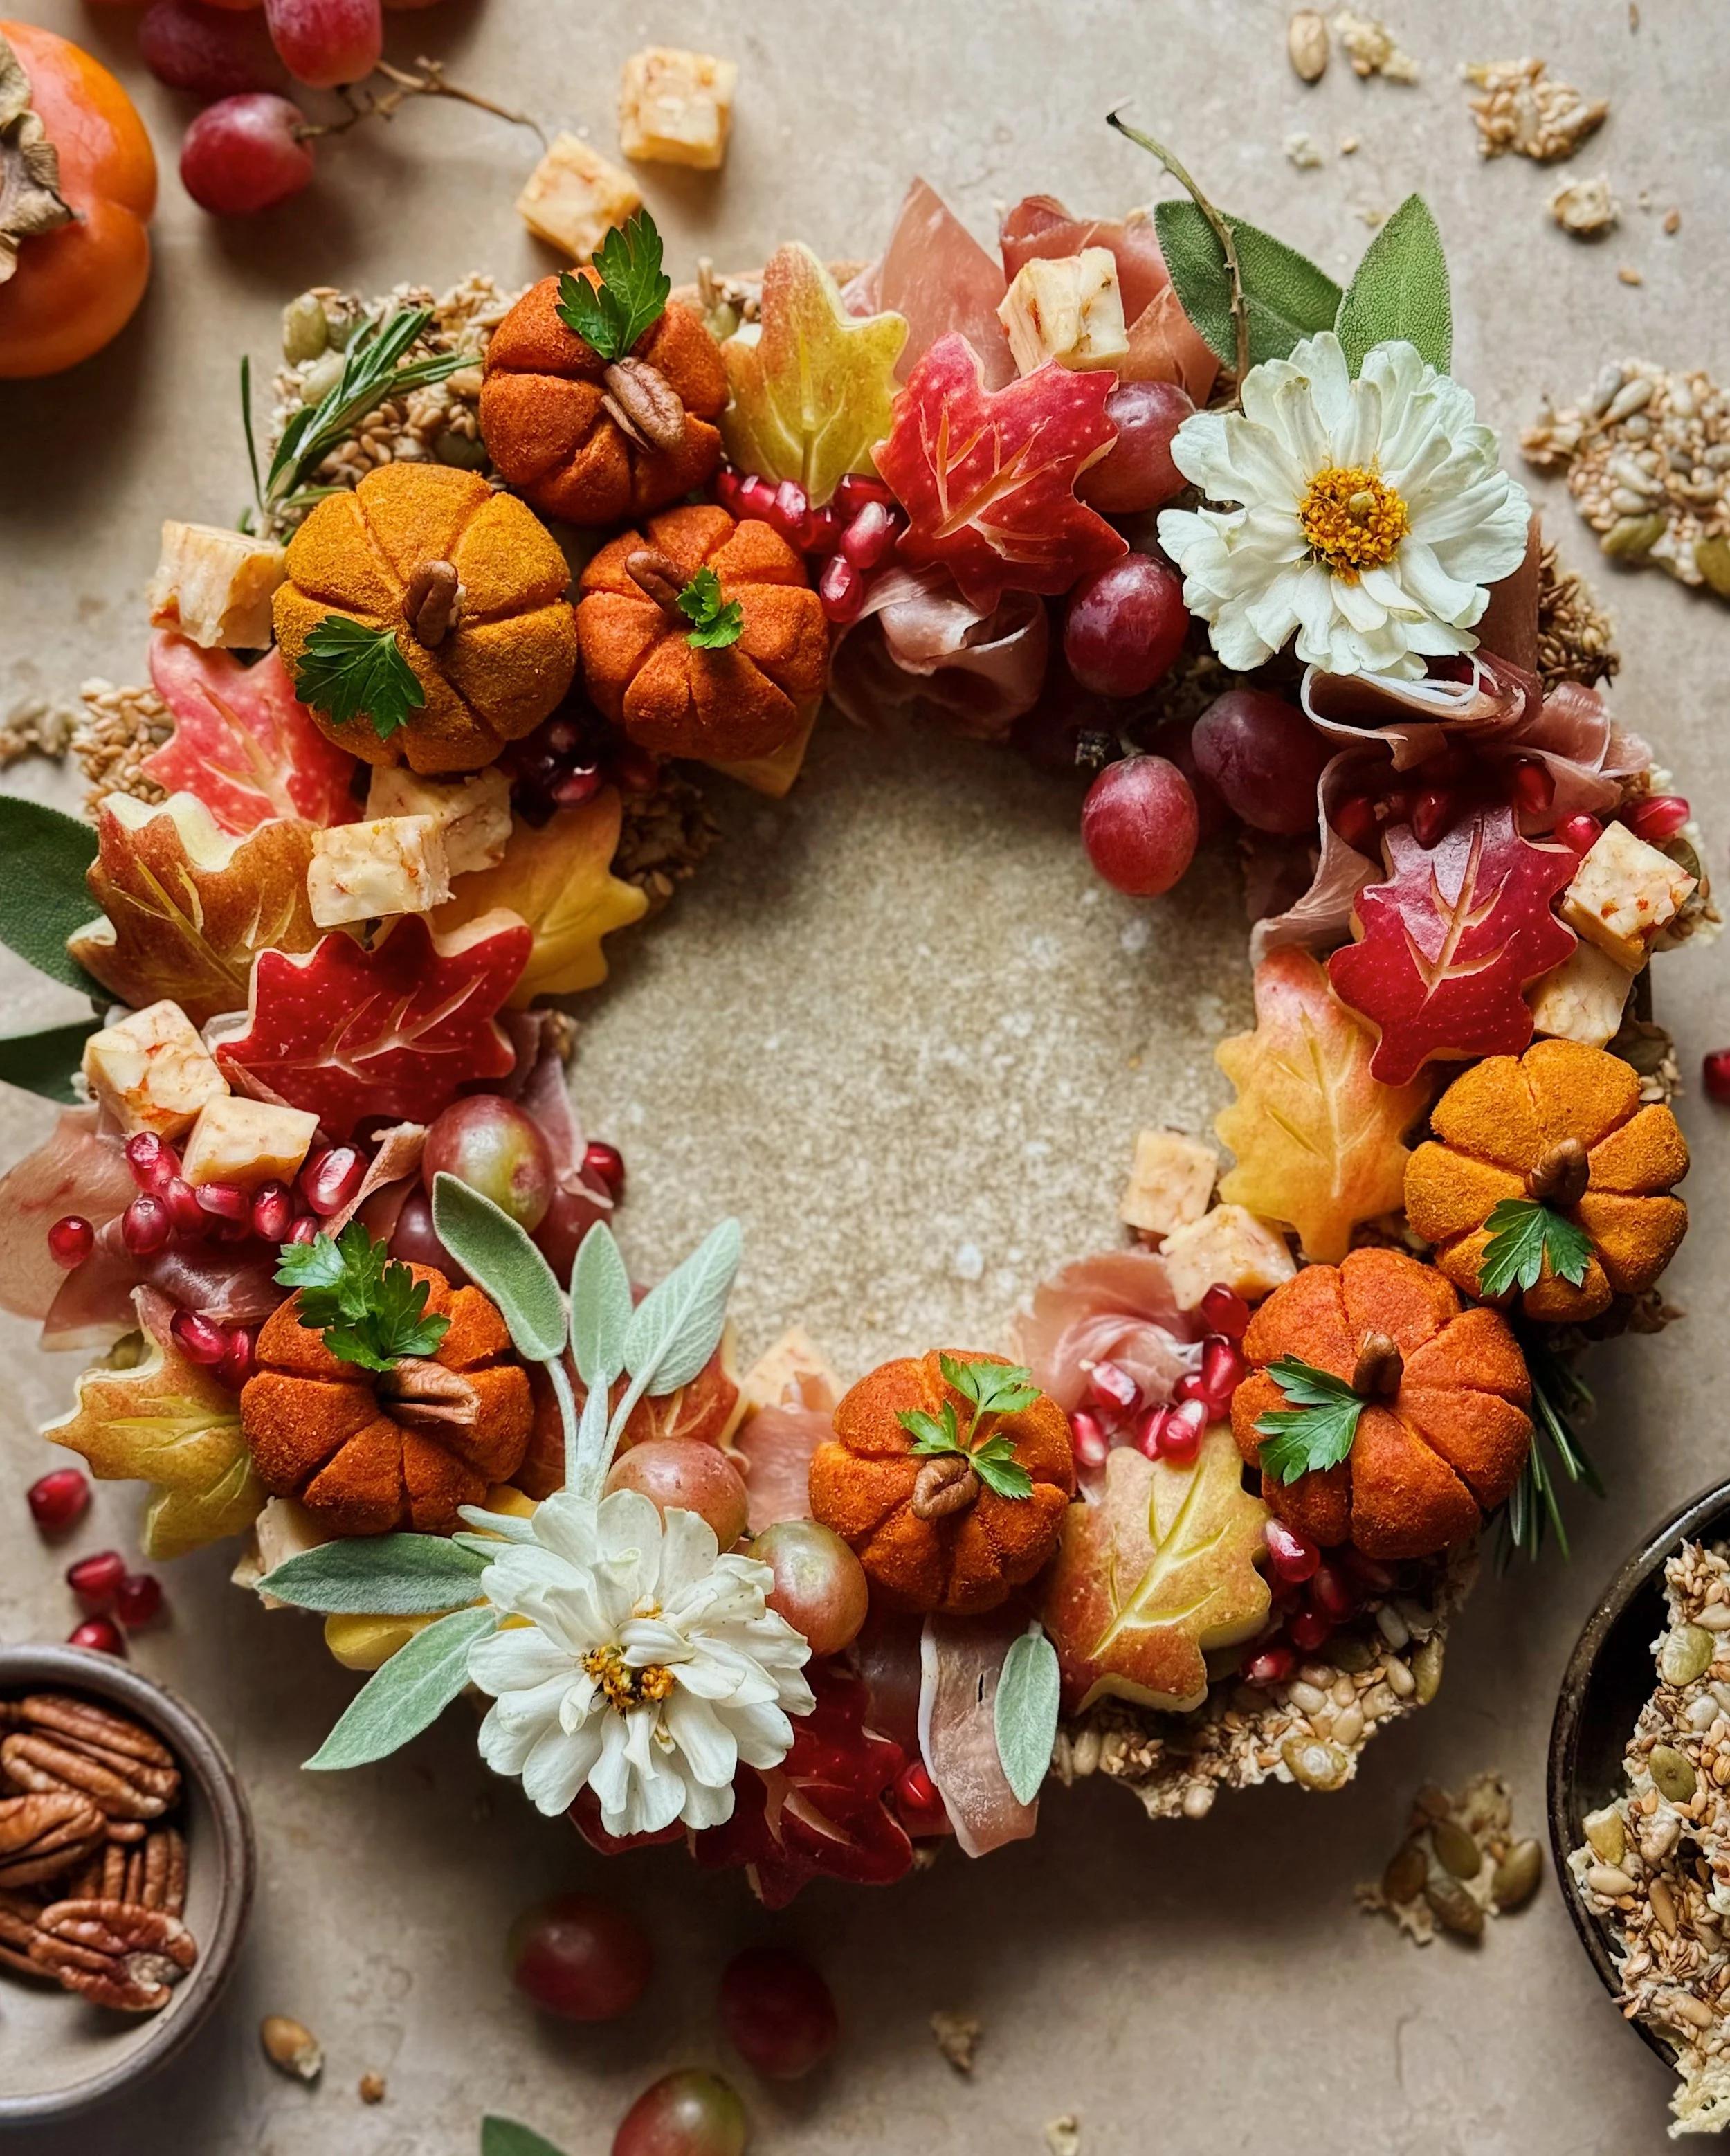
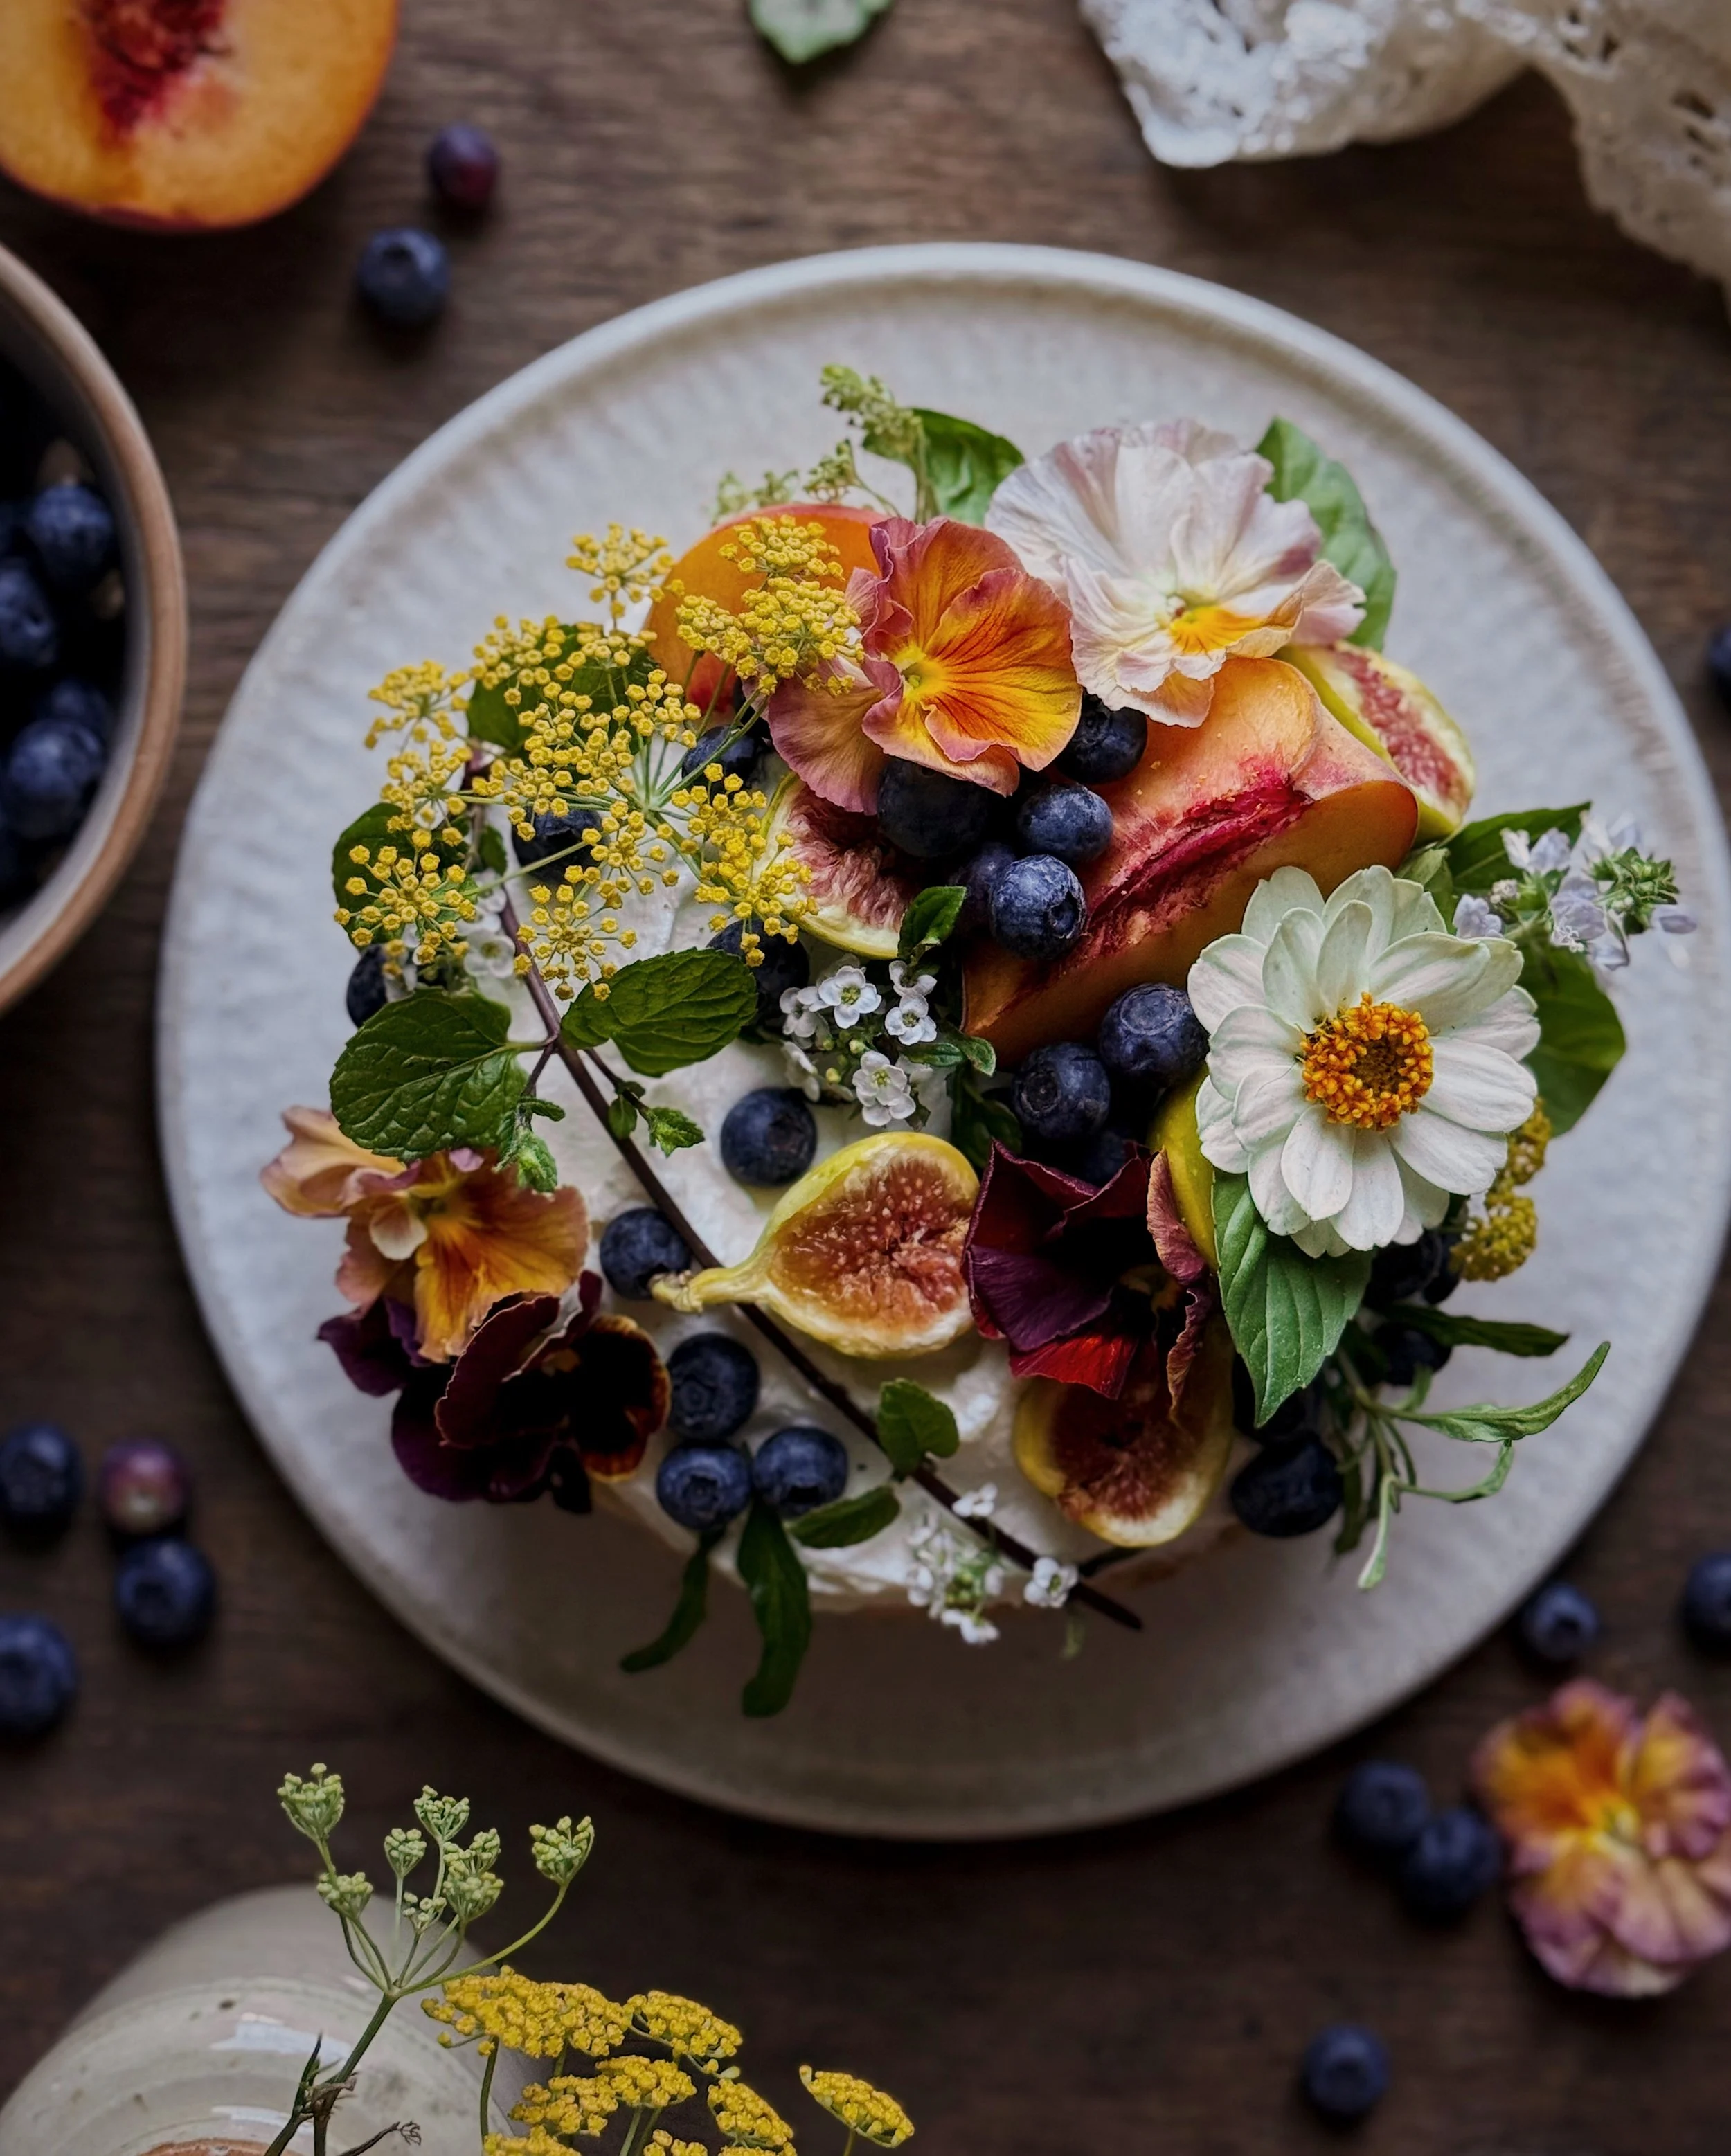
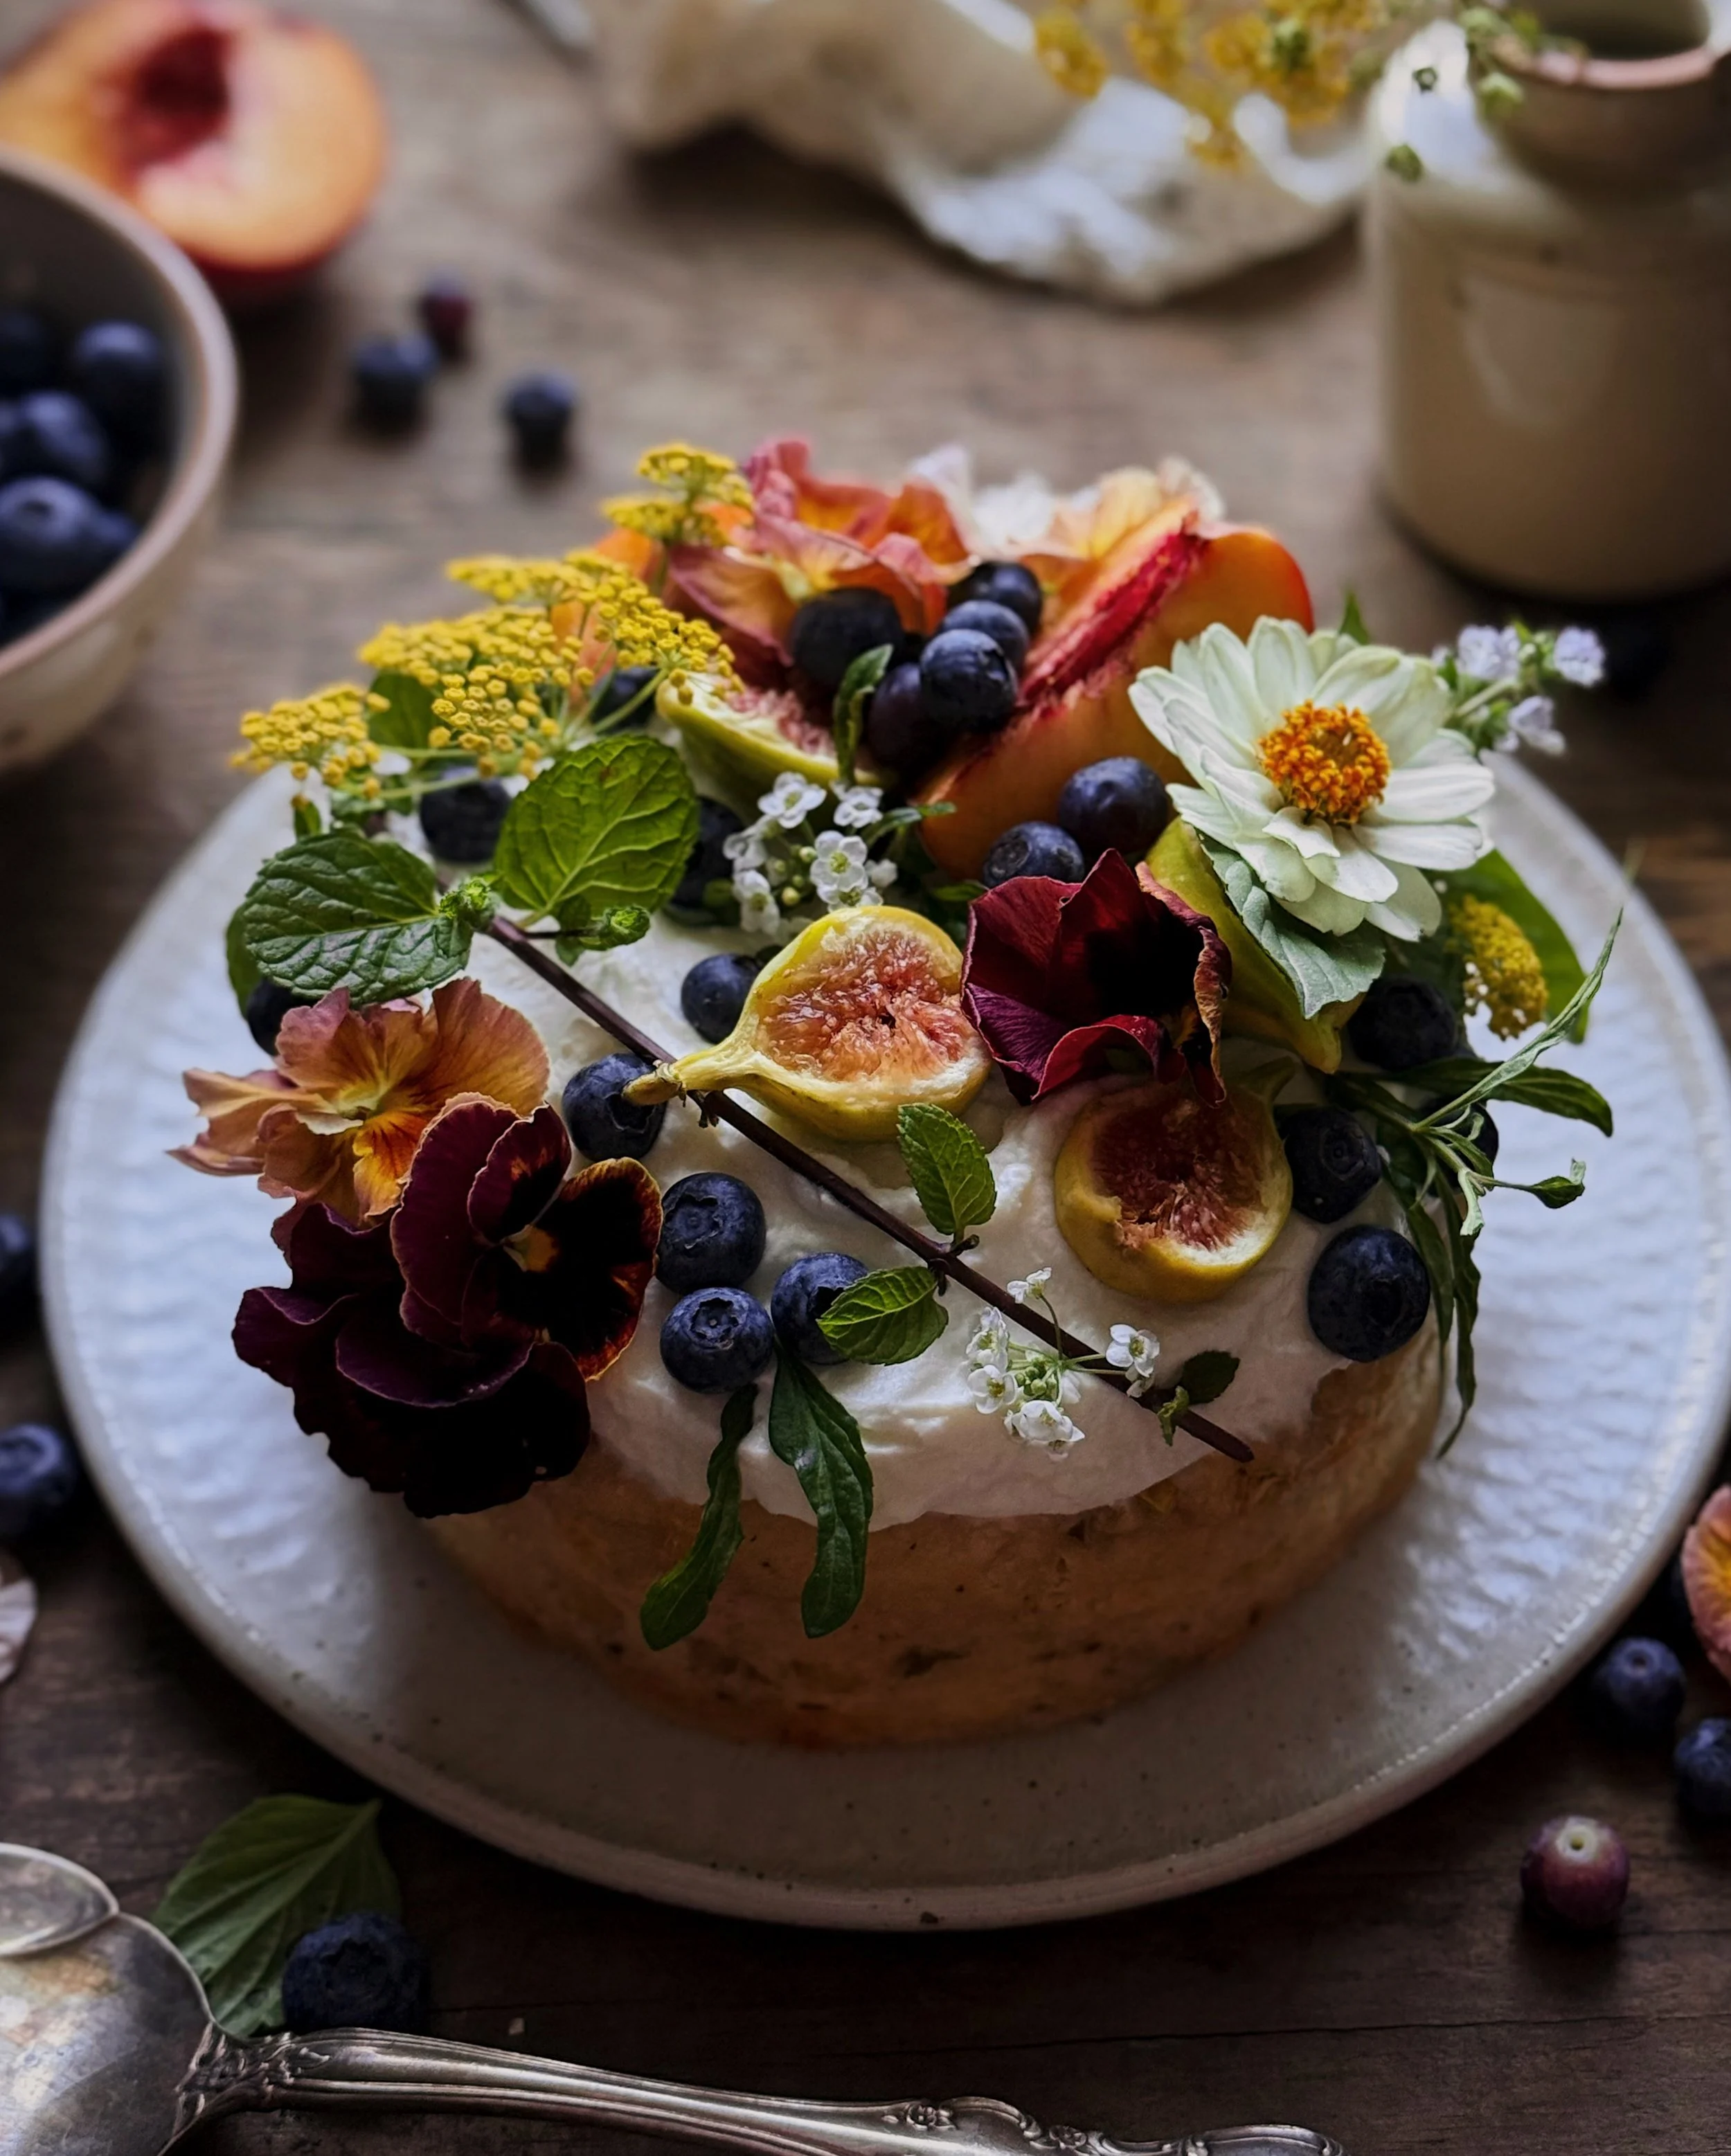
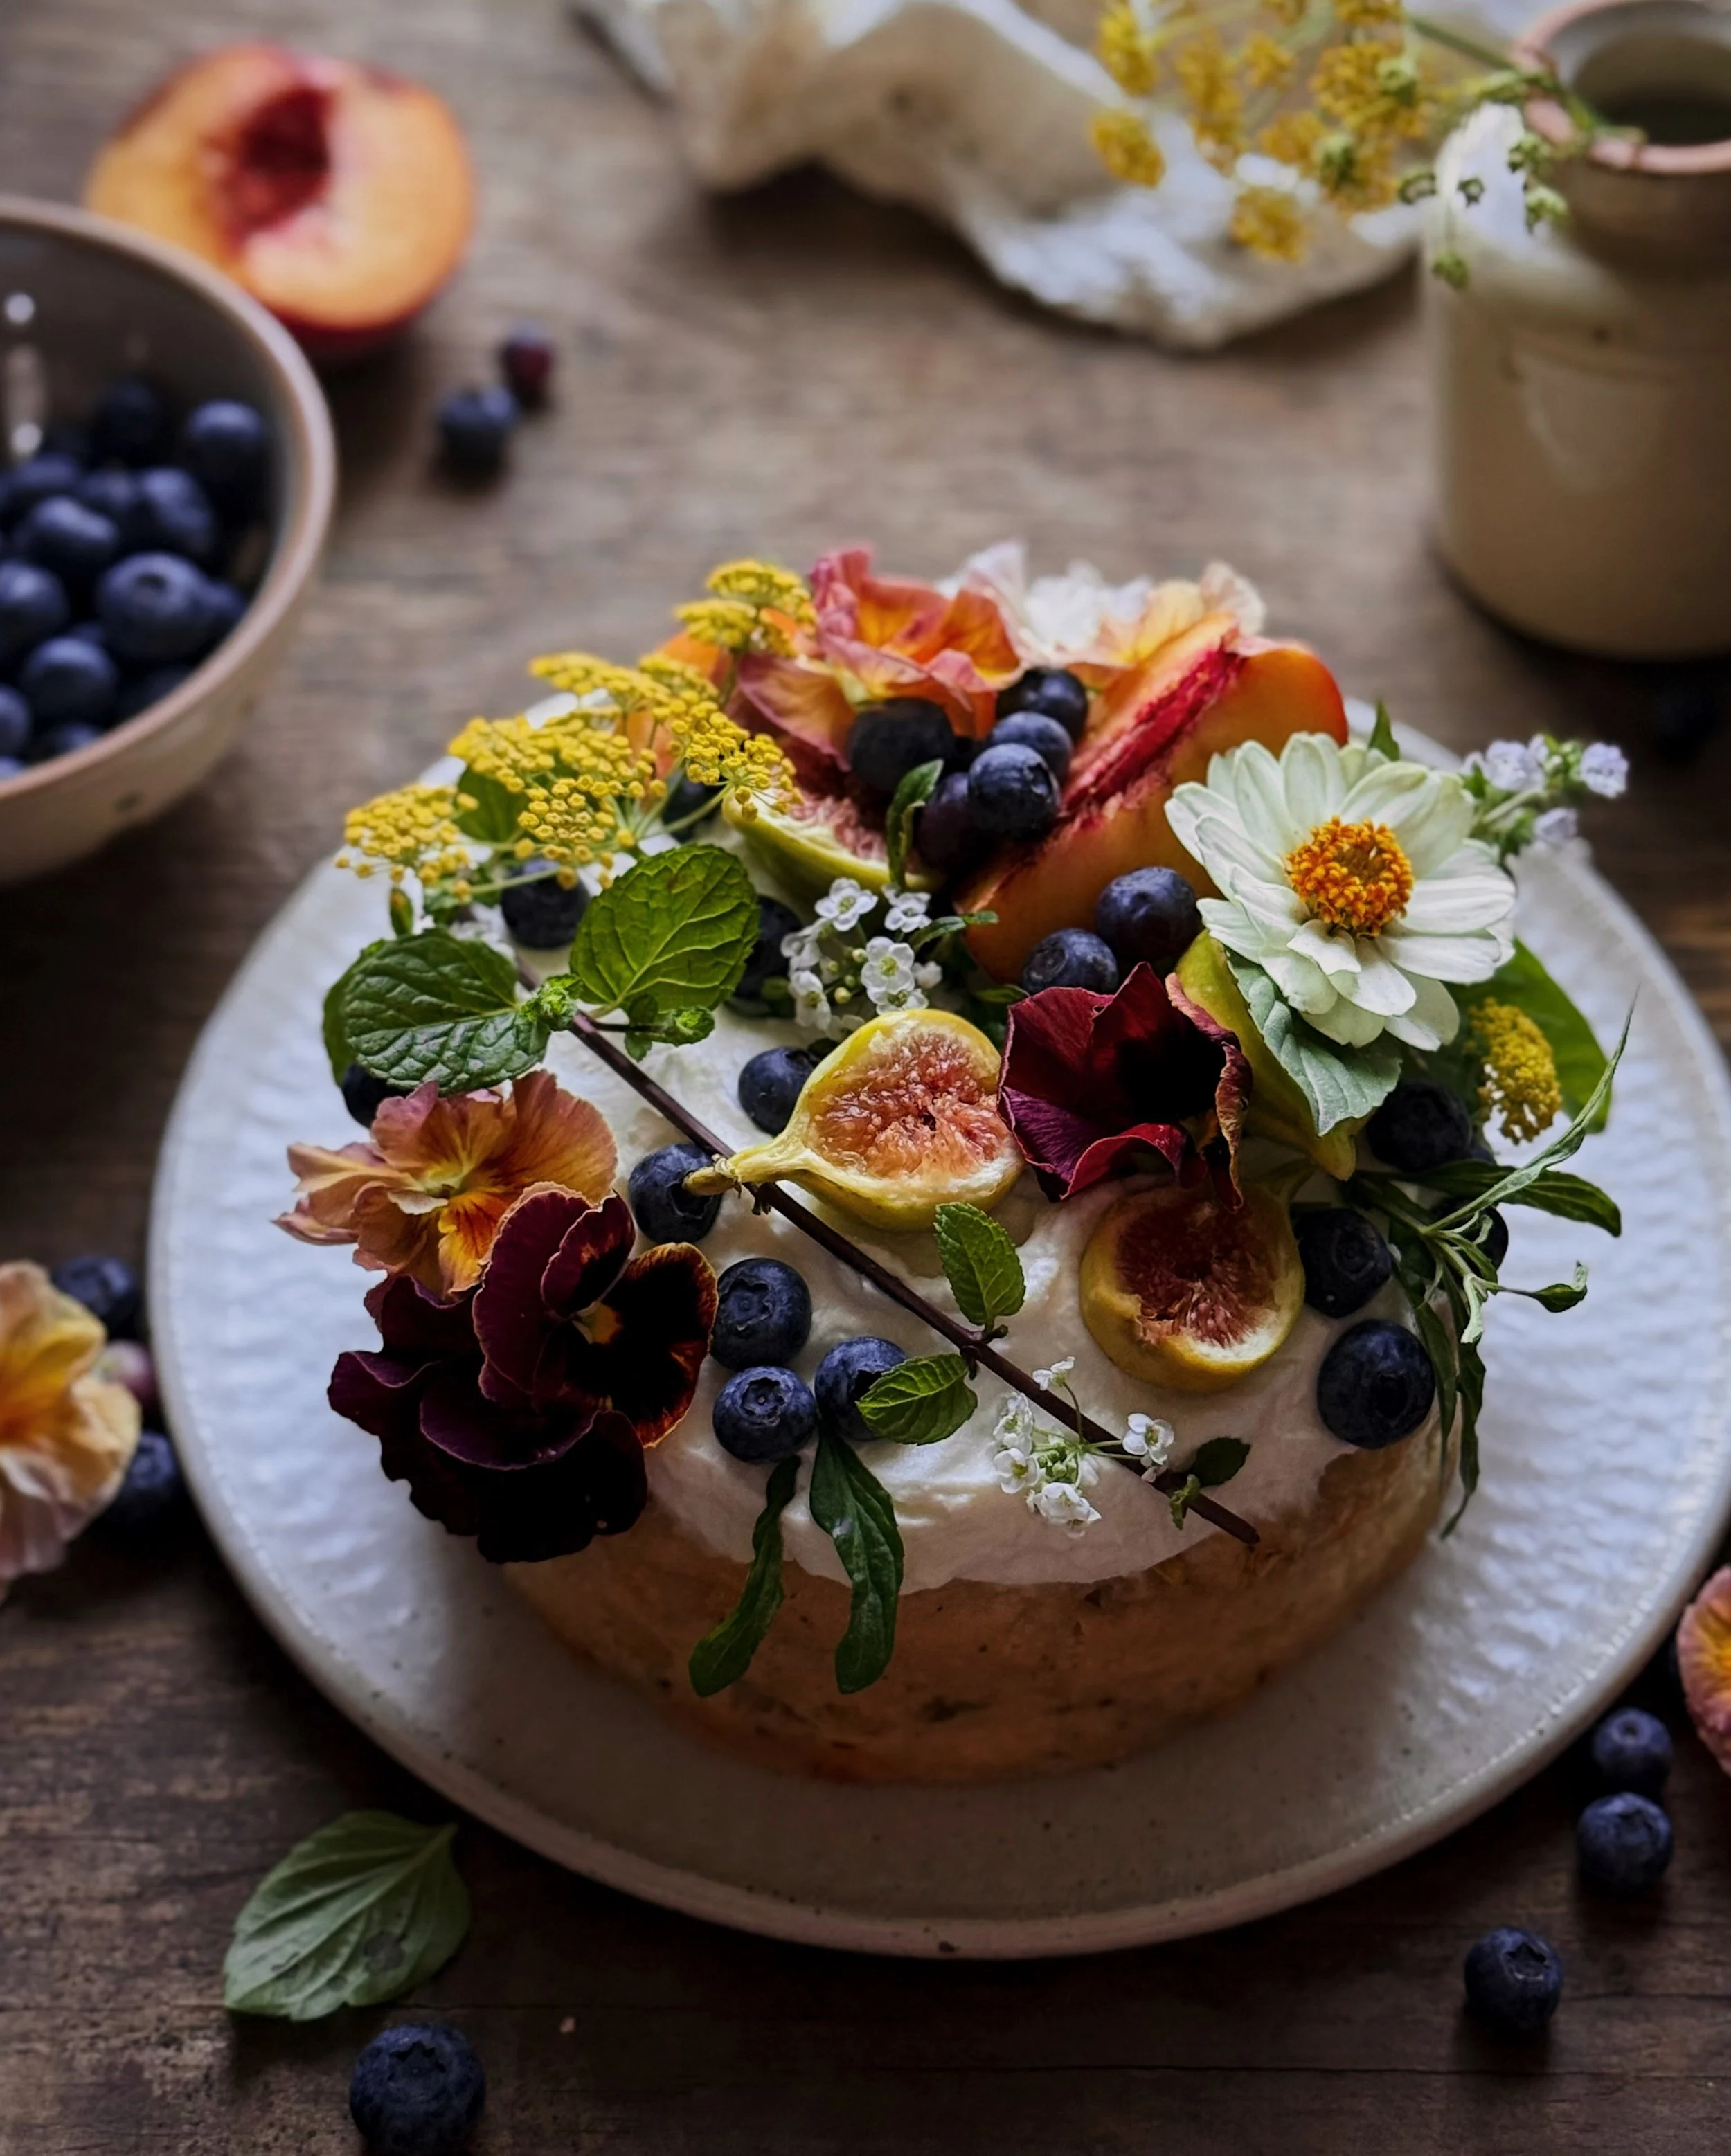
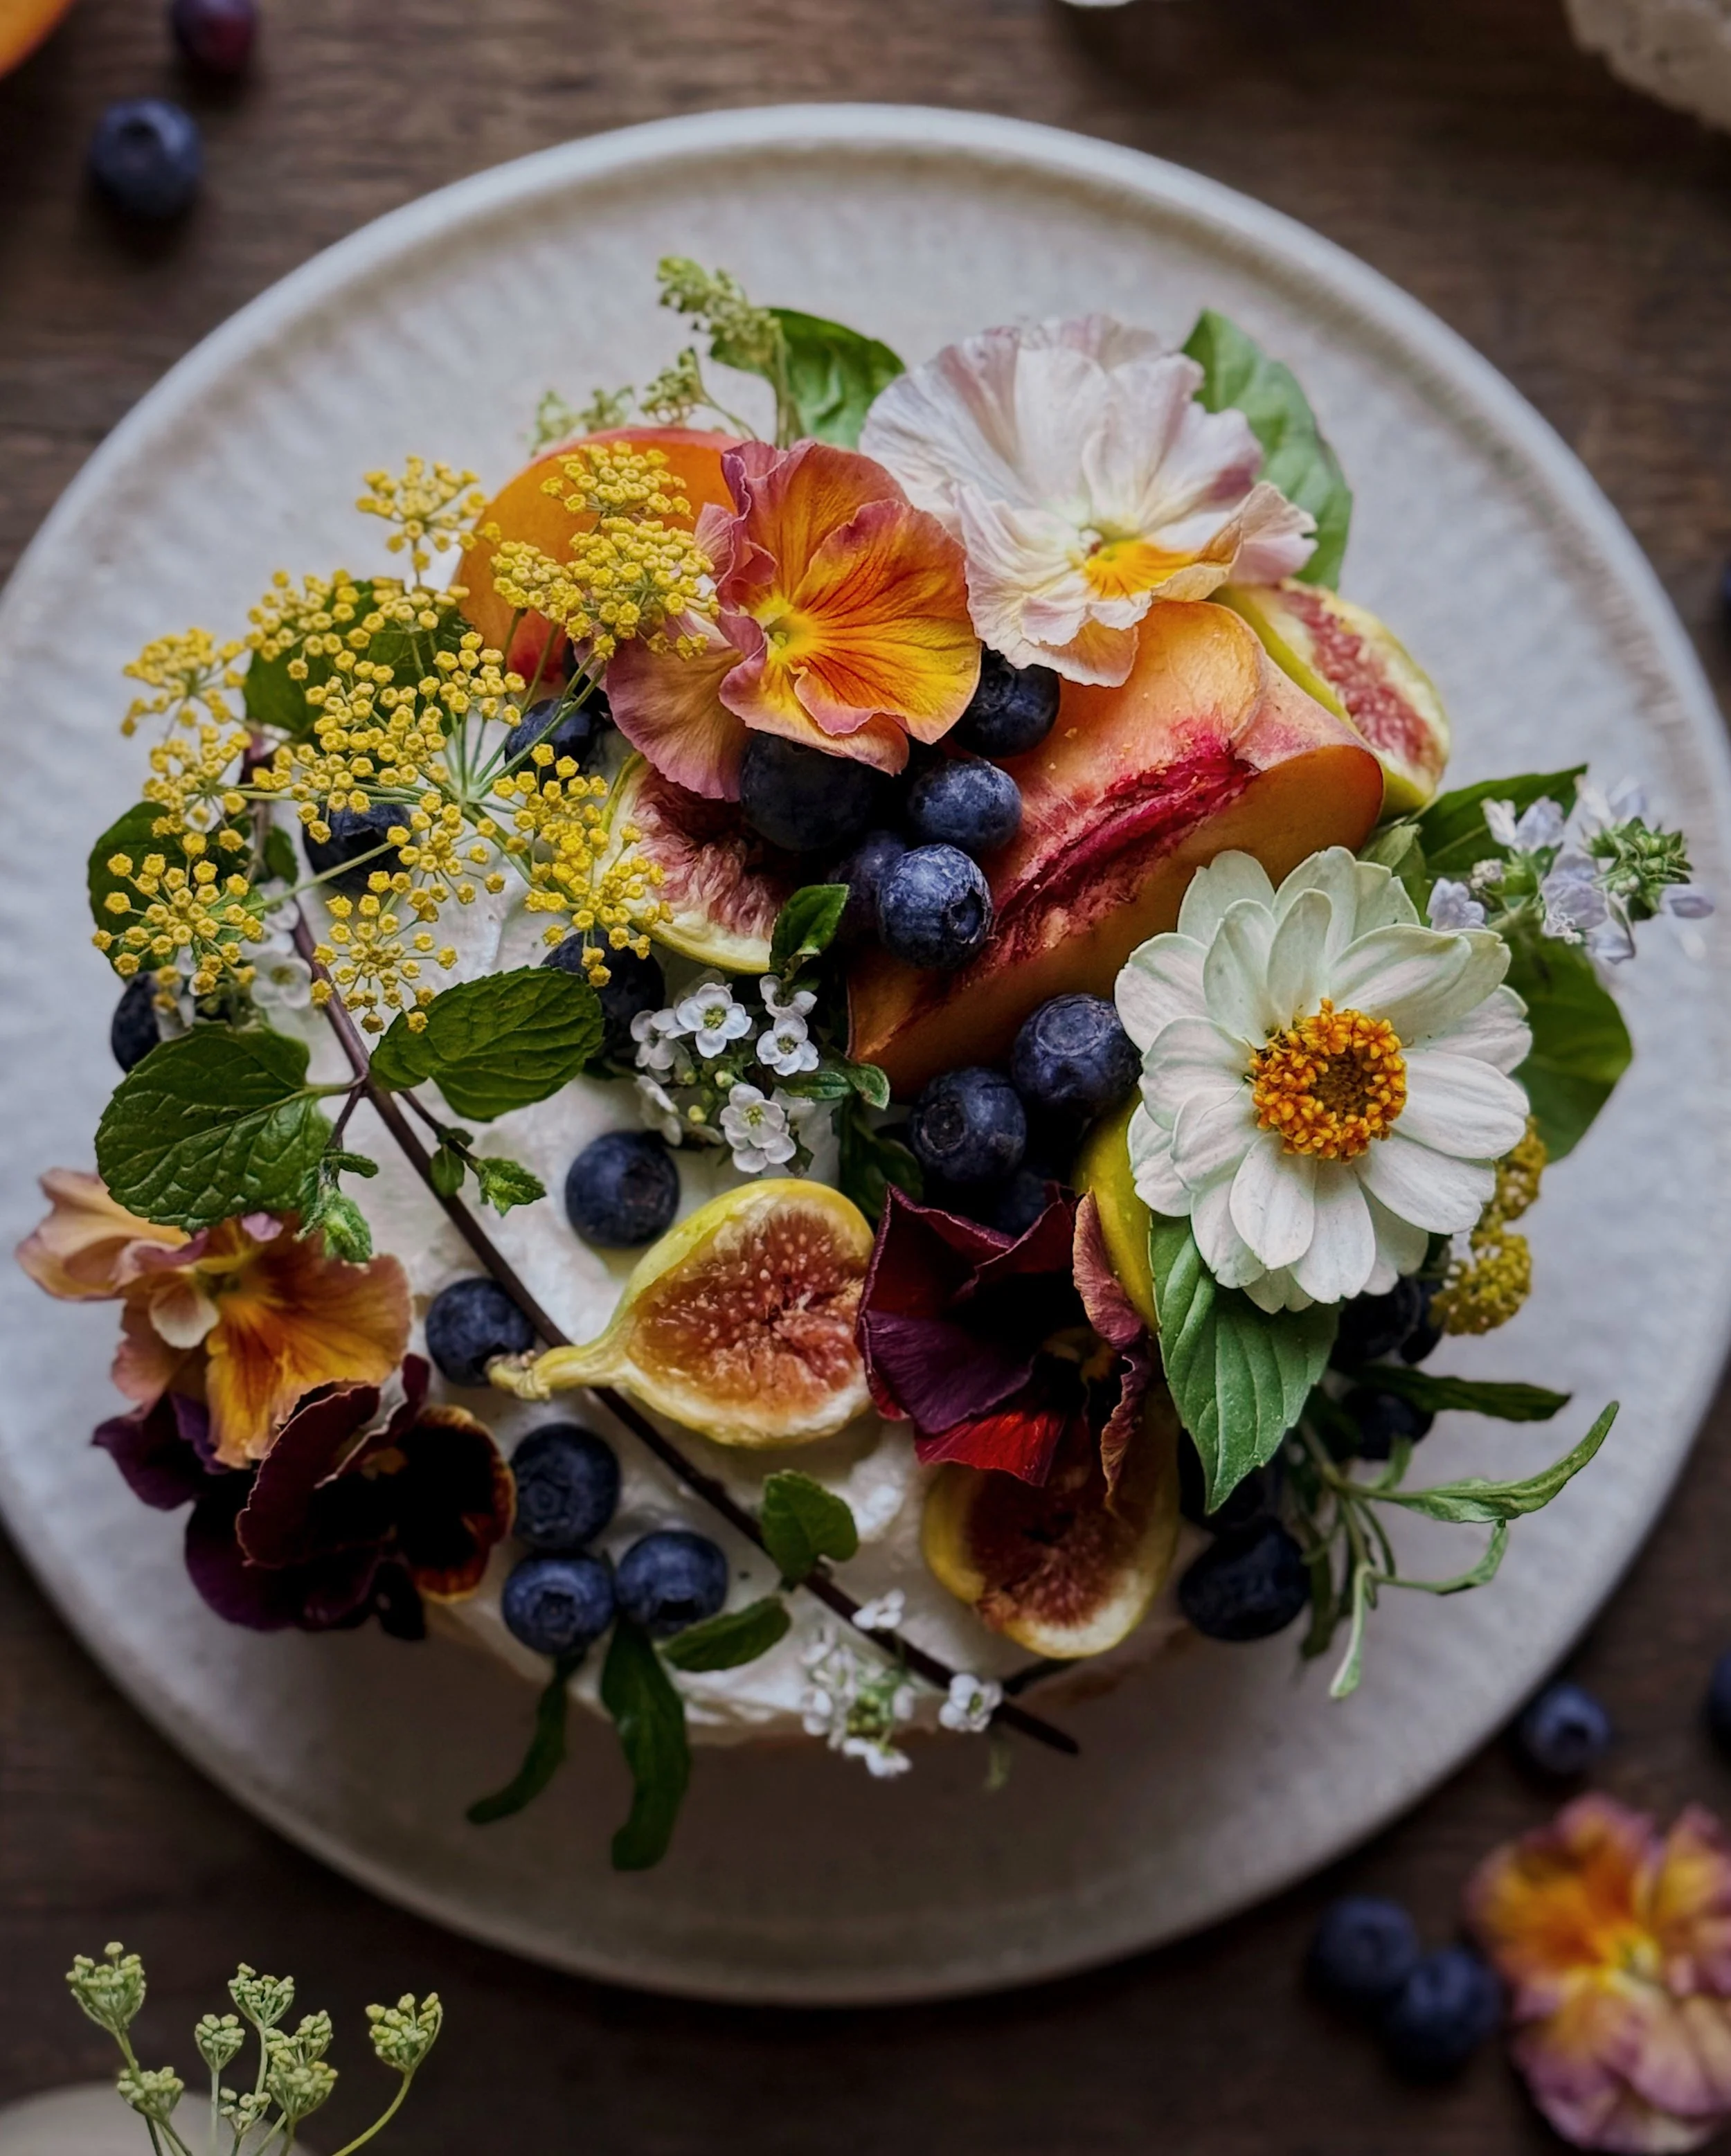
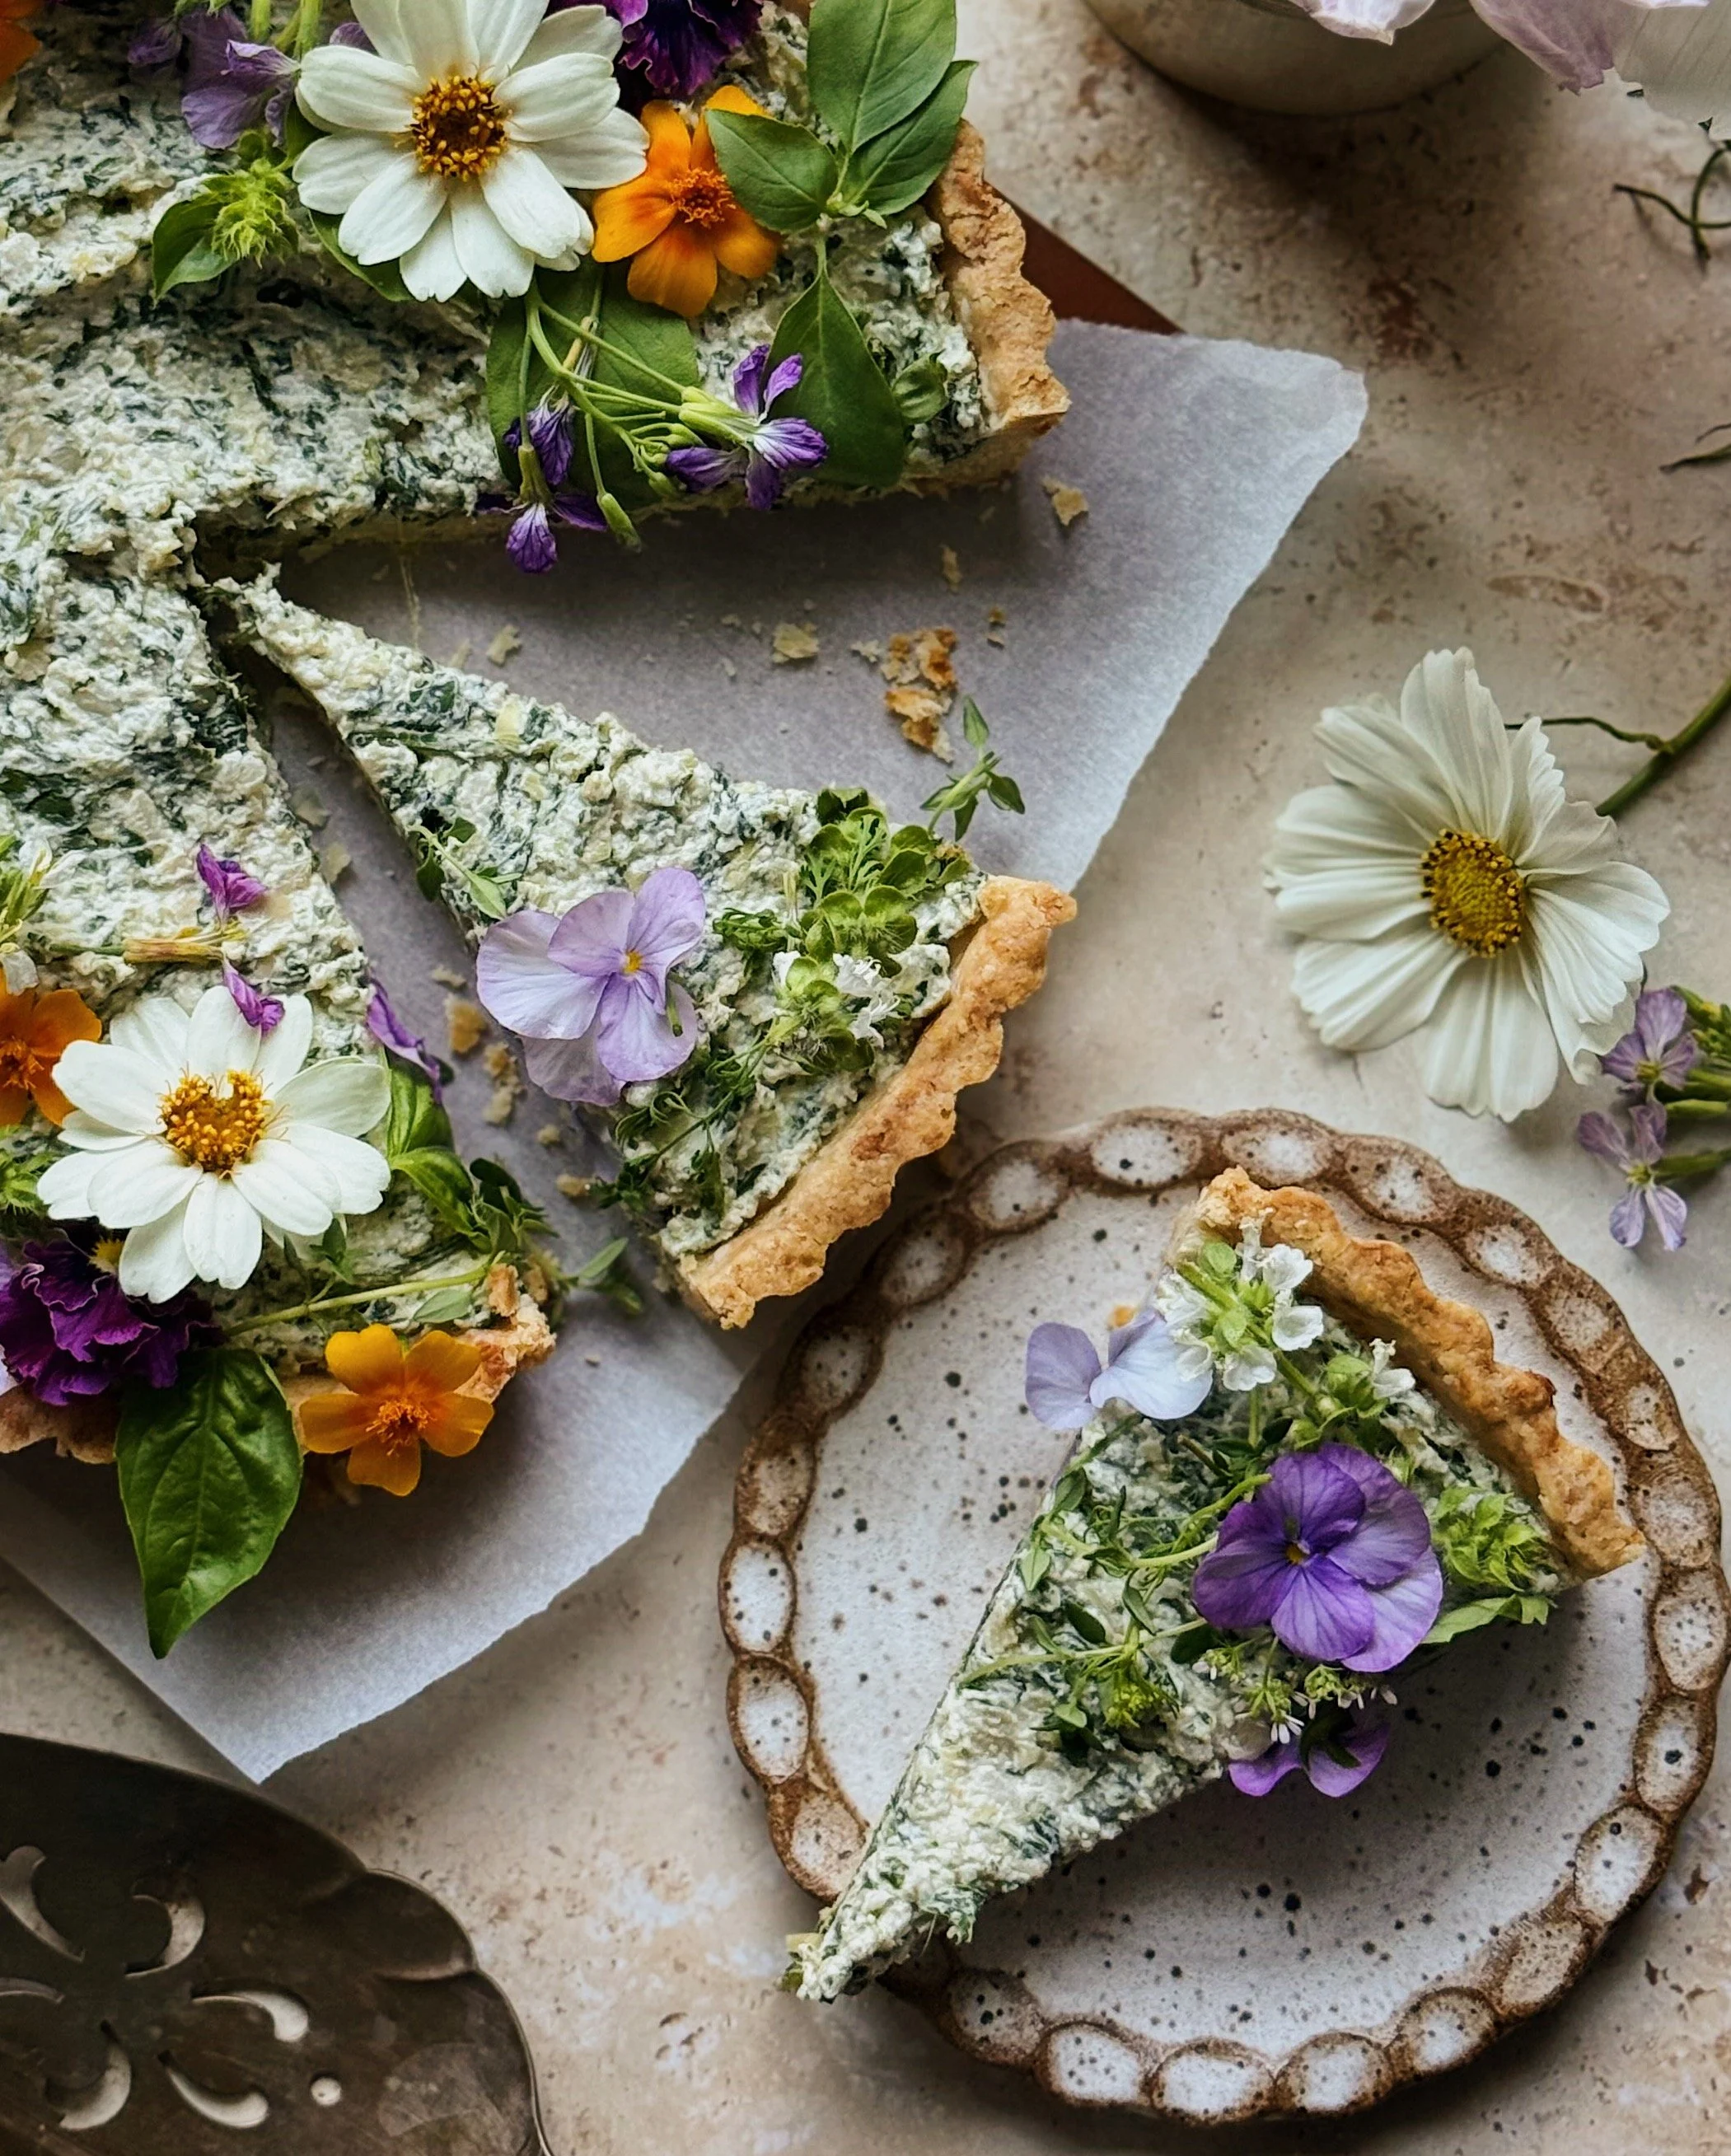
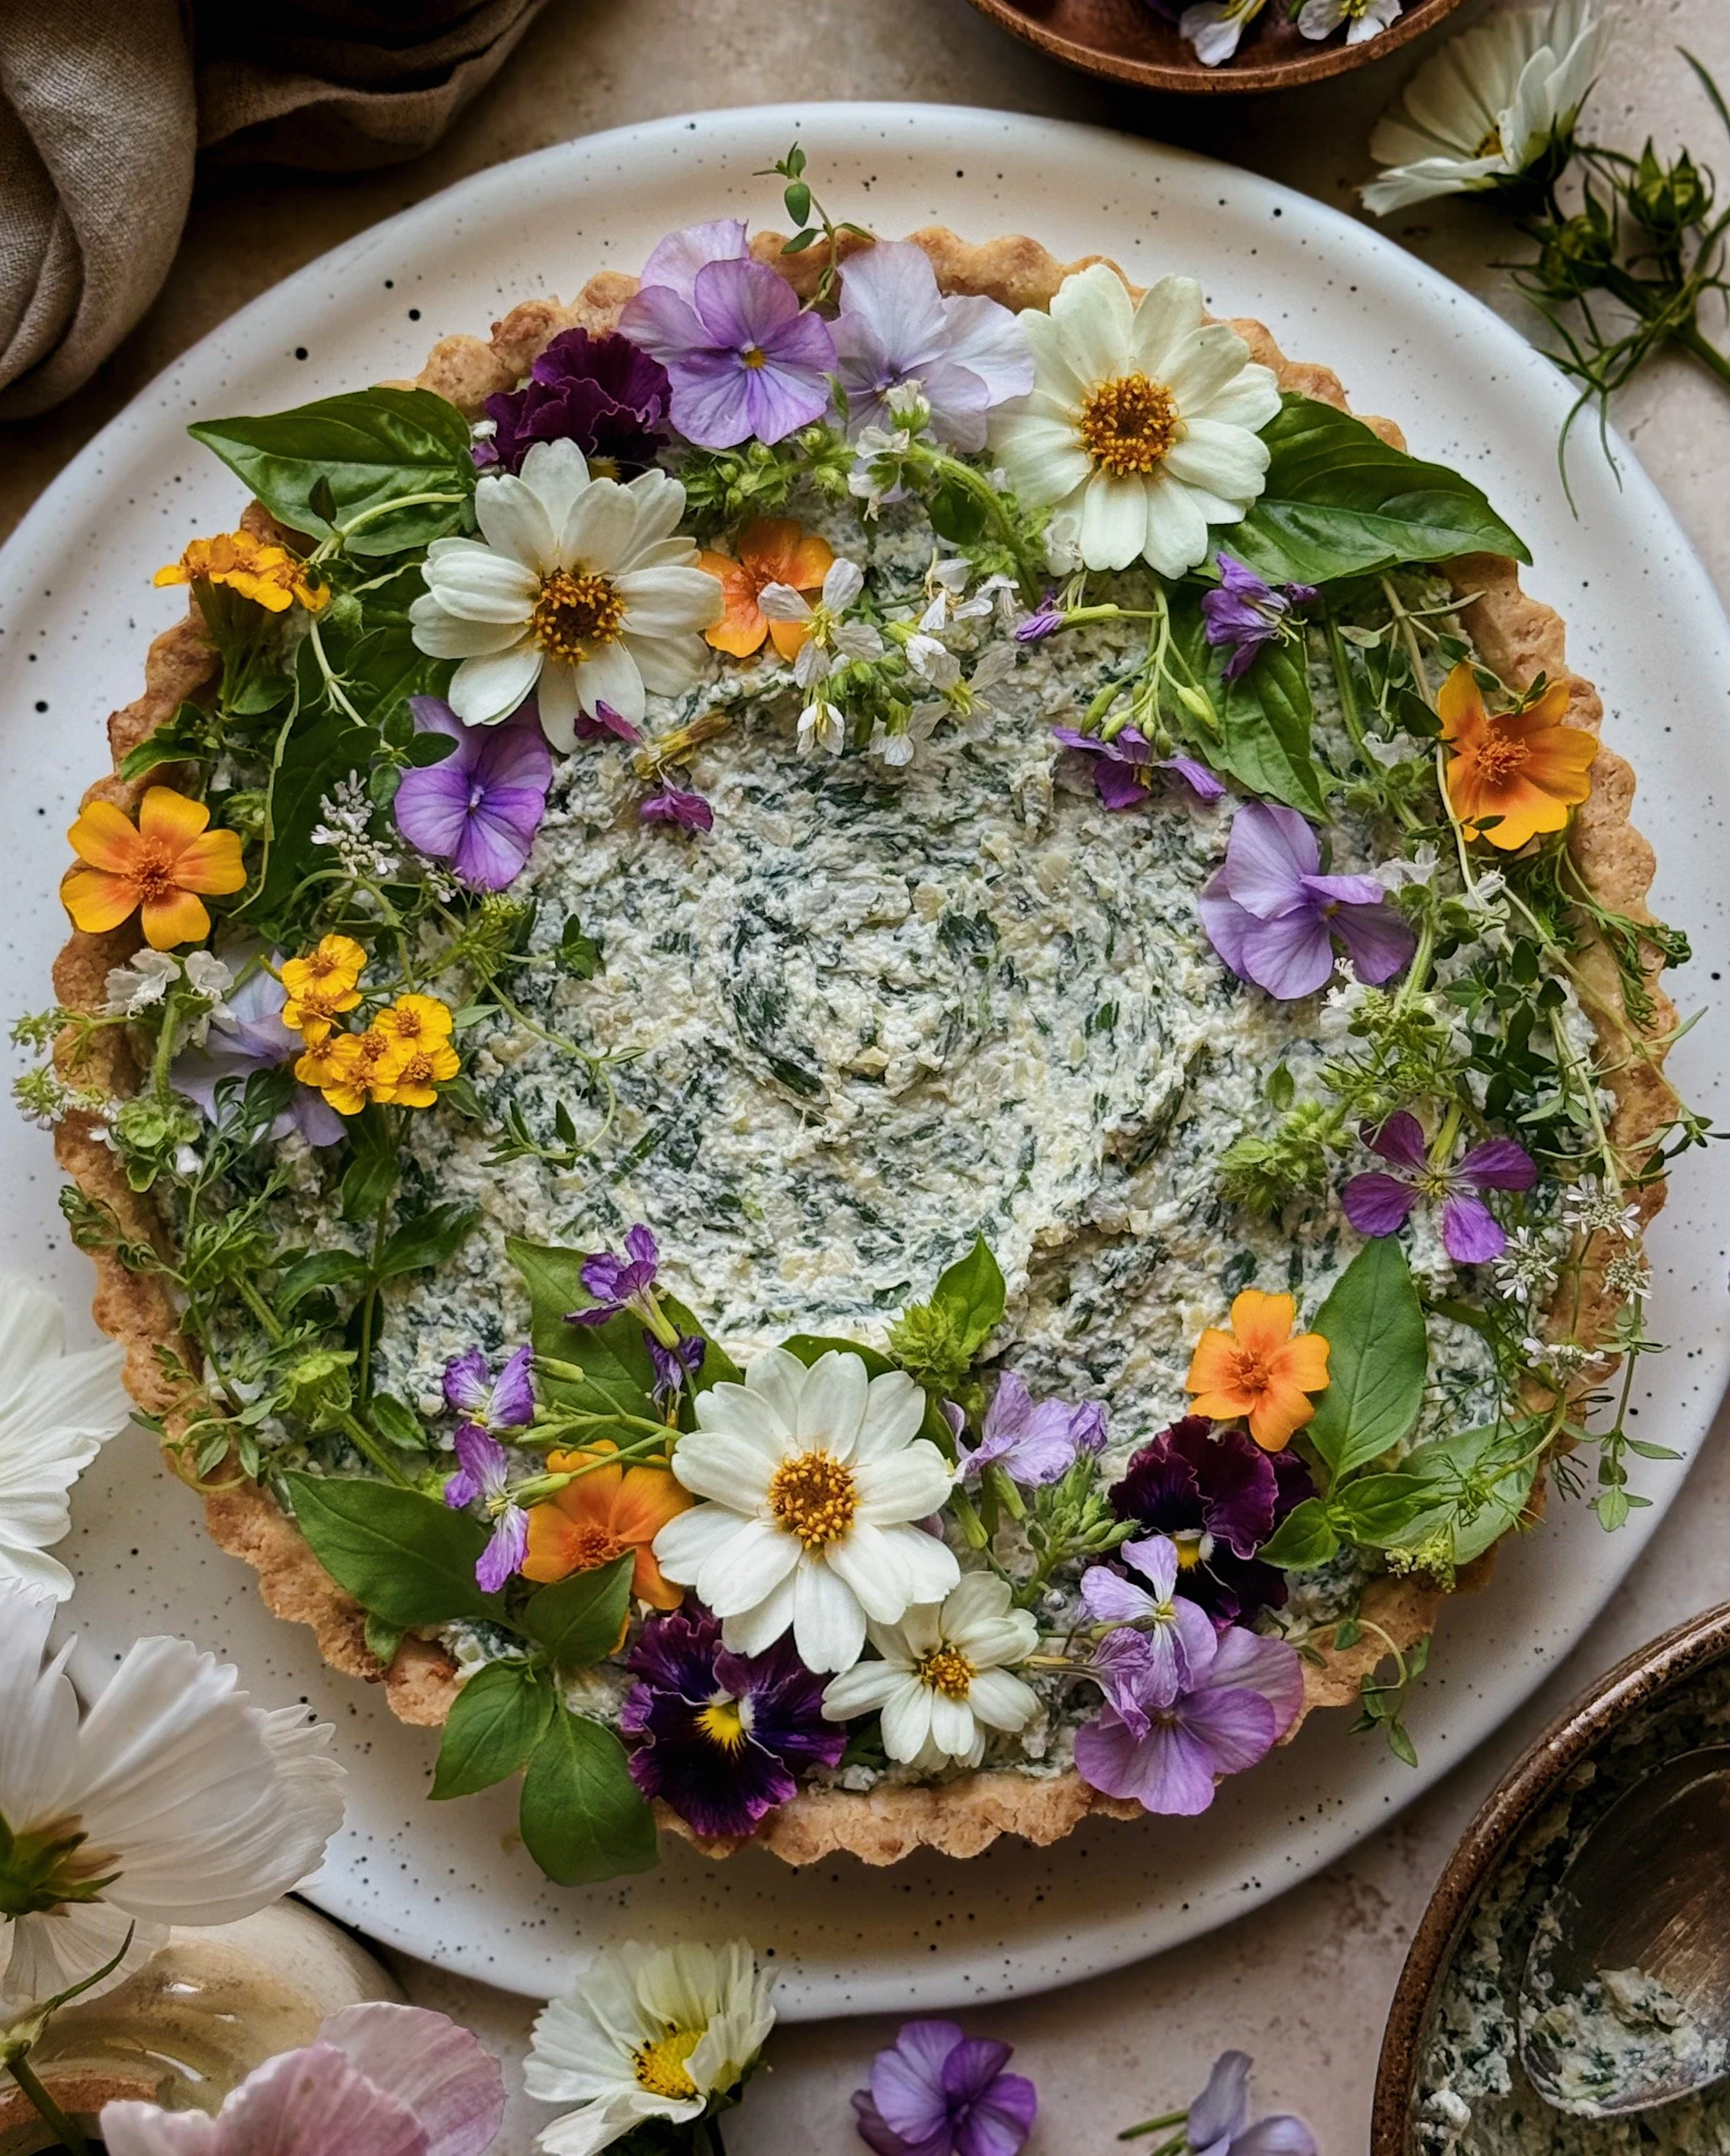
After that, it’s up to you how much or little you decorate it. The tart is meant to taste complete and delicious without the decorations I used for the final photos. If you’d like to, though, you can decorate with any herbs and edible flowers you wish to complement the flavors of the tart; just note that if you are preparing the tart far in advance of serving, pressing the decorations flat so they are fully in contact with the surface of the dip will keep them looking moist and fresh. Using a more sculptural approach with tendrils or curling bits popping off the surface will wilt sooner if fully exposed.
Here is a list of what I used as decorations for the version I made for the photos: basil, thyme, cilantro blossoms, mexican tarragon, zinnias, violas, gem marigolds, and wild radish.
How to Enjoy
This tart works so well for summer entertaining. First of all, dips are already party food and spinach artichoke dip is a classic—but your guests will never expect to see it in the form of a beautiful tart like this. But practically speaking, it’s a great recipe for gatherings because so much of it can be made ahead. I mentioned that you can make and mold the crust the night before but you can also separately make the filling in advance and simply assemble the tart on the day of the party. Unlike other creamy dips that weep excess moisture overnight and form a watery layer on top, if you really squeeze the excess moisture out of the veggies, the recipe will do the rest to keep this dip working great as a tart filling the next day, and even beyond.
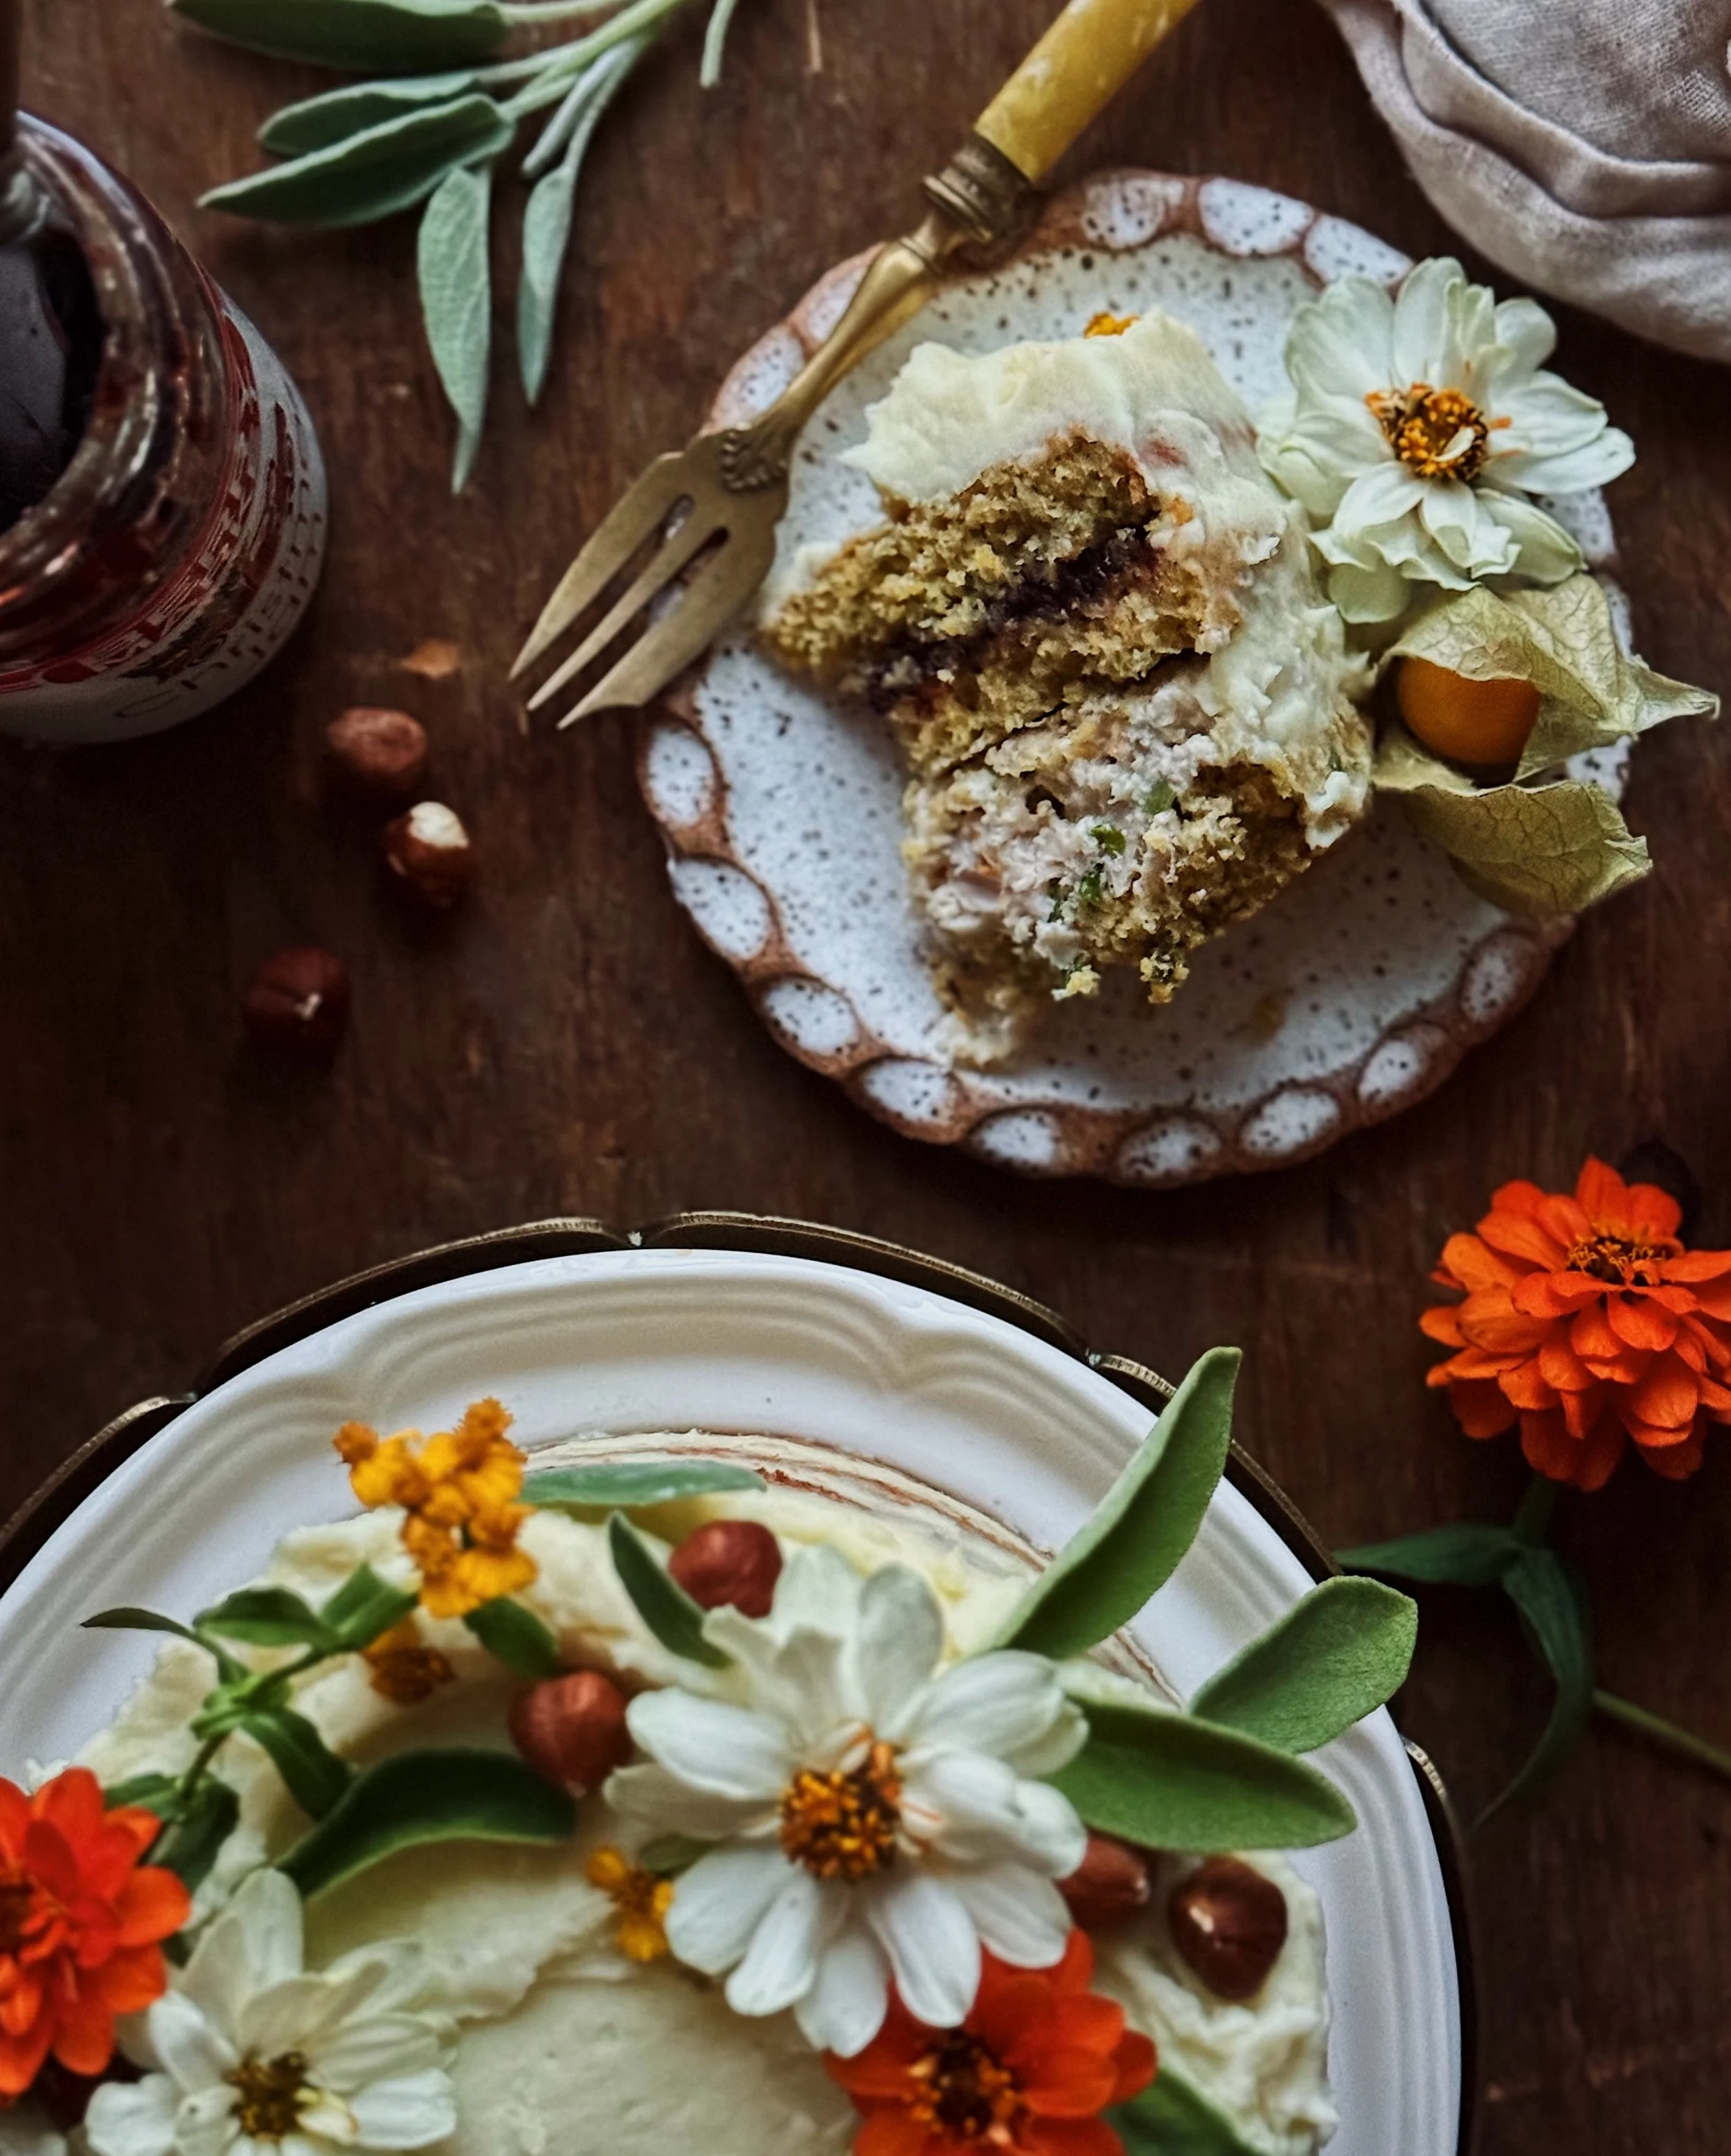
This tart also holds up well as leftovers, as long as you’re okay with a chilled crust. While I recommend serving the baked crust to your guests and family at room temp, the reality of recipe testing at home is that I naturally end up getting to test how well something works as leftovers over a couple of days. Both the sturdy shortbread crust and the thick dip held up well for at least a couple of extra days in the fridge, and even the decorations that were completely pressed against the surface of the moist dip looked pretty cute in that time, barring notoriously delicate herbs like the basil. Because of this, I can also recommend enjoying this tart solo or as a couple over several summer lunches where you only have to turn the oven on once to indulge in multiple helpings of this cheesy, savory, protein-forward treat.
How to Make a Spinach Artichoke Dip Tart with Pepper Jack Crust
(Makes one 9 1/2-inch tart)
Ingredients for the Crust
1/2 cup (1 stick) Real California Milk unsalted butter, cut into small cubes then frozen
1 1/2 cups AP flour
2 oz (about 1/2 cup) Real California Milk pepper jack cheese, grated then chilled
1/2 tsp kosher salt
4–6 tbsp vodka, chilled
Ingredients for the Dip Filling
8 oz raw baby spinach (or 1/3 cup cooked and squeezed dry)
3/4 cup Real California Milk cottage cheese
3 oz Real California Milk cream cheese
1 oz (about 1/4 cup) Real California Milk mozzarella cheese, grated
1 clove garlic, roughly chopped
1 tsp white wine vinegar
2 tsp worcestershire sauce
1/2 tsp onion powder
1/4 tsp kosher salt
1/4 tsp black pepper
4 canned artichoke hearts, squeezed dry and halved
4 canned water chestnuts, patted dry and roughly chopped
herbs and edible flowers, for decorating (optional)
Procedure
To make the crust: Combine the flour, pepper jack, and salt in the bowl of a food processor. Pulse briefly to mix. Scatter in frozen butter cubes and pulse until the texture resembles wet sand. Add 1 tablespoon of vodka and pulse a couple of times; repeat adding vodka 1 tablespoon at a time and pulsing briefly after each, until the mixture can just barely clump together. Dump the mixture into a 9 1/2-inch tart pan (with a removable bottom), starting with the perimeter and then the rest in the middle. Use a spoon or flat-bottomed measuring scoop to quickly press the mixture evenly against the bottom and sides, keeping everything as cold as possible. (If you need more time to get an even layer, pop the tart pan in the fridge for 2–5 minutes if you start to notice the mixture warming up). Chill the unbaked tart shell in the freezer for 20 minutes or in the refrigerator for 1 hour or up to overnight.
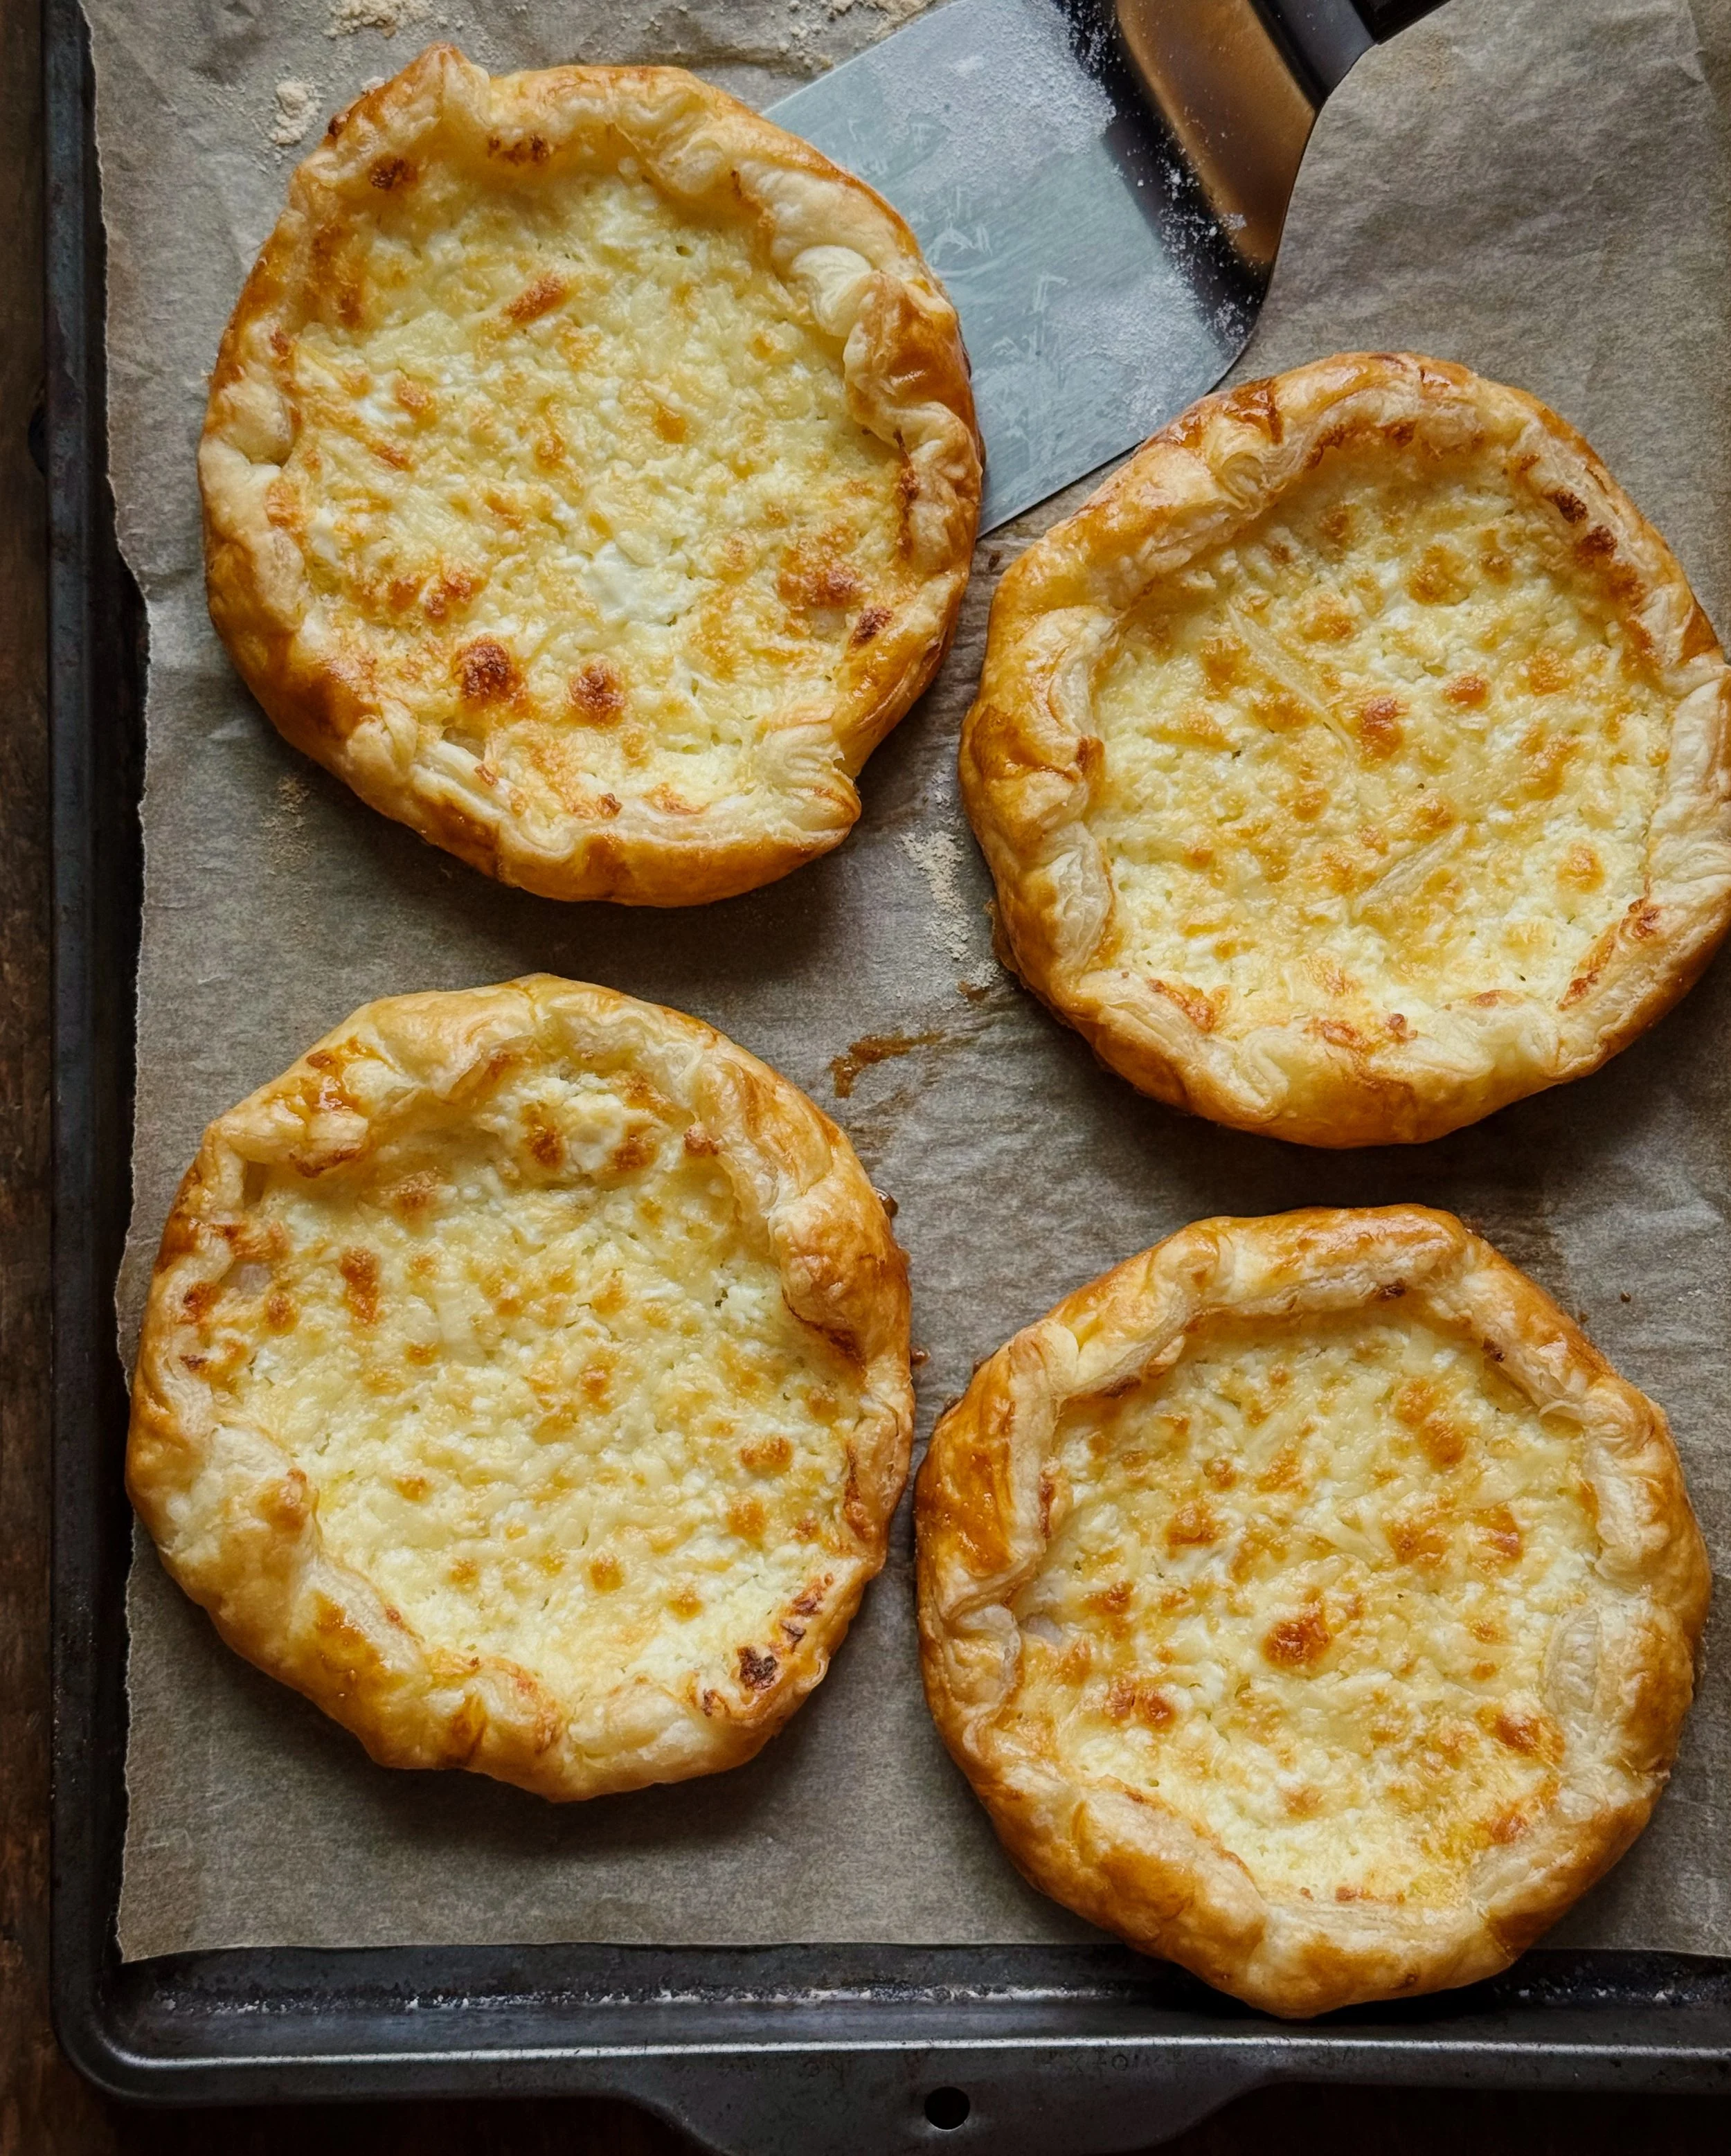
When ready to bake, preheat oven to 400°F. Place the chilled tart shell on a baking sheet. Dock the shell thoroughly with a fork, line with parchment paper, and fill with pie weights. Bake for 20 minutes. Remove pie weights and parchment and bake shell for an additional 20 minutes or until golden brown. Allow to cool before filling with the dip.
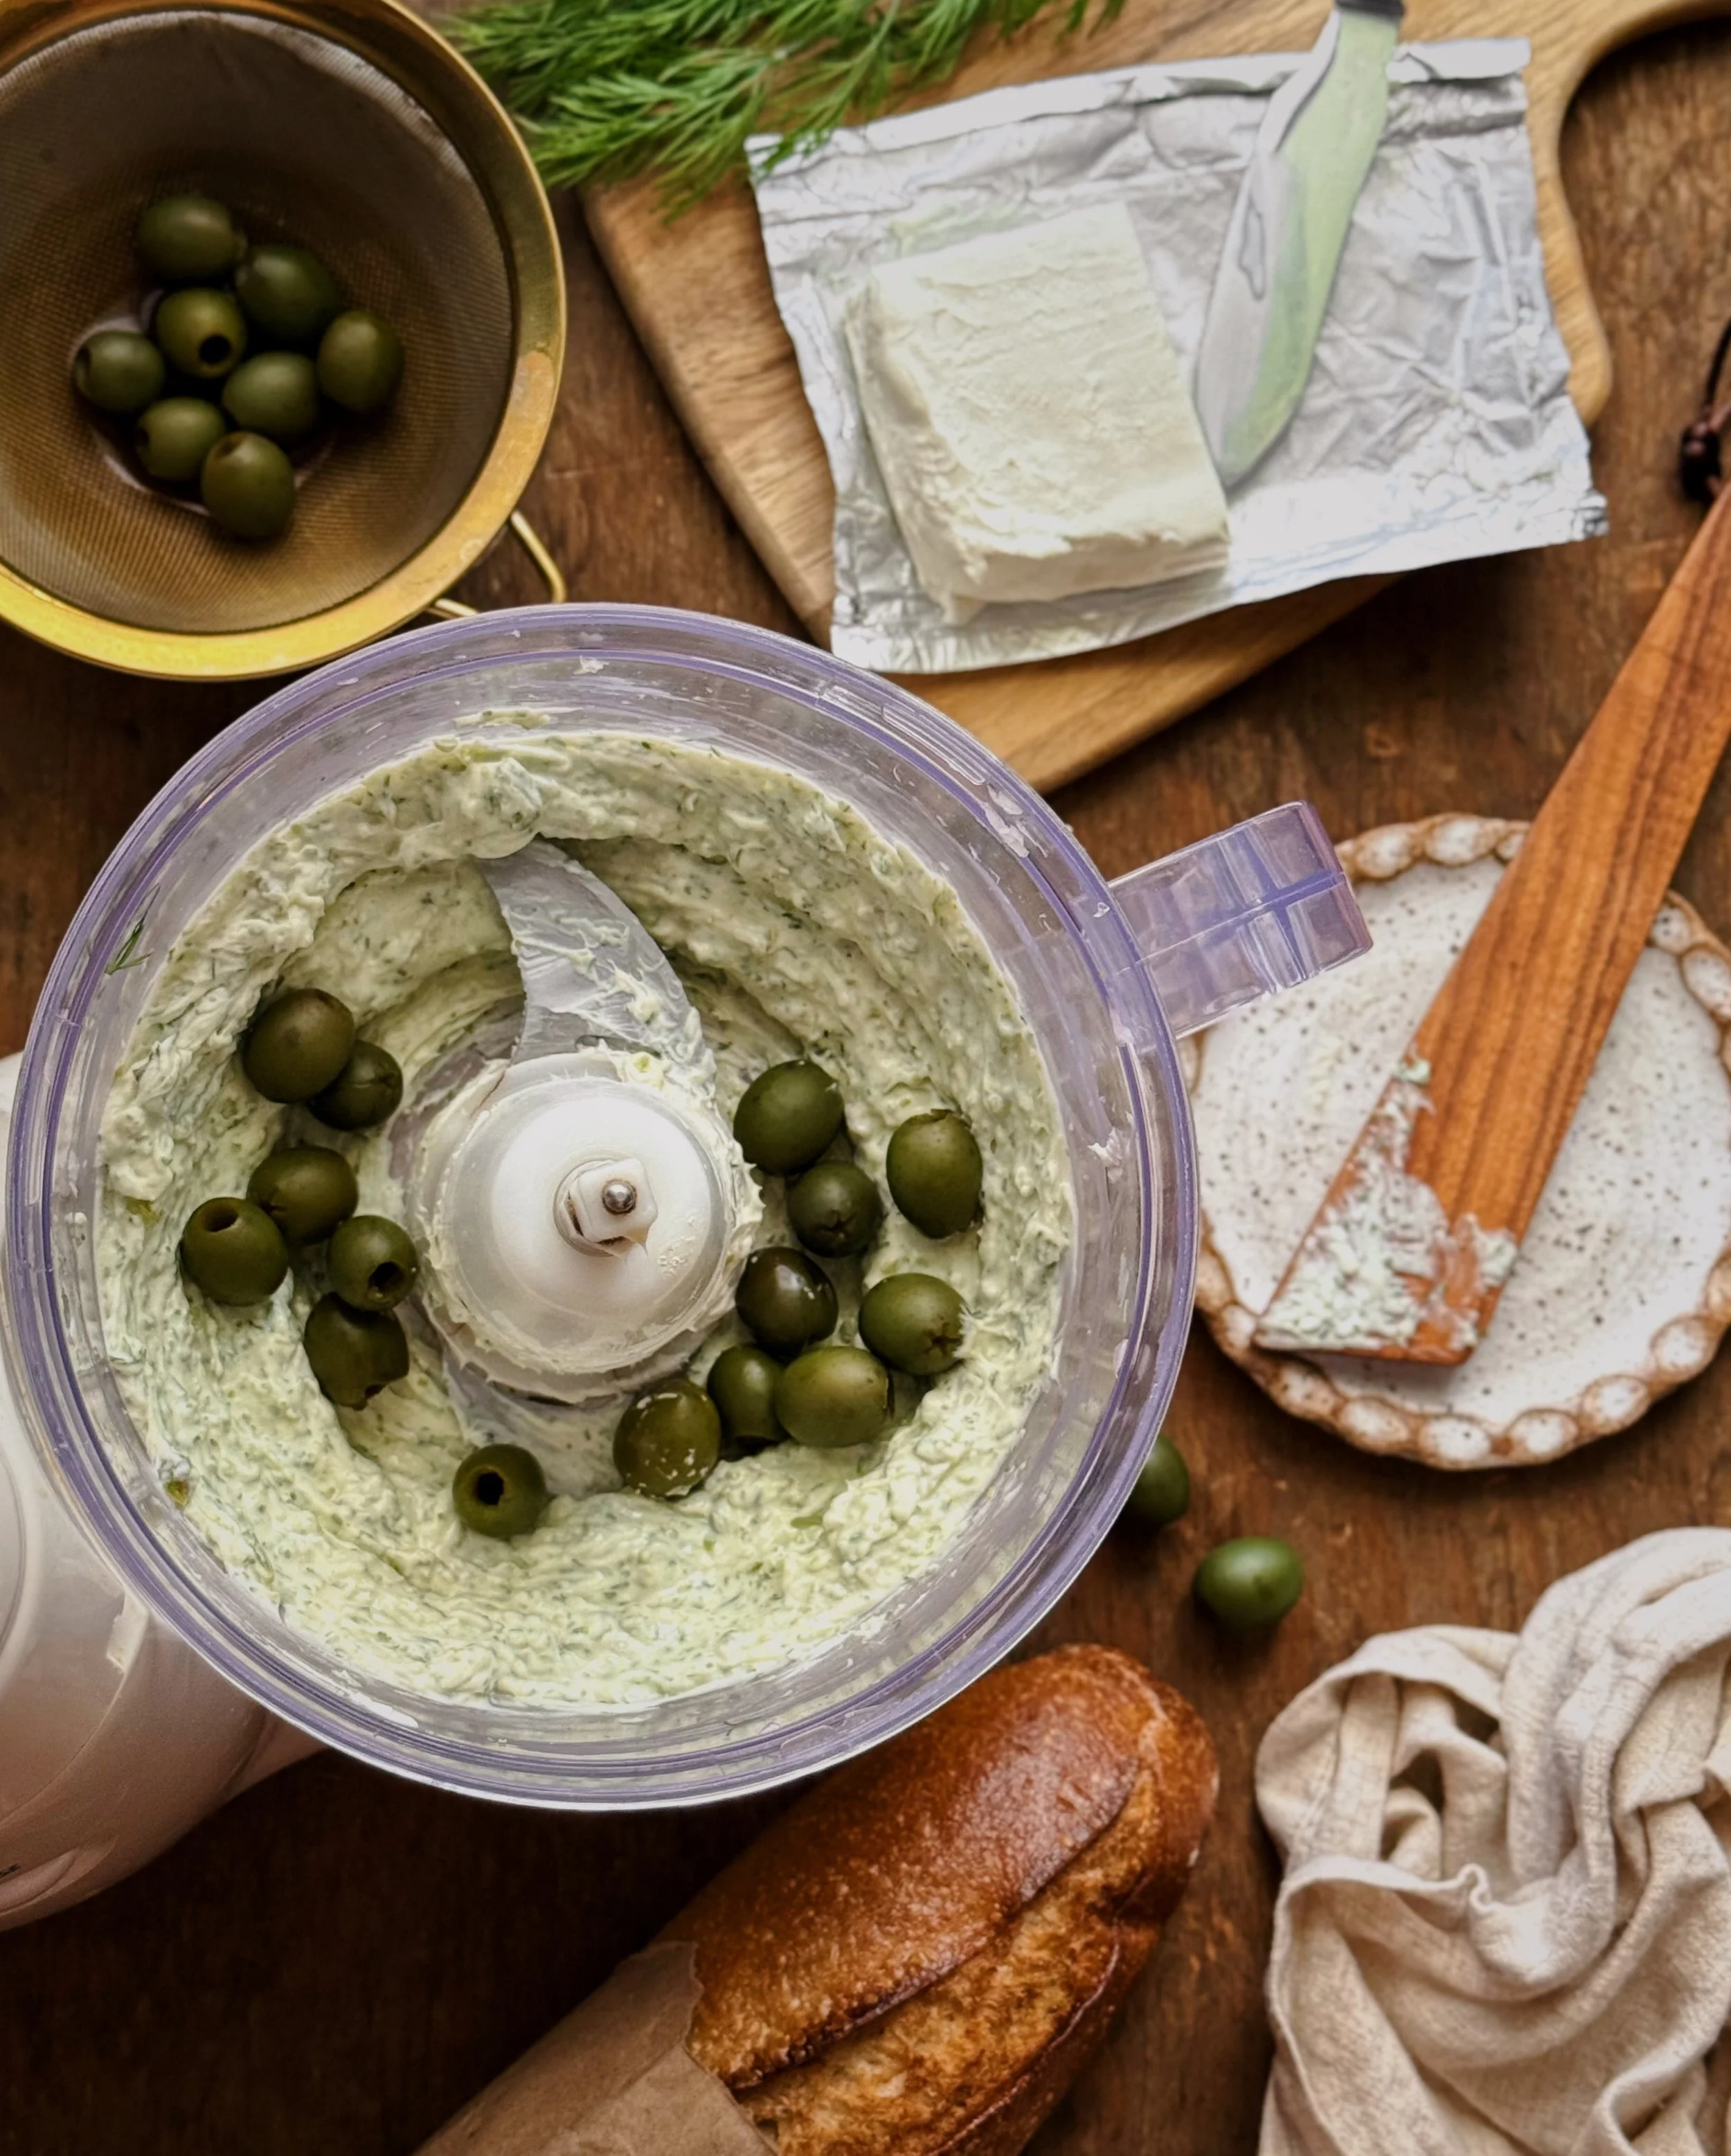
To make the dip filling: If using fresh spinach, heat a large nonstick pan on medium heat and add spinach. Cook for 5 minutes, using a spatula to constantly move the spinach around to evenly distribute over the heat; once wilted, spread out to continue to encourage evaporation of the excess moisture. Let cooked spinach cool and then wring out well. This should yield about 1/3 cup of cooked spinach when wrung. (Alternatively, wring out enough frozen spinach for 1/3 cup.) Roughly chop prepared spinach.
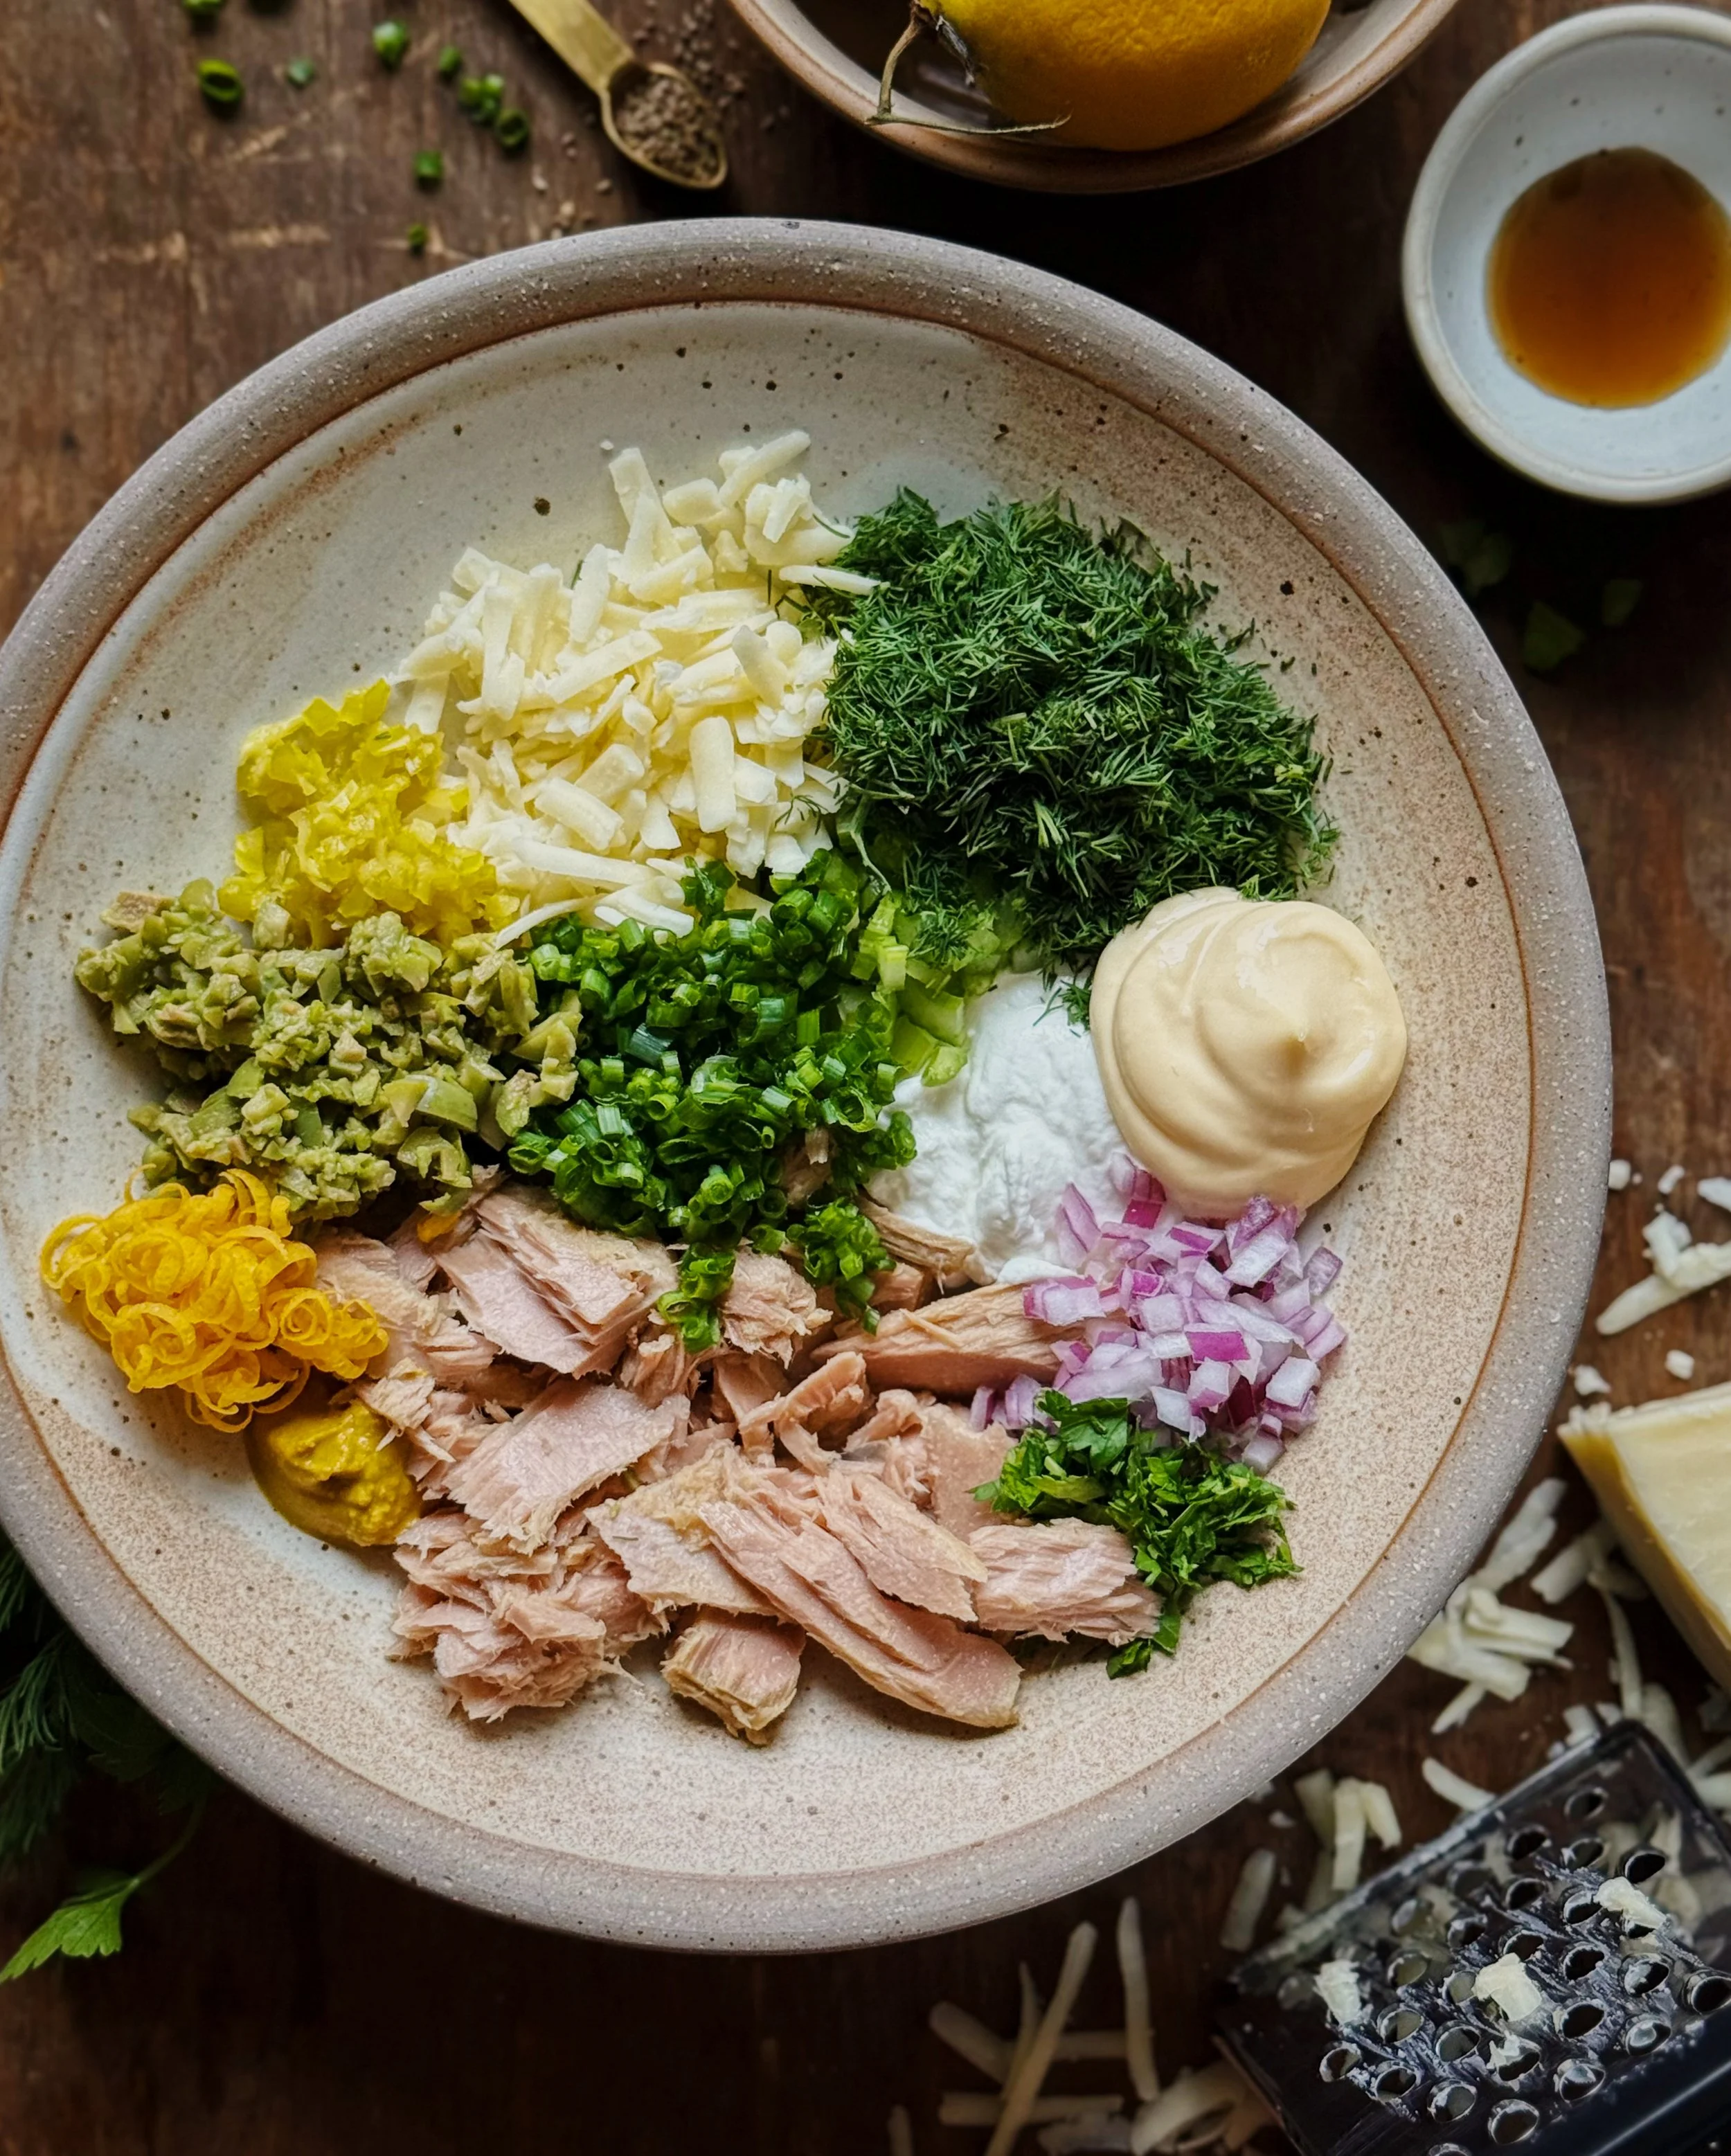
Combine cottage cheese, cream cheese, mozzarella, garlic, vinegar, worchestershire sauce, onion powder, salt, and pepper in the bowl of a food processor. Process until the mixture is smooth. Add artichoke hearts and water chestnuts. Pulse 3-5 times until just incorporated. Add spinach. Pulse 3-5 times until just incorporated; the spinach, artichoke hearts, and water chestnuts should still retain some texture. Refrigerate dip mixture until ready to assemble the tart.
To assemble the tart: Spread the dip filling evenly inside the baked tart shell. Just before serving, decorate as desired.
Thank you so much to Real California Milk for sponsoring this post! Find Real California Milk dairy products near you by visiting here, or look for the seal!