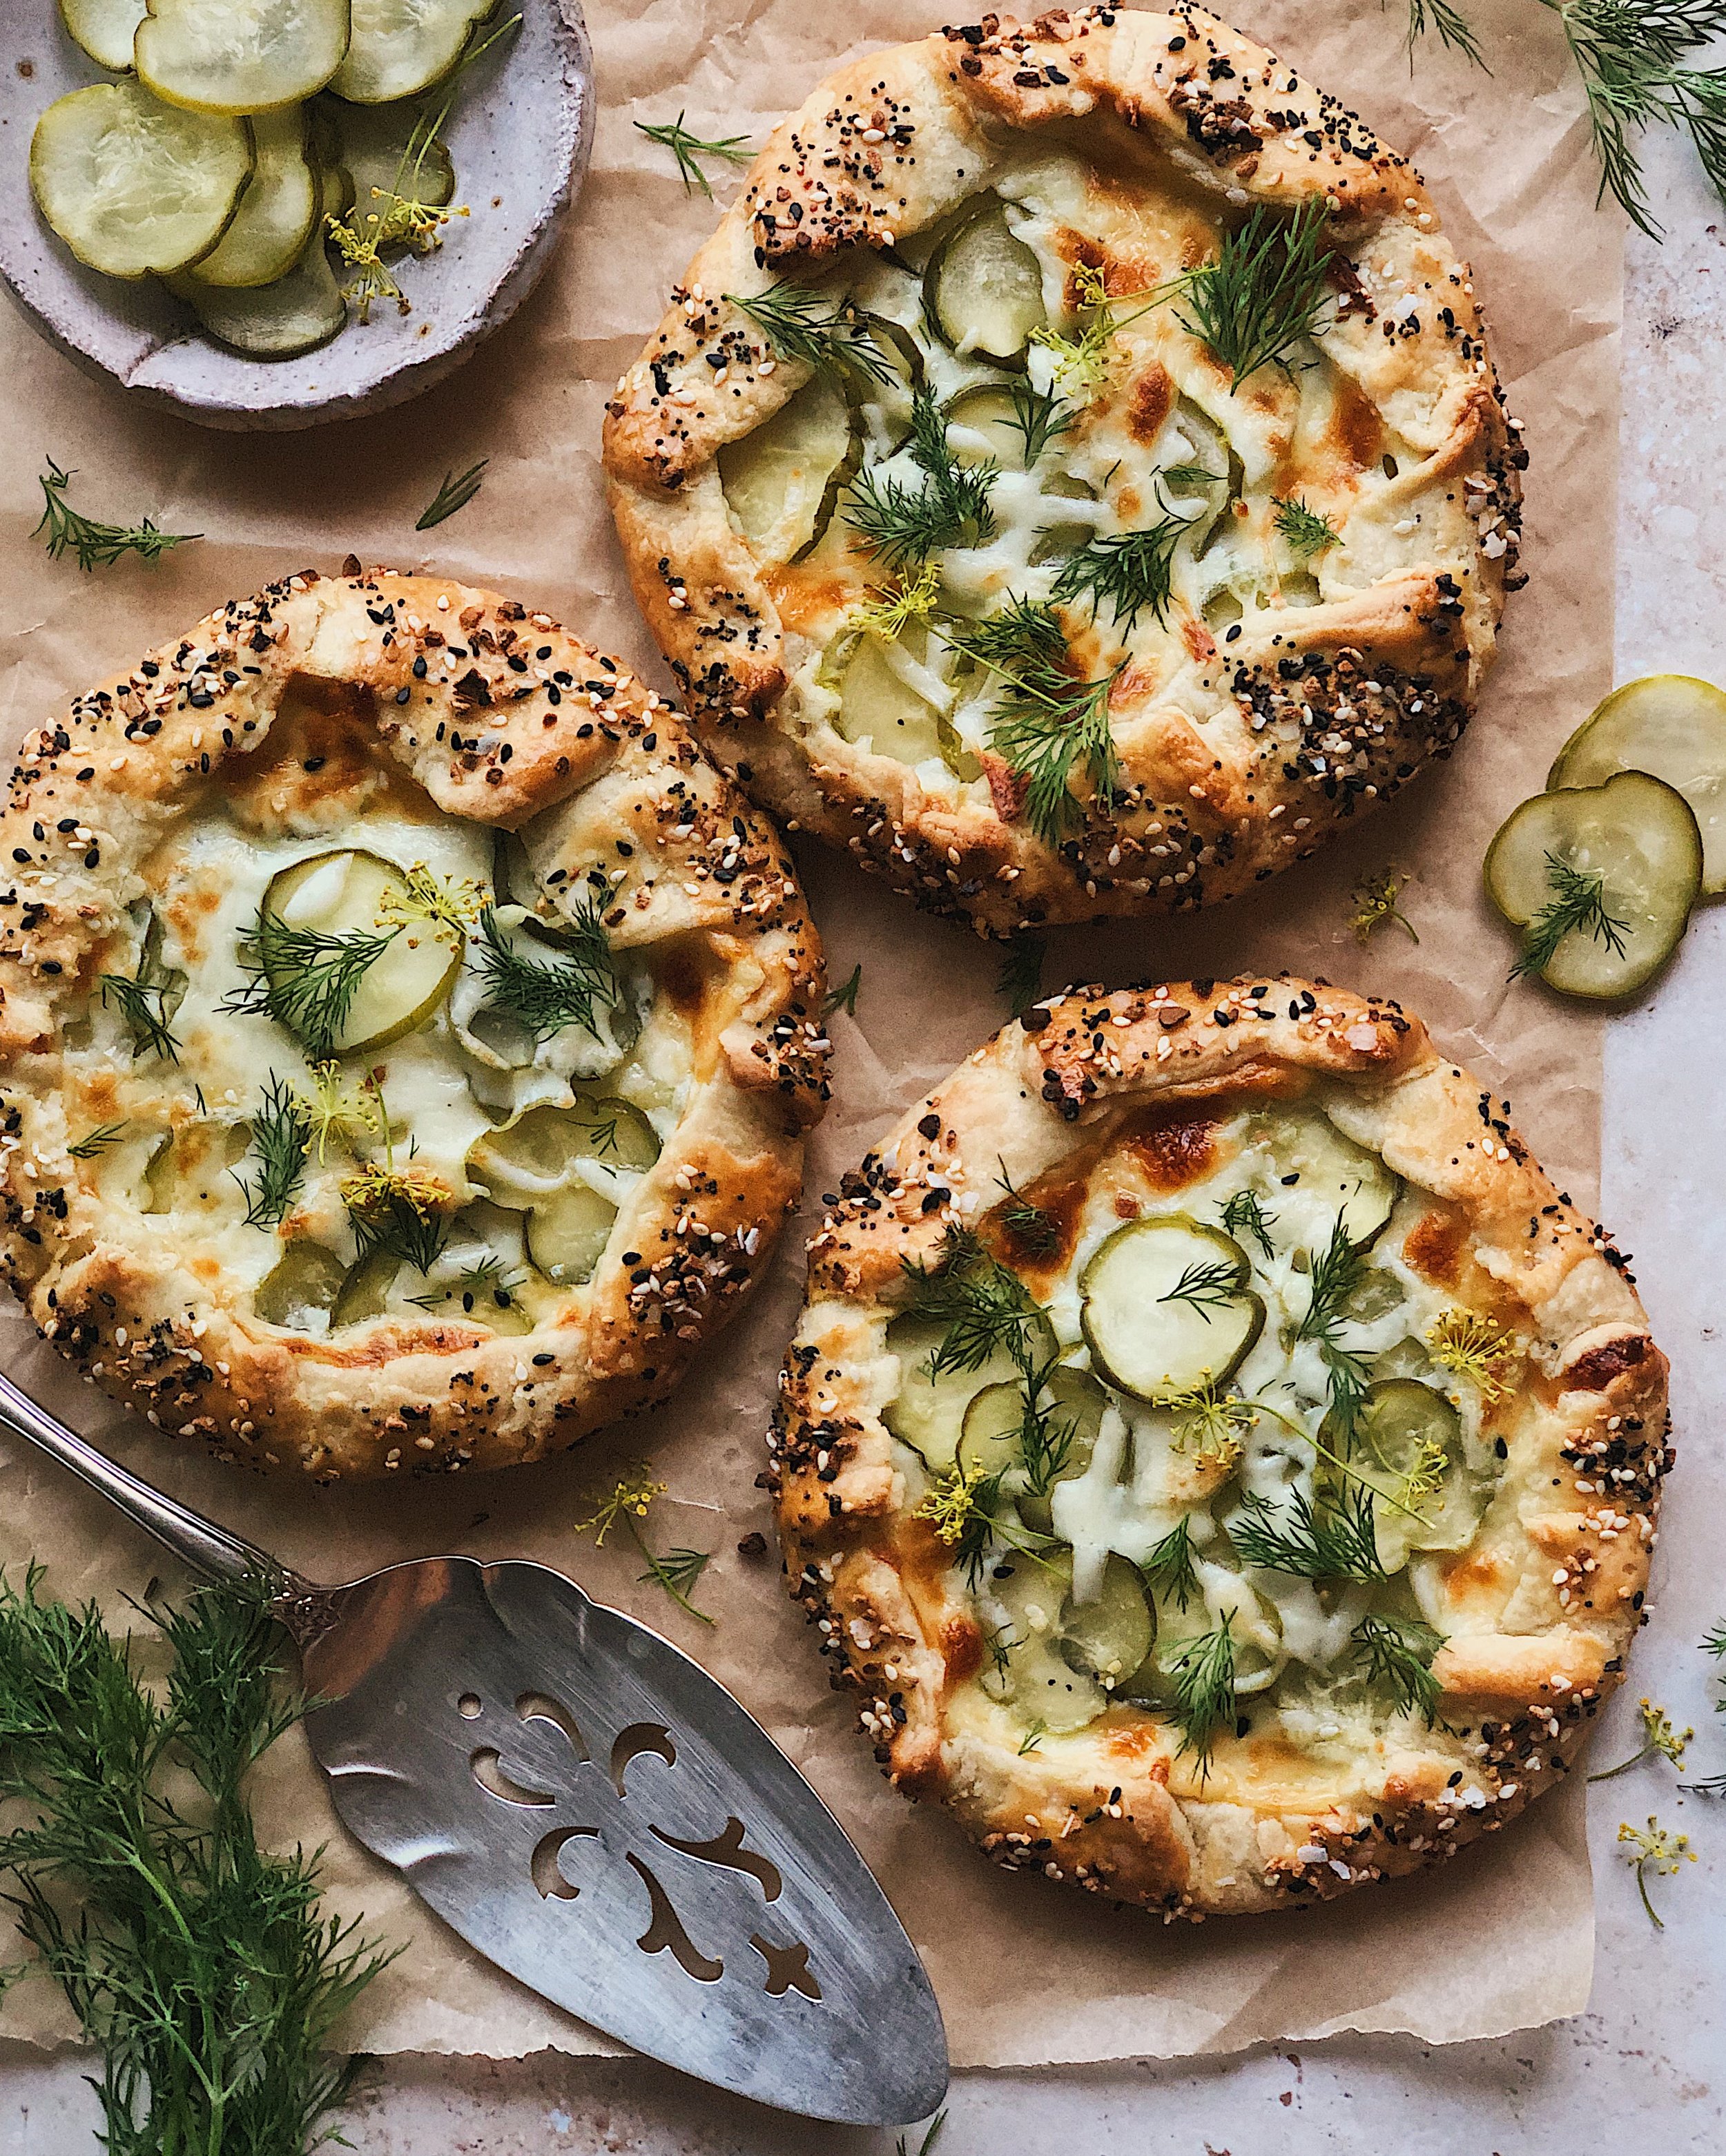
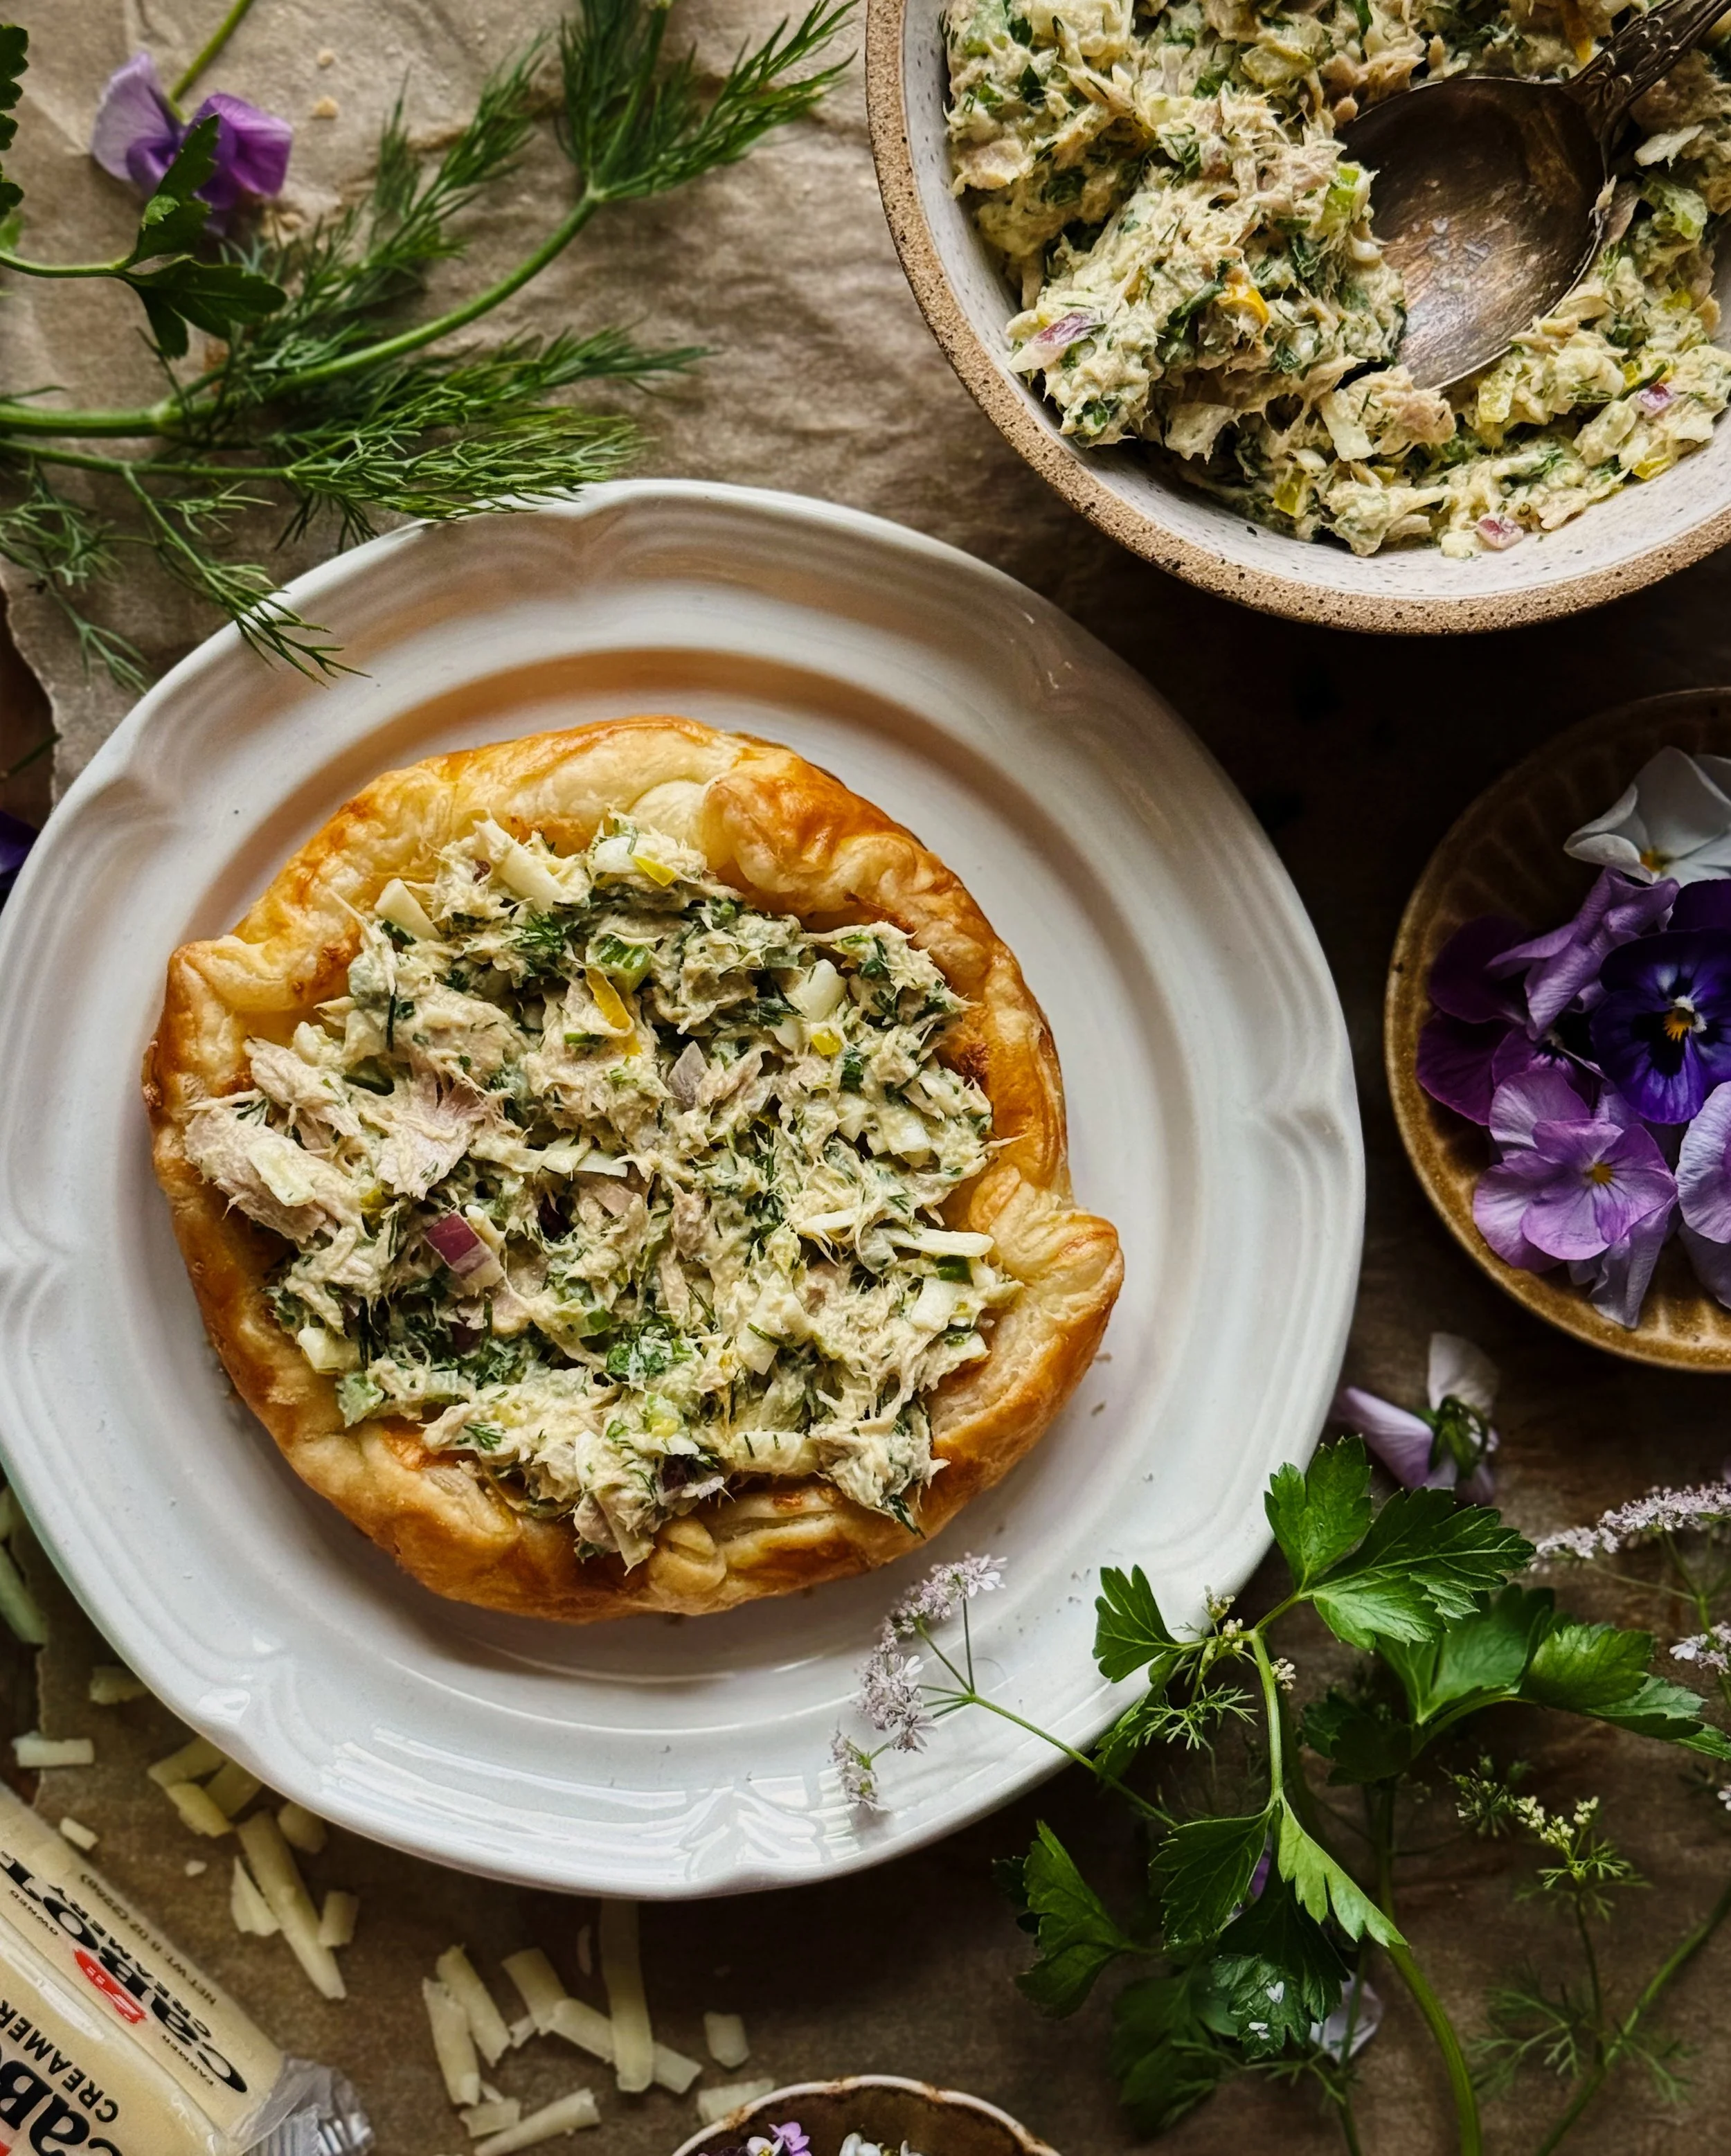
Recipe: Upside-Down Tuna Melt Tarts
/These tarts take the best parts of a tasty tuna melt—a fully-loaded tuna salad and gooey melted cheese—and rework them into a flaky galette-style pastry tart that is perfect for anything from springtime picnics to romanticizing your work-from-home lunch. I’m calling them “upside-down tuna melt tarts” because instead of the cheese being melted on top, these feature a pool of Cabot Vermont Sharp Cheddar hidden underneath the tuna!
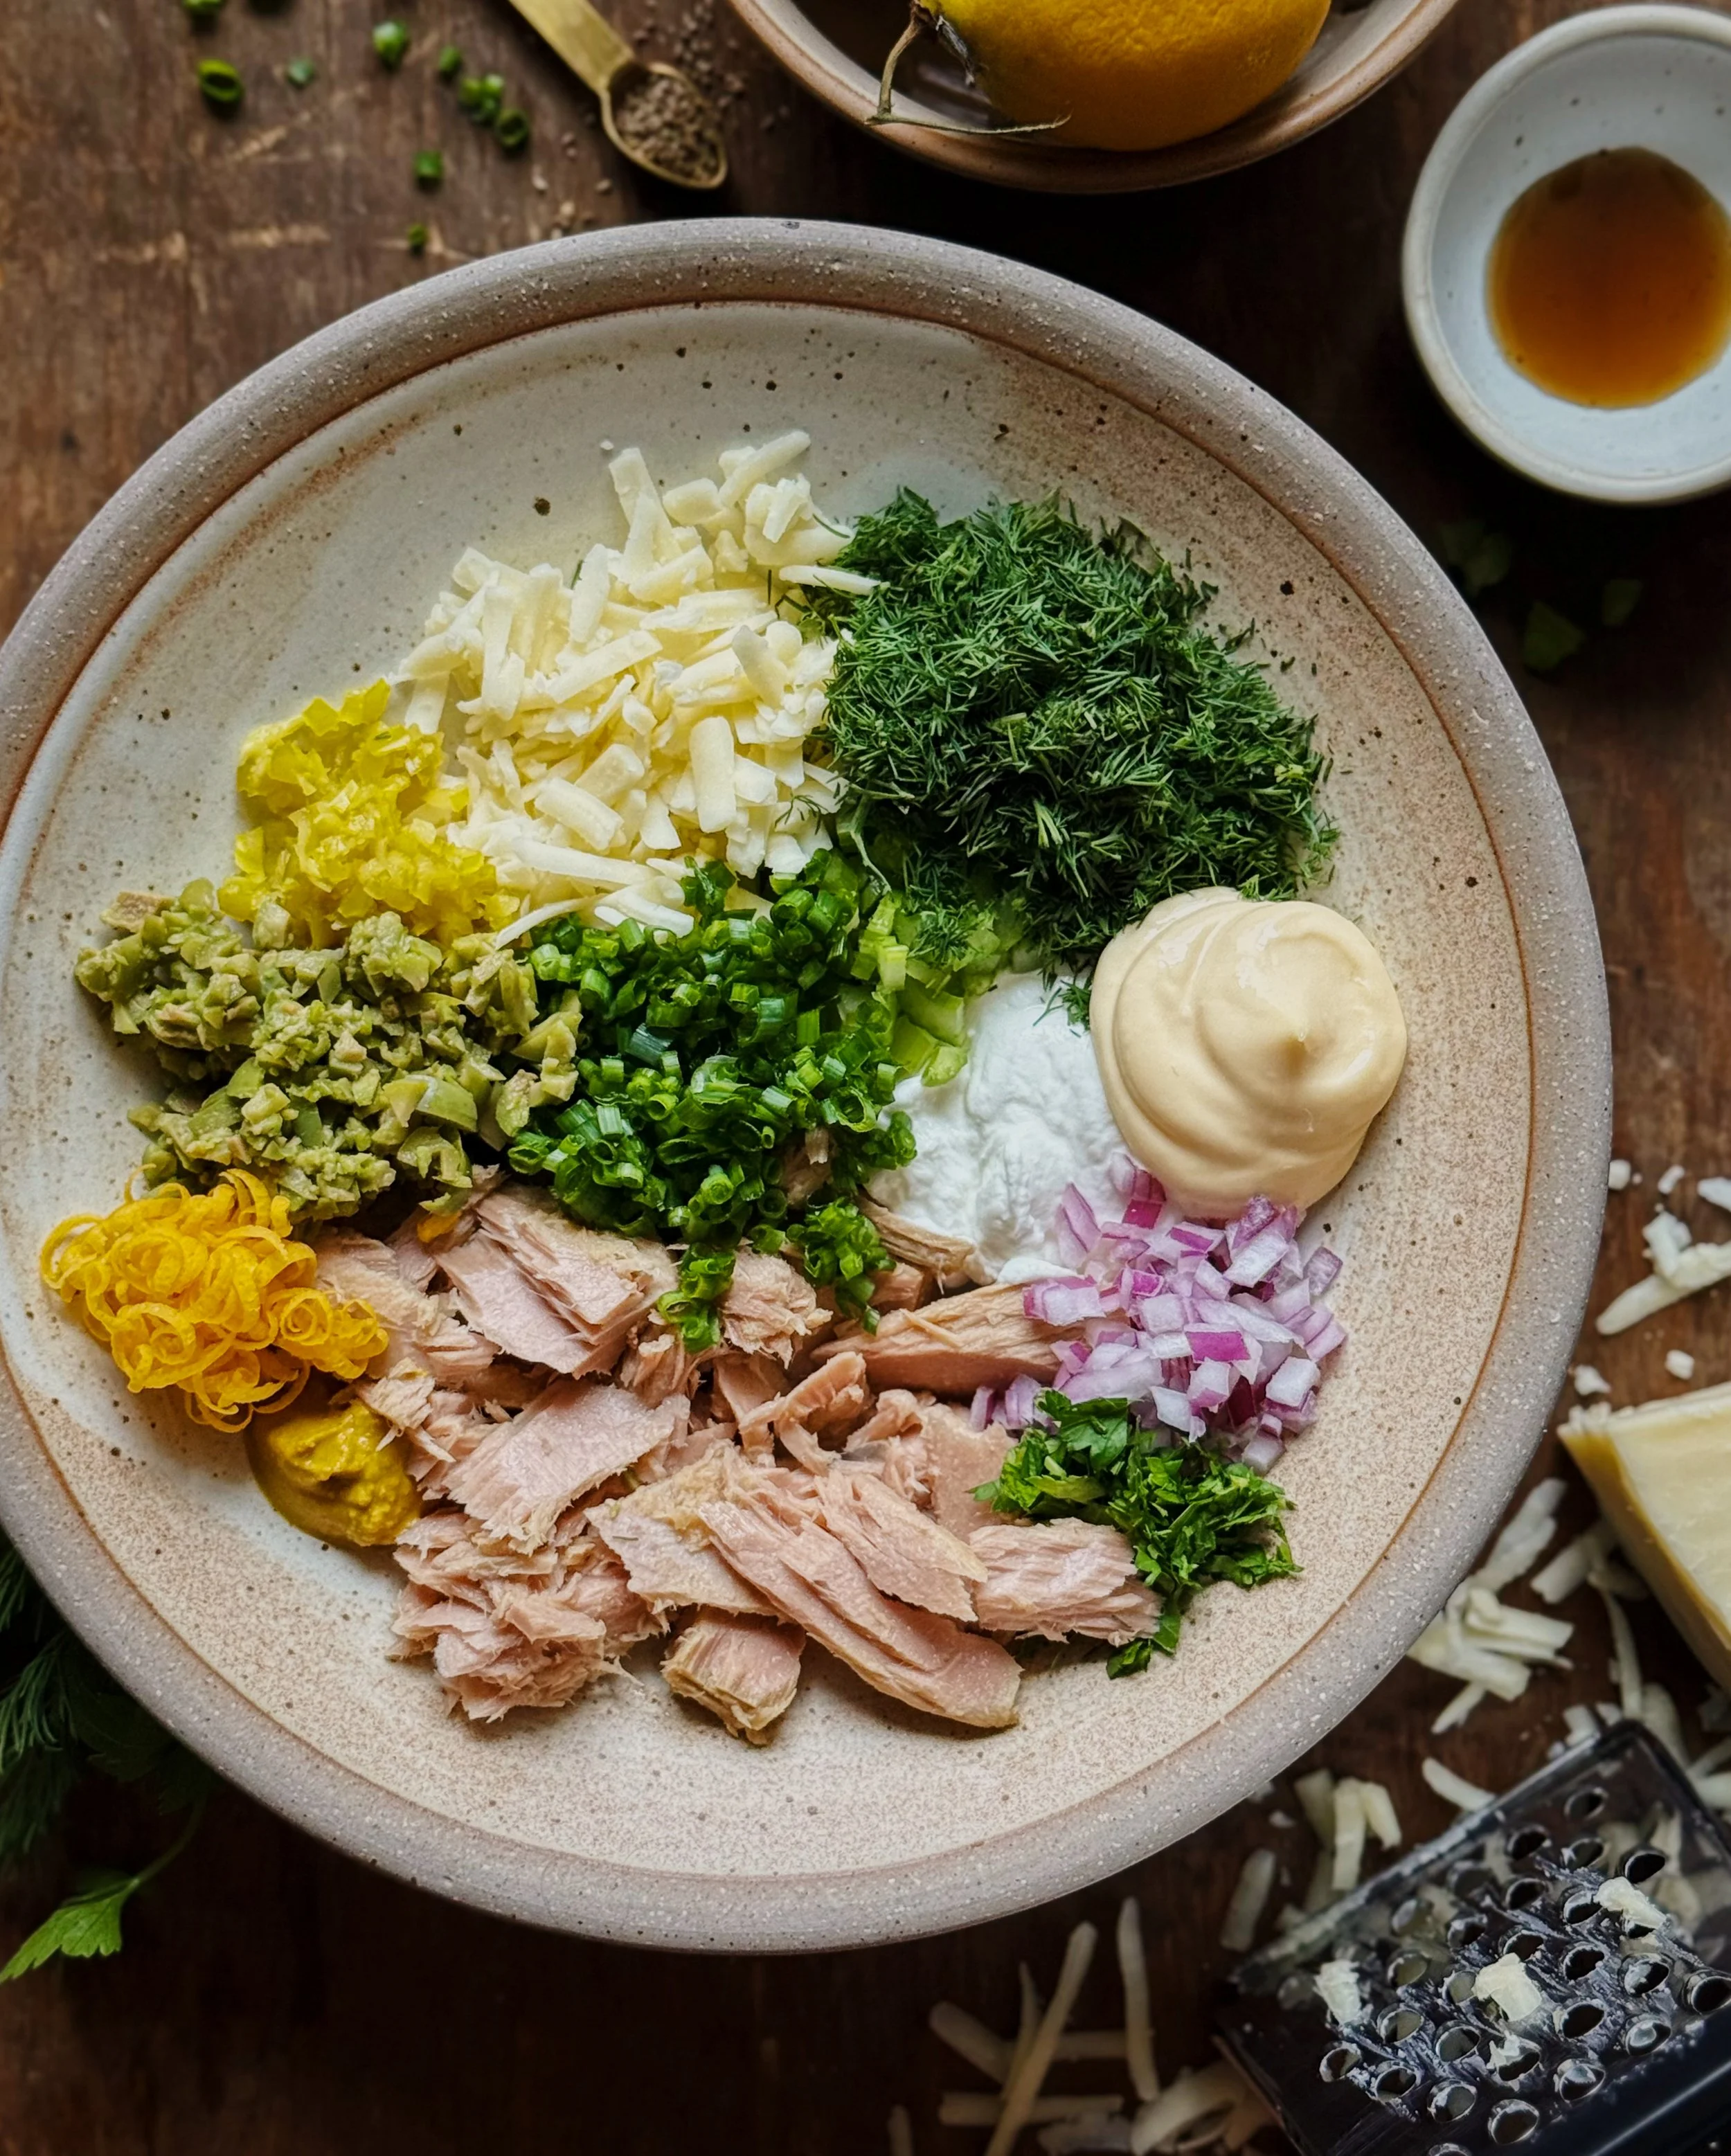
Tuna melts may have gotten their start as ultra-casual American diner fare, but I love a complex and more sophisticated tuna salad with lots of chopped briny and herby bits in the mix. So after baking the puff pastry and cheddar together for a cheesy pastry base, they’re loaded with a high-quality jarred tuna combine with mayo, spicy mustard, red onion, celery, olives, pepperoncini, lemon zest, fresh herbs, and a few other special ingredients (hint: more cheddar) to make a tuna salad that will totally level up your home cafe experience.
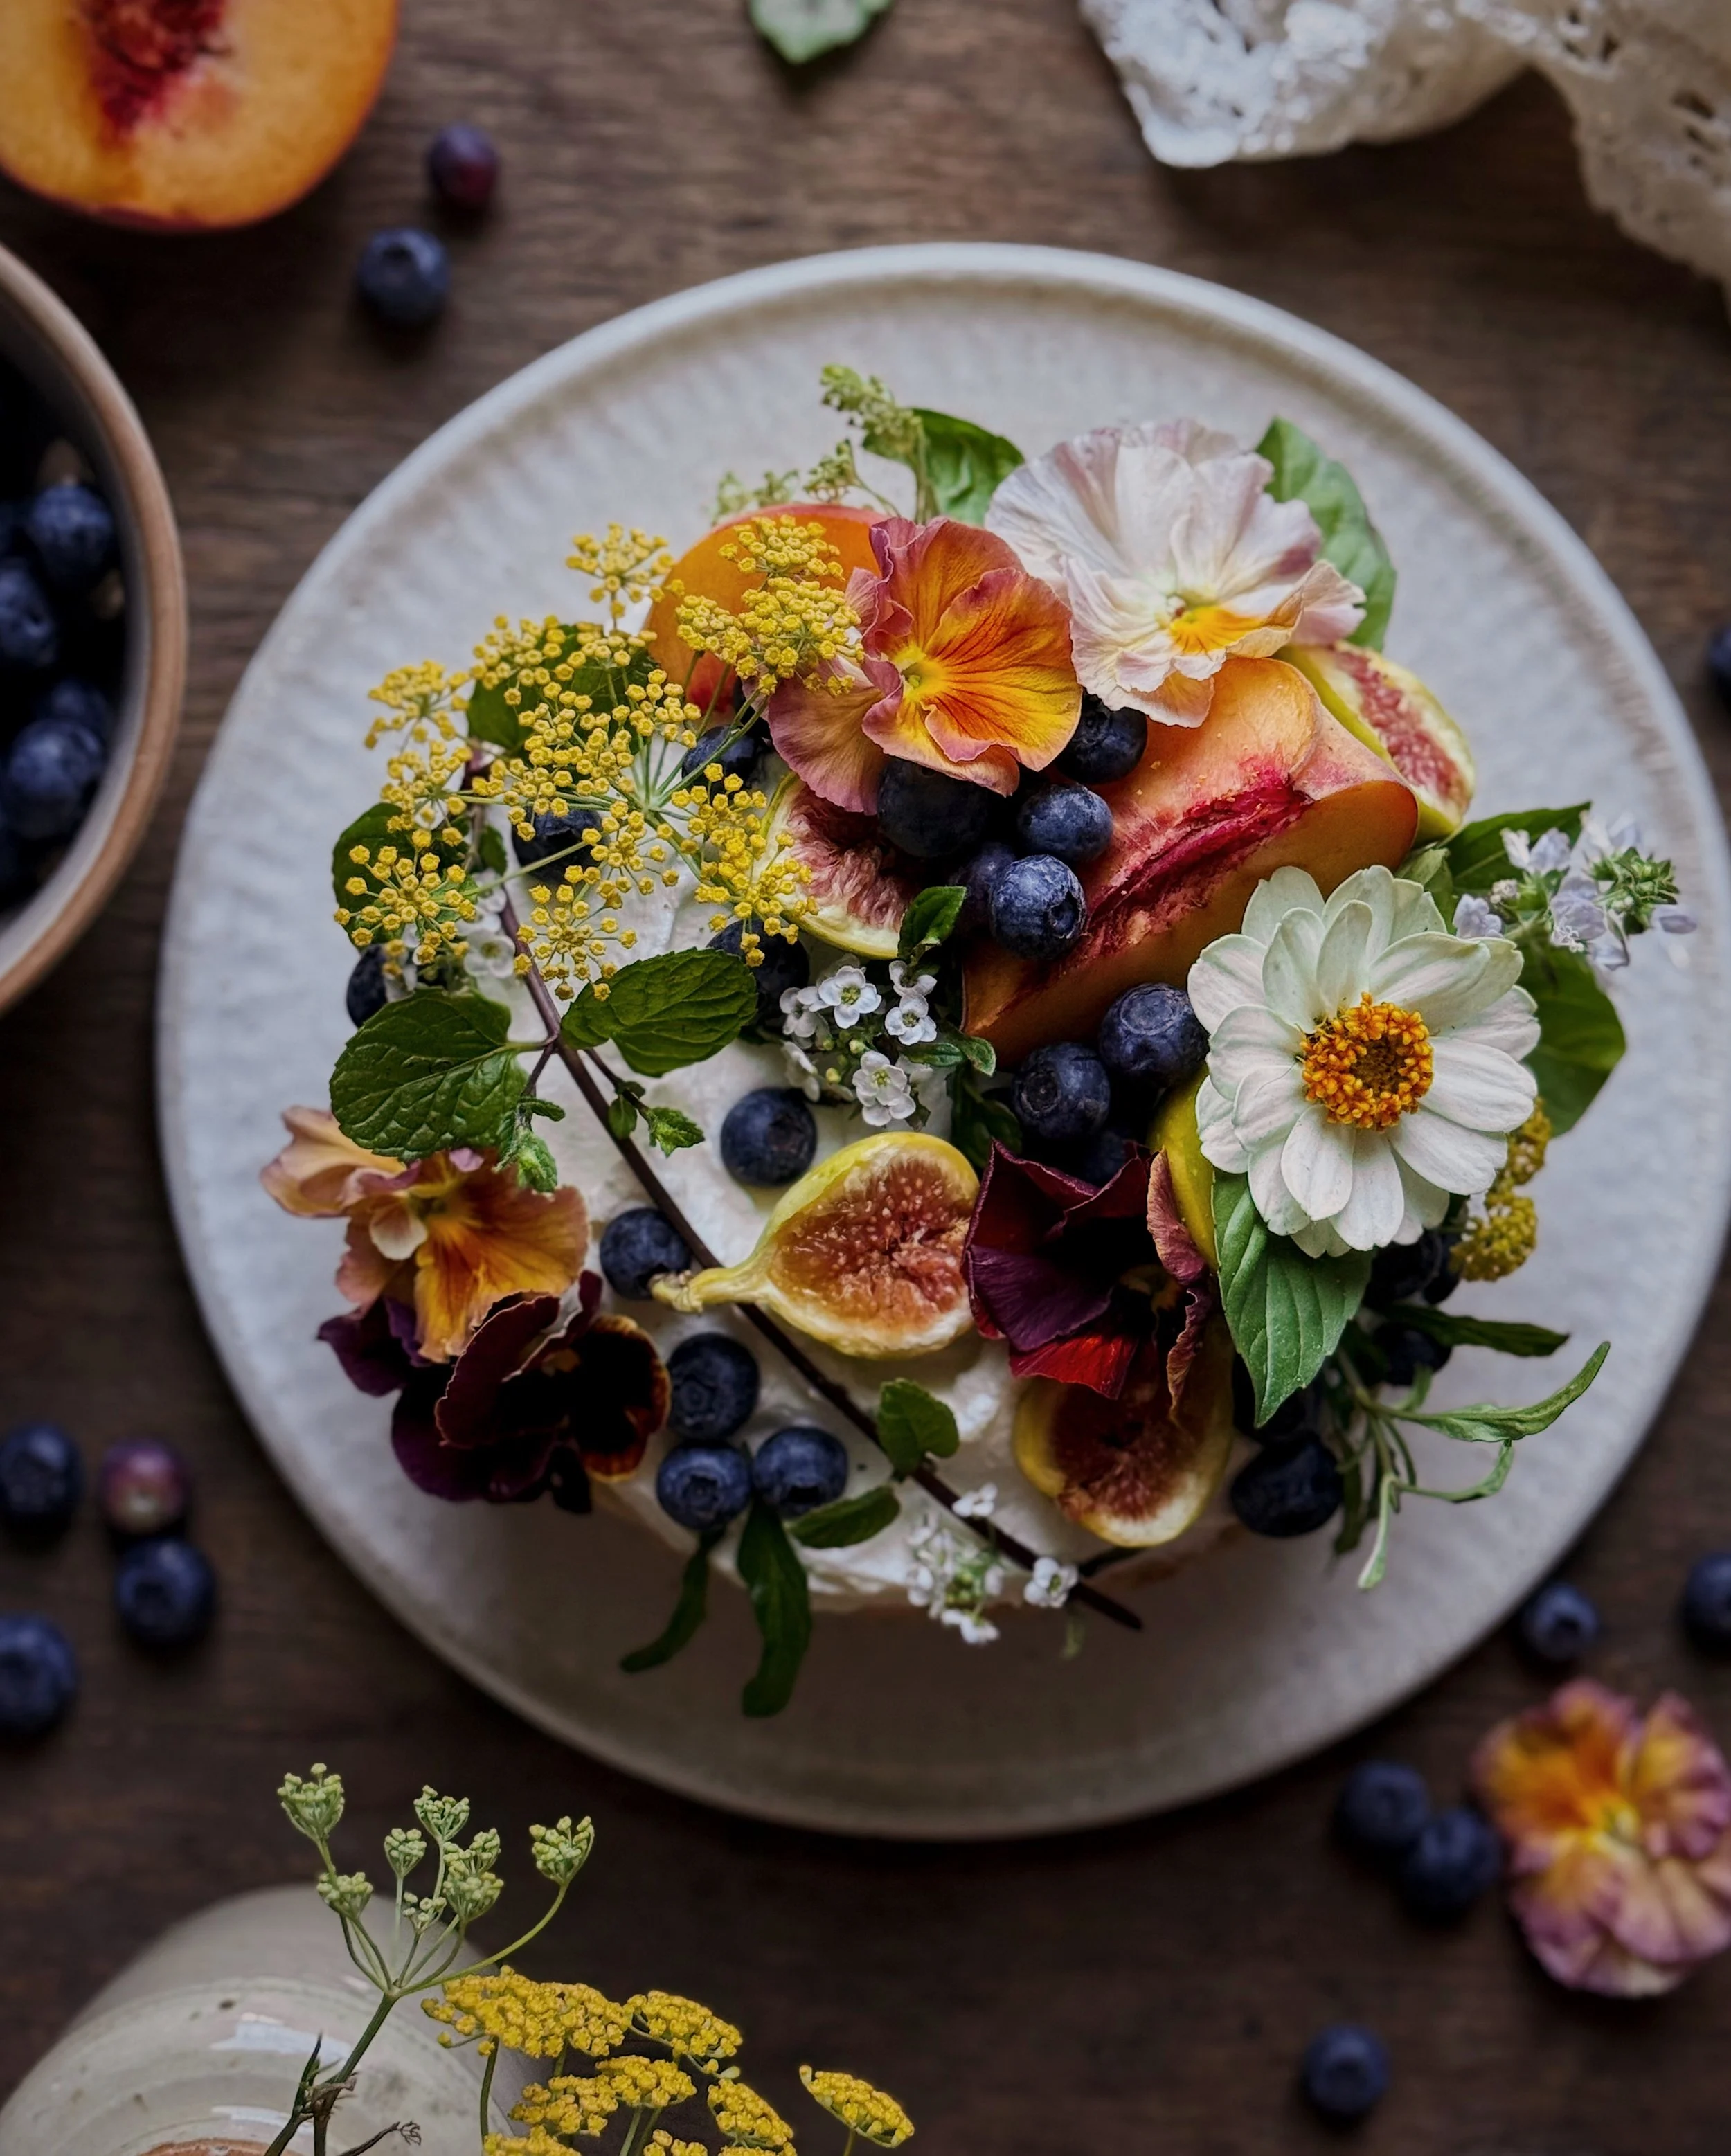
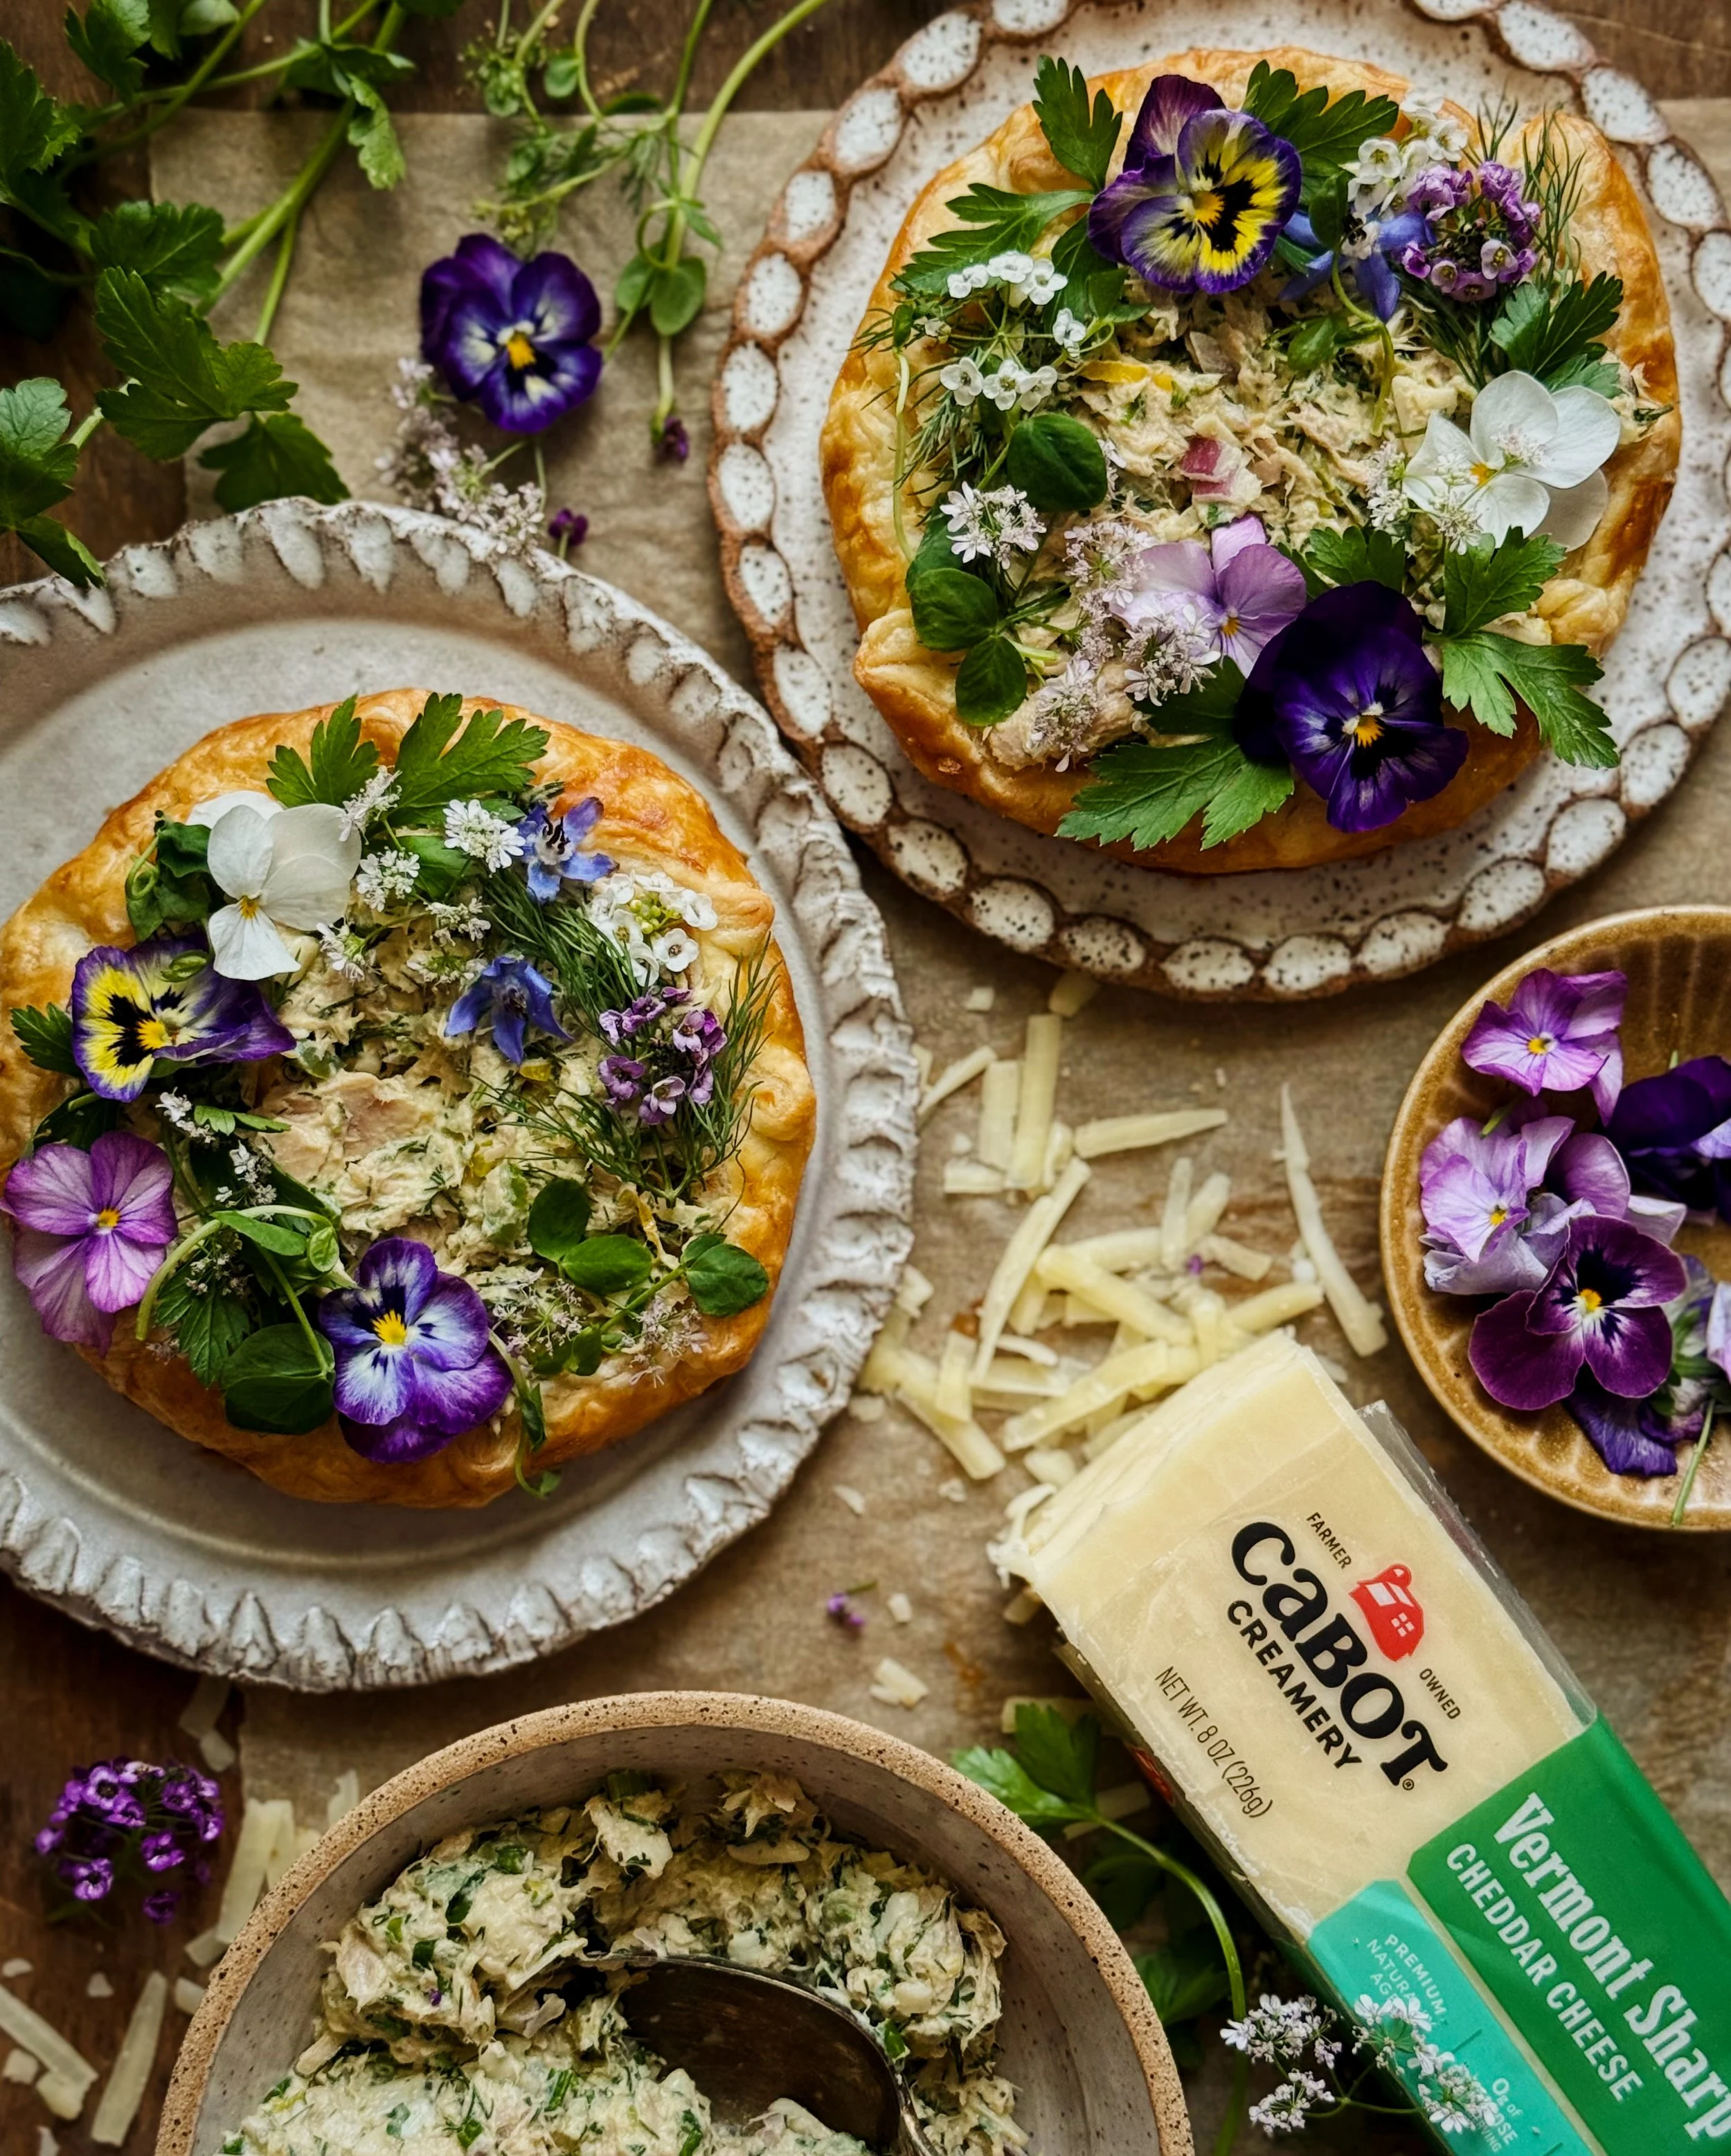
I love a picnic salad but they aren’t always the prettiest sort of salad are they? I wanted to find a way to make my awesome tuna salad look as beautiful as it tastes, and for some reason putting something into a nice little pastry gives me permission to go all out with decorating it. That's how I came up with the idea for these tarts. In the photos, you’ll see that I decorated them with parsley, dill, pea shoots, cilantro blossoms, borage, violas, and sweet alyssum. That being said, I give you full permission to skip the decorating step entirely. There are plenty of herbs in the tuna salad itself to give the mixture that fresh herbaceousness that the decorative herbs imply, and there’s nothing about the decorations that make these tarts more tuna-melt-eque. They aren’t critical.
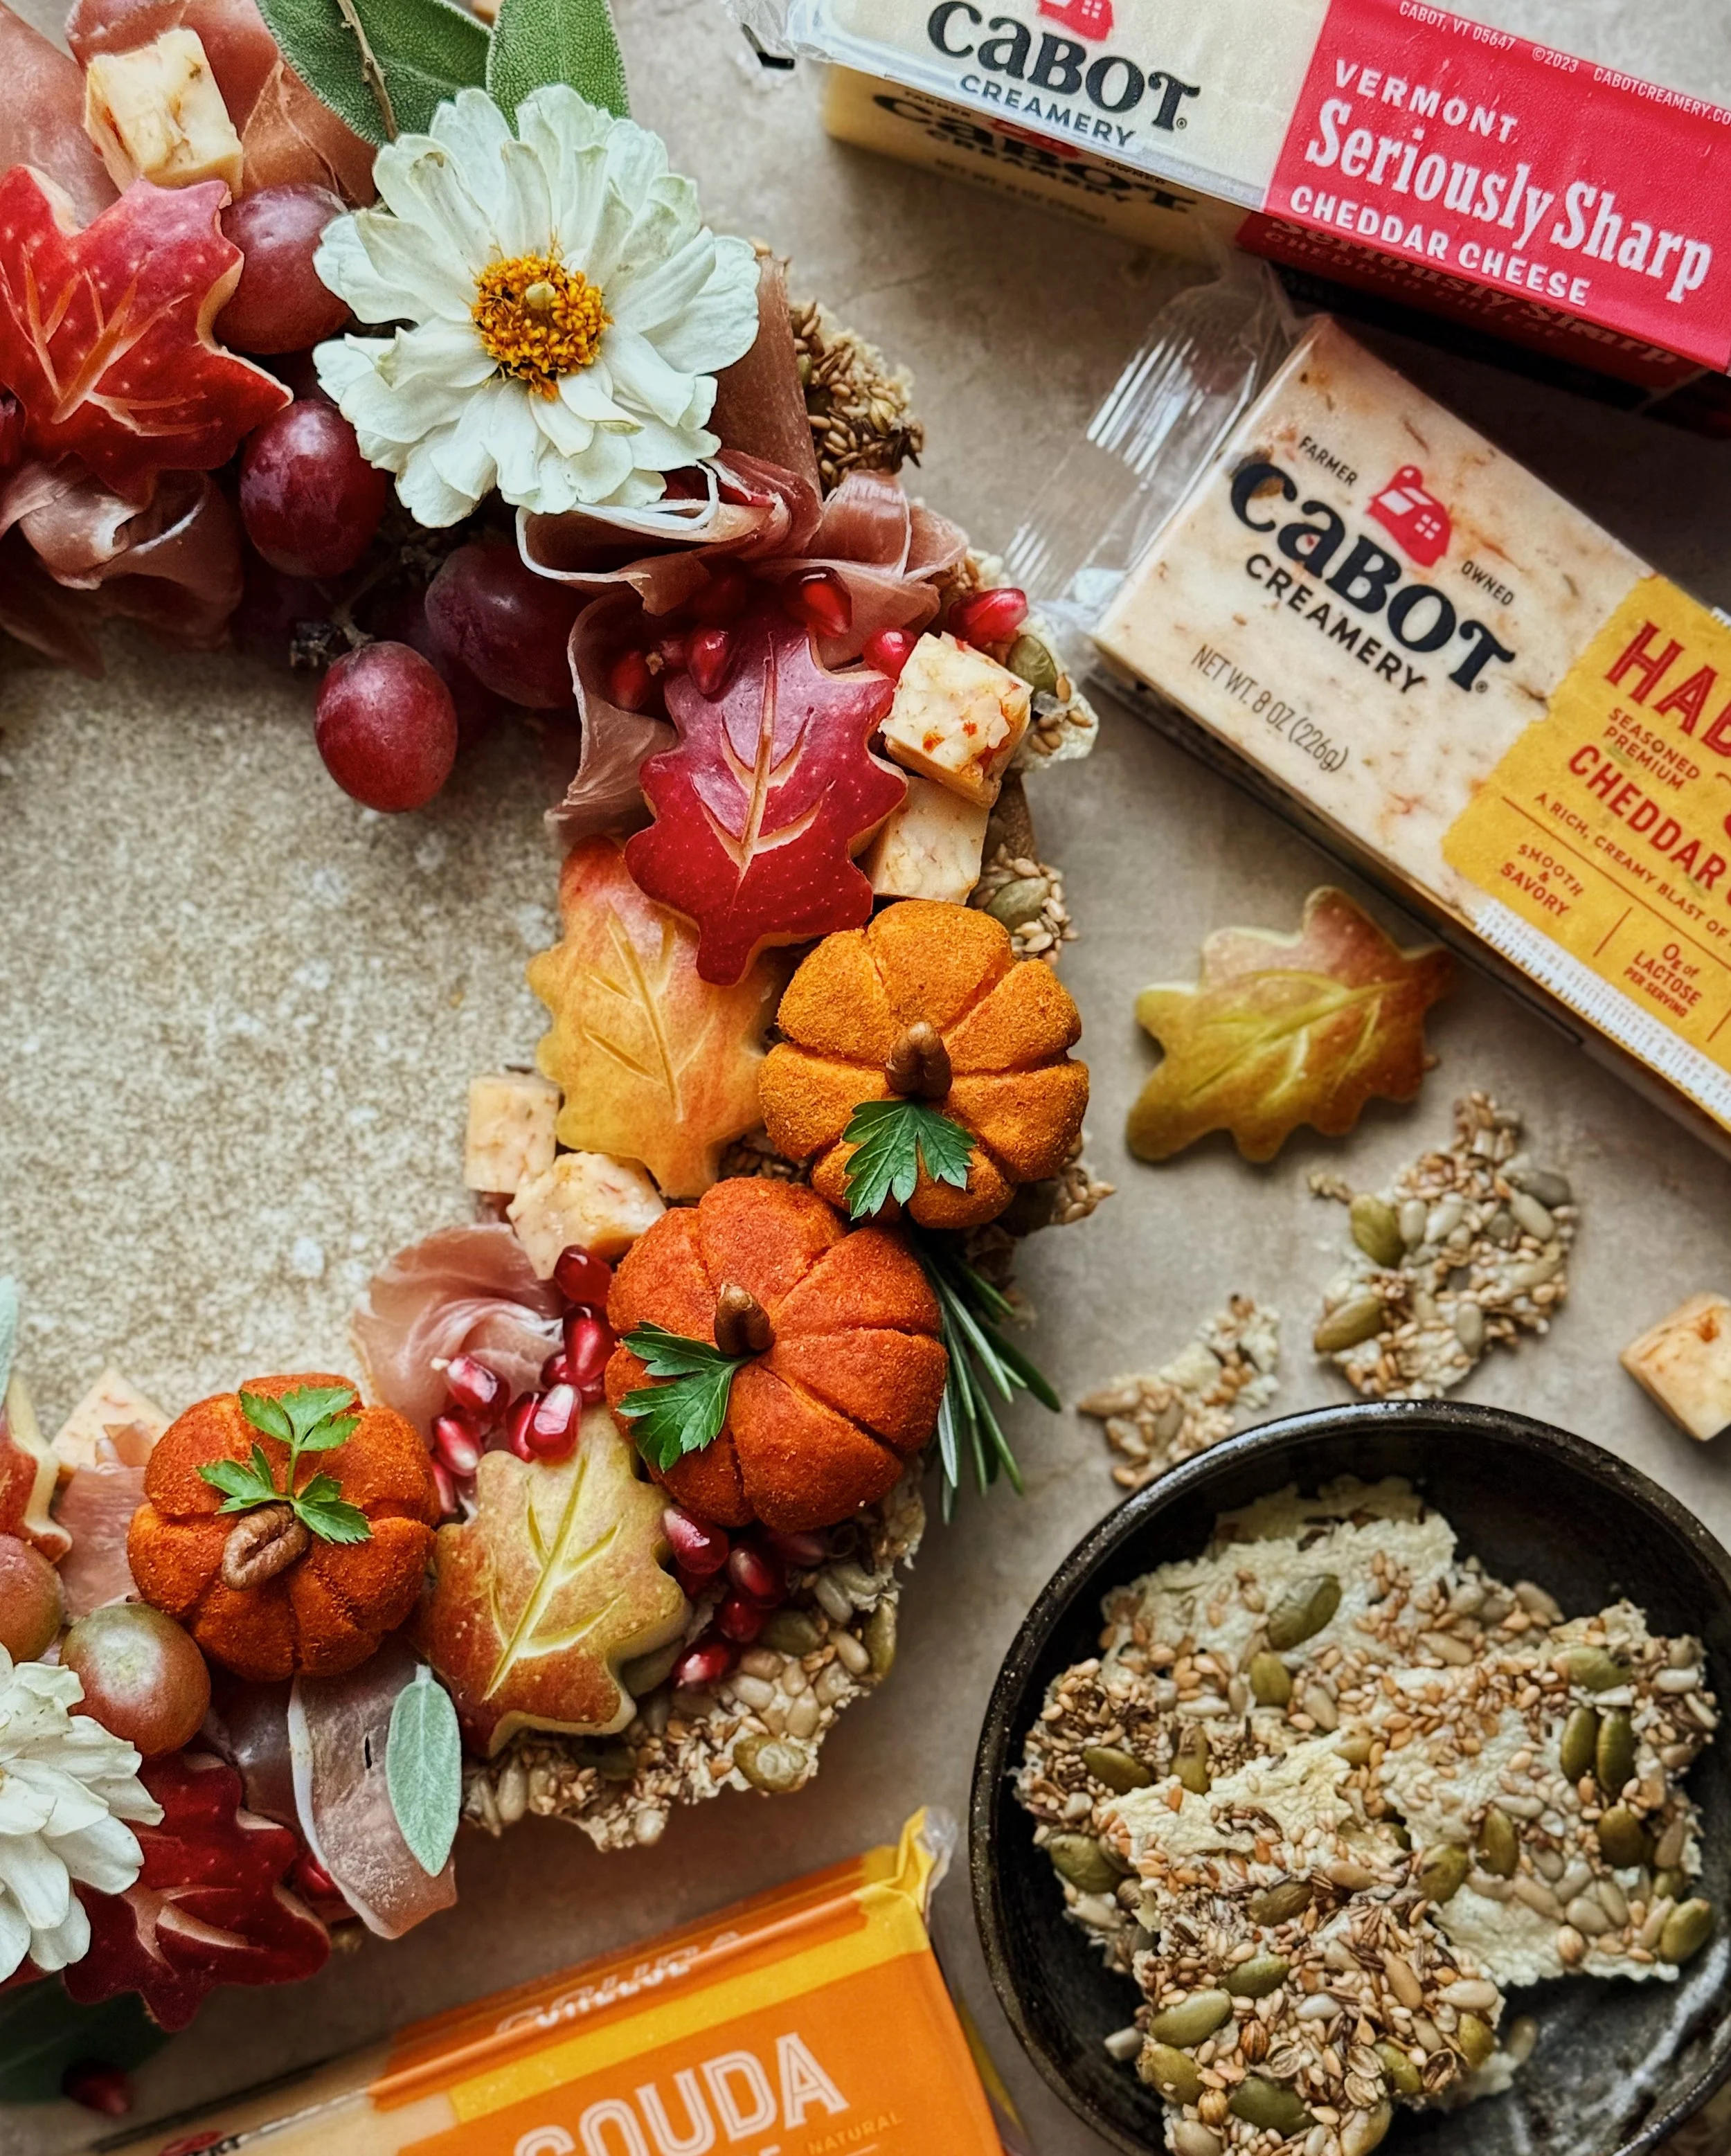
But what is critical is the quality of the cheese you are tucking underneath that layer of tuna salad, and I always have Cabot Creamery’s cheddars stocked in my fridge for whenever I want to experiment with a new idea for a cheesy pastry. Cabot is a co-operative owned by farm families throughout New England & New York and 100% of profits go back to the farmers. Thank you to Cabot Creamery for partnering with me on this recipe and continuing to encourage my crazy mashups concepts!
Notes about what you need to make the cheesy tart bases
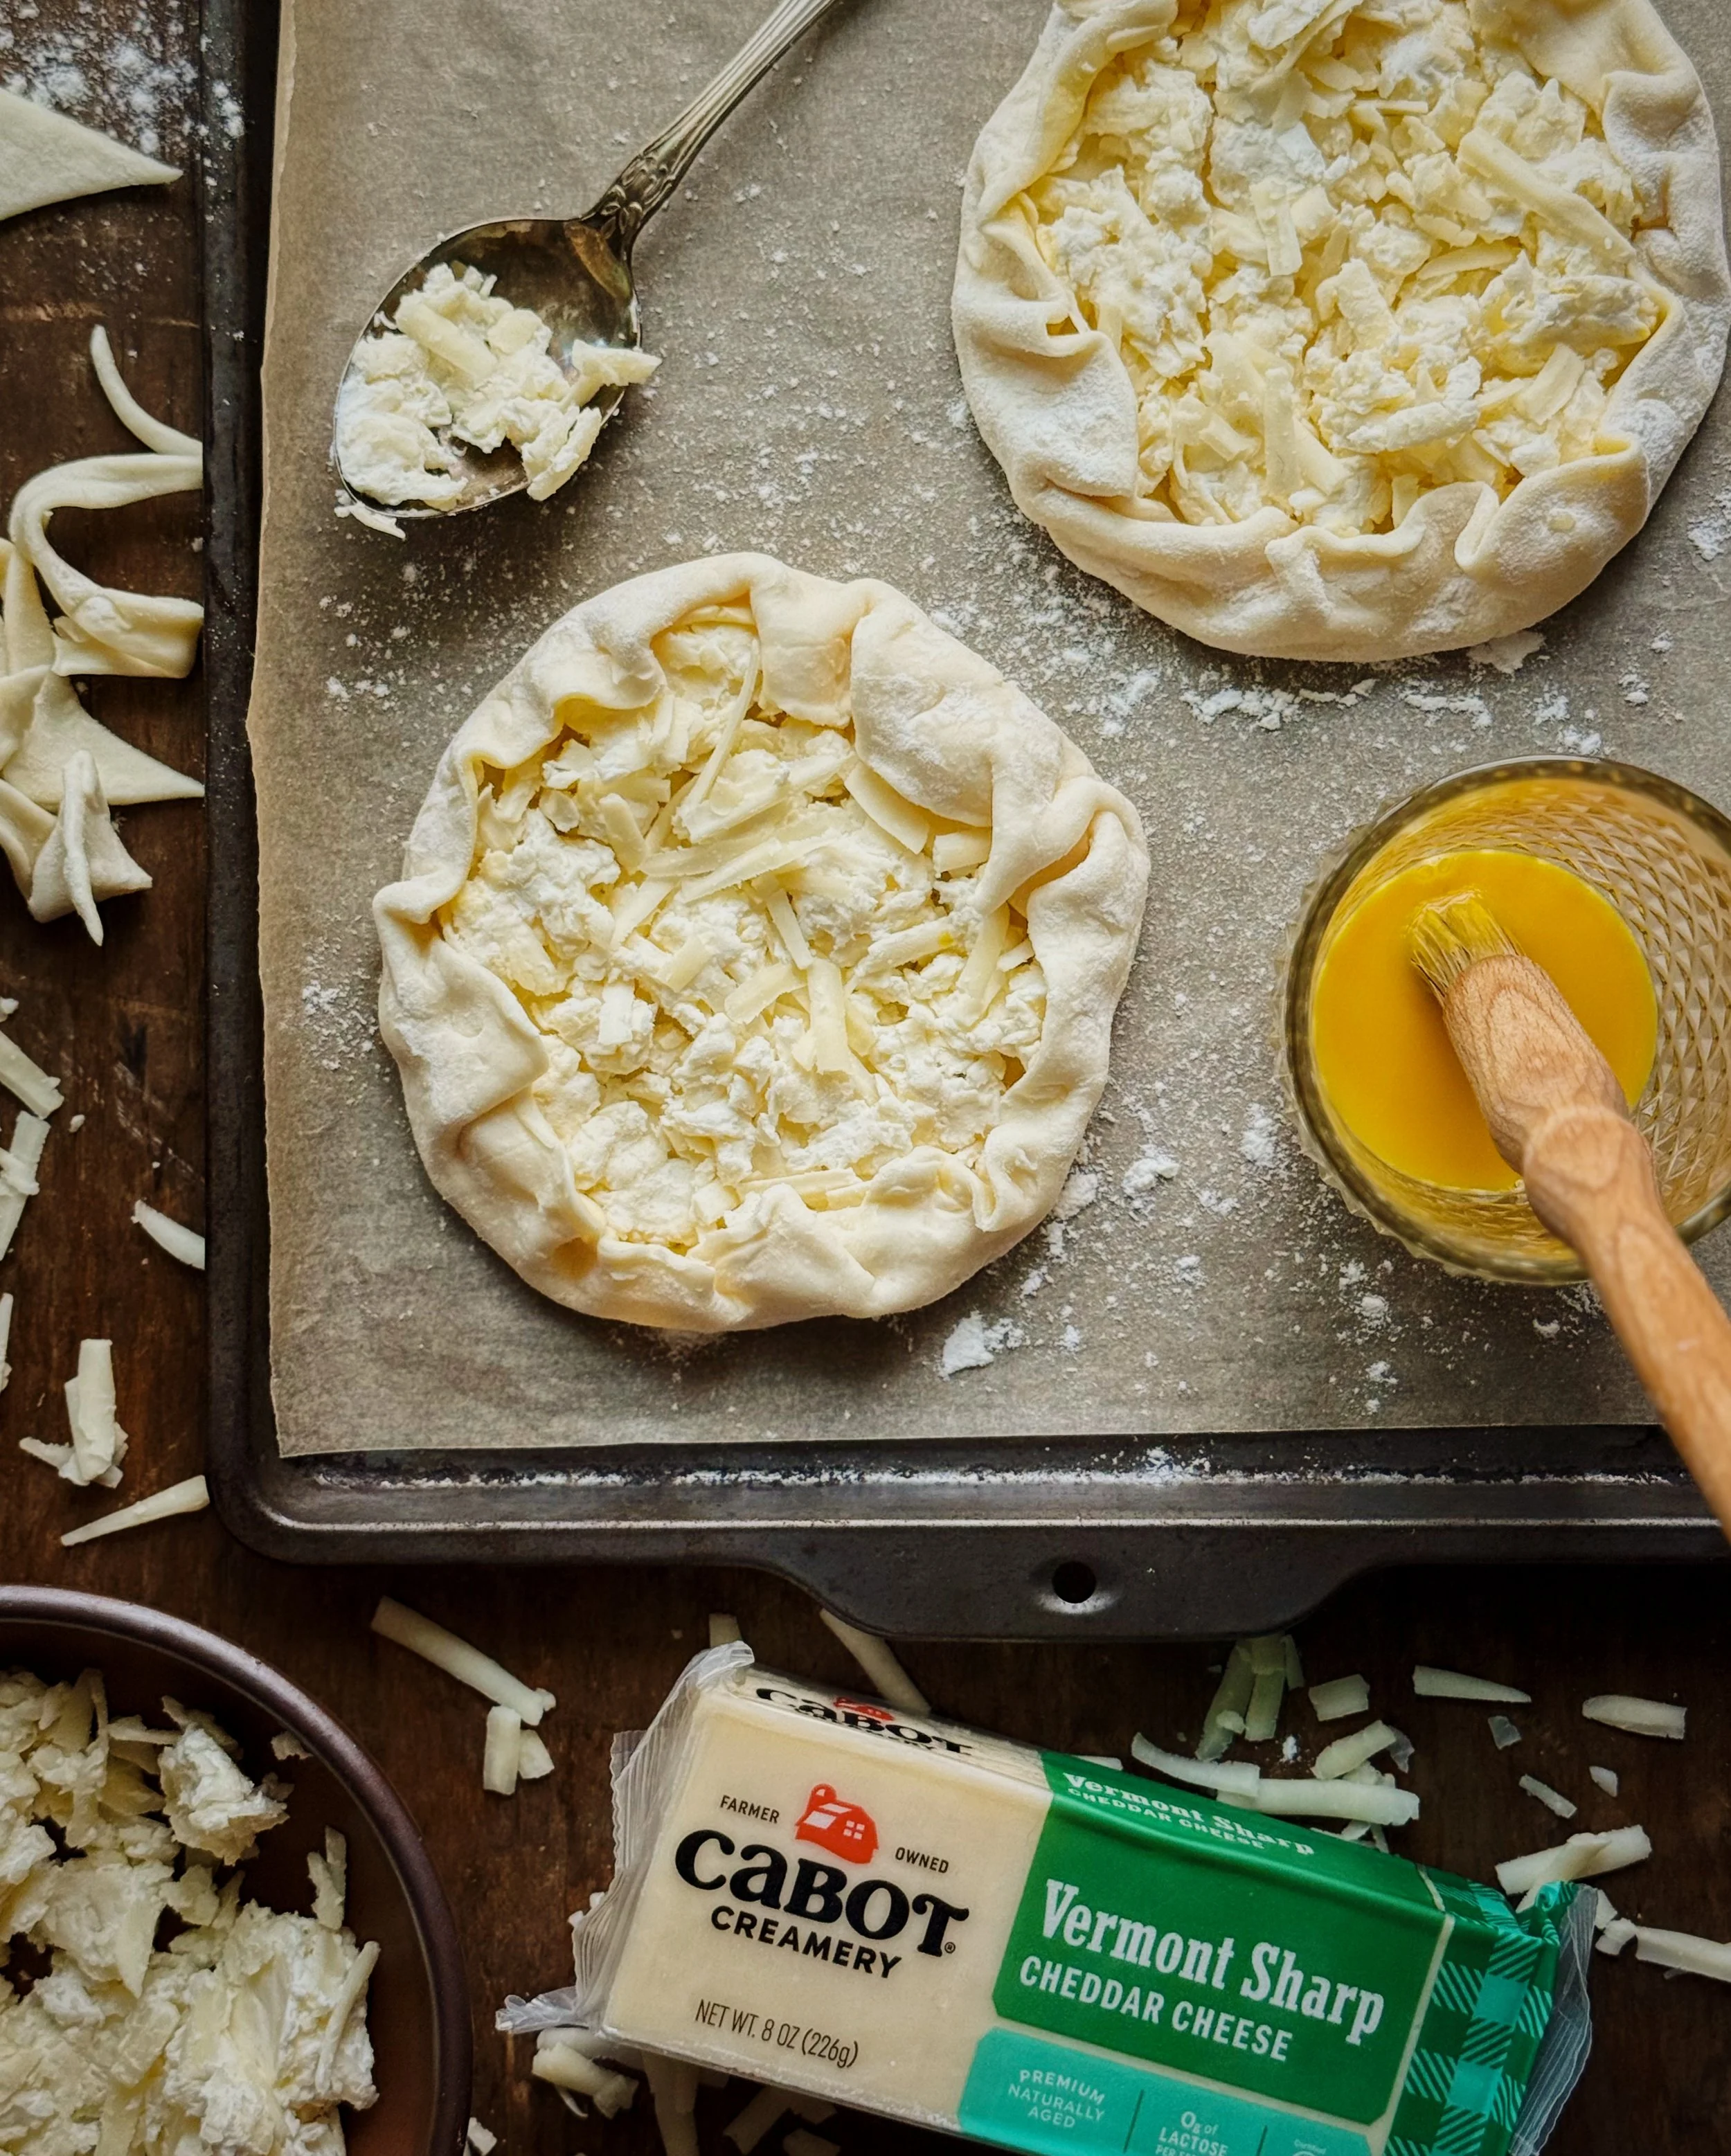
Puff Pastry: This recipe is meant to be easy and playful, so I used frozen, ready-made, pre-rolled puff pastry for the pastry component of these tarts. When cutting puff pastry dough, be sure to make clean downward cuts; dragging your knife can seal the layers together and prevent them from puffing up nicely when baked. I used puff pastry that came as a 12.5” x 10” sheet, which I divided into quarters to make 4 tarts; note that if yours comes in a significantly different size, that you may end up with too much or too little cheese filling and tuna salad to fit. Luckily, this recipe is easy and flexible, so you can fill up the tarts with the amounts that look right for their size.
Sharp Cheddar: I chose Cabot Vermont Sharp Cheddar for my upside-down tuna melt tarts because of its creamy texture and a nice buttery tang, making it perfect for this recipe and the classic diner sandwich that inspired it. I think it has the perfect amount of big bold sharpness to stand up alongside the strong tuna salad flavors.
Cream Cheese: Combining the freshly-grated cheddar with a little bit of cream cheese is the key to maintaining the “melty” texture for the cheesy center of these tarts after they are baked, and even after they are cooled! The ratio of cheddar to cream cheese in this recipe prevents the baked cheddar from forming a crust while still serving as an adequate enough barrier to prevent the puff pastry from getting soggy from the tuna salad.
Notes about what you need to make the tuna salad
Canned, Tinned, or Jarred Tuna: Obviously, the quality of the tuna you use will have a significant impact on the tastiness and texture of your tuna salad filling for this recipe. I always use a high-quality jarred yellowfin tuna packed in olive oil to make my tuna salads; the tuna comes in large chunks so I can break them down myself, ensuring that the mixture is not overly mushy. You can use your favorite brand but be sure to use one that is packed in olive oil, which will automatically have a richer flavor and texture than those packed in water. (If you really must use a tuna packed in water, you may wish to reduce the amount of Greek yogurt to prevent the tuna salad from being too wet.)
Sharp Cheddar: I could not resist adding a bit of grated Cabot Vermont Sharp Cheddar into my tuna salad as well! There’s not enough to be really able to pick it out in the mixture but it will add an undertone of complexity to the creamy notes in the tuna salad.
Mayonnaise: To me, it doesn’t taste like a tuna melt without some mayo. I used Japanese-style mayonnaise because I prefer the sweeter flavor and I think it tastes less oily. But you can use the mayo that you prefer for this one.
Greek yogurt: We need enough creamy ingredients to hold the whole mixture together but I find too much mayo in any picnic salad can be overwhelming. Doing a combo of mayo and Greek yogurt is a better balance.
Hot English Mustard: This helps cut through the creamy flavors.
Red Onion: A little bite from raw onion keeps a salad like this feeling fresh and tasting complex.
Celery: For some crunch and classic flavor in a good tuna salad.
Celery Seeds: I find that these have a bold celery flavor but also much more nutty and complex. This surprise spice is one of the ingredients that takes this tuna salad beyond the classic or familiar and into the territory of something more special.
Mild Green Olives and Pepperoncini: I tested a few different briny mix-ins before coming to the conclusion that mild green olives and pepperoncini were the best options to include. They bring buttriness and bright tang respectively, and do well to balance out the strong tinned fish flavor from the tuna.
Meyer Lemon Zest and Juice: A bright lemon flavor makes this tuna salad feel way more fresh and modern than the retro mayo-heavy classic style. I love the distinctly sweeter, more floral aroma of a meyer lemon but if you can’t find one, a regular lemon will do just fine.
Fish Sauce: I will sub in fish sauce for salt in nearly any situation that I can, and this is a perfect example of where using this unexpected Asian pantry staple can really thrive in its job of adding intense savoriness and umami without adding any unpleasant fishiness. This will really make the tuna salad unlike any other you’ve had before.
Chives, Dill, and Parsley: I found that this combination of herbs brought the fresh spring garden flavors that I wanted this salad to have. They put the “salad” in the tuna salad but since they hold up well in the moist mixture, the salad keeps well if you want to spread it out over a couple of lunches or pack it up for a picnic.
Assembling and enjoying the tarts
Obviously these tarts are going to be at their peak when the pastry is still warm from the oven and the cheese mixture is still bubbly. However, I really wanted to develop a recipe that could become an exciting weekday home cafe treat, even as leftovers, as well as something you could bring on a picnic. Therefore, the tuna salad mixture should not have any excess watery liquid to it. When piled directly on top of the baked cheese mixture, the cheddar and cream cheese combo acts as a barrier to prevent the puff pastry from getting too soggy. If you do find that your tuna salad has turned out wet rather than moist, this may be because your individual ingredients were not fully drained before incorporating them into the salad; if this is the case, be sure to drain away any excess liquid before assembling the tarts.
I found that the fully assembled tarts held up quite well and tasted just as good the next day after a little reheat in the toaster oven. This actually provided a new great experience with the tuna salad getting warmed up too. The only things that didn’t look so fresh were the herbs and especially the flowers that were used for decoration, so if you plan to keep these for one or two nights, hold off until the day of eating to add those pretty finishing touches.
If planning to take this on a same-day picnic, you could transport them fully assembled if you have the right vessel, or you could keep the tuna salad in a separate container from the cheesy pastry bases. The cheese layer will obviously no longer be bubbly after these have cooled but it will have a soft cheese spread texture still reminiscent of “melted” cheese, but colder.
I hope these tuna salad tarts, with their secret cheesiness, become a go-to lunch in your household!
How to Make Upside-Down Tuna Melt Tarts
Ingredients for the Tuna Salad
6–7 oz tuna packed in olive oil, drained
1 oz Cabot Vermont Sharp Cheddar, grated
1 tbsp red onion, finely diced
1 tbsp celery, finely diced
8 mild green olives, drained and finely chopped
1 tbsp peperoncini, drained and finely chopped
1 tbsp meyer lemon zest
3 tbsp meyer lemon juice
3 tbsp Greek yogurt
3 tbsp Japanese mayo
2 tsp hot English mustard
1/8 tsp celery seed
1/8 tsp cracked black pepper
1 tsp fish sauce, or to taste
3 tbsp chives, finely chopped
3 tbsp dill, chopped
1 tbsp parsley, finely chopped
Ingredients for the Tarts
1 sheet frozen puff pastry, thawed according to package instructions
Flour, for dusting
6 oz Cabot Vermont Sharp Cheddar, grated
2 oz Cabot Cream Cheese, softened at room temp
prepared tuna salad
1 egg yolk, beaten (for eggwash)
1 tsp water (for eggwash)
Ingredients for Decorating (Optional)
dill
parsley
pea shoots
edible flowers (such as cilantro blossoms, borage, violas, and sweet alyssum)
Procedure
Gently combine all the tuna salad ingredients together except for the dill and parsley. Refrigerate and allow the flavors of the ingredients to meld together while preparing the tart bases.
Mix together the cream cheese and grated sharp cheddar for the tarts and set aside.
Beat together the egg yolk and water to make the eggwash. Set aside.
Carefully unroll or unfold the thawed puff pastry sheet over a well-floured surface. Use a pizza cutter, pasta cutter, or sharp knife to cut the sheet into 4 equal pieces, taking care to slice down cleanly and not drag the cutting implement; this will ensure that the pastry edges can puff up.
For each piece of pastry dough, press down with your fingertips to flatten and stretch the area where the filling will be placed, leaving about a 3/4” border. Trim off the corners to make a more rounded shape (does not have to be perfectly circular). Dock the center area with a fork and then spread a quarter of the cheese mixture evenly over this area. Brush the exposed pastry border with eggwash, taking care to not seal the layers shut. Fold in small sections of dough inward towards the filling to define a more circular shape and form a rustic, galette-style tart. Place on a parchment-lined tray. Repeat with the remaining pieces of pastry. Be sure to space the tarts with at least 2 inches of buffer all around them. (Note: I baked my 4 tarts on 2 separate trays, I only combined them onto 1 tray for the photos).
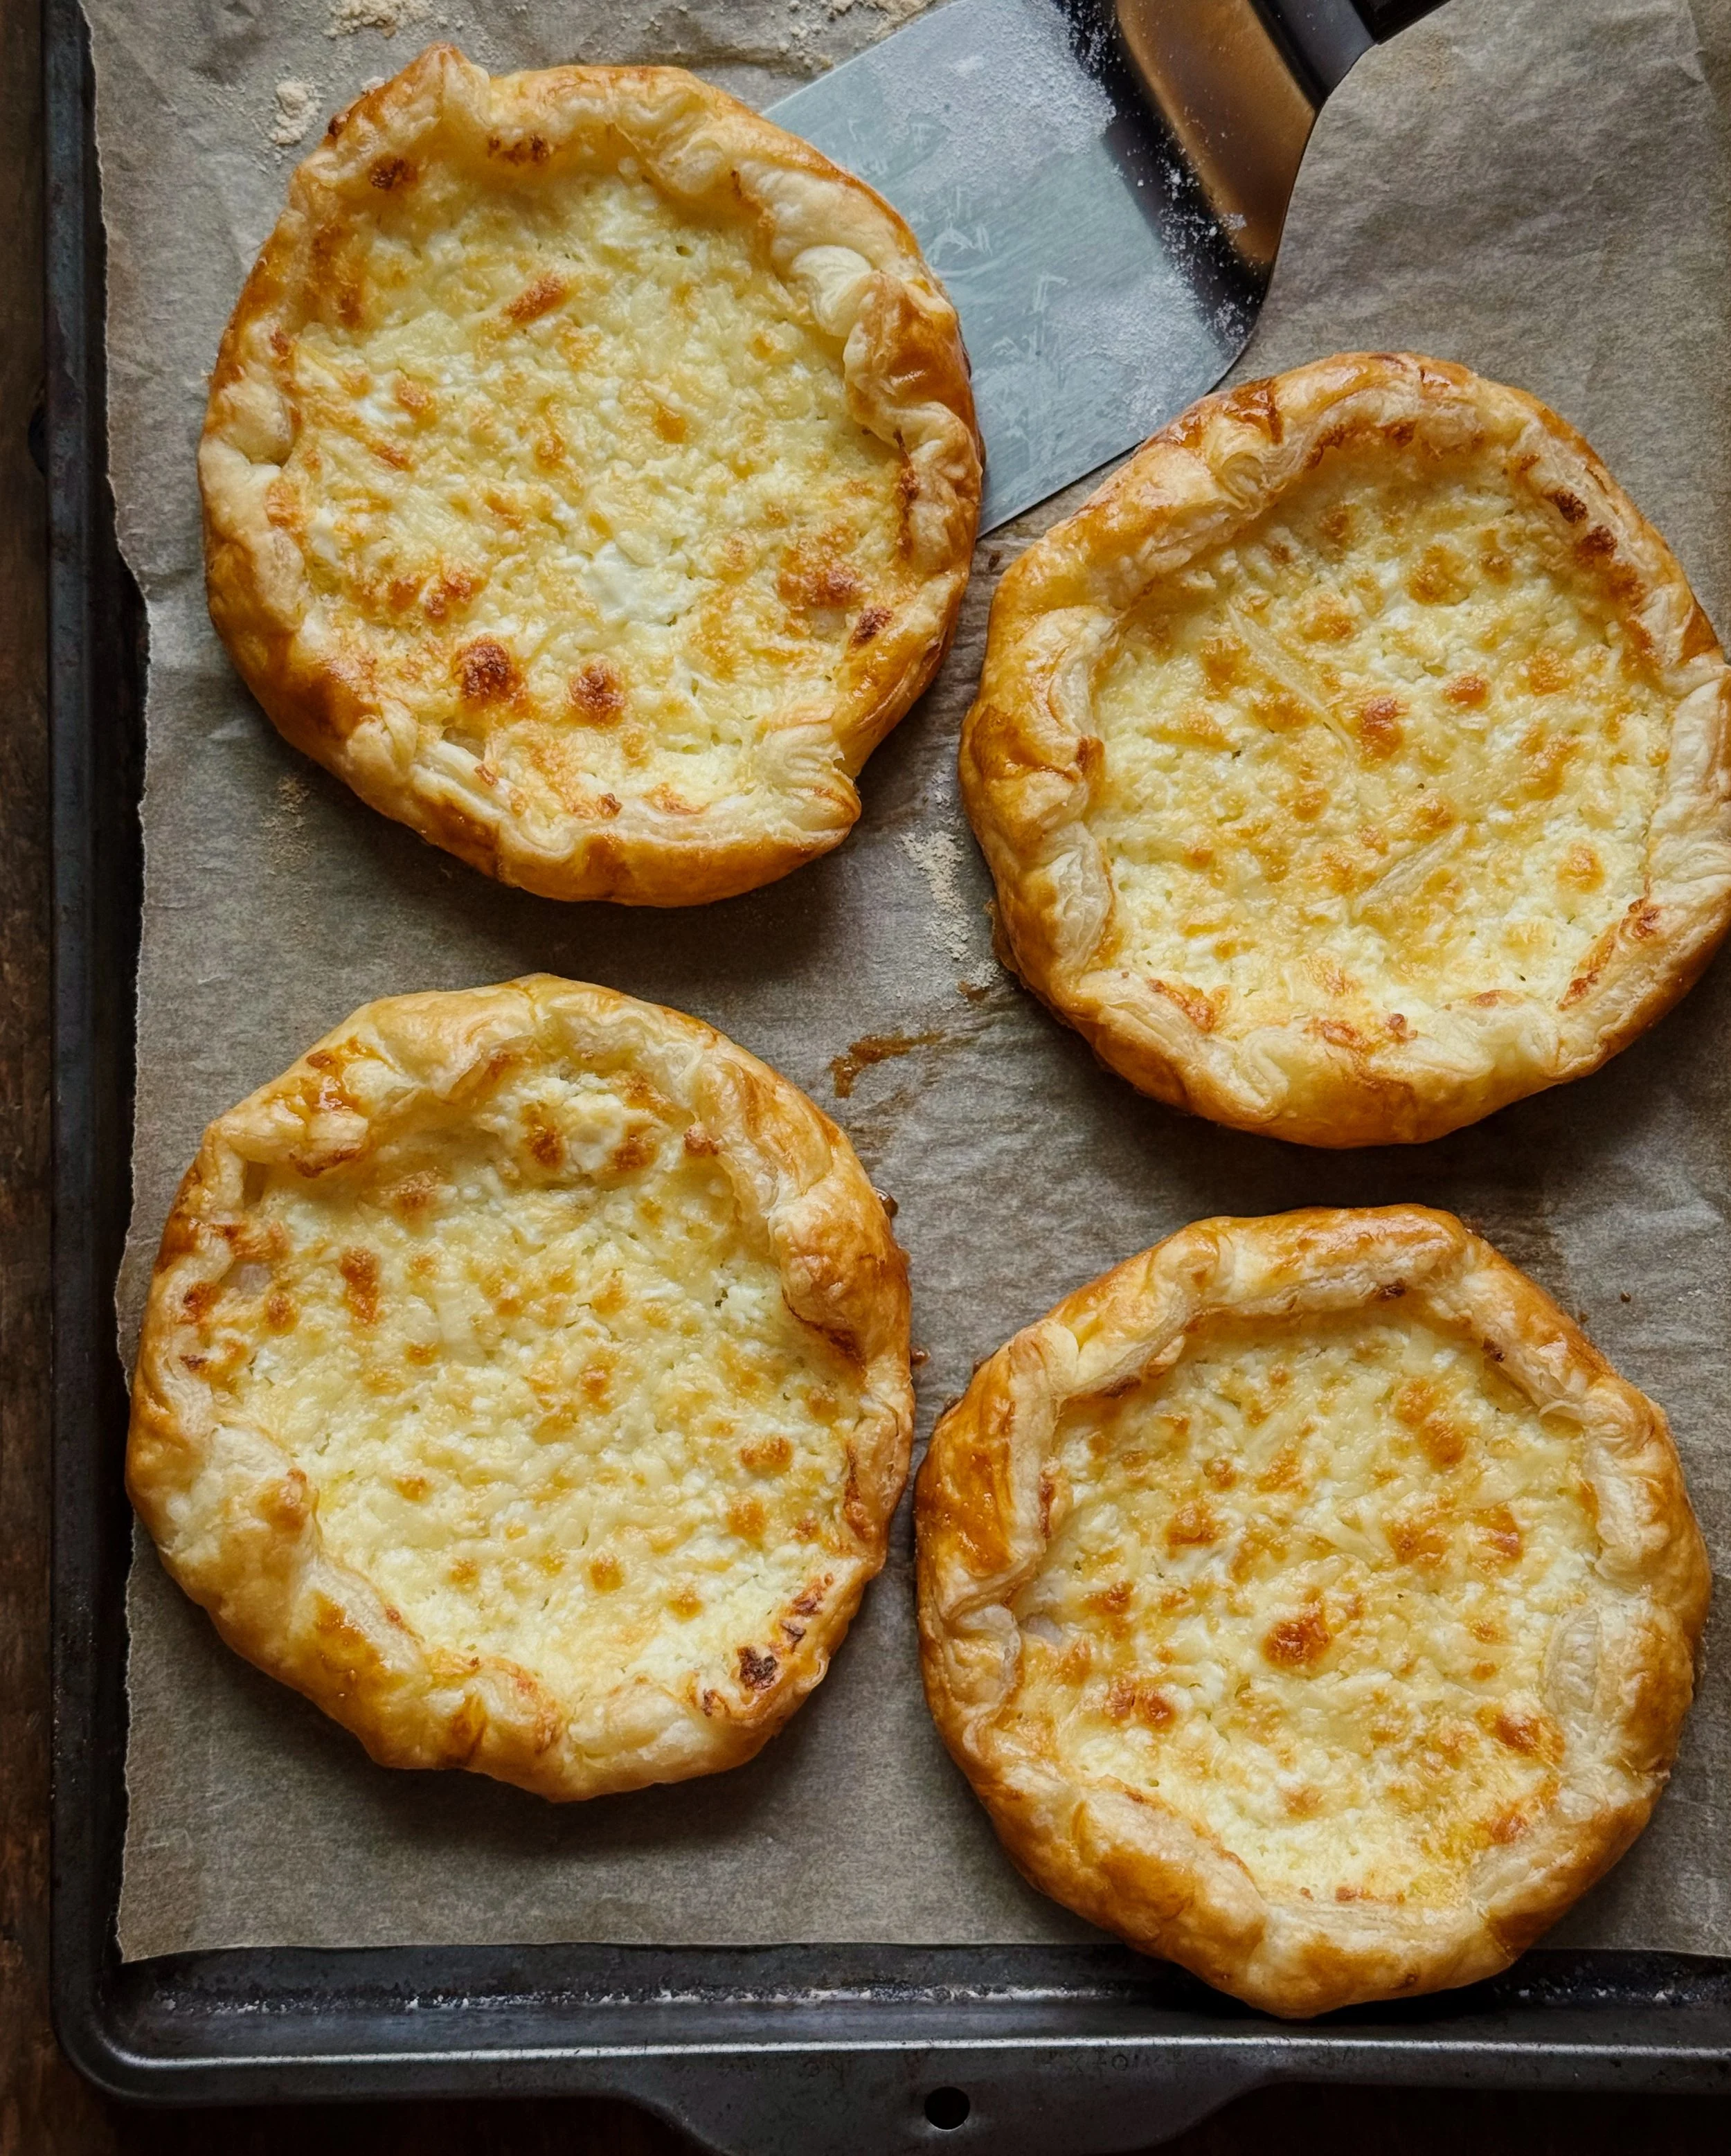
Place the tarts in the freezer for at least 20 minutes. In the meantime, preheat the oven to 400°F*. After chilling the tarts, quickly brush the exposed pastry with eggwash and immediately bake for 20–25 minutes*, or until the edges are puffy and golden. (*Note: baking temperature and time may vary depending on the puff pastry dough used; consult packaging instructions.)
Fold the chopped dill and parsley into the tuna salad mixture. Divide the tuna salad amongst the baked tarts.
If desired, decorate with fresh herbs and edible flowers.
Thank you so much to Cabot Creamery for sponsoring this recipe! Visit their website to find out where you can find their delicious cheddars, which are all naturally aged, naturally gluten-free, and have 0 grams of lactose per serving.