


Recipe: Green Olive and Gorgonzola Crostini (with Bee Decorations!)
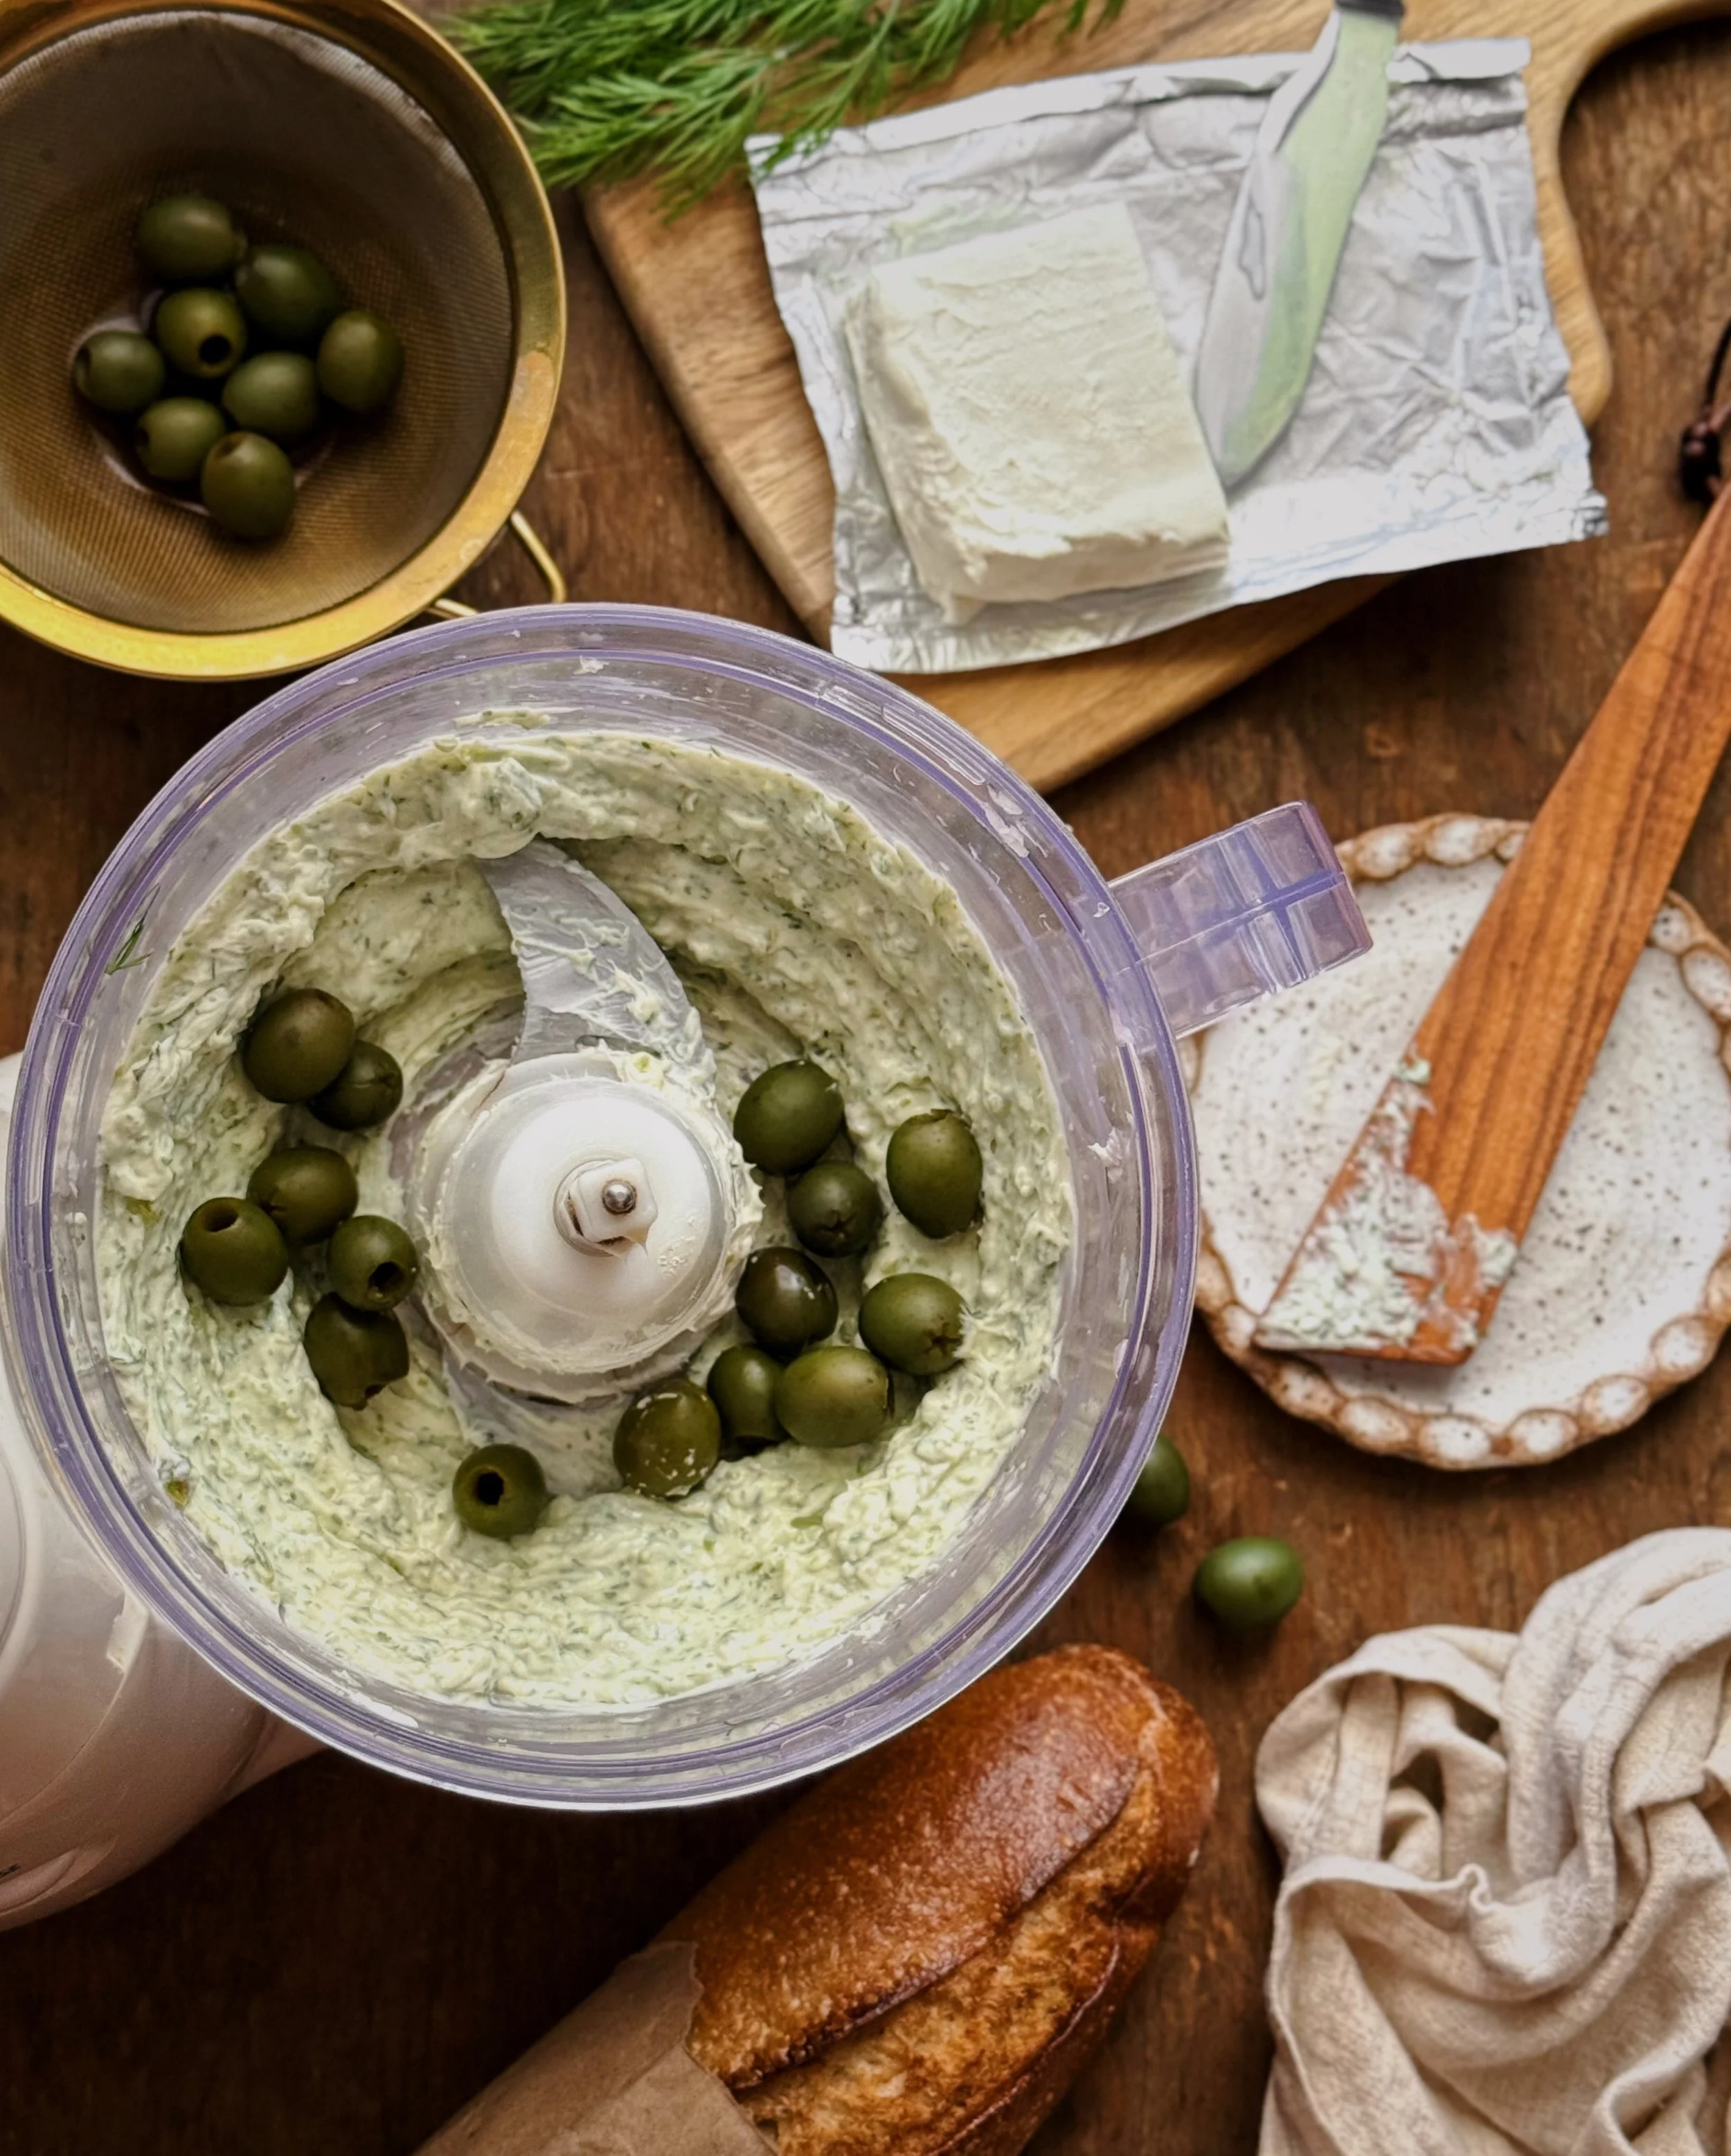
/These whimsical crostini feature a savory spread made with green California Ripe Olives and gorgonzola; it is rich and complex in flavor but totally easy to make, with a buttery umami from the olives, a tiny bit of funk from the gorgonzola, and a fresh pop of herbaceousness from the dill. These ingredients come together in a food processor to become something that is both versatile and indulgent, and as a bonus, they form a subtle spring green hue that is perfect for celebrating this time of year.
This spread is fantastic as a dip for crudités or you could use it to make a very unique tuna salad or egg salad sandwich. I also am not ashamed to admit I ate several spoonfuls of this stuff by itself throughout the process of working on this blog post. But for this recipe, I am going to use it on crostini! A thick creamy spread like this one is perfect for turning crostini into mini edible canvases that you can decorate because it acts as a delicious glue for whatever you want to add on top. And I’ll teach you how to make the cutest edible decoration to top them with, out of a few ingredients grown prominently in California—olives, tomatoes, and almonds.
The idea for this recipe came from a great cocktail that I had at an Italian restaurant in my neighborhood, La Connessa. It was called a “Tomatini”—a simple martini with gin, a hint of tomato, and gorgonzola-stuffed green olives. I thought about naming this recipe “Tomatini Crostini” but, while that has a fun ring to it, it did not match how the real star of both the recipe (and the cocktail that inspired it) is the olives!
This recipe was developed in partnership with California Ripe Olives and CA GROWN. And if the spring vibes weren’t enough to convince you to make this crostini recipe right now, how about some exciting prizes? I made these to share inspiration for the "Show Us What You're Cooking With California Ripe Olives" contest hosted by No Crumbs Left and CA GROWN. Between now and April 20, 2026, you can enter to win a $500 gift card to Williams Sonoma and other sweet prizes by sharing how you love eating California Ripe Olives and tagging @cagrownofficial and @nocrumbsleft in the caption on Instagram or Facebook. Of course, I’d love to see you make and share this recipe, but any way to enjoy California Ripe Olives could be a chance to win the giveaway. Please check out this post on the No Crumbs Left site for the complete details of the contest before entering.
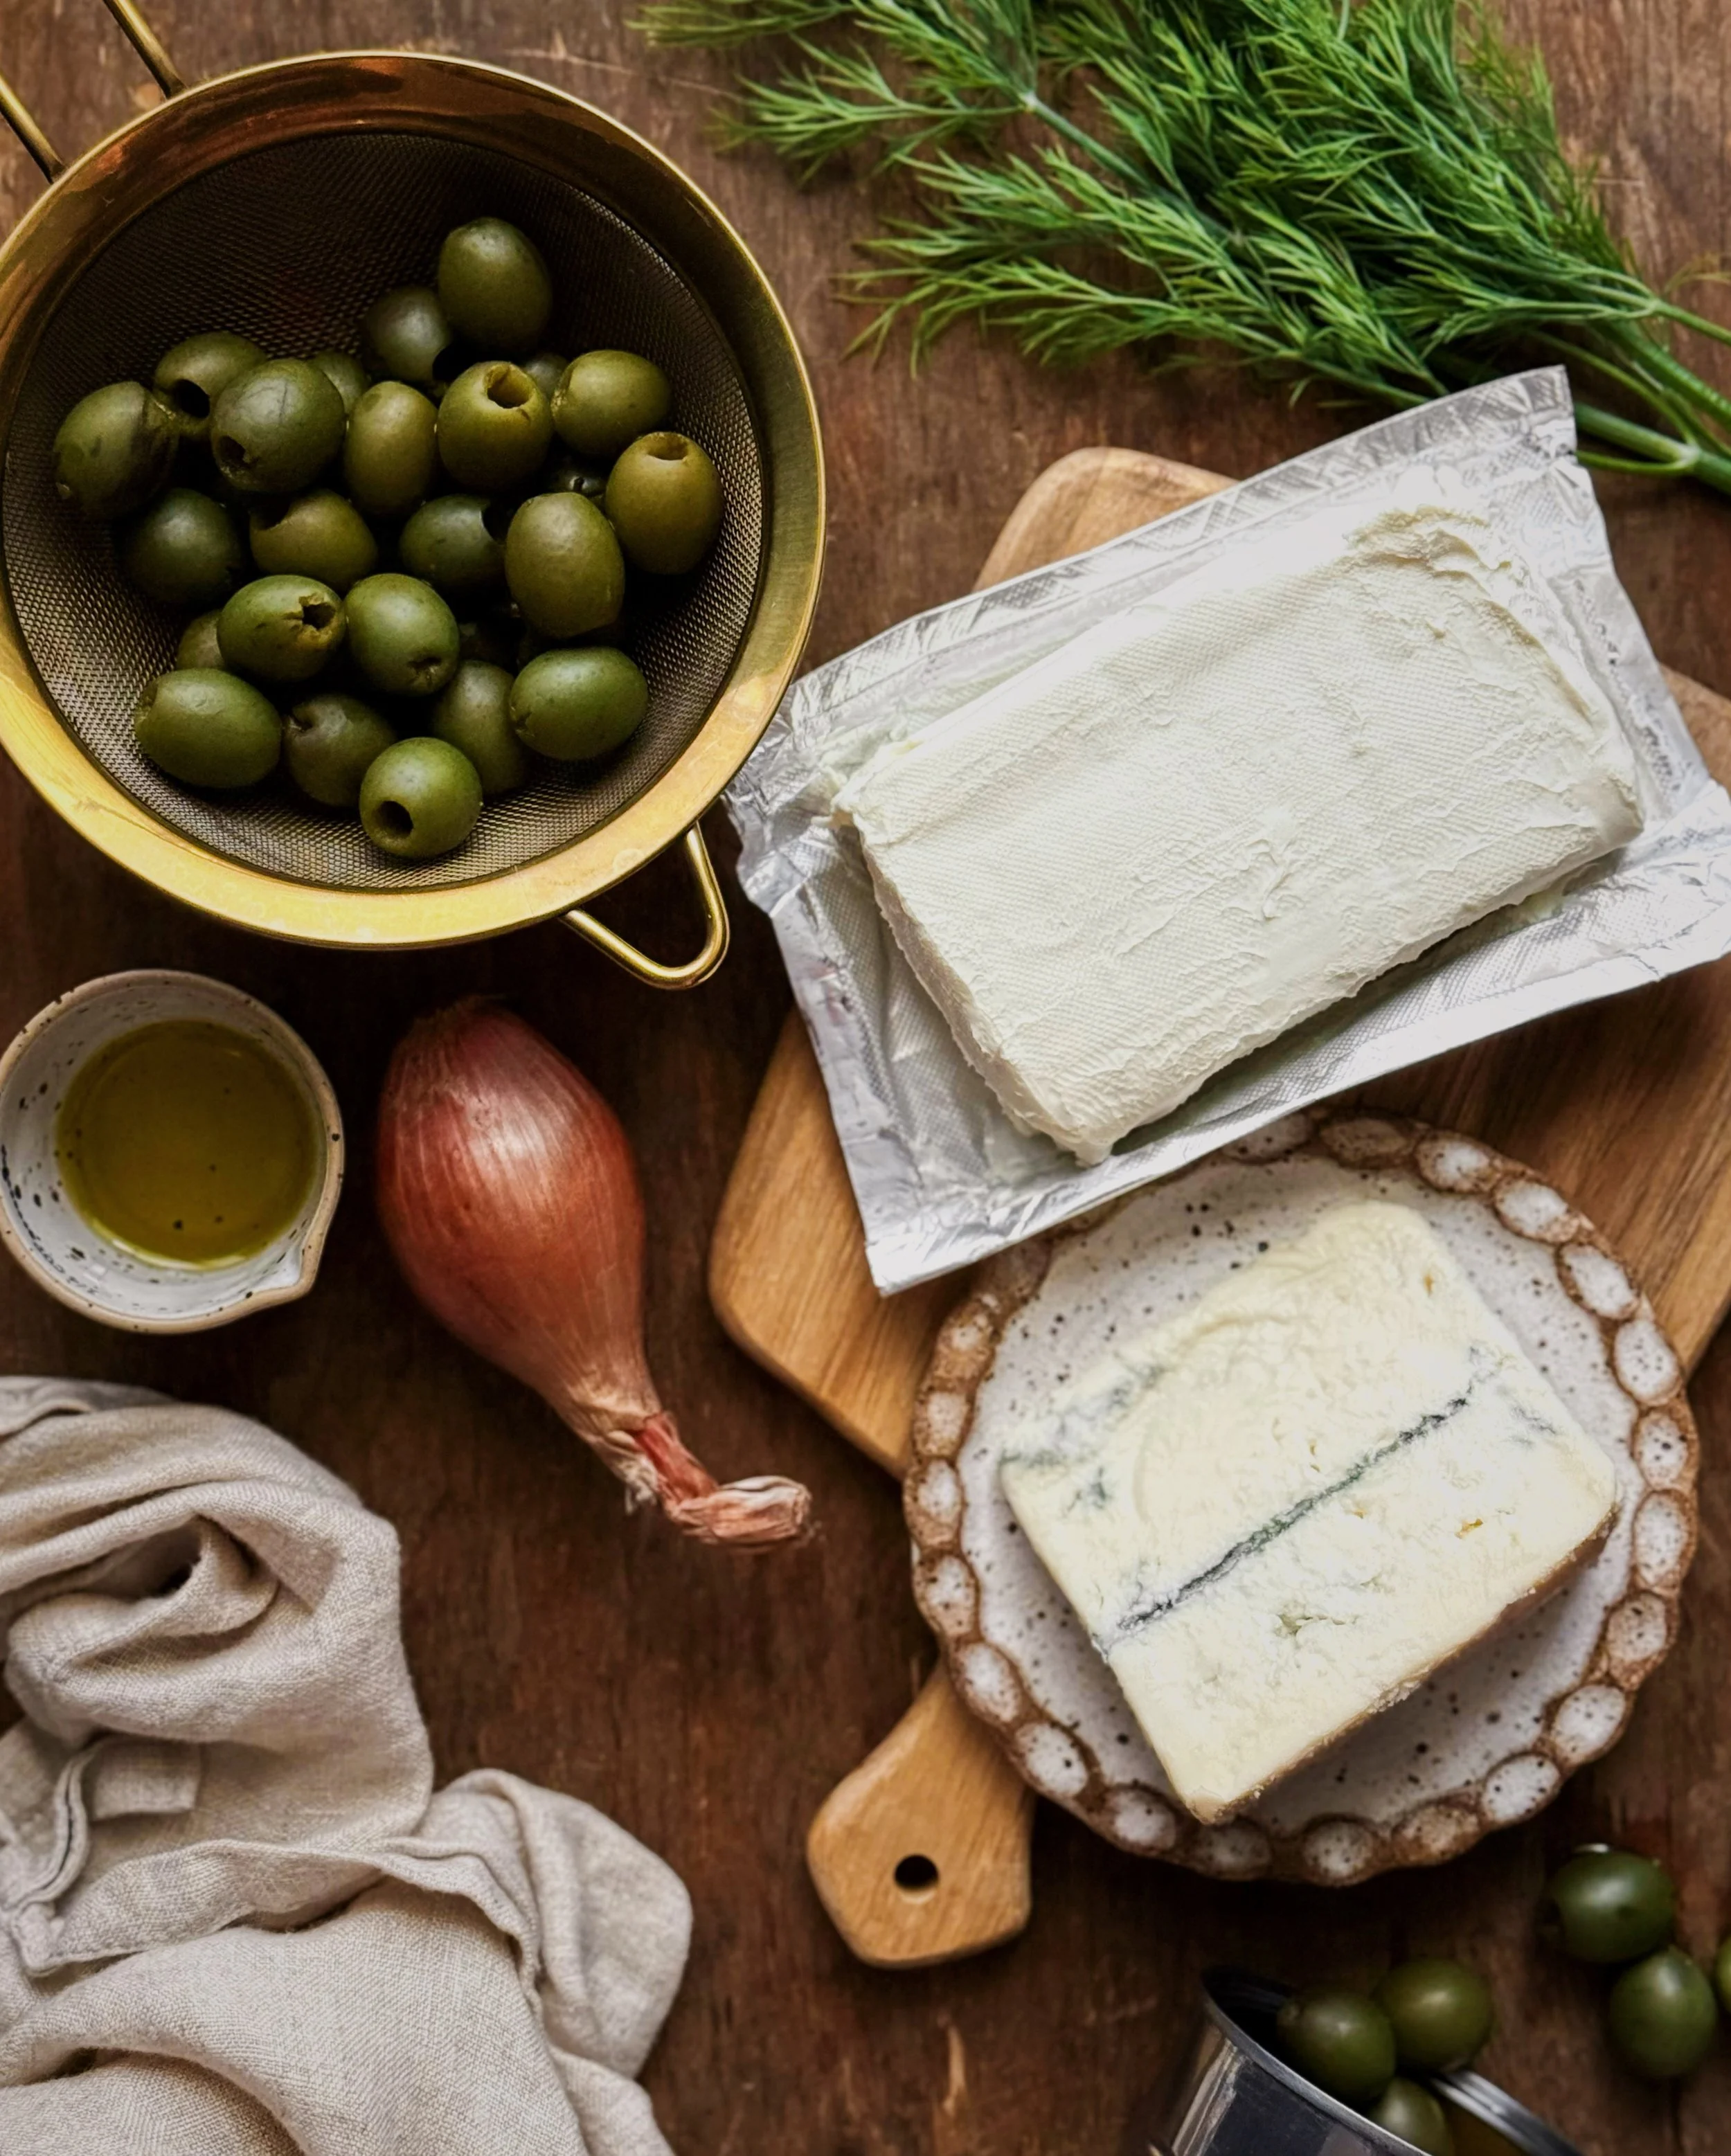
Notes About the Ingredients for the Green Olive and Gorgonzola Spread
Green California Ripe Olives: For this recipe, you’ll set aside a small amount from the can of olives for decorating (or simply snacking while you cook!) and the rest will go into the spread. Even if you don’t live in California like I do, you can find canned California Ripe Olives at major grocery stores all throughout the U.S. Look for cans with “California Grown” on the label or ones that say "California Ripe Olives”. These olives have such a smooth, buttery flavor that I think is incredibly approachable and versatile. California Ripe Olives taste so good because of their curing process. They are first cured with a goal of pulling out any natural bitterness from the olives, then cold-water rinses remove all traces of the curing solution, and then they are canned with a mild salt-brine solution. If the sharp, strong flavors of other olives have made you skeptical in the past, I still encourage you to give these a try because their flavor is so smooth and pleasant! As a bonus, the shades of earthy green that spill out of the can are just so beautiful.
Gorgonzola Dolce: Gorgonzola is a blue-veined Italian cow’s milk cheese. “Dolce” is the milder, creamier, and subtly sweet version and that’s what we want for this recipe. We want it to blend nicely into a spread and complement the gentle flavor of the olives rather than taking over. The alternative is “gorgonzola piccante” which is more crumbly and has much more of a pungent flavor. The packaging or label usually indicates pretty clearly which type of gorgonzola you’re getting, but if it feels very soft instead of crumbly, you are likely getting the right one.
Cream Cheese: I opted to cut the funky cheese flavors of the gorgonzola with some cream cheese. Using equal parts of cream cheese and gorgonzola still allows the distinct flavor of gorgonzola to come through while keeping the spread mellow enough for a crowd-pleasing party appetizer.
Dill: I wanted to include an herb in the mix to bring some fresh herbaceousness and dill is the perfect complement to the other slightly briny flavors. Plus the huge bunches of dill at the farmers markets at this time of year are so alluring to me that I could not resist.
Shallot: I included a gently-sautéed shallot in the spread because I found that it brought some nice complexity to the mix. It’s not going to present forwardly when you taste the spread together, but it turned the whole spread into something that was more than the sum of its parts.
Notes on Making the Crostini
To make crostini, I recommend selecting a girthy baguette that has a bit of give to it when you press gently on the bread. Some baguettes are very skinny and firm, practically like a giant breadstick, and I would prefer to have control over the crunchiness of the crostini myself. Slice your baguette on a bias to give the crostini a fancier look and to give yourself a greater surface area for decorating. Then, brush them with good extra virgin olive oil from California and pop them into a hot oven until they are the level of crisp that you desire.
The recipe below has measurements for 8 crostini, which I find to be roughly half of a baguette.
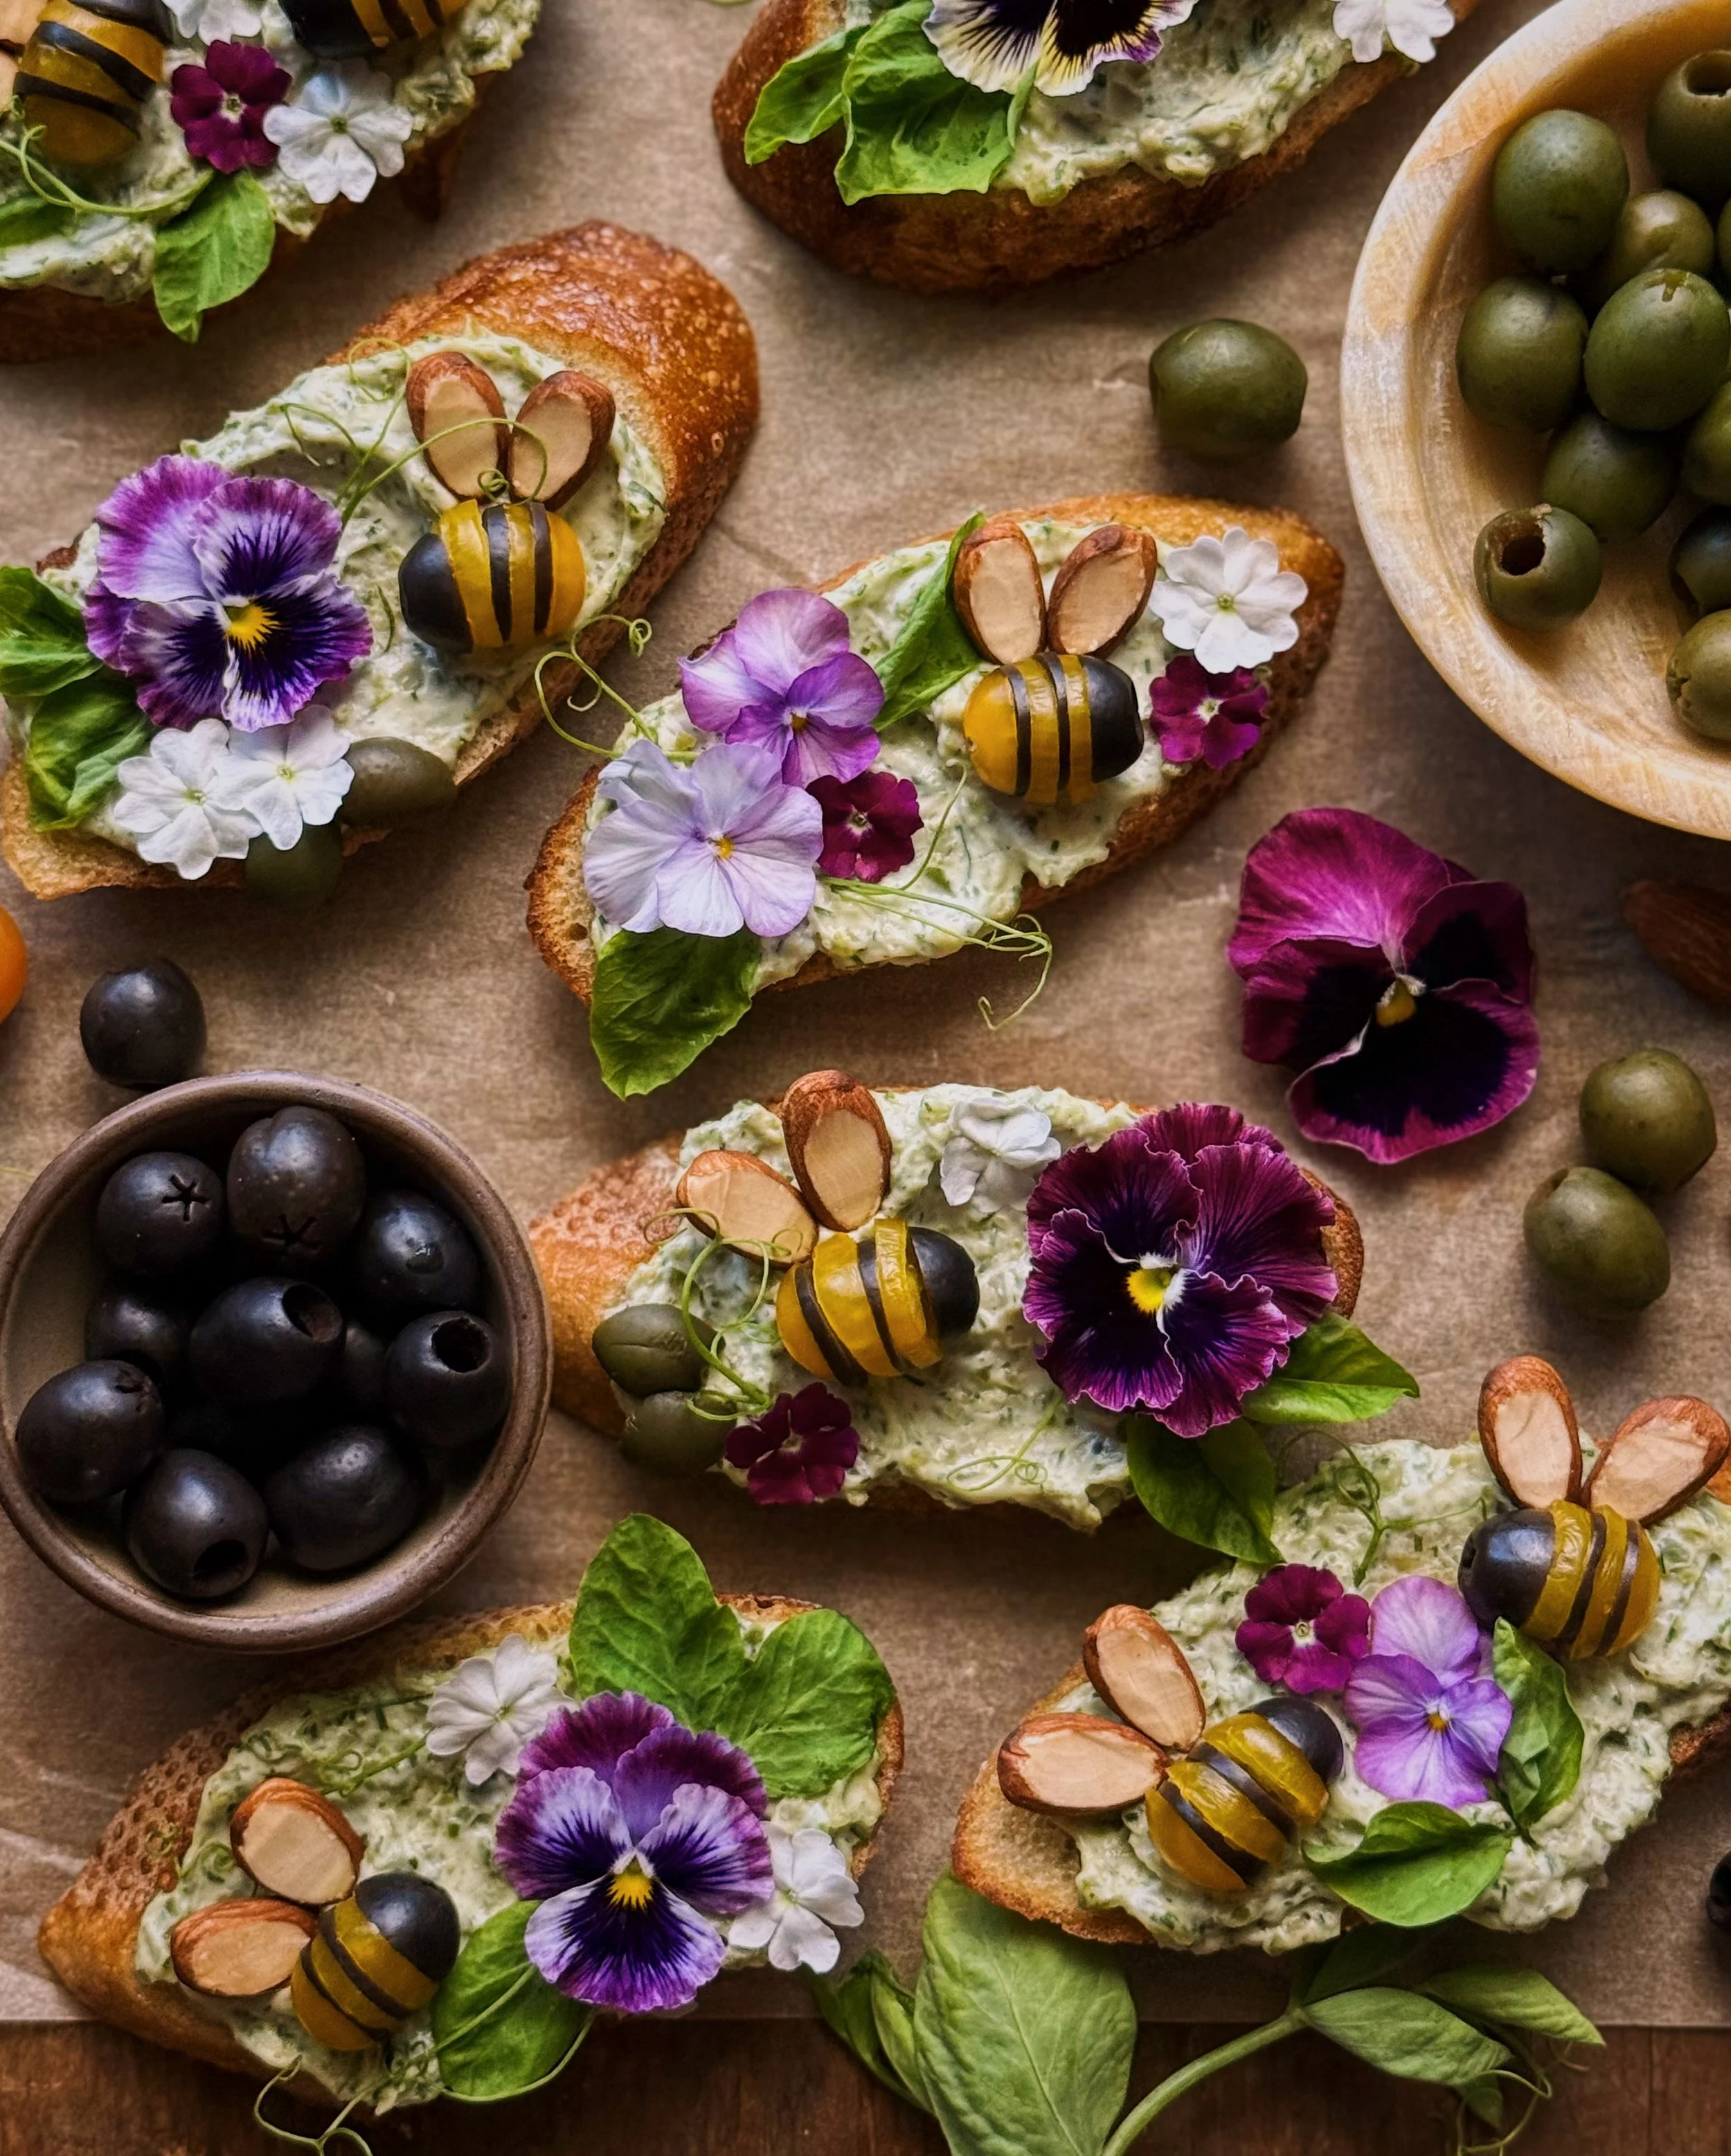
How to Make the Edible Bumblebee Decorations
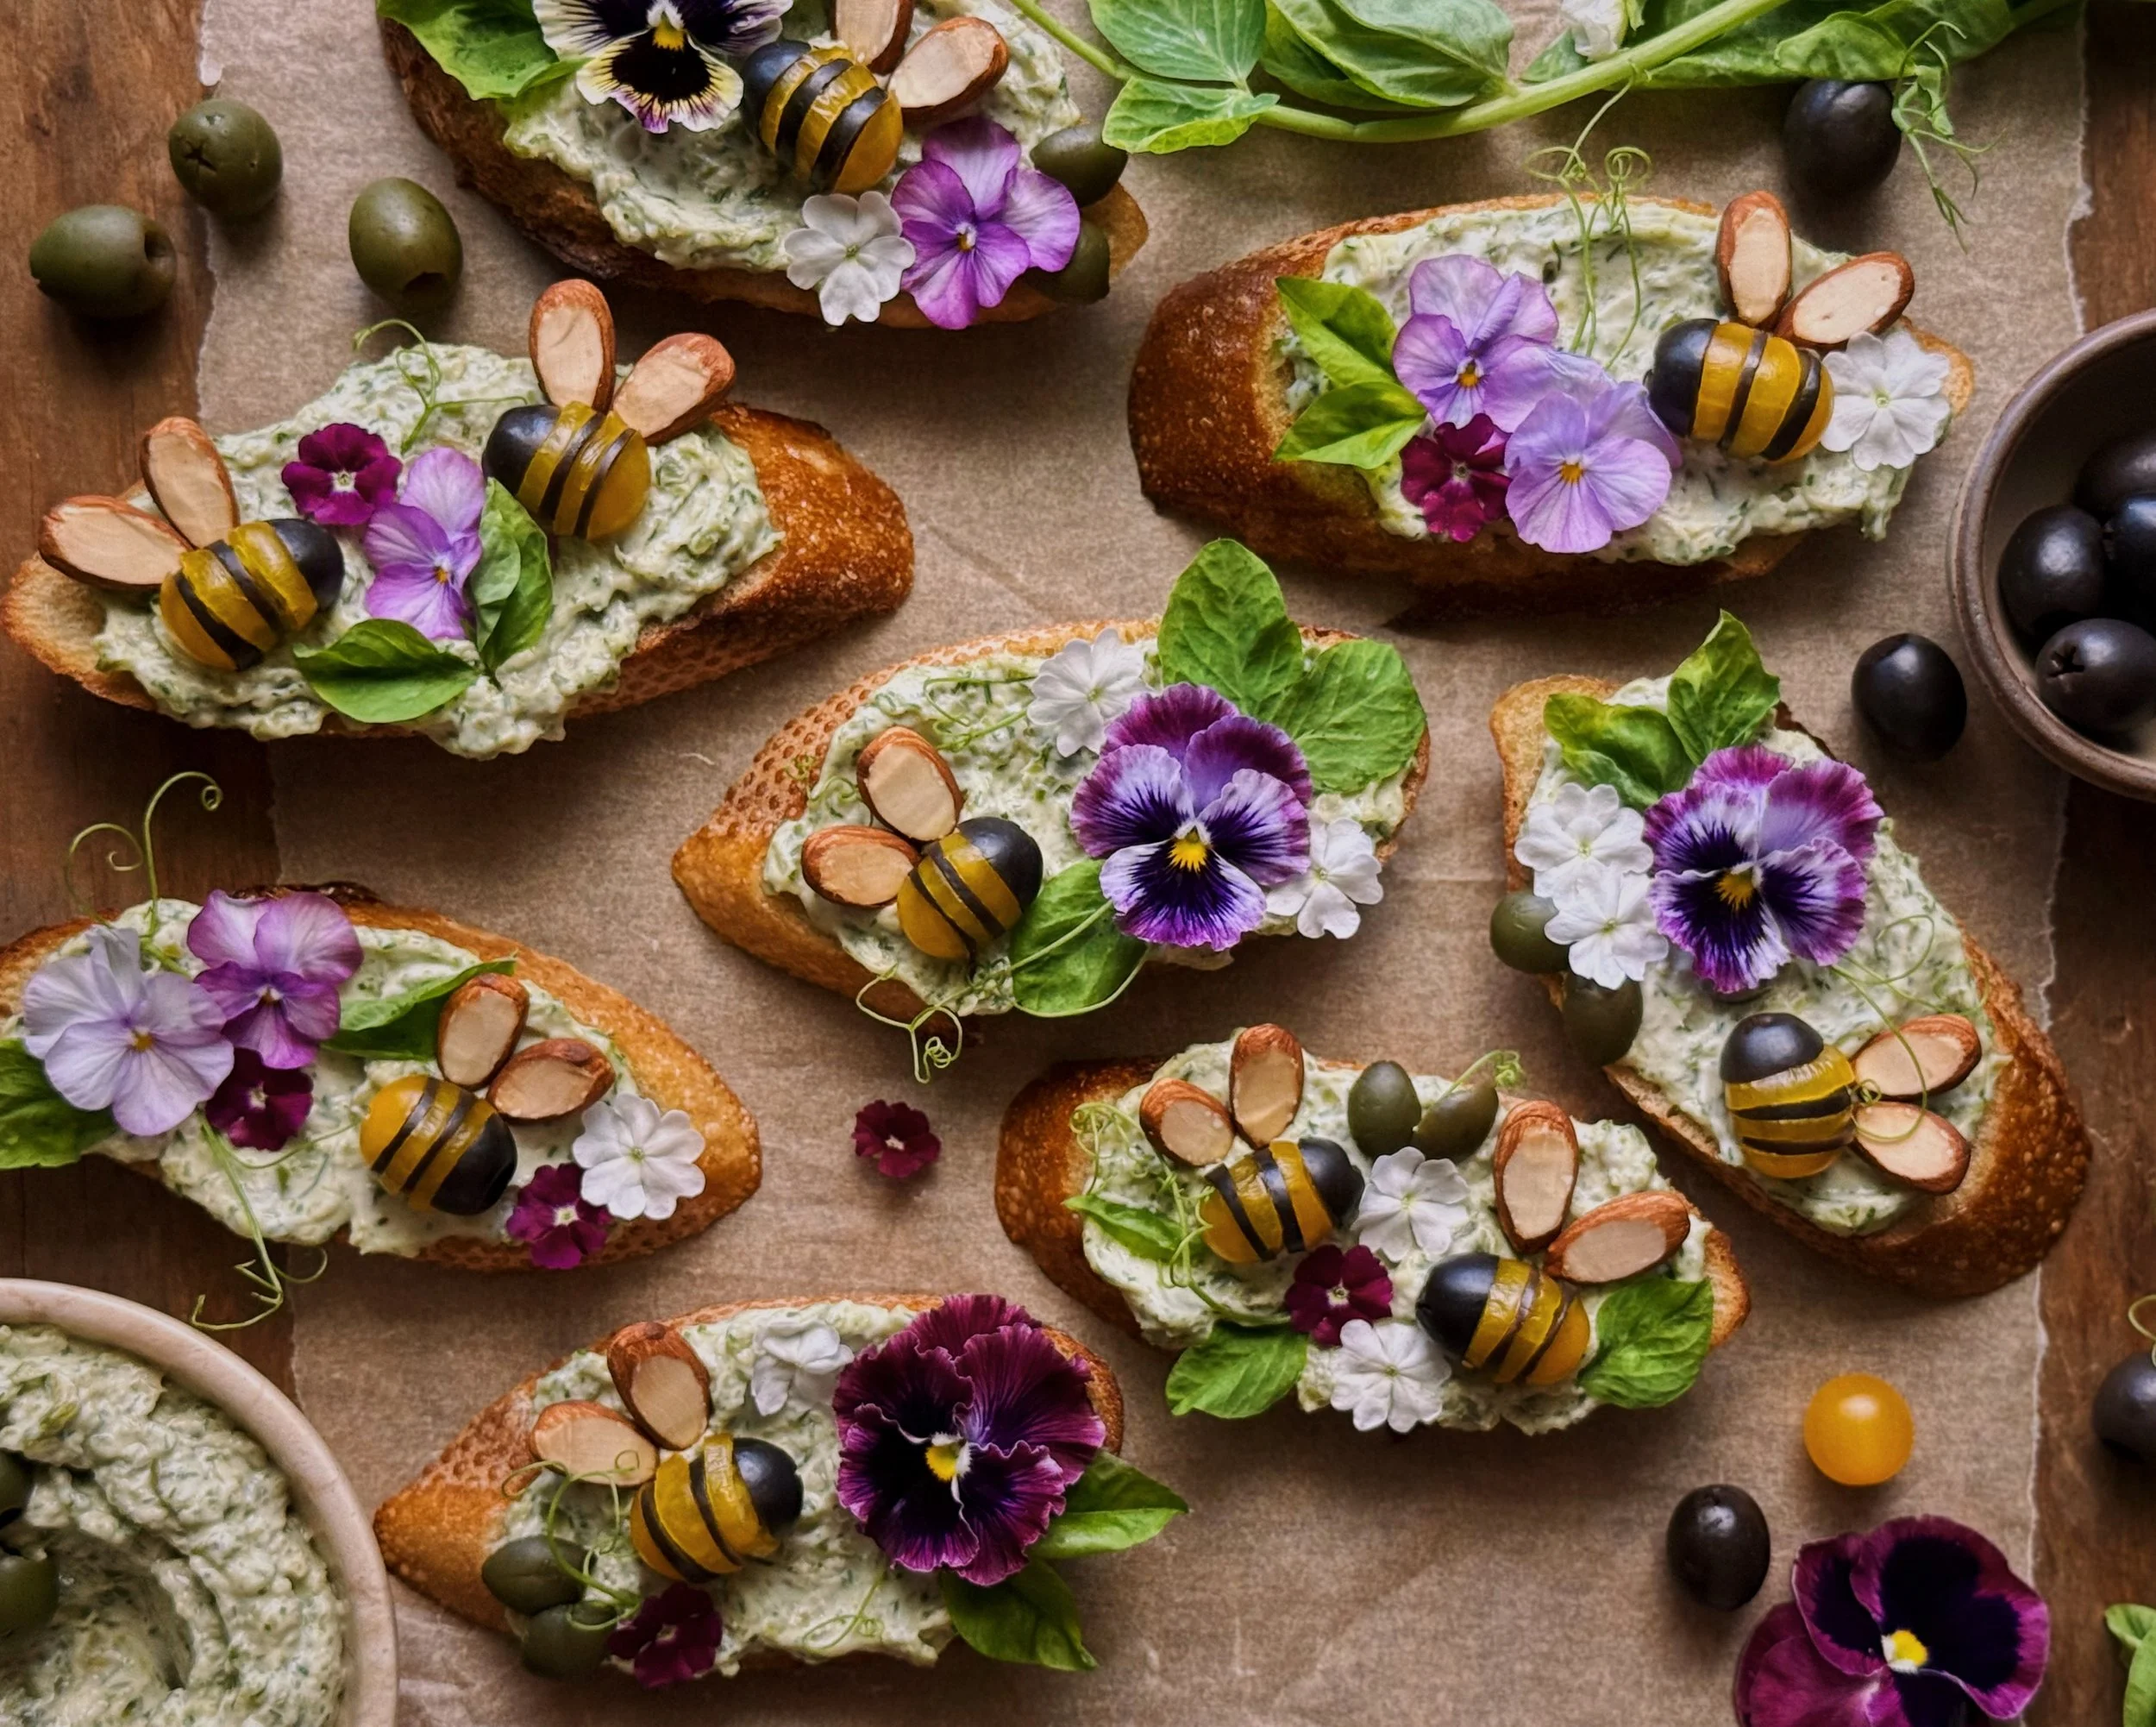
Since the spread comes together so easily in the food processor, I had plenty of time to devote to decorating my crostini for a spring theme. I thought these sweet little bumblebee decorations would be such a fun touch, and the ingredients add to the eating experience as well; the bright acidity of the tomatoes are a nice contrast to the creamy rich spread, and the almonds add a nutty crunch atop the crostini.
For each bee, you will need 2 almonds for the wings, as well as 1 yellow cherry (or grape) tomato and 1 black California Ripe Olive for the body. You will want the olive and tomato to be as close in diameter as possible for the pieces of the bumblebee to fit nicely together. I found yellow tomatoes that were quite tiny, so I used medium black California olives. For most yellow cherry tomatoes, large olives might be a better choice.
The image below shows the pieces you will need to form each edible bumblebee:
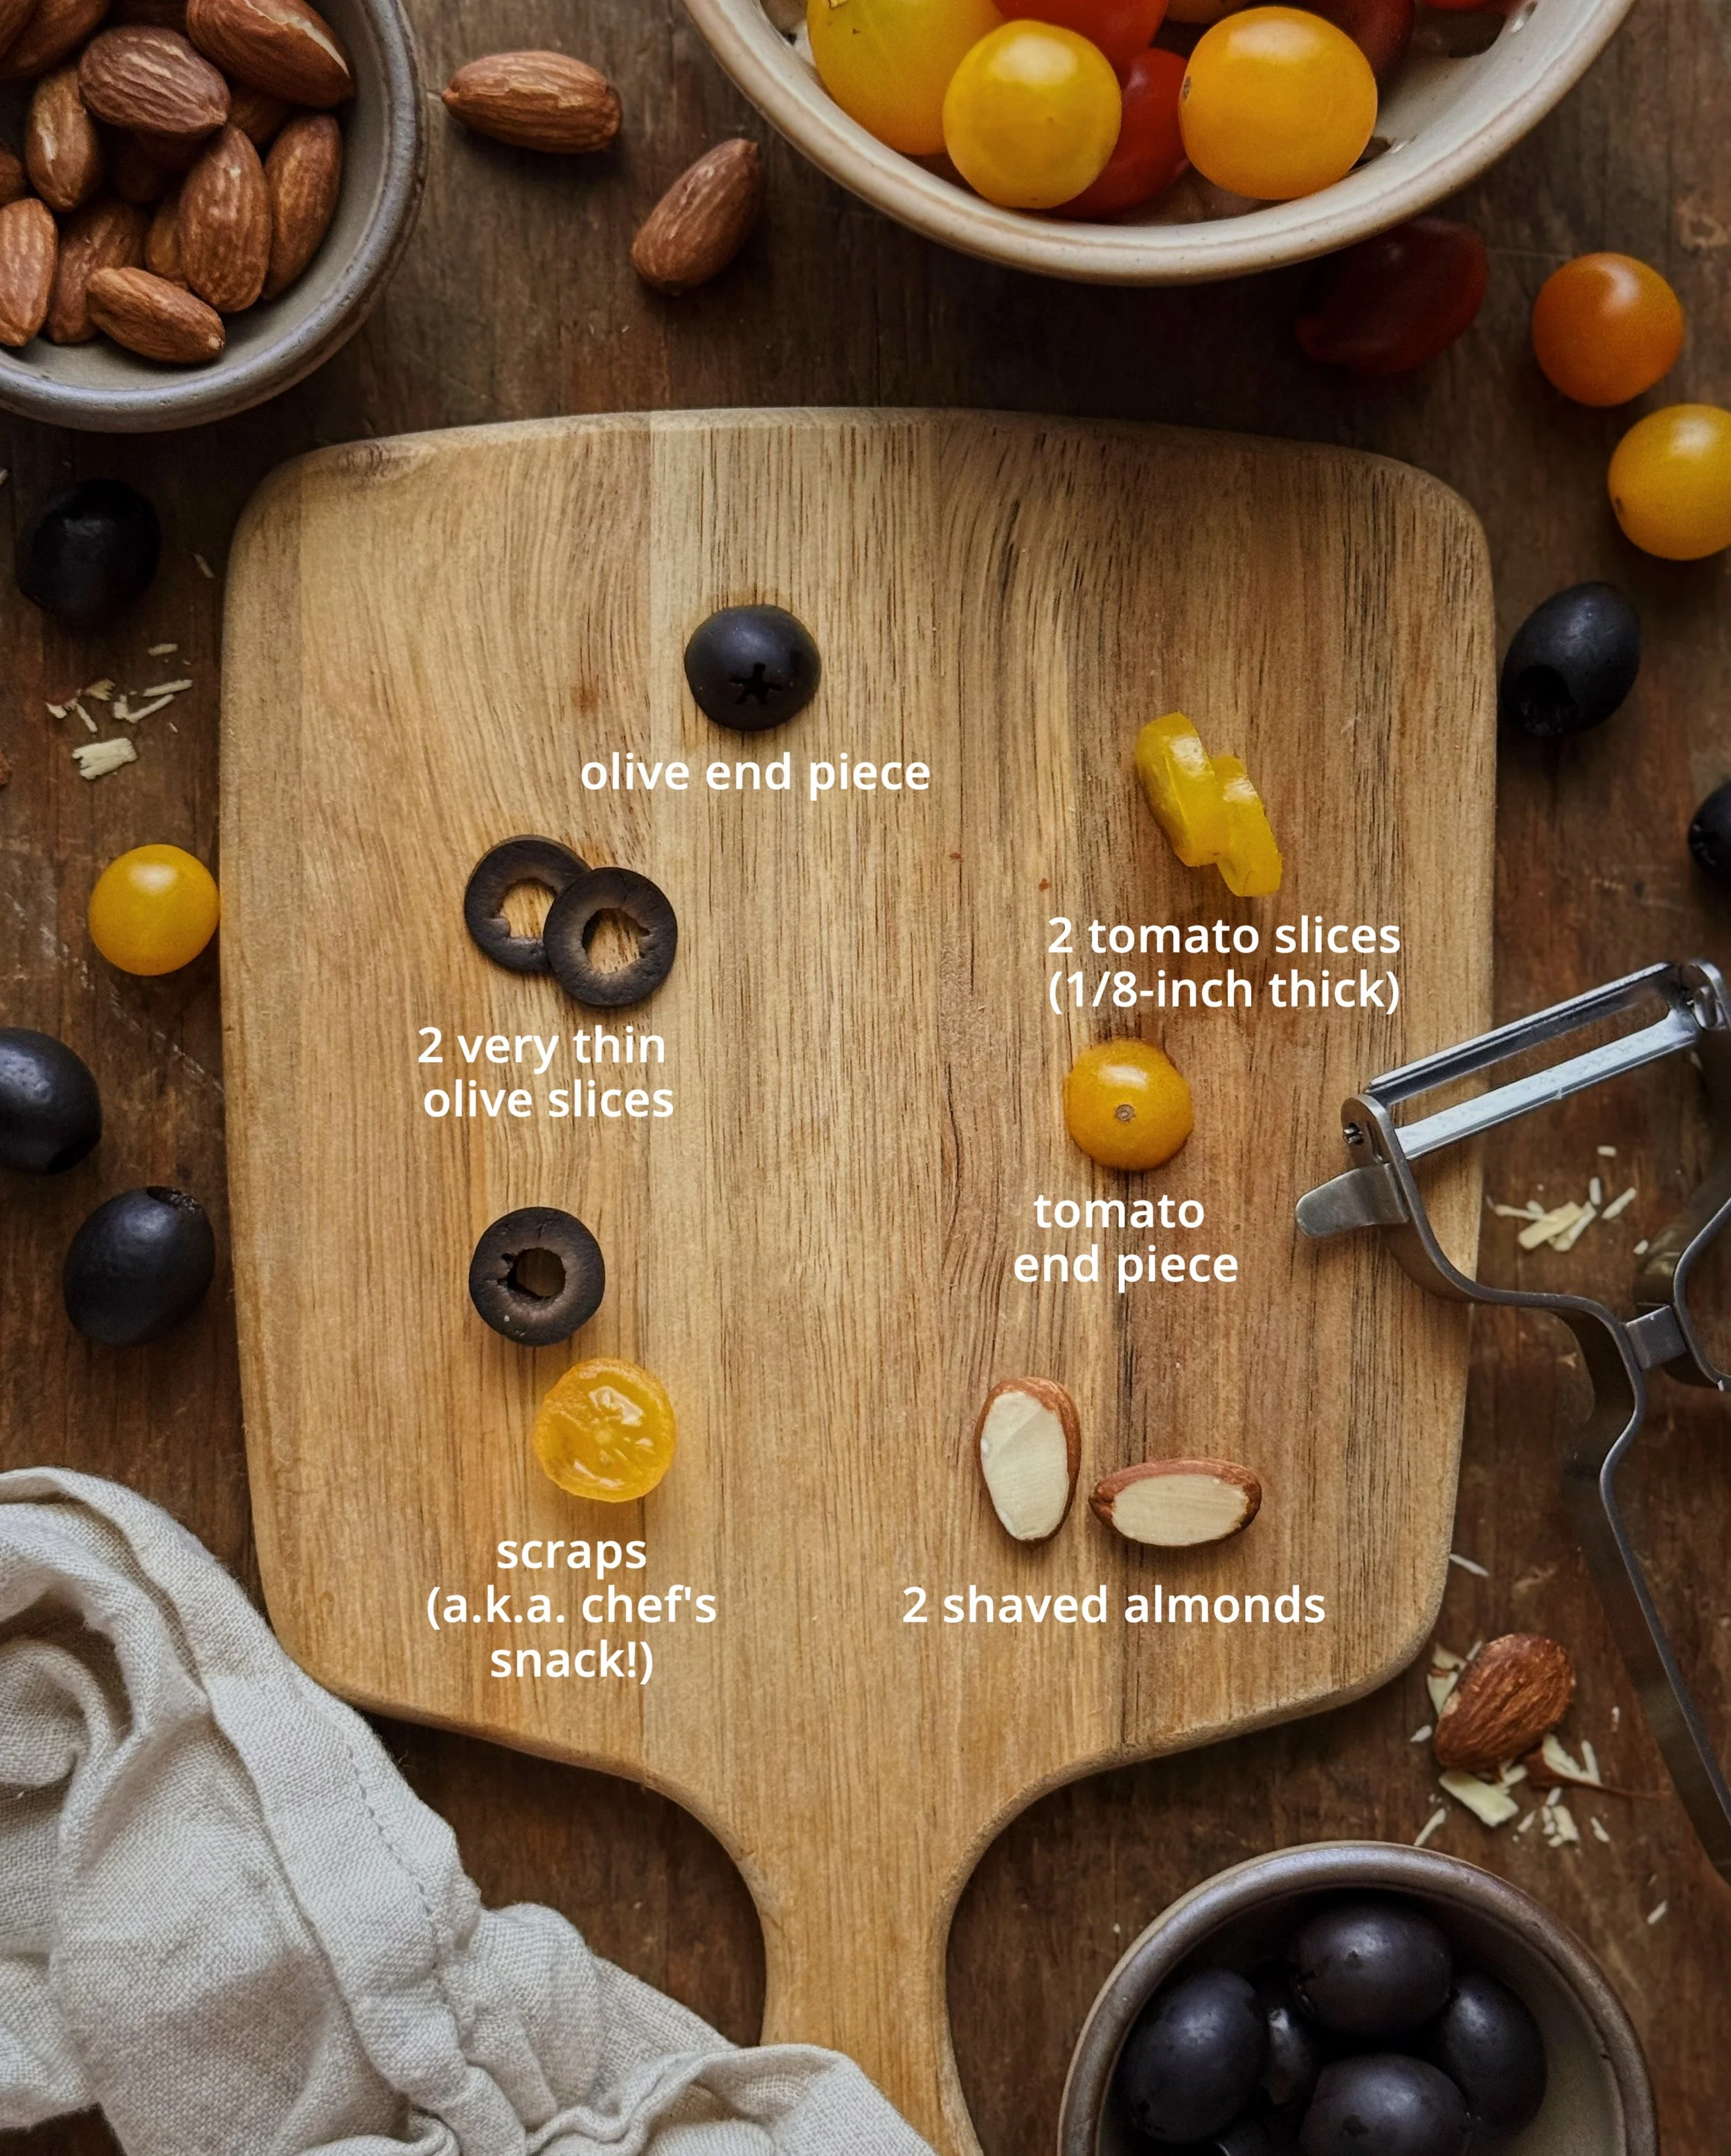
Head: From the end of the olive with the X, slice off one-third of the length of the olive to form the head for the bee.
Black stripes: Cut 2 very thin slices of black olive for the stripes. (The remaining end of the olive won’t be used for the bee, so set it aside or consider it a chef’s snack!)
Bee-hind: I recommend using a sharp serrated knife for slicing the tomato pieces. Cut a small section from one end of the tomato to form the back end of the bee’s body.
Yellow stripes: Cut 2 slices of tomato that are about 1/8-inch thick. Note that these should be thicker than the black stripes. I think this makes the bees look more charming than evenly-sized stripes. (The remaining end of the tomato can also be set aside or snacked on. )
Wings: Select 2 similar almonds. Use a vegetable peeler to shave off a little bit of the skin on one side to expose the light-colored seed. This will make them look like wings with a bit of an outline to them. (Alternatively, you could use almond slices instead of whole almonds for this but I like the textural addition of having the whole almonds on the crostini.)
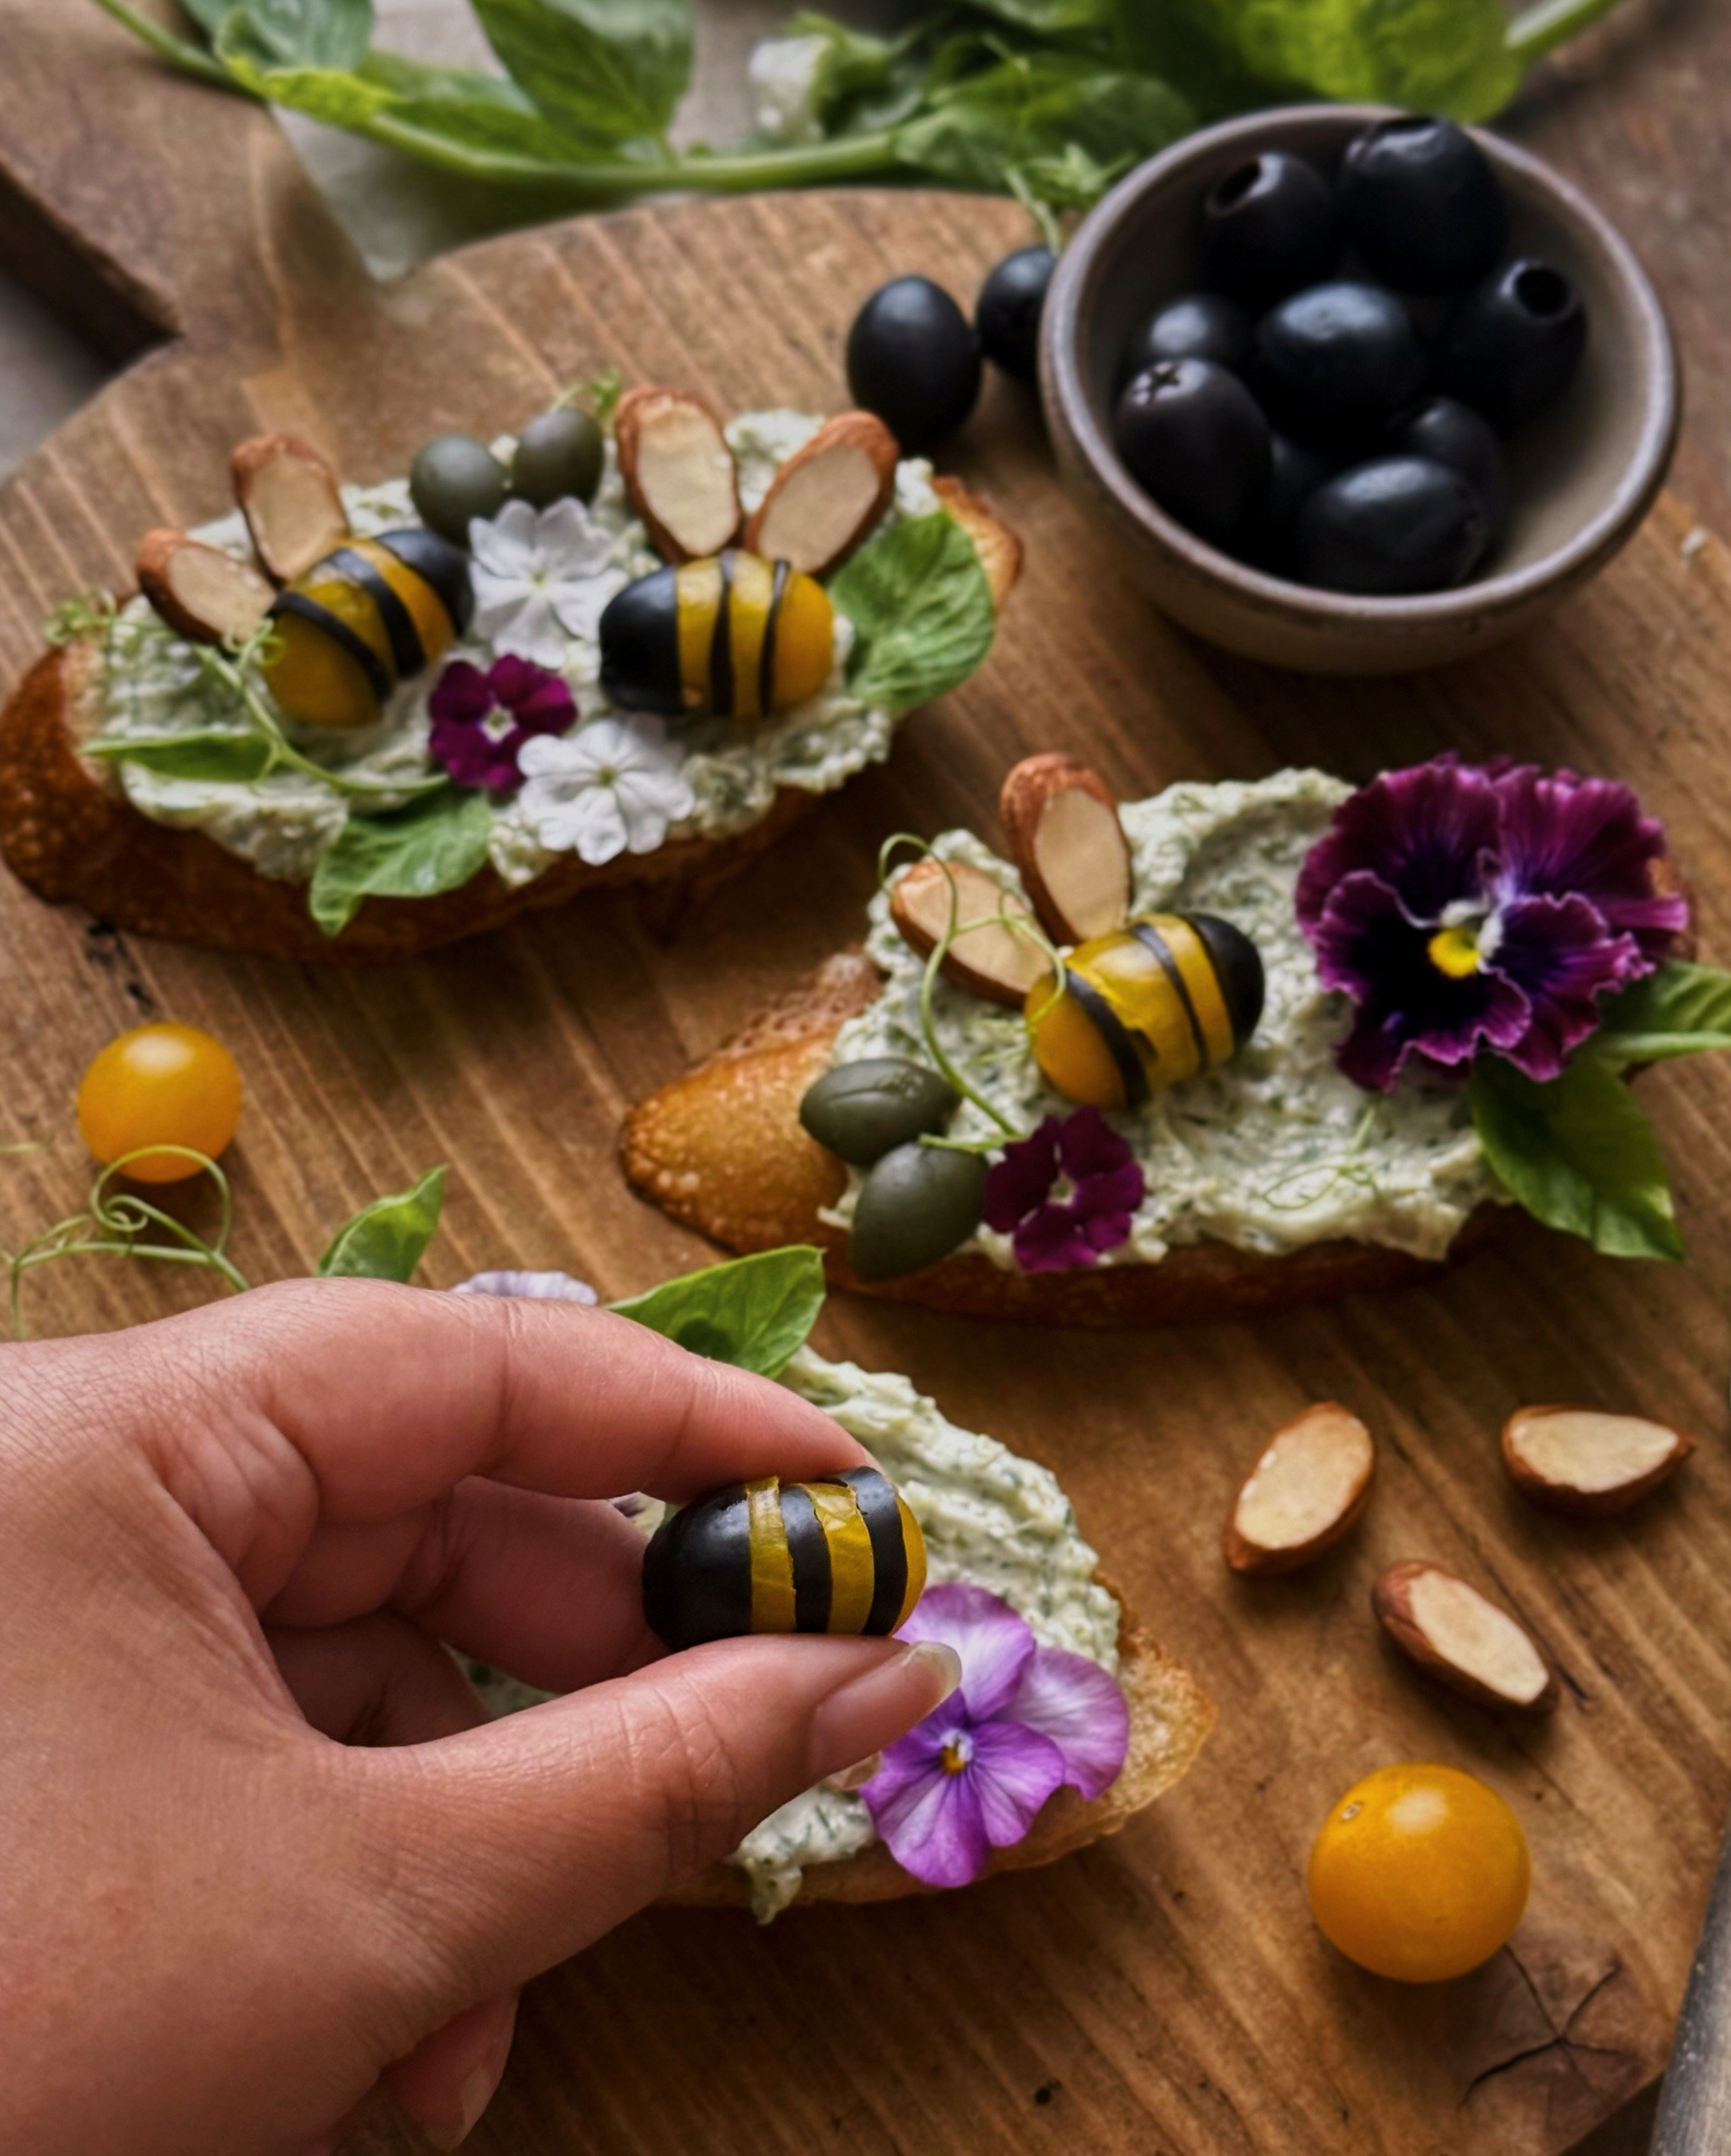
Alternate the pieces of olive and tomato to form the bee body and embed that arrangement onto the spread to hold the pieces together. Then add the almonds, with the shaved side facing up. The creamy spread should hold the bees together on the crostini nicely. I recommend 1–2 bees per crostini.
I finished decorating the crostini with the extra green olives left over from making the spread, plus some edible flowers from my garden as well as pea leaves and tendrils, to create a whole springtime scene on each crostini. These young pea greens are one of the things I look forward to at spring farmers markets. While extra decorative elements are optional, I highly encourage you to seek out this particular seasonal green. I think the pea tendrils especially add such a delicate and sophisticated touch and I love how their twists and curls mimic the movement of bees. I hope you have as much fun making these little bees and snacking on these delicious crostini as I did!
How to Make Green Olive and Gorgonzola Crostini
Ingredients for Spread
1 tbsp California extra virgin olive oil
1 small shallot, peeled
4 oz gorgonzola dolce
4 oz cream cheese
2 large sprigs dill, thick stems removed
1 can medium green California ripe olives, drained and divided
Ingredients for Crostini
8 slices of baguette
2–3 tbsp California extra virgin olive oil
1–1 1/2 cup Green Olive and Gorgonzola Spread
Ingredients for 1 Bee (Multiply as Desired)
1 medium or large black California ripe olive
1 yellow cherry tomato, such as sungold
2 roasted almonds
Ingredients for Decorating (Optional)
pea leaves and tendrils
edible flowers
Procedure
To make the spread:
Put the shallot in a food processor and process it into small pieces. Heat a small skillet on low and add the olive oil. Sauté the shallot gently just until it starts to become fragrant and translucent, about 2–3 minutes. Remove from heat and set aside.
Put the gorgonzola, cream cheese, and dill in the food processor and process until smooth. Add the sautéed shallot and process to combine. Reserve about 10–12 green olives for decorating, then add the remainder of the green olives to the food processor in batches, pulsing a few times after each batch to combine. (This allows the olives to retain a bit of their texture, making for a creamy spread with distinct fine bits of olive.) Transfer the spread to a jar with a lid and refrigerate until needed; the texture will remain smooth and spreadable directly out of the refrigerator.
To make the crostini:
Preheat the oven to 475°F. Brush a light amount of olive oil onto each baguette slice and place on a baking tray. Bake the slices for 4–7 minutes, depending on your crunch preference for your crostini.
Spread about 2 tablespoons of the green olive and gorgonzola spread on each of the crostini.
To decorate the crostini:
For each bee, select a black olive and a yellow tomato of similar diameter.
From the olive, cut one third from one end to form the bee’s head and two thin slices for the stripes; you’ll be left with another rounded end piece that won't be used for the bee.
From the tomato, cut off one rounded end to form the end of the bee and two 1/8” slices for stripes; the rest of the tomato won’t be used.
Select two similar almonds. Use a vegetable peeler to shave off some of the skin on one side of each almond to make them resemble wings.
Alternate the prepared pieces of olive and tomato to form the bee. Add the bee to a crostini, embedding the arrangement into the Green Olive and Gorgonzola Spread so that the spread helps to hold it together and in place. Add the almond wings to complete the bee. Repeat as desired to make more bees for the remaining crostini.
If desired, continue to decorate the crostini using pea leaves, tendrils, and edible flowers to create a whole spring scene for your little edible bees.
Thank you so much to California Ripe Olives and CA GROWN for sponsoring this recipe! If you make this recipe before 4/20/2026, remember to enter the "Show Us What You're Cooking With California Ripe Olives" contest!