Recipe: Easy Tomato Soup

tomato soup with grilled cheese croutons

As much as I wish it did, soup season does not correspond with tomato season. But it turns out, that’s okay! Because my favorite recipe for tomato soup—one that tastes rich and velvety without any cream and is full of tomato flavor—uses canned tomatoes! Reliable and super-duper easy to make at any time of year, all you need is good canned tomatoes, a blender, and a few other basic ingredients to make that classic tomato soup that goes oh-so-well with a good grilled cheese sandwich (or topped with grilled cheese sandwich croutons)!

Blender soups are obviously my favorite soups to make because they are just so damn easy. And for this recipe, there is something about the onions and butter getting blended together that gives this tomato soup a great creamy texture without pushing the soup into bisque territory. And with a touch of my secret ingredient—fish sauce—to bring some extra umami, it will taste like this soup simmered in a grandma’s kitchen all day when it really takes hardly any time at all to make.

Here are the ingredients you’ll need to make my recipe for this easy tomato soup:

  • canned tomatoes: I’ve made this with various brands of canned tomatoes and I am always happy with the results but I will usually go for the San Marzano or San Marzano style tomatoes because they are more dense and have a better tomato flesh to seed ratio. Also note that tomatoes that are packed in puree or a thick puree-like tomato juice will obviously render a thicker, more flavorful soup that the ones where the tomatoes are packed in water. This means you will have to adjust the water-to-tomato ratio a bit as you make the soup, to get the consistency that is to your liking. (After watching this in-depth review of canned tomato brands by Ethan Chlebowski, I typically get the brand Cento.)

  • butter: Salted or unsalted is fine. Since canned tomatoes typically come with a considerable amount of salt, there’s not need to fuss over whether your butter has salt in it or not either. This is a recipe where you are going to want to taste for seasoning while you go.

  • onion: If I’m lucky enough to find sweet onions at the grocery store, I like to use them when making this soup. But I’ve also made this with regular red onions or yellow onions; any of these will do perfectly well here.

  • garlic: Gotta have a little garlic in tomato soup! I usually do about 6 cloves because I love garlic.

  • fish sauce: The (not so) secret ingredient! I add fish sauce to any tomato-based soup or sauce I make because I think it really adds an extra depth of flavor and brings out the tomato-y flavors. It will not taste fishy but it will taste delicious.

This soup may be amazingly easy to make but it’s also quite presentable with the help of some little finishing touches. Look at what a glorious blank, vibrant red canvas awaits you below! Some leaves of fresh basil, a drizzle of good olive oil, some cracks of black pepper, or even a little swirl of crème fraîche would make this soup as a much a treat for the eyes as the taste buds.

If you wanna get really crazy, make your favorite version of a grilled cheese and cut it up into little cubes to top your tomato soup with grilled cheese croutons. For the image at the top of this recipe, I made mine with sourdough, white cheddar, gruyere, and a drizzle of sriracha, and used herbed butter to toast/fry it up in the pan.

Note: This recipe makes 2 generous portions that are enough for meals in my household when paired with grilled cheese sandwiches.

easiest tomato soup

How to Make Easy Tomato Soup

Ingredients

4 tbsp (1/2 stick) butter
1 medium onion, peeled and cut into rough wedges
4–6 garlic cloves, smashed and peeled
28 oz can of whole peeled San Marzano tomatoes
water
1/2–2 tsp fish sauce (or to taste)

Optional Garnish Ideas

fresh basil leaves
cracked black pepper
chives
crème fraîche
extra virgin olive oil
parmesan cheese
grilled cheese croutons

Special Equipment

blender

Procedure

In a Dutch oven or study medium-sized pot, gently melt butter on medium-low heat. Add onions and sweat them until they start to become translucent. Add garlic and turn heat down to low, stirring regularly until it becomes fragrant and loses its raw bite but doesn’t brown. Transfer to a blender.

Add the can of tomatoes, including the liquid/puree. Fill the can a quarter of the way with water (about 7–8 ounces) and slosh around to incorporate any remaining tomato residue from the can; add this to the blender as well.

Set the blender to liquify all the ingredients together then return everything to the pot on low heat. If the soup seems too thick, add a small amount of water at a time to get the desired consistency.

Stir in 1/2 teaspoon of fish sauce and then taste for seasoning. There’s a possibility that if you had a lot of salt in your canned tomatoes and/or you used salted butter so you won’t need to season any further. If needed, continue to add fish sauce, a little bit at a time, until the seasoning is to your liking. You won’t need to cook down this soup much after it comes out of the blender, so be sure to taste it at that point and add seasoning to your preference.

Keep the soup on low heat, stirring occasionally, until it’s hot all the way through and starting to bubble or simmer. At this point, it’s ready to serve. Top with your desired toppings and enjoy!

Mini Salmon and Kabocha Squash Pot Pies

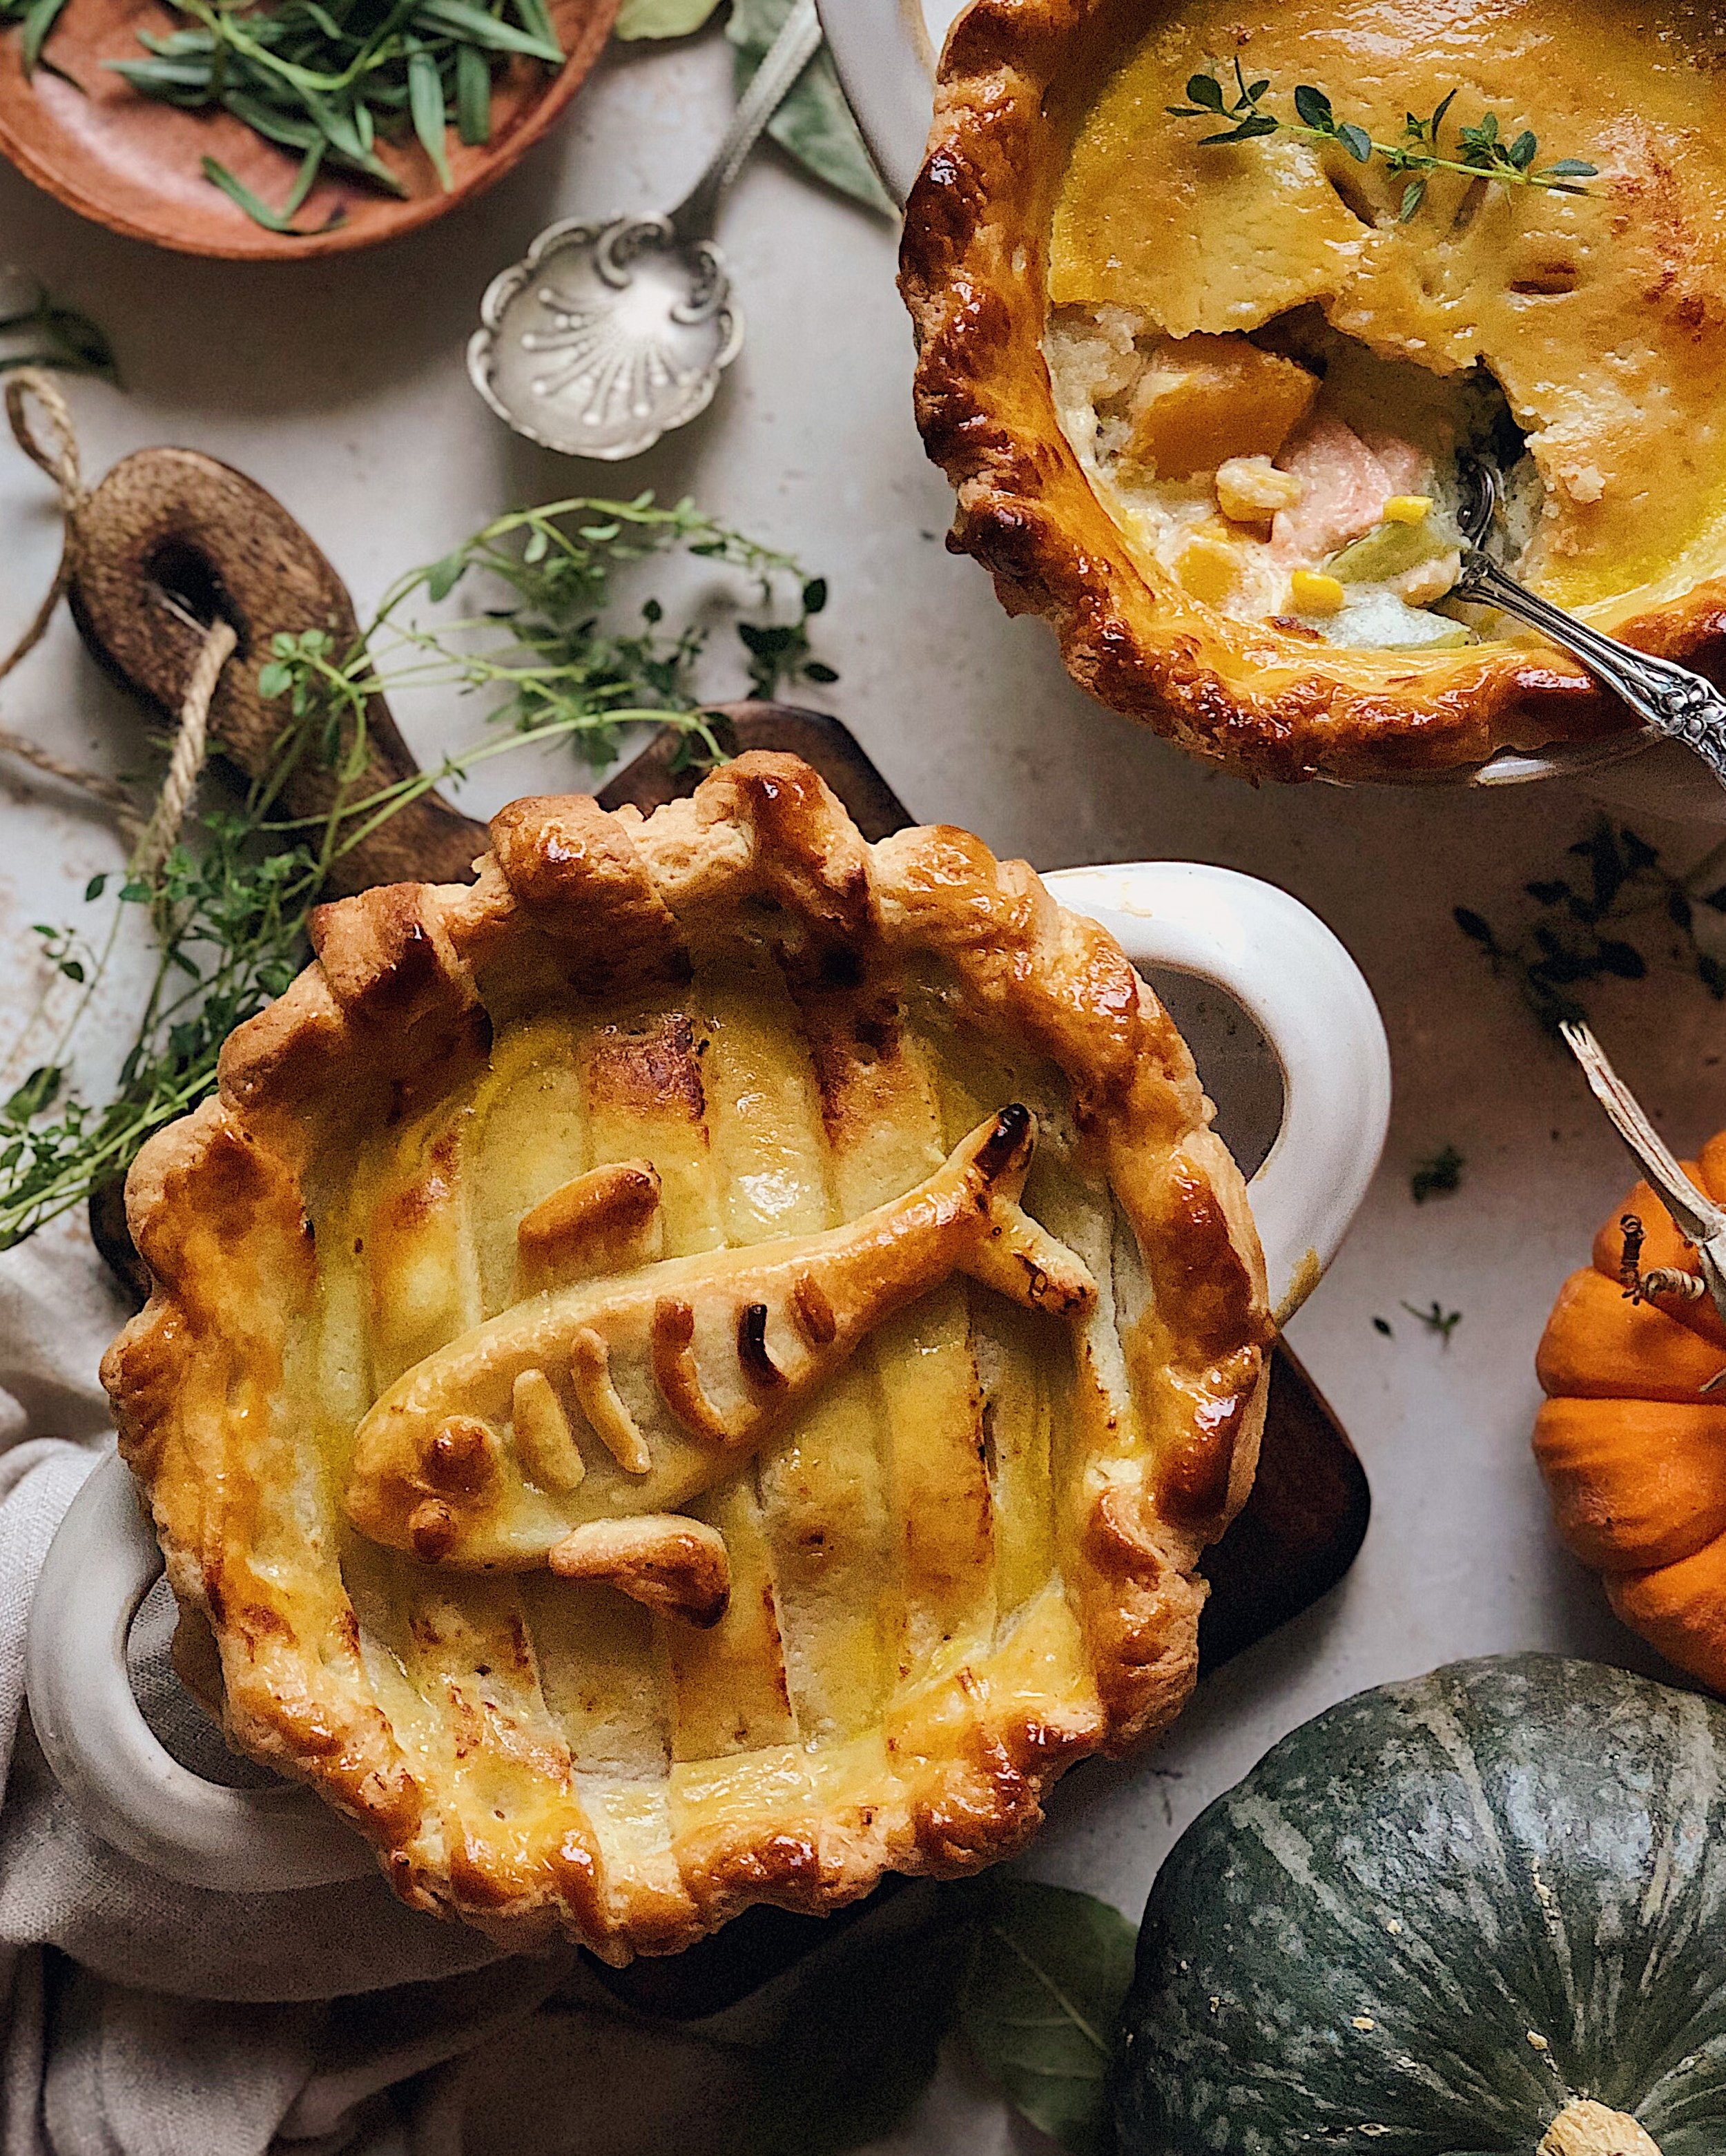
I wrote up a recipe for Kvarøy Arctic Salmon for mini pot pies filled with a creamy, hearty filling of salmon, kabocha squash, and corn. This was inspired by the herring and pumpkin pie from the Studio Ghibli movie Kiki’s Delivery Service. Ages ago, my friend Sandy gave me the idea to try to recreate the fish pastry design from the movie and I finally was able to do a version that I was really proud to share.

I am pretty late to watching all the Studio Ghibli movies. I watched Kiki’s Delivery Service for the first time last year. I happened to be in Stockholm when I watched it, and then found out the next day that the city in the movie was actually inspired by Stockholm! So I got to see one of the buildings that was recreated in the movie right after. Because the experience was so serendipitous, this movie will have a special place in my heart.

You can get the recipe for these pot pies on Kvarøy Arctic’s website.

Slow Cooker Chicken Adobo Ramen

I grew up hardly knowing my own grandparents across the ocean, and it was just me, my parents, and my sister here in the States. But my parents' host mom—the woman who opened her home to them when they first arrived as immigrants—was from the Philippines and she continued to be a mother figure to my parents and a grandmother figure to me well after my parents got settled. I call her Lola, the Filipino term for a grandma. So even though I am not Filipino, I grew up eating lots of chicken adobo during visits to my Lola’s house.

I remember my Lola's version of chicken adobo being more tangy/vinegary and more brothy than other versions I've had at restaurants as an adult. There was something about that soy and vinegar sauce that was always so appetizing; the kind of thing that you have to reawaken your tastebuds when you don’t think you feel like eating. I felt I could drink it by the bowlful! Which is why I developed this fusion recipe where the chicken adobo braising liquid becomes the base for a noodle soup.

The key steps to making this recipe are:

  • Browning the chicken. This renders out the excess fat from the chicken skin, giving you a glorious schmaltz that will be used later.

  • Braising the chicken in a slow cooker. I opted to go the slow cooker route to keep the recipe low maintenance. The browned chicken thighs are given a chance to soak up the flavors from a braising liquid made up of soy sauce, vinegar, lots and lots of garlic, and black peppercorns.

  • Making the broth. Blending together the strained braising liquid and all that soft garlic creates an emulsified broth that is rich and almost creamy. It has a much more concentrated flavor than a traditional soup ramen.

  • Frying the garlic chips. That saved chicken fat goes into making the most delicious garnish of fried garlic chips, which in turn infuses the chicken fat with some of that garlic flavor.

  • Frying the egg. Inspired by Filipino silog, I decided this ramen needs to get topped with a beautiful fried egg.

  • Boiling the noodles and assembling the bowl. I chose to keep the thigh whole but you can also shred it up before serving if you don’t want the recipients to have to maneuver with the bone.

  • Finally, that schmaltzy goodness from before gets drizzled over the whole bowl as a finishing touch at the end.

Click here to get the recipe on the Pete and Gerry’s site!

Thank you so much to Pete and Gerry’s for sponsoring this recipe!

Recipe: Tomato Soup with Pepperoni and Cheese Toast Tops

So we all know that the very best part of French onion soup is the bread and cheese topper that goes over the soup: that delicious gratinated crostini that forms a lid for you to push through to get to the rest of the contents of the bowl, where the top is covered in a very generous layer of melted cheese and the underside is soaked through with the cozy, soul-warming broth. I learned a new word as I was researching for this recipe, and that word was gratinated—which, according to ol’ Merriam and Webster means “to cook with a covering of buttered crumbs or grated cheese until a crust or crisp surface forms”. Well, why can’t other soups have gratinated toasts as blankets to keep them warm?

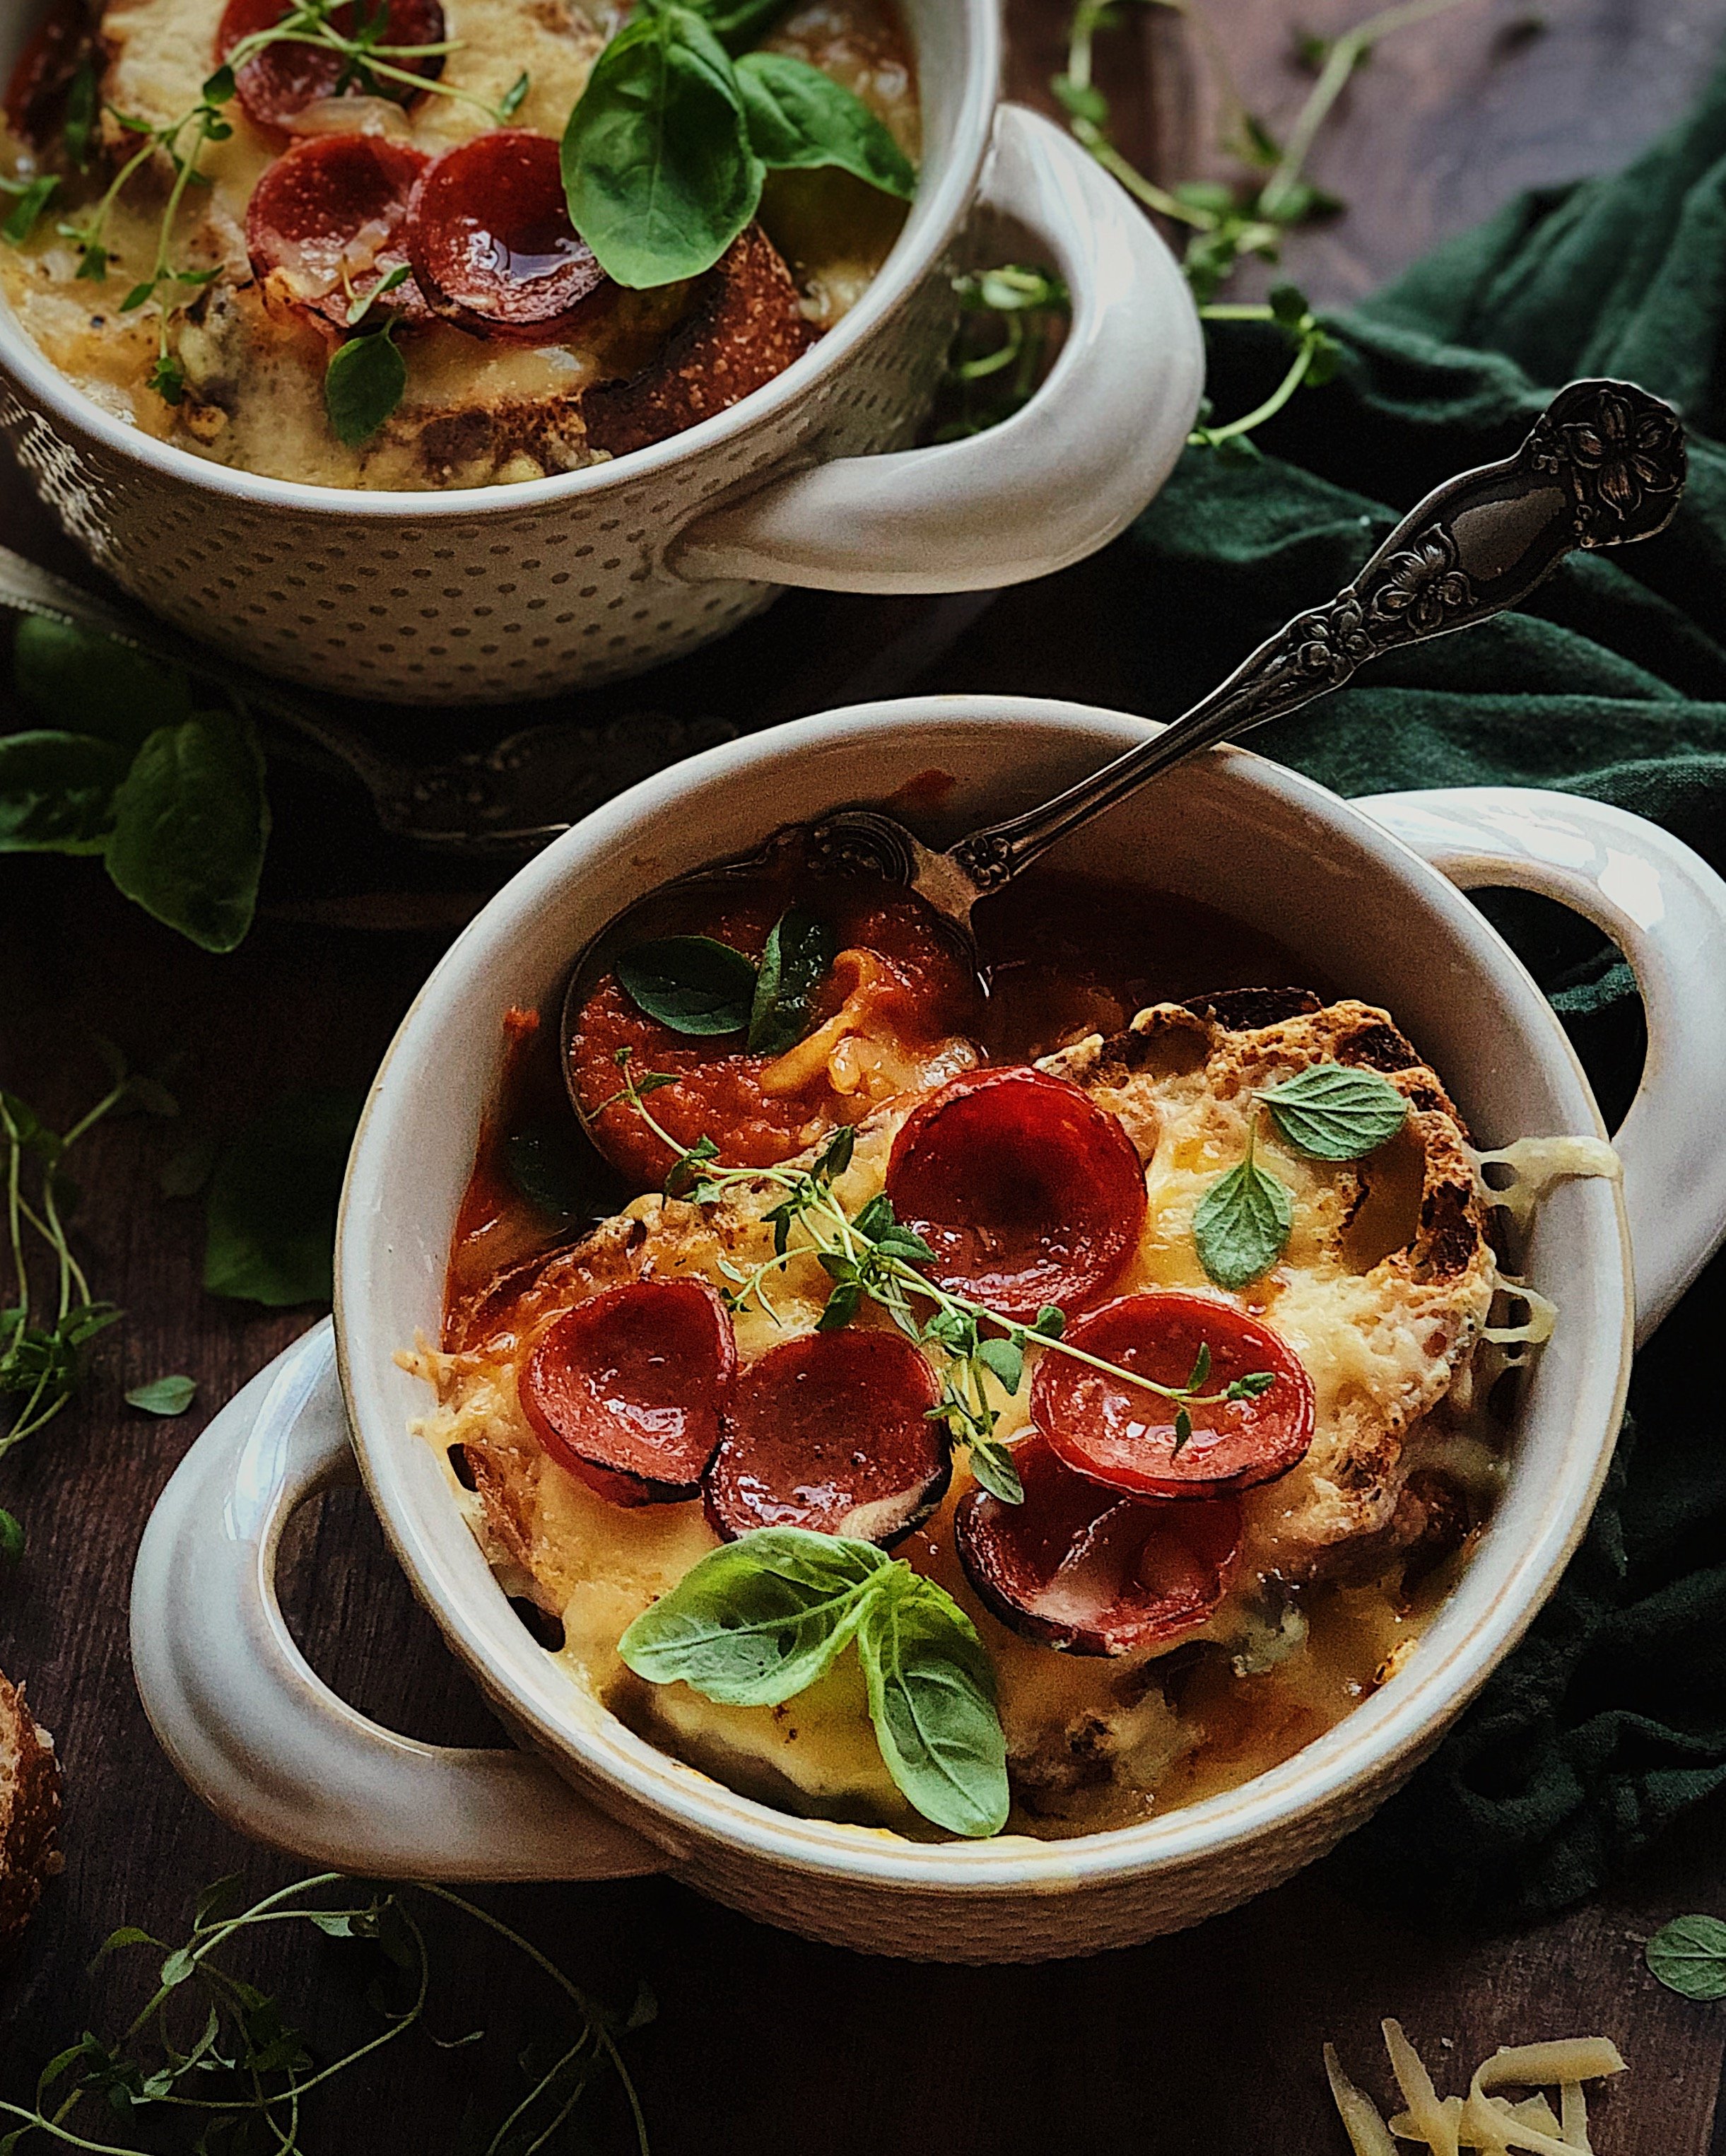
They obviously, surely, can and may—and I thought there was no more deserving soup than a simple tomato one. We all already know that tomato soup pairs perfectly with toasted bread and melted cheese, seeing as a grilled cheese sandwich and a bowl of tomato soup has long had a honorary place in the Culinary Couples Hall of Fame. So I decided to take this union to the next level by taking my trusty, amazingly easy tomato soup recipe and give it a melted cheese toastie top. But then my mind went to how tomato soup is basically like a brothy tomato sauce, and how tomato sauce + bread + melted cheese = pizza toast, and how pepperoni and cheese is the ultimate pizza combo…and that is how we ended up here: tomato soup with pepperoni and cheese toast tops.

And it is every bit as good as you might dream it would be.

Some notes about the ingredients for my tomato soup with pepperoni and cheese toppers:

  • The base of this recipe is whole peeled canned tomatoes. There are a lot of varieties out there and I have found quite a vast difference in salt content and the natural sweetness of the tomatoes. Therefore, this recipe has lots of notes about tasting along the way and seasoning according to your tastes. You might also notice that whole peeled canned tomatoes sometimes come in purée and other times come in a thin liquid. You will want to add more liquid to the soup if you are using ones that come with a thick purée. Do they really have to be San Marzano style? No. But it is typically what I look for because…just because.

  • My go-to way of seasoning any tomato-based sauce or soup is with fish sauce. Trust me on this one. There is something about the acidity of the tomatoes and the salty, funky fish sauce umami that works so well for bringing out the best of tomato flavor. I promise that it won’t actually taste like fish, but instead like tomatoes that have been cooked with love and with some sort of flavorsome mystery ingredient. I am a diehard fan of the Three Crabs brand of fish sauce, by the way.

  • Check the size of your bread. You will want something that can lie flat against the surface of the soup inside the soup crock, so that it forms a nice topper over the soup without the edges getting burned. You will also want something nice and crusty, so that it doesn’t completely disintegrate the moment it is placed on top of the soup. You’ll be toasting it first, and then putting it on top of the soup, and then melting the cheese over it under the broiler.

  • Use the type of cheese that works for you but make sure it’s freshly grated. Any semi-hard white block cheese should work well for this; I used a young gouda but you could go with mozzarella or pay homage to the French onion soup inspiration with gruyere. Any cheese you associate with melting. But be sure to grate it yourself instead of using the pre-grated stuff in order to get a nice cohesive consistency.

  • And finally, how do I turn pepperoni into those iconic, inviting little cups of grease? I get a whole stick of pepperoni in natural casing and slice it myself. This article on Serious Eats goes into detail about what type of pepperoni gets cuppy when cooked. I used Boar’s Head Natural Casing Traditional Pepperoni and it has always served me well. (Shoutout to my friend Peggy for pointing me in the right direction on this.)

That all being said, this recipe is so dang flexible. Skip the pepperoni if you want. Use a few tiny baguette slices instead of one slice of toast covering the whole top. Use a damn boxed tomato soup if you really must. At the end of the day you are talking about tomatoes, bread, cheese, and some fire magic to melt it all together, and (as long as you are being safe about that fire bit) you’re gonna end up with something good.

How to Make Tomato Soup with Pepperoni & Cheese Toast Tops

Ingredients for Soup

1/4 cup butter
1 medium sweet onion, peeled and cut into wedges
6–8 garlic cloves, peeled and smashed
1 28-oz can of whole peeled San Marzano tomatoes*
1–2 tsp fish sauce
1–2 tsp sugar (optional)
cracked black pepper, to taste (optional)

Ingredients for Toast Toppers

2 small slices crusty bread**
1+ cup freshly grated cheese, such as young gouda, gruyere, monterey jack, or mozzarella
8–12 slices pepperoni with natural casing
herbs for garnish, such as basil, thyme, or oregano

*If using “tomatoes in purée”, see extra note in Procedure.
**Check that the bread slices fit within your soup crocks in order to form a “topper” over the soup

Procedure

In a medium dutch oven or pot, melt butter on medium-low heat. Add onions and sweat until they turn translucent and edges are beginning to caramelize. Add garlic, turn heat down to low, and stir regularly until garlic is fragrant and starts to turn golden. Add can of tomatoes.

Scrape up any bits stuck to the pot and carefully transfer contents of pot to a blender. Add 3/4 cup water (or, if using “tomatoes in purée” add 1 1/4 cup water). Blend until liquified, then pour back into pot.

Stir in 1 teaspoon of fish sauce. Check for seasoning. If soup tastes a bit weak in tomato flavor, add 1 to 2 teaspoons of sugar.

Simmer uncovered on low, stirring occasionally, until soup is heated through and starts to bubble or simmer. Check for seasoning again and add additional fish sauce or sugar as needed. Season with black pepper if desired. Cover and keep warm.

Lightly toast slices of bread with your preferred method of toasting.

Spoon soup into 2 oven-safe soup crocks. Top each with a piece of toast. Divide cheese between the two toasts.

Position an oven rack so crocks can be close to the broiler flame. For easy transportation, place crocks on a sturdy sheet pan before positioning under broiler. Watch carefully while broiling. Broil until cheese just starts to melt, then top cheese toasts with pepperoni and continue to broil until cheese is completely melted and pepperoni has curled up to form cups. (Alternatively, you could follow these same steps using a kitchen blowtorch instead of a broiler if you make sure to move the torch around to distribute heat evenly.)

Remove soup crocks and garnish with fresh herbs before serving.

One last reminder about safety…I consider this recipe to be pretty easy but it does involve FIRE. Whether you choose to use your oven’s broiler setting or a blowtorch, keep a close watch on your precious soup toppers. Once the cheese starts to melt, you’ll be surprised how quickly it can die a charred death under an unsupervised broiler. Use oven-safe containers. Don’t let your bread catch on fire. Basically, you don’t want yourself or your culinary creation to end up like Andy:

Image via @foone on Twitter, from Apple’s Oregon Trail

Recipe: Chicken and (Chinese) Dumplings

Having grown up in a household where at least 4 different languages/dialects were randomly slung around, it is no wonder that I was linguistically confused throughout my childhood. My parents were young kids when Malaysia got its independence from the British, so the English I learned from them at home was the British English (with a Malaysian twist) they learned there, and there were always random words from Cantonese, Hokkien, and Bahasa Malaysia sprinkled in. So imagine my confusion as a child going to school for the first time in America; I thought  “airplane” and “aeroplane” were two different forms of aircrafts and I spent my childhood being a rather quiet kid because I was just so worried about saying the wrong words all the time. Fortunately, I eventually learned enough American English to earn a degree in it, and those days of me being quiet are long over!

Even so, these semantic quirks seemed to continue well into my adulthood. Back when I had a sad job as a textbook editor with no time to go out for lunch breaks, I bought some cans of chicken and dumplings to bring to the office. I guess the image on the can was not enough to inform me otherwise, and I excitedly pictured myself microwaving a nice cozy bowl of creamy American style soup (which I loved) loaded with the wontons from the dumpling soup of my childhood. Up until that point, the only dumplings I knew of were Asian dumplings. So boy was I surprised when out of the can plopped some lumps of solid dough in place of the meat-stuffed purses I imagined.

I grew to appreciate those strange (to me) dough globs bobbing in what I learned was a classic comfort food of the American South. But I always thought that my interpretation of chicken and (Chinese) dumplings needed to exist too! I love having partners like Filippo Berio who are willing to entertain my weird personal stories and support me in turning them into reality. Since we were already breaking away from the norm, I decided to use Filippo Berio Extra Virgin Olive Oil to sauté my veggies and cook flour into a sort of roux-like base that gives this winter warmer its body and heartiness. Olive oils may be associated with Mediterranean cooking, but they can be used to create a variety of dishes from around the world; Filippo Berio offers a whole range of high quality olive oils with different properties and flavor profiles, depending on what type of cooking you are doing. I used their extra virgin olive oil because I knew it would bring a richness to the dish as well as a beautiful golden color; if my soup looks a little more glowy and inviting than the typical pale chicken and dumplings, that’s why!

Some notes about the ingredients:

  • Boxed broth is absolutely fine for this recipe, but I encourage you to save up your produce scraps, chicken bones, and leftover Thanksgiving turkey carcass and make your own delicious no-waste broth! You can read about how to do that in my previous post with Filippo Berio right here.

  • Filippo Berio Extra Virgin Olive Oil is fruity and grassy and I love it for sautéing vegetables. Though this recipe does not involve making a traditional roux, sautéing the vegetables in this oil and then adding a little bit of flour to the mix is what helps give this soup body and adds to its complexity of flavor.

  • I’m calling this recipe “chicken and dumplings” but in this case, the chicken is actually IN the dumplings! Ground chicken and mild leeks are the main ingredients in the dumpling filling. If you can find it, go for ground chicken thigh meat which is more moist. And be sure to only use the tender white and light green portions of the leek.

  • I use shaoxing wine and soy sauce for this recipe, not just in the dumplings but to season the soup as well. It is a fusion dish, after all! If you do not have shaoxing wine, you can sub in dry sherry in a pinch.

  • If you go to an Asian grocery store for your dumpling wrappers, you may be spoilt for choice. Since these dumplings are going to be boiled, most options will work for this recipe no problem. I usually get the ones that are for potstickers.

How to Make Chicken and (Chinese) Dumplings

Ingredients for the Dumplings

1/2 lb ground chicken
1 cup leeks (light tender parts only), finely chopped
4 cloves garlic, minced
2 tbsp fresh parsley, chopped
1 sprig (1–2 tsp) rosemary leaves , finely chopped
1 tbsp shaoxing wine
1 tbsp soy sauce
1/8 tsp white pepper
1/4 tsp salt
18–20 round dumpling wrappers

Ingredients for Soup

1/3 cup Filippo Berio Extra Virgin Olive Oil
1 small yellow onion, diced
2 carrots, cut into 1/4-inch slices
2 celery stalks, cut into 1/4-inch slices
4 cloves garlic, minced
1/2 tsp salt, plus more to taste
2 tbsp AP flour
1/4 tsp cracked black pepper
3 cups unsalted or low sodium chicken or turkey broth
1 tbsp shaoxing wine
1 tsp soy sauce
2 dried bay leaves
1/2 tsp dried oregano
1/2 cup frozen peas, thawed
3/4 cup evaporated milk
fresh herbs (such as oregano, rosemary, or thyme), for garnish (optional)

Procedure

To make the dumplings, combine all of the listed dumpling ingredients (except the wrappers!) in a mixing bowl and mix thoroughly. Scoop about 1 tablespoon of filling into the middle of a wrapper. Dip a finger into water and paint a wet ring along the edges of the wrapper. Fold the wrapper in half to seal in the filling, taking care to press out air bubbles. If desired, bring the two sides of the semicircle together and overlap to form a loop, using water to help stick the dough together; or, fold to your desired dumpling shape. Place on a tray lined with parchment paper. Repeat until all the filling is secured into dumplings. Refrigerate dumplings until ready to use.

Add Filippo Berio Extra Virgin Olive Oil to a soup pot on medium-high heat. Add onion and when it starts to sizzle, sauté until it begins to turn translucent. Add carrots and celery and sauté for 1 minute, then add garlic and salt. Sauté until the garlic begins to color and carrots and celery start to soften, about 4–5 minutes. Sprinkle flour and pepper into the pot and cook, stirring, until the flour at the bottom of the pot begins to turn golden, about 2 minutes. 

Gradually stir in the broth, scraping the bottom of the pot with a wooden spoon to scrape up the flour and make sure it incorporates with the broth without clumping. Stir in shaoxing wine, soy sauce, bay leaves, and dried oregano. When the soup begins to bubble, turn heat to the lowest setting and simmer, uncovered, for 10 minutes or until carrots are almost the desired tenderness. 

Add peas and evaporated milk. Stir together and season with salt to taste. Turn up heat to high and gently add the dumplings, making sure they are fully submerged in the liquid. Allow the dumplings to cook through, about 4–5 minutes.

Spoon into bowls, making sure everyone gets enough of all the goodies, especially the dumplings. Optionally, garnish with fresh herbs before serving.

Thank you so much to Filippo Berio for sponsoring this recipe! Visit their website to learn more about their authentic olive oils, made to the highest quality standard of excellence and craftsmanship.

Recipe: Cheesy Curry Noodle Soup with No-Waste Broth

For this recipe, I partnered with Filippo Berio to share an easy idea for how we can reduce food waste when cooking at home. Filippo Berio is committed to learning more about sustainability in production practices (including protection of olive trees, olive groves, enhancing olive biodiversity and enhancing production efficiency when creating oil) and they are also committed to helping cooks at home reduce waste in their own kitchens. 

The pandemic and last year’s lockdown definitely changed the way that I grocery shop but I feel very lucky and privileged to say that I was able to develop some positive new habits from it. One of the things I continue to do is hold on to my food scraps and use them to make a flavorful broth. I always saved the roasted chicken or duck carcasses to make into soup (something I learned from my parents, who would usually use them to make a Cantonese soup with pickled mustard greens) but now I also hold on to things like onion peels, bones, herb stems, and any tops and bottoms of veggies that I typically trim off. I keep adding them to a container in my freezer and because of my job, it really does not take long to accumulate enough to make a big pot of broth. The container fills up so quickly after a couple of big shoot days that it really makes me realize how wasteful I was when I wasn’t saving my scraps before; they truly still have so much flavor left in them that would have otherwise been discarded.

The food scraps broth that I made for this recipe works as a fantastic base for anything your heart desires for soup season, but one tip I will share with you is that stirring in one of Filippo Berio’s incredible pestos is an easy way to bring complex flavor to the broth and transform it into a unique soup. I don’t think a lot of people think to use pesto in soup, but there is a ramen place in the SF Bay Area that does it to make a great fusion ramen, and I’ve been so inspired from that to make various fusion-y noodle soups. 

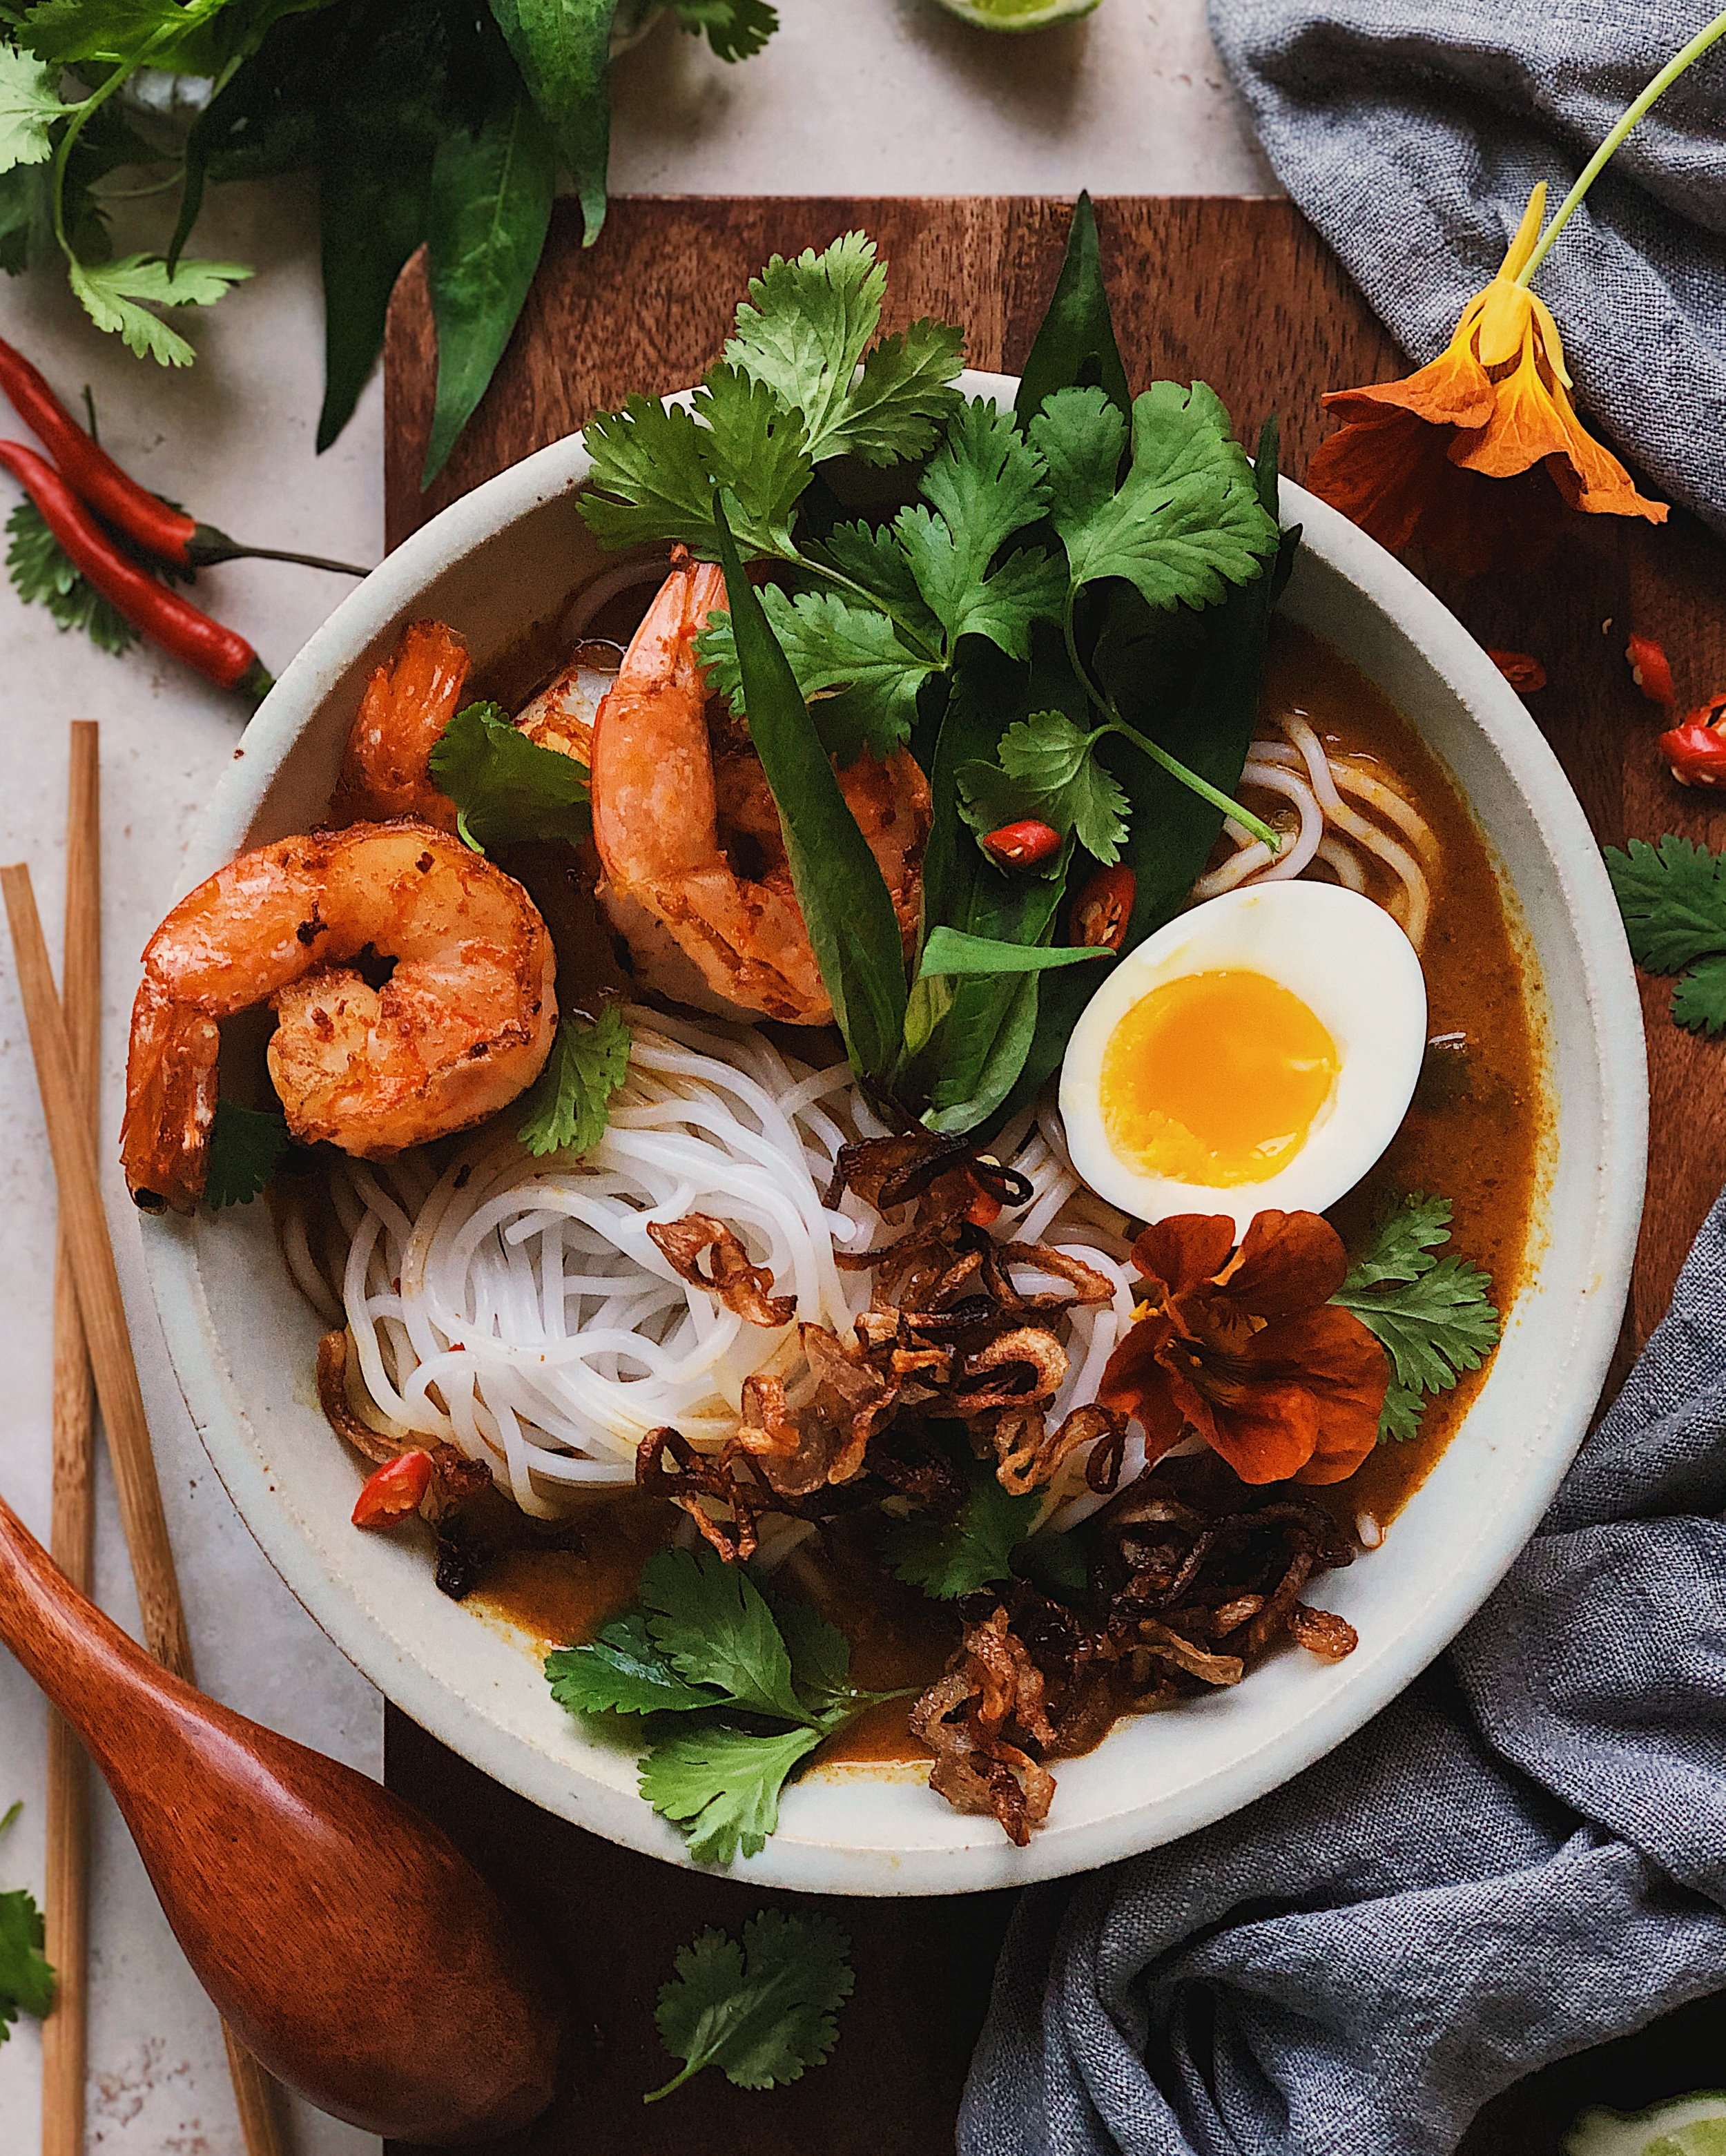
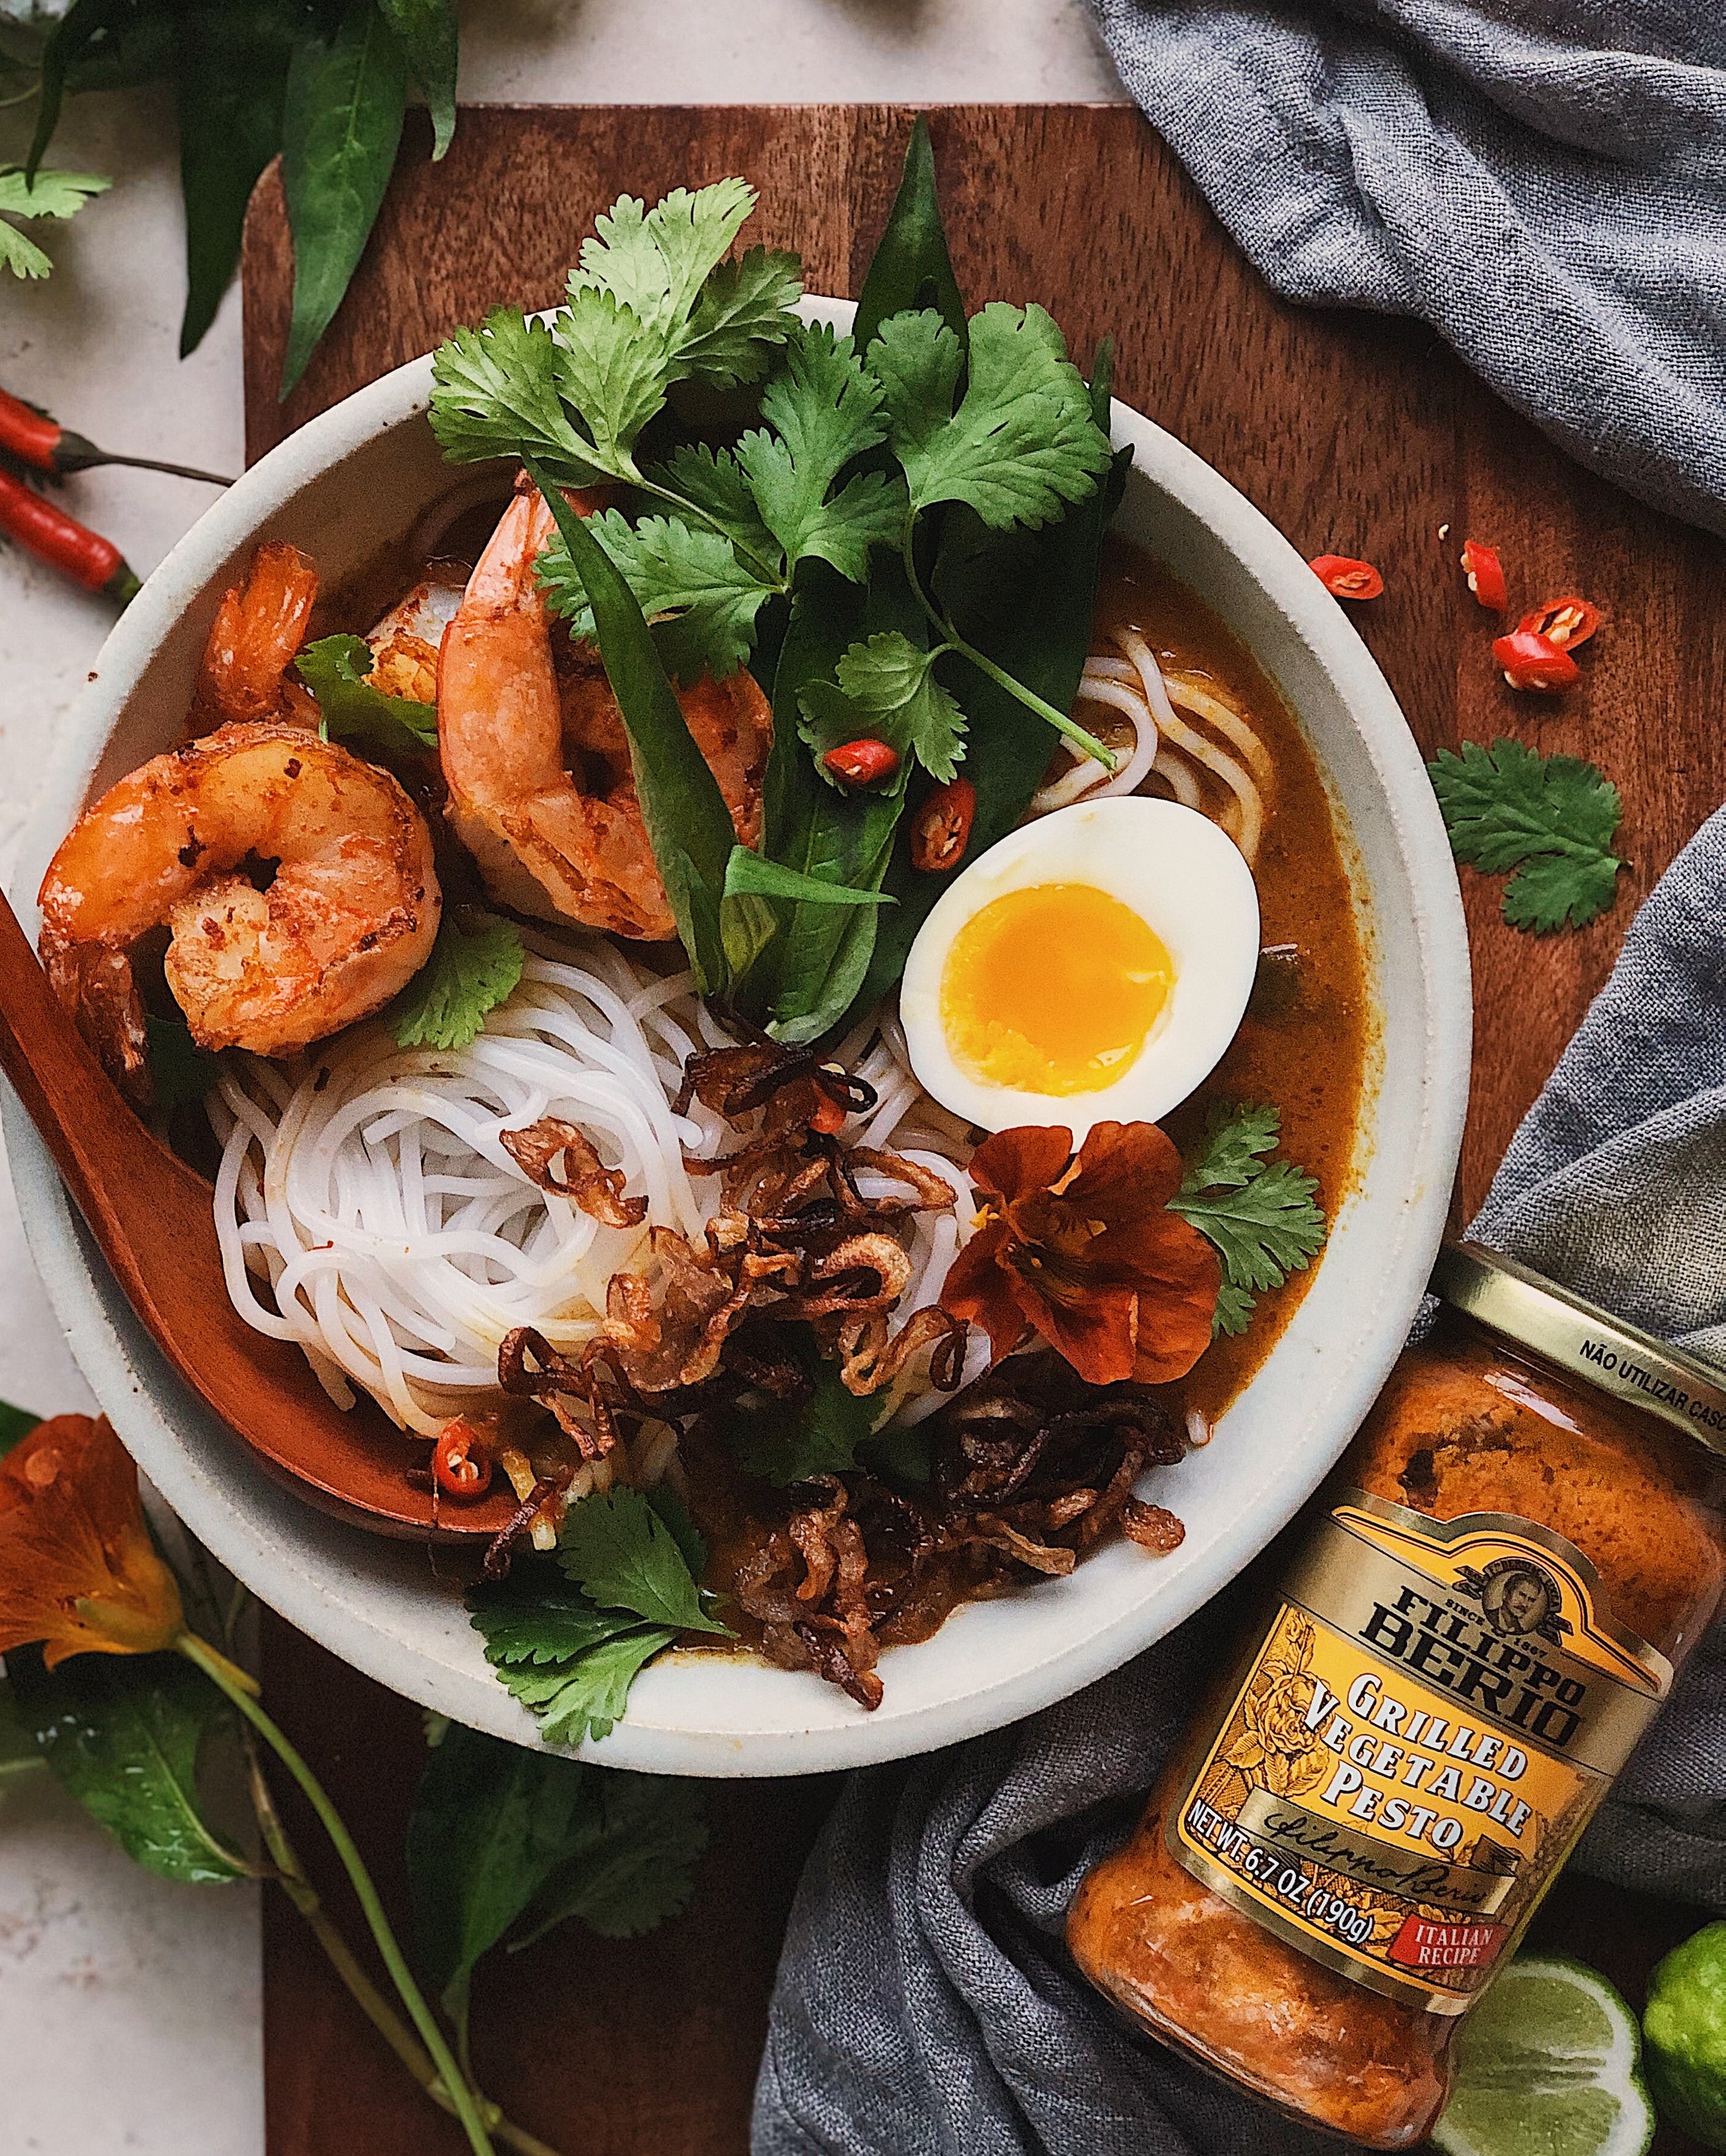
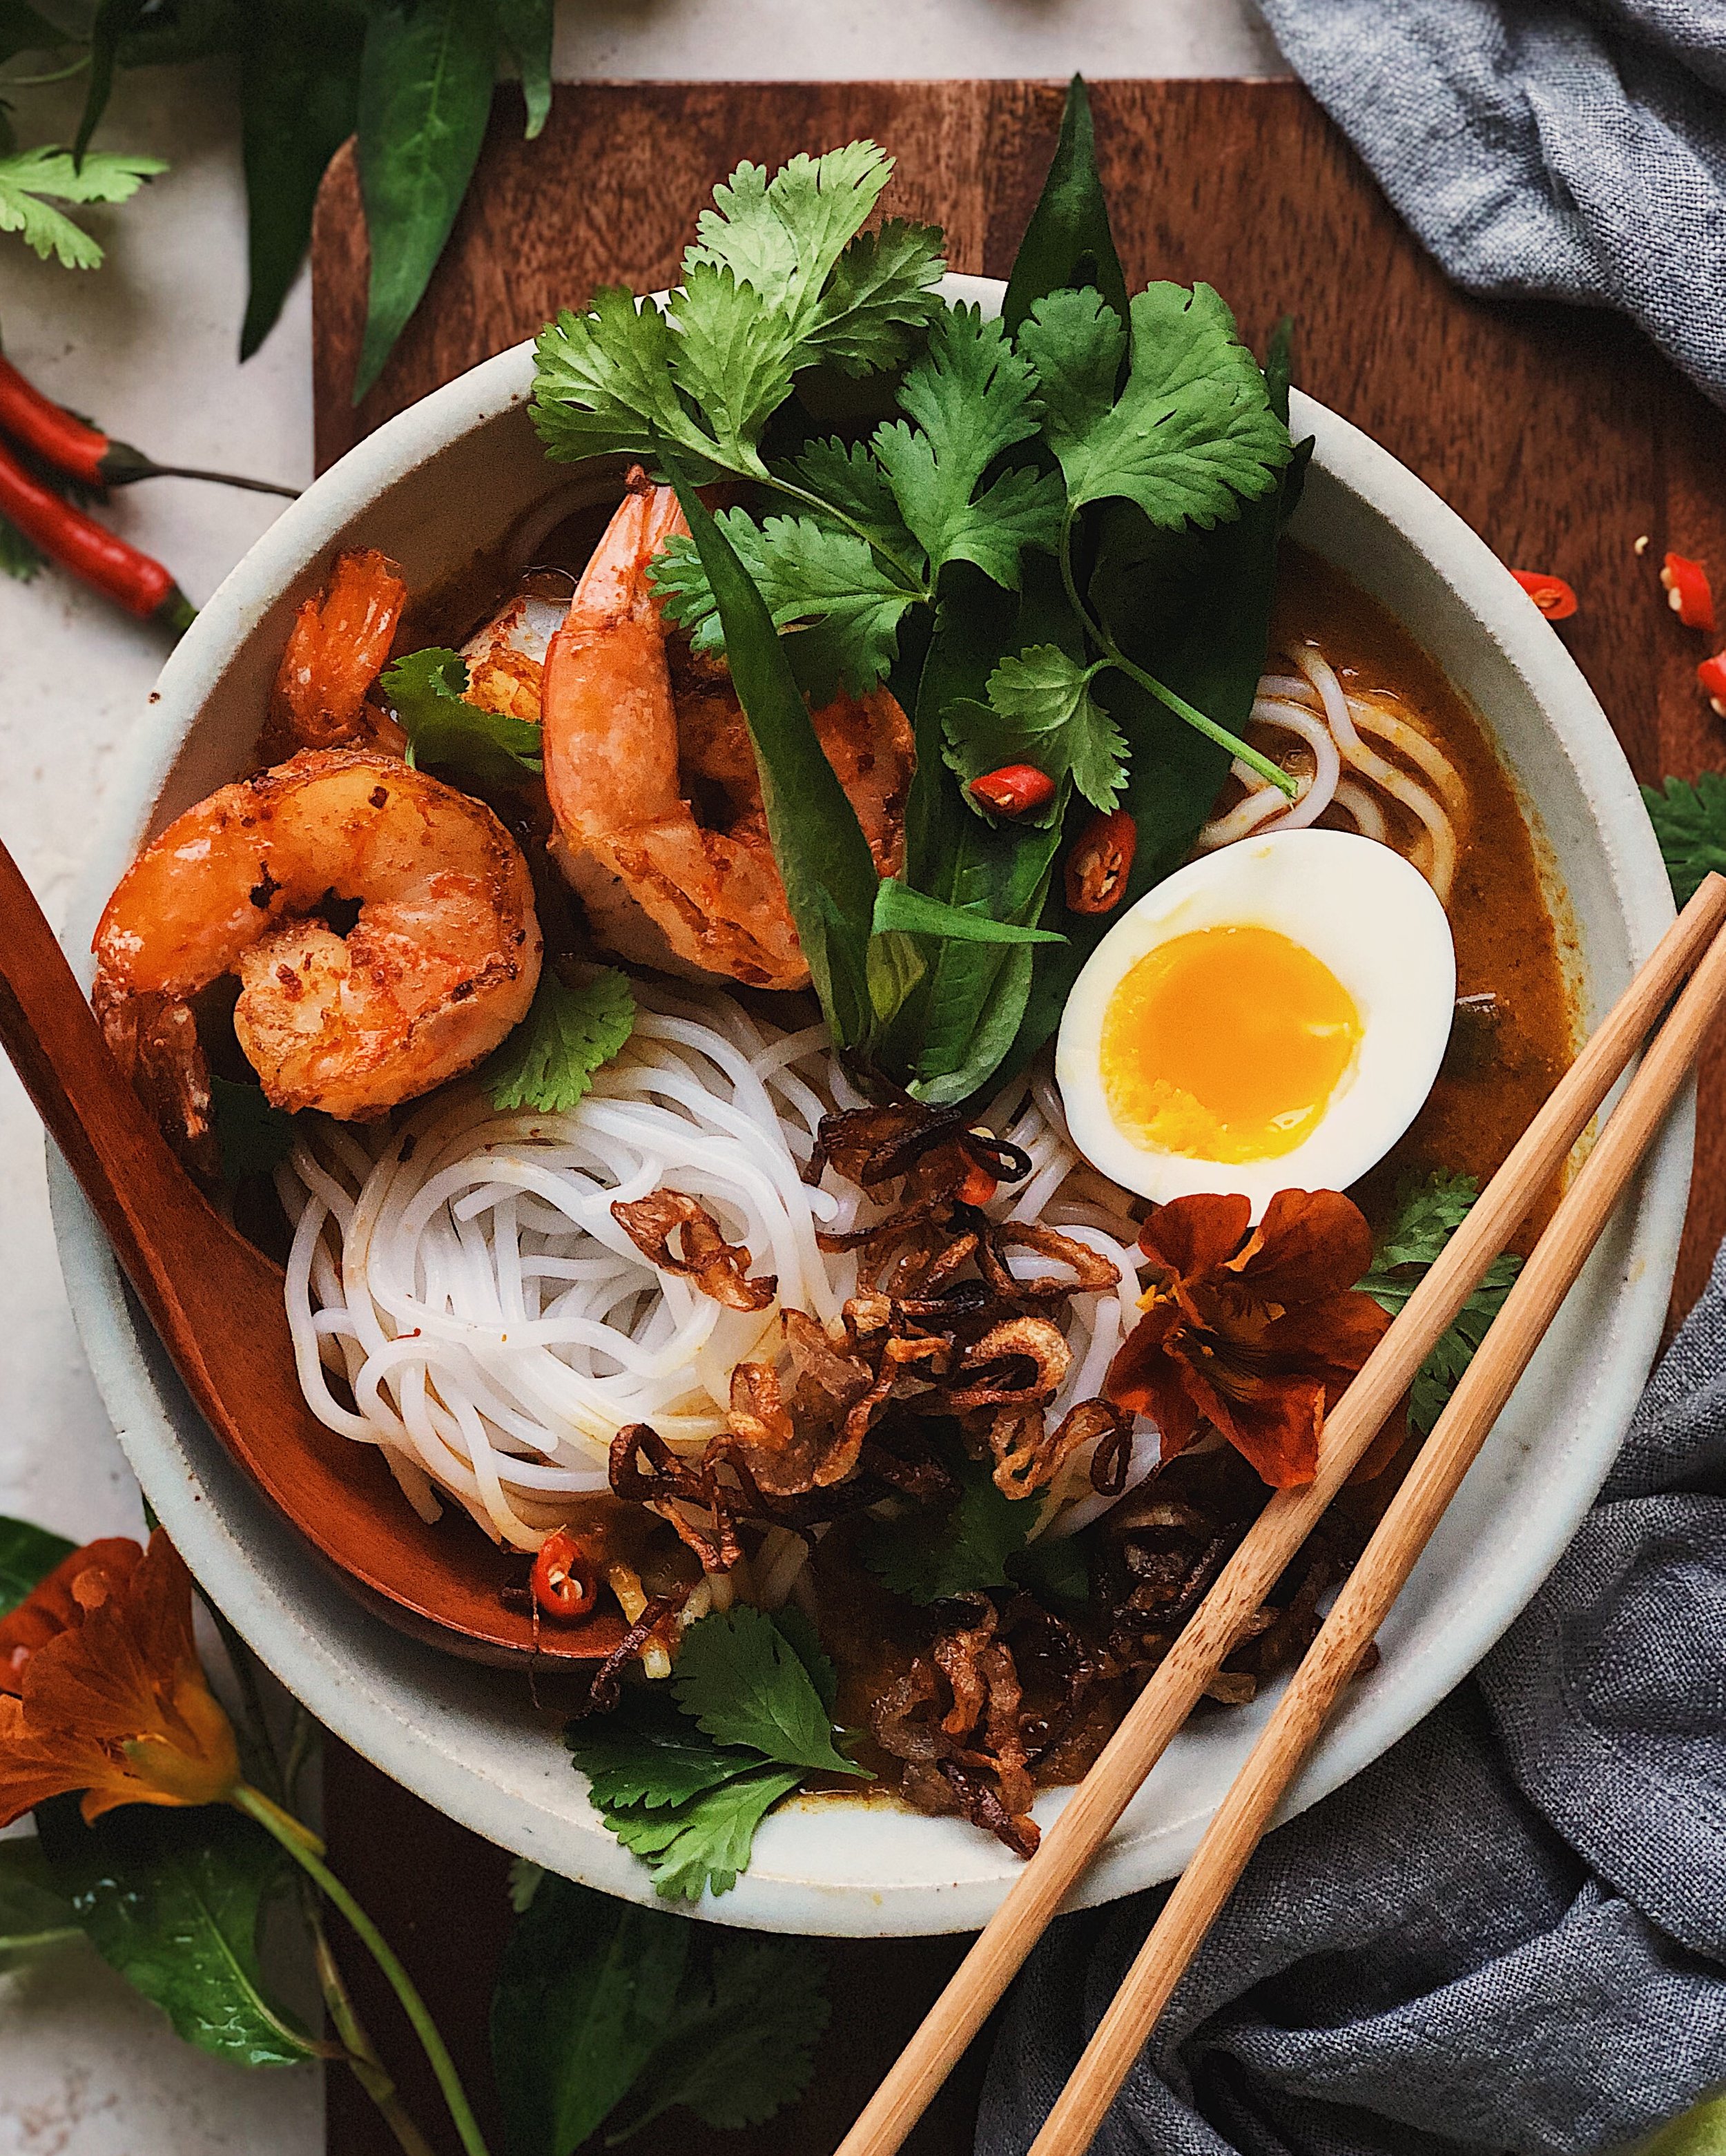
This particular recipe is special because it is a fusion of my and my spouse’s cultures. One of the things that he and I bond over is our love for noodles—coming from an Italian American family, he grew up eating lots of pasta with tomato sauces and pestos while I grew up in my Malaysian Chinese family having stir-fried noodles and noodle soups such as wonton mee and curry laksa. This recipe is sort of like a curry laksa with an undercurrent of homestyle Italian cooking. I used Filippo Berio Grilled Vegetable Pesto in place of a Malaysian laksa paste to bring robust umami to the soup and because of the puréed grilled veggies and the Grana Padano cheese in it, the soup gets a satisfying creaminess that we Malaysians know as lemak, without the use of the traditional coconut milk found in curry laksa. The result is cheesy, spiced (but not that spicy, imo), and very slurp-worthy.

Making this fusion curry noodle soup can be broken down into three phases:

Making the broth: All those food scraps that have been accumulating in the freezer get another chance to give you their wonderful flavors by simmering into a lovely broth. I always make this when I have a roast duck or chicken carcass on hand but if you don’t have one, you can boost the umami by adding a handful of dried shiitake mushrooms. This recipe will yield more that you need to make the two servings of noodle soup described, and you can also prepare the broth in advance. Keep it in a jar in the fridge for a couple of days or reuse a ramen takeout container and freeze it for longer storage.

Transforming the broth into tasty curry soup: Whisking the broth together with Filippo Berio Grilled Vegetable Pesto immediately gives it homestyle Italian flavor and some creaminess. Then, adding curry powder, fish sauce, and sambal oelek brings in some Southeast Asian flavors to make it into a wonderful fusion soup. For the curry powder, I used an Indian curry powder recommended for chicken but even the generic curry powder in the spice section of a Western grocery store would work fine. 

Preparing the toppings: I used Filippo Berio Extra Light Olive Oil to fry some shallots and pan-sear some big shrimp to top my laksa-inspired curry noodle soup. There are so many variations of laksa in Malaysia and there’s no hard rule on what to put on top or even what noodles to use. In fact, many hawker stalls that serve laksa will have big vats of simmering broth and let you choose from a selection of noodles and toppings to add. Whatever you choose to top your cheesy curry noodle soup, Filippo Berio Extra Light Olive Oil is great for quickly pan-frying at high heat to crisp things up for good texture.

Curry laksa is all about cramming as many flavors as possible into a bowl of noodle soup and this fusion version is no exception!

How to Make Cheesy Curry Noodle Soup with No-Waste Broth

Ingredients for No-Waste Broth 

about 1 gallon of food scraps, such as vegetable ends, onion peels, and chicken bones
10 cups water

Ingredients for Soup

2 cups no-waste broth
1/2 cup Filippo Berio Grilled Vegetable Pesto
1 tbsp curry powder
2 tsp fish sauce
2 tbsp sambal oelek, or to taste

Ingredients for Noodle Bowl

1–2 tbsp Filippo Berio Extra Light Olive Oil
1 large shallot, thinly sliced*
6 shrimp, 13/15 sized, peeled and deveined*
1/4 tsp fine chili flakes
pinch of salt
12 oz cooked rice noodles
1–2 boiled eggs, peeled and halved
fresh herbs, such as cilantro and Vietnamese coriander
1–2 bird’s eye chilies, sliced (optional)
1 makrut or conventional lime, sliced into wedges (optional)

* Save these peels for the next batch of broth, or prep these ingredients in advance to use them in this one!

Procedure

To make the broth, combine the food scraps and the water in a stock pot and bring to a rapid boil. Reduce to a minimal simmer and continue to cook, uncovered, for 1 hour. Allow to cool slightly before using a fine sieve to remove the scraps, squeezing out as much liquid as possible before composting them. Cool and store the broth if making in advance, otherwise measure out the amount needed for the soup.

Combine all the soup ingredients in a small pot on low heat. Whisk together until fully incorporated and allow the soup to come to a simmer. Cover and keep warm while preparing the noodle bowls.

In a small skillet, combine 1 tablespoon oil and the shallots. Cook on low heat, stirring constantly, until the shallots are lightly browned and crisp. Place fried shallots on a paper towel to drain. 

In a small bowl, toss together shrimp, chili flakes, and salt. Use the same skillet for frying the shallots and add extra oil if needed. Heat the skillet on medium-high heat, then add the shrimp and cook for 1 minute on each side or until seared and cooked through.

Divide the noodles into two bowls. Pour over the hot soup, then top with shrimp, eggs, fried shallots, and fresh herbs. Serve with extra herbs, bird’s eye chilies, and lime wedges at the table, if desired.

Thank you so much to Filippo Berio for sponsoring this recipe! Visit their website to learn more about their authentic olive oils, made to the highest quality standard of excellence and craftsmanship.

Chicken Ramen with 40++ Cloves of Garlic

garlic_ramen.JPG

Ramen broth is one of those things that I think is less about strictly following a recipe, and more about following your heart. And my heart led me to this idea for turning the French classic “chicken and 40 cloves of garlic” into a ramen. So, be warned that what follows is just a loose guideline moreso than a recipe.

Ina Garten’s Chicken with Forty Cloves of Garlic was the first (only?) French “fancy” dish that I made regularly when I started cooking in college. Is it even fancy? It feels more like countryside/provençal vibes to me in hindsight but it felt very luxurious then. Back then, I also skipped the cognac and used two-buck Chuck for the white wine, which honestly still sounds perfectly good to me now. While other college kids were eating Top Ramen, I was ditching class and learning how to cook by watching hours and hours of the Food Network, seduced by the soothingness of Ina Garten’s voice. So, this recipe is a tribute to that time in my life.

How I even came up with the idea to turn this French chicken and garlic dish into ramen in the first place was when I came across Mandy Lee’s Vampire Slayer Ramen recipe, but I think you will find that these renditions of ramen are quite different from one another.

This awkwardly vague recipe should guide you to a very subtle, creamy broth that is naturally sweet from the braised garlic and some satisfying fall-of-the-bone wings that provide bites of umami as you slurp. As is a common practice with these creamy broths, I tried a version with Asian style unsweetened soy milk but did not notice it making much impact in taste or texture, so I left it out below. I kept the seasoning quite minimal, adding just enough salt to make the other flavors known, but you may find that a little drizzle of soy sauce might make things more in line with the saltier restaurant ramens you are used to.

One more thing I need to tell you about this, though, is that I experienced some pretty rowdy stomach noises in the 24 hours that followed. The kind that made me google “does garlic make you gassy”. (Spoiler alert: It does.) In my opinion, a small price to pay to indulge in a garlic lover’s noodle bowl dream. But you have been warned.

garlic-ramen.jpg

How to Make Chicken Ramen with 40++ Cloves of Garlic

Ingredients for the broth

6–8 party wings, flats recommended
salt
butter
40–50 cloves of garlic, peeled
1/2 onion
shao xing wine
24 oz high-quality bone broth
thyme
miscellaneous food scraps
soy sauce, to taste

For the Bowl

2 servings of fresh ramen noodles
5 cloves of garlic, thinly sliced
neutral oil
2 ramen eggs, plus a few spoons of marinade*
other garnishes, such as black garlic, seaweed snacks, sliced scallions, pea shoots (optional)

*I have found this recipe very helpful for making ramen eggs.

Procedure

To make the broth: Season wings all over with salt. In a large dutch oven, heat a generous knob of butter. Add chicken wings and brown on each side, lowering the heat as needed to avoid burning too quickly. Remove browned wings and add garlic and onion. Cook until they begin to caramelize, then deglaze the pot with a splash of shao xing wine. Add bone broth, a few sprigs of thyme, and whatever food scraps you have around for making stock (such as onion skins, carrot peels, bones, skin, etc). Return the wings to the pot. Cover and simmer on low until the wings are tender, then remove the wings and set aside.

Continue simmering the broth as desired, until the garlic cloves are mushy and it tastes naturally sweet from the aromatics. Remove thyme stems and any inedible food scraps. Transfer the remaining contents of the pot into a blender and carefully blend until completely smooth. (Please exercise caution when blending hot liquids, and allow the liquid to cool a bit first if you have time.) Return broth to the pot and season to taste. Keep warm on low heat while preparing the rest of the ramen bowls.

To make the wings: Bring some of the marinade from the ramen eggs to a simmer in a small pan. Add the cooked chicken wings and cook in the marinade, flipping occasionally, until the wings look flavorfully glazed and most or all of the marinade has evaporated.

To make the fried garlic chips: Spread the thinly sliced garlic out evenly in a small pan and add enough oil to cover. Fry on medium low to low heat until the garlic starts to turn golden brown (watch carefully). Remove pieces as they brown and transfer to a paper towel. Reserve the garlic-infused oil when the frying is complete.

To assemble: Cook noodles and divide between 2 bowls. Top with wings and egg, then pour in the broth from the side. Garnish with garlic chips and any other toppings. Drizzle some garlic-infused oil over the top.

My Basic Jook Recipe

porkbellycongee.JPG

There are plenty of recipes out there for rice porridge, commonly known as congee, or what my Cantonese family calls jook. I am mostly recording this basic jook recipe down for myself, because I know how I like to make it but I sometimes forget things like: How much was the right amount for our 2-person household? How much water did I start off with? How far in advance of dinner do I need to start it, again…? Getting old sucks, and one of the worst things about it for me so far has been forgetting all the simple little things that used to be so easy for me to recall.

To me, a good basic jook has a silky feel to it. Something that goes down easy without a lot of chewing but isn’t a completely homogenous puree either. Some people like theirs as more like a soupy water with cooked rice floating in it, but that’s not for me. I also like making sure that there is a pleasant mild flavor to it when eating it all on its own, even though a variety of toppings is an absolute must for eating jook in my household. Pickled vegetables, white pepper, and soy sauce where the most common toppings from my childhood. But instead of those, I really went all-out in the photo above to lure you in— And it worked, right?

The jook in the photo features red braised pork belly that I made using Omnivore’s Cookbook/Maggie Zhu’s recipe here. There’s also a poached egg, radish shoots, pea shoots, chopped scallions, crushed chicharrones, and some slices of red Fresno chili. I also served it with a side of you char kueh/youtiao/Chinese donut, which I buy at the Asian supermarket and always keep stashed in my freezer. The best part of eating jook is tossing in a few slices of the fried dough, letting them get soggy, and then eating a big scoop of the soggy donut and jook all at once.

How I Make Basic Jook/Congee

(Makes 2 dinner portions)

Ingredients

1/2 cup jasmine rice
2 cups bone broth
2-4 cups water
2 inches ginger, peeled
2 tbsp shaoxing wine
2 tbsp fish sauce
salt

Procedure

Combine rice, bone broth, and 2 cups of water in a large pot and turn heat on high. Finely grate ginger directly into the pot so it catches all the juice. Add shaoxing wine and fish sauce. Stir everything together.

Bring to a boil and then reduce heat to low. Cover and simmer for 1 hour, stirring occasionally to make sure nothing sticks to the bottom. If jook looks too dry, add water 1/2 cup at a time along the way. Continue simmering until jook reaches desired consistency. Season to taste.

Serve with yummy accompaniments.

Need a faster recipe? Check out my shortcut Chicken Jook with Ginger-Scallion Oil recipe, using storebought cooked rice and rotisserie chicken (sponsored recipe).

Recipe: Chicken Jook with Ginger-Scallion Oil

Lily_Oct2_Social.JPG

Rice porridge is known by many different names—I learned the term “congee” in America, but grew up calling it the Cantonese term “jook”. But I think something that all Asian kids and former kids can agree upon is that it is THE dish for Asian parents to make as a cure for any and all under-the-weather situations. I’ve had several people tell me they don’t like jook because it reminds them of the one thing they ate while being sick as a kid…but I personally love jook in sickness and in health!

That being said, as an adult there are times when that cure-all feels desperately needed, and parents are no longer around to stand over the stove to slowly simmer that rice into a tummy- and soul-warming porridge. In those times, shortcuts are a necessity! So when Bibigo USA asked me to develop a jook recipe for flu season, I wanted to make sure the recipe was super easy and ready to provide comfort in 30 minutes.

The ginger-scallion oil was inspired by the kind that my mom used to make to go with Hainanese chicken rice, but I also included garlic to help boost immunity and ward off vampires. Not only is it awesome on jook, chicken, and rice, but I have been using it on biang biang noodles, roast duck, and pretty much anything.

Lily_Oct2_Banner.JPG

How to Make Chicken Jook with Ginger-Scallion Oil

Ingredients

1 Bibigo Cooked Sticky White Rice
2 cups bone broth or chicken stock
1 tbsp + 1 tsp ginger, grated and divided
1–2 scallions, thinly sliced
1 small clove garlic, minced
Coarse Kosher salt, to taste
2 tbsp avocado oil*
1/3 cup rotisserie chicken, shredded

*Can be substituted with other neutral, high smoke point cooking oils, but not olive or sesame oil

Procedure

Microwave Bibigo Cooked Sticky White Rice according to instructions on packaging for 90 seconds.

Combine the broth, microwaved rice, and 1 teaspoon ginger in a small pot and bring to a boil. Turn down the heat to medium and allow to boil for 10 minutes. Add 1/2 cup water, and continue to simmer, stirring occasionally, until the jook becomes homogeneous, about 10 minutes. Add salt to taste.

While jook is boiling, prepare the ginger-garlic-scallion oil. Gently blot excess moisture from the remaining ginger. In a small heat-safe bowl, combine ginger, scallions, and garlic, plus a generous pinch of salt. Heat oil in a small saucepan until it just starts to smoke (or test by throwing in a small piece of scallion to see if it sizzles). Carefully pour oil over aromatics and mix well. 

When jook is the desired consistency, transfer to a bowl and top with shredded chicken. Top with ginger-scallion oil and serve.

Thank you so much to Bibigo USA for sponsoring this recipe! For more recipe ideas and to learn more about their products, visit their website!

Recipe: Mandu Jeongol

Lily_Oct1_Social_v2.JPG

I can’t wait for hot pot season. Despite usually preferring sunshine, I do have a deep appreciation for gloomy weather that is motivated mostly by my stomach.

I think budae jjigae has gotten some spotlight in recent years—a trendy dish among younger adults in South Korea but a dish borne out of a deep and sad history. (I learned a lot from this article on Food52 and this video from Munchies). So for those who already know and love budae jjigae in its modern revival, the easiest way I describe mandu jeongol to you is a healthier, more veggie-forward version. While budae jjigae night feels like going all in on processed, salty favorites (no sarcasm here; I LOVE Spam), mandu jeongol night feels like a nice cozy night in, eating lots of fresh veggies and loving it. It can definitely still involve lots and lots of soju though, too!

For me, the most key ingredients to a good mandu jeongol are the crown daisy greens (also known as chrysanthemum greens, I find these at Asian markets); gray squash (I get this from my neighborhood Mexican market), and of course ready-made mandu/dumplings. While even the first two can be improvised if you do not have access to less mainstream produce, do not skimp on the mandu! As I have said many times before on my blog, Bibigo Beef & Vegetable Mandu are my absolute fave when it comes to frozen dumplings. They are so juicy and flavorful! So, obviously that is what I used here. Veggies are great and all, but obviously these mandu were the best part of the hot pot.

As with any hot pot, the ingredients and amounts are just guidelines. Eat things as they get cooked to your liking, and adding more ingredients as you go!

Lily_Oct1_Banner.JPG

How to Make Mandu Jeongol

Ingredients for soup base

4 tbsp coarse gochugaru
2 tbsp soy sauce
2 tbsp fish sauce
5–6 cloves garlic, minced
1 tbsp Korean plum extract or Chinese plum sauce
32 oz bone broth or chicken stock
Salt to taste

Ingredients for Hot Pot

1/2 medium onion, sliced
3 scallions, cut into 2-inch pieces
1/2 block firm tofu, sliced
1 gray squash, sliced
1 carrot, sliced*
6 cremini or shitake mushrooms
3 ounces enoki mushrooms
12 ounces napa cabbage, cut into chunks
2 cups crown daisy leaves
8+ Bibigo Beef & Vegetable Mandu
1/2 cup kimchi (optional)
1/2–1 cup tteok/fresh rice cakes (optional)

* I used mini bento vegetable cutters to cut my carrot slices and give them that scalloped edge.

Procedure

Make soup base by combining gochugaru, soy sauce, fish sauce, garlic, and plum extract/plum sauce. Mix together and set aside.

In a wide, shallow pot, evenly distribute the onions and white parts of scallions. Add kimchi, if using. Stir together sauce mixture with a splash of broth and pour evenly over onions.

Arrange remaining vegetables and tofu (and rice cakes, if using) in the pot as desired. Top with frozen mandu. Fill the pot using the remaining broth. Cover, and place on a portable cooktop/burner at the table. Bring to a boil, remove the lid, and enjoy eating the ingredients with your table companions as they get cooked.

Thank you so much to Bibigo USA for sponsoring this recipe! For more recipe ideas and to learn more about their products, visit their website!

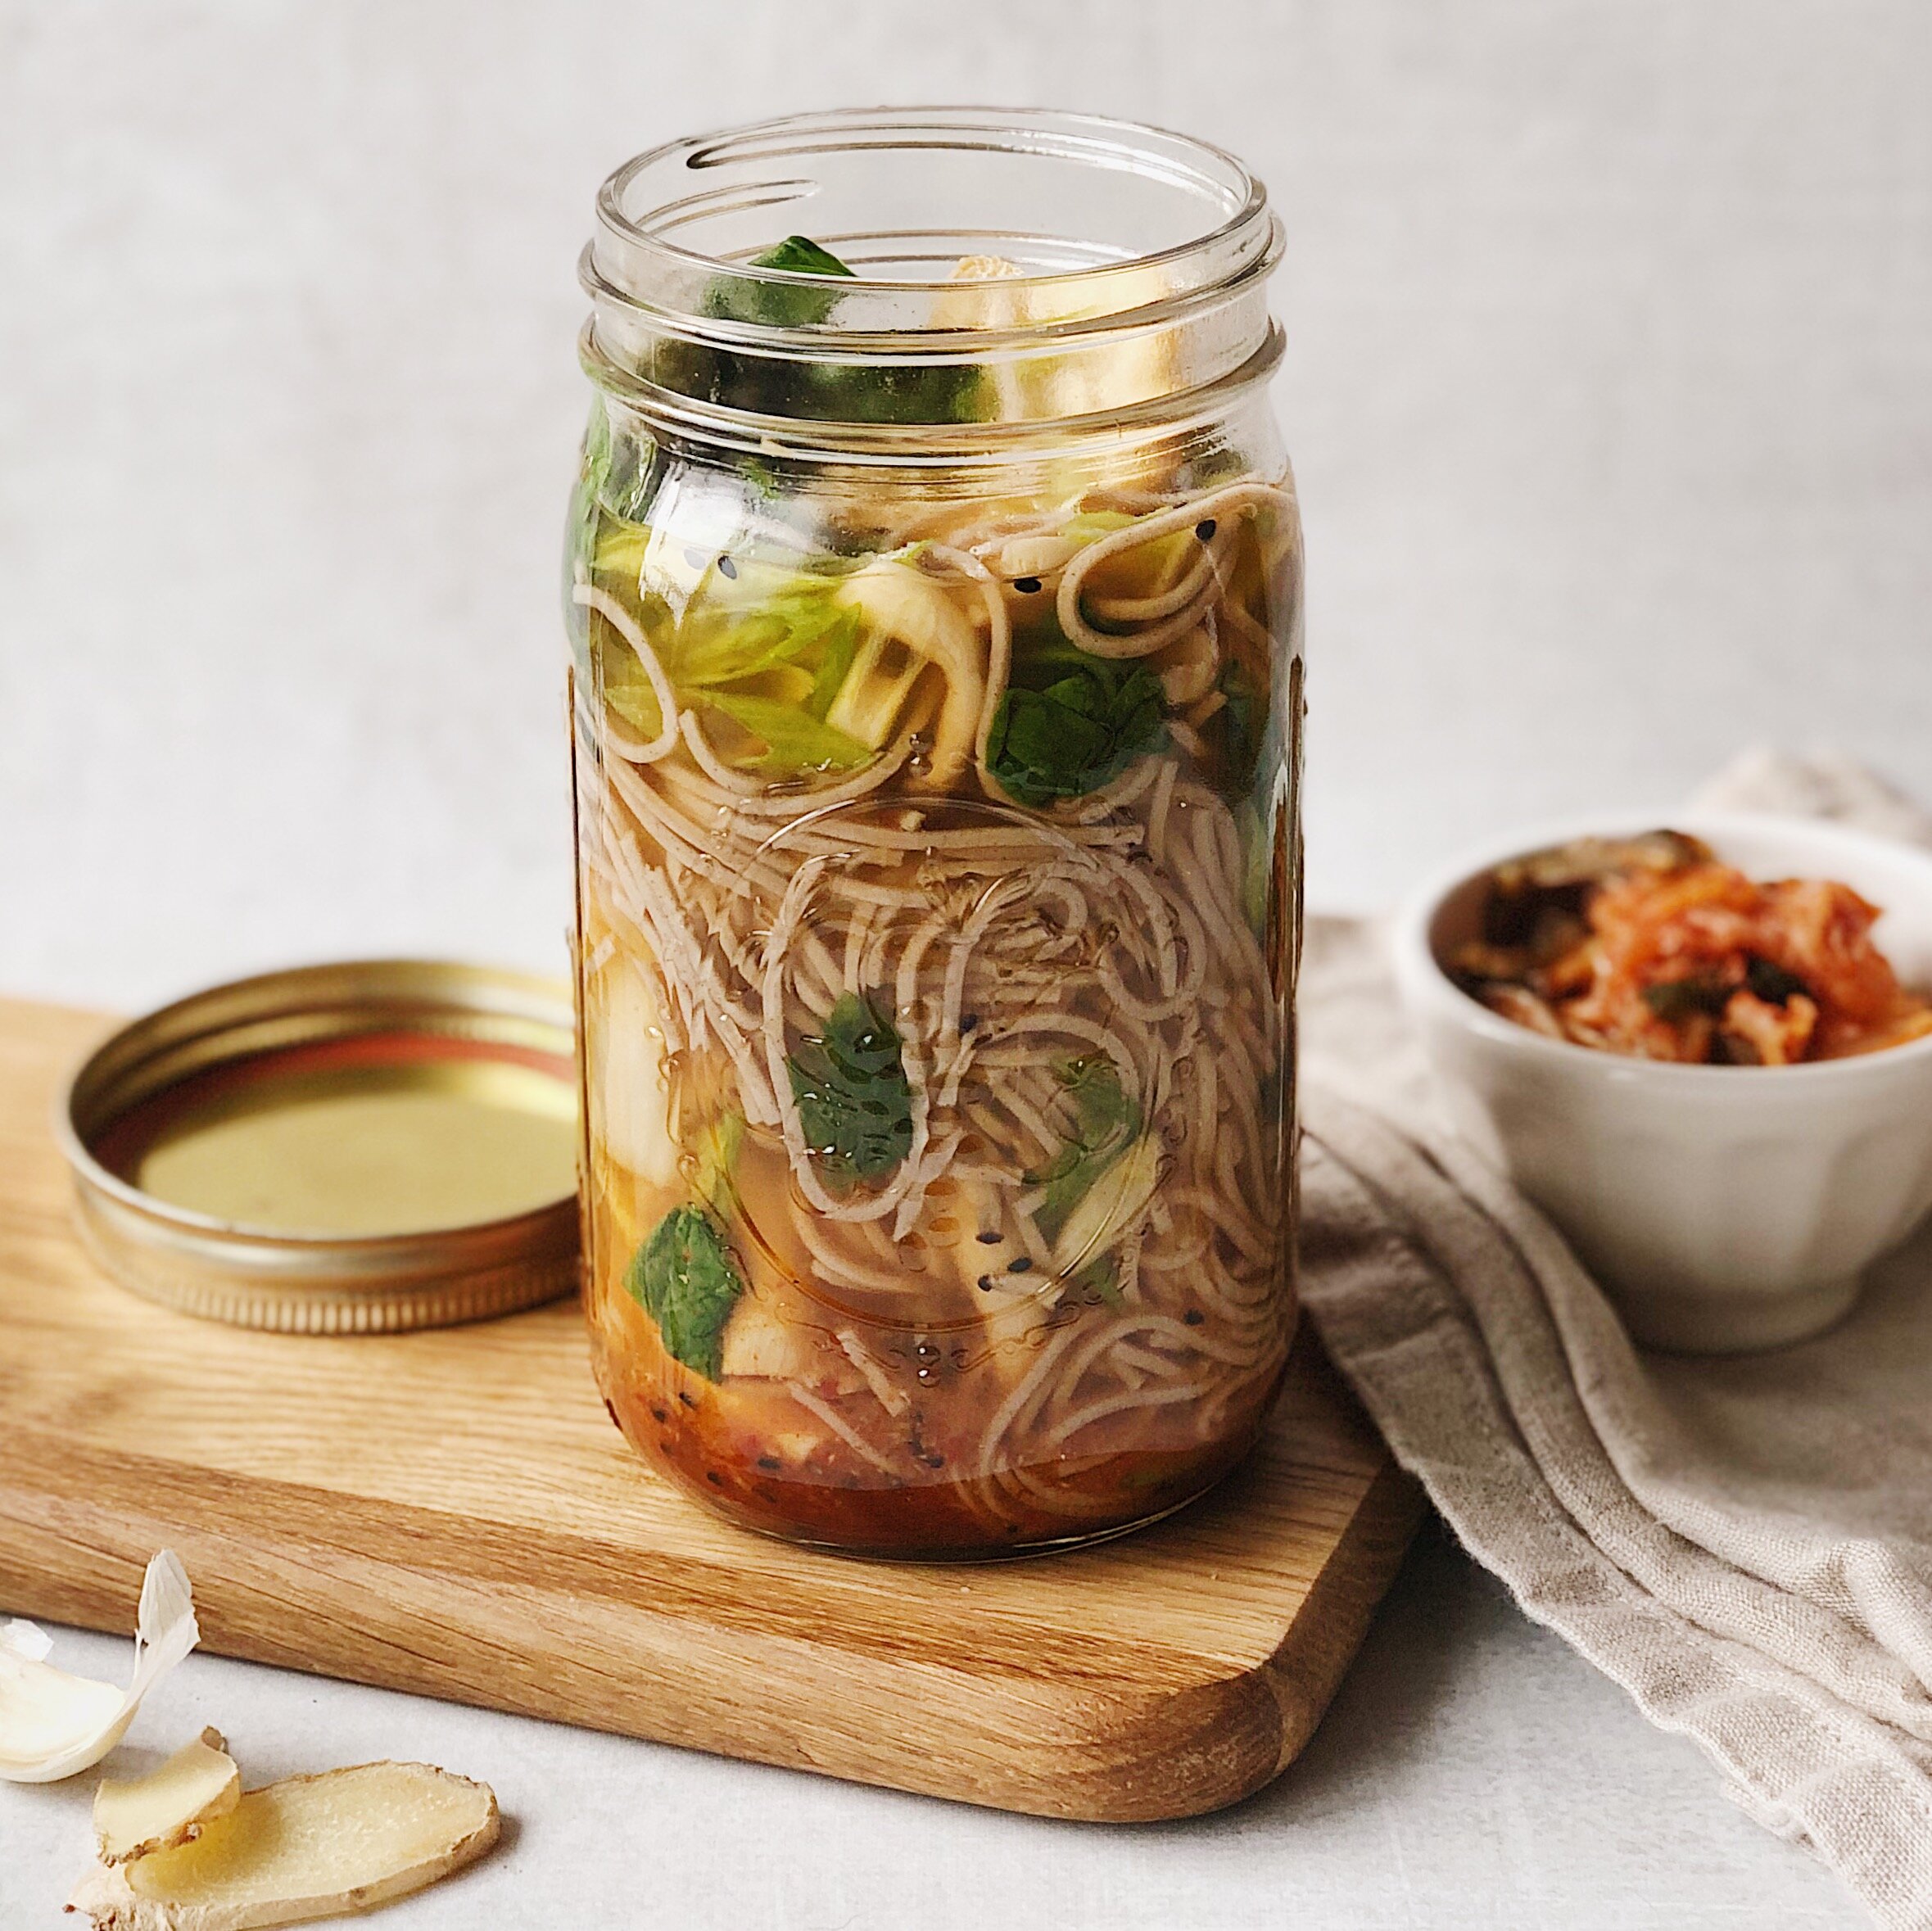
How to Make an Instant Noodle Soup Jar

Lily_Oct3_Social_v1.JPG

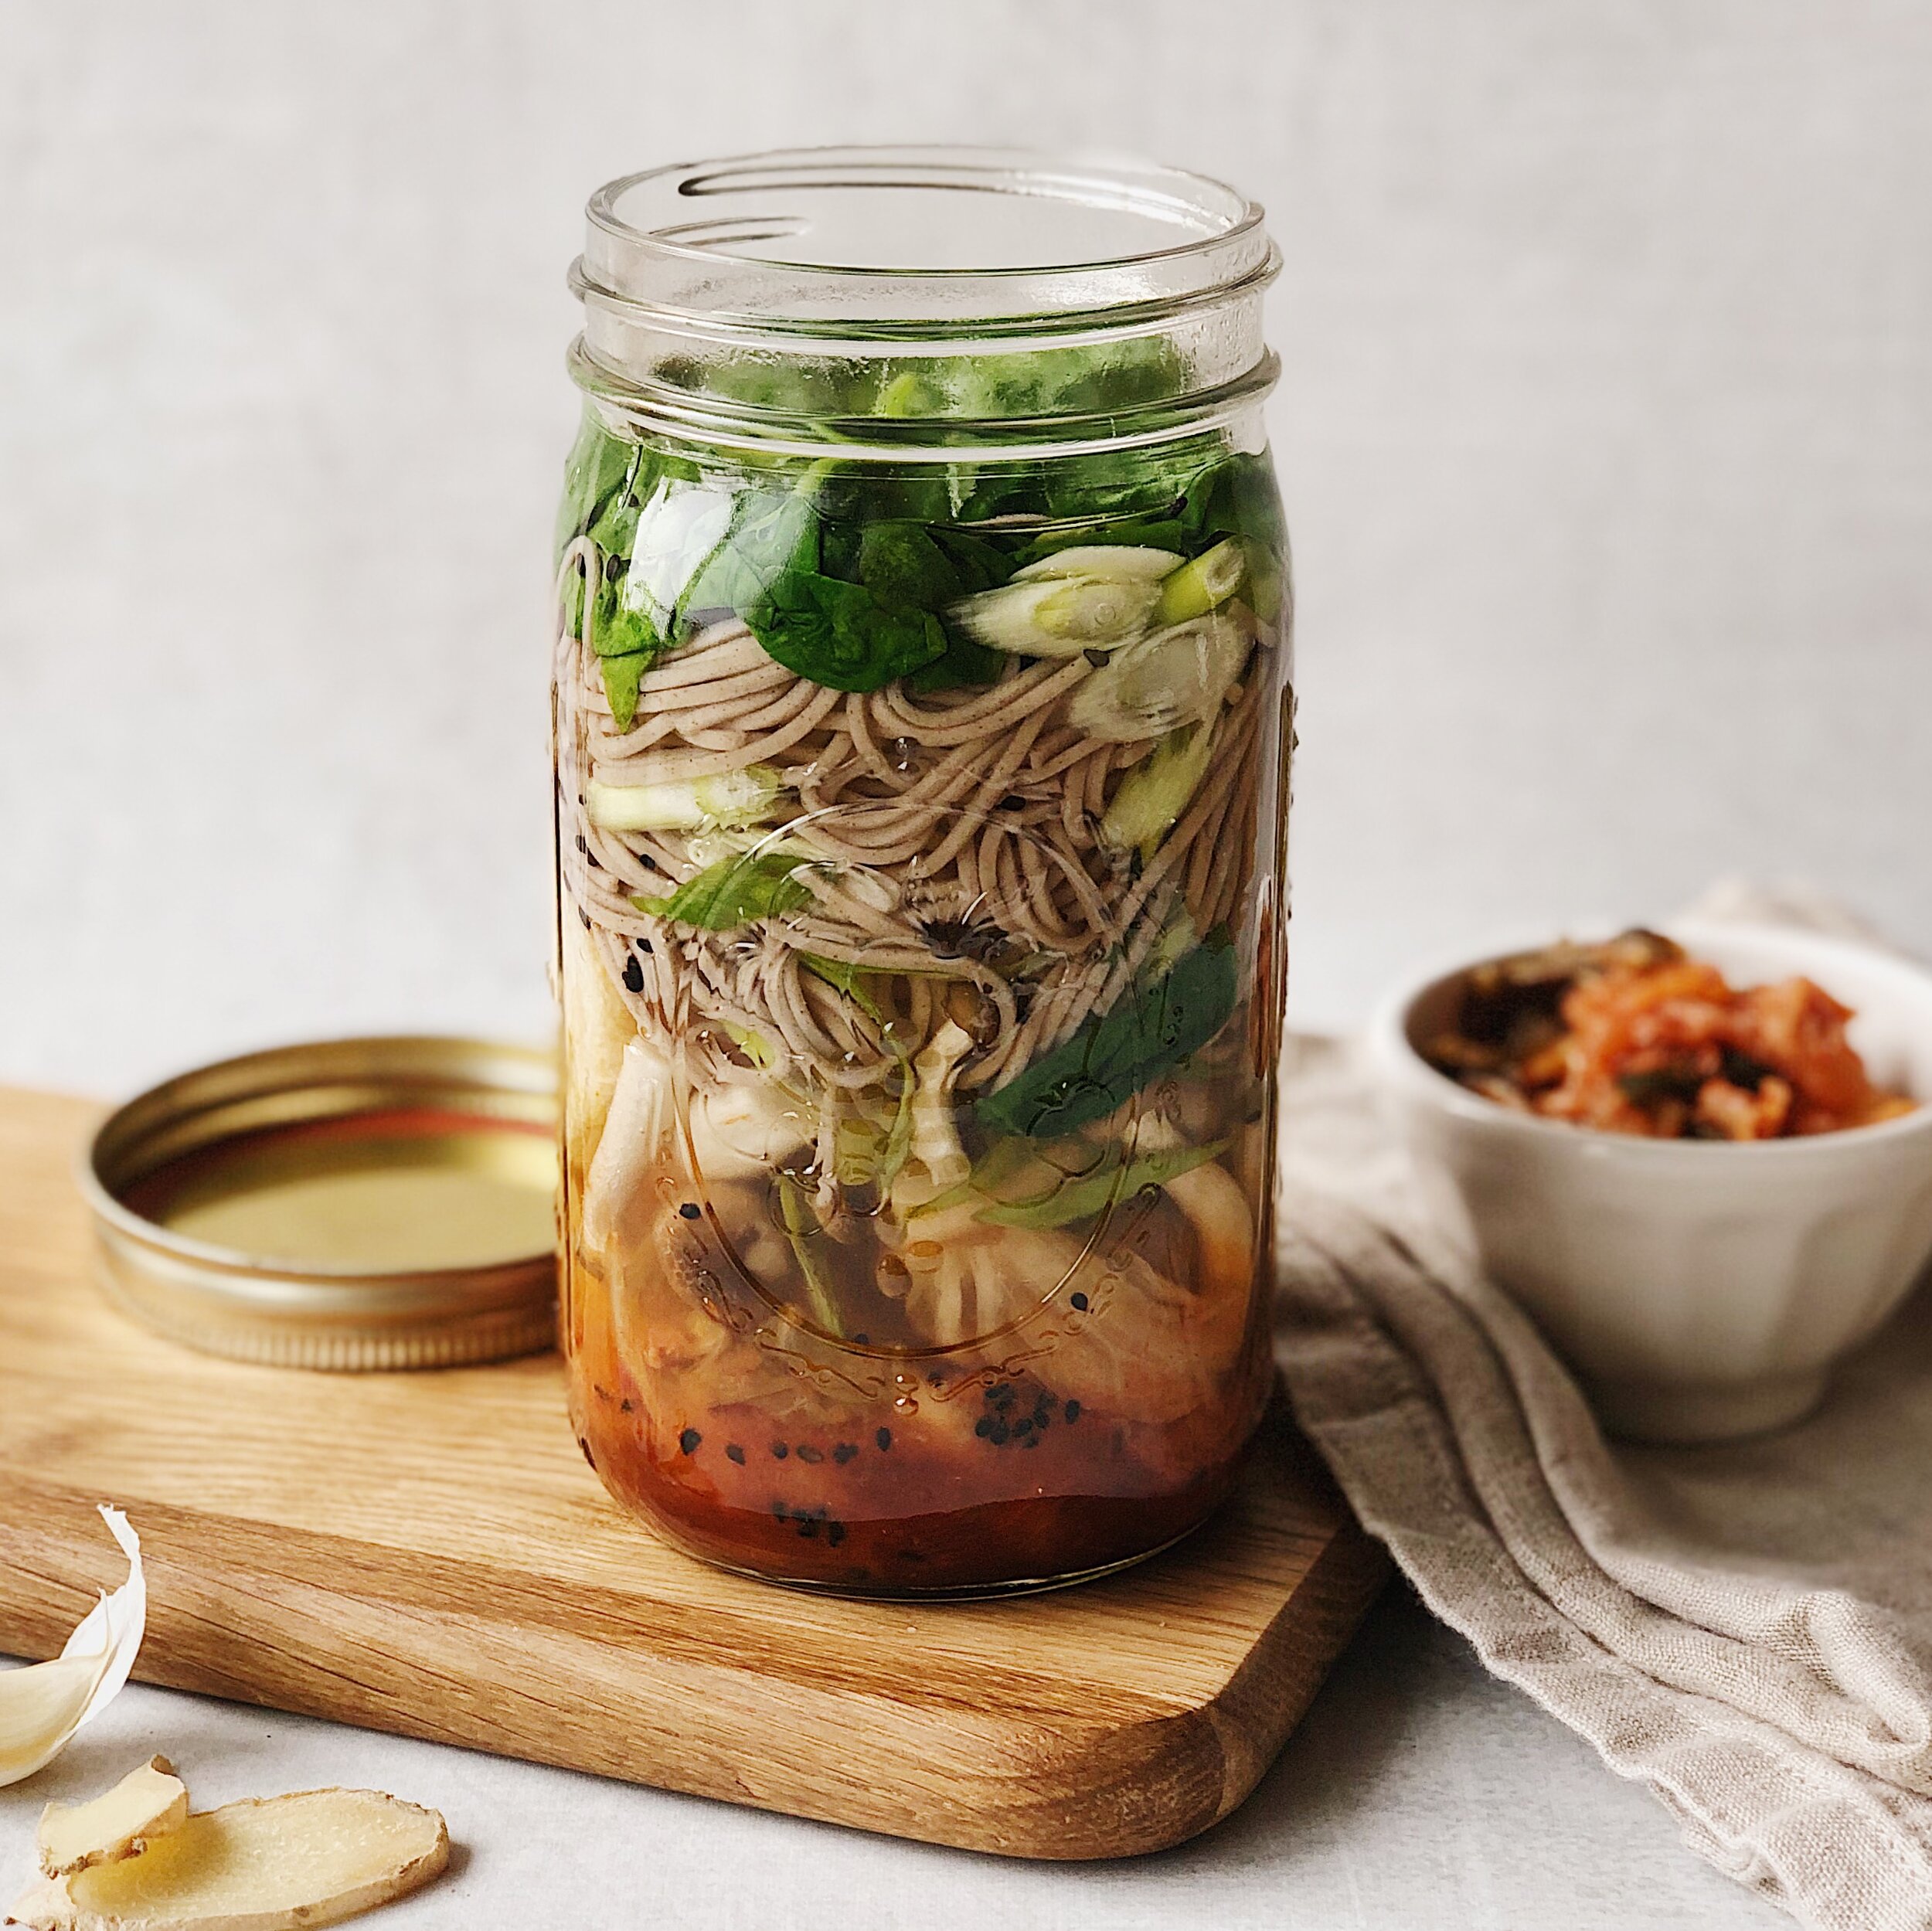
So, I really really like instant noodles. But I try to only indulge in them in desperate times of need when my fridge is barren or I am too incapacitated to make something of nutritional substance. However, I have always wanted to make instant noodle soup jars at some. The idea of packing one of these up for a loved one’s lunch, seeing the colorful, fresh ingredients in layers through the glass, and thinking about converting them into a comforting soup with just the addition of hot water—just like an instant cup noodle—gives me all the hygge feels for some reason.

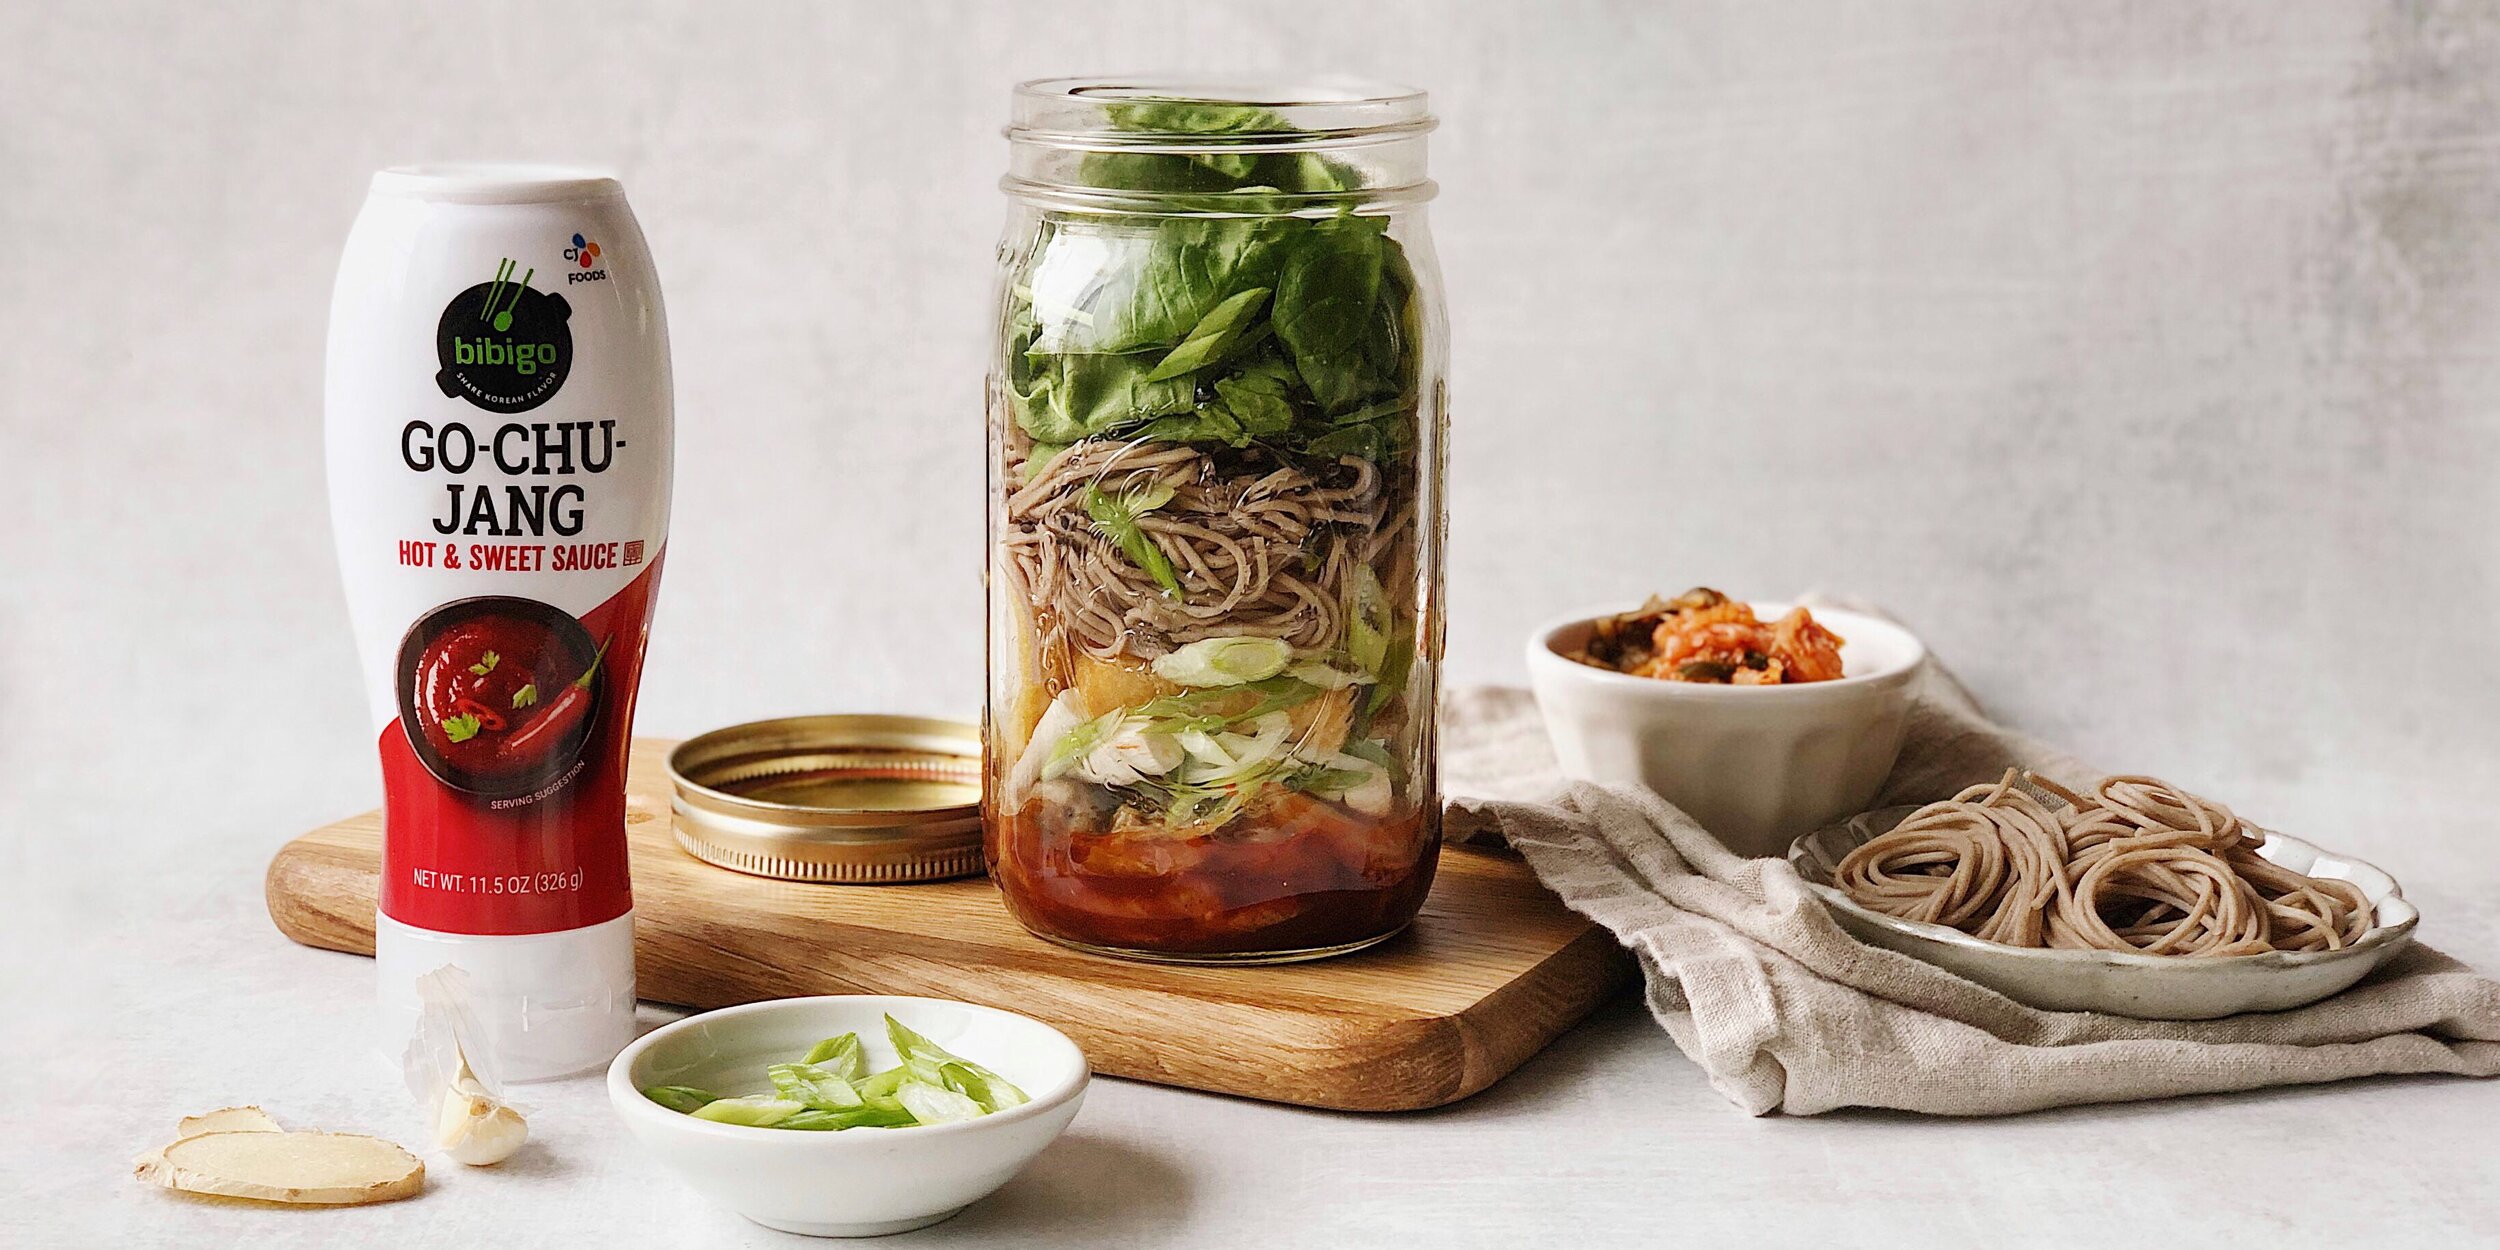
Thus, I collaborated with Bibigo USA to make a Instant Kimchi Noodle Soup Jar. The recipe below shows you how to make a great slightly spicy base for a noodle soup but the other ingredients are totally just guidelines. Experiment with other veggies or types of noodles if you like! The whole point is to create a custom instant noodle soup that suits your tastes and is full of the nutritional substance that is pretty dang lacking in a storebought instant noodle cup. Just make sure to par-cook anything that’s really firm, because you will want everything that goes into the jar to soften and cook in the same amount of time.

Lily_Oct3_Banner.JPG

How to Make Instant Kimchi Noodle Soup Jars

Ingredients for soup base

2 tbsp Bibigo Hot & Sweet Go-Chu-Jang Sauce
1 clove garlic, minced
1 tsp ginger, minced
2–3 tsp doenjang or soybean paste
1 tsp kimchi juice

Other Ingredients

1/2 bundle soba noodles
1/3 cup kimchi
1 scallion, thinly sliced
1/3 cup beech mushrooms
2 large fried tofu puffs, sliced
1/2 cup baby spinach leaves
1/2 tsp black sesame seeds (optional)

Procedure

Combine Bibigo Hot & Sweet Go-Chu-Jang Sauce, garlic, ginger, doenjang, and kimchi juice in a bowl and mix until well incorporated. This is your soup broth base.

Bring a large pot of water to a boil. Par-boil soba noodles just until they are no longer brittle, about 2–3 minutes. Immediately remove noodles from pot and rinse with very cold water. Allow to drain thoroughly.

Pour sauce mixture into the bottom of one 32-ounce jar or two 16-ounce jars. (One 32-ounce jar will fill a large ramen bowl when emptied.) Add kimchi, scallions, mushrooms, tofu puffs, and par-boiled noodles. Top with spinach and sesame seeds, if using. Place lid on jar(s) and store in refrigerator until ready to use.

When ready to eat, bring kettle of water to boil. Fill jar with boiling water until the level reaches the bottom of the spinach layer. Allow noodles to soften and finish cooking, about 3 minutes. Carefully stir everything together before consuming.

956C3A63-60D2-4AEA-B65F-EE4260252BA0.JPG

Thank you so much to Bibigo USA for sponsoring this recipe! For more recipe ideas and to learn more about their products, visit their website!

Recipe: Slow Cooker Short Rib Pho

shortribphonoodlesoup.JPG

Huge disclaimer: This is not a traditional/authentic or proper pho recipe in any way. I am very much a home cook, and this recipe is my practical solution for making a comforting noodle soup with all the pho flavors at home, without a lot of active maintenance. Things I associate with making a proper pho include: using a variety of beef bones for a rich complex flavor, using all whole spices, and skimming the scum and impurities off the top of the broth for several hours to produce a completely clear broth. This recipe does not involve any of these things! You could choose to run the entire broth through a fine sieve before serving, but I do not do this since I am not looking to impress anyone at home.

The key to compensating for the lack of effort in this recipe is using a good store-bought bone broth—this basically becomes the stand-in for buying, cleaning, roasting, and boiling all those aforementioned beef bones. For Bay Area folks, I recommend the one found in the frozen section at Berkeley Bowl, that seems to be made in-house. I’ve also tried Bonafide Provisions beef bone broth and that worked well too. You are looking for something that is heavy in natural collagen from the bones and doesn’t have other added flavorings; it’s usually kept frozen and something that is sold as shelf stable is not gonna cut it in terms of richness. You want a broth that sticks to the noodles.

Now let’s talk about fresh garnishes. In that first photo, you’ll see mint, red veined sorrel, and rau răm (Vietnamese coriander?) that I grew in my backyard. These are probably not authentic pho garnishes either! From what I understand, different regions in Vietnam tend to serve different herbs depending on what grows prevalently. At restaurants near me, I see Thai basil served with pho. I like to think I am keeping to the spirit of using regional produce by using what is growing in my garden. But again, I am not making any claims of being any sort of authority on the matter here. If making this in the winter when my garden is looking lackluster, I use Thai basil and cilantro from the store.

Although it does take (inactive) time, I think of this as a cheater shortcut pho recipe that will fill your house with the smell of pho and fill your belly with beefy joy—even though it’s a little on the scrappy unrefined side.

Recipe_ShortRibPho_01.JPG

How to Make Shortcut Slow Cooker Short Rib Pho

(Makes 4 servings)

Ingredients for Broth

4–6 short ribs (about 2.5 lbs), cut into separate rib pieces
five spice powder
salt
pepper
1 sweet onion, quartered
2–4 tbsp fish sauce
32 oz high-quality beef bone broth, defrosted
several cloves of garlic, crushed and peeled
several ginger slices
2 tbsp brown sugar
8–10 star anise
neutral cooking oil
water

Ingredients for Pho Assembly

1 package (14 oz) dry flat rice noodles
1 shallot or 1/8 small red onion, very thinly sliced
2 tbsp cilantro, chopped

Optional Garnishes for Serving

1 lime, cut into wedges
1 fresh jalapeño or serrano chili pepper, sliced
1–2 scallions, thinly sliced
fresh herbs, such as Thai basil, extra cilantro
sriracha and hoisin sauce, for dipping

Procedure

Generously (very generously!) rub salt, pepper, and five spice onto the rib pieces and heat up a large pan on the stove on high. Once hot, turn down to medium-high and add a splash of oil, then the beef short ribs and sweet onion. Seer all sides of the short ribs and onions, adding the garlic and ginger halfway through the process. After ribs are seared and aromatics are charred, dump everything into the slow cooker.

Turn the heat down to low and add 2 tablespoons of fish sauce and a splash of water to deglaze the pan. Add all the pan bits to the slow cooker along with the star anise and brown sugar. Add the bone broth plus about 32 oz of water

Set the slow cooker to high and cook for 4 hours.

In the meantime, prep the fresh ingredients.

Cook pho noodles according to the instructions on the package, or until they are just barely al dente. The hot broth will soften them even further.

Carefully remove the short ribs from the broth. If desired, remove the meat from the bone and slice (or, serve the bowls with meat attached to the bones). At this point, taste the broth for seasoning and add more fish sauce if desired.

To assemble, place cooked noodles in a bowl. Ladle the hot broth on top, add the short rib, and garnish with the thinly sliced onion and cilantro. Serve everything else on the side along with some Sriracha and hoisin sauce.

This recipe was originally written for my friends at Nomtastic Foods.