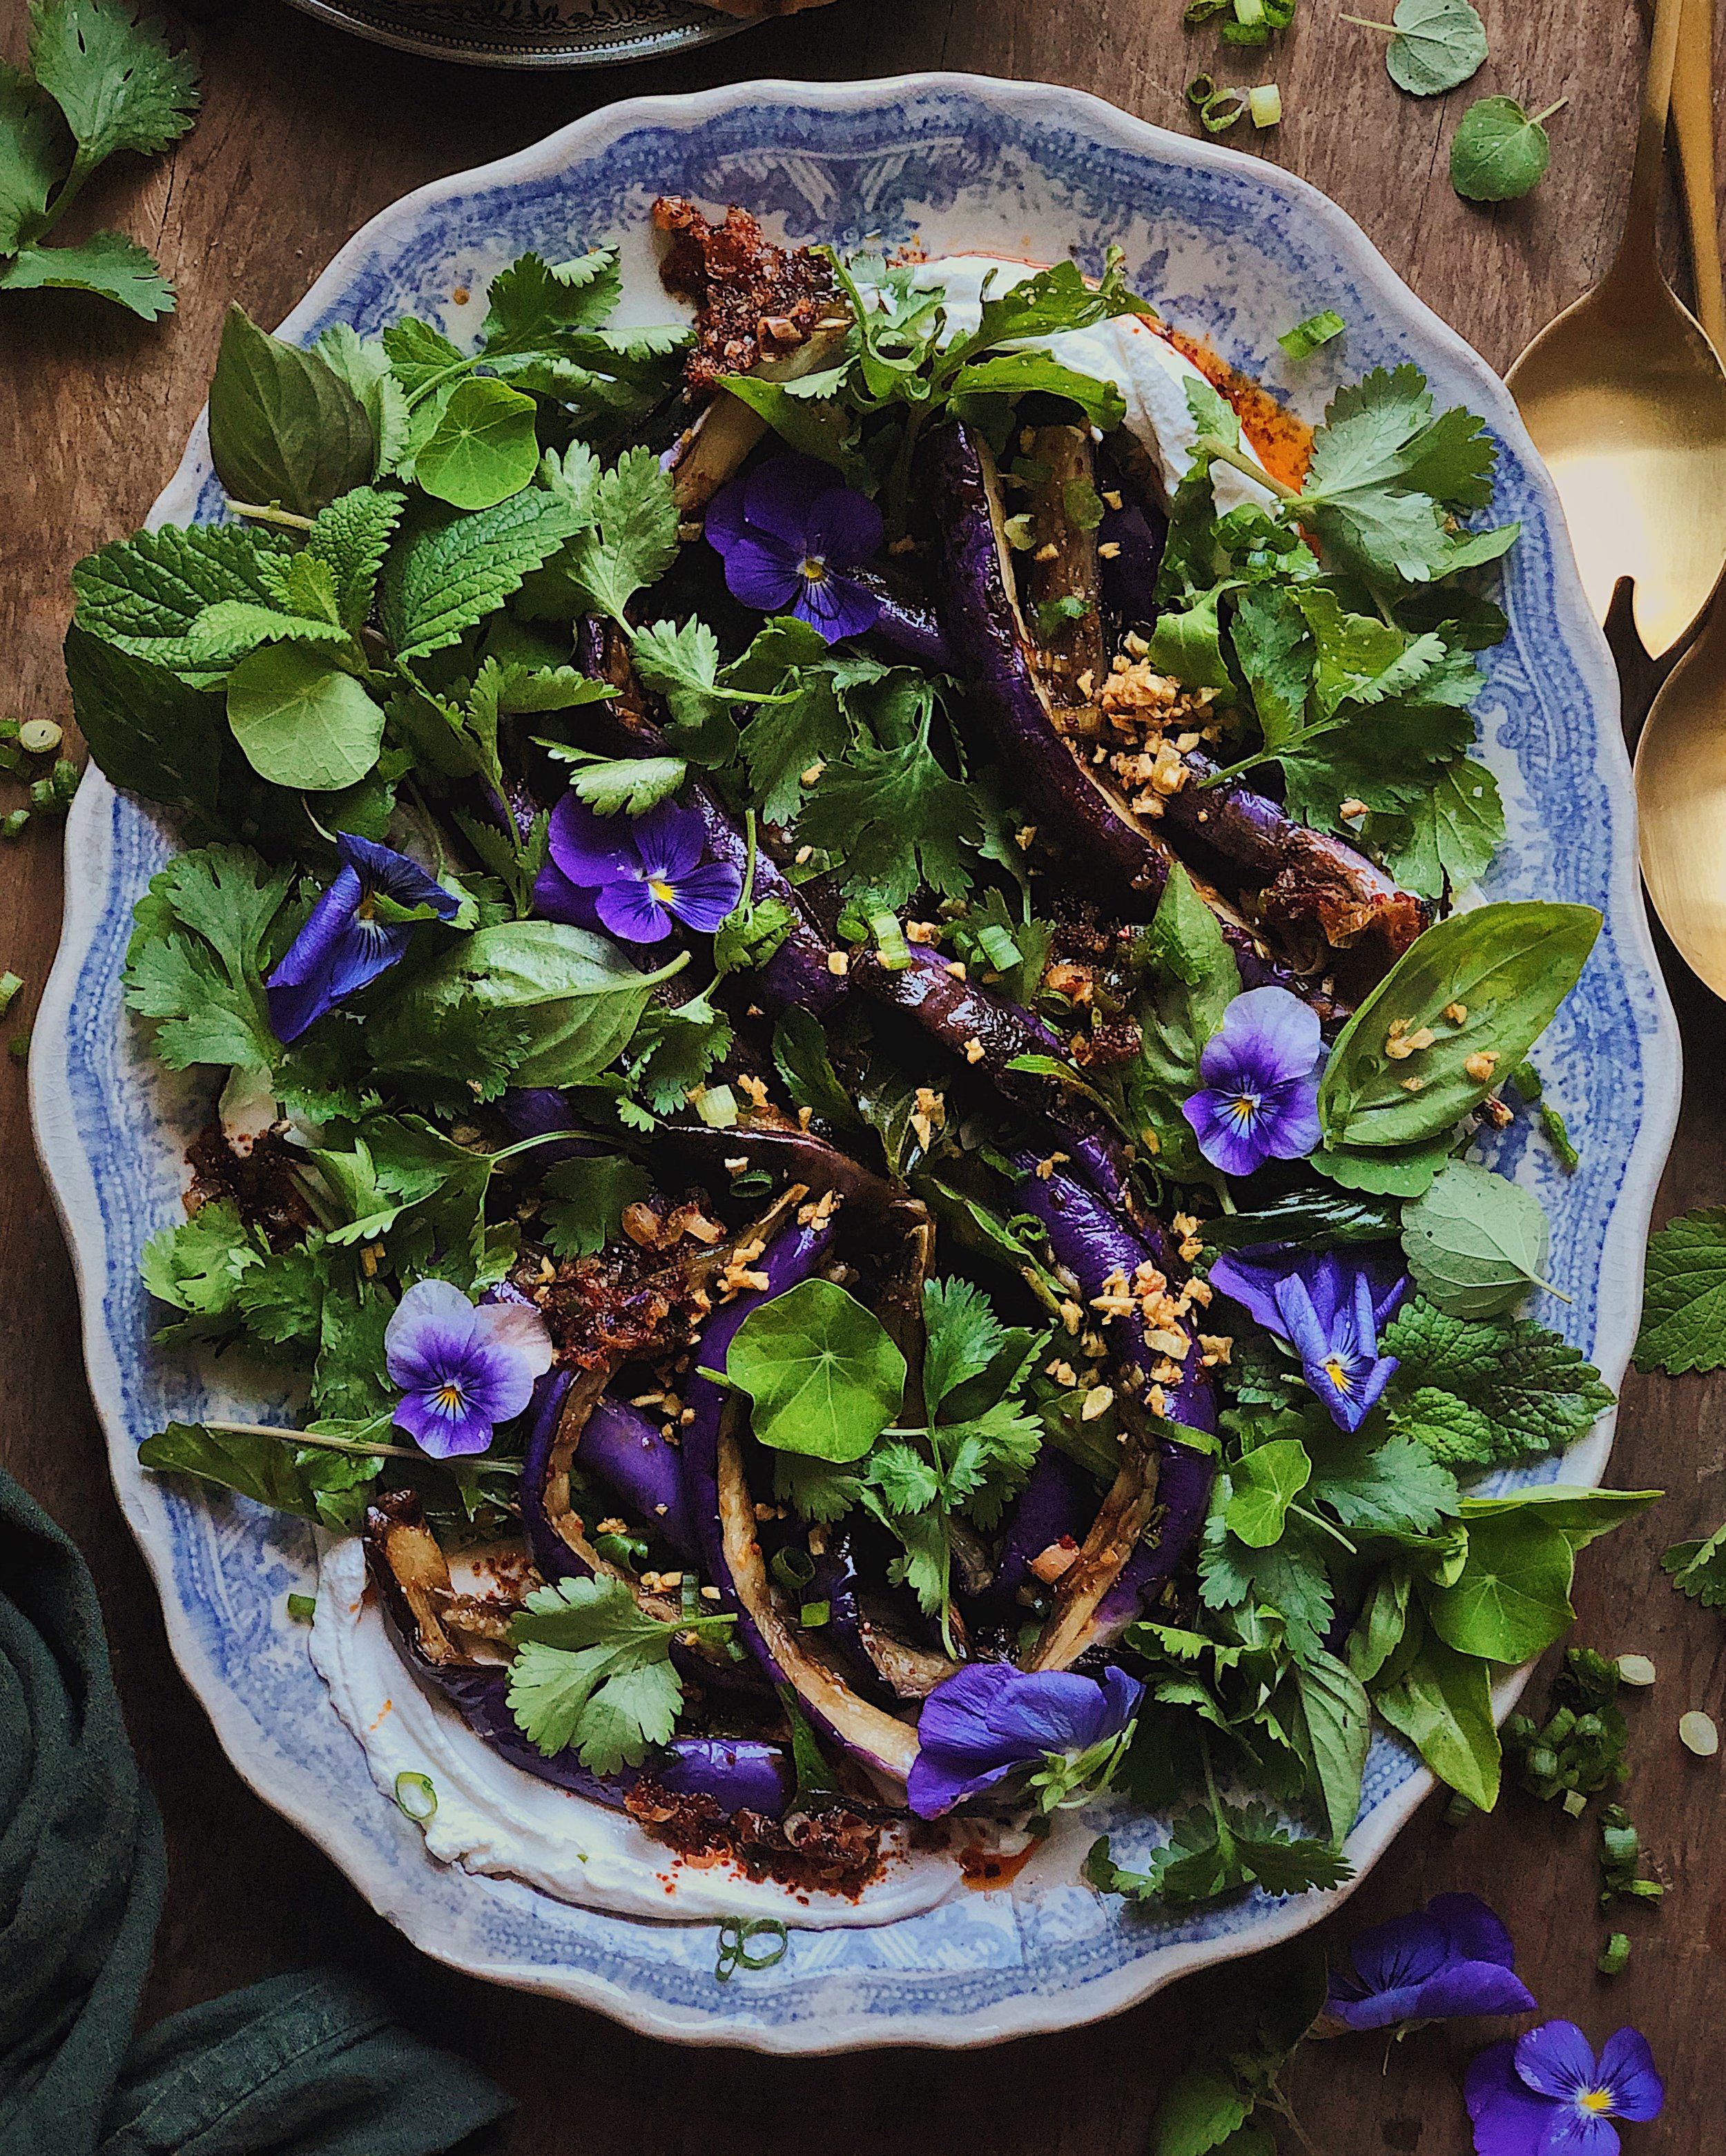
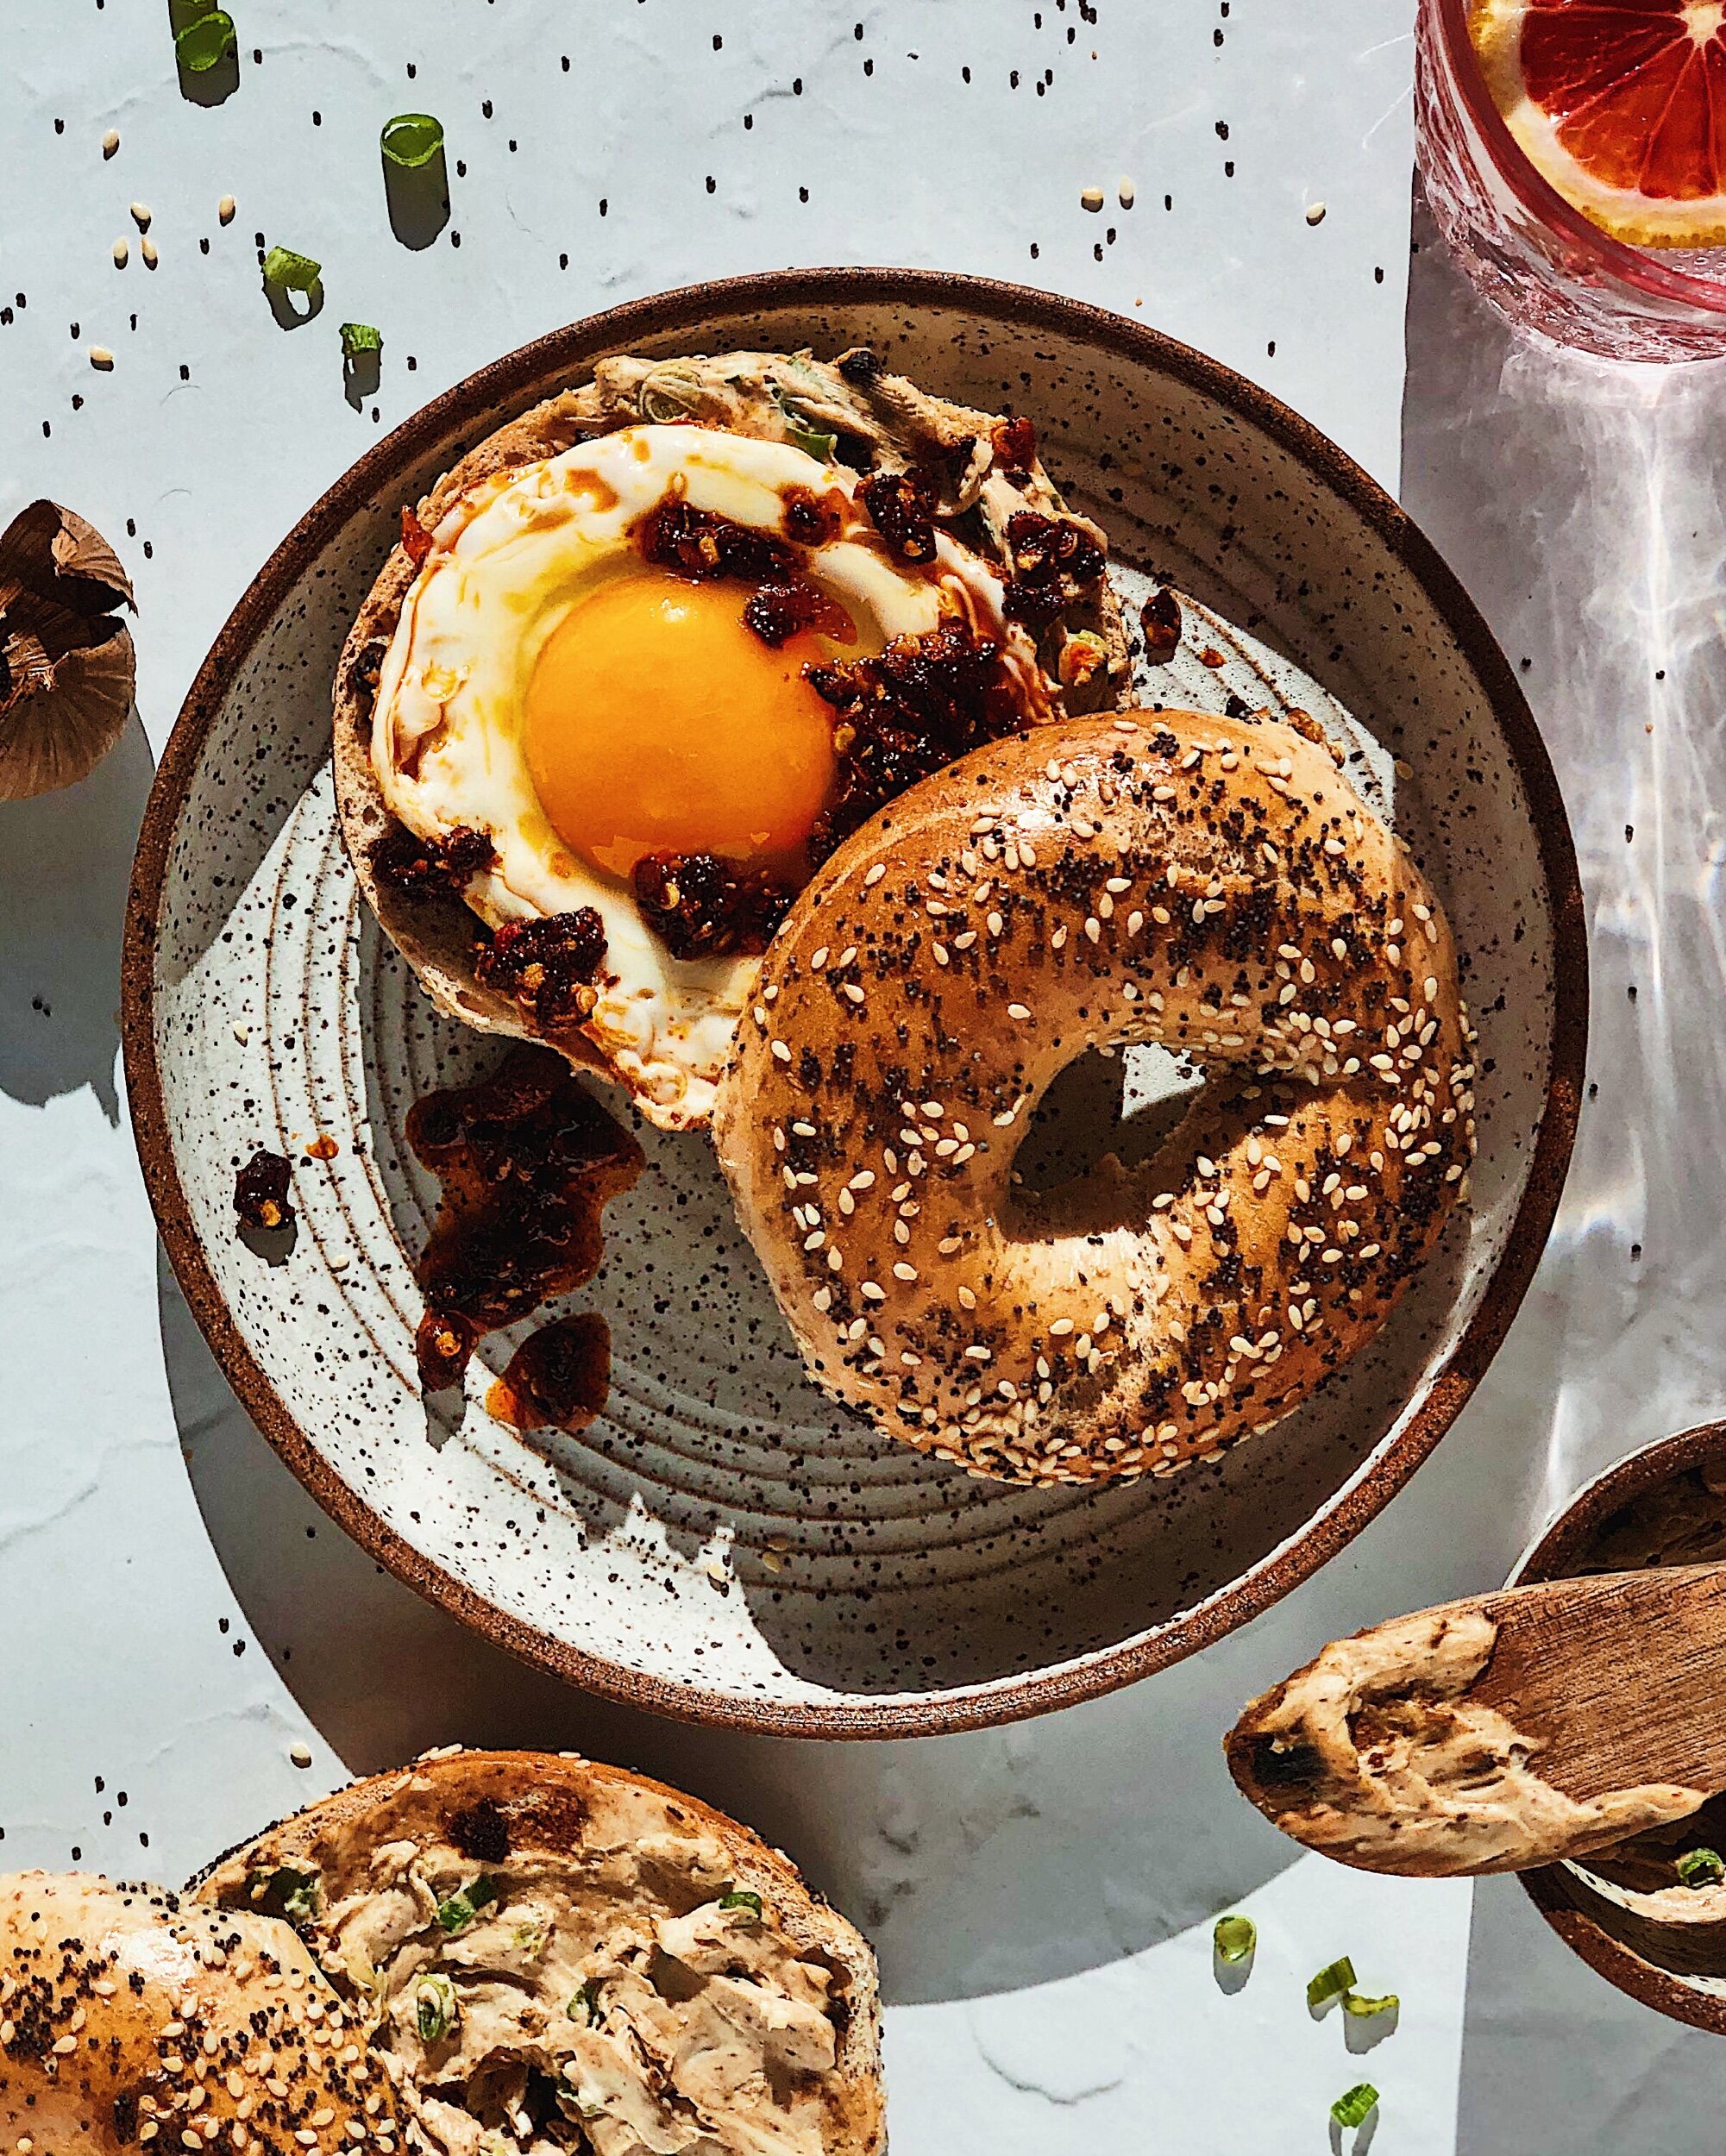
Melt-in-Your-Mouth Chili Garlic Eggplant Salad on Labneh

Eggplants, aubergines, brinjals. I never understood why people don’t like them. I think people who say it’s a texture thing are eating ones that are not cooked properly. People who say they are bitter must be eating ones that aren’t fresh. When cooked properly and at the right time, eggplants—especially Chinese and Japanese eggplants—shouldn’t be anything but silky flavor sponges. And this recipe features these long eggplants in their very best form, with a completely melt-in-your-mouth texture and a rich, tangy, fragrant, and numbing spicy sauce that is absolutely addictive.

Chili garlic eggplant—as in, the stir-fry kind found on many Chinese restaurant menus in the US—used to be the thing I’d make to treat myself when my anti-eggplant spouse was out of town. He has since come around to admitting that he actually does enjoy eggplant, just not in the crappy eggplant parms he had during his Italian-American upbringing. So I get to have stir-fried chili garlic eggplant a lot more often nowadays. But this is not a recipe for that dish.

I just got back from London where I had dinner at Ottolenghi and every single dish we ordered came with some pool of creamy dippable/scoopable yumminess beneath or next to wonderful soft vegetables, whether it was yogurt, labneh, toum, or whipped feta. It was all so good, and fueled my obsession for serving absolutely everything on a pool of labneh, as if it wasn’t maxed out already (see: here, here, here). So when I got home, I was determined to make my own eggplant-on-labneh dish, but I wanted to put a Chinese spin on it. This is the recipe for that dish.

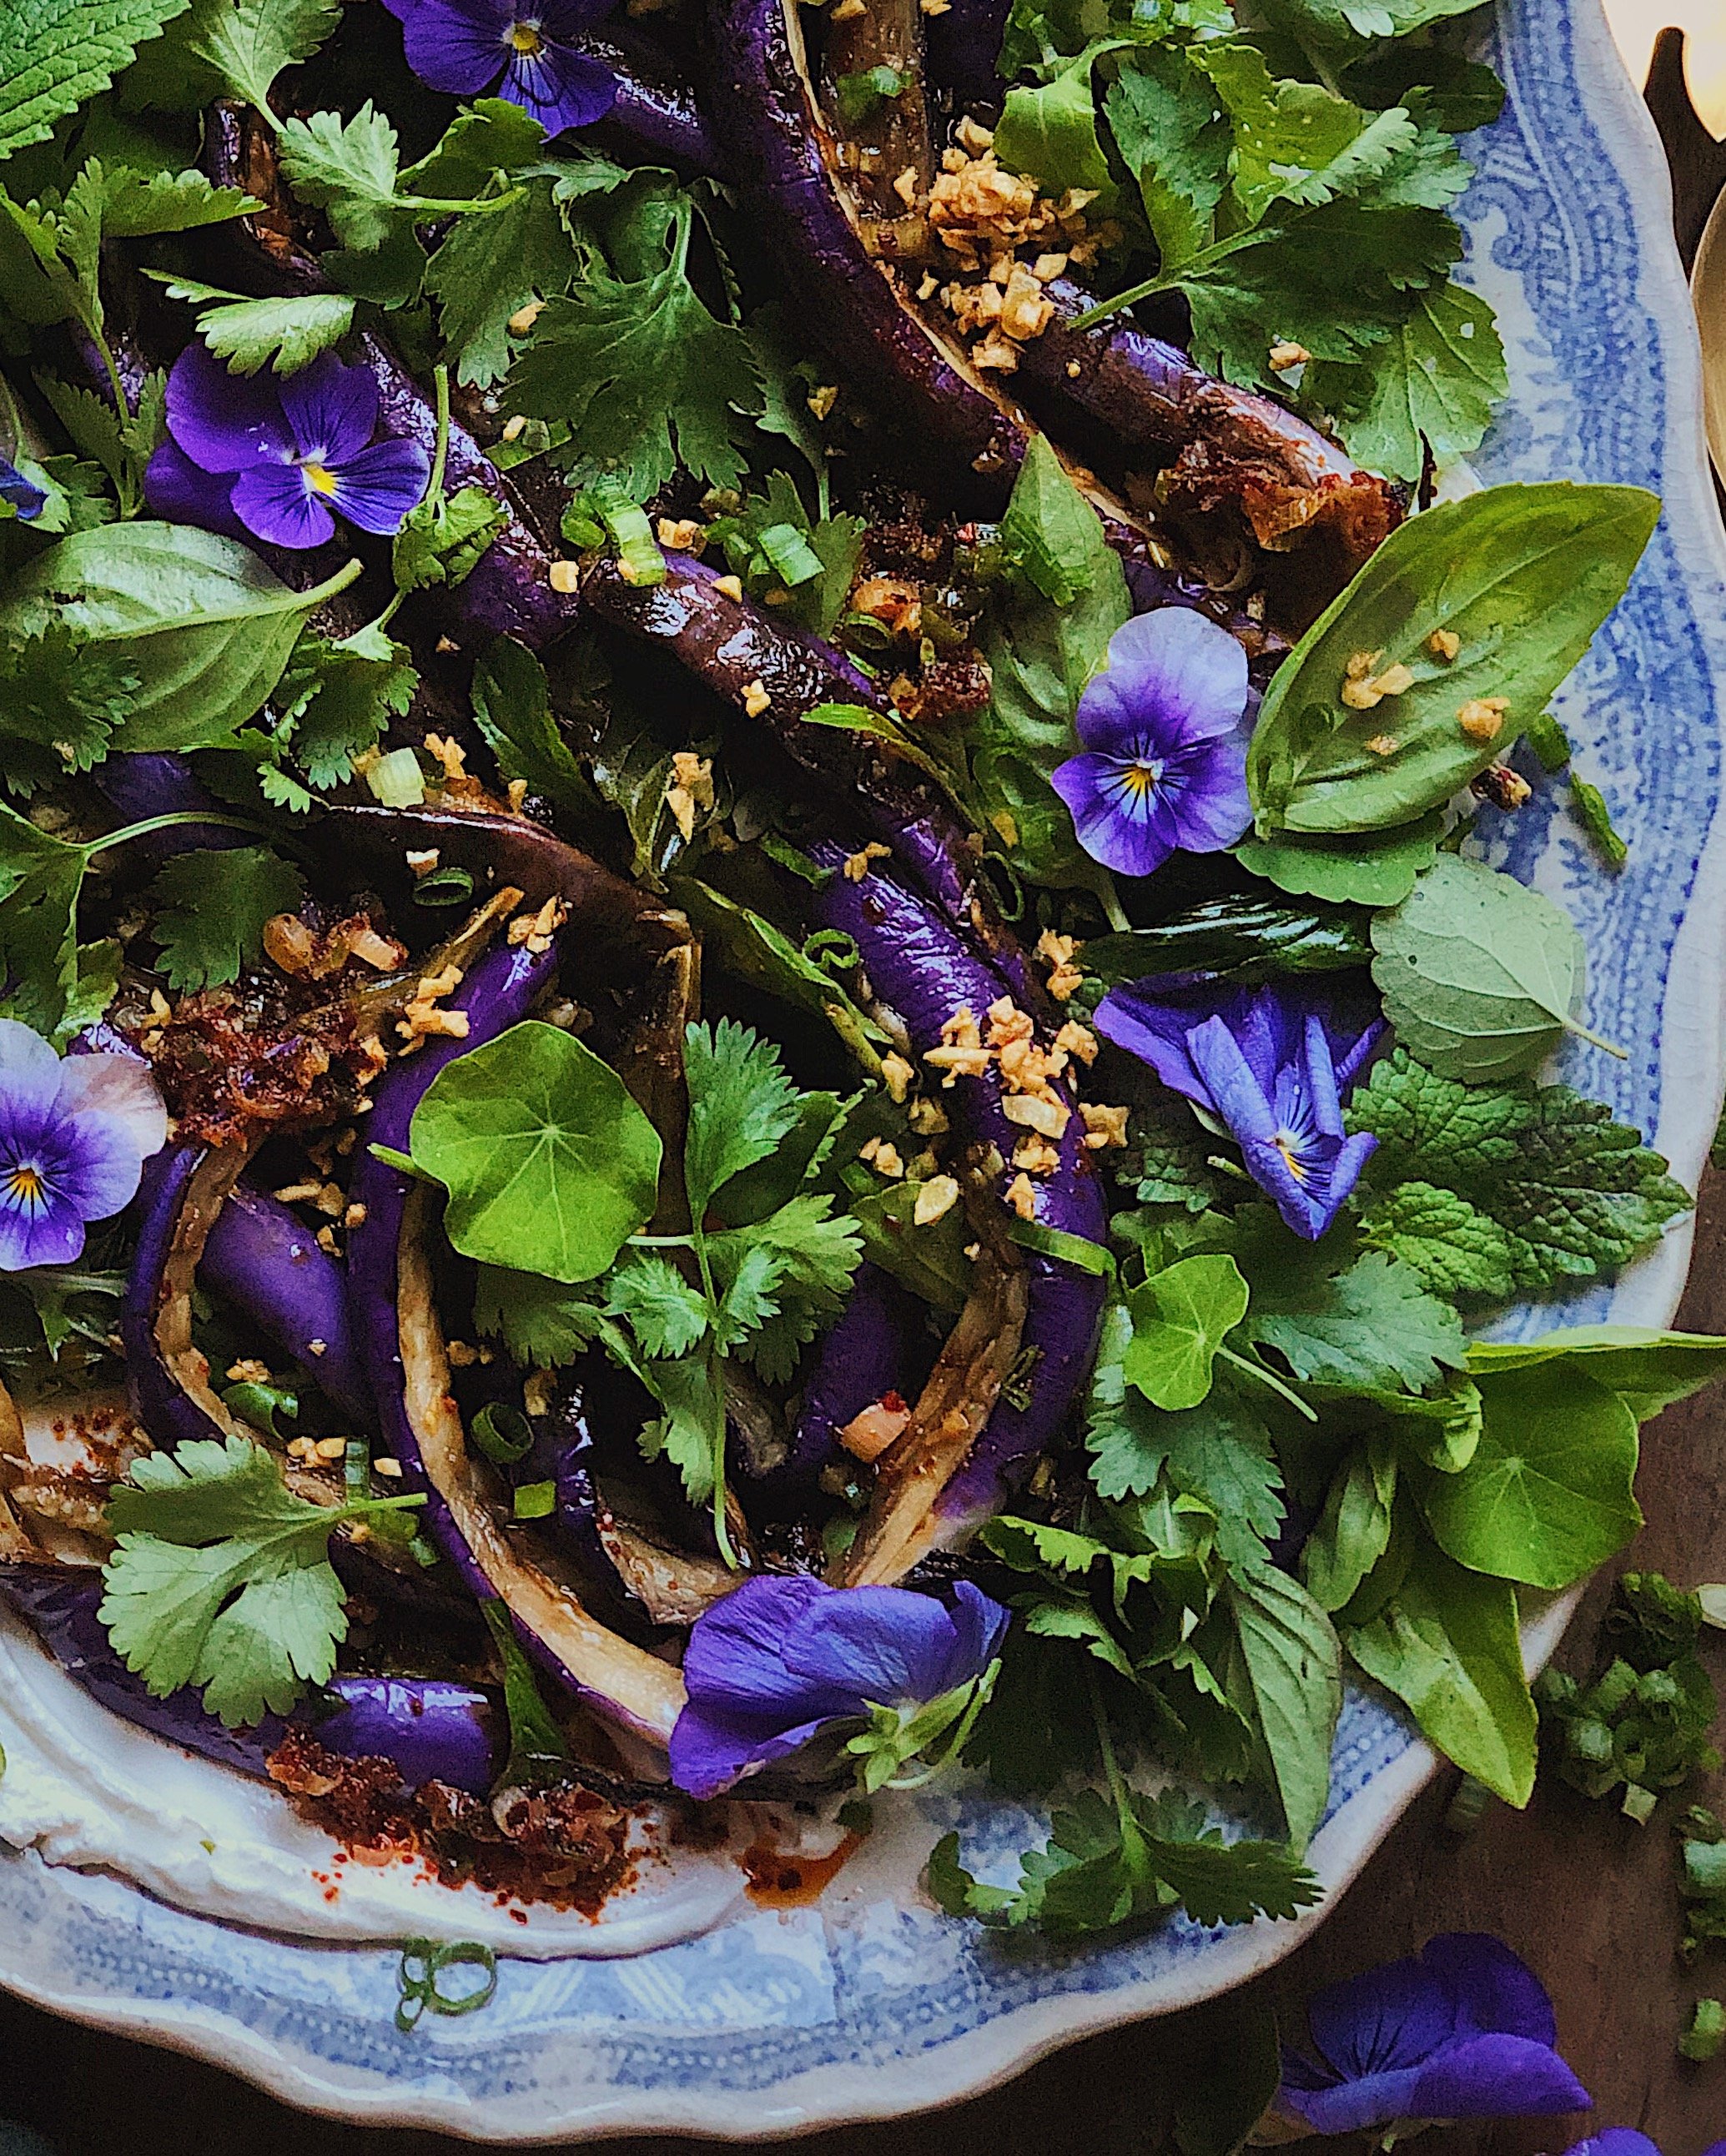
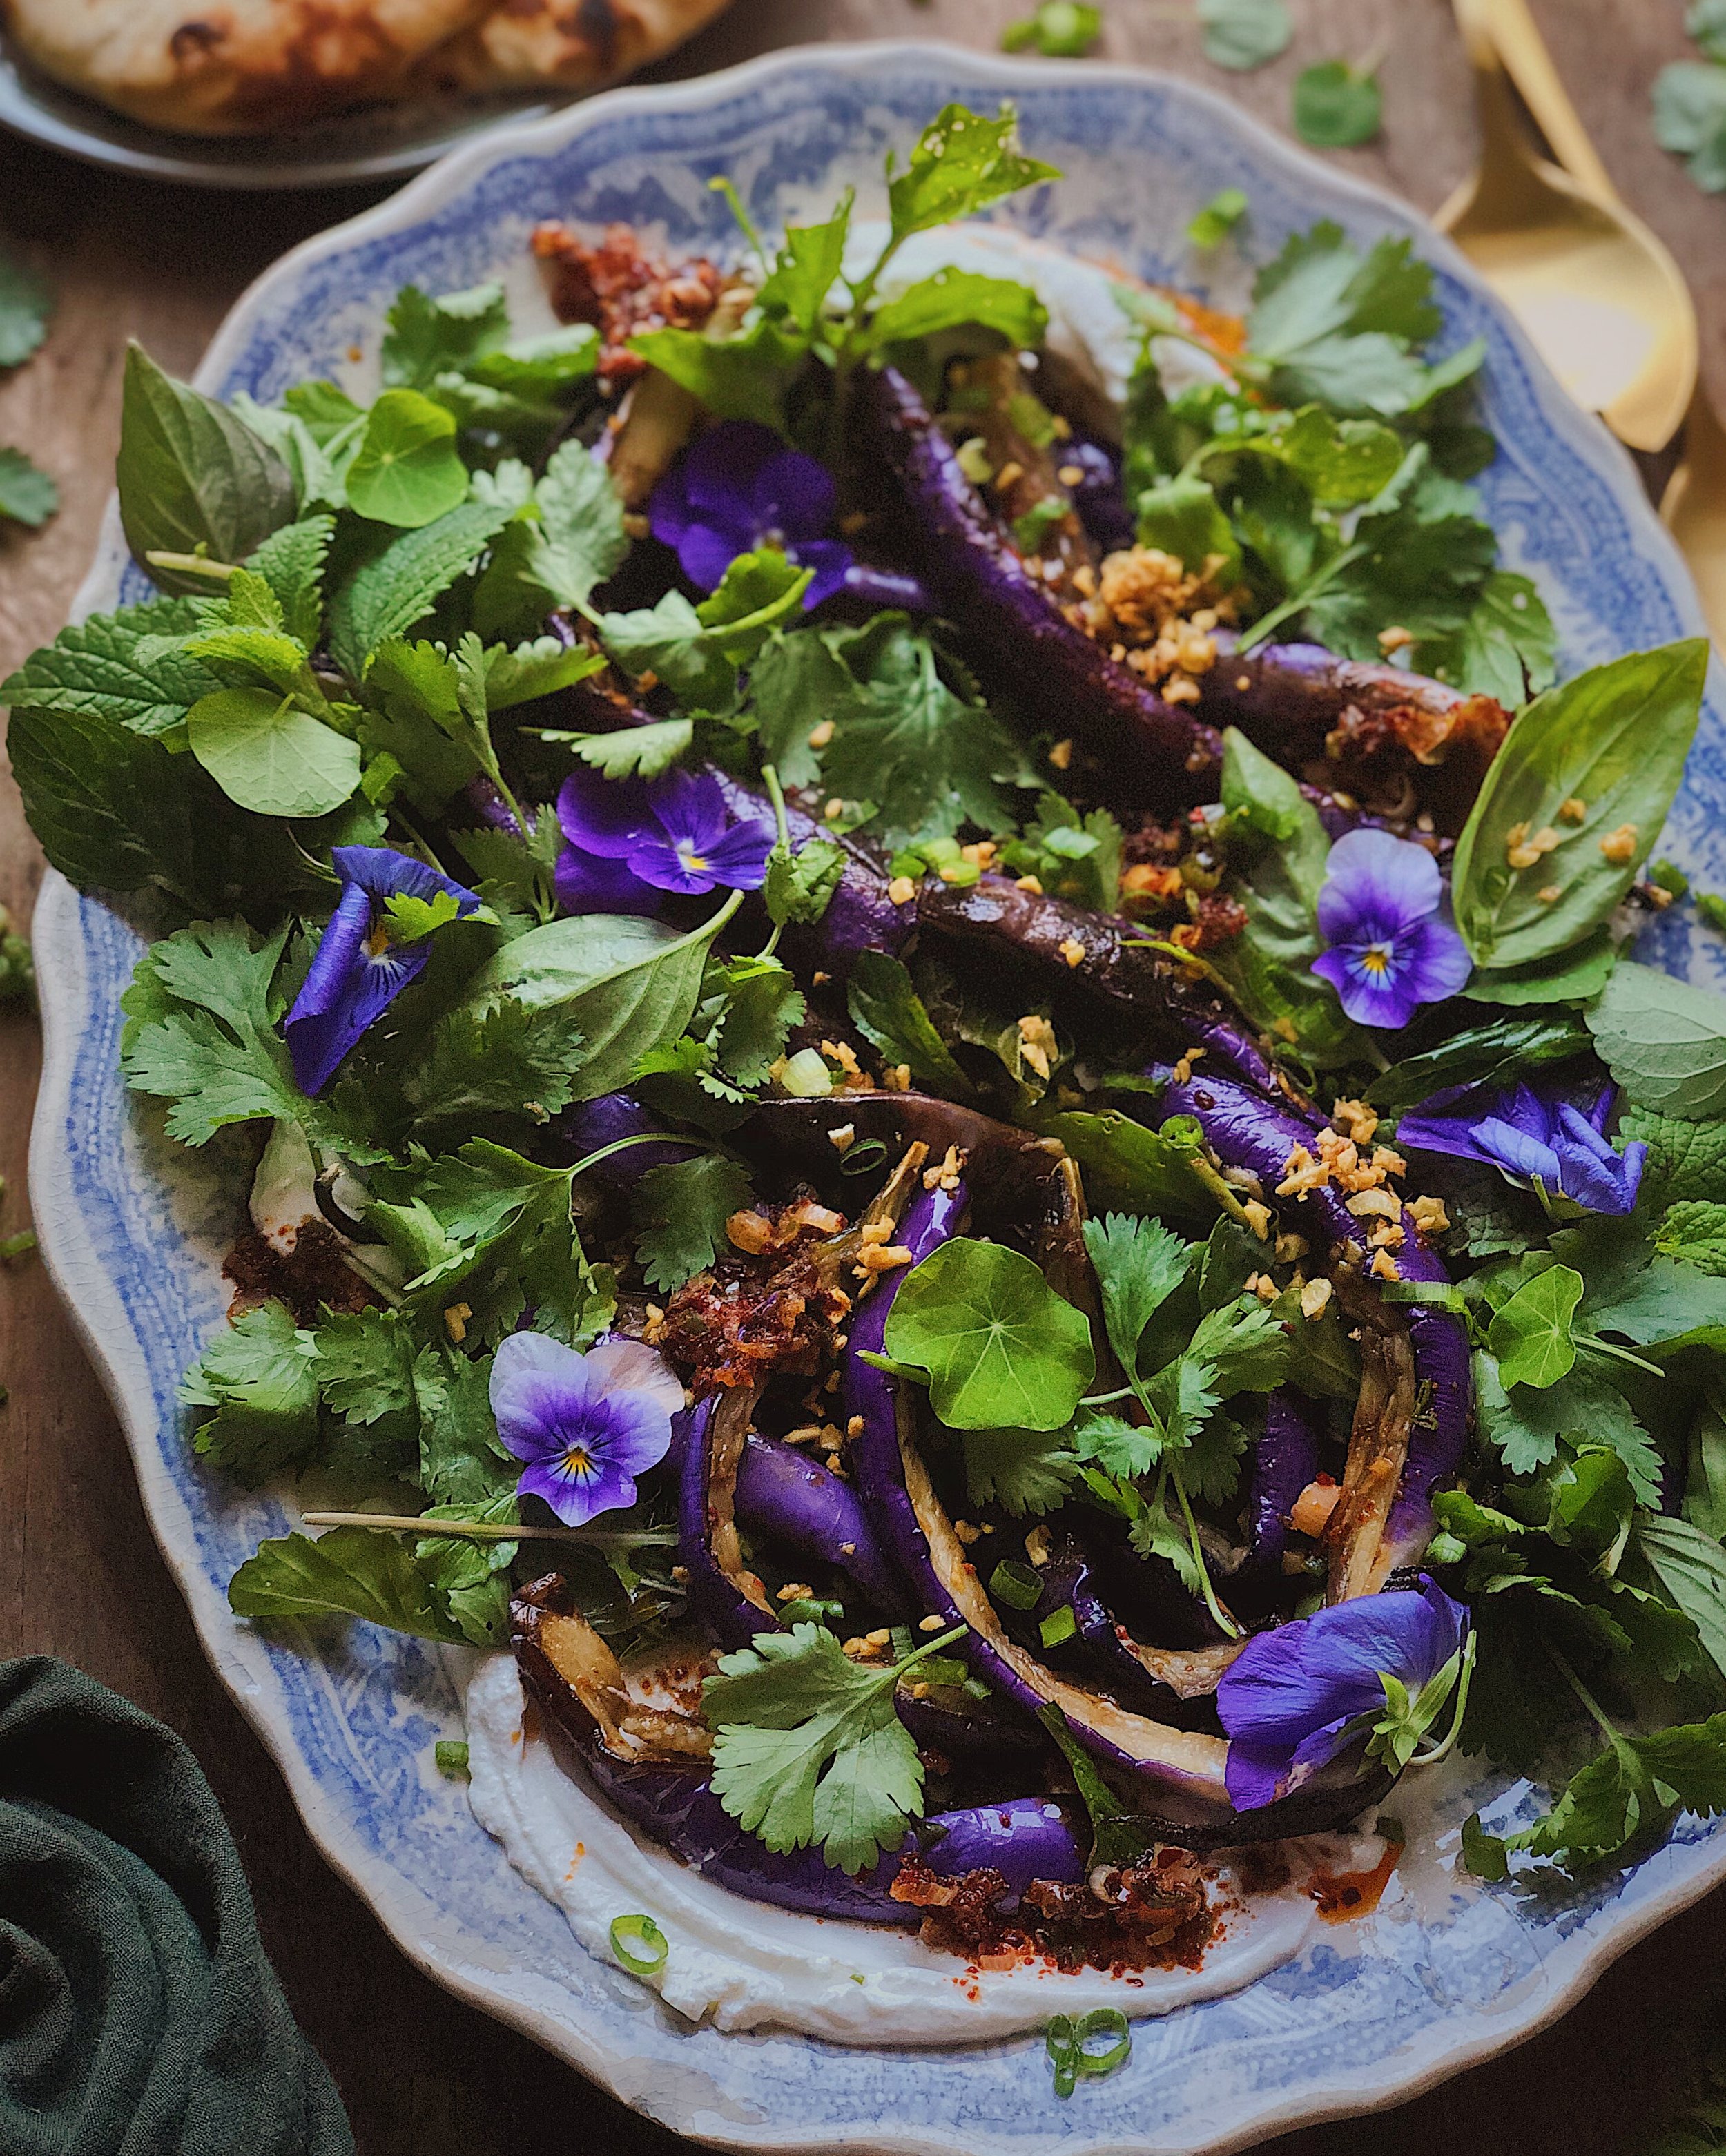
One thing I was determined to do with this recipe was make sure that the beautiful purple color of the eggplant was preserved and the eggplant did not turn brown when cooked. I was so happy that this cooked eggplant turned out a shade that almost exactly matched the purples I have going on in my garden. Here are some useful resources I came across when I was researching how to preserve the purple color of eggplants after cooking:

I ended up going with an oil blanching technique because I wanted the eggplants to be ultra silky soft but also have a hint of caramelization from the cooking.

So what does this dish taste like? This dish combines my homemade numbing chili oil + my usual Chinese cold appetizer dressing + silky eggplant + an herby salad + creamy labneh. It’s like the smashed cucumber salad you get at a Sichuan restaurant but with much gentler textures and kicked up a few notches of luxury. It might be the best eggplant dish I’ve ever had and it’s definitely the best I’ve ever made. Note that for experimentation purposes I used a medley of all sorts of herbs (mint, cilantro, Thai basil, Italian basil, arugula, nasturtium, lemon balm) to build out the salad component of this eggplant salad—so that’s what’s in the photos—but I found that the bites with the cilantro tasted far better than the others, so that’s what’s reflected in the written recipe below.

This recipe was adapted from Brandon Jew of Mister Jiu’s.

Awkwardly Vague instructions for Melt-in-your-Mouth Chili Garlic Eggplant Salad on Labneh

Ingredients

2 Chinese eggplants cut into long wedges
4 cups water
2 tbsp kosher salt
vegetable oil, for frying
3 cloves garlic, finely chopped
1 tbsp extra virgin olive oil
2 scallions, thinly sliced, white and green parts divided
1 1/2 tsp sugar
2 tbsp rice vinegar
1 tbsp chinkiang vinegar
1 tbsp soy sauce
1 tbsp homemade mala chili oil, plus more to taste
labneh
cilantro

Procedure

In a large bowl or rectangular tub, dissolve the salt in the water. Add eggplant, and place a plate or something on top to make sure it’s all fully submerged. Let brine for 1 hour.

In the meantime, combine the garlic and olive oil in a small pan and fry gently on medium low, stirring continuously. Once the garlic starts to turn golden, remove from heat and keep stirring to allow the residual heat to cook the garlic through. Then, drain off the oil into a separate bowl and set both aside.

Heat enough vegetable oil to deep fry the eggplant in a Dutch oven. In the meantime, pat the eggplant dry.

Dry off your brining bowl and use it to make the dressing. Whisk together the garlic-infused olive oil plus the white parts of the scallions, sugar, both vinegars, soy sauce, and 1 tablespoon of chili oil. Set aside.

On another burner/hob, get a dry wok ready on very high heat.

Oil blanch all the eggplant by adding it at once to the dutch oven. Once you start to see some browning on the edges, remove the eggplant and allow it to drain well. Then, add it to the super hot dry walk, cut side down. As you start to see caramelization occurring, remove the pieces of eggplant from the wok and add it to the dressing bowl.

After all the eggplant has been caramelized and blistered, toss it around in the dressing.

Coat your serving platter with a thin, swoopy layer of labneh. Add the eggplant. Drizzle on extra chili oil to taste. Then sprinkle on the fried garlic, sliced scallion greens, and lots of cilantro.

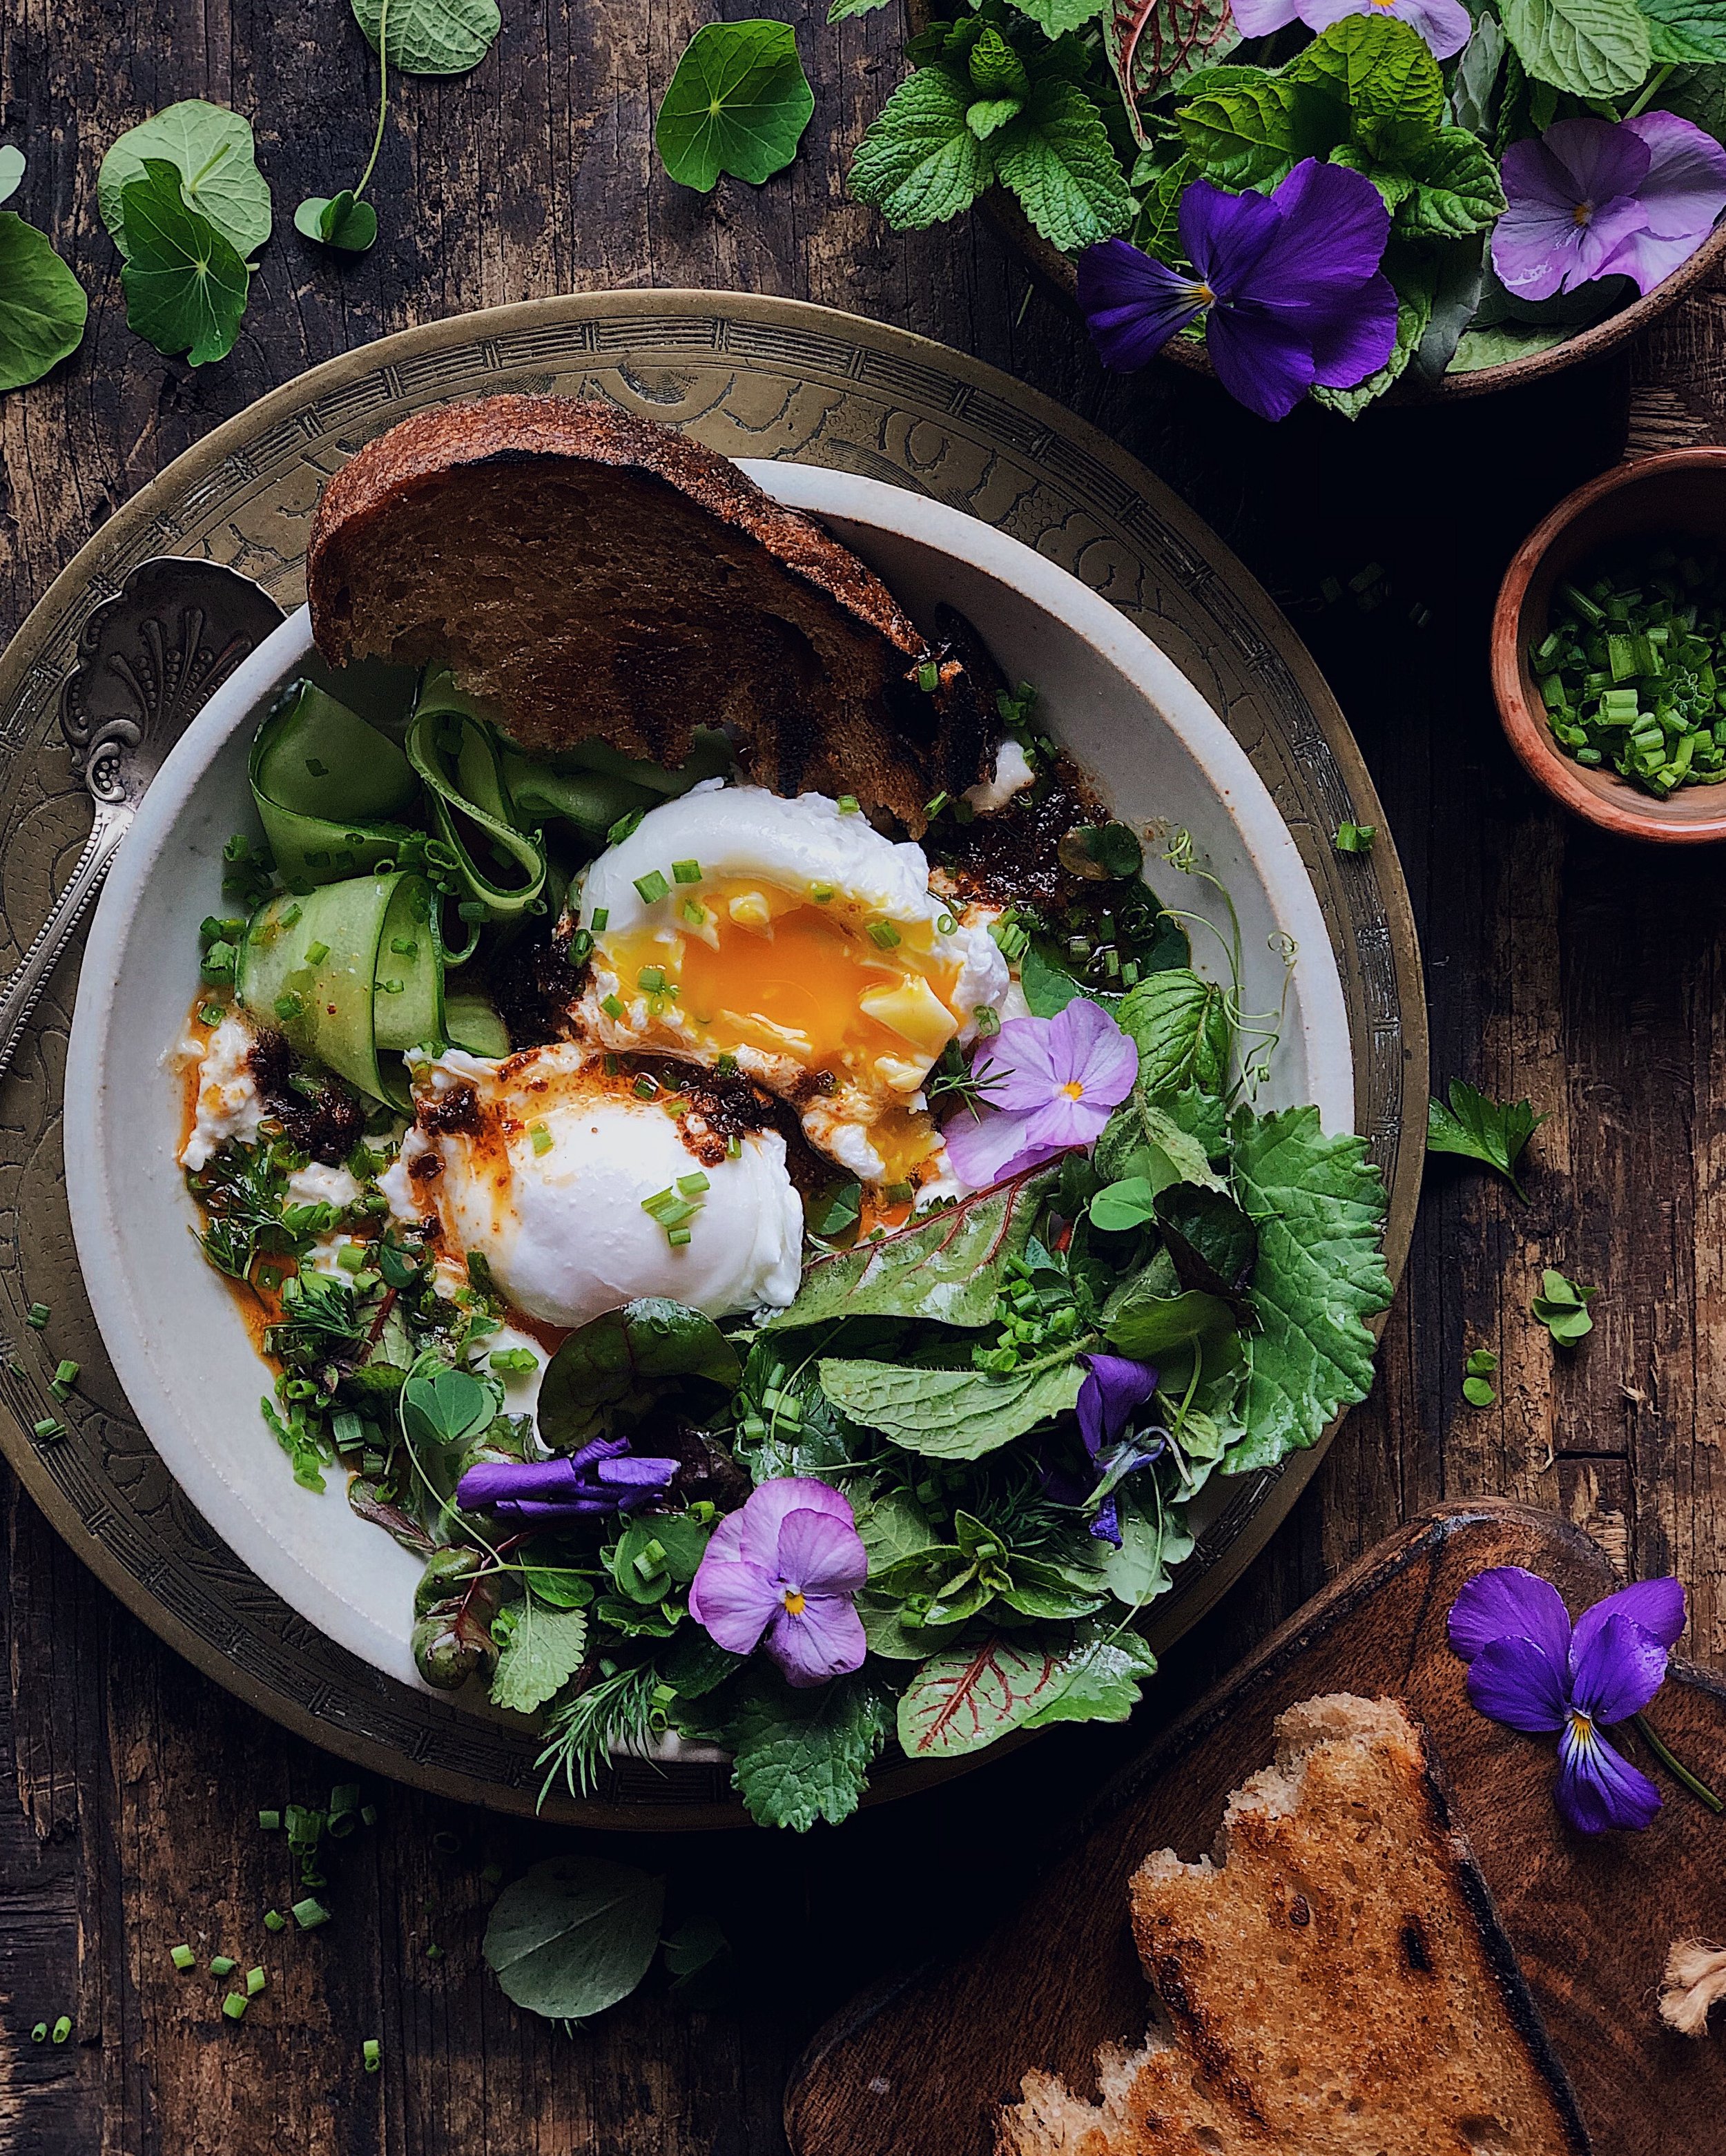
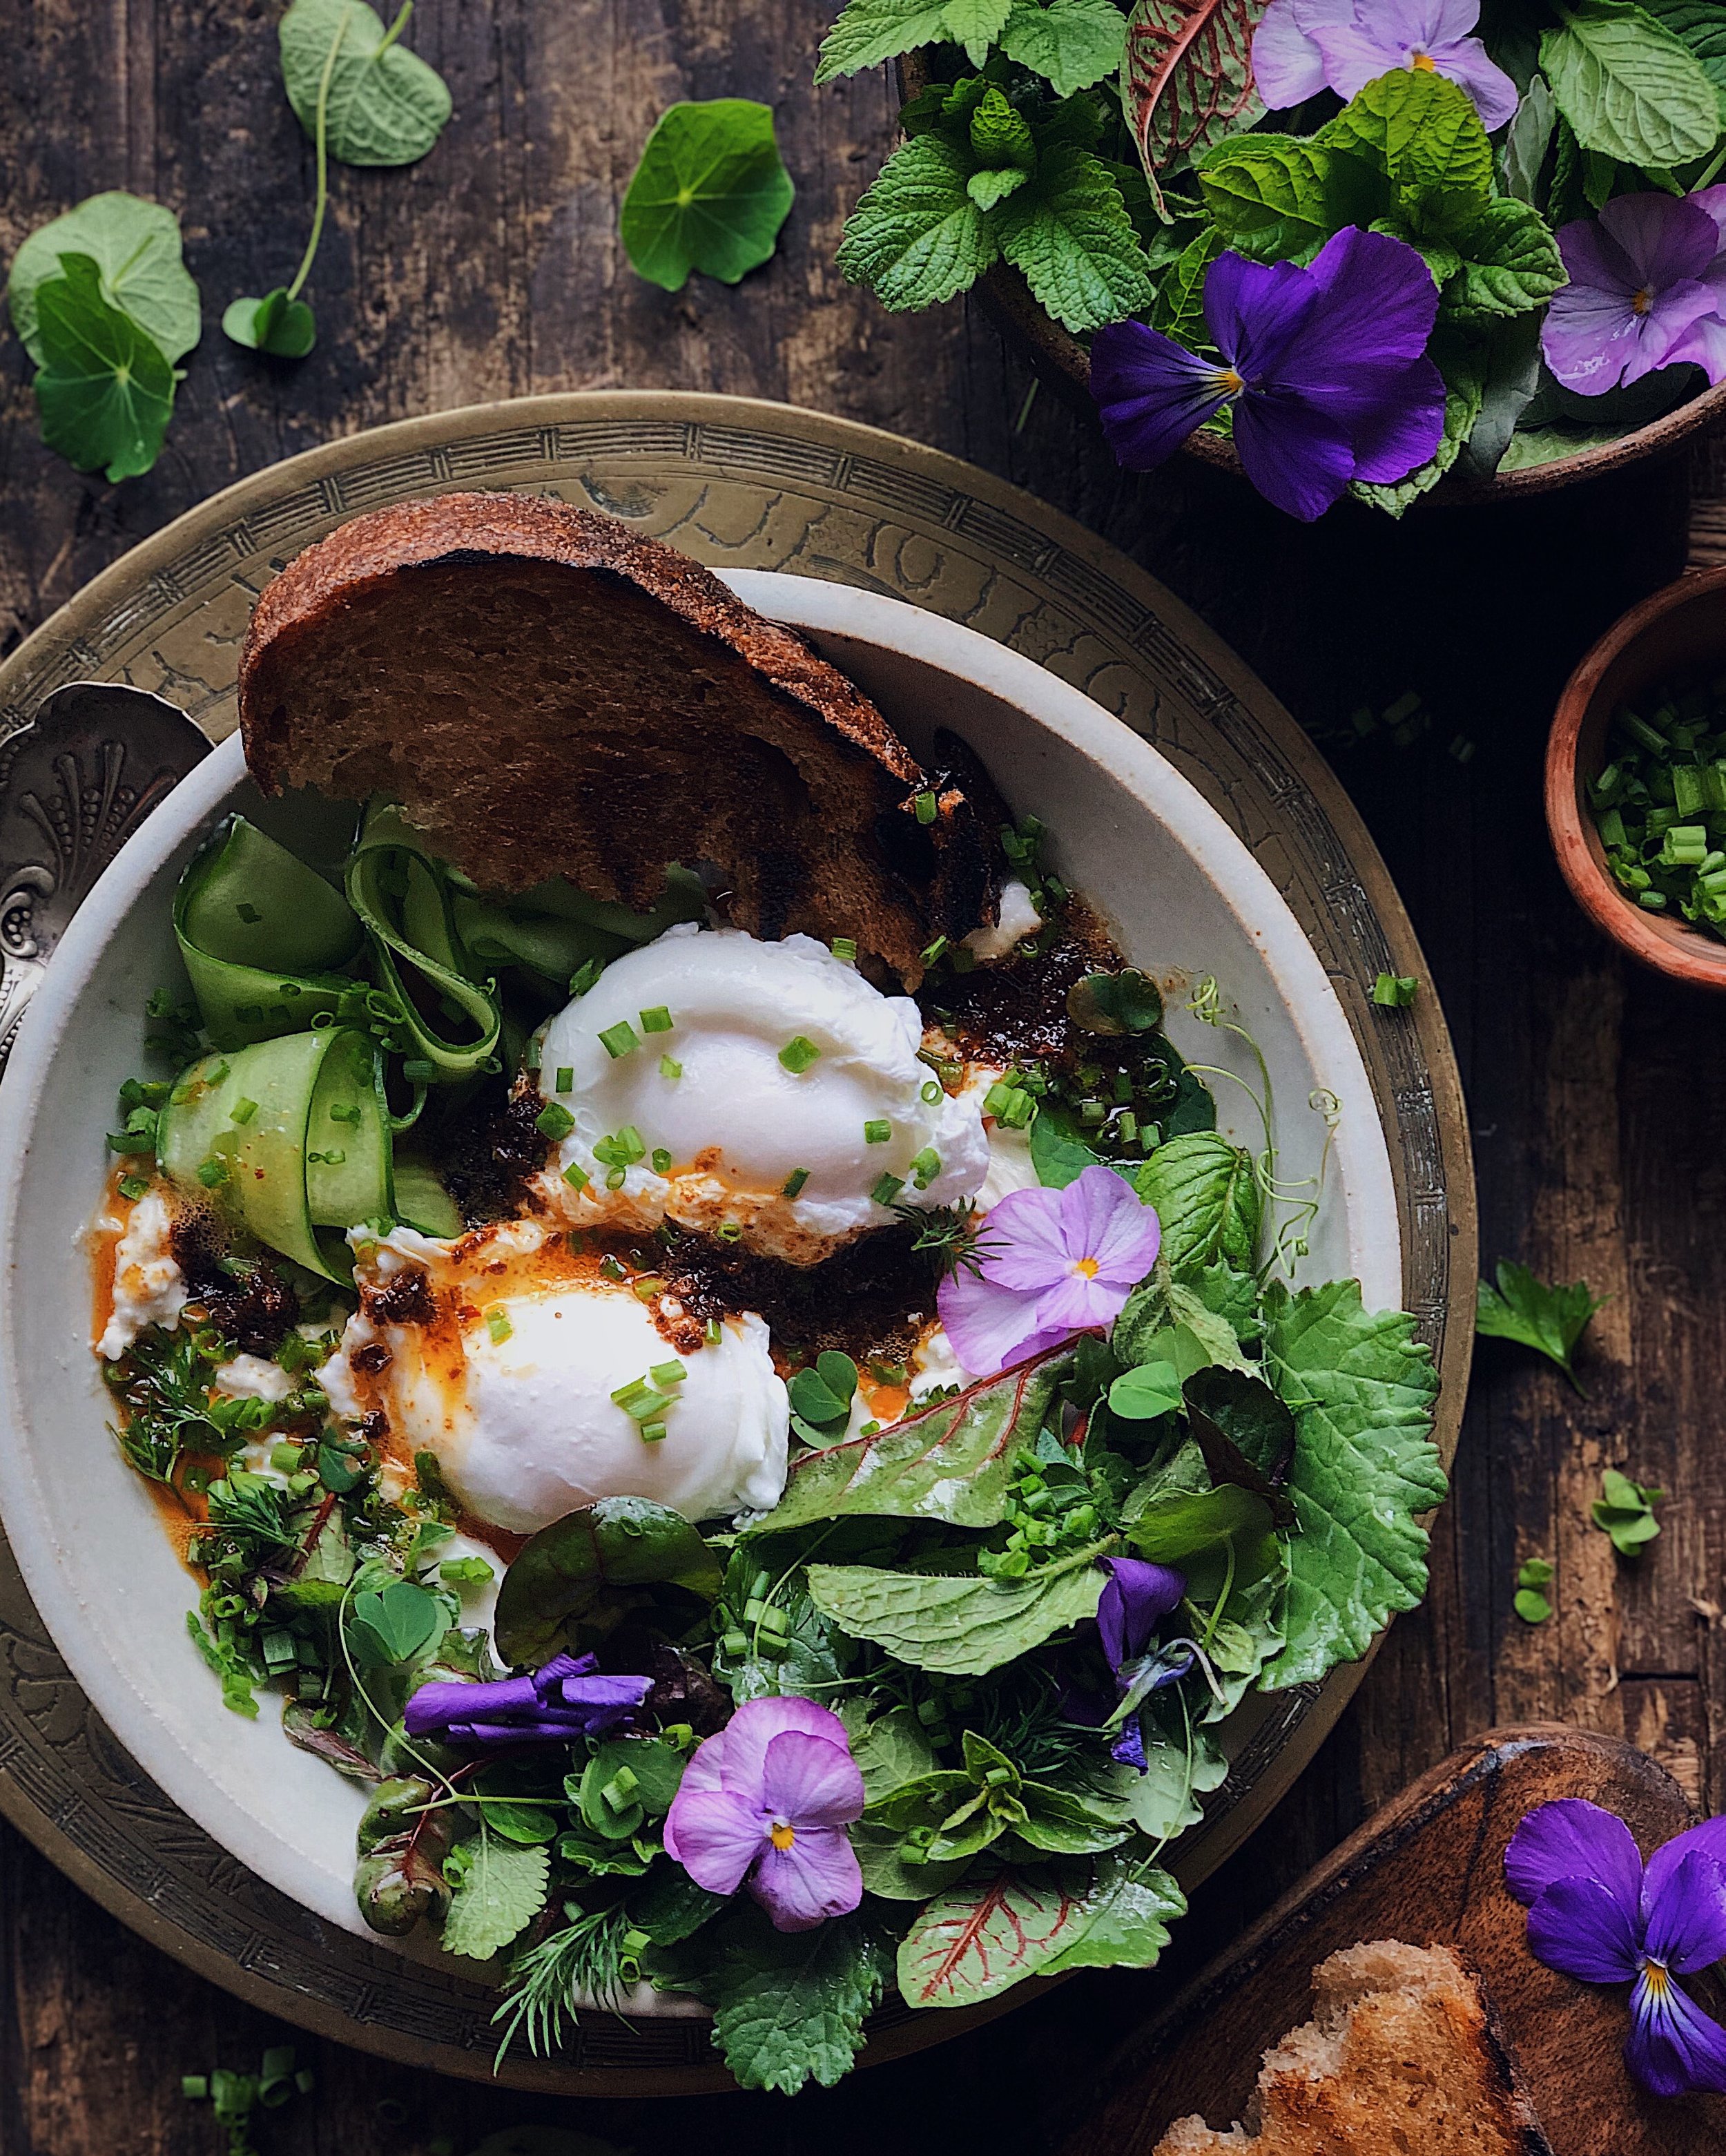
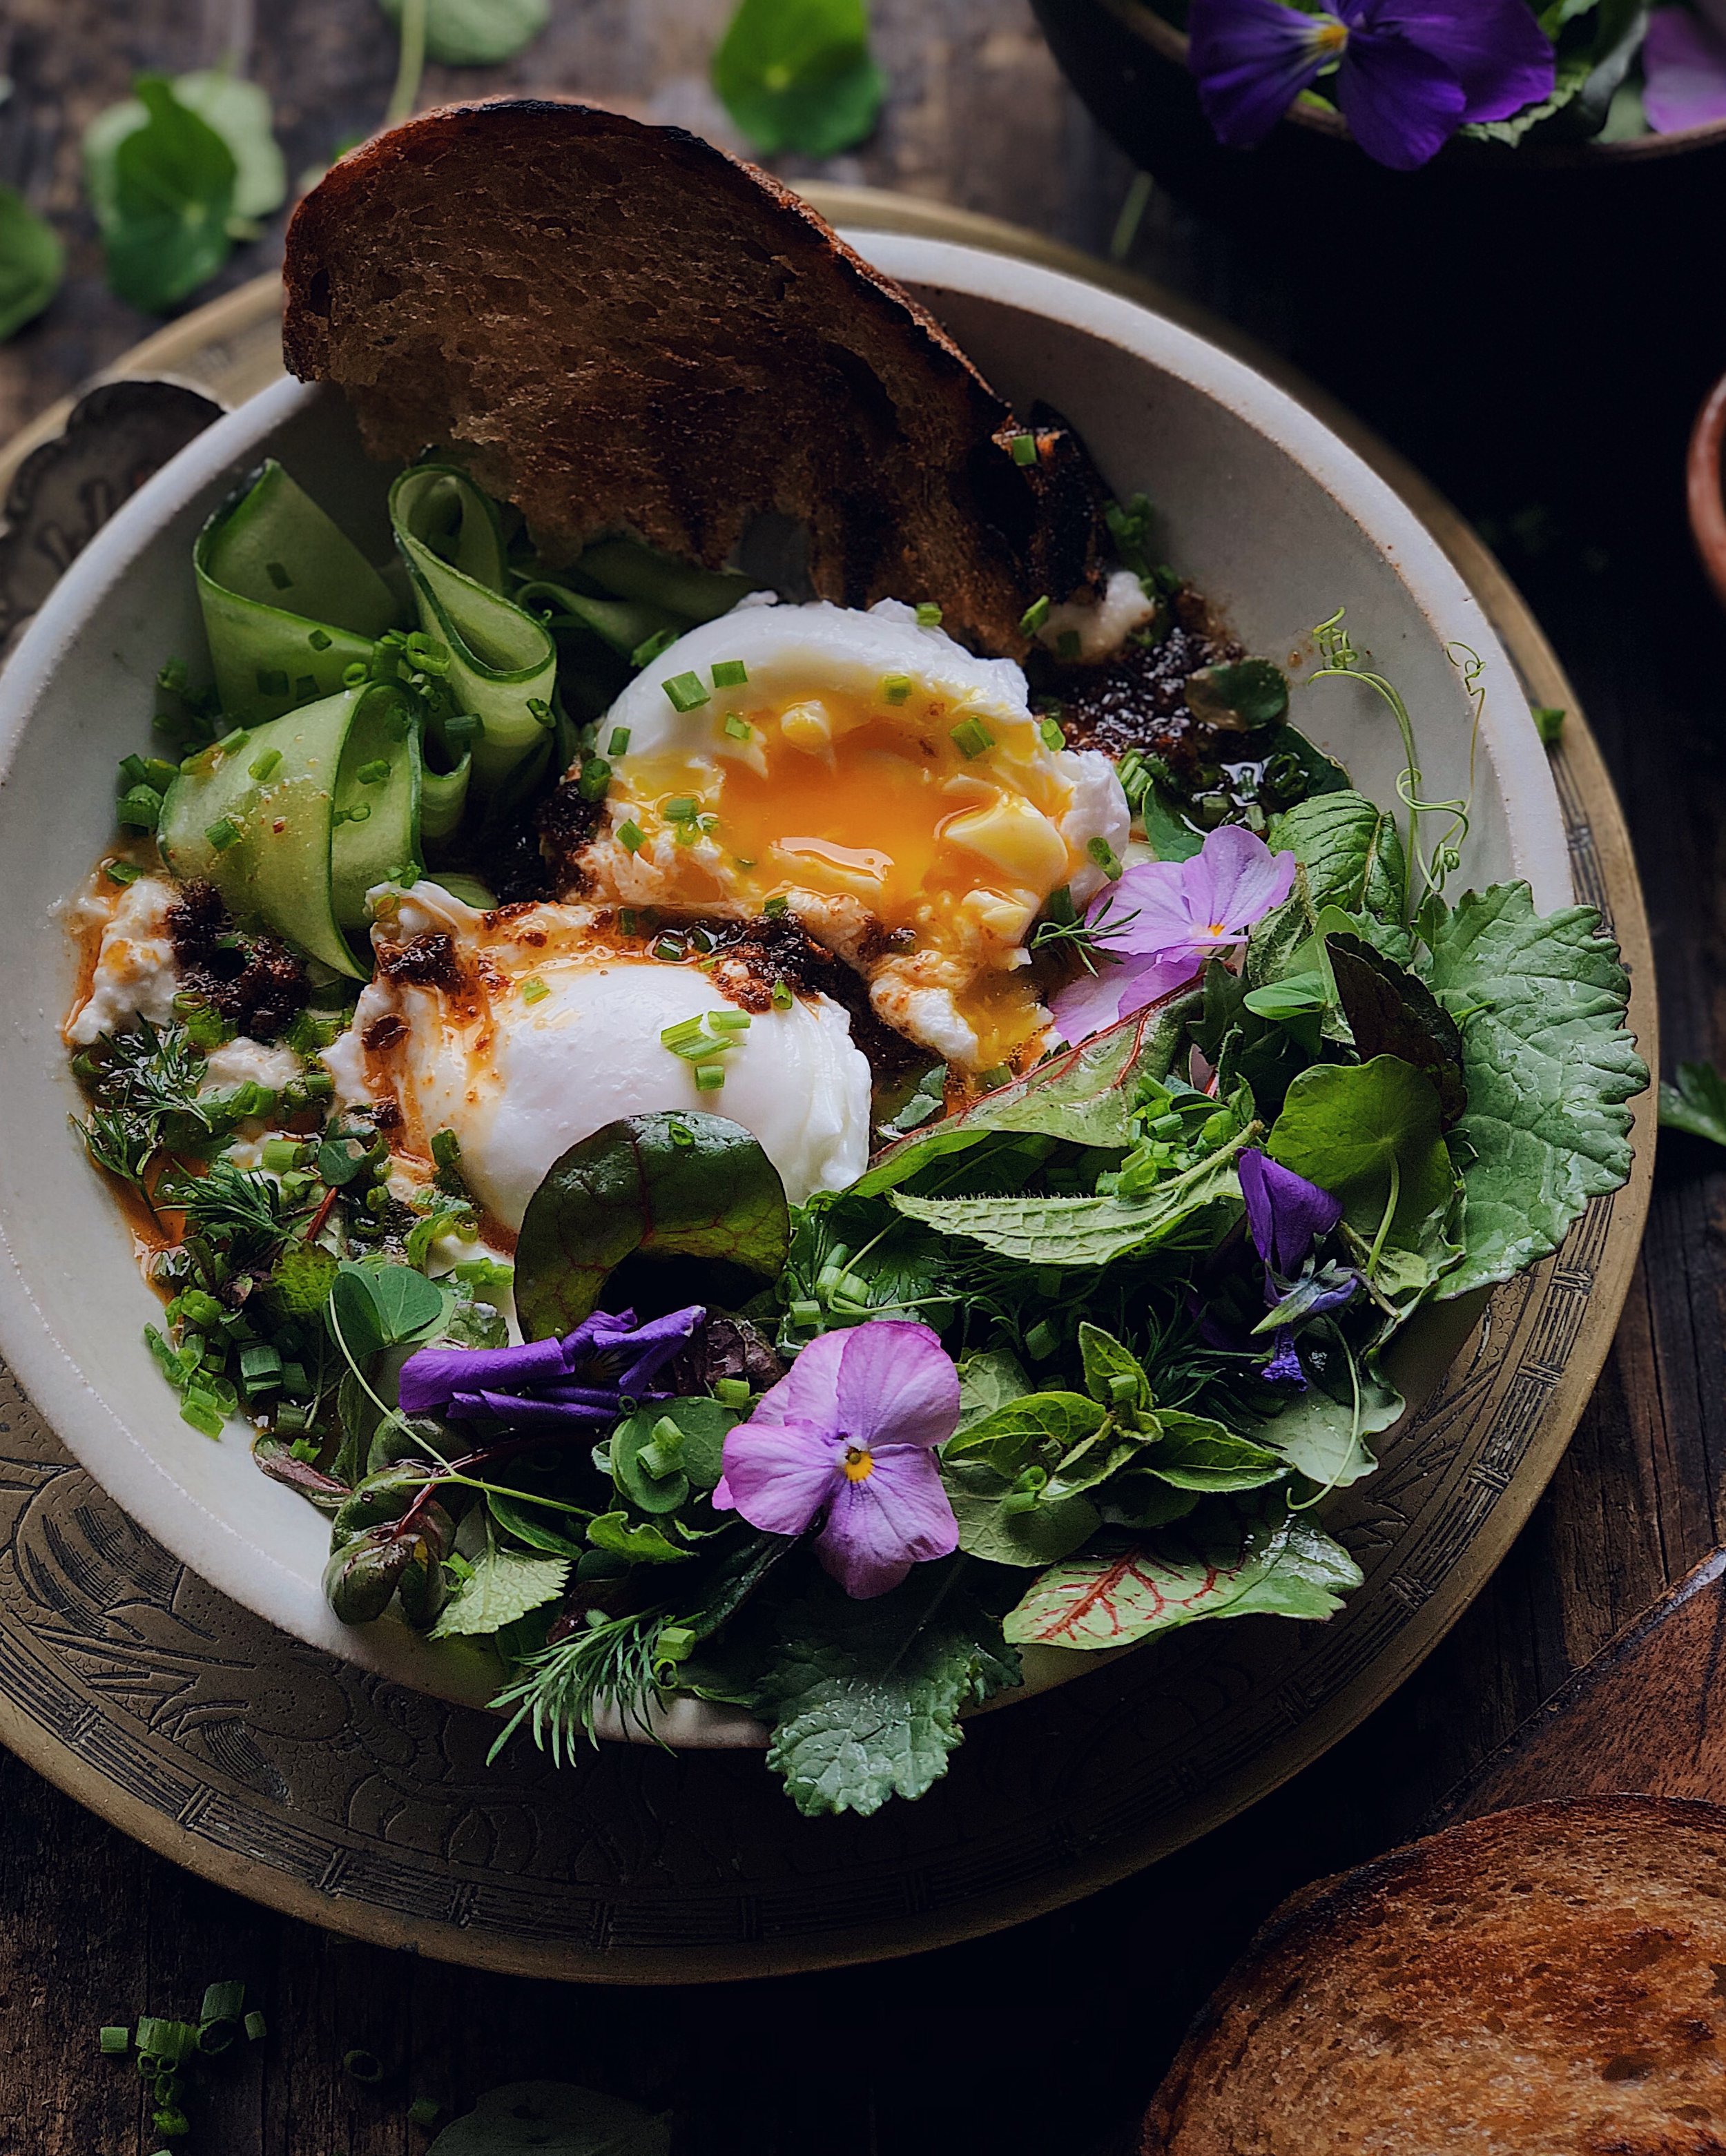
Poached Eggs in Burrata and Sambal Butter

I don’t have an exact recipe for this but it is maybe my favorite breakfast that I have ever made for myself so I had to document it here, if anything so that I could remember what I did. This is another poached egg bowl born out of my obsession for çilbir, which is known in English as Turkish eggs. Çilbir is a dish of garlicky yogurt topped with poached eggs and then drizzled with a chili butter made with a Turkish chili. This one has those general components (creamy base, eggs, spicy melted butter) but done a little differently in favor of some of my other obsessions.

This post is not sponsored but it uses some of my favorite storebought products to bring together a most epic of flavor combos:

  • Toom garlic dip: I love this when I am too lazy to make Lebanese toum from scratch

  • BelGioioso black truffle burrata: My absolute favorite burrata, I’m obsessed! Great stracciatella action inside with a thin casing and the perfect amount of truffle flavor.

  • Azalina’s sambal: A Malaysian company local to me in SF! I feel grateful to have them around to stay connected to the flavors of my heritage.

  • Mizkan Sushi Seasoning: This is my cheat for when I want a simple salad vinaigrette and I am too lazy to make one.

This dish also includes a beautiful little salad that I made out of mostly things I “foraged” from my backyard garden. Now that my edible garden is well underway and in full bloom, I love being able to go out there and snip little bits of leaves from here and there to make an herbaceous salad whenever I want to bring some freshness to a dish. This would also be great with a salad of any tender herbs you have remnants of in your fridge, or mild cresses, or baby arugula.

Oh yes, and a delicious bread is an absolute must to serve with this dish, to spoon on all the creamy goodness and mop up the bowl. Here, I had it with slices of a garlic loaf from my favorite Bay Area bakery, Wild Flower Bread!

Awkwardly Vague instructions for Poached Eggs in Burrata and Sambal Butter (with a little herby salad)

Ingredients

2 eggs
white vinegar, for poaching eggs (optional)
scoop of Lebanese toum (garlic dip)
4 oz ball of black truffle burrata
1 persian cucumber, sliced into ribbons with a veggie peeler
4 tbsp salted butter
Malaysian sambal
a small handful of fresh tender greens
seasoned sushi vinegar
chopped dill
chopped chives

Procedure

Make the poached eggs. (I keep wavering between doing the whirlpool method vs not. In this case I thought the shape would be better for the dish without the whirlpool so here’s what I did instead:) Bring about 4 inches of water to boil in a pot. Crack the eggs into small bowls. Turn the heat down to low, add a small splash of vinegar, and slowly tip in the eggs. Turn the heat up to medium-low and allow eggs to poach for 3 minutes. Transfer eggs to an ice bath.

Smear a scoop of toum into the bottom of your bowl. Break up the burrata and add it evenly on top of the toum to form a base for the eggs.

Arrange the cucumber ribbons and poached eggs on top.

In a small pan, melt the butter on medium-low heat. When it starts to foam, add in as much sambal as is to your taste. Break down the sambal paste with a spatula and mix it in with the butter until fully incorporated.

Toss your little collection of greens with a splash of the sushi seasoning.

Pour the sambal butter over everything in the bowl. Add the salad to one side and then sprinkle dill and chives over everything.

Serve with some amazing bread.

Recipe: Chili Cheese Scones

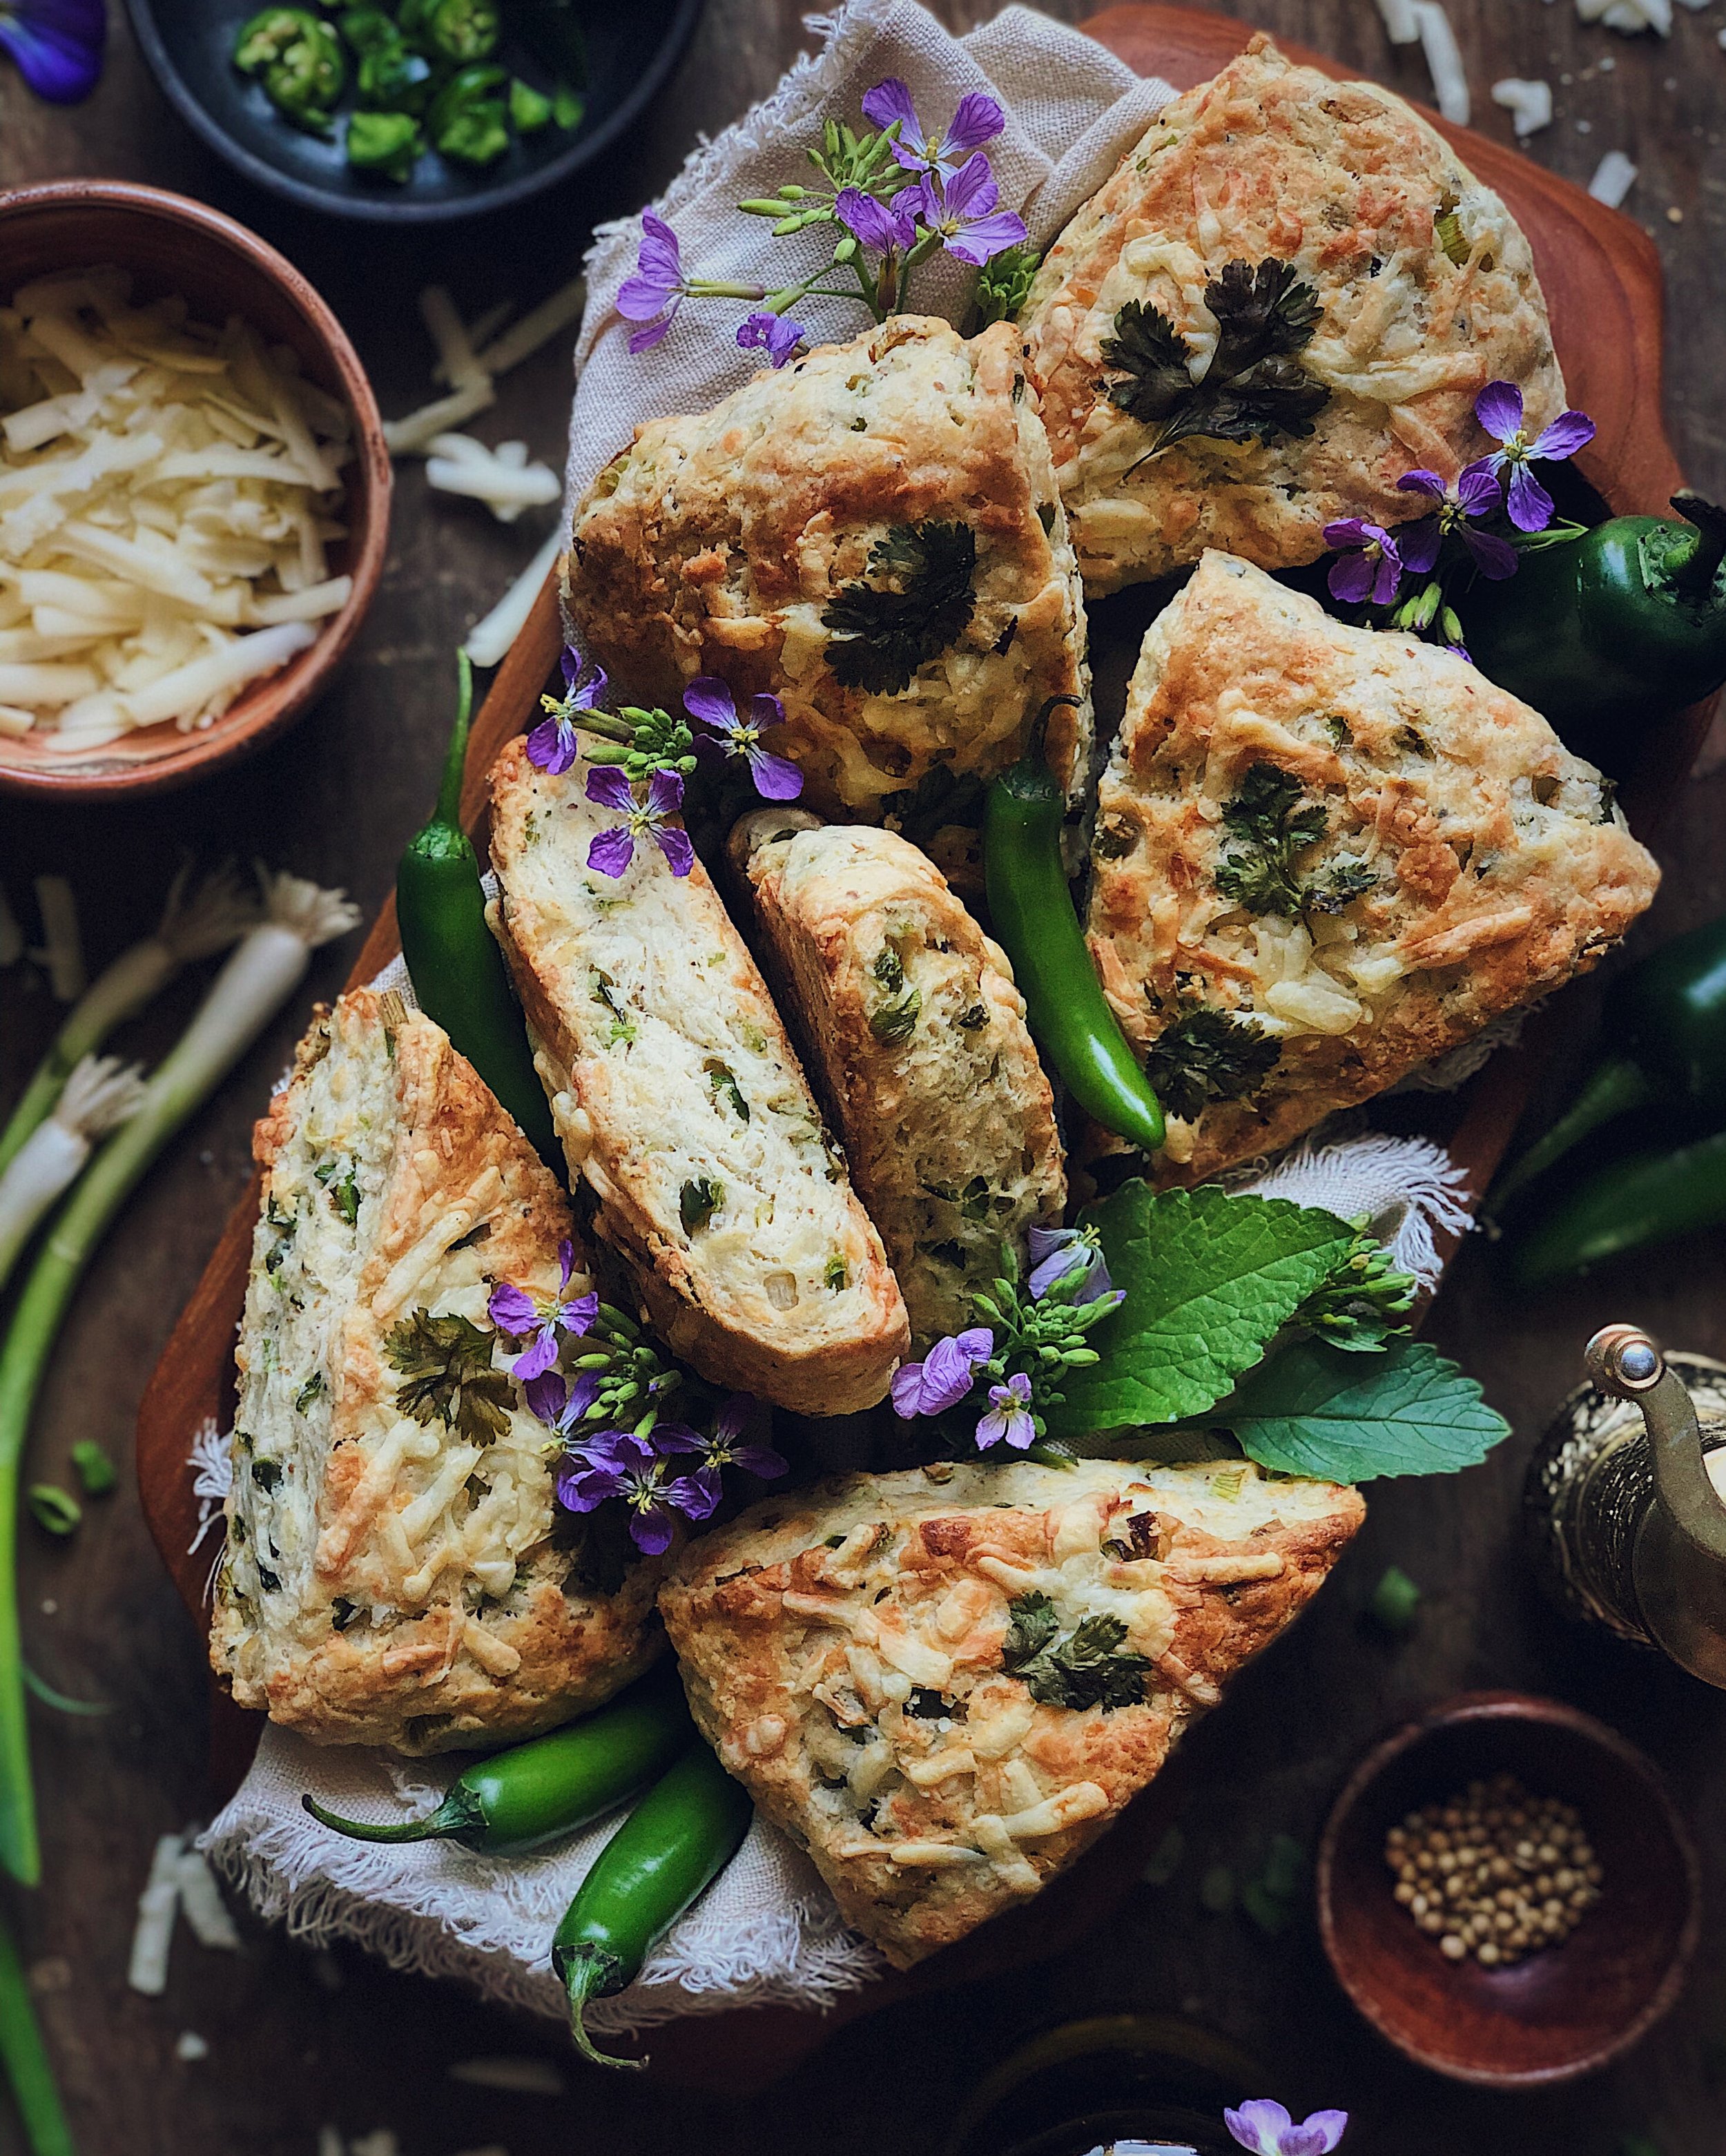
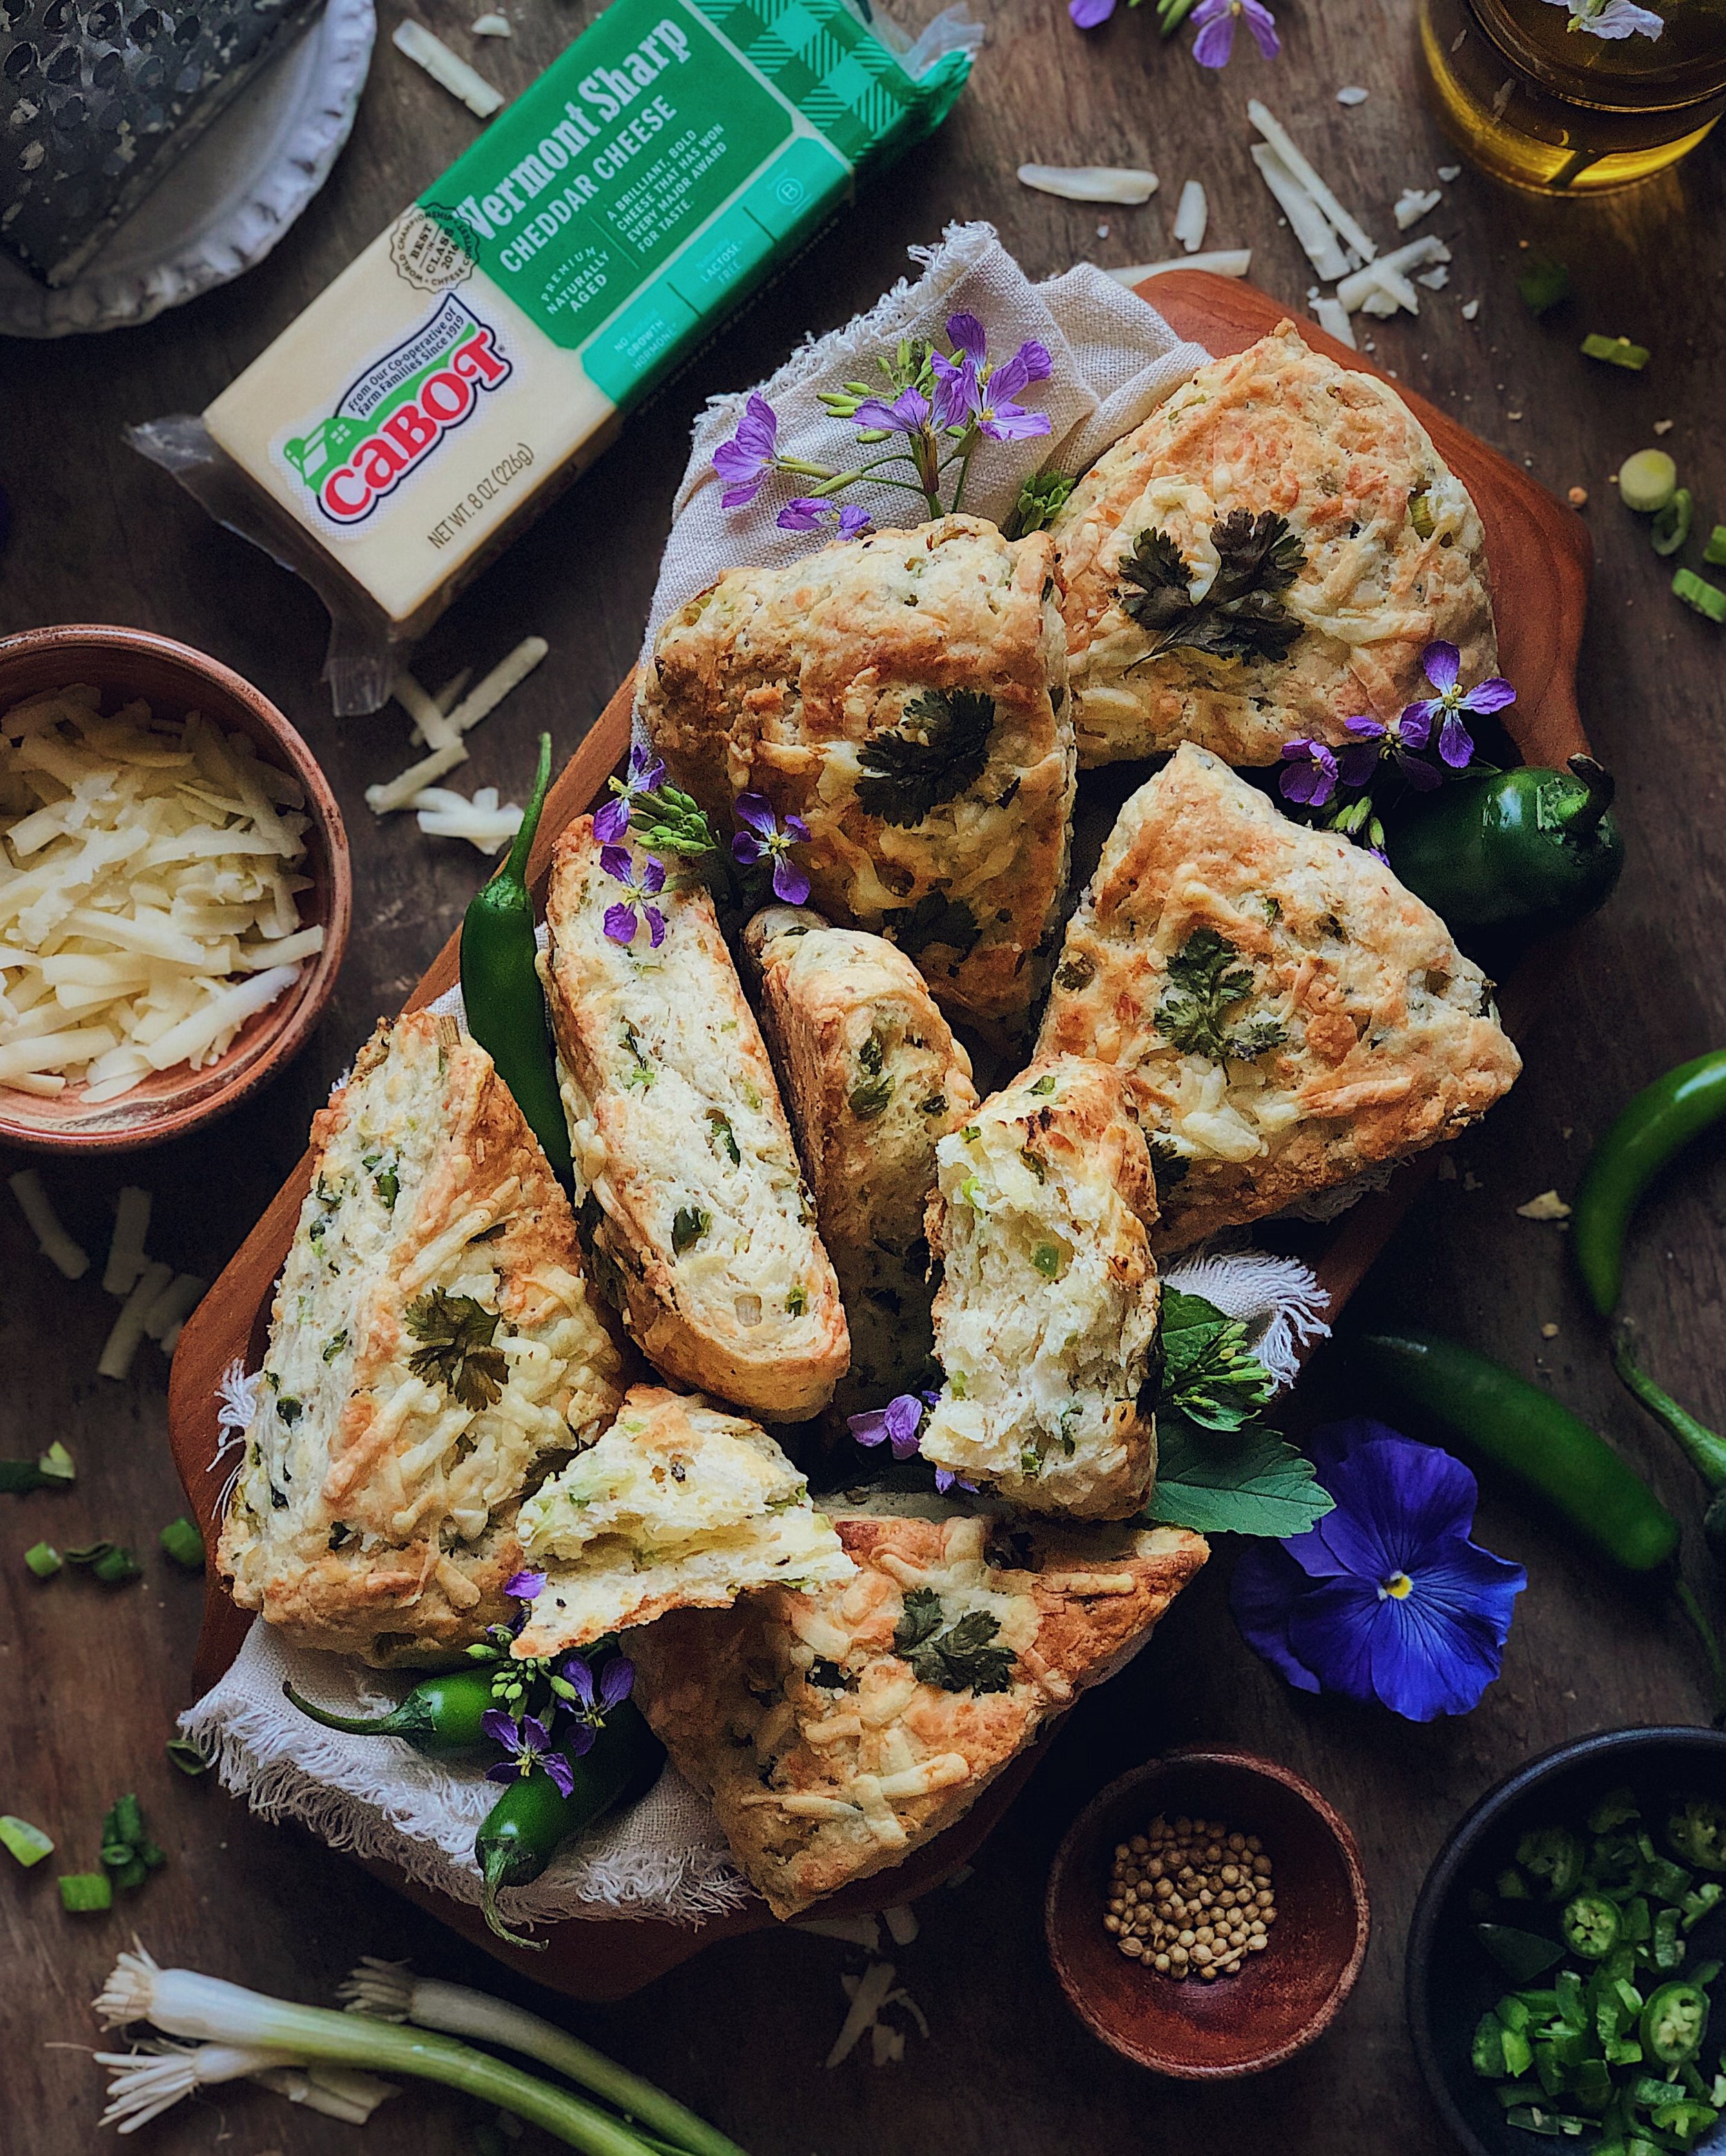
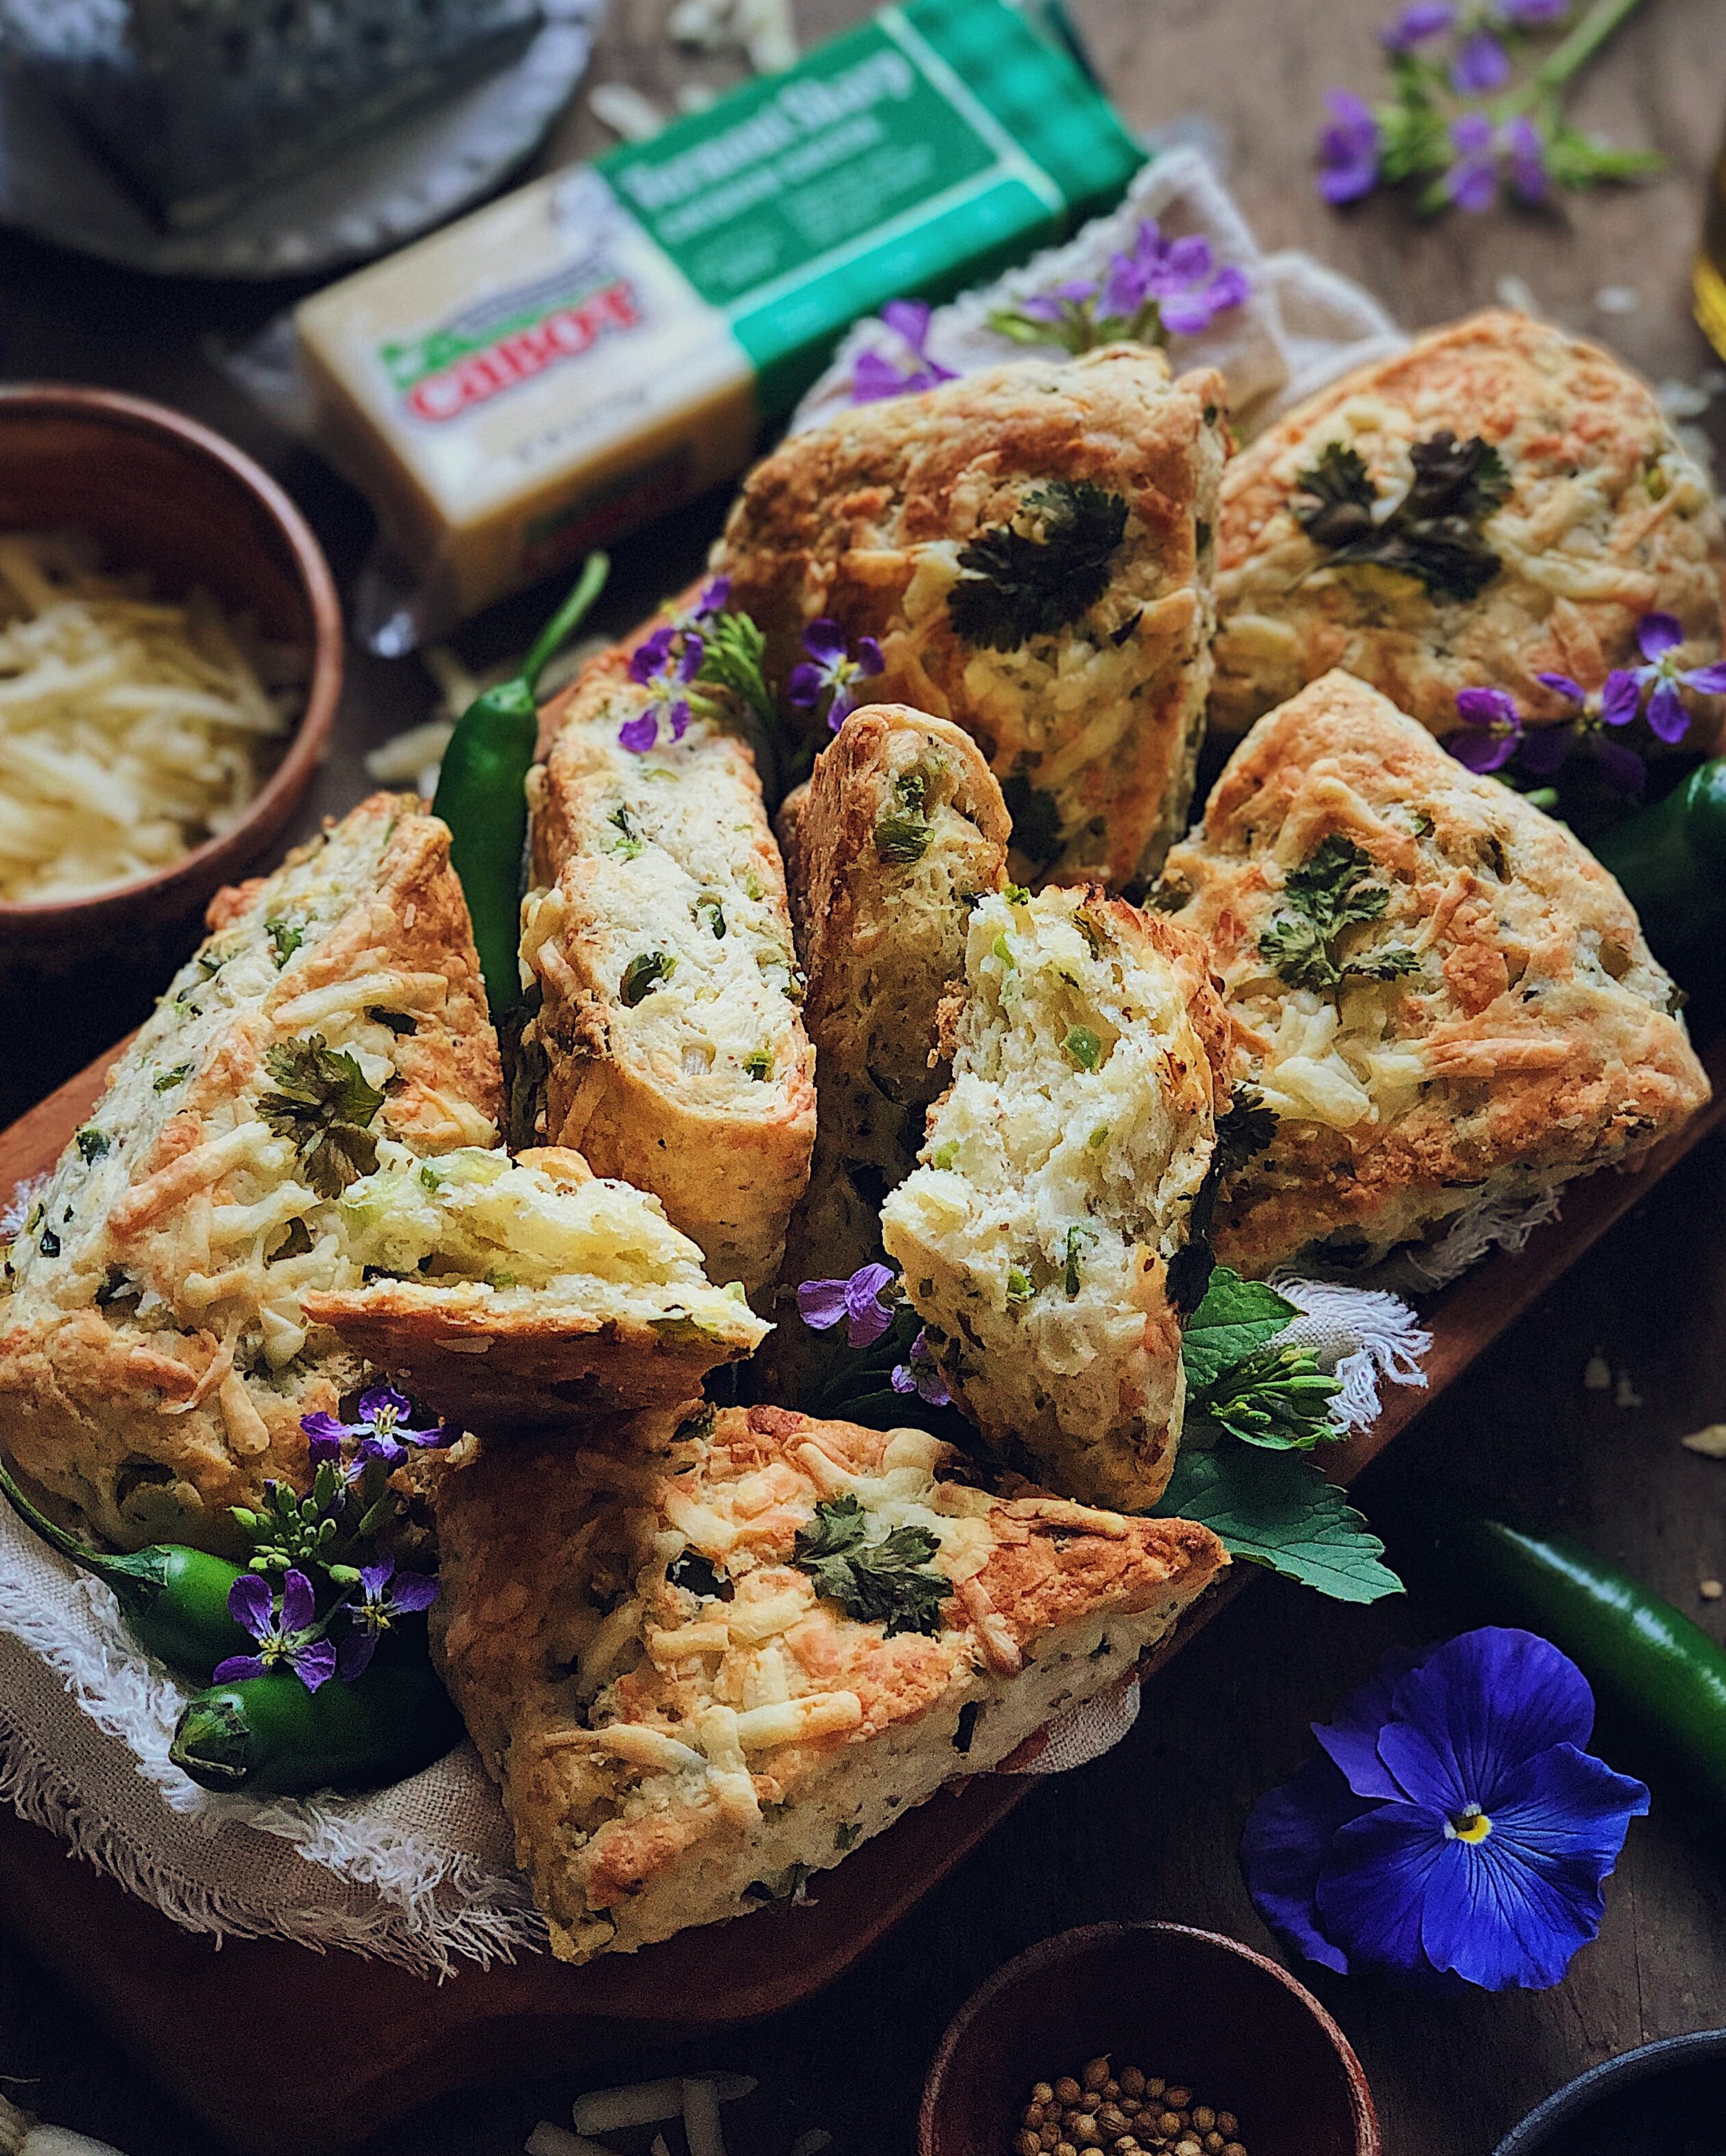
For this recipe, I partnered with Cabot Creamery to create my version of a baked goodie that I think gets totally overlooked: savory scones! I feel like sweet scones get all the love, but as a diehard member of Team Savory for life, what I like about savory scones is that they can be such a satisfying handheld snack or a way to round out a real meal. 

These scones are filled with a combo of green chilies, scallions, black pepper, and lots of high quality Cabot Vermont Sharp Cheddar. The inspiration for this flavor grouping comes from Indian-style chili cheese toast, which I first experienced at a Bombay-inspired restaurant in London called Dishoom. There, the pairing of chili cheese toast and eggs is called Eggs Kejriwal. I’ll still go to Dishoom whenever I’m in London, but at home, I was happy to find it was easy to replicate the chili cheese toast and was blown away by how good the simple combo of chopped green chilies, scallions, black pepper, and melted cheddar tasted together. It really is an example of the whole being more than just the sum of its parts and I think a lot of credit can be given to the power of a high-quality sharp white cheddar, when it is all gooey and melty, for bringing everything together.

So when Cabot Creamery asked me to come up with a recipe to show off one of their wonderful cheddars, I thought it would be tasty to put the flavors of one of my favorite toasts into the lovely portable format of a scone. But despite the inspiration coming from London, these aren’t going to be the dry, crumbly, or bland scones you might get with an afternoon tea service. These are flavor-packed American style scones and they are super tender and light!

I opted to use Cabot Vermont Sharp Cheddar for this recipe, which has such a nice bold sharp cheddar taste. Cabot is a co-operative owned by farm families throughout New England & New York and 100% of profits go back to the farmers, which I think is so cool for a brand that is so widely distributed. They are also the world’s first dairy co-op to get a B Corp certification. This particular cheese offering from them has a creamy texture and buttery richness to it, and is equally as good for just snacking on alone as it is getting baked into scones—which made it really hard for me to resist eating it while I was prepping the ingredients to shoot this recipe. 

These scones are nice and cheesy, with a little bit of kick from the chilies, and a unique spiced undertone from the coriander seeds and black pepper. I hope you’ll give them a try!

What you need to know about the key ingredients for this Chili Cheese Scone recipe:

  • Butter: Freezing the butter and then grating it is my go-to technique for any sort of baked pastry that I want to be airy and flakey. No one wants overly-dense, hard scones. In contrast, the frozen butter, and keeping everything as cold as possible in general, allows for the creation of steam inside the scones as they bake, which form air pockets that keep the texture light. I used Cabot Salted Butter for this recipe to add an extra note of rich savoriness.

  • Cheddar: The cheddar is really the star of these cheesy scones! I went for the Cabot Vermont Sharp Cheddar, which I think has a great classic sharp cheddar taste that really holds up nicely mixed into these scones. However, I think that Cabot Creamery’s Seriously Sharp Cheddar would also be great here. Be sure to grab one of their cheese bars and grate it fresh for this recipe.

  • Green Chilies: The green chilies are what give the scones a nice little spicy kick. I used a mixture of jalapenos and serranos here (2 very large jalapenos and 1 long serrano) but you could also choose one or the other. I removed the pith and seeds from the jalapenos because I don’t care for the texture but kept it all in for the thinner serrano and this brought a noticeable amount of heat to the scones. If you remove all the pith, the scones will be much milder.

  • Scallions: Chopped scallions add a nice savory and aromatic flavor to the scones. They get sweeter when the scones are baked and taste so good with the cheddar!

  • Black Pepper: This adds a zingy spiced component to the scones. Please do not use the ground pepper that comes out of a store-bought spice jar. Whole black peppercorns and a pepper mill on a coarser setting, and subsequently nice freshly-cracked pepper, is what will give you the flavor impact you want.

  • Coriander Seeds: Sometimes when I make chili cheese toast, I also include cilantro, or coriander. For my scones, I opted to include coriander seeds because I think they bring such a great mysterious and complex spice flavor without adding any extra spicy heat. I measured out the whole seeds first, then toasted them in a dry pan until they became fragrant, then pulsed them a couple of times in a spice grinder. If you have a mortar and pestle that would be even better. You want to crush them up and get them to release their aroma but you don’t need a fine powder.

A couple of other techniques to get the best scones:

  • Like I mentioned before, keeping everything cold is what gives you scones that are tender and airy instead of dense and firm. Popping the scones in the freezer while you wait for your oven to heat up will help the scones poof up instead of spreading out.

  • Creating letterfolds with the dough before cutting out the scones is what gives them those nice layers similar to an American style biscuit. You can definitely just gather the dough together and cut out the scones right away, but this extra step of flattening it out and folding the slab of dough a few times is a quick trick that makes them extra special.

How to Make Chili Cheese Scones

(Makes 8 scones)

Ingredients

2 cups AP flour, plus extra for dusting
2 1/2 tsp baking powder
1 tbsp sugar
1/4 tsp kosher salt
1 tsp freshly cracked black pepper
1 tbsp whole coriander seeds, toasted and then coarsely ground
2/3 cup heavy cream
1 egg
6 oz Cabot Vermont Sharp Cheddar, grated
1/2 packed cup scallions, chopped
1/2 cup jalapeno or serrano peppers, cut into 1/8” dice (see note*)
1/2 cup (1 stick) Cabot Salted Butter, frozen
1 tbsp Cabot Salted Butter, melted
Cilantro leaves, for decoration (optional)


Notes

* You can control the level of spicy heat in the scones by how much of the pith you choose to include. The majority of a chili pepper’s heat comes from the pith.

Procedure

Combine the flour, baking powder, sugar, salt, pepper, and ground coriander seed in a large mixing bowl and whisk together.

Set aside a few pinches of the grated Cabot Vermont Sharp Cheddar for topping off the scones later.

Into the dry ingredients, stir in the rest of the cheddar, plus the chopped scallions and chilies.

In a separate bowl, whisk together the heavy cream and egg.

Working quickly with cold hands, grate the stick of Cabot Salted Butter into the dry ingredient mixture, tossing together the ingredients along the way to ensure even distribution. 

Drizzle in about one-third of the wet ingredients. Incorporate gently with some of the dry ingredients. Continue gradually incorporating the wet and dry ingredients together, taking care to not overstir. (Mixture can be clumpy and uneven.)

Dump the mixture onto a work surface and gently press together with your hands until it all sticks together. Lightly flour a work surface, then shape the dough into a rough rectangle, about 6x9. Lightly flour the surface of the dough, then fold down the top third and fold up the bottom third (like you would fold a letter). Flip and rotate 90 degrees and repeat the shaping, rolling, and folding sequence. Flip and rotate again, then do the sequence one more time, for 3 sets of letter folds total.

Then, fold the dough in half and shape it into a flat circle, about 7-8 inches in diameter. Cut the dough into 8 equal wedges. Transfer to a parchment-lined baking sheet and place in the freezer for 15 minutes.

In the meantime, place an oven rack one-third from the top of the oven and preheat oven to 400°F.

Brush melted butter on the tops of the chilled biscuits. Sprinkle remaining cheddar on top. If desired, decorate with fresh cilantro leaves.

Bake for 25–27 minutes, or until tops begin to get golden.

Thank you so much to Cabot Creamery for sponsoring this recipe! Visit their website to find out where you can get their delicious cheeses, such as their naturally-aged cheddars, near you!

Recipe: Stone Fruit & Herbed Goat Cheese Tart with Cheesy Crust & Hot Honey Butter

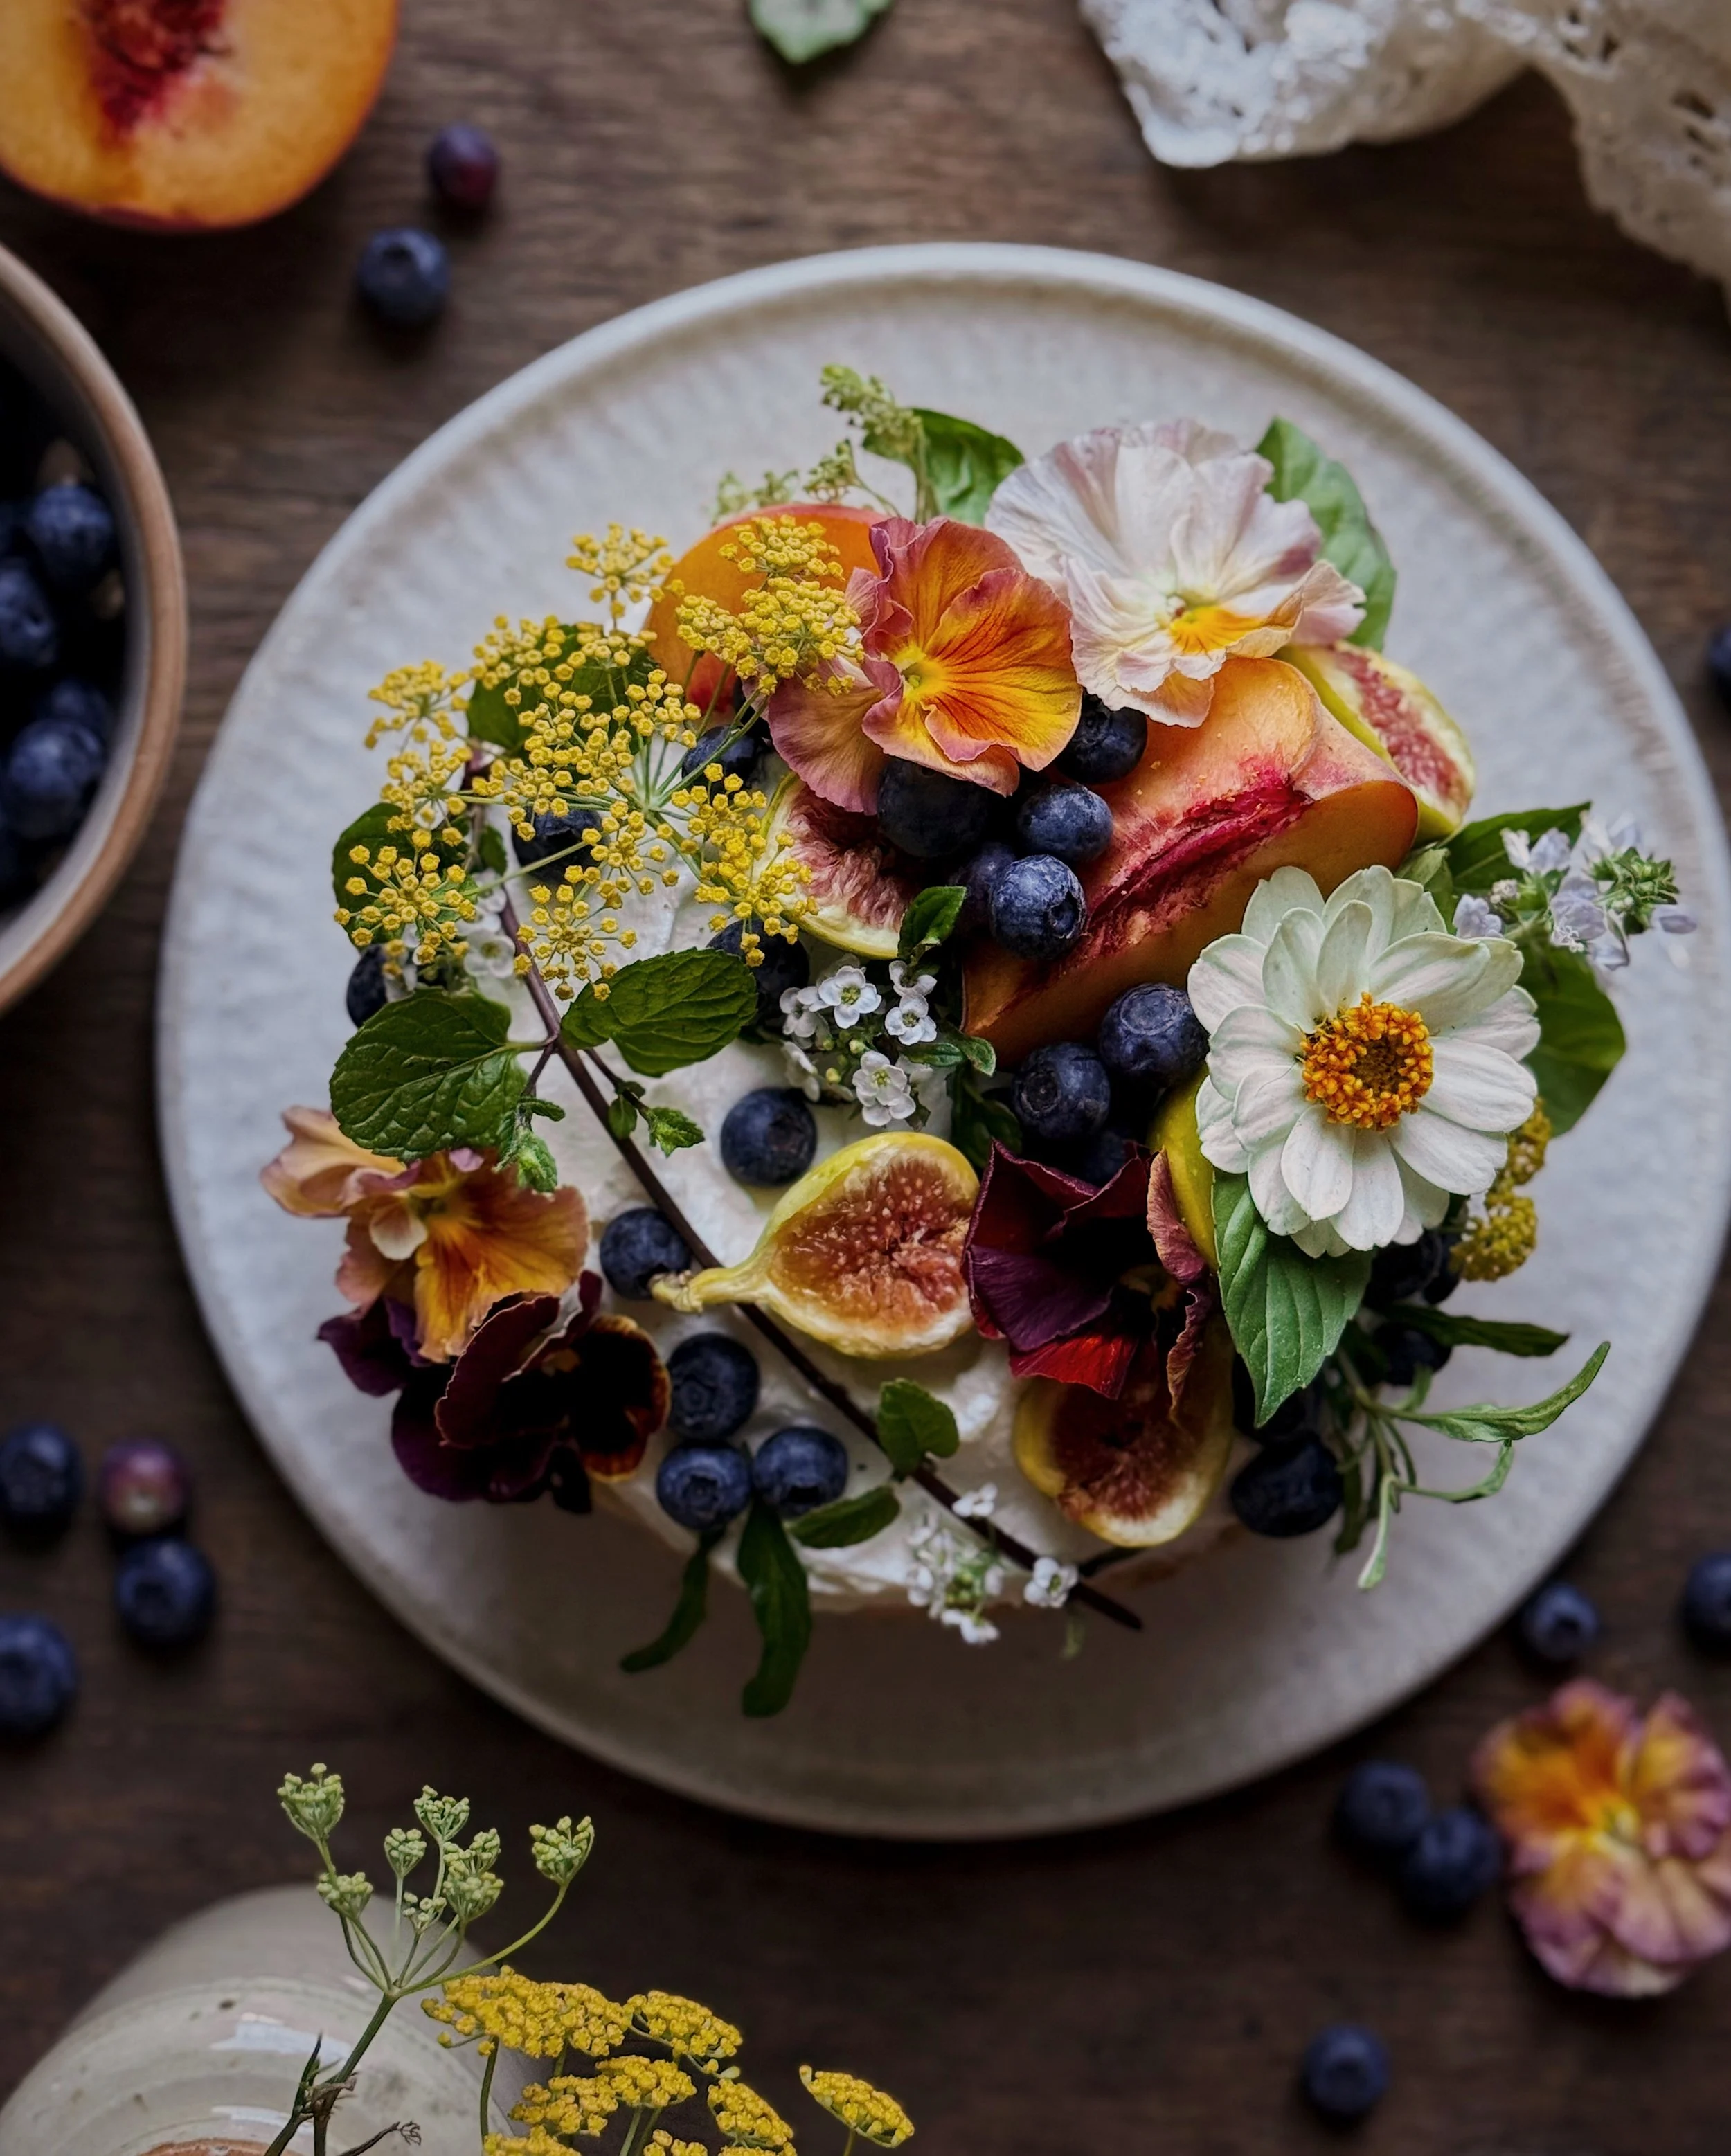
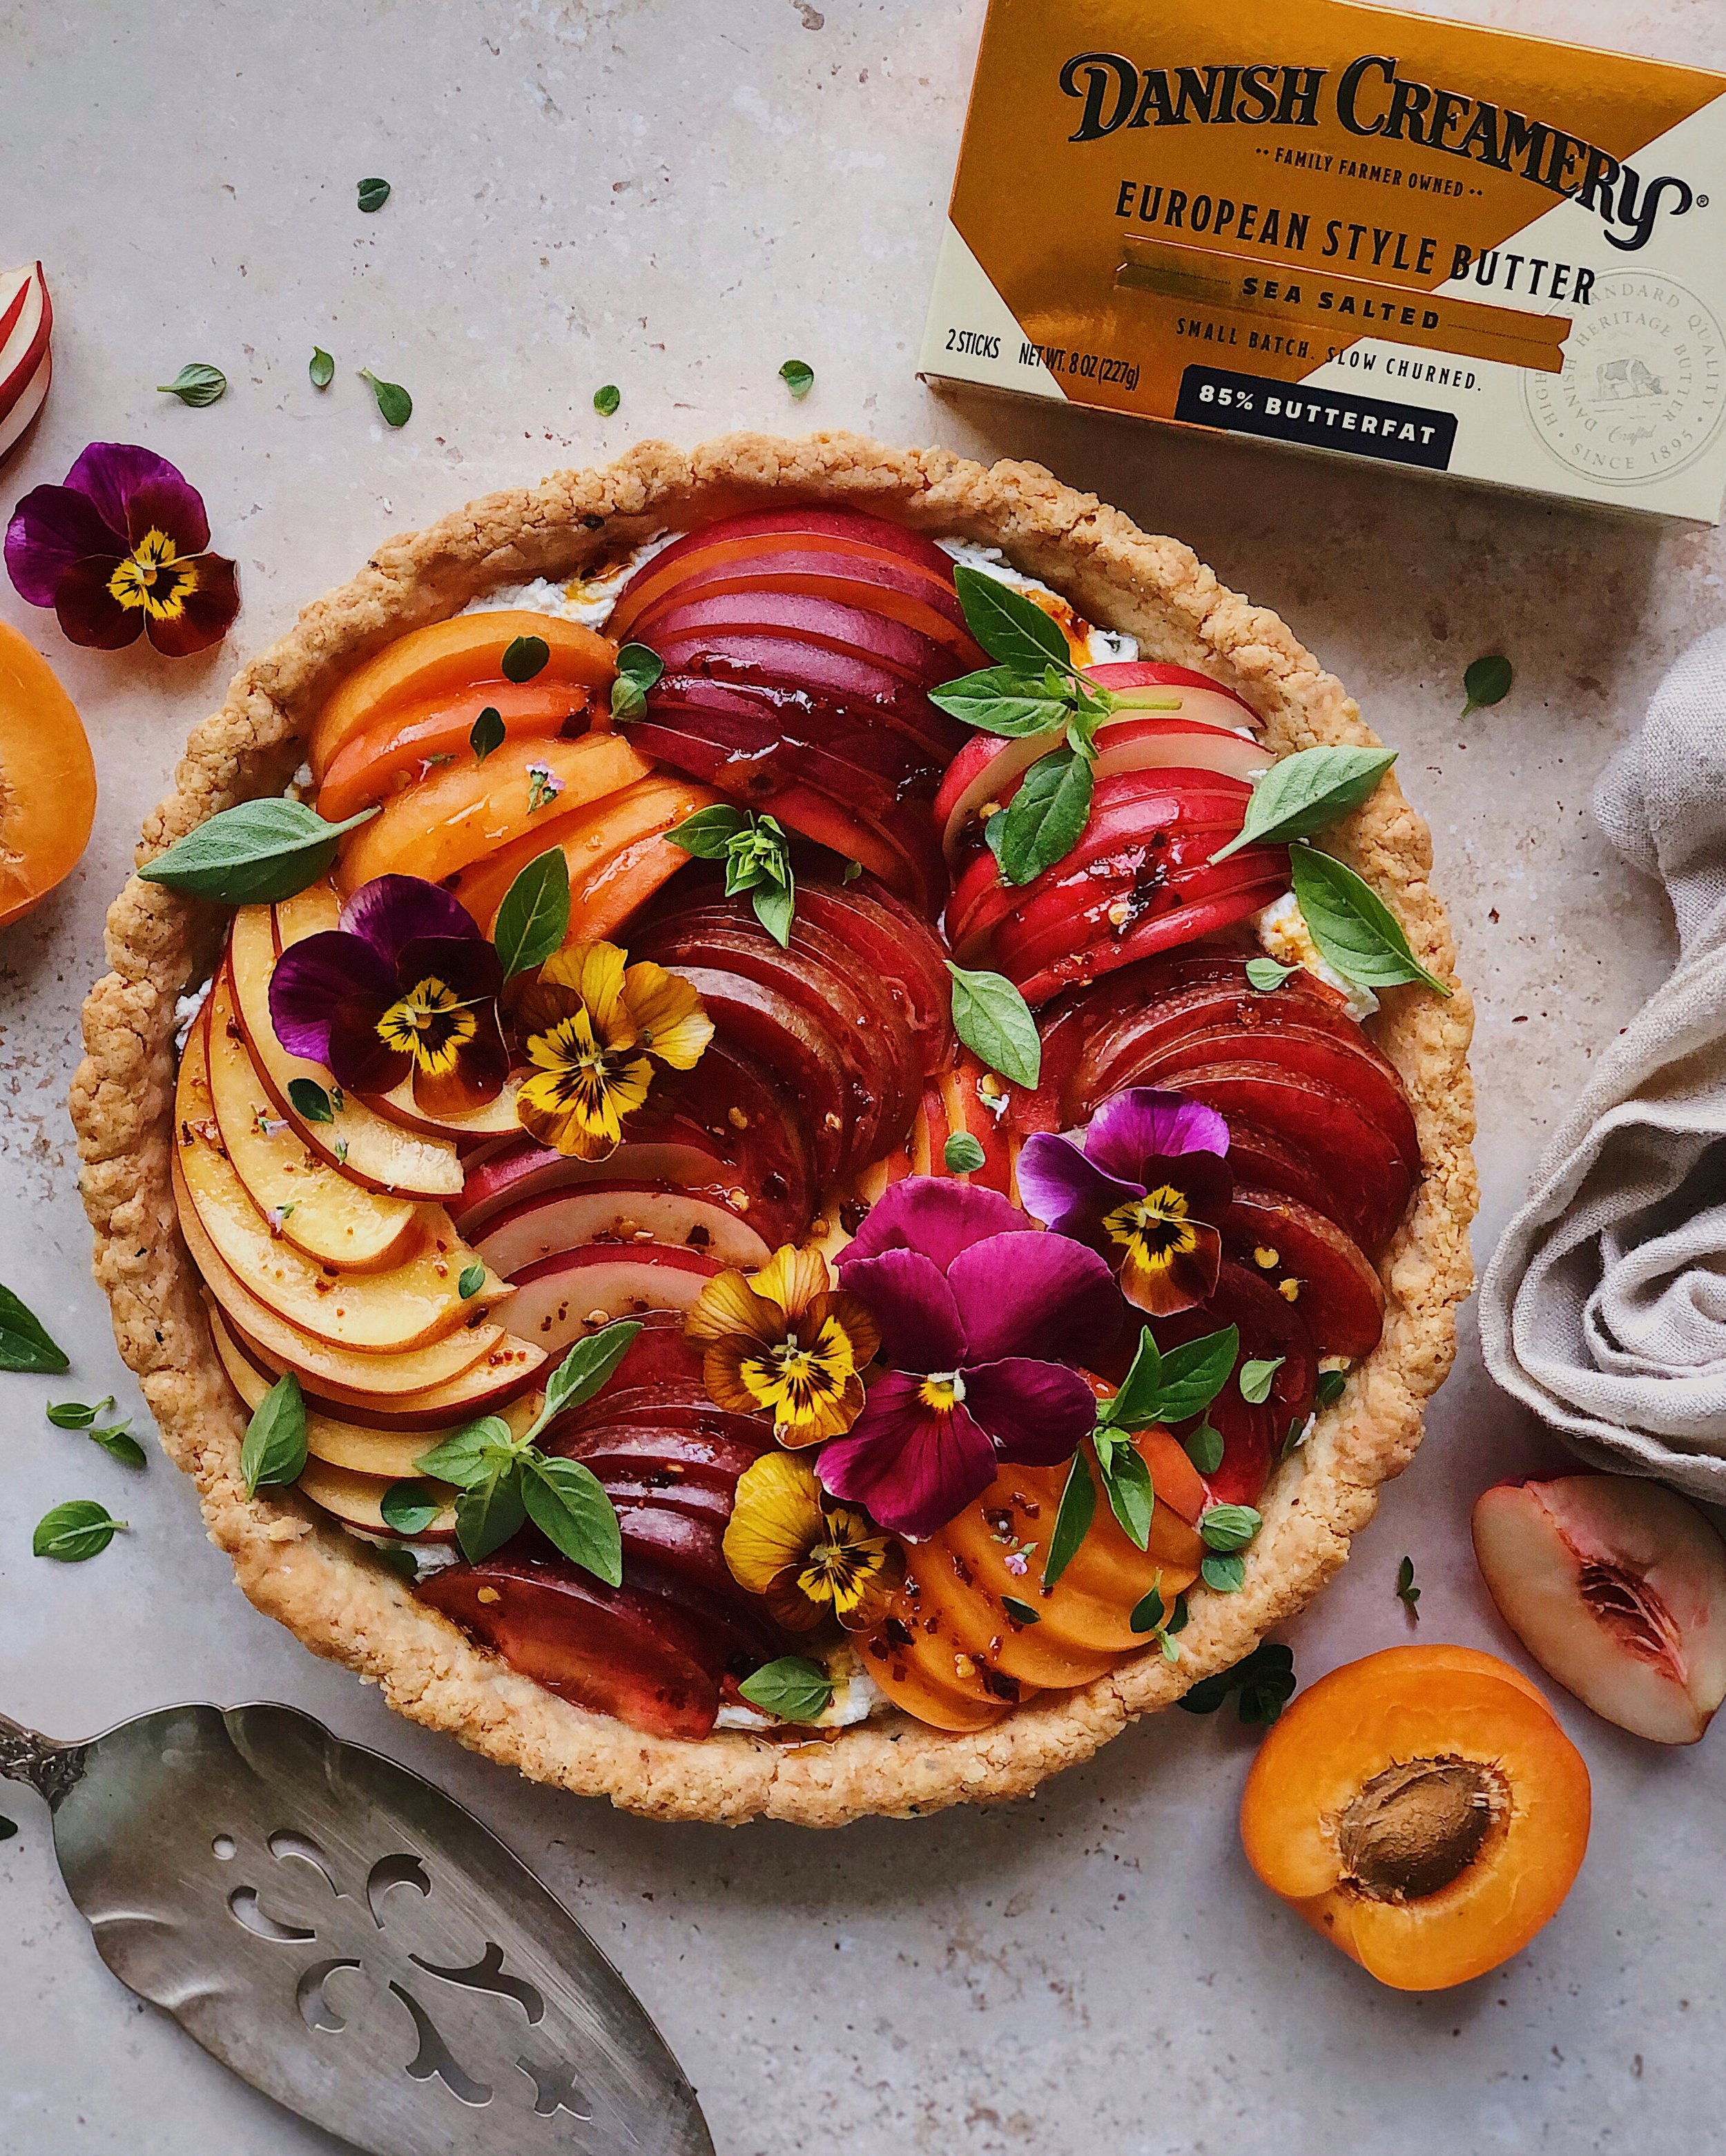
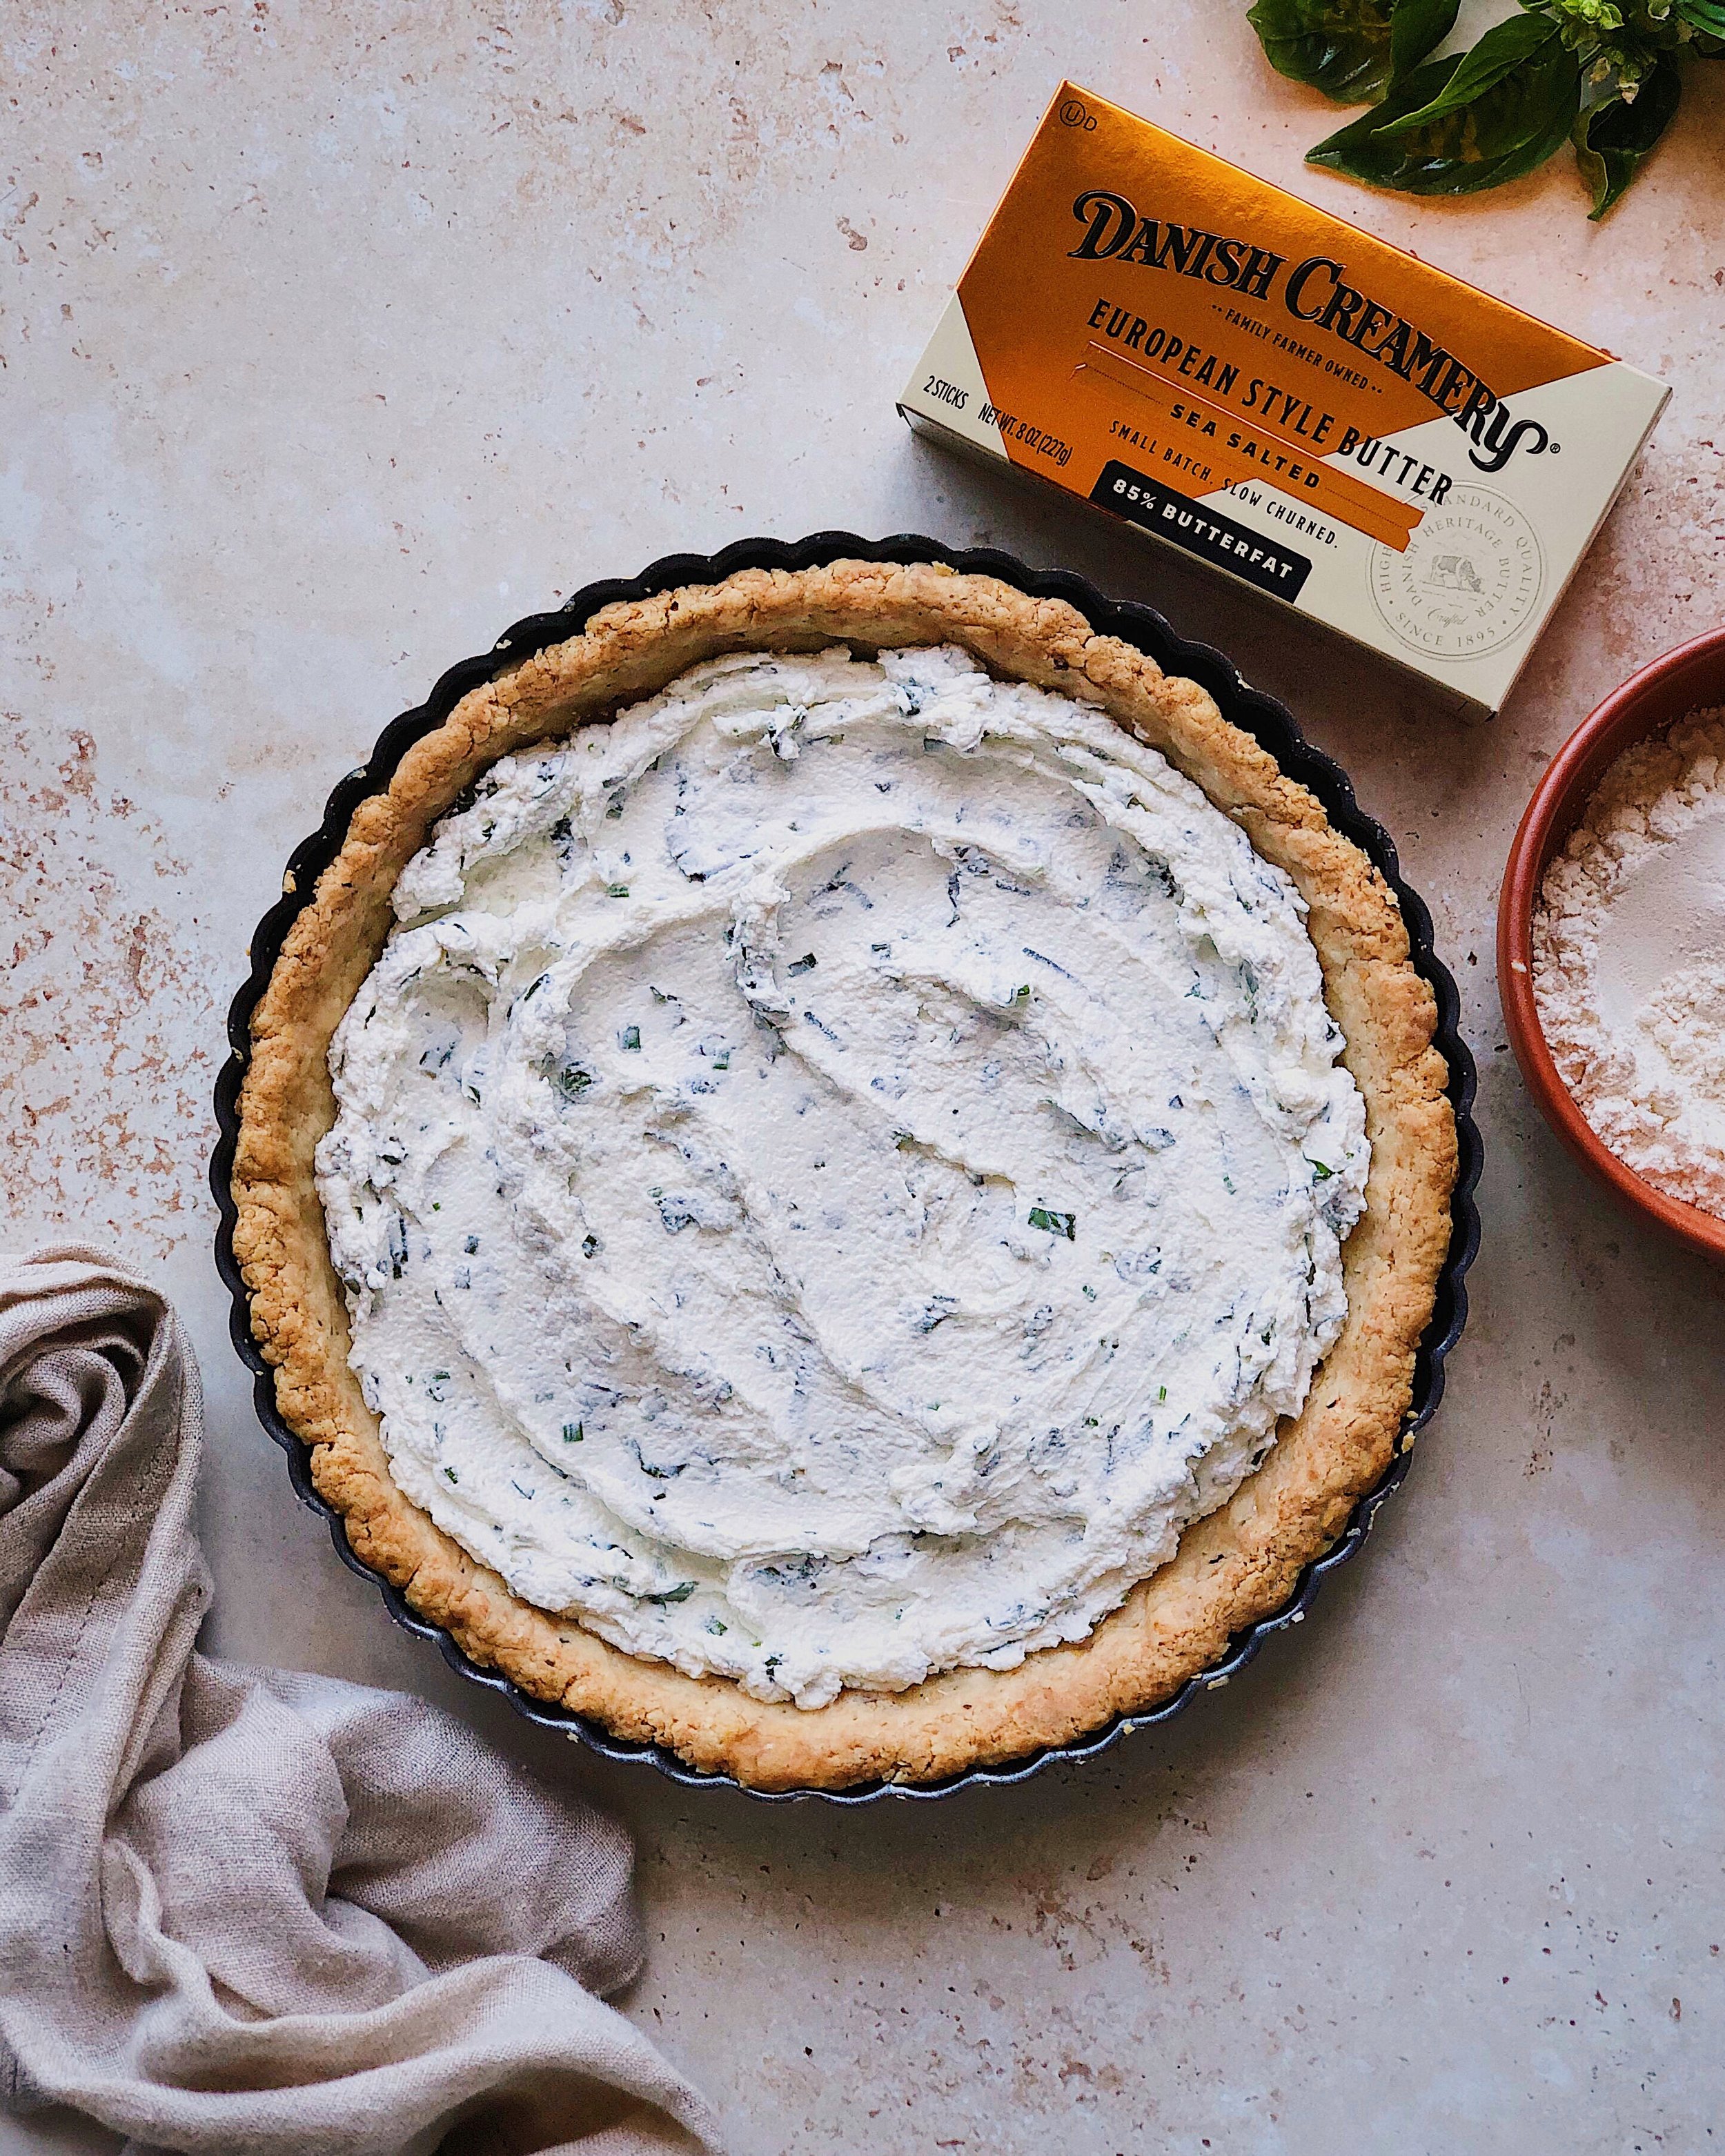
For this recipe, I partnered with Danish Creamery to celebrate my favorite time of the year—stone fruit season! I came up with the idea for this tart because I love making hybrid baked goods in the summer that feature raw seasonal produce in all of their peak-flavor glory. I still want the satisfaction of crafting and baking some kind of base or crust—something where I can proudly say “I made this from scratch!”—but when fruits are already ripe and bursting with their natural juices, I think baking them is honestly a waste, so I add them at the end to be enjoyed fresh.

So, this tart features a snappy cheesy buttery shortcrust, which gets baked solo and then gets filled by a creamy blend of whipped goat cheese and fresh herbs and topped with fresh, raw stone fruit before getting finished off with a drizzle of hot honey butter. Because my taste preferences are always leaning towards savory, I love to experiment with combining sweet fruit with savory ingredients and I think that the balance is just wonderful; it allows for savoring the natural sweetness of a beautifully ripe fruit without limiting the result to something that can only be served as a dessert. Instead, I recommend that this sweet-savory beauty be considered for your next al fresco brunch or picnic potluck; it holds up well when made a bit ahead so it would certainly be a low-stress addition to any sun-soaked gathering where smiles and good vibes are the objective.

Though the nectarines, apricots, and pluots are obviously the star here, don’t sleep on this cheesy crust! I am so proud of how much flavor I was able to pack into something that is often overlooked or perceived as just a vessel when it comes to tart making, and it is definitely a recipe that I will be using as a base for more than just the fruit tart idea you see here. Loaded with asiago cheese and high-quality butter, this savory shortcrust is so snappy and yummy that it would even be delicious broken up into chunks and eaten alone as a snack! This sturdy shortcrust is what helps make this tart a good menu item for summer gatherings, and the munchable texture is a result of keeping all the ingredients super cold while putting together the dough and keeping the moisture content to a minimum. Using Danish Creamery European Style Sea Salted Butter, which has a higher butterfat content than most other European butters, is one trick I used getting the right texture and flavor for the crust. A good butter is key for a shortbread or shortcrust, and Danish Creamery’s  butter is made with just high-quality cream and a touch of sea salt, slow churned for a rich flavor that really sets this shortcrust dough recipe up for durable and delicious success.

I also used Danish Creamery’s European Style Sea Salted Butter in the hot honey butter drizzle that serves as the finishing touch for this tart. This creation is something akin to drizzling a dessert with salted caramel at the end, but I think the hint of spicy chili mixed with the honey and the salted butter is the perfect way to really bring together this combination of sweet and savory flavors. You will end up making more than you need for the tart when following the recipe below, and I recommend saving the extra to drizzle on toasts, pizza, or anything where a little spicy indulgence is welcomed.

This stone fruit and herbed goat cheese tart is made up for the following components:

  • Cheesy Shortcrust: A durable tart shell is what holds all the magic together, but it also brings plenty of its own flavor. I start by cutting Danish Creamery European Style Sea Salted Butter into small cubes and then freezing them—keeping the crust ingredients super cold is what gives you a short, crisp, snappy texture instead of a dreaded soggy bottom, so planning a little ahead and giving the cubes of butter time to freeze will make that goal easier. The rich, creamy butter, made with cream from healthy grass-fed California cows, becomes the savory foundation that gets supplemented with asiago cheese and black pepper to give the crust its addictive flavor. While using high-quality butter should be a given for a crust like this, there’s also an unexpected ingredient: vodka. Using vodka instead of water further ensures that this crust does not get bogged down by moisture; it brings together all the dry ingredients but evaporates quickly in the bake, along with any concerns about having alcohol in your pastry. These ingredients get pulsed together in the food processor and then pressed into the tart pan, so you don’t even have to bother with rolling. 

  • Herbed Goat Cheese: Whip together room temp chèvre with Greek yogurt and fresh chopped herbs to form the first layer of filling that goes inside the cheesy tart shell. Not only does the mixture help hold the stone fruit in place if you choose to arrange it in a decorative manner, but the tangy, creamy goat cheese and herbs are such a lovely flavor complement. You can really use any soft herbs of your choosing here but I opted for chives, basil, and thyme.

  • Stone Fruit: This is the main event! In case you didn’t know,  the term “stone fruit” refers to fruits like peaches and apricots that have a singular stone-like pit inside to house the seed. Feel free to use a medley of nectarines, apricots, and pluots like I did, or whatever is your personal fave. When selecting your stone fruit for this tart, seek ones that are fragrant but still have some firmness to them, so that they are easy to slice and will keep well on top of the tart. You can either slice them thinly and arrange them like I did, or opt for chunkier wedges that you can just dump into a somewhat-even layer on top.

  • Hot Honey Butter: This finishing touch brings a unique spicy kick to the sweet-savory creation and helps to unite all the other flavors. A mix of gochugaru (Korean red chili flakes) and red chili pepper flakes are given a chance to bloom in a bit of velvety Danish Creamery European Style Sea Salted Butter before being combined with honey. This recipe yields more than what is needed for the tart; save the extra in a microwave-safe jar and heat for a few seconds to improve viscosity for drizzling on other creations afterward.

How to Make the Stone Fruit & Herbed Goat Cheese Tart

Ingredients for Crust

1 stick Danish Creamery European Style Sea Salted Butter, cut into 1/4”-inch cubes then frozen
1 1/4 cup all purpose flour
1/2 cup asiago, grated then chilled
1/2 tsp kosher salt
1/2 tsp freshly cracked black pepper
4–6 tbsp vodka, chilled

Ingredients for Filling

5 oz goat cheese/chèvre, at room temperature
4 tbsp Greek yogurt, drained
1/2 tsp chives, finely chopped
1 1/2 tsp thyme leaves
2 tbsp basil leaves, finely chopped
2–3 stone fruits, sliced
fresh herbs and edible flowers, for garnish (optional)

Ingredients for Honey Butter

1 tbsp Danish Creamery European Style Sea Salted Butter
1 tsp gochugaru/Korean chili flakes
1/2 tsp red pepper flakes
3 tbsp honey

Special Equipment

food processor
tart pan with removable bottom
dry beans or pie weights

Procedure

To make the crust, add flour, asiago, salt, and pepper to a food processor and pulse briefly to combine. Scatter in frozen butter cubes and pulse until the texture resembles wet sand. Add 1 tablespoon of vodka and pulse a couple of times; repeat, adding 1 tablespoon of vodka at a time and pulsing briefly after each, until the mixture looks like it is just barely starting to form clumps. Dump mixture into tart pan and use a spoon to quickly press mixture evenly against the bottom and sides, keeping everything as cold as possible. (A sheet of wax paper could also aid in smoothing out the mixture). Chill unbaked tart shell in the freezer for 20 minutes or in the refrigerator for 1 hour or up to overnight.

Preheat oven to 400°F. 

Dock chilled shell with a fork to prevent it from warping and puffing while baking. Line with parchment paper or foil and fill with dry beans or pie weights. Place the tart pan on a baking sheet and bake for 20 minutes. Gently remove the lining and weights, then bake for an additional 20 minutes, or until the crust is golden brown. Allow to cool to room temperature before filling.

In the meantime, combine goat cheese, yogurt, and chopped herbs in a mixing bowl. Using a hand mixer, whip together until incorporated and fluffy. Set aside.

When the tart shell is cooled, spread the goat cheese mixture in an even layer. Arrange sliced stone fruits on top. 

To make the hot honey butter, add butter to a small stainless steel pot and heat on medium-low. When the butter is completely melted, reduce heat to low and add gochugaru and pepper flakes; stir continuously with a silicone spatula for 1–2 minutes, allowing the spices to bloom and the mixture to get completely foamy. Add honey and keep stirring until the mixture becomes completely foamy again. Remove from heat and once the bubbling resides, drizzle hot honey butter immediately over the tart, to taste. 

If desired, garnish with pretty edible flowers and herbs.

Thank you so much to Danish Creamery for sponsoring this recipe! Visit their website to learn more about their legacy of carefully-crafted Old World-quality butter made with milk from family farms since 1895.

Recipe: Mala Marinated Tomato Salad (with Burrata)

This is this one of those recipes that is meant to help off-season tomatoes reach a higher potential but that would also be so good with ripe tomatoes in season. The background for this idea is really not all that complicated: I love the classic Sichuan mala smashed cucumber salad and I also love salads that revolve around tomatoes. So, why not use that same Sichuan-inspired, numbing-spicy dressing for tomatoes instead of cucumbers?

Sichuan cucumber salad is really the only raw Chinese salad I can think of. The cucumbers are typically smashed first, but lately I have been seeing a lot of recipes on the ‘gram where the cucumbers are cut in a special way to make a cool spiraled effect. The dressing typically leans on the classic Chinese vinegars (rice vinegar and black vinegar), garlic, and soy sauce; and my favorite versions are the ones that also include mala, or numbing-spicy, chili oil made with Sichuan pink peppercorns. It is crisp, cold, and refreshing. It appears as an appetizer on Chinese restaurant menus among other cold dishes like couple’s delight but I love making my own version at home as a side dish (I guess like Korean banchan) when I cook up a really heavy and hearty Asian meal of any sort. The tangy, tingly, crunchy cucumbers are a perfect balance to braised or grilled meats.

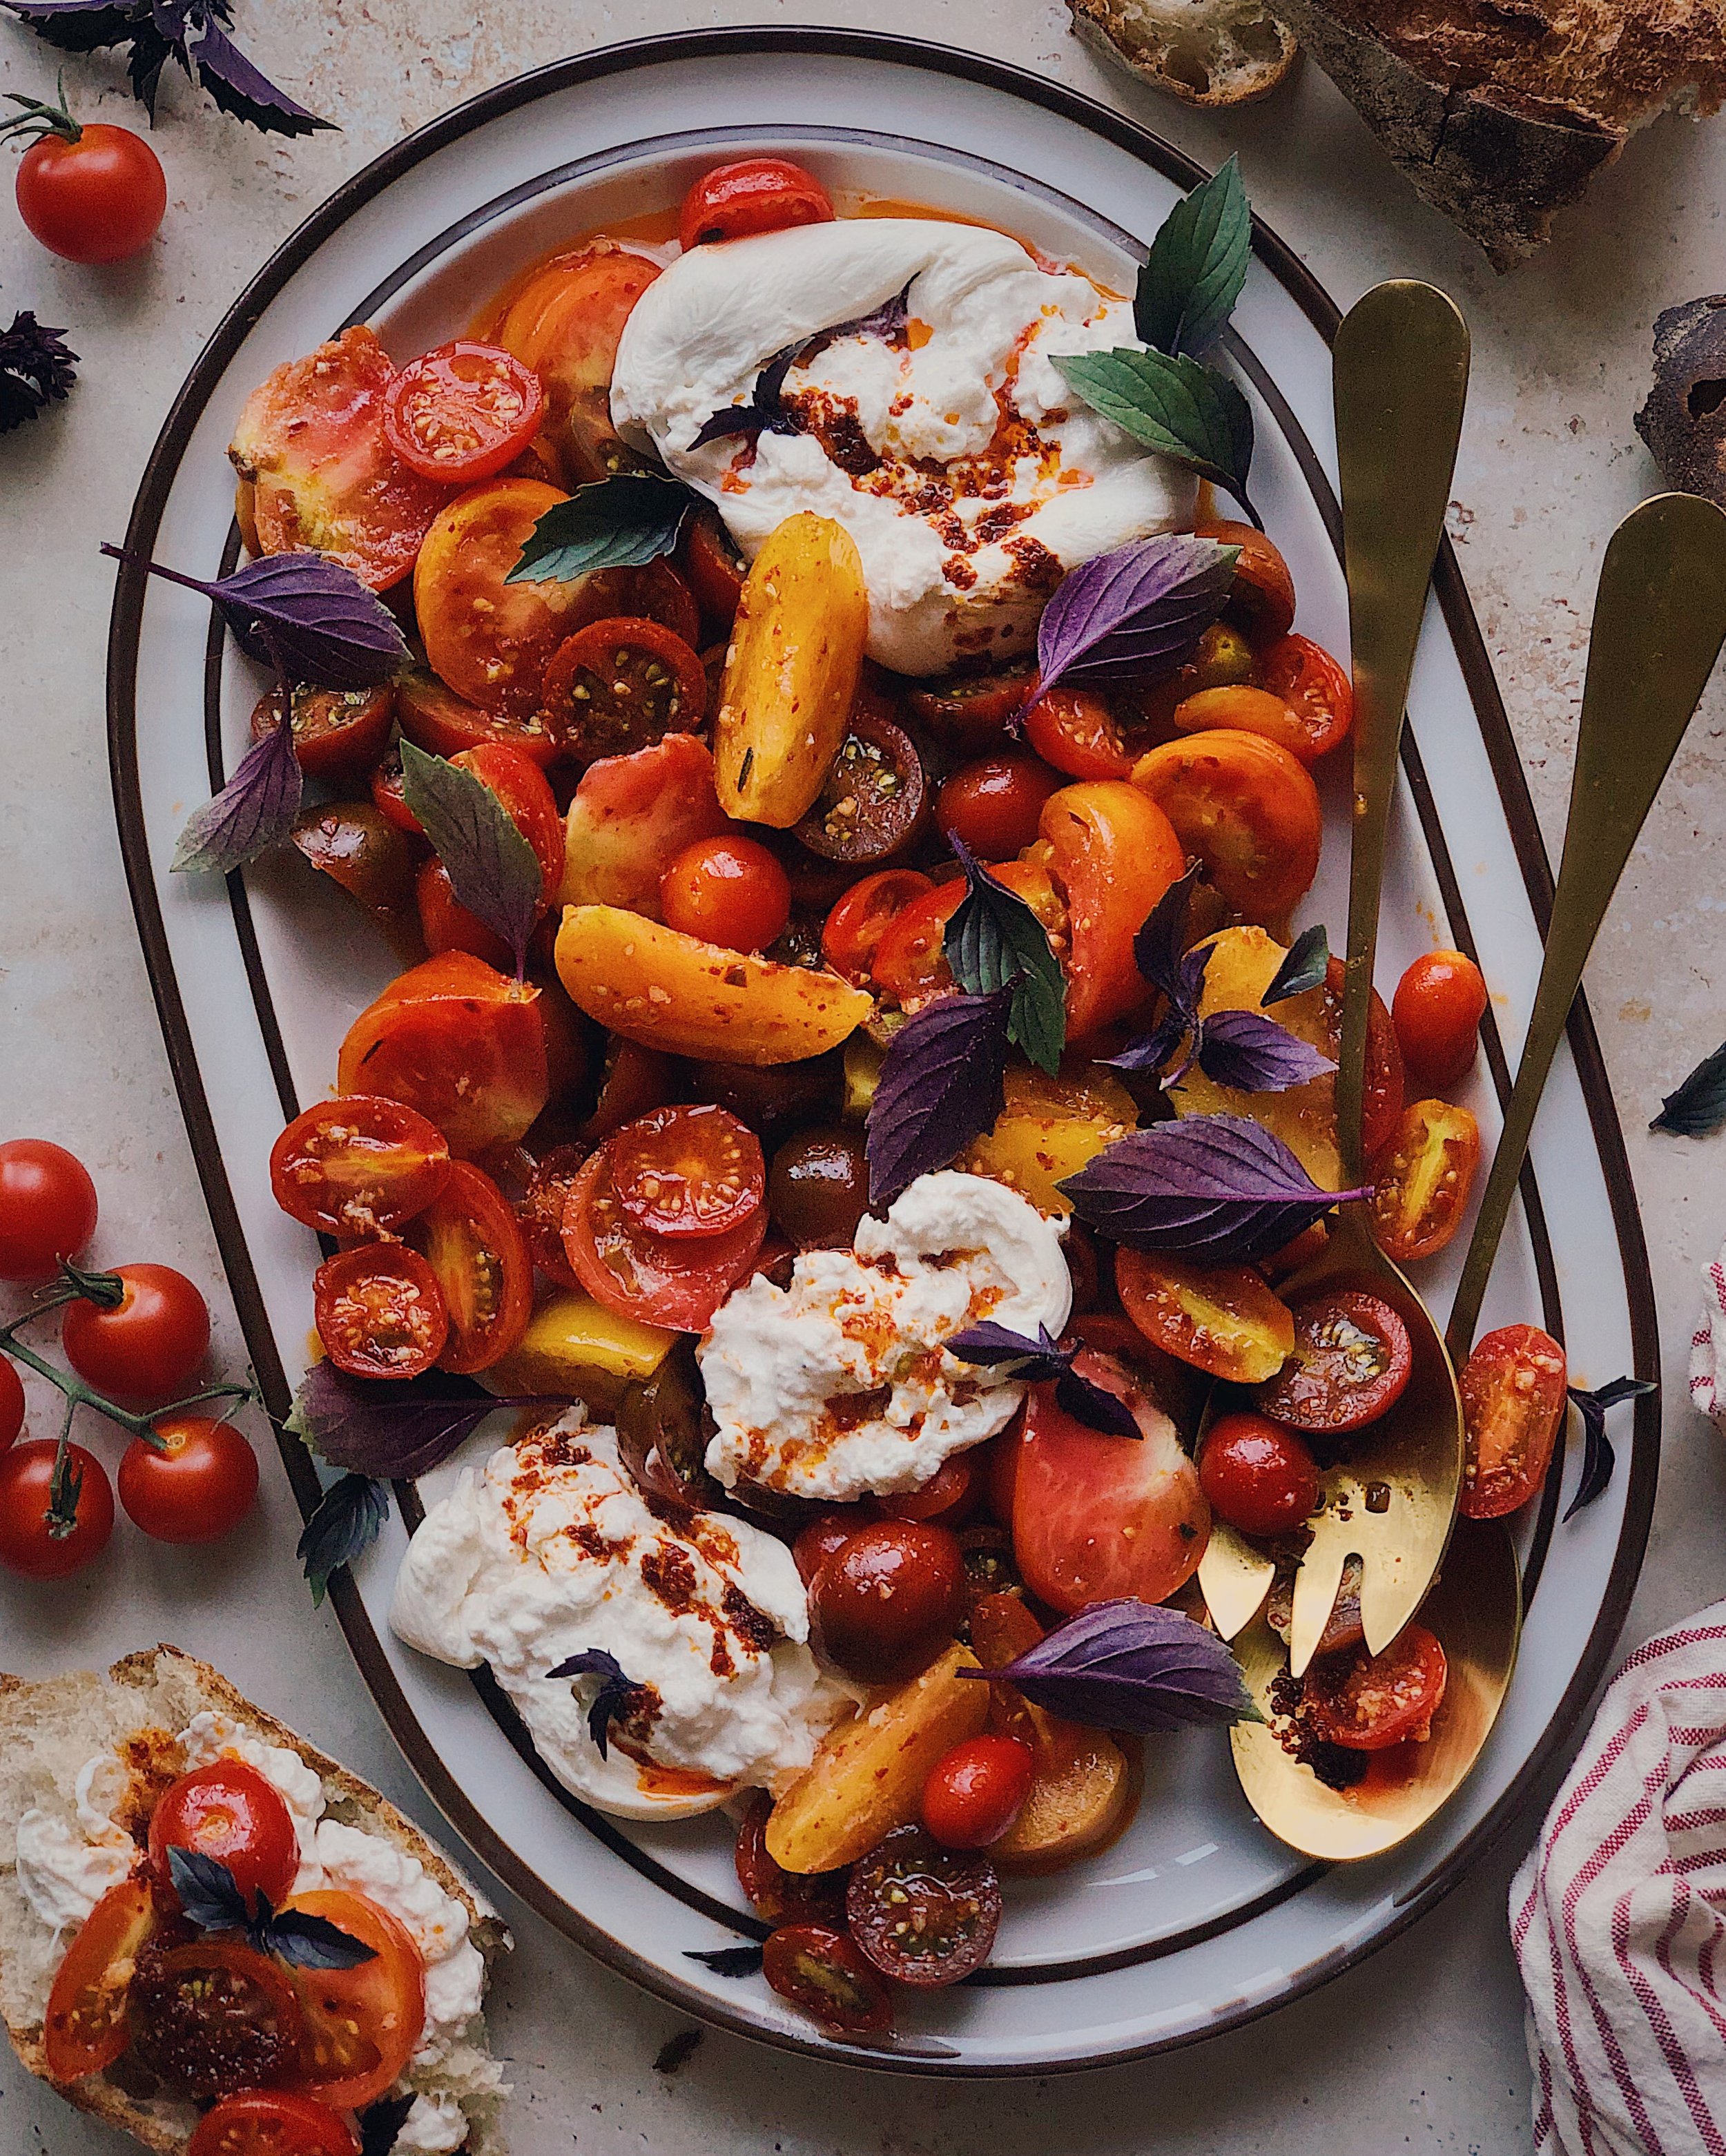
While cucumbers will always be a sidekick in my mind, tomatoes can definitely be a main character. In adapting my Sichuan-inspired salad dressing for tomatoes, what I ended up with was, I guess, a Chinese fusion version of a caprese salad. I ended up serving it with burrata and basil (yes, the crazy purple leaves you see are a type of basil called “wild magic”!), and Spouse and I thoroughly enjoyed it as a main course, spooning the tomatoes onto crusty bread. But you can definitely skip out on the burrata and herbs, and serve this marinated tomato salad as an appetizer or side dish.

This recipe involves three different stages of flavor building.

  • Salting the tomatoes. This is a good practice regardless of the time of year, whenever raw tomatoes make an appearance because the salt really helps bring out the best flavor that your tomato has to offer. Because I tested this recipe when tomatoes were not yet in season, I used more salt than would be needed for really amazing tasting ripe tomatoes. Keep this in mind when you are at this stage of making the recipe. You can use whatever tomatoes you’d like; I recommend a medley of heirloom tomatoes and cherry tomatoes to keep things looking interesting. Just cut them into bite-sized chunks with plenty of open surface area to absorb all the flavors of the marinade.

  • Marinating the tomatoes in the dressing. I like to allow the raw garlic and the tomatoes to sit for a bit in a more concentrated vinegar mixture so the garlic has the opportunity to pass on some of its punchy flavor to everything else in the mix.

  • Adding the chili oil. This recipe uses my easy mala chili oil recipe, which you can find here; note that my recipe is a lot less salty than many commercial chili oils, so you may want to keep that in mind if you are opting to use a storebought one. This step is very much to-taste, depending on how tingly you want your tomato salad to be. I recommend adding a tablespoon at a time and tasting along the way. If you do opt to make the caprese-esque version shown in the photos, I recommend not going full-blast with the chili oil in the tomato mixture and reserving some to drizzle over the burrata as a finishing touch.

How I Make Mala Marinated Tomato Salad

Ingredients

2 lbs tomatoes, cut into bite-sized chunks*
1/2–3/4 tsp kosher salt
2–3 cloves garlic, minced
1 tbsp Chinese black vinegar
3 tbsp rice vinegar
1 1/2 tsp sugar
1/2 tsp fish sauce
2–4 tbsp mala chili oil
8 oz burrata (optional)
basil leaves (optional)

*If using cherry tomatoes, cut them in half so they can absorb the flavors from the dressing.

Procedure

In a large bowl, add tomatoes and salt and toss to combine.

In a separate small bowl, whisk together garlic, both vinegars, sugar, and fish sauce. If you are very impatient, microwave the mixture for 10 seconds to help dissolve the sugar. Once the sugar is dissolved, add the dressing to the tomatoes and mix gently but thoroughly to coat. Allow to marinate for at least 10 minutes. (I recommend 20–30 minutes for off-season tomatoes.)

Add chili oil to your taste and mix gently to combine.

For optional “caprese” version: Spoon tomatoes and some dressing into a serving dish. Tear burrata into large globs and distribute amongst the tomatoes. Drizzle additional chili oil over the burrata. Garnish with basil. Serve with toasts or crusty bread.

Recipe: Chicken Meatball Skewers with Craggy Crispy Potatoes & Spiced Ketchup

Maybe this is a surprising tale to tell as a food blogger but my family does not have a bunch of family recipes that have been passed down from generation to generation. There is one cookbook that I remember my mom using, that she brought with her from Malaysia and we have a few tried and true recipes from there. And she also has her famous (among friends) curry puff recipe that I definitely need to get from her. For the most part, though, when I am feeling nostalgic for the food memories that make me feel connected to my family and my heritage, I have to try to recreate them from memory.

But, sometimes, as the great Ina Garten says, “storebought is fine”!

My parents are I are all about using store-bought pastes to recreate our favorite Malaysian dishes sometimes, and guess what? They turn out plenty delicious. A good prepared spice paste will have all the flavor complexity that requires time to develop and will save you the time and hassle of cleaning mortars and pestles and food processors.

Another great thing about a storebought spice paste is that it makes it easy to get creative. For example, I do have my own from-scratch chicken satay recipe but using a spice paste such as Asian Home Gourmet’s Marinade for Meat Satay allows me to easily incorporate those flavors of satay that are so nostalgic to me into other meals. This spice paste can be purchased at Millenniyum.com. (I am really lucky to have access to lots of great grocery stores near where I live, but if you have trouble finding the special Southeast Asian ingredients I use in a lot of my recipes, then Millenniyum is a great place to order them online. They carry a variety of products that I would consider to be iconic to stocking a Southeast Asian pantry.)

A lot of times when I am coming up with ideas for fusion dishes, what sparks the idea is looking at commonalities among foods from different cultures—I love encountering these connections because it further proves my belief that it is through food that people of different cultures can find the best channels of communication. There are many other cultures besides my own that have iconic versions of meat on a stick, and kofta kababs are another favorite example of mine. It may be spelled kofta, köfte, kefta or other variations, but throughout the Levant and Arabic cultures, there is some version of ground meat served molded around skewers—a meatball kebab.

I love that the ground meat mixture is such a wonderful carrier of flavor, so I thought creating a meatball version of chicken satay would be a great, texturally-new way to experience one of my favorite flavor combos. Since I was drawing inspiration from kofta kababs anyways, I decided to combine my chicken meatball satay with crispy potatoes, reminiscent of those Turkish fast casual stands all over Europe that pair shawarma and kebabs with fries. Since I didn’t need the whole packet of Asian Home Gourmet Marinade for Meat Satay in my marinade, I was also able to use some to amp up plain ol’ ketchup to make an incredible dipping condiment for my super crispy potatoes.

This latest culinary fusion of mine is made up of the following components:

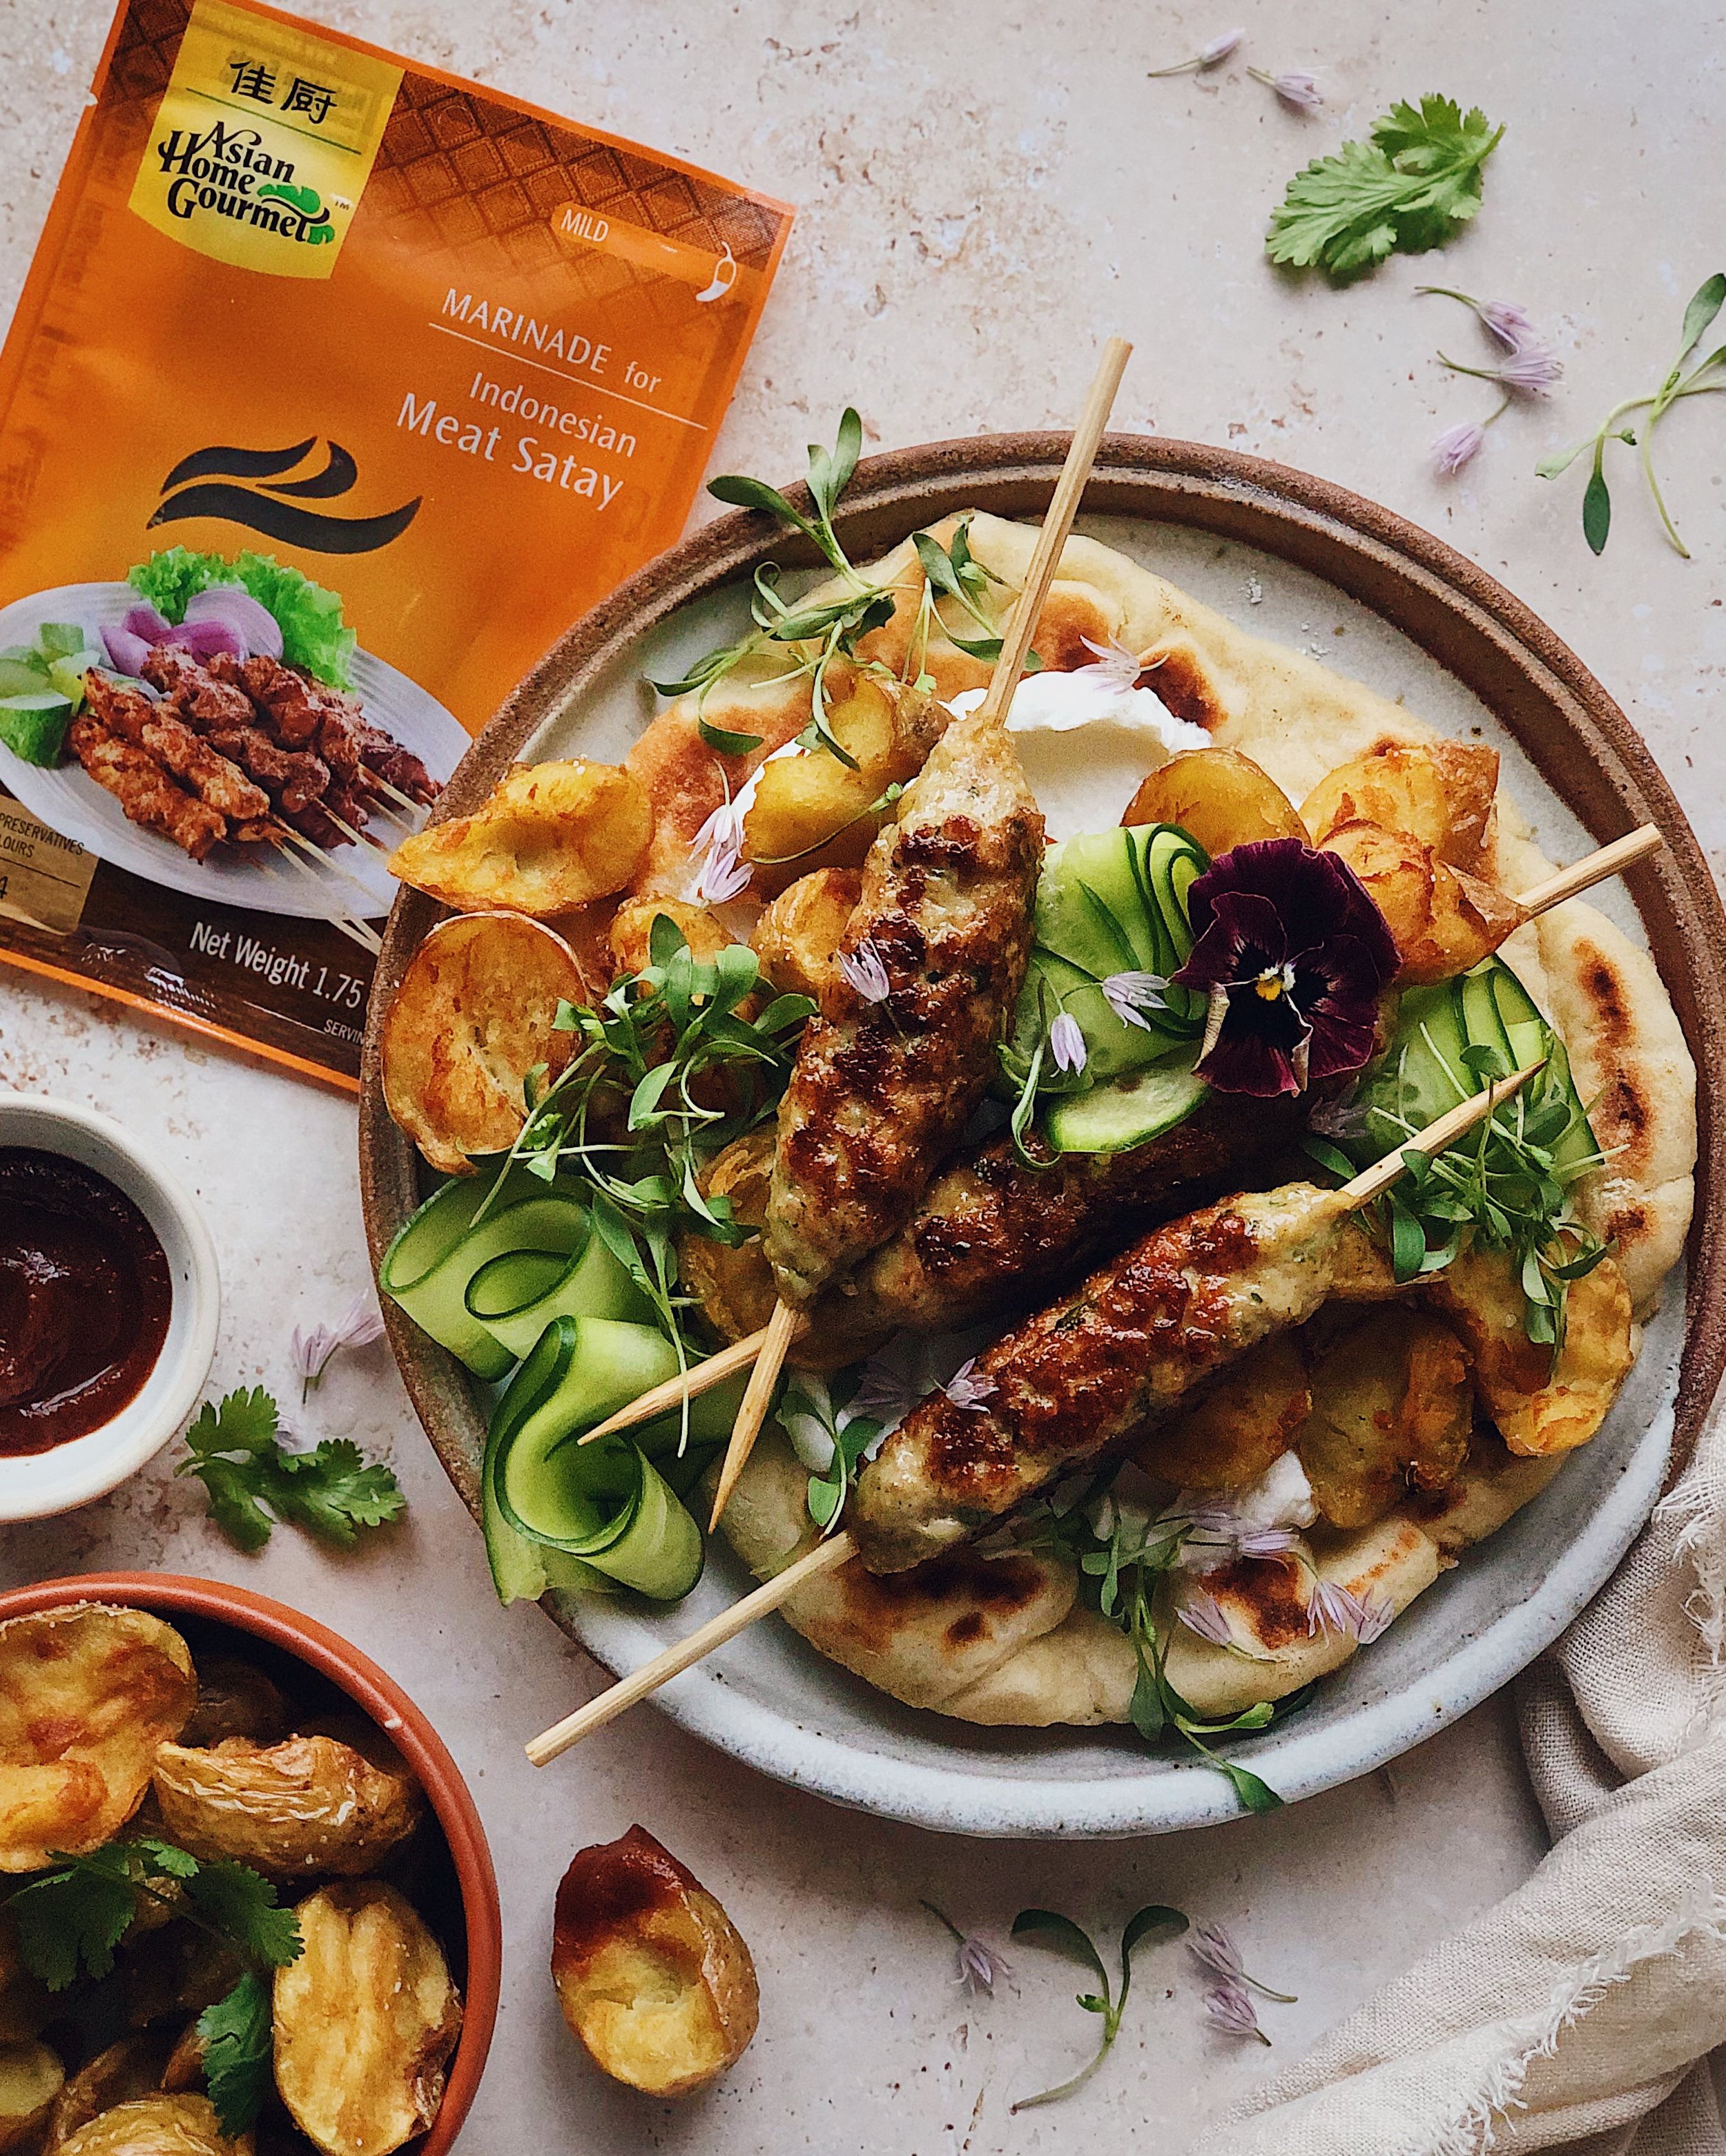
  • chicken meatball skewers: A cross between Southeast Asian chicken satay and Arab kofta kebabs; ground chicken is mixed with Asian Home Gourmet Marinade for Meat Satay and some binders to create a meatball mixture that is loaded with the flavor of chicken satay. This mixture is quite sticky if you use a 96% lean/4% fat ground chicken like I did; I recommend chilling it for a bit to get it to firm up more and continuously dipping your fingers into some water while you are molding the mixture around skewers, to prevent it from sticking to your hands. The slightly messy process will be well worth it when you end up with an incredibly tender meatball texture for your meat skewers. I cooked the meatball skewers in a pan with a large flat base that could easily accommodate the length of the skewers, rotating regularly with tongs to keep their shape. Satay and kebabs are both typically grilled, but I thought this pan fried method would help make this recipe more accessible, and something that could be made year round.

  • craggy crispy potatoes: In place of french fries, I made these craggy crispy potatoes that are so incredibly addictive. First I boil baby potatoes in salted water until they are completely soft. When they are slightly cooled and totally dry, I rip them apart with my hands and that creates all kinds of irregular craggy surfaces, that when crisped up in a deep frying phase turns into all these wonderful crispy edges. Just look at how golden and delicious they look in the photos!

  • spiced ketchup: Whisking together some regular ketchup with some of that Asian Home Gourmet Marinade for Meat Satay will transform it into a condiment that tastes so full of complex spices. It is perfect for those potatoes but you may just want to end up getting extra spice paste packets to make this for all your other favorite deep fried carb formats.

  • other serving suggestions: I opted to serve my skewers and fried potatoes on top of naan and a big smear of yogurt, and finished things off with micro cilantro and cucumber ribbons. I completely recommend this combo, which further serves to bridge the gap between things served with satay and things served with kebabs. However, these are an optional finishing touch.

How to Make Chicken Meatball Skewers with Craggy Crispy Potatoes & Spiced Ketchup

(Makes about 12 skewers)

Ingredients

1 packet Asian Home Gourmet Marinade for Indonesian Meat Satay

Ingredients for Chicken Meatball Skewers

1/3 cup panko breadcrumbs
1 egg, beaten
1 tbsp cilantro, finely chopped
1 lb ground chicken (96% lean/4% fat recommended)
2–3 tbsp cooking oil

Ingredients for Crispy Potatoes

1 lb baby yukon gold potatoes
1 1/4 tsp kosher salt, divided
2–4 cups vegetable oil (or high smoke point oil) for deep frying
2 tbsp ketchup

Ingredients for Serving (Optional)

flatbreads, such as naan
cucumbers, sliced
yogurt
cilantro or micro cilantro

Procedure

Combine breadcrumbs and egg and allow to sit for 2–3 minutes so breadcrumbs absorb egg and become soggy. Then, combine all meatball ingredients and 4 teaspoons of Asian Home Gourmet Marinade for Indonesian Meat Satay. Mix thoroughly until homogenous. Refrigerate meatball mixture to allow it to become more firm while preparing the potatoes.

In a medium pot, combine potatoes with 6 cups of water, or enough to completely cover the potatoes in 2 inches of water. Bring to a boil and add 1 teaspoon of salt. Continue boiling potatoes until they begin to crack, about 25–30 minutes. Drain completely and allow to cool.

Prepare the spiced ketchup by combining ketchup with the remaining Asian Home Gourmet Marinade left in the packet. Whisk until homogeneous. Set aside until ready for serving.

In a heavy pot, heat up enough frying oil to be deeper than the size of the largest potato. Prepare a small baking tray lined with paper towels. When boiled potatoes are cool enough to handle, gently break into large chunks with your hands to create irregular craggy pieces—halves for smaller potatoes and quarters for larger ones. When oil starts to shimmer, test it by adding a tiny piece of potato to the oil; if it bubbles vigorously, the oil is hot enough. Working in batches if necessary to not crowd the pot, deep fry potatoes until golden brown, about 3–5 minutes per batch. Remove from oil and drain on prepared paper towels. 

Once all potatoes are fried, remove paper towels and place fried potatoes directly on tray. Toss potatoes with remaining 1/4 teaspoon salt (or salt to taste). Place potatoes in the oven and turn on to 175°F to keep warm while preparing the skewers.

Begin forming the meatball skewers by moistening hands with water to prevent sticking, then scoop about 1/4 cup of the chilled meatball mixture and mold into a long shape around a wooden skewer. Repeat with the remaining meatball mixture.

Use a skillet large enough for the skewers to lie flat or a flat griddle pan; heat on medium. Add enough cooking oil to thinly coat bottom of pan. Working in batches if needed, place prepared meatball skewers in heated pan and cook for 5–7 minutes, using tongs to rotate regularly to maintain the rounded shape. Add cooking oil as needed and repeat until all the meatball skewers are lightly browned on the outside and cooked through.

To make the serving suggestion shown in the photos, spread a thin layer of yogurt over flatbreads, then top with skewers and potatoes; garnish with cucumbers and micro cilantro. 

Serve the spiced ketchup on the side for dipping the potatoes.

Thank you so much to Millenniyum for sponsoring this Asian Home Gourmet recipe! Check them out on Instagram here or visit their website to purchase Southeast Asian pantry essentials.
Easy Spicy Chicken Congee

LilyMorello_Post_Sept21_1.JPG

Today I’ve partnered with RightRice and Nona Lim to share an easy congee or jook recipe. Many of us remember our parents making congee or jook or rice porridge as a cure-all for us when we were sick—but now that we are adults, we have to make it for ourselves when we are feeling under the weather.

Traditional jook takes time but my easy hack will get you a nourishing bowl of comfort much quicker. The trick is using RightRice’s fast and nutrient-packed “rice” and a broth that is already super full of flavor.

Click here to get the recipe on RightRice’s site!

Thank you so much to RightRice for sponsoring this recipe!

Jammy Eggs in Sambal

SambalEggs_Vertical2.JPG

This recipe was inspired by Malaysian sambal telur (eggs in chili sauce) which I associate with nasi lemak, the national dish of my parents’ home country. However, I altered the idea in a couple key ways:

  • tomatoes in the sambal: I don’t think of tomatoes as being common in Malaysian cooking and when I think of Malaysian sambal, it does not using contain tomatoes. However, I find spicy tomato sauces to be so addicting, and I wanted the sauce for this dish to be something that heat lovers would want to keep coming back to, scooping up over and over with their roti or naan. So my version is a tomato-y sambal. If you leave a lot of the chili seeds in, it will definitely pack a punch, but the acid from the tomatoes makes it even more pleasing.

  • jammy eggs: With typical sambal telur you tumis or fry/sauté hard boiled eggs, so not only are the yolks fully cooked but the outside of the whites have a unique, firm brown skin from the frying. I prefer soft and gentle eggs that have a luxurious mouthfeel so I opted to nestle jammy 6.5-minute eggs into my tomato sambal for this dish.

Click here to get the recipe on the Pete and Gerry’s site!

SambalJammyEggs_Horizontal1.JPG
SambalJammyEggs_Horizontal2.JPG

Thank you so much to Pete and Gerry’s for sponsoring this recipe!

Mala Glass Noodle Salad with Steak, Smashed Cucumbers, and Egg Ribbons

Chinese salads are not big bowls loaded with leafy greens like what you think of with Western salads. They are more often cold appetizers featuring just one marinated crunchy veggie. (Btw, “Chinese chicken salad” is not really a Chinese salad, it’s Chinese-American!) Smashed cucumber salad may be the most iconic example of these crunchy veggie cold dishes that we have instead of salads. It can sometimes be found with mala chili oil and other times without, but either way, it is incredibly refreshing for summer. I wanted to take this classic salad and turn it into a full meal that would be perfect for a hot summer evening (even though it is cold and gloomy in SF), and this is what I came up with!

This salad has:

  • smashed cucumbers, marinated in the classic rice vinegar based dressing with lots of zingy garlic

  • glass noodles for a satisfyingly bouncy texture

  • egg ribbons for airiness and savoriness

  • Chinese five spice-rubbed steak

  • cilantro and radish microgreens for freshness and herbaceousness

  • toasted sesame seeds for the finishing touch

  • mala chili oil for that numbing spicy heat that I am obsessed with!

Not a boring salad by any means! Click here to get the recipe on the Pete and Gerry’s site!

MalaGlassNoodleSalad_Vertical1.JPG

Thank you so much to Pete and Gerry’s for sponsoring this recipe!

Recipe: Chili Makrut Yellowtail Ceviche

LM_DutchYellowtail_Pt2_Post2.JPG

One of my favorite food memories of all time is from a ceviche tostadas stall in Mexico City called Tostadas La Chaparrita in the Mercado de Coyoacán. We had spent several hours waiting in the heat to get into Casa Azul (a.k.a. Frida Kahlo’s old home turned museum) and were desperate for a good bite to eat after a disappointing museum experience. A quick Google search led me to this well-reviewed place but what we got when we arrived exceeded expectations—a wide bar lined with mounds and mounds of all varieties of ceviche, ready to be piled on to crispy tortillas. They were piled up the way spices are heaped in the markets in Turkey or Morocco, but the piles were fresh seafood in every combination imaginable, marinated in lime juice. 

I often daydream about those mountains of ceviche but I never thought to try making my own until I learned about The Kingfish Company’s Dutch Yellowtail. It recently became available in the frozen section at Whole Foods Markets and because of the way it is raised and frozen, it is safe to eat raw as a high-grade sashimi when properly thawed. Dutch Yellowtail is sustainably raised in indoor basins on land using pristine water from a marine estuary. It is also a “Green Choice” as recommended by the Good Fish Foundation in the Netherlands. This means that it is raised specifically to be clean to eat and clean for the planet as well! When I took the thawed pieces out of the packaging, I found the fish to be firm and bouncy, with a clean smell. Since Dutch Yellowtail has a mild flavor and firm texture, it is so perfect for ceviche! 

Instead of replicating those exact memories of ceviche in Mexico or a traditional recipe from Peru, I wanted to come up with my own take on it, using Southeast Asian ingredients. I took inspiration from the aromatics used in the Malaysian food of my heritage, but I also was inspired by Thai and Vietnamese dipping sauces as I was developing the recipe for my ceviche marinade. I think that a little bit of funk from fish sauce, a little spice from fresh chilies, and bright, aromatic flavors like ginger and makrut lime leaves put such a great spin on ceviche that is distinctly Southeast Asian and therefore, distinctly me!

SEAsianCeviche_4.JPG

What you should know about the ingredients:

  • Dutch Yellowtail: This sustainably raised fish comes from farms run on 100% green energy and with no hormones or antibiotics. Its taste is similar to the hamachi you would find at a sushi restaurant. It absorbs the flavors of the marinade really well, and the longer you keep it in the marinade, the more “cooked” the texture will seem. I enjoyed it both with a brief (30 minute) rest, where the texture was more similar to sashimi, as well as after it soaked overnight. Look for this at Whole Foods Market!

  • bird’s eye chilies: These are also known as Thai chilies or I grew up calling them chilli padi. I love the instant spicy zing that they impart on Southeast Asian dipping sauces, but I personally find biting into a fresh piece to feel too much like a tiny fireball on my tongue. I picked them out before mixing the marinade with the fish but leave them in if you prefer!

  • makrut lime leaves: To me, this is what gives this ceviche recipe a unique flavor that is distinct from the ceviches of Latin American countries. (You can read more about alternative names for finding it here.) The leaves are quite hard, so slice them as finely as you can; I like to kind of crush them up a bit with my hand before rolling them tightly to cut a fine chiffonade. Of course, it is okay to leave this ingredient out if you can’t find it, but the dish will not have as much of a unique Southeast Asian flavor.

SEAsianCeviche_1.JPG
LM_DutchYellowtail_Pt2_Post1.JPG

In the photos here, you can see that I’ve served this ceviche a couple different ways:

  • Tostadas, inspired by my experience in Mexico City—You can often buy ready-made tostadas in the tortilla section of a grocery store, or you can simply make your own by deep frying corn tortillas in corn oil until they are nice and crunchy.

  • Toast, my all-time favorite carb based food vehicle—Use whatever is your favorite method for making toast; spreading on a layer of the avocado mash first before piling on the ceviche will help prevent the bread from getting soggy

This ceviche would also be great in little single-serving glasses, or served family style with tortilla chips for scooping. However you choose to serve it, I hope these ideas inspire you to make your own fresh yellowtail ceviche at home!

SEAsianCeviche_3.JPG

How to Make Chili Makrut Yellowtail Ceviche & Mashed Avocado

Ingredients for the Marinade

3/8–1/2 cup lime juice (about 4 limes)
2 tsp fish sauce
1 tbsp brown sugar
1–2 bird’s eye chilies, sliced
2 tsp ginger, finely grated
1 clove garlic, finely grated

Ingredients for Ceviche

8 oz Dutch Yellowtail, cut into small cubes (about 1/4”–1/2”)
2 makrut lime leaves, very finely sliced
1/2 shallot, finely chopped
2 sprigs Thai basil leaves, torn
5 stalks cilantro, leaves picked

Ingredients for Mashed Avocado

1 ripe avocado
1/2 lime, juiced
pinch of salt

For serving

prepared toasts, tostadas, or tortilla chips
microgreens, radish slices, or edible flowers (optional)

Procedure

Combine the ingredients for the marinade and let stand for 1 hour. Then, optionally, remove the chili pieces.

Combine the Dutch Yellowtail cubes, makrut lime leaves, shallot, and Thai basil leaves with the prepared marinade. Mix together and let the ceviche marinade in the fridge for at least 20 minutes, or up to overnight, depending on preference. (Over time, the fish will take on more flavor from the marinade and have more of a “cooked” texture.) Add the cilantro leaves after the ceviche has rested to the desired doneness. 

Just before serving, slice open the avocado, remove pit, and scoop flesh into a bowl. Add lime juice and salt and mash together to the desired consistency.

Serve the ceviche on top of avocado mash on toast or tostadas, or serve both components with tortilla chips on the side.


Thank you so much to The Kingfish Company for sponsoring this recipe! Visit their website to learn more about how they raise their sustainable fresh Dutch Yellowtail!

Disclaimer: consuming raw or undercooked meats, poultry, seafood, shellfish, or eggs may increase your risk of foodborne illness, especially if you have certain medical conditions.

How I Make My Mala Chili Oil

ChiliOil1.JPG

Here’s my recipe for mala chili oil. Mala means “numbing spicy” and it is the flavor and sensation that is iconic to Sichuan/Szechuan cuisine. This is my go-to process for when I want to make my own chili oil at home!

The ma, or numbing part, comes from what is commonly called “Sichuan peppercorns” in the States, but it is actually the husks that are used in cooking these types of dishes. Sichuan pepper husks are super unique in that they contain a molecule that causes a tingling sensation on your tongue. It is not at all like the feeling of eating a spicy chili, where it burns like your tongue is on fire. Instead, it is a tingling, numbing sensation like when your foot “falls asleep”.

The la, or spicy part, of mala usually comes from adding spicy chili peppers to the dish. I really like the emphasis on the numbing quality in mala dishes, and prefer to get the chili flavors without having it be flaming spicy. So for my chili oil recipe, I use Korean red pepper flakes, or gochugaru. I think these have a nice robust chili flavor but they don’t add that much heat.

I make my chili oil by first combining the gochugaru, salt, and aromatics into a heat-safe bowl. Then I basically steep the sichuan pepper husks in the oil gradually, until they impart their numbing quality into the oil. (Remember to keep in mind that I like mine really numbing!) Then, I pour the hot oil over the chili flakes and aromatics to awaken all of their flavors. The hot oil splatters and bubbles when you pour it on the other ingredients, so be sure to proceed with caution!

This numbing spicy chili oil is great on dumplings, eggs, noodles, and more! Combining it with a little soy sauce and black vinegar turns it into an awesome easy sauce for my hand-torn noodles, or you can see it in use in my Dan Dan Dumplings recipe. I will probably add to this list of recipes in the future, because this chili oil is the foundation of so many ideas I have yet to write down. I hope you love it as much as I do!

ChiliOil.gif
ChiliOil5.JPG

How to Make My Special Recipe for Numbing Chili Oil

Ingredients

2 tbsp coarse Chinese or Korean chili flakes
2 cloves garlic, minced
1 scallion, thinly sliced
4 tsp pink Sichuan pepper
2 star anise
1/2 tsp salt
1/2 cup high smoke point neutral oil

Procedure

In a heat-safe bowl, combine chili flakes, garlic, scallions, and salt.

In a small saucepot, combine oil, Sichuan pepper, and star anise. Heat on medium-low heat until the lighter interior parts of the peppercorn husks begin to turn brown, about 4 minutes. Turn off the heat and wait for the pepper to turn fully dark brown, about 1 more minute.

Carefully pour oil through a fine mesh strainer over the ingredients in the bowl. Stir everything in the bowl together and allow to sit for at least 10 minutes (more is recommended) to let the flavors integrate and the garlic cook through.

Recipe: Togarashi Lobster Rolls with Smoky Maple Butter

LobsterRoll_1.JPG

As a flatlay photographer, lobster rolls are a dream sandwich. That vibrant red from the lobster meat, the glisten of melted butter, and those split-top buns exploding with filling—how could that not catch your eye? But living over here on the West Coast, I have literally never seen one of those split-top brioche buns at the store. And a lobster roll just isn’t the same (it definitely does not photograph the same) without a bun that is stuffed from the top. Sure, you could use a hot dog bun. But one day, I thought of something even better: Hawaiian rolls.

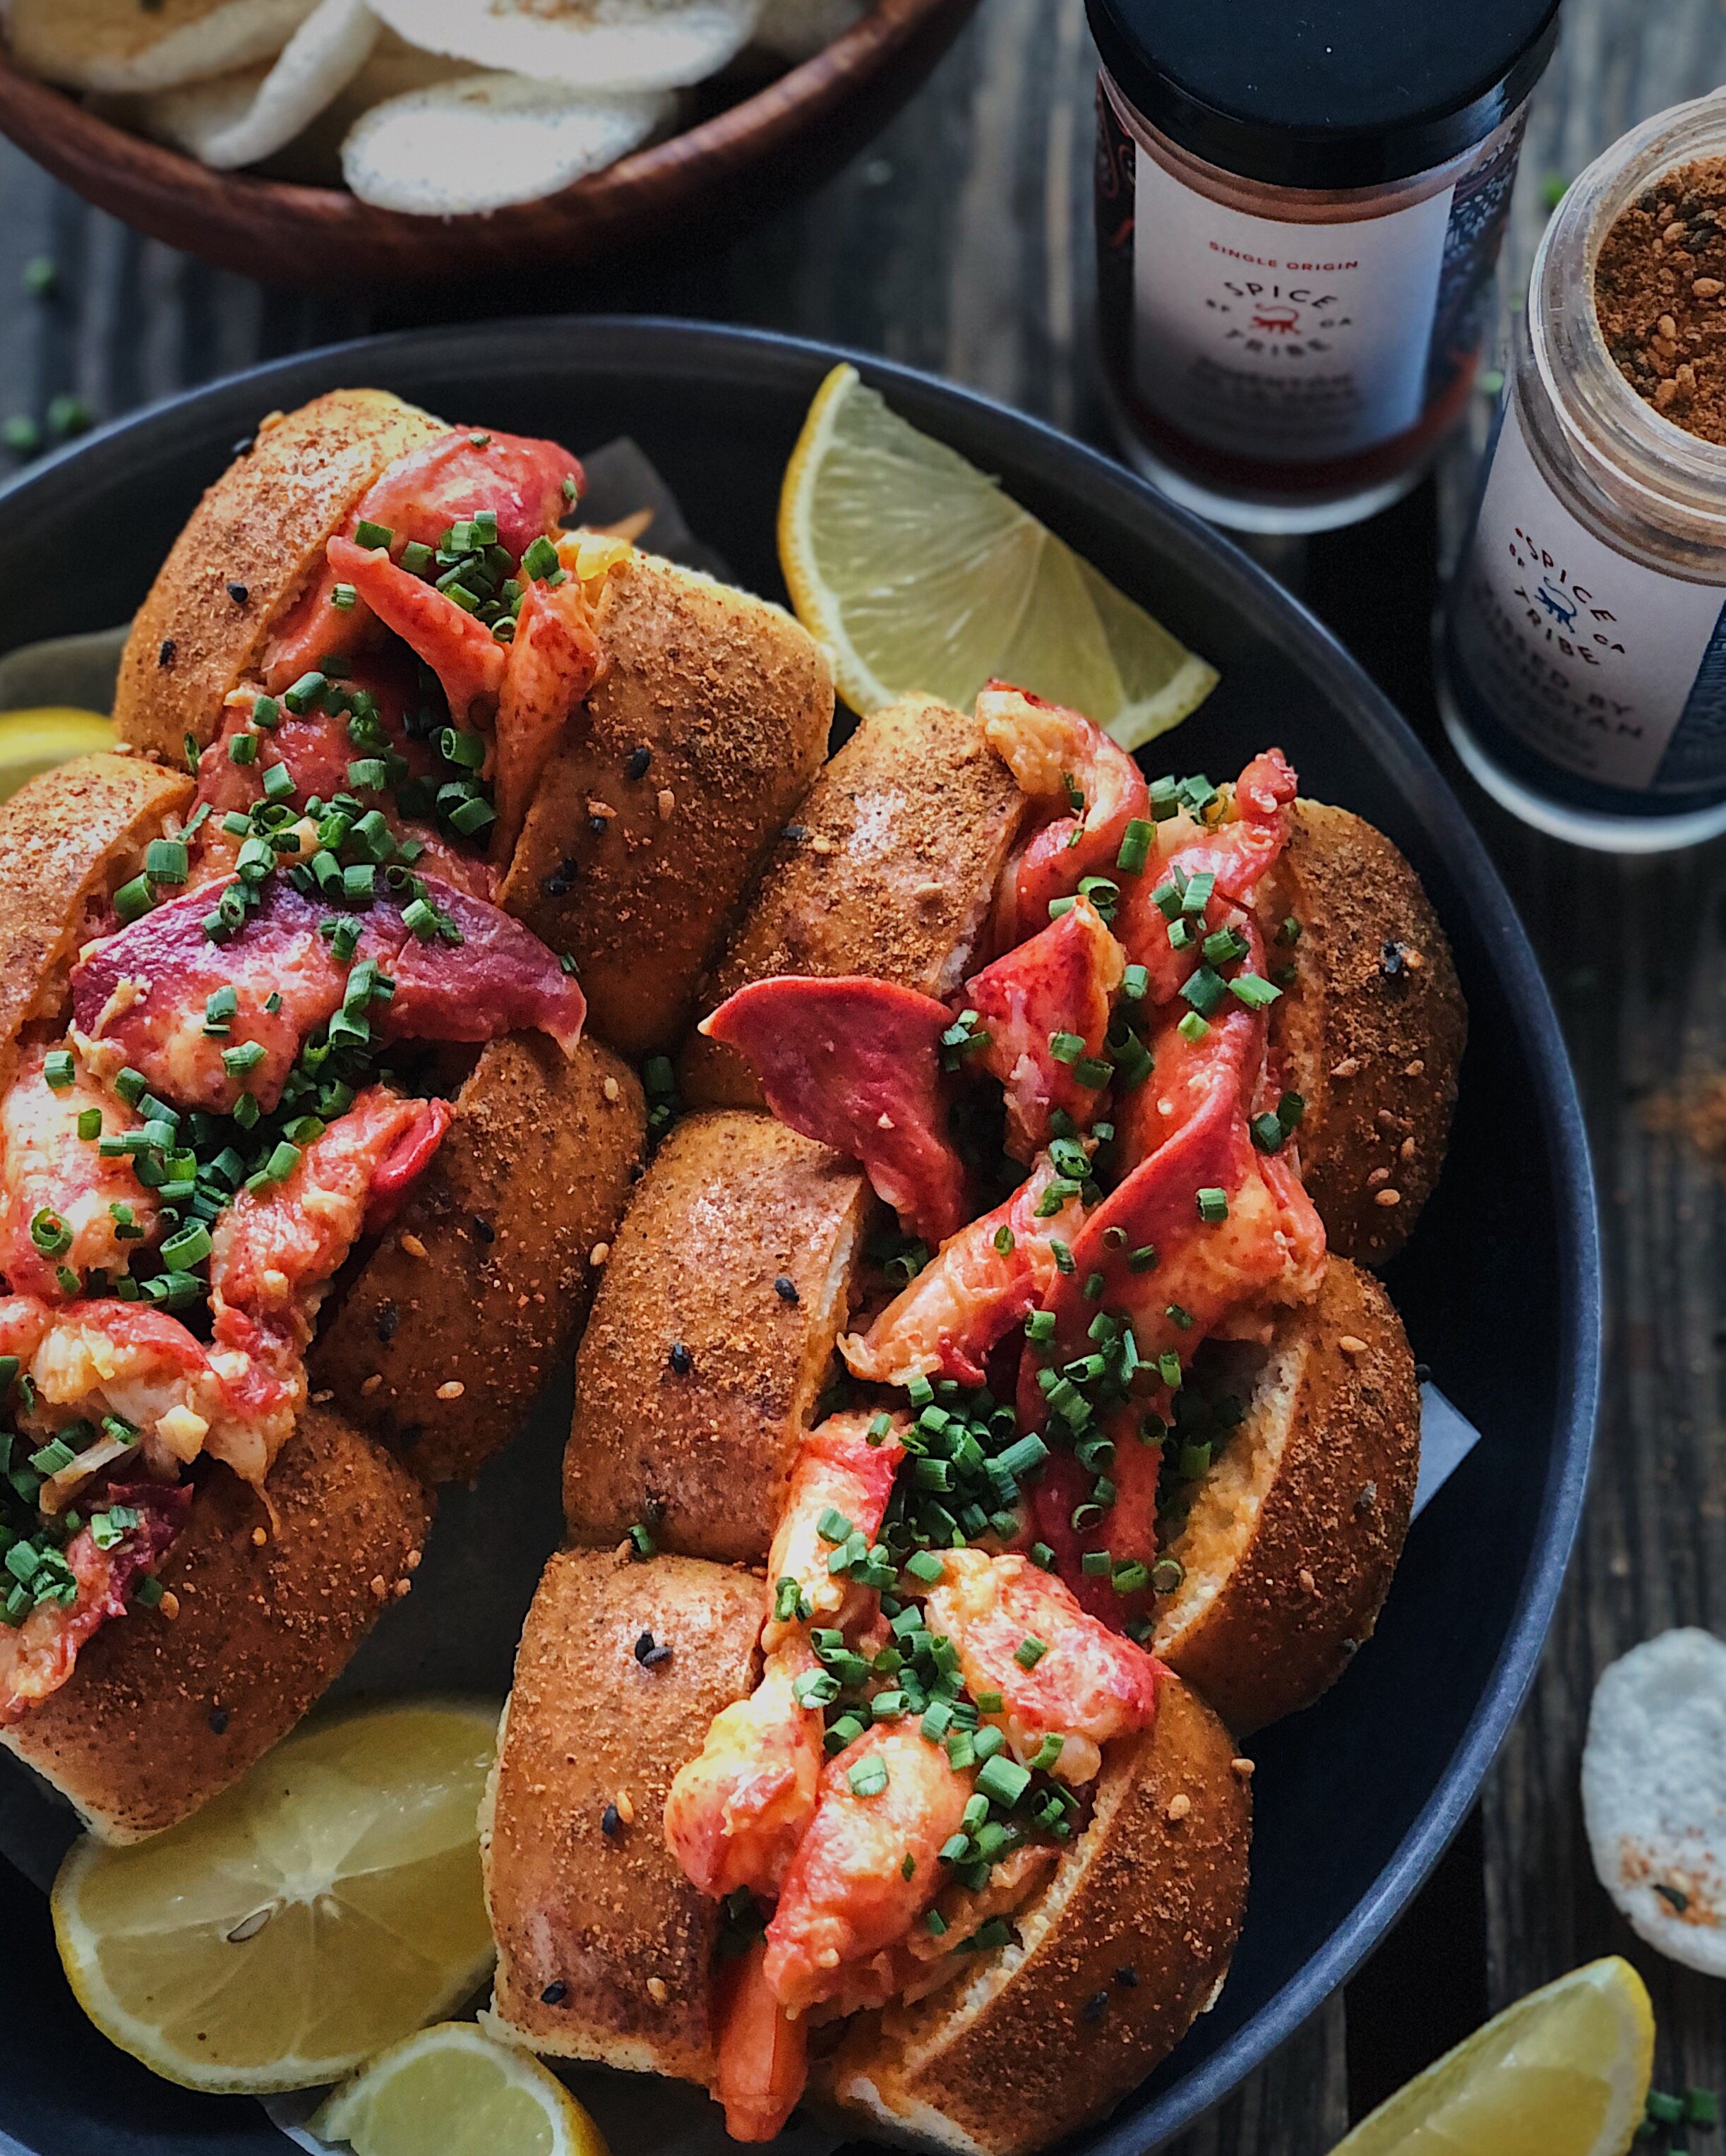
Not only are Hawaiiian rolls the perfect soft texture, but their sweetness goes so perfectly with the naturally sweet, succulent meat of a crustacean. They usually come in packs of 12 all stuck together, so I view that as an invitation to choose my own bread eating adventure. Pulling off a row of 3 of them leaves you with the perfect sized bun for a lobster roll. Then, what you do is take a reliable bread knife and slice downward from the top to create that split-top bun, making sure to only slice halfway down so the bottom base stays all connected. Now that’s a lobster roll…roll!

But there’s still a way to make it even more awesome. I recently ordered from Michael Mina’s Tokyo Hot Chicken and saw that they have shichimi togarashi spiced Hawaiian rolls. I decided to make my own version using Spice Tribe’s Kissed by Binchotan Japanese Chili blend; it’s Spice Tribe’s take on the classic Japanese shichimi togarashi spice blend and the name is a reference to the blend of spices commonly being used on yakitori (grilled chicken skewers) after the meat had been kissed by the binchotan charcoal. Giving the tops of the Hawaiian rolls a little brush of egg white helps adhere all the seasoning nicely; then, popping the rolls in the oven for just a few minutes not only gets the rolls nice and warm, but it bakes on that spicy chili blend so it stays on until it gets to your mouth, instead of getting chili powder all over your hands. The end result is a bun that is not just a mere vessel for your delicious buttered lobster, but a complex flavor delivery of its own, contrasting the sweetness of the dough with some fiery, roasty heat.

After stuffing with lobster tossed in smoky maple butter, serve them up as a long roll and leave it up to the lucky eater to decide if they want to attack it whole or split it up into delightful mini lobster roll sliders.

LobsterRoll_4.JPG

As for this lobster filling, I know there are different styles on the East Coast like the Maine style that is cold with mayo and maybe celery, or the Connecticut style with plain butter served warm. Obviously this is not either of those and I am not trying to upset anyone over there but I really think people should keep an open mind and appreciate all the delicious ways to eat lobster rather than getting all caught up with which one is the “best” one. I will say though, my version is pretty dang good.

Some time ago, I had some grilled oysters from Hog Island Oyster Co that were filled with a chipotle bourbon brown sugar butter and my seafood eating life was changed forever. That combination of a smoky sweet butter with shellfish is so, SO good, and I have been replicating that idea at home in various formats ever since. So, this lobster roll is meant to capture that flavor combination that I love so much. Since I already made the buns of the lobster roll spicy from the togarashi chili blend, I opted to go with Spice Tribe’s super smoky Pimenton de la Vera paprika in the flavored butter. This is truly such a good smoked Spanish paprika—it has a nice fruity note to me and it does not shy away from the smokiness, and it’s got that chili flavor without the heat. Mixing it with the maple syrup and the butter, it becomes one of those condiments that I desperately wish was socially acceptable to drink on its own.

LobsterRoll_2.JPG

I recommend serving these lobster rolls with shrimp chips—an iconic snack for Asian American kids of my generation, for sure. They are quite mild in flavor but I think that their subtle shrimpiness goes great with these lobster rolls. Toss them in some furikake or shredded nori and some extra Spice Tribe Kissed by Binchotan blend to give them an extra kick. Now you’ve really got yourself a Pacific Coast lobster roll feast.

LobsterRoll_3.JPG

How to Make Togarashi Lobster Rolls with Smoky Maple Butter

(Makes 2 rolls)

Ingredients

6 Hawaiian sweet rolls, still connected
1 egg white, beaten
1–1 1/2 teaspoons Spice Tribe Kissed by Binchotan blend
8–10 ounces cooked lobster meat, cut into large chunks
2 tablespoons salted butter
1 tablespoon maple syrup
1/2 teaspoon Spice Tribe Pimentón de la Vera
2–3 drops liquid smoke (optional)
1 tablespoon chives, finely chopped
lemon wedges, for serving

Procedure

Preheat oven to 350°F.

Divide the Hawaiian rolls into two long sections of 3 rolls, to form the “buns” for the lobster rolls. Use a bread knife to partially slice each from the top to halfway down; take care to not slice all the way through, but create an opening in which to stuff the filling.

Place the buns on a baking sheet lined with parchment paper. Brush the tops of the buns with a thin layer of egg white. Sprinkle Spice Tribe Kissed by Binchotan blend onto the eggwashed tops until they are evenly coated in the spice blend. Bake for 5–7 minutes, or until the egg white is completely dried.

Place the lobster meat in a heat safe bowl.

In a small saucepan, add butter and heat on low. Once butter is melted, add maple syrup and stir together. When the mixture becomes completely foamy, stir in the Spice Tribe Pimentón de la Vera as well as the  liquid smoke, if using. Remove from heat and pour the butter mixture over the lobster meat. Gently fold the lobster and the butter mixture together.

Divide the lobster mixture between the two buns. Sprinkled chives on top and serve with lemon wedges.

Additional serving suggestion: Sprinkle furikake and additional Spice Tribe Kissed by Binchotan blend over shrimp chips and serve with the lobster rolls.

Thank you so much to Spice Tribe for sponsoring this recipe! Check them out on Instagram here or visit their website to purchase high quality spices and unique small-batch spice blends.

Recipe: Spiced Garlic Shrimp Over Coconut Rice

LilyMorello_GarlicShrimp_1.JPG

With international travel still being potentially a ways away, at the moment it seems like the most accessible tropical destination for those of us with U.S. passports is the beautiful state of Hawai’i. It feels like at any given time, someone I follow on Instagram is there and, of course, the thing I am most jealous about is the FOOD! The famous garlic shrimp trucks right along the water (the last one I visited in the before times was Geste Shrimp on Maui) are life changing, in my opinion! Still determined to travel virtually through food as much as I can right now, I whipped up a batch of my own version of those super buttery, garlic-loaded shrimp.

I have tried emulating those Hawaiian shrimp trucks before, but this time around, I decided to give it a slightly spicy, Southeast Asian-inspired twist. I seasoned the garlic butter with Spice Tribe’s Thai-inspired Long-Tail Sunset spice blend, which is made up of coconut, ginger, tamarind, Thai chili, coriander, cumin, and lemongrass. For a seasoned spicy-eater, I find this blend to taste more spiced than spicy from the chili, and overall there is a lovely tangy tropical flavor. It definitely gives the dish some nice flavor complexity, but with minimal extra effort. If you like spicy, garnishing the shrimp with fresh Thai chilies will more than make up for it!

You gotta have rice to capture all the extra butter and garlic, and since this tropical shrimp goes perfectly with my coconut rice, I went ahead and included it in this recipe. Coconut rice is the foundation of nasi lemak, the (unofficial) national dish of my parents’ home country of Malaysia, but I have found that it is so good with so many other things—pretty much anything with Southeast Asian flavors. (If you want a way to visually wow people with a super simple staple recipe, you can also learn how to make a blue version of my coconut rice using butterfly pea blossoms here.) I also opted to include cucumber as a suggested accompaniment to this recipe because it is a common accoutrement in nasi lemak. If you are wondering how I made those cucumber roses, I simply used a vegetable peeler to make thin cucumber “ribbons”, stacked 2–3 together, and rolled them up.

LilyMorello_GarlicShrimp_4.JPG
LilyMorello_GarlicShrimp_2.JPG

Some things to consider as you gather your ingredients:

  • Shrimp: One thing that bothered me about the garlic shrimp I ate in Hawai’i is that the shells were left completely on. I’m cool to deal with the mess, but I always felt like that garlic infused butter was going to waste simply coating the part of the shrimp that would get peeled off. One of the advantages of making it at home is getting to prepare the shrimp the way you like it! I like buying a big bag of frozen “E-Z peel" shrimp from Costco to keep in my freezer; they come deveined, and are super easy to peel off the shell entirely or peel off everything but the tails like I did for these photos. These were 10/13 sized shrimp—they were massive and super plump! You may want to reduce the cook times if you are using much smaller shrimp; use your visual cues.

  • Potato starch: You can definitely substitute with cornstarch if you don’t have potato starch. However, I find potato starch to fry up lighter and crisper when using it for a dredge like this. You can find it at Asian grocery stores, as it is common in Korean and Japanese cooking. Adding a thin crust to the shrimp makes a big difference in giving the butter and garlic something to cling to.

  • Garlic: Yes, there is a lot of garlic going on here because that is the whole point of this dish! I still clearly remember the big puddle of melted butter and fried garlic at the bottom of my takeout container when I ate from that shrimp truck in Maui. This recipe is actually more on the conservative side, relatively speaking, and should give you just enough butter and fried garlic to generously coat the shrimp without any left over. But it’s definitely for garlic lovers only!

  • Coconut milk: I find that the consistency of coconut milk varies drastically from brand to brand. You want something where you can thoroughly shake it to a homogeneous consistency in the can before opening. I find that Thai-based brands usually work well for this recipe. If you try shaking the can and you can’t hear or feel things mixing together, this means there is a big solidified glob of coconut fat stuck on one end that will be hard to fully integrate with the liquid without a blender; try to avoid these cans.

The intention is to serve the shrimp over a bed of the coconut rice, to capture the spirit of the Hawaiian plate lunch. However, it’s obviously also fun to serve it family style, where you and your dining companion can fight for the last shrimp!

LilyMorello_GarlicShrimp_3.JPG

How to Make Spiced Garlic Shrimp Over Coconut Rice

Ingredients For the Shrimp

1 1/2 lbs shrimp, peeled and deveined (10/13 size recommended)
1/2 cup potato starch
1/4 tsp fine salt
2–3 tbsp high-smoke point oil
6 tbsp butter
18 cloves of garlic, peeled and chopped
2 1/2 tsp Spice Tribe Long-Tail Sunset blend
1/2 tsp fish sauce
cilantro leaves, for garnish
3–4 Thai chilies, sliced (optional)

Ingredients for the Rice

1 cup jasmine rice, washed and drained
1/2 cup Thai coconut milk, shaken before measuring
1 cup water
pinch of salt

For serving

lime wedges 
cucumber slices

Procedure

To make the coconut rice, mix the jasmine rice, coconut milk, water, and salt in the pot of a rice cooker and cook as normal. When rice is done cooking, immediately fold together gently, and then cover and let rest until serving.

Combine potato starch and salt in a shallow bowl. Pat shrimp dry and toss to coat thoroughly in the potato starch mixture. Dust off the excess potato starch.

In a large skillet, heat 2 tablespoons of cooking oil on medium-high. Add shrimp in a single layer. Cook for 2 minutes, or until color becomes vibrant, then flip, add extra oil if needed, and cook for the same time on the other side. Turn off the heat and transfer shrimp out of the skillet.

To the same skillet with the heat off, add butter and garlic. Set heat on low and stir with a spatula as the butter melts. Keep stirring to evenly and gently fry the garlic and infuse the butter. When the butter is melted and becomes completely foamy, add the Spice Tribe Long-Tail Sunset blend. Keep cooking and stirring until the garlic becomes golden brown, about 5 minutes, then turn off the heat and add the fish sauce. Stir to combine, then add the shrimp and toss to coat.

Divide coconut rice onto plates and top with shrimp. Sprinkle cilantro leaves and Thai chilies (if using) over the shrimp. Serve with lime wedges and cucumber.

Thank you so much to Spice Tribe for sponsoring this recipe! Check them out on Instagram here or visit their website to purchase high quality spices and unique small-batch spice blends.

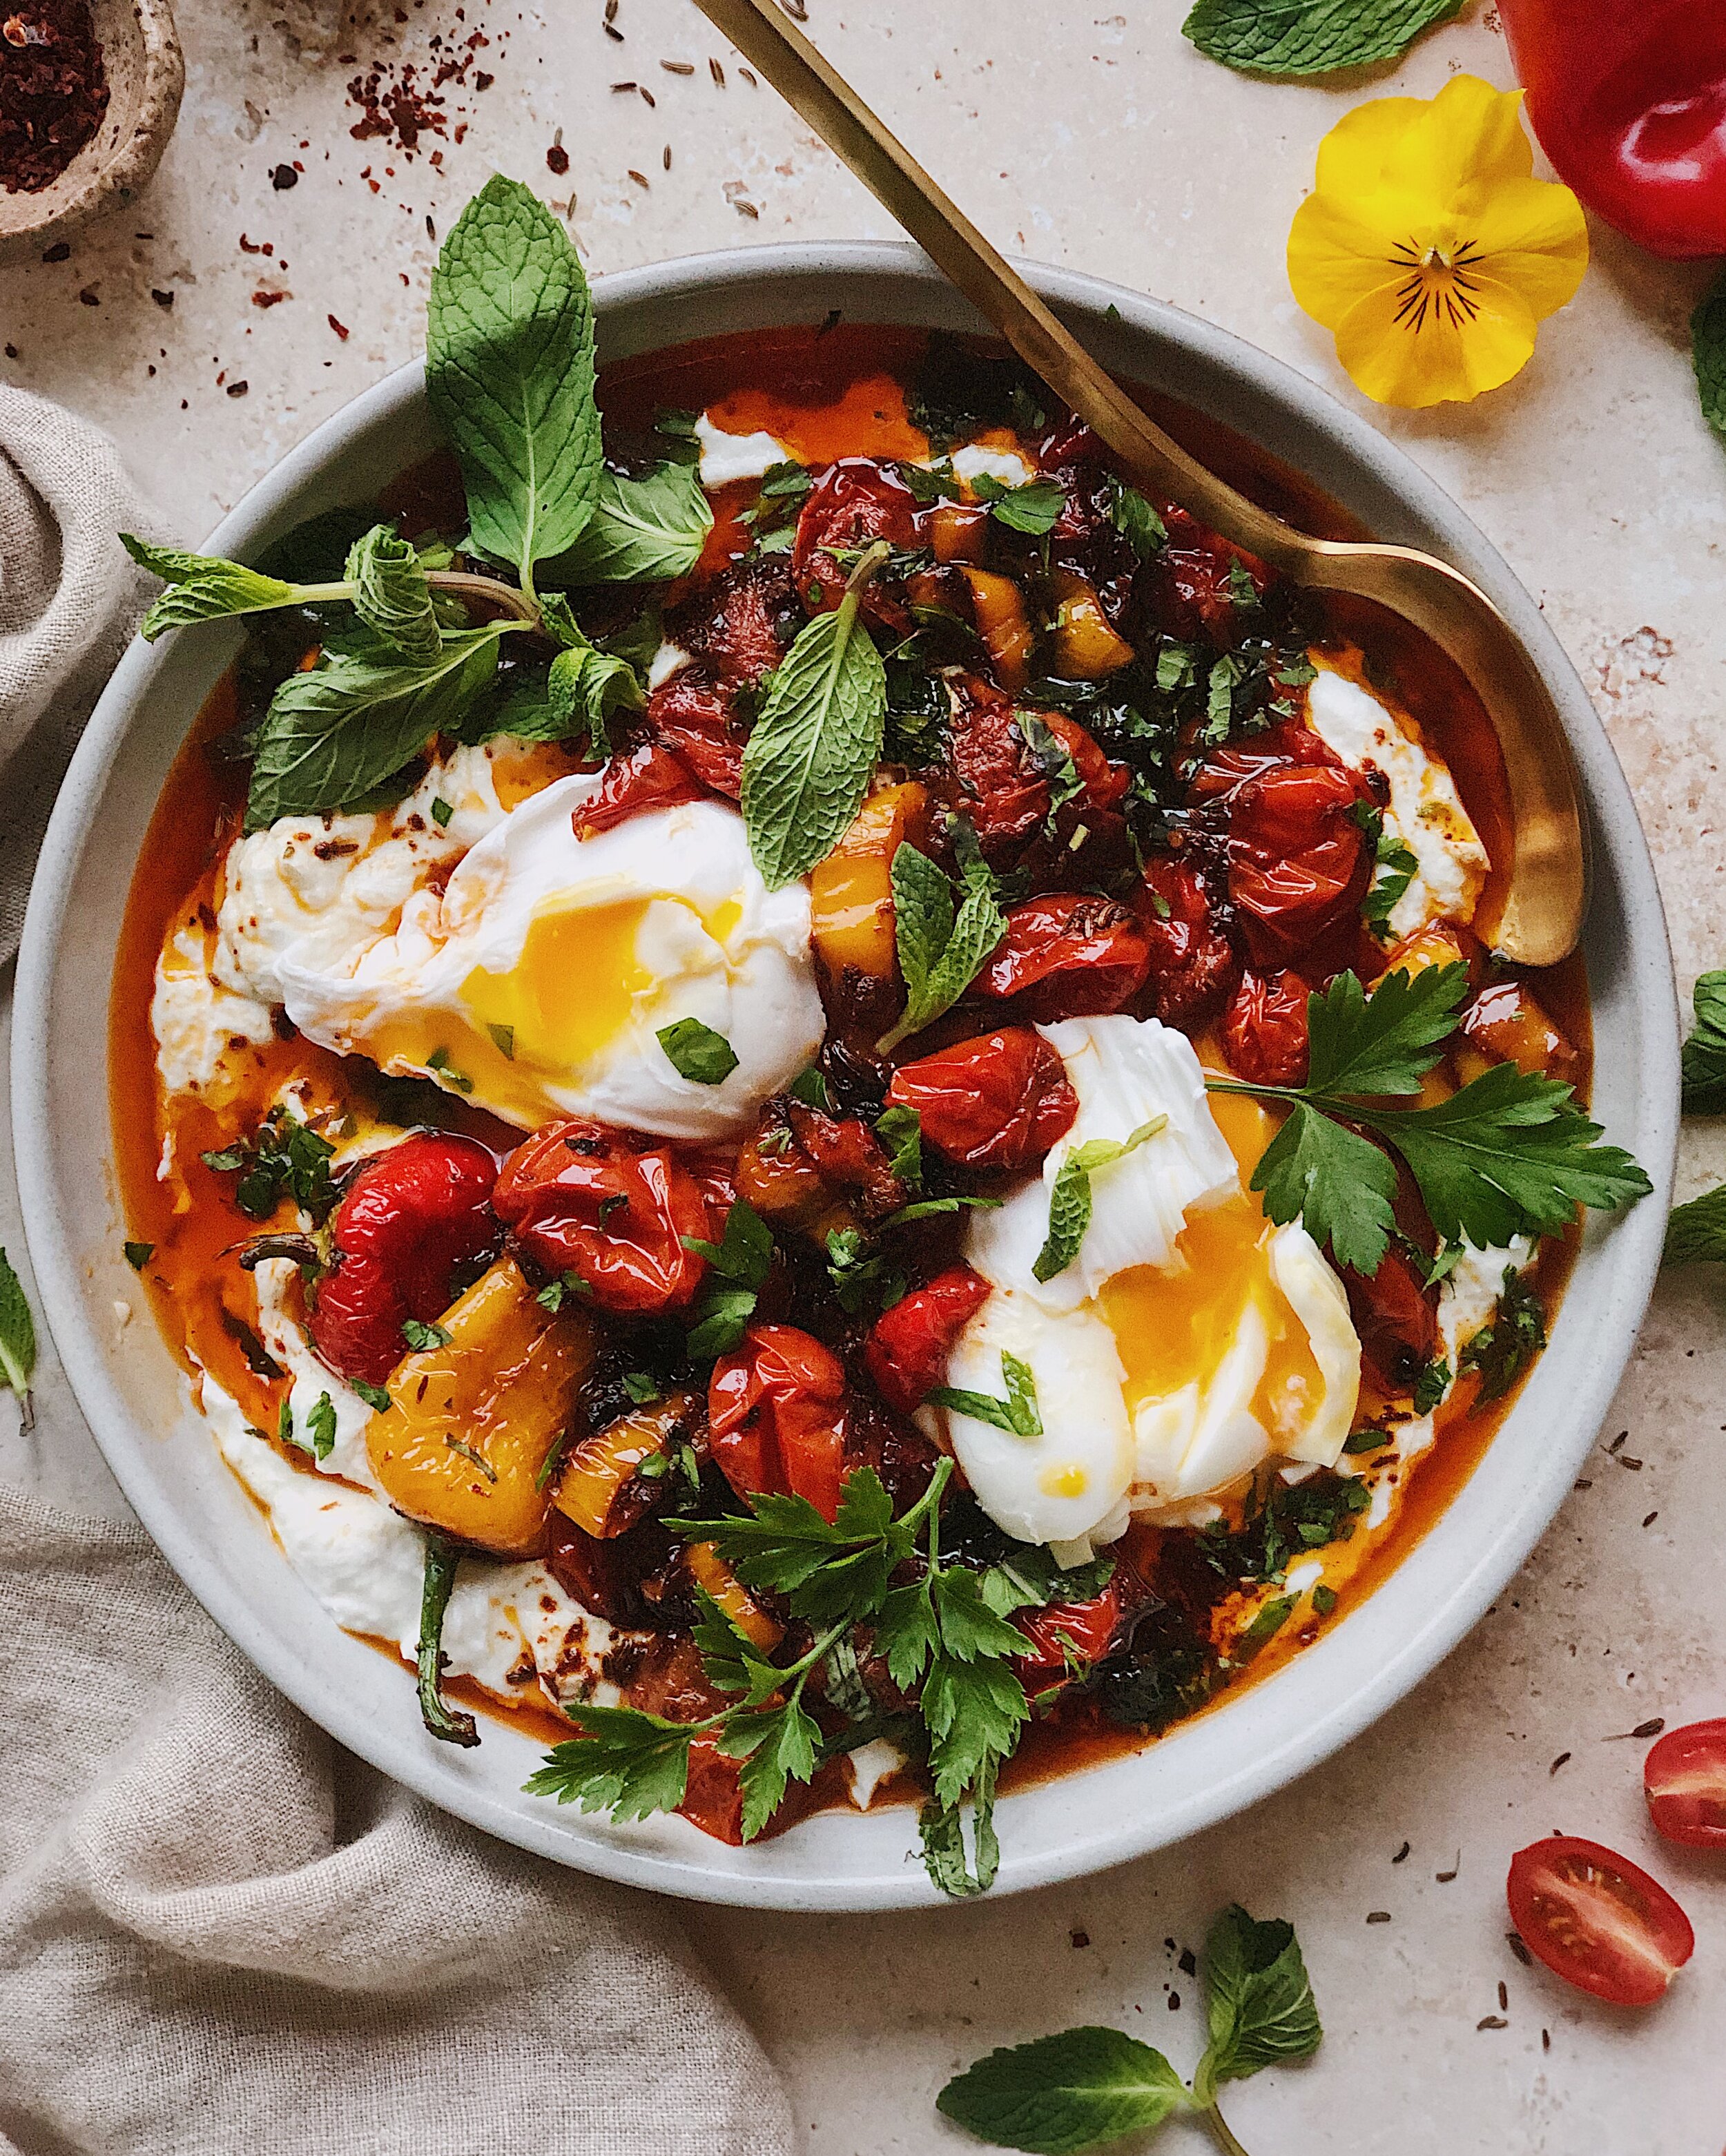
Recipe: Turkish Eggs with Charred Tomatoes & Sweet Peppers

LilyMorello_TurkishEggs_03.JPG

One of my favorite breakfast dishes of all time is çılbır—known in English simply as “Turkish eggs”. The first time I had this was not anywhere in Turkey, but in London, and I was in awe over how bold it was to combine three such indulgent things: creamy garlicky yogurt, runny poached eggs, spicy melted butter. I love all of those things individually, but together they were something else entirely—unapologetically, mindblowingly good.

For a while, I wasn’t sure if Turkish eggs was really a Turkish dish. My Kurdish friend who grew up in Turkey never heard of it. And, I had trouble finding it on menus when I was researching where to eat in the three different cities I visited in Turkey; (likely due to being unable to read Turkish,) the only place I was able to get it was at a super hipstery brunch place in Istanbul with major San Francisco vibes, where their riffed version came on a bed of wilted greens. But finally, I found this article by Maha Salah which talks about çılbır being considered a humble dish made from Turkish moms’ kitchen staples, and that’s why it’s not included in the flashy kahvalti spreads in the touristy areas I visited. (Although I also read that sultans of the Ottoman Empire enjoyed it for breakfast, too.)

Because çılbır is one of my favorite breakfasts, whenever I see Aleppo pepper or Halaby pepper, my mind immediately goes to the glorious spicy melted butter that spreads over the yogurt like lava in this dish. When I started working with Spice Tribe, one of the products I was most excited to receive was their Maras Chile Flakes, which are the same pepper variety but sourced right from Turkey. I knew I had to use it in some sort of riff on Turkish eggs.

To be clear, çılbır does not need riffing. Its beauty comes from its simplicity, so I love that it’s a dish born from what people always had on hand. But I wanted to show off Spice Tribe’s Maras Chile Flakes while contributing some ideas that went beyond the basic recipes that were already out there, and in a way that continued to celebrate the beauty of simple ingredients without a whole lot of effort.

LilyMorello_TurkishEggs_01.JPG
LilyMorello_TurkishEggs_05.JPG

So here’s what I added to the mix:

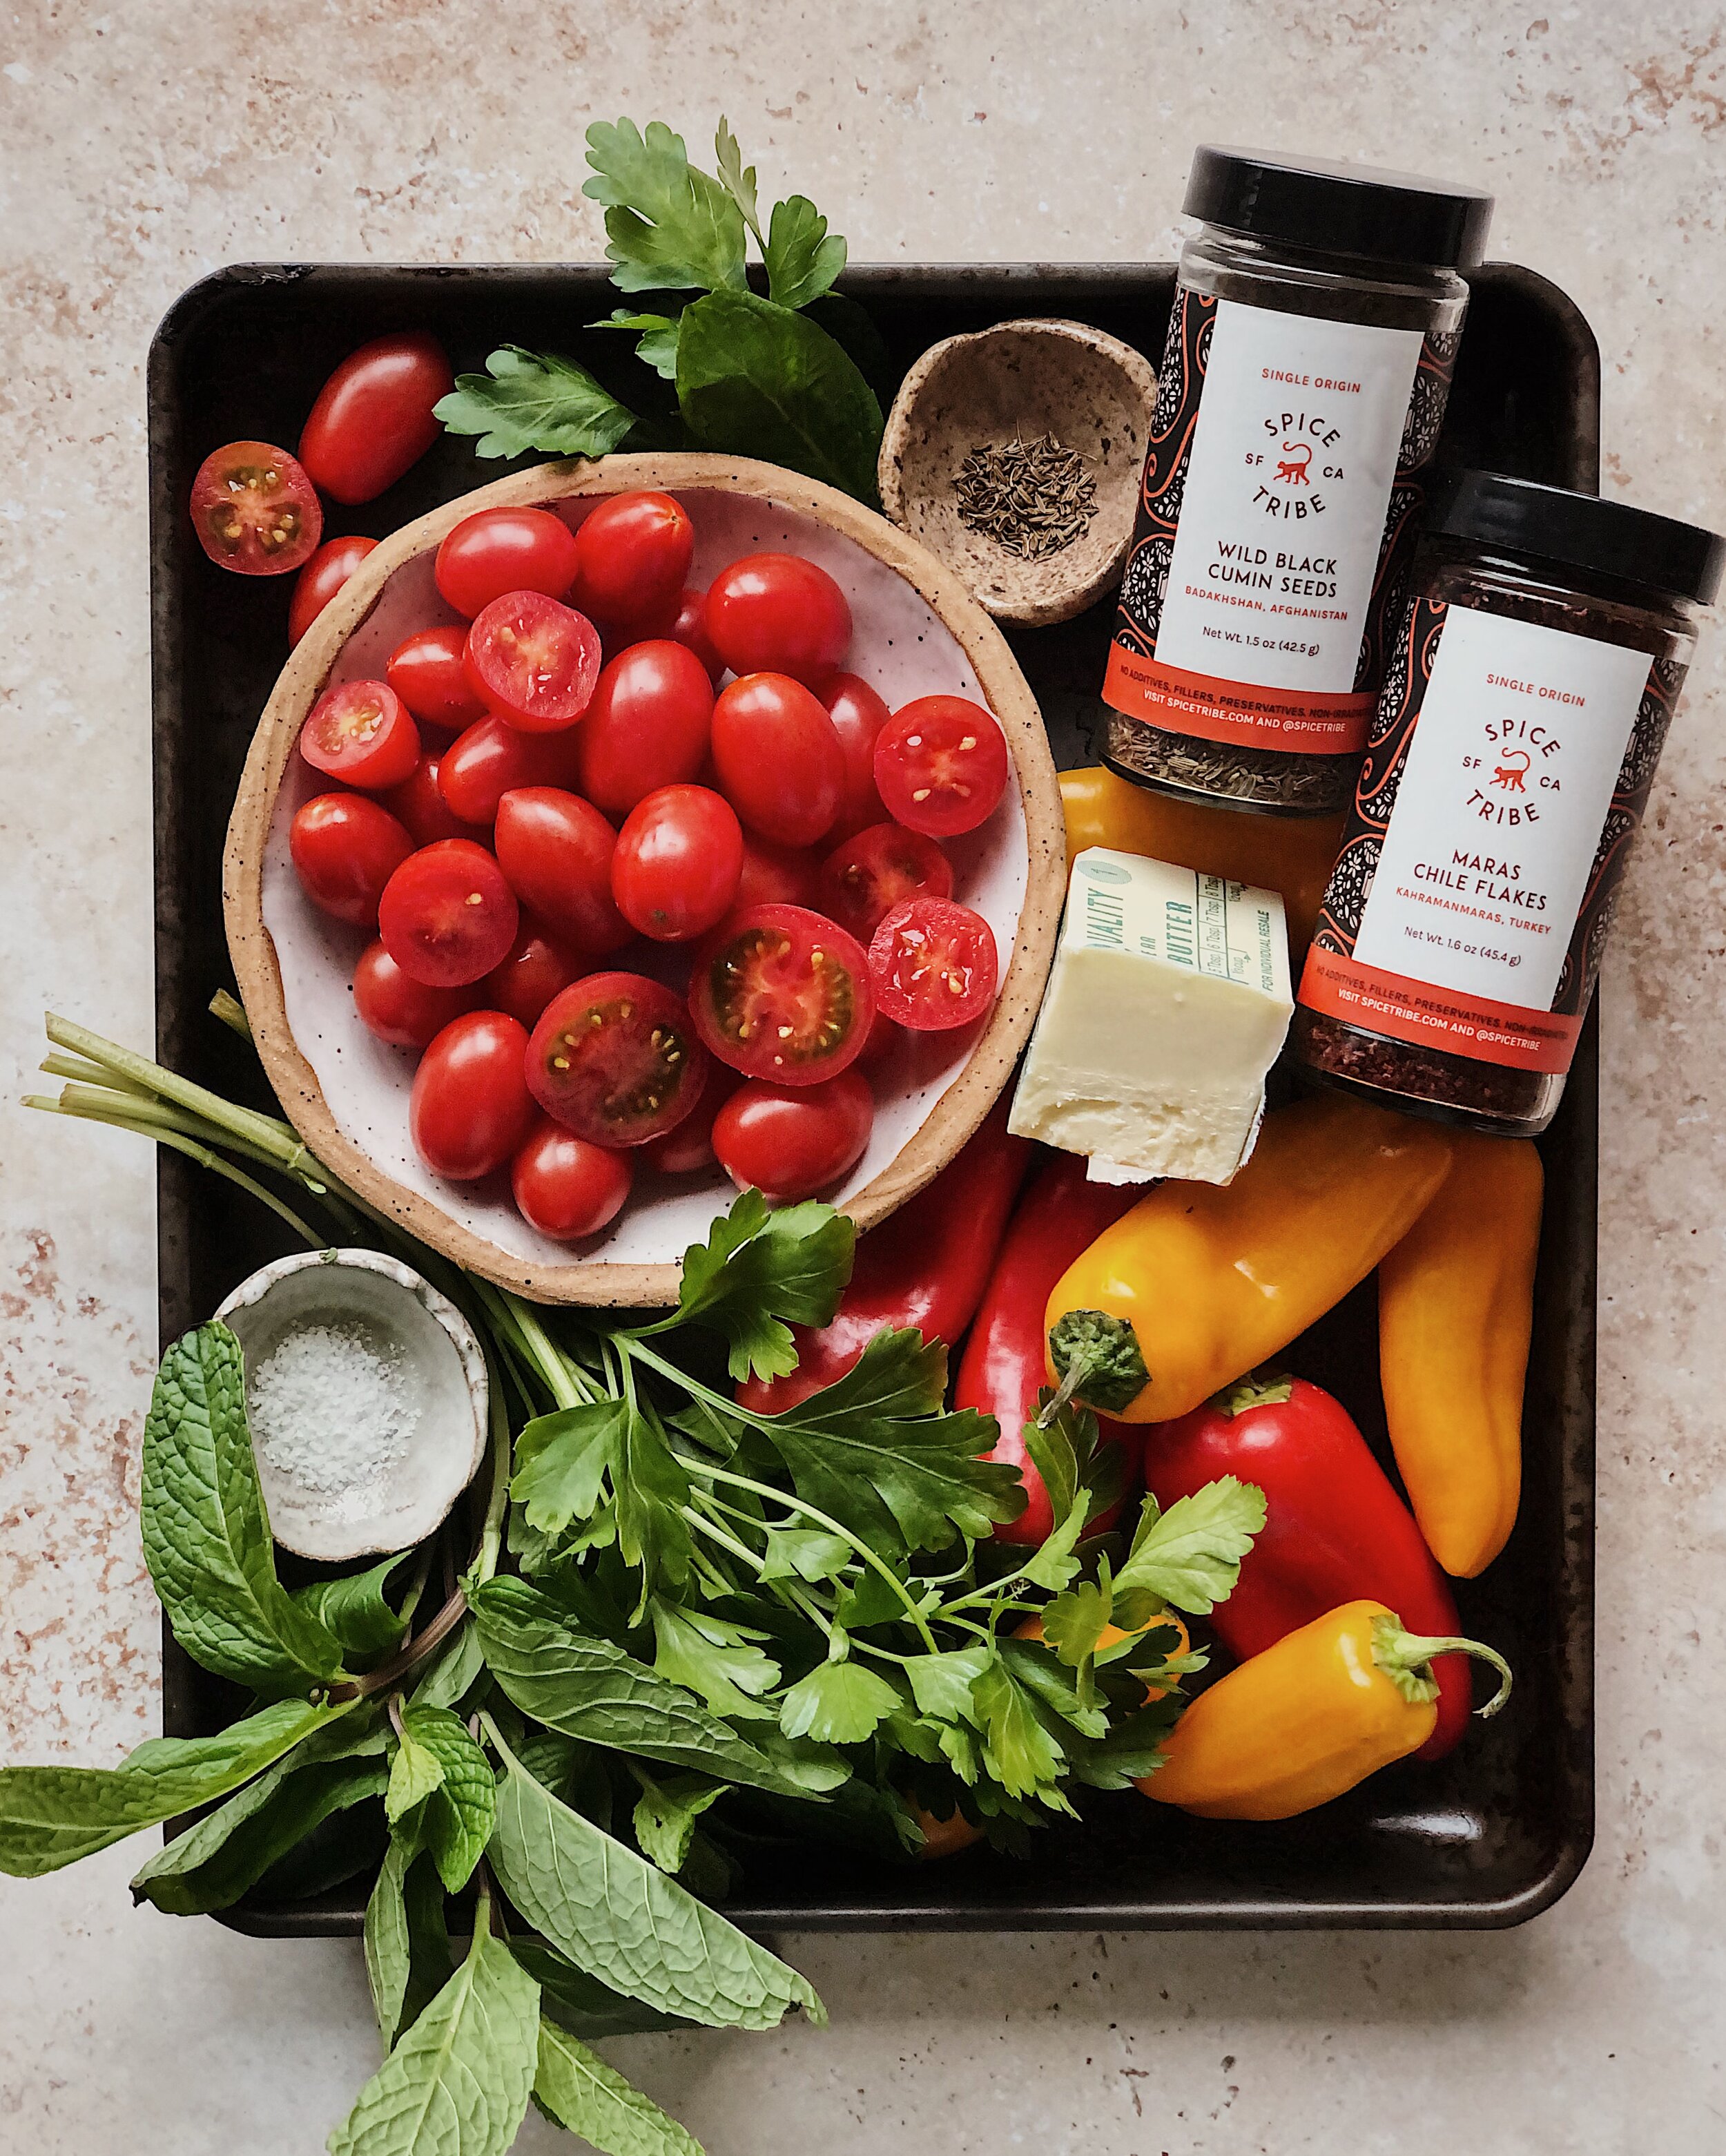
  • Cherry or grape tomatoes: Cooked in a hot skillet until they burst, the juices from these flavor bombs bring a little freshness, and acid to complete that holy quaternity of salt, fat, acid, heat.

  • Sweet peppers: Apparently these are mini bell peppers, but I buy them in bags that are generically labeled “sweet peppers” at Trader Joe’s; they are similar in size to a jalapeño pepper but completely different in taste. The natural sweetness of these becomes even more pronounced when they get all soft and charred, and they add another dimension of flavor indulgence when they are swimming in that yogurt and butter.

  • Wild black cumin seeds: Bloomed in the butter as it melts, Spice Tribe’s Wild Black Cumin Seeds add a fragrance of cumin to the dish and a little bit of a nutty texture. When cooked whole, I find these black cumin seeds to smell and taste like a milder version of the ground spice I use in curries.

  • Fresh herbs: I couldn’t resist garnishing with some fresh herbs—in this case, parsley and mint. But I admit the motivation was mostly aesthetic; the dish will be still delicious without them.

Served with some crusty toasts or charred flatbreads to mop everything up, this dish is a delicious paradox of humble yet indulgent ingredients. Those extra add-ons really turn it into a full meal, so I would recommend enjoying this not just for breakfast, but any time of the day.

LilyMorello_TurkishEggs_02.JPG

How to Make Turkish Eggs
with Charred Tomatoes & Sweet Peppers

Ingredients

1 cup Greek yogurt
1–2 cloves garlic, pressed*
1/6 cup extra virgin olive oil
12 ounces cherry or grape tomatoes
8 sweet peppers, stems removed, sliced into 1/4-inch pieces
1/2 tsp Kosher salt, or to taste
1/4 cup salted butter
2 tsp Spice Tribe Maras Chile Flakes
1 tsp Spice Tribe Wild Black Cumin Seeds
2 eggs, poached
Fresh herbs, such as mint and parsley (optional)
Toast or flatbread, for serving

* If raw garlic is too pungent for your taste, substitute with 2–4 cloves of garlic confit or roasted garlic, mashed well.

Procedure

Mix together yogurt and garlic. Set aside to allow flavors to incorporate.

In a large nonstick skillet, heat the olive oil on medium-high until shimmering. Carefully add the tomatoes and peppers in one layer and season with salt. Reduce the heat to medium if the oil starts to smoke, but leave the tomatoes and peppers to char on one side before flipping over. (Note: As the tomatoes start to burst, there will be some oil splatter.) Cook the tomatoes and peppers until lightly charred on two sides, about 5–7 minutes total.

Move the tomatoes and peppers gently to one side of the pan, reduce the heat to medium-low,  and add the butter to the other side. As the butter starts to bubble along the edges, add the Maras chile flakes and cumin seeds. Stir the spices into the pool of melted butter and continue to cook until the butter starts to foam. Fold all the contents of the pan together.

Swirl the yogurt mixture onto the bottom of the serving dish(s), creating channels for the melted butter to flow. Tuck the poached eggs into the yogurt, spoon on the tomatoes and peppers, then pour the spiced melted butter over everything. Garnish with fresh herbs if desired. Serve with bread to scoop everything up.

Thank you so much to Spice Tribe for sponsoring this recipe! Check them out on Instagram here or visit their website to purchase high quality spices and unique small-batch spice blends.

Recipe: California Love Fried Chicken Bao

LilyMorello_FriedChickenBao_05.JPG

Hot chicken bao is a concept that I’d been experimenting with for some time now. It started with me wanting to take the components of a Nashville hot chicken sandwich (from the likes of Howlin’ Ray’s, for example) and stuff them all into fluffy, Chinese style steamed buns for no other particular reason than that a fully loaded bao is one of the best food formats. While the most famous version is probably the pork belly gua bao that are popular in Taiwan, these “lotus leaf” bao have become a popular receptacle for all kinds of fillings and I’ve personally also developed a compulsion to stuff all my favorite food combinations inside them (e.g. pastrami sandwiches, Korean-style egg drop breakfast toasts, spicy KFC). For a while, though, I was trapped in the headspace of wanting to perfectly recreate the very best restaurant-quality Nashville hot chicken sandwich where the only thing different was the bun…and that’s when I hit a big block. After all, I haven’t even been to Nashville before! How could I capture such an iconic food when the only place I’ve ever had it was in California?

And that’s when I realized, I needed to make it my own. Make it less about imitating something that already existed and more about the flavor combination that I wanted to capture inside these little bao. What were the ingredients that made sense to me?

LilyMorello_FriedChickenBao_01.JPG
LilyMorello_FriedChickenBao_04.JPG

One day, while I was looking at Spice Tribe’s pretty California Love bottle, it somehow clicked that this spice blend was exactly what I needed for my backburnered fried chicken bao idea. I didn’t grow up eating a lot of cayenne-heavy Southern spice blends (cayenne is what gives Nashville hot chicken its spicy heat) but the California Love blend felt a lot more familiar to me—probably because it was based on Spice Tribe founder Trent’s own upbringing in California. Though I must still give huge credit to every Nashville hot chicken joint I’ve ever ordered a sandwich from (Howlin’ Ray’s and Starbird are my faves) for the inspiration, the recipe now feels very me.

I really wanted these bao to celebrate how the diverse population of California has had a huge impact on how I create in the kitchen. These are the pieces that you’ll be bringing together to make my California Love Fried Chicken Bao recipe:

  • Lotus leaf bao: These can be found in the frozen section of an Asian supermarket. You want the ones that are folded, that you can stuff things into; I’ve seen them called “lotus leaf bao” but they probably won’t be labeled that in English. I keep them in my freezer until it is time to steam them and it does not take long in a bamboo steamer to transform them into fluffy pockets.

  • Fried chicken: I used a very simple technique for battering and frying the chicken, similar to the way I make Chinese-American takeout dishes like sweet and sour pork. You are not going to get a really thick crunchy crust like you would with Southern fried chicken because I thought that would overwhelm the delicately soft texture of the steamed bao; instead, expect a light yet crisp exterior.

  • The seasoning: The technique I used for applying seasoning to the chicken is taken directly from how Nashville hot chicken is made: a dry spice blend is mixed together and after frying the chicken, some of the hot oil is added to the spices; that seasoned oil paste is then brushed on to the fried chicken. However, instead of the cayenne-heavy seasoning used for Nashville hot chicken, I used Spice Tribe’s California Love all-purpose chile blend as the main component; I loved that it was a tribute to founder Trent’s own memories of growing up in California and cooking with his dad. The blend features California chilies and to me it celebrates the big presence of Mexican cuisine here. To that, I added Korean gochugaru for color and another chili component, but overall these are meant to be mild and approachable, not too spicy.

  • Cabbage slaw: Here, I once again tapped into Chinese-American cuisine for inspiration—the dressing for this is based on a “Chinese chicken salad” that my dad was really into at a Cantonese-American restaurant we frequented when I was a kid.

  • Sriracha mayo: A holy unity of practically every Asian-American kid’s two favorite condiments (sriracha + Japanese mayo) to form the ultimate sandwich spread.

  • Pickles: Because you can’t have a good fried chicken sandwich without pickles.

These satisfying fried chicken bao have a little bit of everything—a little sweetness and just a hint of spiciness in the seasoning blend, a little crunch from the pickles and the chicken batter, creaminess from the mayo, sweet-sour tang from the slaw—all hugged together by those fluffy, pillowy bao.

LilyMorello_FriedChickenBao_03.JPG
LilyMorello_FriedChickenBao_02.JPG

How to Make California Love Fried Chicken Bao

For the Slaw

4 tsp rice vinegar
1 tbsp honey
2 tsp sesame oil
1/2 tsp soy sauce
Pinch of kosher salt
1/2 small cabbage, finely shredded
1/8 red onion, thinly sliced

For the Chicken

3 boneless skinless chicken thighs
1 egg, beaten
2 tsp soy sauce
1/2 – 2/3 cup cornstarch
oil for frying

For the Chicken Seasoning

1 1/2 tsp Spice Tribe California Love blend
2 tbsp gochugaru*
1 tbsp brown sugar
1/2 tsp sugar
1 tsp kosher salt
1/3 cup hot frying oil

To assemble

8 frozen lotus leaf bao
1/4 cup Japanese mayo
4 tsp Sriracha (or to taste)
Dill pickle chips

*Note: If you want to make these more spicy, substitute in cayenne powder, to your taste.

Procedure

To make the slaw, whisk together rice vinegar, honey, sesame oil, soy sauce, and salt. Toss together with the cabbage and onions until everything is coated. Store in the refrigerator until ready to assemble the bao. (Can be made up to 4 hours in advance.)

Cut chicken thighs crosswise into 1 1/2-inch pieces. Beat together egg and soy sauce. Combine chicken pieces with egg and soy sauce mixture until everything is coated and allow to rest for 10 minutes.

In the meantime, in a dutch oven, heat enough oil to submerge the chicken pieces.

Pour 1/2 cup cornstarch into a rimmed plate. Remove one of the chicken pieces and allow the excess liquid to drip off, then dredge the chicken in the cornstarch until completely coated. Set aside and repeat until all the chicken is coated in cornstarch, adding more cornstarch to the plate if needed.

The oil is hot enough when you insert a wooden chopstick or spoon into the oil and small bubbles appear. Working in batches and adjusting the heat as needed, deep fry the chicken until golden brown and cooked, about 5–8 minutes.  Let fried chicken drain on a rack or paper towels.

While chicken is draining, set up a bamboo steamer lined with parchment paper and place the frozen bao inside, using pieces of parchment paper to keep them from touching. Steam the bao over a wok with simmering water until soft, about 5 minutes. (Or, if you do not have a bamboo steamer, wrap them in damp paper towels and microwave in 30-second increments until soft.)

Transfer chicken to a large tray. Combine all the dry seasoning ingredients in a heat-safe bowl. Then, add the frying oil while it is still hot. Stir together then brush the seasoning mixture onto the chicken until fully covered.

In a small bowl, mix together the Japanese mayo and the sriracha. 

To assemble, spread some sriracha mayo on the inside of a bao, then stuff with slaw, 1–2 pieces of chicken, and pickle chips. Repeat with the remaining ingredients.

Thank you so much to Spice Tribe for sponsoring this recipe! Check them out on Instagram here or visit their website to purchase high quality spices and unique small-batch spice blends.

Recipe: Jalapeño Popper Stuffed Soft Pretzels

JalapenoPopperPretzels1.JPG

I love jalapeño poppers and I love soft pretzels, so I thought, why not combine them into the ultimate stuffed gooey snack?

To my German friends and bretzen fans, sorry not sorry. These (like my pretzel buns which have the exact same dough base) have a texture which resembles something you’d more likely find at an American mall than an Oktoberfest tent. I like soft, fluffy doughy things. I also think the soft dough is necessary because you don’t want the molten cheese to simply squeeze out when you tear in to one of these babies.

stuffedpretzels1.JPG

I wasn’t going to share a recipe for these but then I posted a photo of the leftovers in my Insta stories and got multiple people asking me when the recipe is going to be out, so here we are. I fully admit that the process for rolling and stuffing the pretzels could use some visuals for better clarity; I will update this recipe the next time I make these with more illustrative aids. But I am hoping what I wrote below makes sense. You basically want to roll out the dough so that it is really tapered to a point on the ends, and much fatter in the middle—about a 1-inch diameter or even more. I often see recipes call for dough to be rolled into a “rope” or a “snake” but really you want these to resemble the shape of a long slug (minus the antennae, of course). You need enough volume in the middle two-thirds of your dough slug so you can roll it out flat, fill it with a line of filling, and pinch it closed. You don’t want the filling to leak out when boiling (though some melty spillage in the baking process is not a bad thing). You also don’t want the ends to be as fat as the middle because that will make it look clunky and awkward when you are twisting into a pretzel shape.

I have only tested it with crushed chicharrones for the coating, but I am quite confident it will work with regular panko. Next time I made these I will try it with panko to make sure the panko doesn’t brown too quickly, but in the meantime, just keep and eye on them as they are baking if you choose to go that route.

Finally, these are plenty cheesy and gooey on their own but if you want to dunk them in cheese sauce like I did, I will be the last to tell you that is not a good idea. I use this recipe from Serious Eats when I make cheese sauce.

stuffedpretzels2.JPG

How to Make Jalapeño Popper Stuffed Pretzels

(Makes 5 pretzels)

Ingredients for the Dough

3/4 cup warm water
1 tsp (slightly heaped) active dry yeast
1 tbsp honey
1 tbsp butter, melted and cooled
2 tsp brown sugar
1/2 tsp salt
2 cups AP flour, plus more for dusting
nonstick cooking spray

Jalapeño Popper Ingredients

5 oz cream cheese, softened
pickled jalapeños, chopped
~ 1 1/2 cups freshly grated mozzarella
crushed chicharrones or panko breadcrumbs

For the Water Bath

9 cups water
1/2 cup baking soda

Procedure

Combine warm water, yeast, and honey in the bowl of your stand mixer and stir gently. Allow yeast to bloom and foam up for 5 minutes.

Add butter, brown sugar, and salt, and stir together. Fit stand mixer with the dough hook and turn on to the lowest setting. Begin adding flour, 1/2 cup at a time, until a dough starts to come together. Use a rubber spatula to scrape everything together. If the dough is sticky, add a little bit more flour.

Turn the mixer to medium high and knead the dough for about 5 minutes until it feels smooth and bouncy. Turn the dough onto a clean worksurface and roll into a smooth ball. Grease the inside of the mixing bowl, and place the ball of dough back inside. Cover with a damp towel and allow to rest in a warm place for 20 minutes.

In the meantime, make the filling. Combine the cream cheese, pickled jalapeños, and mozzarella cheese into a homogenous mixture. (The amount of jalapeños and mozzarella cheese can be to your taste, but keep in mind it needs to fit inside the pretzels.) Set aside.

On a lightly-floured worksurface, divide the rested dough into 5 equal pieces and roll each piece into a ball. Then roll each into a long slug-like shape that is fatter in the middle and tapers off on the ends. These should be about 20–22 inches in length.

Then, take one of your long tapered pieces of dough and, using a small, lightly-floured rolling pin, roll out the middle two-thirds of the dough. The midpoint should measure about 3–3.5 inches when it is rolled out. Spread roughly one-fifth of the cream cheese mixture in a line along this rolled out section of dough, leaving some dough exposed above and below. Then overlap the exposed edges together over the filling and pinch together tightly, making sure the filling is sealed in well. You should end up with a long dough slug again, that is similar in size and shape to when you started. Twist this into a pretzel shape. Set aside and repeat with the other dough slugs.

In a large pot, combine water and baking soda for water bath and bring to a boil. Preheat oven to 425°F. Line 1 or 2 large baking trays with parchment paper.

Place each pretzel in the boiling water bath for 10 seconds on each side, then place on the parchment-lined tray. (I find it easiest to put them in face-down in the water first, flip, and then lift up with a spatula.) Give plenty of space in between, as they will puff up as they bake.

Pack on the panko breadcrumbs or crushed chicharrones onto the wet dough. Brush with additional water from the water bath if necessary for more adhesion.

Bake for about 15 minutes in the middle rack of the oven. Eat them as soon as you can manage without burning your fingers!

Recipe: Mala Chili Oil Fried Egg

chilioilfriedeggbagel.jpeg

Lately, I have been really into frying eggs in Sichuan pepper chili oil. Why fry an egg in regular, flavorless oil when you can have a fried egg whose every crag and crispy edge is filled with a hint of something numbing spicy?

The inspiration for this was a video I saw of a hawker stall in Malaysia that serves up eggs fried in sambal. (Sambal is a term used in Southeast Asia to refer to various chili sauces and pastes, typically made with pulverized fresh red chilies of some sort.) I’ve tried making this a couple of times but couldn’t get it to look aesthetic enough. It was also horribly messy (and sometimes slightly painful) because the bits of chili and aromatics in the sambal would splatter everywhere once the oil was hot. But it was from this concept that I thought of the idea of frying my eggs in something other than plain ol’ oil. I realized that if I made an infused oil but strained out all the spices, it would essentially be like using regular oil to fry an egg, with no particles to splatter crazily out of the pan.

My mala chili oil fried egg is shown above with a black garlic and scallion cream cheese and the classic Lao Gan Ma chili crisp**, on an everything bagel.

How to Make a Mala Chili Oil Fried Egg

Ingredients For the chili oil

2 tbsp coarse Chinese or Korean chili flakes
4 tsp pink Sichuan pepper
2 star anise
1/2 cup high smoke point neutral oil

You’ll also Need

1 egg (or more)
coarse kosher salt

Procedure

Add chili flakes to a heat-safe bowl. In a small saucepot, combine oil, Sichuan pepper, and star anise. Heat on medium-low heat until the lighter interior parts of the peppercorn husks begin to turn brown, about 4 minutes. Turn off the heat and wait for the pepper to turn fully dark brown, about 1 more minute. Carefully pour oil through a fine mesh strainer over the chili flakes. Mix together and transfer to a jar when cooled. Allow the chili to infuse with the oil overnight for best results. Then, use this chili oil to fry eggs, or as a base for a dumpling or noodle sauce!

To fry the egg: Skim 1 tablespoon of clear oil from the top of the jar (or pass the contents through a strainer). It is important to only use the oil as any other solids will splatter out of the pan when frying.

Heat the oil in a small nonstick pan, then add the egg (I like to crack the egg into a small bowl first). Spoon some of the hot chili oil over the egg whites to help them cook, and/or cook egg to your preference! Hit it with a little sprinkle of salt (or a drizzle of LGM chili crisp!).

Recipe: Dan Dan Dumplings

DanDanDumplings1.JPG

I love to experiment with taking the components of an existing dish and reimagining them in the form of a dumpling filling. If there’s a tried and true combination of ingredients already, then stuffing all of those flavors together into a one-bite dumpling format for most efficient delivery to the tastebuds will obviously result in something awesome. The trouble is that it’s hard to really celebrate those brilliant fillings in photo form. (Or, at least I personally struggle with that.) Dumplings are plenty cute-looking whole, but what makes them delicious is hidden inside.

But I finally had an idea for a dish-within-a-dumpling combo that I thought was worth photographing, because the sauce is just as important and sexy-looking as the dumplings. Presenting: Dan Dan Dumplings.

This idea builds off of this existing recipe that I developed for Bibigo USA, as a moreish way to serve their frozen mandu. I am super obsessed with Sichuan pepper and mala (numbing-spicy) foods and as part of that recipe, I developed my own version of mala chili oil! If you have never experienced them before, Sichuan pepper husks are super unique in that they contain a molecule that causes a tingling sensation on your tongue. It is not a burning heat, like eating a spicy chili, but rather a numbing sensation like when your foot “falls asleep”. I know it sounds a little unsettling when put that way, but it is honestly a delightful experience when eating in conjunction with flavorful, spicy foods. The combination of Sichuan pepper and spicy chilies is known in Chinese cuisine as mala, which translates to numbing-spicy.

chilioilingredients.JPG

Dan dan noodles have become an iconic mala dish associated with Sichuan cuisine in Chinese-American restaurants, and they are the inspiration for these dumplings. Dan dan refers to the carrying pole that OG street food vendors would use to transport their ingredients as they walked around. Since I’m not carrying my ingredients around on a pole, technically these aren’t “dan dan dumplings”, but I am gonna call them that because they are meant to be the dumpling version of dan dan mian. The dish usually has 3 major components: 1) an oily sauce that is a little numbing, nutty (from sesame paste), and spicy; 2) bouncy noodles; 3) a topping made of ground pork and preserved greens and sometimes a blanched Chinese vegetable. Instead of wok-frying the ground pork mixture, I stuffed it inside the dumpling wrappers, ditched the noodles, and went heavy on the chili oil in the sauce, in a similar vein to chili oil wontons.

I used the recipes for dan dan noodles by Woks of Life and Omnivore’s Cookbook as references for developing this dumpling recipe. One slight road bump that I ran into when replicating the flavors of dan dan noodles was the type of pickled vegetable used in the pork mixture. Both reference recipes call for a specific Sichuan-style preserved vegetable called sui mi ya cai. After staring at the shelves of pickled vegetable packets for quite some time at my local Asian supermarket, one of the uncles working at the store offered to help, but said they didn’t have it. This “preserved mustard green (chili)” is what I used instead.

DanDanDumplings4.JPG
DanDanDumplings2.JPG
DanDanDumplings3.JPG

Because the chili oil sauce is such a key component to this dish, I wanted to use a dumpling fold that would allow the sauce to really stick to the dumplings. What better way to accomplish this than to turn the dumplings themselves into little cups? Apparently this is known as the “rose bud” dumpling fold, but I received overwhelming feedback that this fold is quite reminiscent of the hats from The Handmaid’s Tale. It is super easy—just place a little scoop of filling on one half of the dumpling wrapper, fold in half and seal with some water, then overlap the two sides of the semicircle. You can see a video of how to do it here.

I obviously went very heavy on the chili oil in these photos. You can add it to your taste, but I was quite happy eating these as they were.

DanDanDumplings5.JPG

How to Make Dan Dan Dumplings

Ingredients For the chili oil

2 tbsp coarse Chinese or Korean chili flakes
2 cloves garlic, minced
1 scallion, thinly sliced
4 tsp pink Sichuan pepper
2 star anise
1/2 tsp salt
1/2 cup high smoke point neutral oil

Ingredients for the Dumplings

1/2 lb ground pork
2 tsp hoisin sauce
2 tsp shaoxing wine
1 tsp kecap manis (or 1/2 tsp dark soy and 1/2 tsp brown sugar)
1/2 tsp five spice powder
1/4 tsp ginger powder
a pinch of toasted and ground Sichuan pepper (optional)
1 2.5 oz packet spicy preserved mustard greens
about 24–26 dumpling wrappers

Ingredients for the Sauce

4 tsp Chinese sesame paste, stirred
2 tsp honey
1 tbsp soy sauce
2 tbsp black vinegar

For Garnish

1 scallion, sliced
1–2 tbsp roasted unsalted peanuts, chopped
cilantro (optional)

Procedure

In a heat-safe bowl, combine chili flakes, garlic, scallions, and salt. In a small saucepot, combine oil, Sichuan pepper, and star anise. Heat on medium-low heat until the lighter interior parts of the peppercorn husks begin to turn brown, about 4 minutes. Turn off the heat and wait for the pepper to turn fully dark brown, about 1 more minute. Carefully pour oil through a fine mesh strainer over the ingredients in the bowl. Stir everything in the bowl together and allow to sit for at least 10 minutes (more is recommended) to let the flavors integrate and the garlic cook through.

To make the dumpling filling, combine the ground pork, hoisin sauce, shaoxing wine, kecap manis, five spice, powdered ginger, and ground Sichuan pepper (if using) in a bowl until mixed evenly. Fold in the preserved mustard greens. Stuff inside dumpling wrappers and seal shut as desired (see notes above for rose bud fold). Place folded dumplings on a tray dusted with flour to prevent sticking.

In a separate bowl, whisk together sesame paste and honey. Whisk in soy sauce and black vinegar at a gradual drizzle to prevent the sesame paste from clumping.

Bring a large pot of water to boil, then carefully add the dumplings. Remove them as they float to the surface and transfer them to a bowl or tray with a little bit of oil.

Add about 2 tablespoons of the hot cooking water to the sesame sauce and whisk to combine. Then add 2 tablespoons of the chili oil and whisk again.

To serve, spread a generous layer or the sesame sauce in the bottom of each bowl. (You may still have a little bit left over.) Divide the dumplings into each bowl, then drizzle chili oil over the dumplings to taste. (You may still have some chili oil left over too, but I didn’t because I like it numby and spicy!) Garnish, and then mix dumplings in the sauce and oil before devouring.

Shortcut Mala Cumin Lamb for Biang Biang Noodles

BiangBiang5.JPG

To be clear, these are not your traditional or typical Xi’an cumin lamb noodles. If you are looking for a recipe for those, I am afraid you have come to the wrong place (especially since this is not really a recipe at all). I love those noodles too, and have very fond, special memories of trying them for the first time at Xi’an Famous Foods during a solo trip to New York, being blown away about how they somehow exceeded the hype.

But while this recipe is obviously inspired by those flavors, I personally don’t like the idea of trying to replicate a specific restaurant dish at home. Maybe that’s just me. Restaurant cookbooks are gorgeous to look at, but I never buy them. I am happy to accept the reality that the force of my home gas range is never going to replicate that of a restaurants, my 0 days of professional culinary training is not going to produce the same outcome as those who have studied and devoted their lives to the culinary arts. And anyway, I like (liked—before Covid) the idea of going to a restaurant to eat dishes that are wholly different from what I can cook myself at home.

So I am calling this my Cumin Lamb Noodles, but they are very different cumin lamb noodles from what you’ve likely to experienced in a restaurant before. They are a sort of hybrid of a Xi’an-inspired dish and the texture of bolognese but also heavy on the mala (numbing spicy) associated with Szechuan cuisine. Using ground lamb means not worrying about sliced meat getting tough and overcooked, and it almost becomes a part of the sauce—something that can cling to those wide swaths of noodles. I use this storebought mala hot pot mix (link) for the base of the sauce because I am not an expert at Chinese spice blends in the slightest and this is a shortcut recipe, after all.

I really do recommend that you make your own wide biang biang noodles for this (recipe here) but if you are too lazy or don’t have time, I totally get it. Due to their short-lived nature, I have never seen biang biang noodles sold at the Asian grocery store before, so if you are looking for a storebought alternative to use with this sauce, I recommend buying fresh pappardelle.

The recipe below is awkwardly vague because I really don’t believe in measuring when it comes to sauces for noodles. Let it guide you in your interest in making a Xi’an x Szechuan x bolognese hybrid, but be sure to adjust the seasoning to your taste.

BiangBiang7.JPG

Awkwardly Vague instructions for Ground Lamb Cumin Noodles

Ingredients

3/4 lb ground lamb
1/2 small onion, sliced
lots of chopped garlic
lots of cumin
salt
a squeeze of tomato paste
~ 1 oz Szechuan mala hot pot base (like this one)
a heaping tablespoon of gochugaru
avocado oil
cilantro, for garnish
raw hand pulled noodles

Procedure

In a wok, heat oil and stirfry onions. Add lamb and garlic. Season with pinch of salt, lots of cumin. Squeeze in some tomato paste and mix everything together.

Heat some oil (1/6 cup-ish) in separate pot until almost smoking.

At the same time, turn down wok to low heat and cook biang biang noodles in pot of boiling water as described in the noodle recipe.

Add cooked noodles on top of lamb.

Add Szechuan hot pot sauce and gochugaru. Pour hot oil on top of gochugaru.

Toss to combine. Garnish with cilantro.

BiangBiang4.JPG

Recipe: Korean Fire Ribs with Melted Cheese

Lily_July3_Social.JPG

I have probably already said this on here before, but I love my old school slow cooker. I know all the cool kids are about that instant pot life, but my slow cooker is reliable and I trust that it won’t blow up in my face. I love it for pretty much every situation where I’d want super tender meat, including fall-off-the-bone baby back ribs.

One of my favorite flavor combinations in modern Korean cuisine is super “fire-y” spicy meat with ooey gooey melted cheese. So I worked with Bibigo USA to develop this recipe for spicy ribs served piled high in the middle of a moat of melty cheese. Pro-tip, if you have a tabletop induction burner like I do, serve this whole skillet at the table with the heat set to a low setting to keep the cheese melty—we made some epic cheese pulls!

Other Variations for this Recipe

  • If you can’t find the sauce mentioned in the recipe below, Bibigo Original Korean BBQ Sauce (a.k.a. bulgogi sauce) seems to be easier to find. Whisk together 3/4 cup of that sauce (or your own favorite bulgogi marinade recipe) and 1/4 gochujang and use that to substitute for the 1 cup of Bibigo spicy sauce.

  • If you love Korean corn cheese, mix in half a can of corn (drained) into the cheese mixture.

Lily_July3_Banner_v1.JPG

How to Make Korean Fire Ribs with Melted Cheese

Ingredients

1 rack baby back ribs
1 cup Bibigo Hot & Sweet Go-Chu-Jang Sauce
2–3 tbsp gochugaru (or more!)
10 oz mozzarella cheese, freshly grated
1–2 oz cream cheese, softened

ingredients for Garnishing

1–2 scallions
1 red Fresno chili, thinly sliced
1 tsp sesame seeds, toasted

Procedure

Pat baby back ribs dry. Divide in half for fit if needed and place into the pot of a slow cooker. Combine Bibigo Hot & Spicy Korean BBQ Sauce with gochugaru to taste; pour half of the sauce mixture into slow cooker and thoroughly coat the exposed meat of the ribs. Set remaining sauce mixture aside. Cook ribs on low for 5 hours.

To make curly scallion garnish like the ones in the photos, slice green parts of scallions lengthwise into narrow strips and place in a bowl of cold water. Place bowl in the refrigerator for at least 30 minutes.

Remove cooked ribs from slow cooker and allow to rest for 20 minutes. In the meantime, prepare a foil-lined baking tray. 

Mix together mozzarella and cream cheese in a bowl. (Note: Please avoid using the pre-grated mozzarella, as this has additives to prevent the shreds of cheese from clumping together, and will also prevent the cheese from melting together smoothly.)

Cut in between bones of rack pieces to separate into individual ribs and place on foil-lined baking tray. Brush on the remaining sauce mixture. Place tray on the top rack of the oven and turn on the broiler setting. Broil ribs for 7–10 minutes until the edges are slightly charred.

Place cheese inside a cast iron skillet to form a ring. Heat cheese on stovetop on low until cheese just starts to melt, about 2–3 minutes. Then place under the broiler for 1–2 minutes until a few brown spots form. 

Pile ribs in the middle of the cast iron skillet. Top with scallions, sliced chili, and sesame seeds.

Grilling Method (Note that this version will not be as tender as the slow cooker option.)

Pat baby back ribs dry and remove the silverskin membrane.  Cut in between bones to divide into individual ribs. Combine Bibigo Hot & Spicy Korean BBQ Sauce with gochugaru to taste. Add ribs to a large zip-top bag along with half of the sauce mixture. Mix ribs and sauce until thoroughly combined and allow to marinate in the refrigerator overnight. Refrigerate remaining sauce mixture separately. 

Prepare grill. When ready, place ribs on the grill. Continuously brush ribs with remaining sauce mixture and turn until all ribs are cooked evenly.

Follow same steps for preparing cheese and garnishes as above.

Thank you so much to Bibigo USA for sponsoring this recipe! For more recipe ideas and to learn more about their products, visit their website!