Recipe: Savory Veggie Cupcakes with Cheesy Cauliflower Frosting

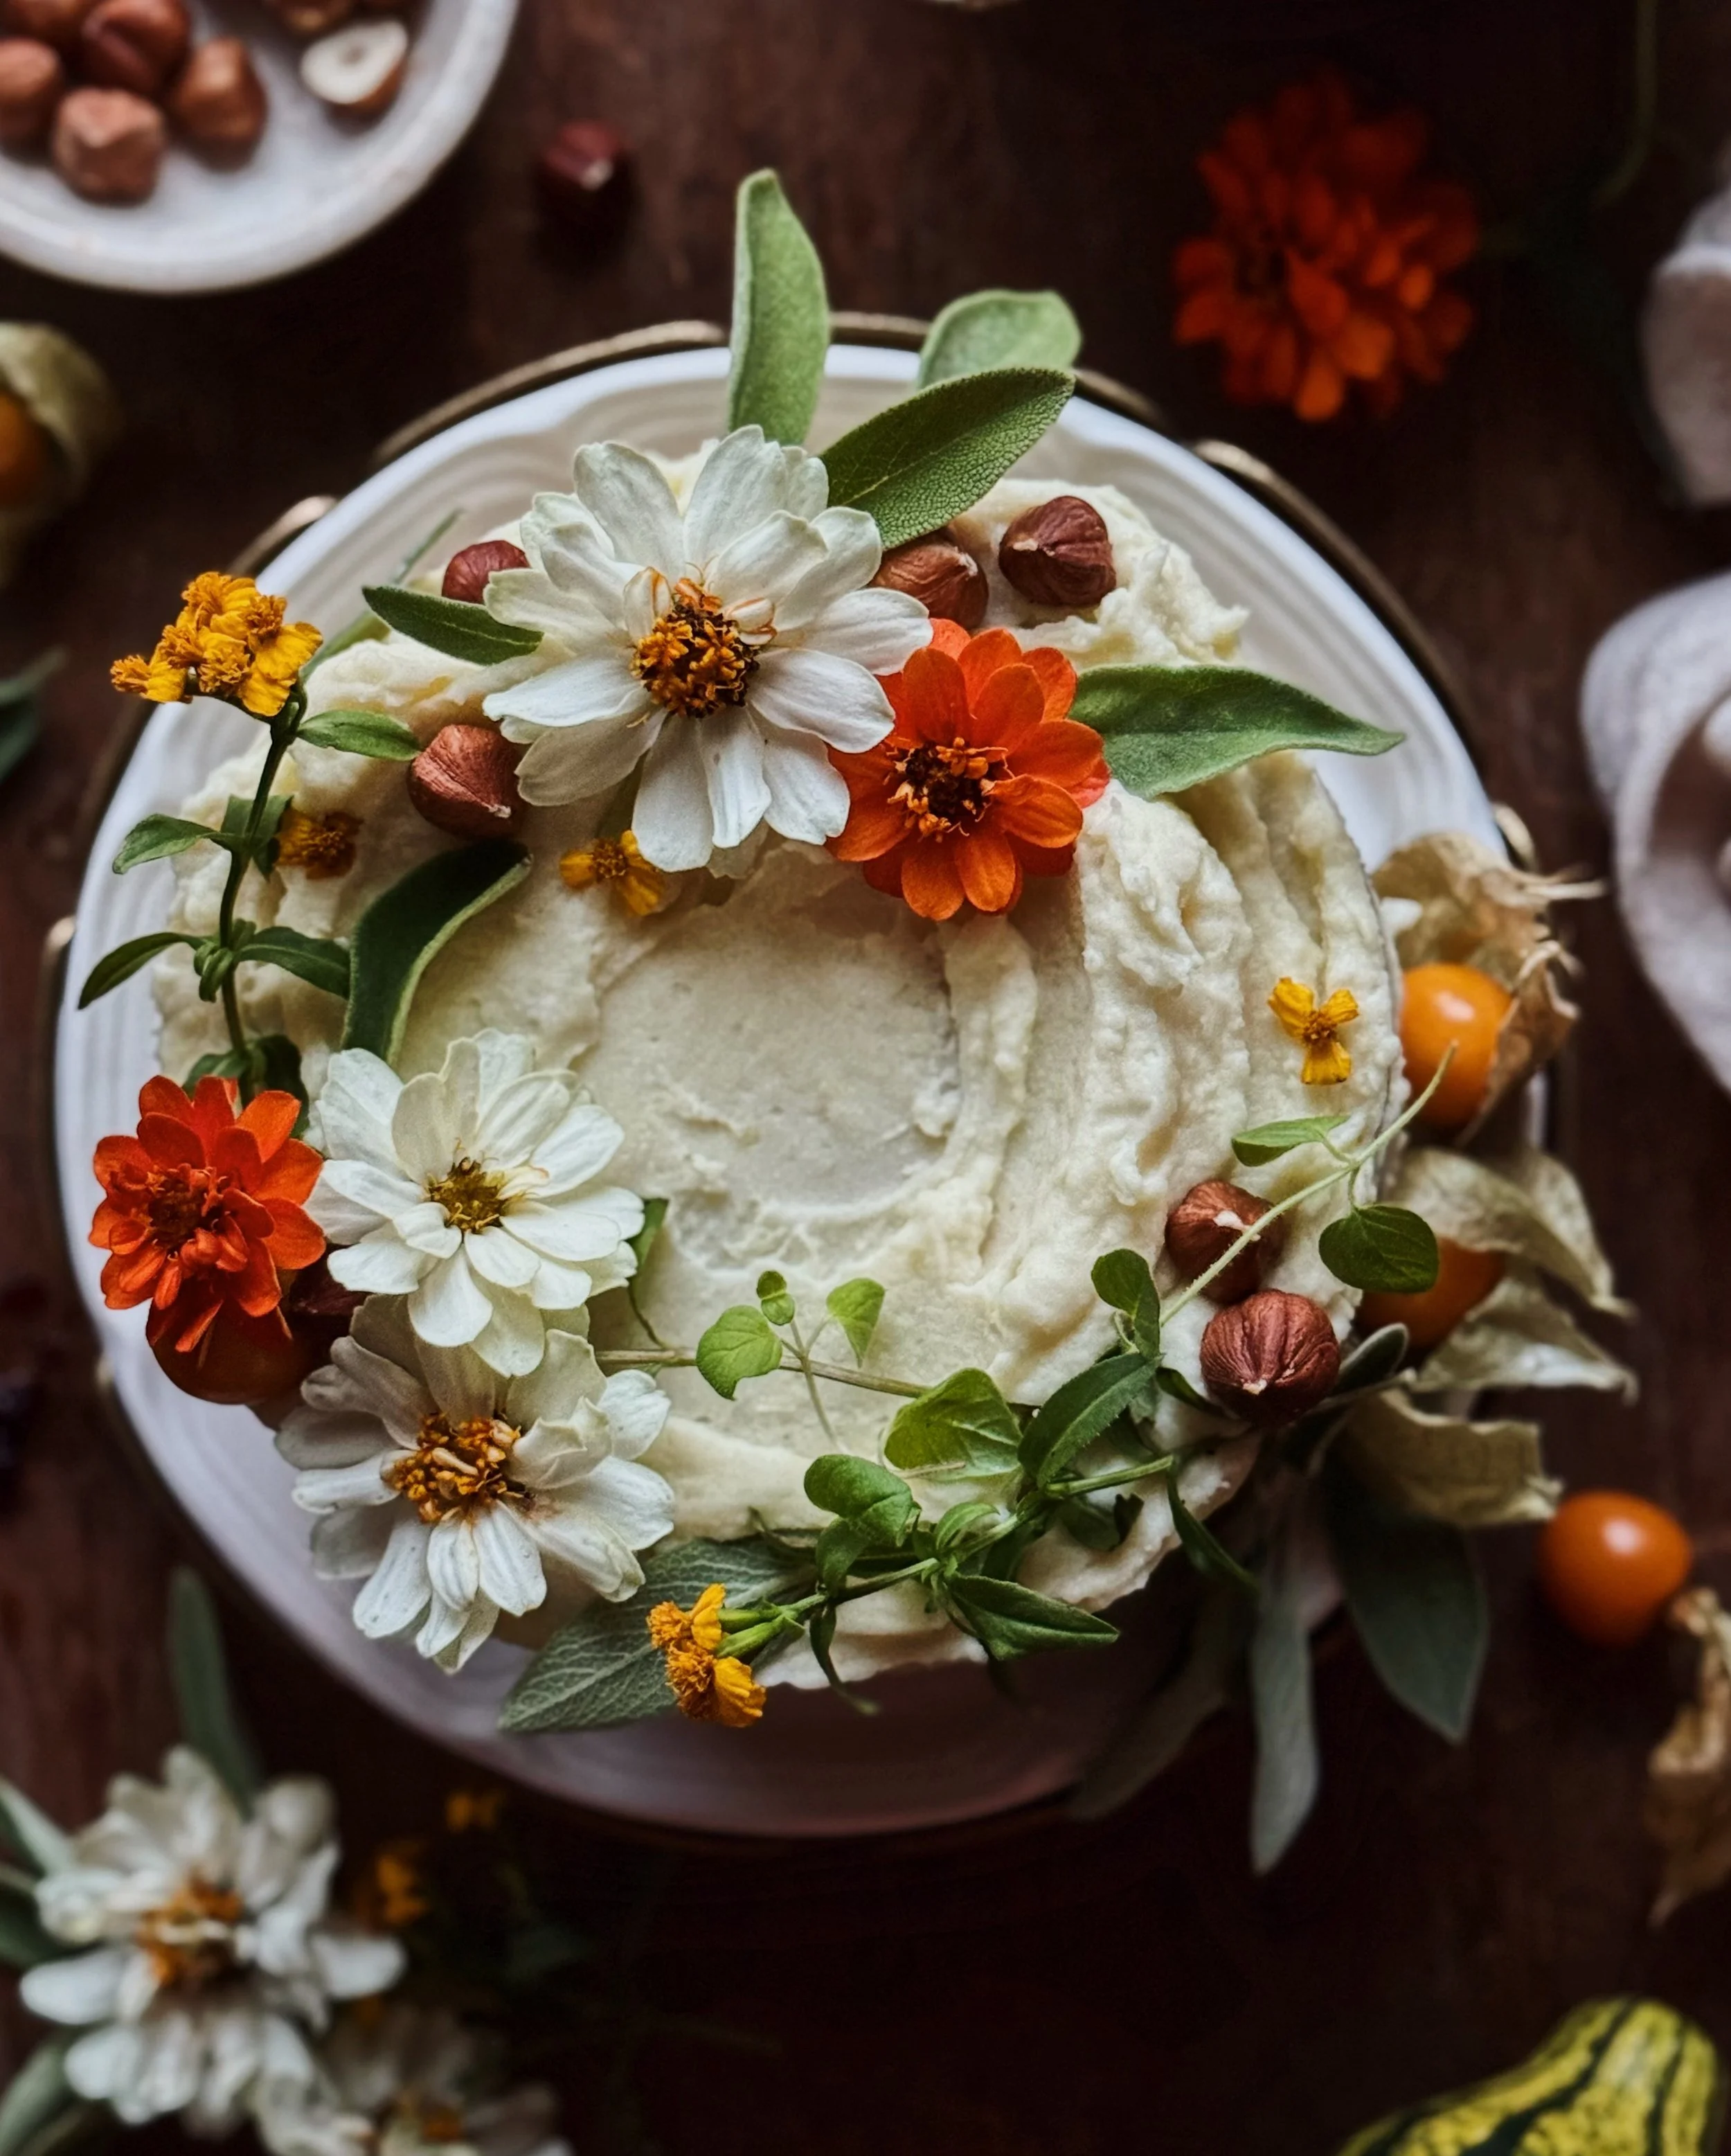
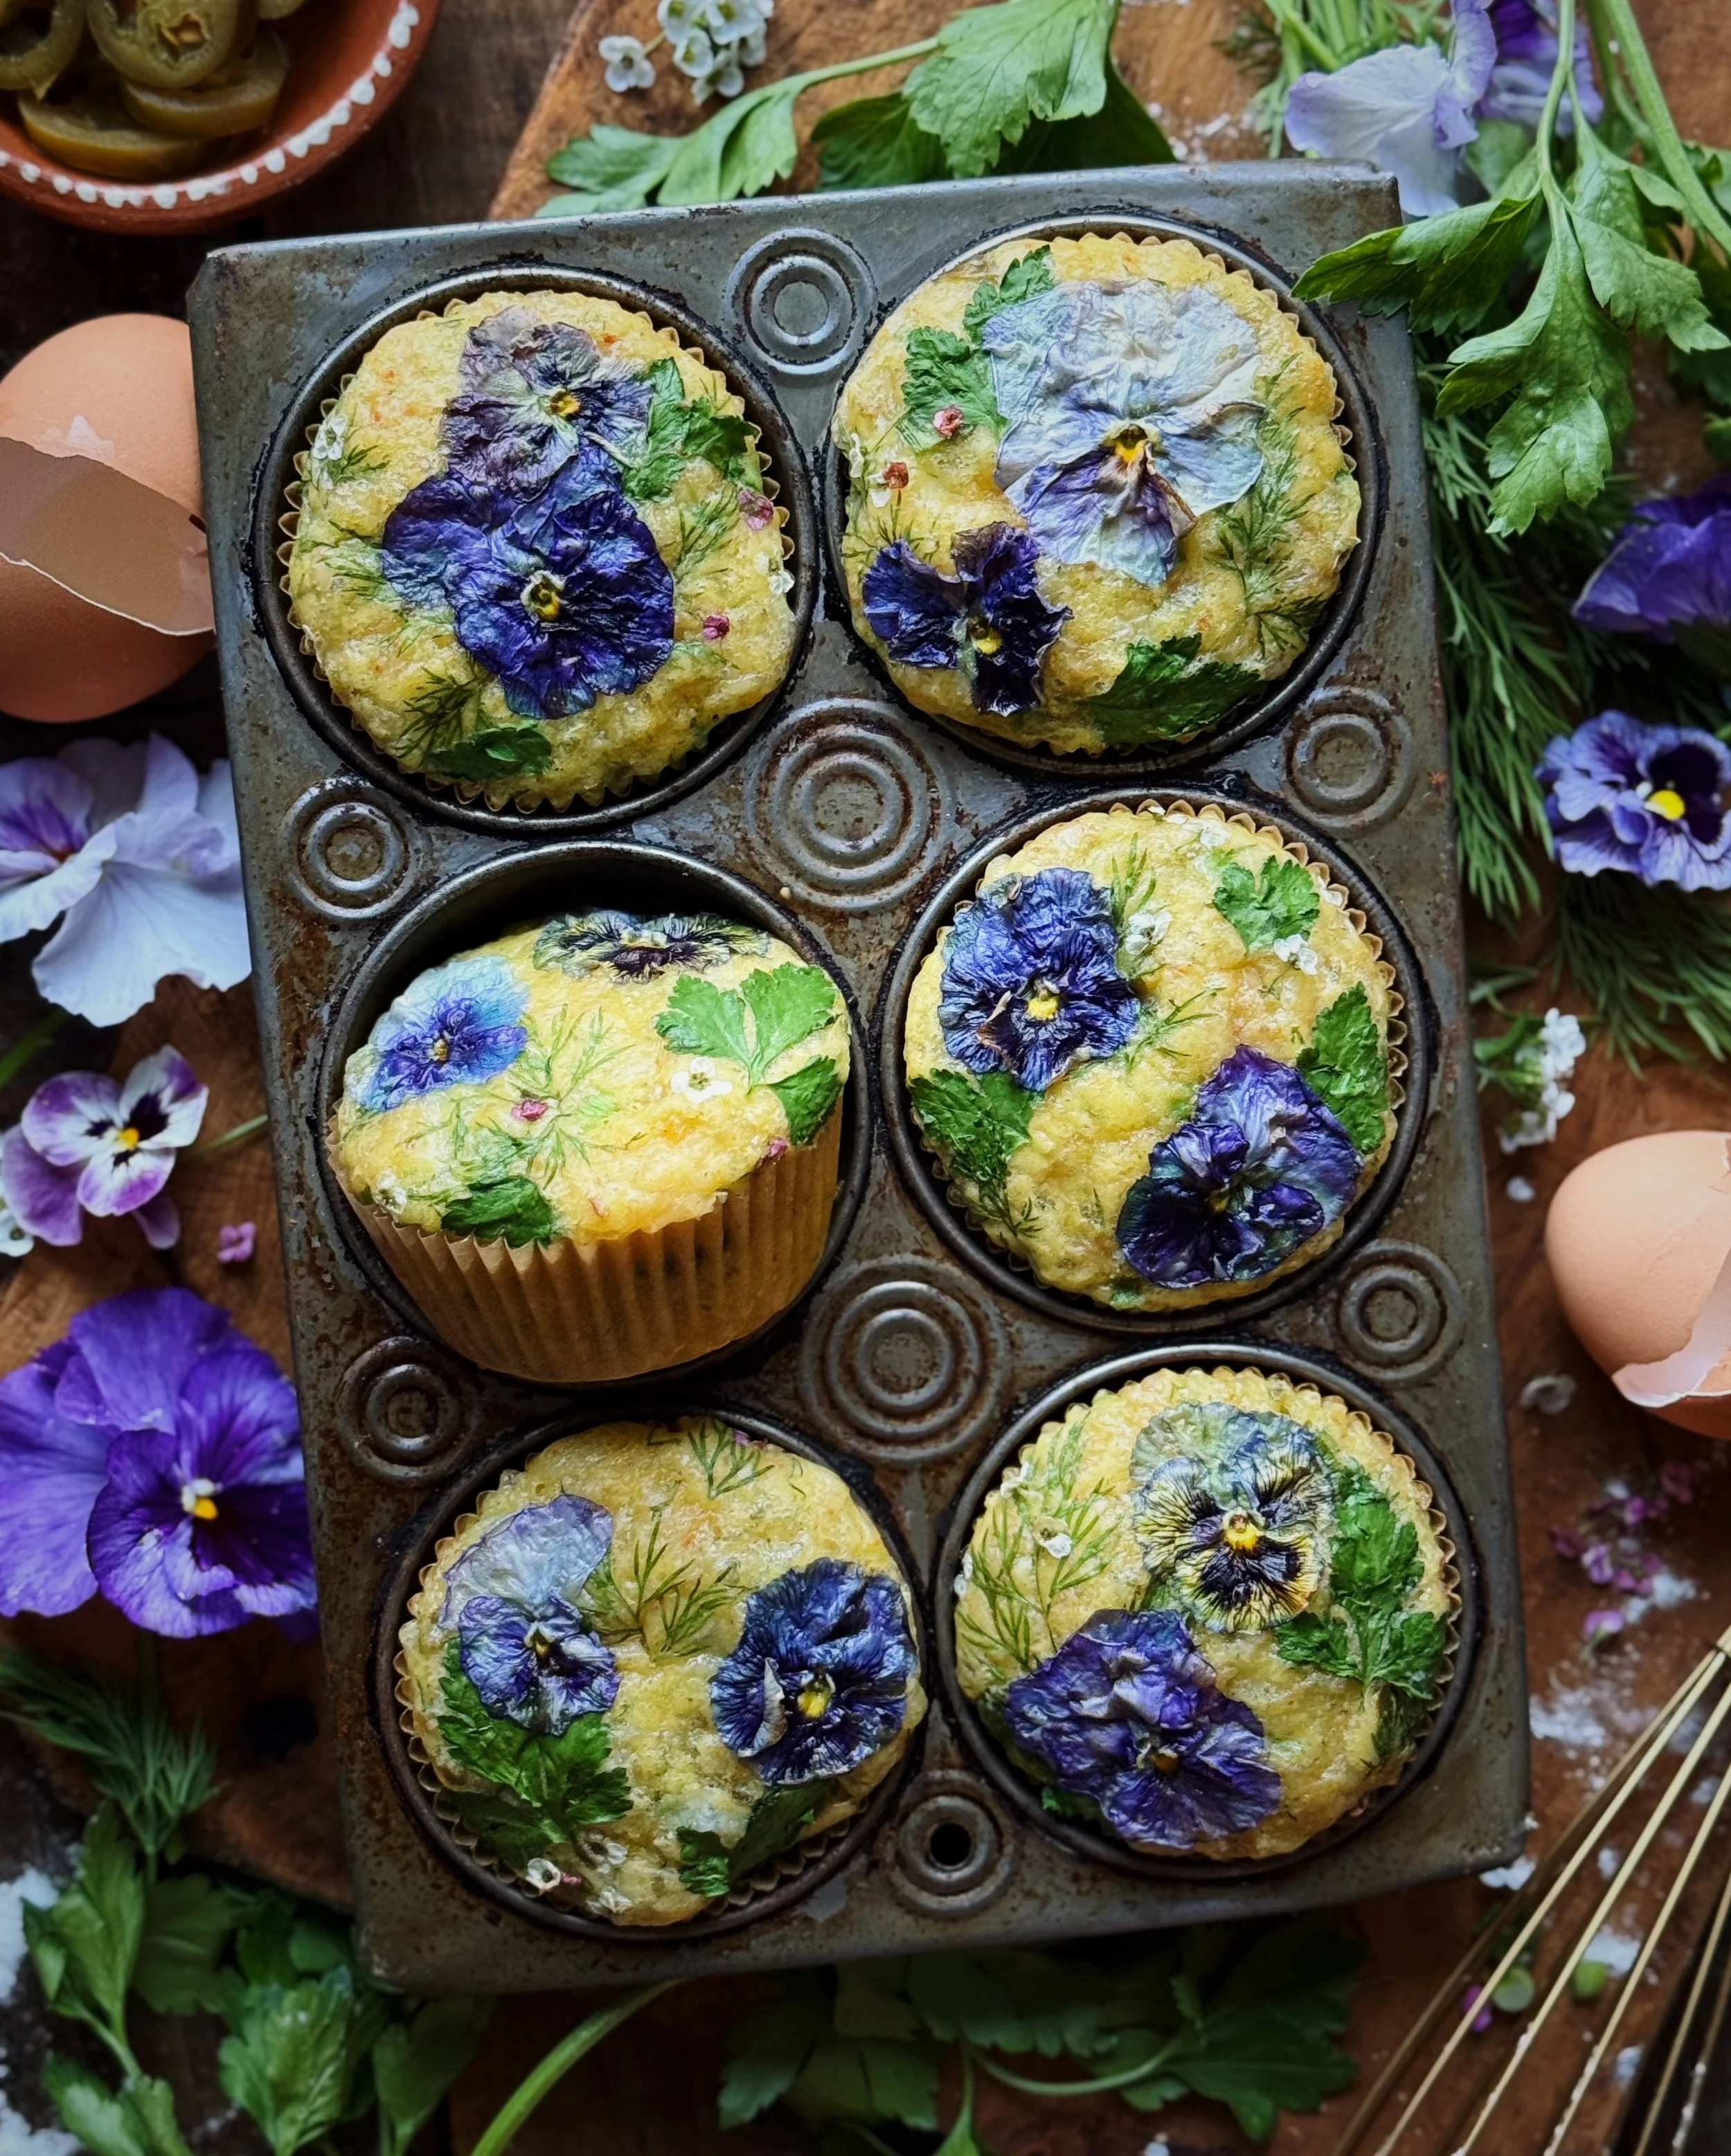
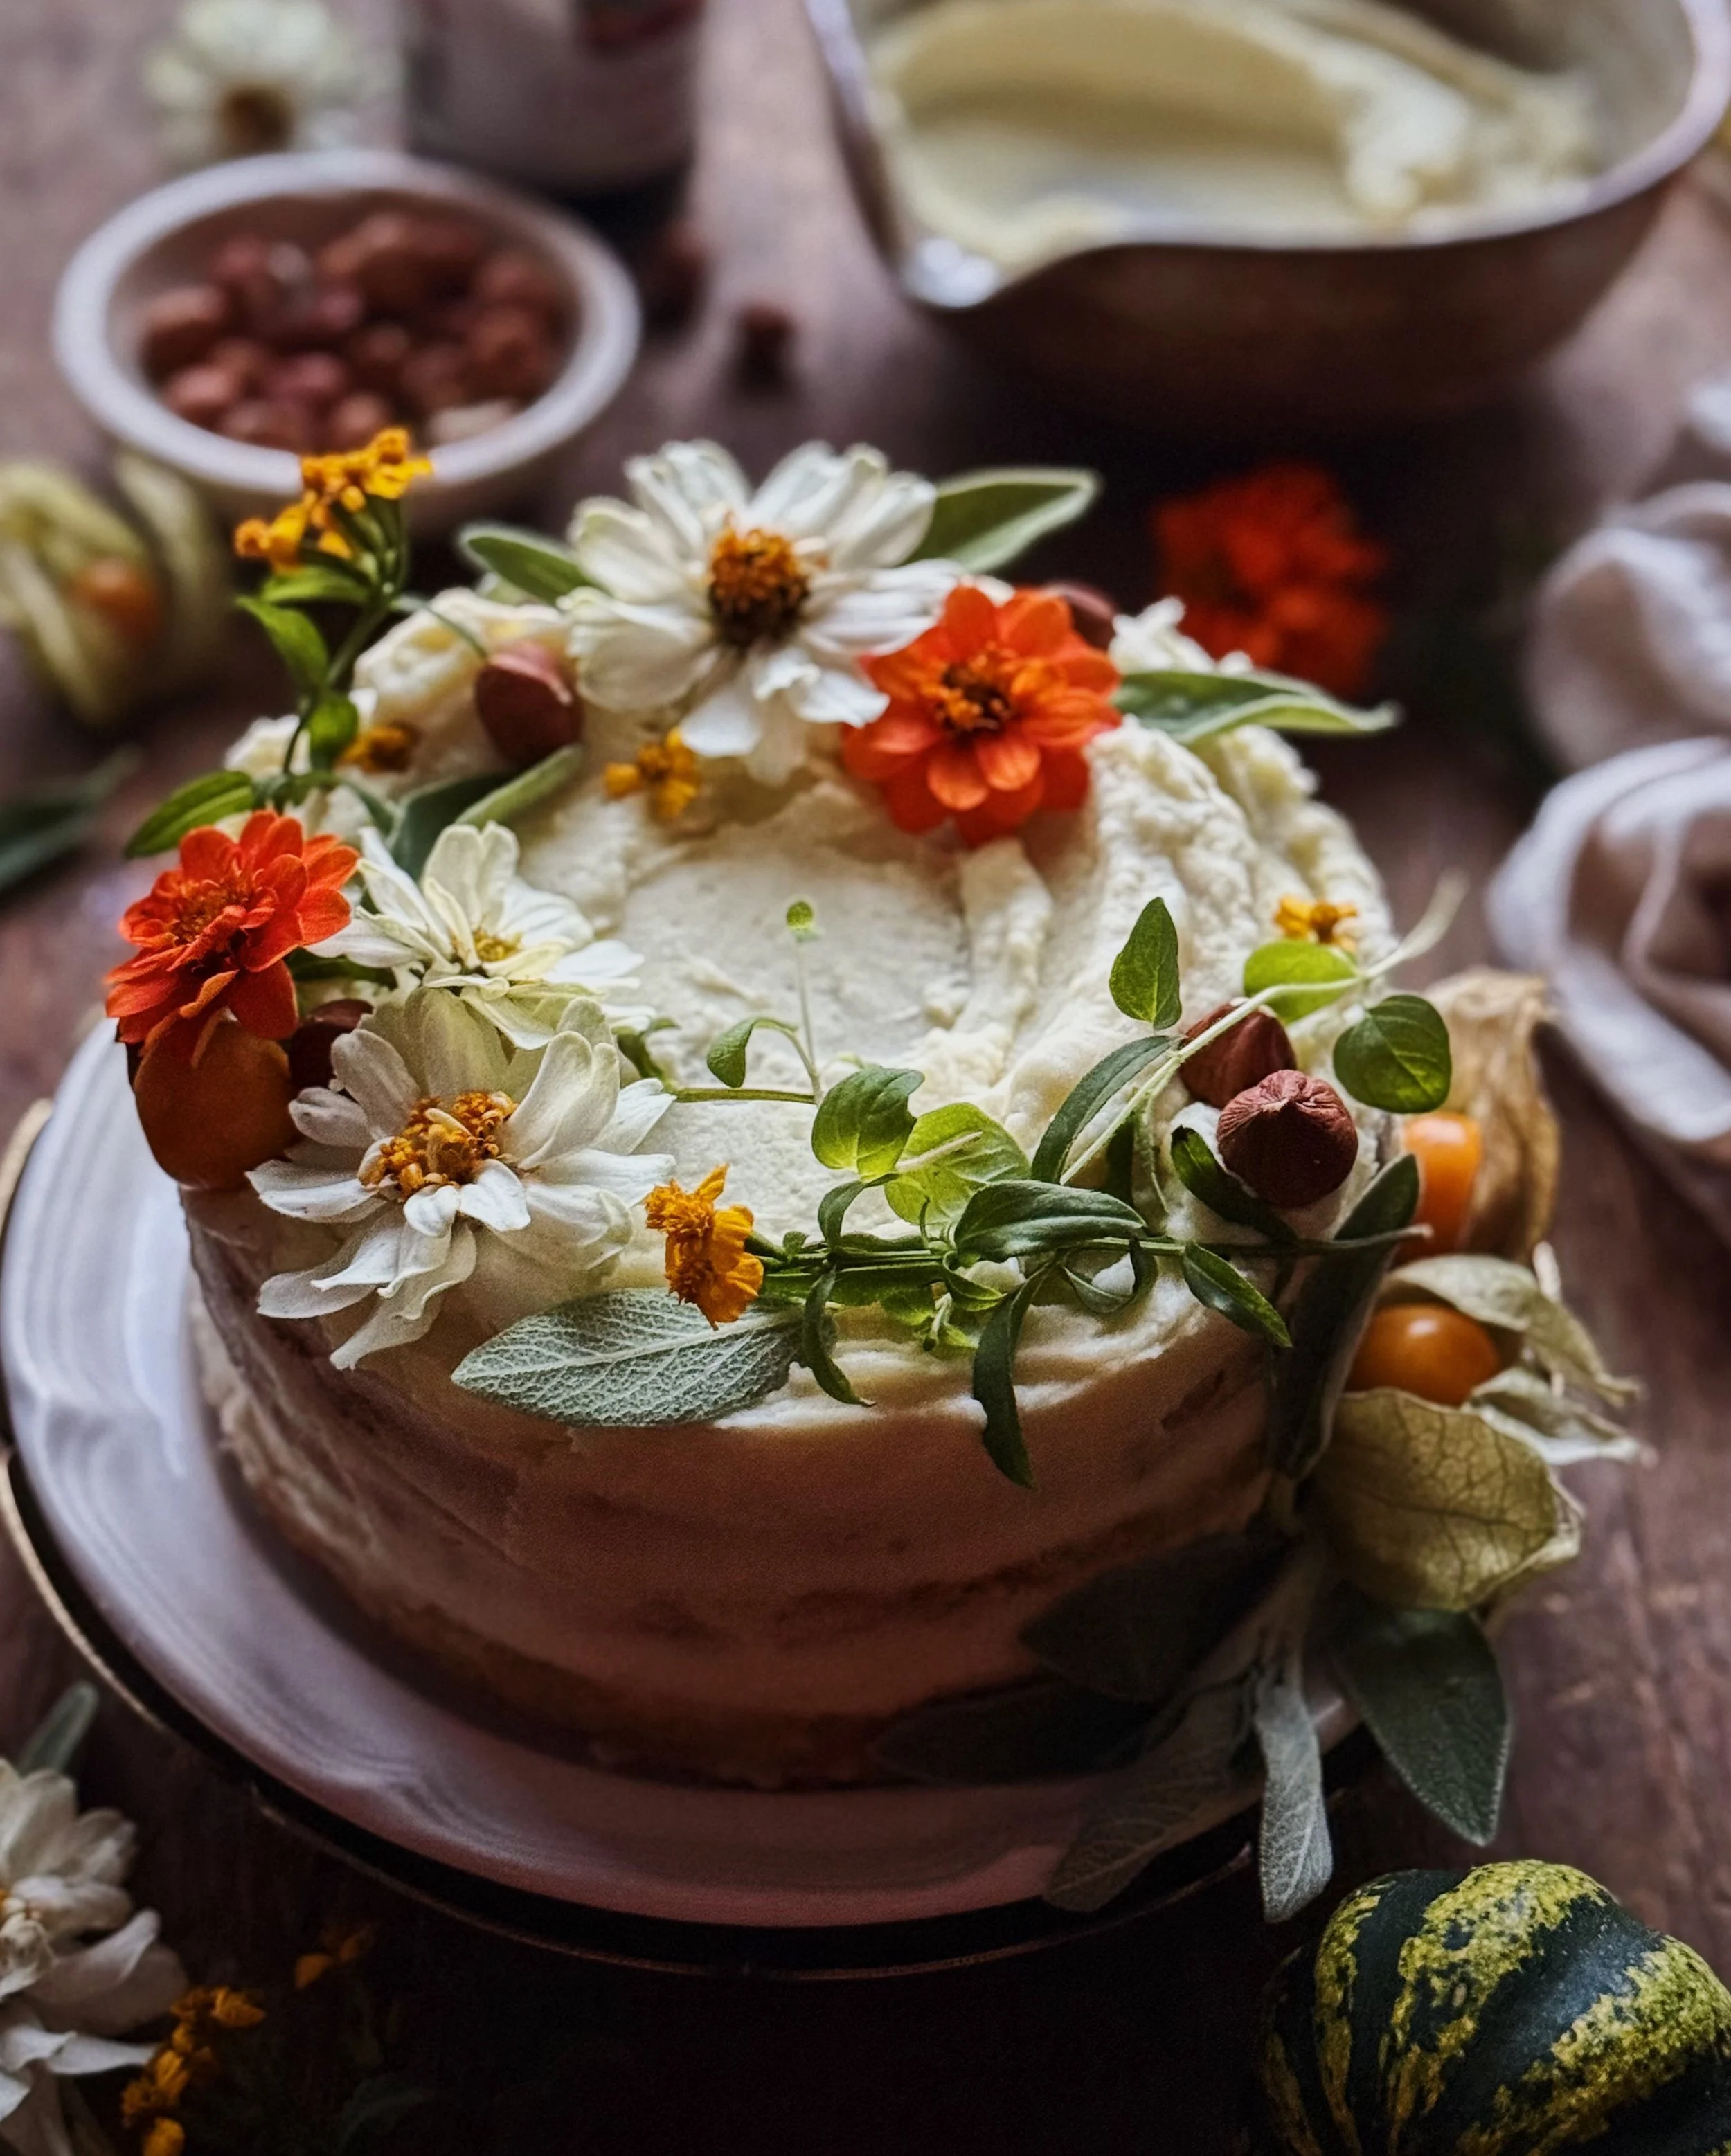
Savory broccoli cheddar cupcakes with cheesy cauliflower frosting, decorated with edible flowers

For this recipe, I partnered with Cabot Creamery to create a savory version of a cupcake! These moist and tender cakes are loaded with broccoli and sharp cheddar and made both flavorful and fragrant with the help of a touch of curry.  Believe it or not, the “frosting” is savory too—it’s actually a smooth cauliflower purée loaded with sharp cheddar!

One of my creative challenges for myself this year is to explore making savory versions of foods that are usually associated with desserts. I’m someone whose taste buds always crave savory flavors over sweet, but I admit that my eyes are so often drawn to the beauty and visual delight of dessert confections. Just looking at a cupcake already brings me joy. But then I realized that there’s no reason for why savory foods can’t get that same visual attention, and that’s exactly what I set out to do with this savory cupcake recipe.

Savory broccoli cheddar cupcakes, frosted with a cheesy cauliflower mash puree
Savory broccoli cheddar cupcakes with cheesy cauliflower frosting, decorated with edible flowers

I’m glad that Cabot Creamery was willing to encourage my crazy idea, as their wonderful cheddars have become a regular tactic for bringing richness and cheesy goodness to my savory dishes. Cabot is a co-operative owned by farm families throughout New England & New York and 100% of profits go back to the farmers, which is another reason to love their stuff. I used their Vermont Sharp Cheddar Cheese in both the cake and frosting components of this recipe, which brought such a nice buttery tang that meant I didn’t even need to use butter in this recipe. With Cabot Creamery’s cheddars having 0 grams of lactose per serving, this savory cupcake recipe was developed with my lactose-sensitive pals in mind, too!

I hope you find these savory cupcakes as joy-inducing as I do! Let’s get into the details about these unique baked goodies and the ingredients you’ll need to make them for yourself.

Chopped broccoli and grated cheddar
Savory broccoli cheddar cupcakes cooling on a wire rack

Notes on the key ingredients for the cakes:

  • Broccoli: I thought a savory cupcake ought to be veggie-forward to make it something that—unlike its sweet counterparts—could be enjoyed throughout the day while getting some nutritional goodness out of it too. For this recipe, I used the very tops of the broccoli florets only and chopped them super fine (as shown in the photo) such that the cakes would have an even and delicate texture throughout.

  • Onion: A must to bring flavor and aromatics to any savory dish, I incorporated onion into my savory cake recipe too. I cut the onion into a fine dice and sautéed it with the broccoli before adding it to my cake batter so that it would basically dissolve into the background and all you would notice is the added flavor complexity from it.

  • Cheddar: For me, cheese is what brings excitement to a savory dish; it’s what makes something ordinary feel rich and indulgent. So in order to make these savory cupcakes feel just as decadent and luxurious as sweet ones, I loaded this cake recipe with lots of Cabot Vermont Sharp Cheddar. Its boldly sharp flavor and smooth consistency are perfect for tying together the veggie and spice components of the recipe. I grated the bar using the standard holes of my box grater for this part of the recipe.

  • Extra Virgin Olive Oil: Inspired by sweeter olive oil cakes, I leaned on a high-quality extra virgin olive oil to keep my savory cakes moist.

  • Oat Milk: In keeping with the challenge to avoid ingredients containing lactose, I used a full-fat oat milk here. You could definitely sub with your favorite nut milks if desired.

  • Curry Powder: This addition is what makes the cake interesting! I just love the combination of curry and cheddar together and I think the curry really takes the flavor profile of these out of breakfast muffin territory and into something more special. I used a Japanese style curry powder which brings a complex blend of spices without adding any spicy heat.

Savory cupcakes made with Cabot Cheddar

Notes on the key ingredients for the frosting: 

  • Cauliflower: I made a cauliflower purée to act as the “frosting” for my savory cupcakes. Boiled cauliflower is easy to get smooth and spreadable in the food processor without adding extra cream and it is also so very foolproof (unlike potatoes that can get gummy if over-handled). I’ve been pretty obsessed with cauliflower lately because it’s light and absorbs other flavors so well. After boiling the cauliflower, you’ll want to squeeze out the excess moisture before adding it to the food processor to avoid your savory frosting being too runny; you don’t want to wring it bone-dry but you do want to give it a good squeeze until water is no longer actively dripping from it. 

  • Leeks: These mild alliums will bring a savory-sweetness to the frosting without overpowering the gentle cauliflower. I used only the white and tender light green parts of the leek for this recipe to keep the frosting smooth as well as neutral in color.

  • Garlic: I added just a touch of garlic to the frosting for savory complexity. A recipe with just one clove of garlic is unusual coming from me, but in this case, it is possible to overdo it; in my recipe testing I tried raw garlic and more cooked garlic and those tests were  too overwhelming for those whipped, light, frosting vibes. Trust me on this one. You’ll want to gently sauté the garlic with the leeks before combining it with the boiled cauliflower.

  • Cheddar: Cabot Vermont Sharp Cheddar is what brings the main flavor here to this frosting. Since the cauliflower’s taste is pretty neutral, it leaves room for the delicious cheddar flavor to shine, so this frosting is very cheesy tasting indeed. I used a grater with small holes to finely grate the bar so that it would incorporate smoothly into the purée.

  • Lemon Juice: This brings some brightness to the flavor of the frosting and enhances the buttery tang of the Cabot Vermont Sharp Cheddar.

  • Extra Virgin Olive Oil: This helps keep the purée smooth and emulsified.

  • Miso Paste: I used a white miso here which is sweeter and milder than other types of miso. It brings an extra umami and saltiness, and it rounds out the savory flavor profile and makes it feel more complete. If you have a different type of miso, I suggest reducing the quantity; if miso paste is difficult for you to source, I recommend just adding a little extra salt, to taste.

Note that this recipe makes more than enough cheesy cauliflower frosting to do a casual coat over the tops of the cupcakes. But if you want to get your piping bags out and pipe a big ol’ swirl, or at least do a nice thick layer that you can decorate with pretty flowers like me, then this recipe will allow for those creative discretions!

Savory broccoli cheddar cupcakes with cauliflower frosting and decorated with edible flowers

How to Make Savory Veggie Cupcakes
with Cheesy Cauliflower Frosting

(Makes 12 cupcakes)

Ingredients for the Frosting

1 head cauliflower, cut into chunks
3/4 tsp kosher salt, divided
3/8 cup + 1 tsp extra virgin olive oil, divided
1 cup leeks (white and light green parts only), roughly chopped
1 clove garlic, roughly chopped
6 oz Cabot Vermont Sharp Cheddar, finely grated
2 1/2 tsp white miso paste
1/4 cup lemon juice

Ingredients for the Cupcakes

2 cups broccoli florets chopped very fine
1 cup yellow onion, finely diced
2/3 cup + 1 tbsp extra virgin olive oil, divided
1/2 tsp kosher salt
2 cups all-purpose flour
1 tsp baking powder
1 tsp baking soda
4 tsp sugar
1/2 tsp garlic powder
1/2 tsp cumin
3/4 tsp Japanese curry powder
4 oz Cabot Vermont Sharp Cheddar, grated
2 eggs, at room temperature
3/4 cup oat milk, at room temperature


Procedure

To make the frosting: Add cauliflower to a pot and cover with water. Add 1/4 teaspoon salt and bring to a boil. Boil until very tender and almost falling apart (about 10-15 minutes). Drain and allow to cool.

Heat 1 teaspoon of olive oil in a skillet on medium-low heat. Add the leaks and season with 1/4 teaspoon salt. When they start to become fragrant, add the garlic. Continue cooking the aromatics, stirring occasionally, until they are tender (about 3–5 minutes).

Squeeze out any excess moisture from the cauliflower and add the cauliflower  to the food processor. Add the cooked aromatics. Pulse until the cauliflower resembles a grain-like texture. Add the miso paste and one-third of the cheddar. Process until the ingredients look combined. Repeat with the rest of the cheese in two more batches. Add the lemon juice and the remaining 3/8 cup olive oil and process the mixture until very smooth, using a spatula to scrape the sides as needed. Transfer the purée to a bowl or piping bag and set aside or, optionally, allow to chill in the fridge. (Note: I found it to be easier to pipe/spread after chilling briefly in the fridge.)

To make the cake: Preheat oven to 425°F. Line a cupcake/muffin pan with paper baking cups.

Heat the skillet again on medium-low heat, with 1 tablespoon of olive oil. Add the onion and salt, and sauté until translucent. Add the broccoli and stir gently, cooking just until it becomes a vibrant green. Remove from heat and allow to cool slightly.

Meanwhile, whisk together the flour, baking powder, baking soda, sugar, garlic powder, cumin, and curry powder in a large mixing bowl. Add the cheddar and mix until it is evenly distributed.

In a separate bowl, whisk together the eggs, milk, and remaining 2/3 cup olive oil until well-combined. Add the cooled broccoli and onion mixture and stir to combine.

Gently fold the wet mixture into the dry one, until the liquid seems fully absorbed and no floury streaks remain. Mixture should be very thick. 

Divide the mixture evenly into the paper baking cups. Bake at 425°F for 5 minutes, then reduce the oven temperature to 350°F and continue to bake for 15–17 minutes, or until an inserted toothpick comes out clean. Leave the cupcakes in the pan for an additional 3 minutes to set before transferring to a cooling rack.

Once the cupcakes are cool enough to handle, they can be frosted and decorated as you wish! (The photos show the cupcakes decorated with nasturtium, wild radish flowers, and thyme.)

Thank you so much to Cabot Creamery for sponsoring this recipe! Visit their website to find out where you can get their delicious cheeses—which are naturally-aged and have 0 grams of lactose per serving—near you!

Recipe: Easy Tomato Soup

tomato soup with grilled cheese croutons

As much as I wish it did, soup season does not correspond with tomato season. But it turns out, that’s okay! Because my favorite recipe for tomato soup—one that tastes rich and velvety without any cream and is full of tomato flavor—uses canned tomatoes! Reliable and super-duper easy to make at any time of year, all you need is good canned tomatoes, a blender, and a few other basic ingredients to make that classic tomato soup that goes oh-so-well with a good grilled cheese sandwich (or topped with grilled cheese sandwich croutons)!

Blender soups are obviously my favorite soups to make because they are just so damn easy. And for this recipe, there is something about the onions and butter getting blended together that gives this tomato soup a great creamy texture without pushing the soup into bisque territory. And with a touch of my secret ingredient—fish sauce—to bring some extra umami, it will taste like this soup simmered in a grandma’s kitchen all day when it really takes hardly any time at all to make.

Here are the ingredients you’ll need to make my recipe for this easy tomato soup:

  • canned tomatoes: I’ve made this with various brands of canned tomatoes and I am always happy with the results but I will usually go for the San Marzano or San Marzano style tomatoes because they are more dense and have a better tomato flesh to seed ratio. Also note that tomatoes that are packed in puree or a thick puree-like tomato juice will obviously render a thicker, more flavorful soup that the ones where the tomatoes are packed in water. This means you will have to adjust the water-to-tomato ratio a bit as you make the soup, to get the consistency that is to your liking. (After watching this in-depth review of canned tomato brands by Ethan Chlebowski, I typically get the brand Cento.)

  • butter: Salted or unsalted is fine. Since canned tomatoes typically come with a considerable amount of salt, there’s not need to fuss over whether your butter has salt in it or not either. This is a recipe where you are going to want to taste for seasoning while you go.

  • onion: If I’m lucky enough to find sweet onions at the grocery store, I like to use them when making this soup. But I’ve also made this with regular red onions or yellow onions; any of these will do perfectly well here.

  • garlic: Gotta have a little garlic in tomato soup! I usually do about 6 cloves because I love garlic.

  • fish sauce: The (not so) secret ingredient! I add fish sauce to any tomato-based soup or sauce I make because I think it really adds an extra depth of flavor and brings out the tomato-y flavors. It will not taste fishy but it will taste delicious.

This soup may be amazingly easy to make but it’s also quite presentable with the help of some little finishing touches. Look at what a glorious blank, vibrant red canvas awaits you below! Some leaves of fresh basil, a drizzle of good olive oil, some cracks of black pepper, or even a little swirl of crème fraîche would make this soup as a much a treat for the eyes as the taste buds.

If you wanna get really crazy, make your favorite version of a grilled cheese and cut it up into little cubes to top your tomato soup with grilled cheese croutons. For the image at the top of this recipe, I made mine with sourdough, white cheddar, gruyere, and a drizzle of sriracha, and used herbed butter to toast/fry it up in the pan.

Note: This recipe makes 2 generous portions that are enough for meals in my household when paired with grilled cheese sandwiches.

easiest tomato soup

How to Make Easy Tomato Soup

Ingredients

4 tbsp (1/2 stick) butter
1 medium onion, peeled and cut into rough wedges
4–6 garlic cloves, smashed and peeled
28 oz can of whole peeled San Marzano tomatoes
water
1/2–2 tsp fish sauce (or to taste)

Optional Garnish Ideas

fresh basil leaves
cracked black pepper
chives
crème fraîche
extra virgin olive oil
parmesan cheese
grilled cheese croutons

Special Equipment

blender

Procedure

In a Dutch oven or study medium-sized pot, gently melt butter on medium-low heat. Add onions and sweat them until they start to become translucent. Add garlic and turn heat down to low, stirring regularly until it becomes fragrant and loses its raw bite but doesn’t brown. Transfer to a blender.

Add the can of tomatoes, including the liquid/puree. Fill the can a quarter of the way with water (about 7–8 ounces) and slosh around to incorporate any remaining tomato residue from the can; add this to the blender as well.

Set the blender to liquify all the ingredients together then return everything to the pot on low heat. If the soup seems too thick, add a small amount of water at a time to get the desired consistency.

Stir in 1/2 teaspoon of fish sauce and then taste for seasoning. There’s a possibility that if you had a lot of salt in your canned tomatoes and/or you used salted butter so you won’t need to season any further. If needed, continue to add fish sauce, a little bit at a time, until the seasoning is to your liking. You won’t need to cook down this soup much after it comes out of the blender, so be sure to taste it at that point and add seasoning to your preference.

Keep the soup on low heat, stirring occasionally, until it’s hot all the way through and starting to bubble or simmer. At this point, it’s ready to serve. Top with your desired toppings and enjoy!

Recipe: Rosemary Honey Butter Dinner Rolls

These pull-apart dinner rolls are fluffy and puffy and soft, just like every good dinner roll should be. But these are no ordinary good dinner rolls! First of all, they are so fragrant from being loaded with fresh rosemary. But additionally, they’ve got a special secret hiding underneath them—sticky, gooey, delicious bottoms where they’ve been baked in a pool of honey butter.

I got the idea of making a savory, rosemary flavored, slightly-sweet baked goodie from Panadería Rosetta in Mexico City. Their bollos de romero were life changing—savory, just a little sweet, and with a beautiful rosemary flavor. I knew I could never replicate this magic at home but I was determined to create a more simple recipe that would be easy to make without a lot of fuss and, when eaten, would at least have enough essence of Rosetta’s bollos to satiate those hungry memories.

I started testing this recipe in 2022, and did a version with some cute Christmas decorations, as seen below. When I posted them on Instagram I guess they sorta went “viral”; or at least it was my most liked post by a landslide. But the rolls I photographed then were not the recipe that I wanted them to be, so I was pretty bummed to not have something to share with others. I really lost momentum with recipe testing after that, and didn’t pick it back up until almost a year later. This time around, I am very pleased to be able to share with you all a recipe that I am very proud of, for delicious dinner rolls that are exactly the way I wanted them to be.

If you have ever had a cinnamon roll or sticky bun with a gooey bottom that’s soaked up a bunch of syrup, these have that same kind of wonderful stickiness on the bottom but they are way way less sweet. The rest of the bun is savory and herbaceous, so they definitely still function as a dinner roll for a festive holiday table but are also plenty good on their own. I brought them to my brother-in-law’s house for Thanksgiving last week, and they got warm praise from grandmas and teenage boys alike, which is why I am so confident in this recipe now!

Notes about the ingredients

  • Please use good clover/flower honey. The flavor of the honey is really noticeable here, since there is quite a lot of it for the sticky bottoms. So use one you like. Do not use makuka honey or that thick spreadable light colored stuff. You want the good old fashioned stuff.

  • Use good butter. Do not substitute with some kind of fakey crap.

  • Use fresh rosemary, not dried. You don’t want to be stabbing your gums or crunching on bits of dried rosemary here, and plus I’ve never tested it with anything but fresh. Leave out any hard or woody bits. You just want the tender leaves here.

Some Notes about Decorating Your Dinner Rolls For the Holidays

Decorating these dinner rolls is honestly completely unnecessary. I have to do it for the ‘gram, otherwise you probably wouldn’t be here reading this blog post right now. But decorating is also fun, and gives these a little extra charm if you are looking to impress someone (though I think the taste is already impressive enough). Here, I will answer some common questions I received about this decorating technique using dill, parsley, carrot fronds, and pink peppercorns:

  • Can you taste the dill?: I personally cannot if the dill is just coming along with a normal bite, and I think I have a pretty good sense of taste. The amount of dill is so negligible compared to the flavors that the roll intends to be (honey, rosemary, fluffy bread) and I really think it loses some of it’s dilliness when it bakes, so I don’t think you’re getting a hit of dill unless you pick off all the dill on the whole batch and eat it plain. But if you hate dill that much, fennel fronds could be a good alternative!

  • Are you really eating whole peppercorns? Yikes!: So, to every person who made a comment like this, I asked them if they have ever had PINK peppercorns before and guess what? The answer was always no. Look, pink peppercorns are very different from the black peppercorns that people are much more familiar with. Pink peppercorns have a nice fruity flavor and they are much smaller and they are delicate and easy to chew, especially after baking. They are not “spicy” or intense like black peppercorns. Just as every type of chili pepper tastes vastly different, people shouldn’t really assume that all peppercorns are exactly the same. I thought that they added a great spice (NOT spicy) note to the rolls.

  • How do the herbs stay green and pretty after baking?: As with any time you use fresh herbs to decorate a baked good, moisture is the key. Use soft, flexible leaves. Brush a bit of honey butter on the dough to act as glue. Gently press them onto the surface of the dough so that they are fully in contact with it; anything sticking up will likely shrivel from the heat of the oven. Then, give them another coat of that honey butter to help lock in the moisture.

You could do this type of decoration with dill, parsley, and pink peppercorns on any dinner roll or bun recipe, really. But I do hope you’ll try this one.

This recipe was adapted from Ariel Lee’s Cheesy Everything Buns recipe, which I also love.

How to Make Rosemary Honey Butter Dinner Rolls

Ingredients for dough

1 cup warm milk or barista style oat milk
1 1/2 tsp dry instant yeast
1 tbsp honey
2 3/4 cup bread flour, plus a little extra
2 tsp kosher salt
2 tbsp unsalted butter, melted and cooled
1 egg, beaten
4 tsp fresh rosemary leaves, finely chopped

Ingredients for Honey Butter Sauce

2 tbsp unsalted butter
1/2 cup honey

Ingredients for finishing touches

flaky salt
fresh herbs such as sage, thyme, parsley, and dill (optional)
pink peppercorns (optional)

Procedure

Make the dough. Place milk, yeast, and honey in the bowl of a stand mixer and stir gently to dissolve the yeast. Let stand until the yeast starts to bloom (about 5 minutes).

Fit stand mixer with a dough hook. Turn the stand mixer on to the lowest setting (speed 1) and gradually add flour. Add salt and butter and once those are slightly incorporated, add egg and rosemary. Scrape everything to the bottom of the bowl and turn the stand mixer up to the medium setting (speed 5). Knead for about 5 minutes so an elastic dough forms, pausing as needed to scrape the contents of the bowl back down to the bottom. (If the dough still feels very sticky, add an additional teaspoon of flour at a time, kneading in each time, until the dough feels smooth and elastic.)

Roll the dough into a taut ball and return to the bowl (you shouldn’t need to grease it). Cover dough with a damp tea towel or plastic wrap and place in a warm spot. Allow to rise until doubled in size, about 1 hour.

Line a 7x11-inch (2 quart) baking dish with parchment paper.

Make the honey butter “sauce” by adding the butter to a small saucepan and melting on low heat. Once the butter is melted, whisk in the honey. Continue whisking on low heat until the consistency is runny and homogenous.

Preheat oven to 350°F.

Pour about three-quarters of the sauce into the baking dish and smooth out to an even layer. Divide risen dough into 12 equal pieces and shape into tight balls. Arrange balls evenly in the baking dish. Cover with plastic wrap and let rise for a second time, for 30 minutes.

If decorating: Brush tops of dough balls with some of the remaining honey butter; note that you may need to reheat the honey butter on low heat to get it to be brushable. Decorate as desired; make sure the herbs come in full contact with the surface of the bun to preserve their color and shape. Brush more honey butter on top.

If not decorating: Reheat the remaining honey butter if needed to get it to a brushable consistency. Brush tops of the rolls generously with honey butter.

Sprinkle a small amount of flakey salt on top of each.

Bake for 25–30 minutes or until golden brown and bubbly.

Chinese Sticky Rice Stuffed Mini Pumpkins

mini pumpkins stuffed with sticky rice

This is a great way to use all those cute mini pumpkins you bought as fall decorations and turn them into a fun fusion side dish. I know you’re gonna ditch them for Christmas decor soon anyway so you might as well fill them with savory satisfying sticky rice, sweet Chinese sausage (lap cheong), and umami-rich salted egg yolks.

If you’ve had the lotus leaf bundles filled with sticky rice at dim sum places, that is lo mai gai. Gai means chicken. This recipe is inspired by the dim sum classics but with a couple of differences: there’s no chicken to fiddle with, so the recipe is a lot more foolproof, and instead of wrapping the rice mixture in lotus leaves and steaming the bundles to give the glutinous rice its addictive, sticky texture, the rice is stuffed into raw mini pumpkins! As the pumpkins roast in the oven, the rice gets treated to a cozy steamy environment that gets the same job done. (Note that you will still need a bamboo steamer setup for the first round of cooking the rice.)

I just winged it when I made the rice mixture for these, but I have attempted to capture the necessary info below for you to replicate this idea yourself. This dish is super flexible, and the great thing about making it at home is that you can adjust it to your own tastes! I, for one, am always bummed that there’s only like one little piece of sausage and not enough salted egg yolk when I order lo mai gai, so I included way more here.

Some notes about the ingredients:

  • sticky rice: This is an Asian short-grain rice that is often labeled glutinous rice. (It does not contain gluten!). It’s quite firm and starchy so you’ll want to soak it overnight and wash it thoroughly before using.

  • lap cheong: This is Chinese cured sausage with a slight sweetness and visible fatty bits. I like the brand Kam Yen Jan.

  • dried shiitake mushrooms: You will need to soak these for a few minutes before they can be sliced.

  • salted egg yolks: I buy these ready-made in a vacuum-sealed pouch at the Asian supermarket.

  • mini pumpkins: All roasted pumpkins are safe to eat! But they definitely vary in texture and flavor. Play around with what you have and make note of what you liked best for next year! If using pumpkins that you’ve had lying around since fall began, be sure to check that they are still unblemished and un-moldy.

Please note that measurements below are estimates. Taste along the way and adjust to your preferences!

Awkwardly Vague instructions for Chinese Sticky Rice Stuffed Mini Pumpkins

Ingredients

1 cup glutinous rice
1–2 tbsp shaoxing wine, or to taste
1–2 tbsp light soy sauce, or to taste
1/8 tsp white pepper
1 tsp kecap manis (optional)
1 large dried shiitake mushroom
2 Chinese sausages (lap cheong), cut on a bias into 1/8-inch slices
about 4–5 salted egg yolks
1–2 scallions, chopped, whites and greens separated
2 water chestnuts, thinly sliced (optional)
about 4–5 mini pumpkins, gutted and seeded
neutral oil (like peanut or avocado)
kosher salt
thyme, for garnish (optional)

Procedure

The night before, leave the glutinous rice to soak in regular water. The next day, transfer the rice to a fine mesh colander and rinse, using your hand to agitate the rice, until the water that comes out is noticeably less starchy.

Get your bamboo steamer setup ready. Pour rice into the middle of a large sheet of parchment paper. Double up the paper if needed. Drizzle 1 tablespoon of shaoxing wine over the rice. Fold up all the sides around the rice to form a bundle that you can place in the bamboo steamer. Steam rice for 20 minutes.

While the rice is steaming, soak the shiitake mushroom in boiling water for 10 minutes, or until soft. Discard tough stem and slice the cap thinly.

Preheat oven to 400°F.

When rice is cool enough to handle, transfer to a mixing bowl. Add 1 tablespoon soy sauce, white pepper, and kecap manis. Taste and adjust seasonings as needed. Add sausage, scallion whites, water chestnuts (if using); mix together.

Brush oil all over the pumpkin bases and lids and season flesh with kosher salt. Place on a foil-lined baking tray. Fill each pumpkin with rice mixture then push a salted egg yolk into the middle. Place matching pumpkin lids on top and bake pumpkins for 40 minutes or until tender.

Fluff up rice. Optionally, you could remove the egg yolk and crumble it on top. Garnish with remaining scallion greens and, optionally, thyme.

When enjoying, be sure to scoop the tender pumpkin flesh and eat it with the rice!

Recipe: Cheddar Tart with Beets and Fall Squash

savory fall tart

For this recipe, I partnered with Cabot Creamery to create a cheesy tart that would be lovely to serve at fall gatherings. This tart features Cabot Seriously Sharp Cheddar in two ways: a snappy cheesy rosemary shortcrust that smells so good when it’s baking in the oven, as well as the filling that goes inside it, which is a flavorful layer of a cheddar and almond spread reminiscent of an old-school party staple, the cheese ball. This smoky, tangy, creamy filling helps to hold in place the topping for the tart—marinated roasted beets and honeynut squash that have been thinly sliced and rolled into rosettes. The edible bouquet in an autumnal palette is likely to impress your guests; but the great thing is, so much of it can be made ahead!

cheese ball spread with cheddar and almonds

When I was a kid, I remember being completely wowed by the flavor combos from those cheese balls covered in nuts that would always be present at holiday parties with my parents’ friends. So, the filling in this tart is a tribute to that combo. It’s indulgently creamy and tangy from the Cabot Seriously Sharp Cheddar, super savory, a little smoky with the addition of paprika, and has such a satisfying texture thanks to the inclusion of sliced almonds. 

I think I loved that combo so much because back then, my family did not keep cheese around very much in our fridge. In fact, up until probably middle school, I thought that the powdery stuff in the green can and the plasticky American cheese slices were the only cheeses that could be purchased directly for cooking at home. That’s why it still makes me so excited that, as a grown-up, I can now get Cabot Creamery’s delicious naturally-aged, rich-flavored cheddars to cook and bake with to my heart’s content. Cabot is a co-operative owned by farm families throughout New England & New York and 100% of profits go back to the farmers. Having access to such high-quality cheeses with that level of freshness would’ve rocked Kid Me’s world. Now, being able to make my own cheese spread at home, just how I like it, brings me so much joy—and I hope it does for you, too!

Here’s what you need to know about the key ingredients for making my Cheddar Tart with Beets and Fall Squash:

  • Cheddar: The cheddar gets used in both the crust and the filling, so it’s gotta be a great one. I used Cabot Seriously Sharp Cheddar which is so good for those of us cheddar lovers who enjoy an intense, sharp flavor. I always like to go for their cheese bars and grate the cheese fresh right before I need it.

  • Butter: Cutting the butter into cubes and freezing it is a major contributor to keeping the crust snappy and buttery without feeling greasy. I used Cabot Salted Butter for this recipe to bring extra rich savoriness to the tart shell.

  • Vodka: Using vodka instead of water to bring the crust ingredients together is my other trick for keeping the tart shell super crispy! I have tested this crust recipe with just chilled water and I do not recommend this substitution.

  • Beets: For this recipe, whole beets are first roasted until tender. The skins come right off after roasting. Then, the beets need to be chilled so they can easily be sliced into thin “petals” with a mandoline. The slices get marinated in a simple, bright vinaigrette before being rolled into rosettes. The autumnal colors of this tart are achieved by roasting 1 red beet and 3 golden beets together. The red beet slices are a deep maroon, while areas of the golden beets that come in contact with the red beet become a more vibrant red shade. To keep some slices at their natural bright golden color, keep them separated from the red beet.

  • Squash: I used a honeynut squash for this recipe but butternut squash would work just as well. Unlike the beets, I peeled and sliced the squash before roasting. Keep the squash slices separate from the red beet if you want them to stay solid orange.

This recipe is great for gatherings because much of it can be done the night before. In fact, it is even recommended that you get the components prepped well in advance, for an easy low-key assembly when you are ready to serve.

Considerations for prepping ahead:

  • For best results, make your pastry dough the night before and let it chill, molded into the tart pan, overnight. Then all you have to do is pop it in the oven the following day.

  • The cheddar and almond filling can be made the night before and stored in a sealed container in the refrigerator. The day-of, just take it out and allow it to come to a spreadable consistency while the tart shell bakes.

  • The roasted beets need to be chilled slightly in order to be sliced by the mandoline, so do plan ahead for this. I recommend doing all the prep for the beet and squash rosettes ahead of time. I used a mini muffin tin to hold the rosettes together before I arranged them all on top of the tart filling. You could do this the night before so the rosettes are ready to just pop onto the tart before serving!

If you need an additional shortcut:

  • This tart can be simplified by using a ready-made pie dough for the crust. The overall flavor of the tart will be less complex and less cheesy but there is still a lot of flavor in the cheese and almond filling and the roasted veggie topping. If you choose to pursue this shortcut, mold the pie dough to the tart container and then follow the package instructions to fully bake the crust before following the recipe for filling the tart.

One thing that can be scary about baking for guests is that a lot can happen in an oven! You put your lovingly-prepared dough, batter, or pastry in but you can’t truly be certain what it will look like coming out. This is why I like to make tarts where the shell is baked completely through first; the filling and topping here do not require additional bake time. The tart can be served at room temperature so it’s one less thing to worry about keeping warm while you are enjoying the conversation of your dining companions.

savory fall tart with roses made of beets and squash

How to Make a Cheddar Tart with Beets and Fall Squash

(Makes one 9-inch tart)

Ingredients for the Crust*

1/2 cup (1 stick) Cabot Salted Butter, cut into small cubes then frozen
1 1/2 cups AP flour
1 oz (about 1/4 cup) Cabot Seriously Sharp Cheddar, grated then chilled
1/2 tsp kosher salt
1 tbsp fresh rosemary, finely chopped
4–6 tbsp vodka, chilled

Ingredients for the Topping

1 medium (about 1/2 lb) red beet, trimmed and cleaned
3 medium (about 1/2 lb each) golden beets, trimmed and cleaned
1 medium (about 1 1/2 lbs) honeynut or butternut squash, peeled and cored
4–8 tbsp extra virgin olive oil, divided
kosher salt
black pepper
3 tsp apple cider vinegar
1 tsp sugar
fennel fronds, for garnish (optional)

Ingredients for the Filling

4 oz cream cheese, at room temperature
2 oz (about 1/2 cup) Cabot Seriously Sharp Cheddar, grated
1/4 cup Greek yogurt
1 tsp worcestershire sauce
1/4 tsp garlic powder
1 1/2 tsp smoked paprika
1/8 tsp black pepper
1/4 cup sliced almonds, roughly chopped


* For a shortcut version, see notes above about substituting a ready-made pie crust.

Procedure

To make the crust: Add the flour, Cabot Seriously Sharp Cheddar, salt, and rosemary to a food processor. Pulse briefly to combine. Scatter in frozen Cabot Salted Butter cubes and pulse until the texture resembles wet sand. Add 1 tablespoon of vodka and pulse a couple of times; repeat vodka step, adding 1 tablespoon at a time and pulsing briefly after each, until the mixture looks like it is just barely starting to form clumps. Dump the mixture into a 9-inch tart pan and use a spoon to quickly press the mixture evenly against the bottom and sides, keeping everything as cold as possible. (A sheet of wax paper could also aid in smoothing out the mixture). Chill the unbaked tart shell in the freezer for 20 minutes or in the refrigerator for 1 hour or up to overnight.

To make the topping: Preheat oven to 400°F. (Beets and squash can be baked simultaneously; just keep an eye on separate bake times.)

Coat beets lightly with olive oil and season lightly with salt and pepper. Tightly wrap beets in foil, place in a baking dish, and bake for 1 hour or until tender. (If you wish to keep some of the golden beet completely yellow, wrap and bake those separately from the red beet.) When beets are cool enough to handle, gently rub off the skins. Then, place in the refrigerator to cool completely. 

Use a mandoline to thinly slice the squash. Coat slices lightly with olive oil. Arrange evenly onto a parchment-lined baking sheet and season lightly with salt and pepper.  Bake at 400°F for 15 minutes. 

Slice cooled beets thinly with a mandoline and lay slices out on a baking sheet. Overlap red beet slices on gold beet slices to dye them as desired to create color variation, or keep some gold beet slices on a separate tray to preserve their color.

Whisk together apple cider vinegar, sugar, a pinch of kosher salt, and 2 teaspoons olive oil. Drizzle evenly over the trays of beet and squash slices and allow to marinade for at least 5 minutes.

Roll the beet and squash slices into rosettes. Start with a small slice of squash, and roll into a tight spiral (the squash  can usually be rolled into a tighter spiral than the beet). Fold or cut subsequent slices in half and keep wrapping them around to mimic the appearance of rose petals. For best results, place rosettes into a mini muffin tin to keep them together, and pre-assemble all the rosettes before placing them on the tart. (This can be done a day ahead.)

To make the filling: Add cream cheese, Cabot Seriously Sharp Cheddar, Greek yogurt, worcestershire sauce, garlic powder, smoked paprika, and pepper to a large bowl. Use a hand mixer to whip ingredients together until combined. Fold in almonds. (This filling can be made ahead. Store in a sealed container in the refrigerator and allow to soften outside the refrigerator before spreading.)

To bake the tart shell: Dock the chilled shell with a fork to prevent it from puffing while baking. Line the inside with parchment paper or foil and fill with pie weights (or dry beans). Place the tart pan on a baking sheet and bake in the 400°F oven for 20 minutes. Remove the lining and weights, then bake for an additional 20 minutes, or until golden brown. Allow to cool slightly before filling.

To assemble the tart: Spread the filling evenly inside the baked tart shell. Gently press the veggie rosettes into the filling; extra beet and squash slices can be used to fill in empty spaces after the initial rosettes are placed. If desired, garnish with a few fennel fronds, or fresh herbs of your choice. Be sure to use a nice sharp knife when slicing, and enjoy!

Thank you so much to Cabot Creamery for sponsoring this recipe! Visit their website to find out where you can get their delicious cheeses, such as their naturally-aged cheddars, near you!
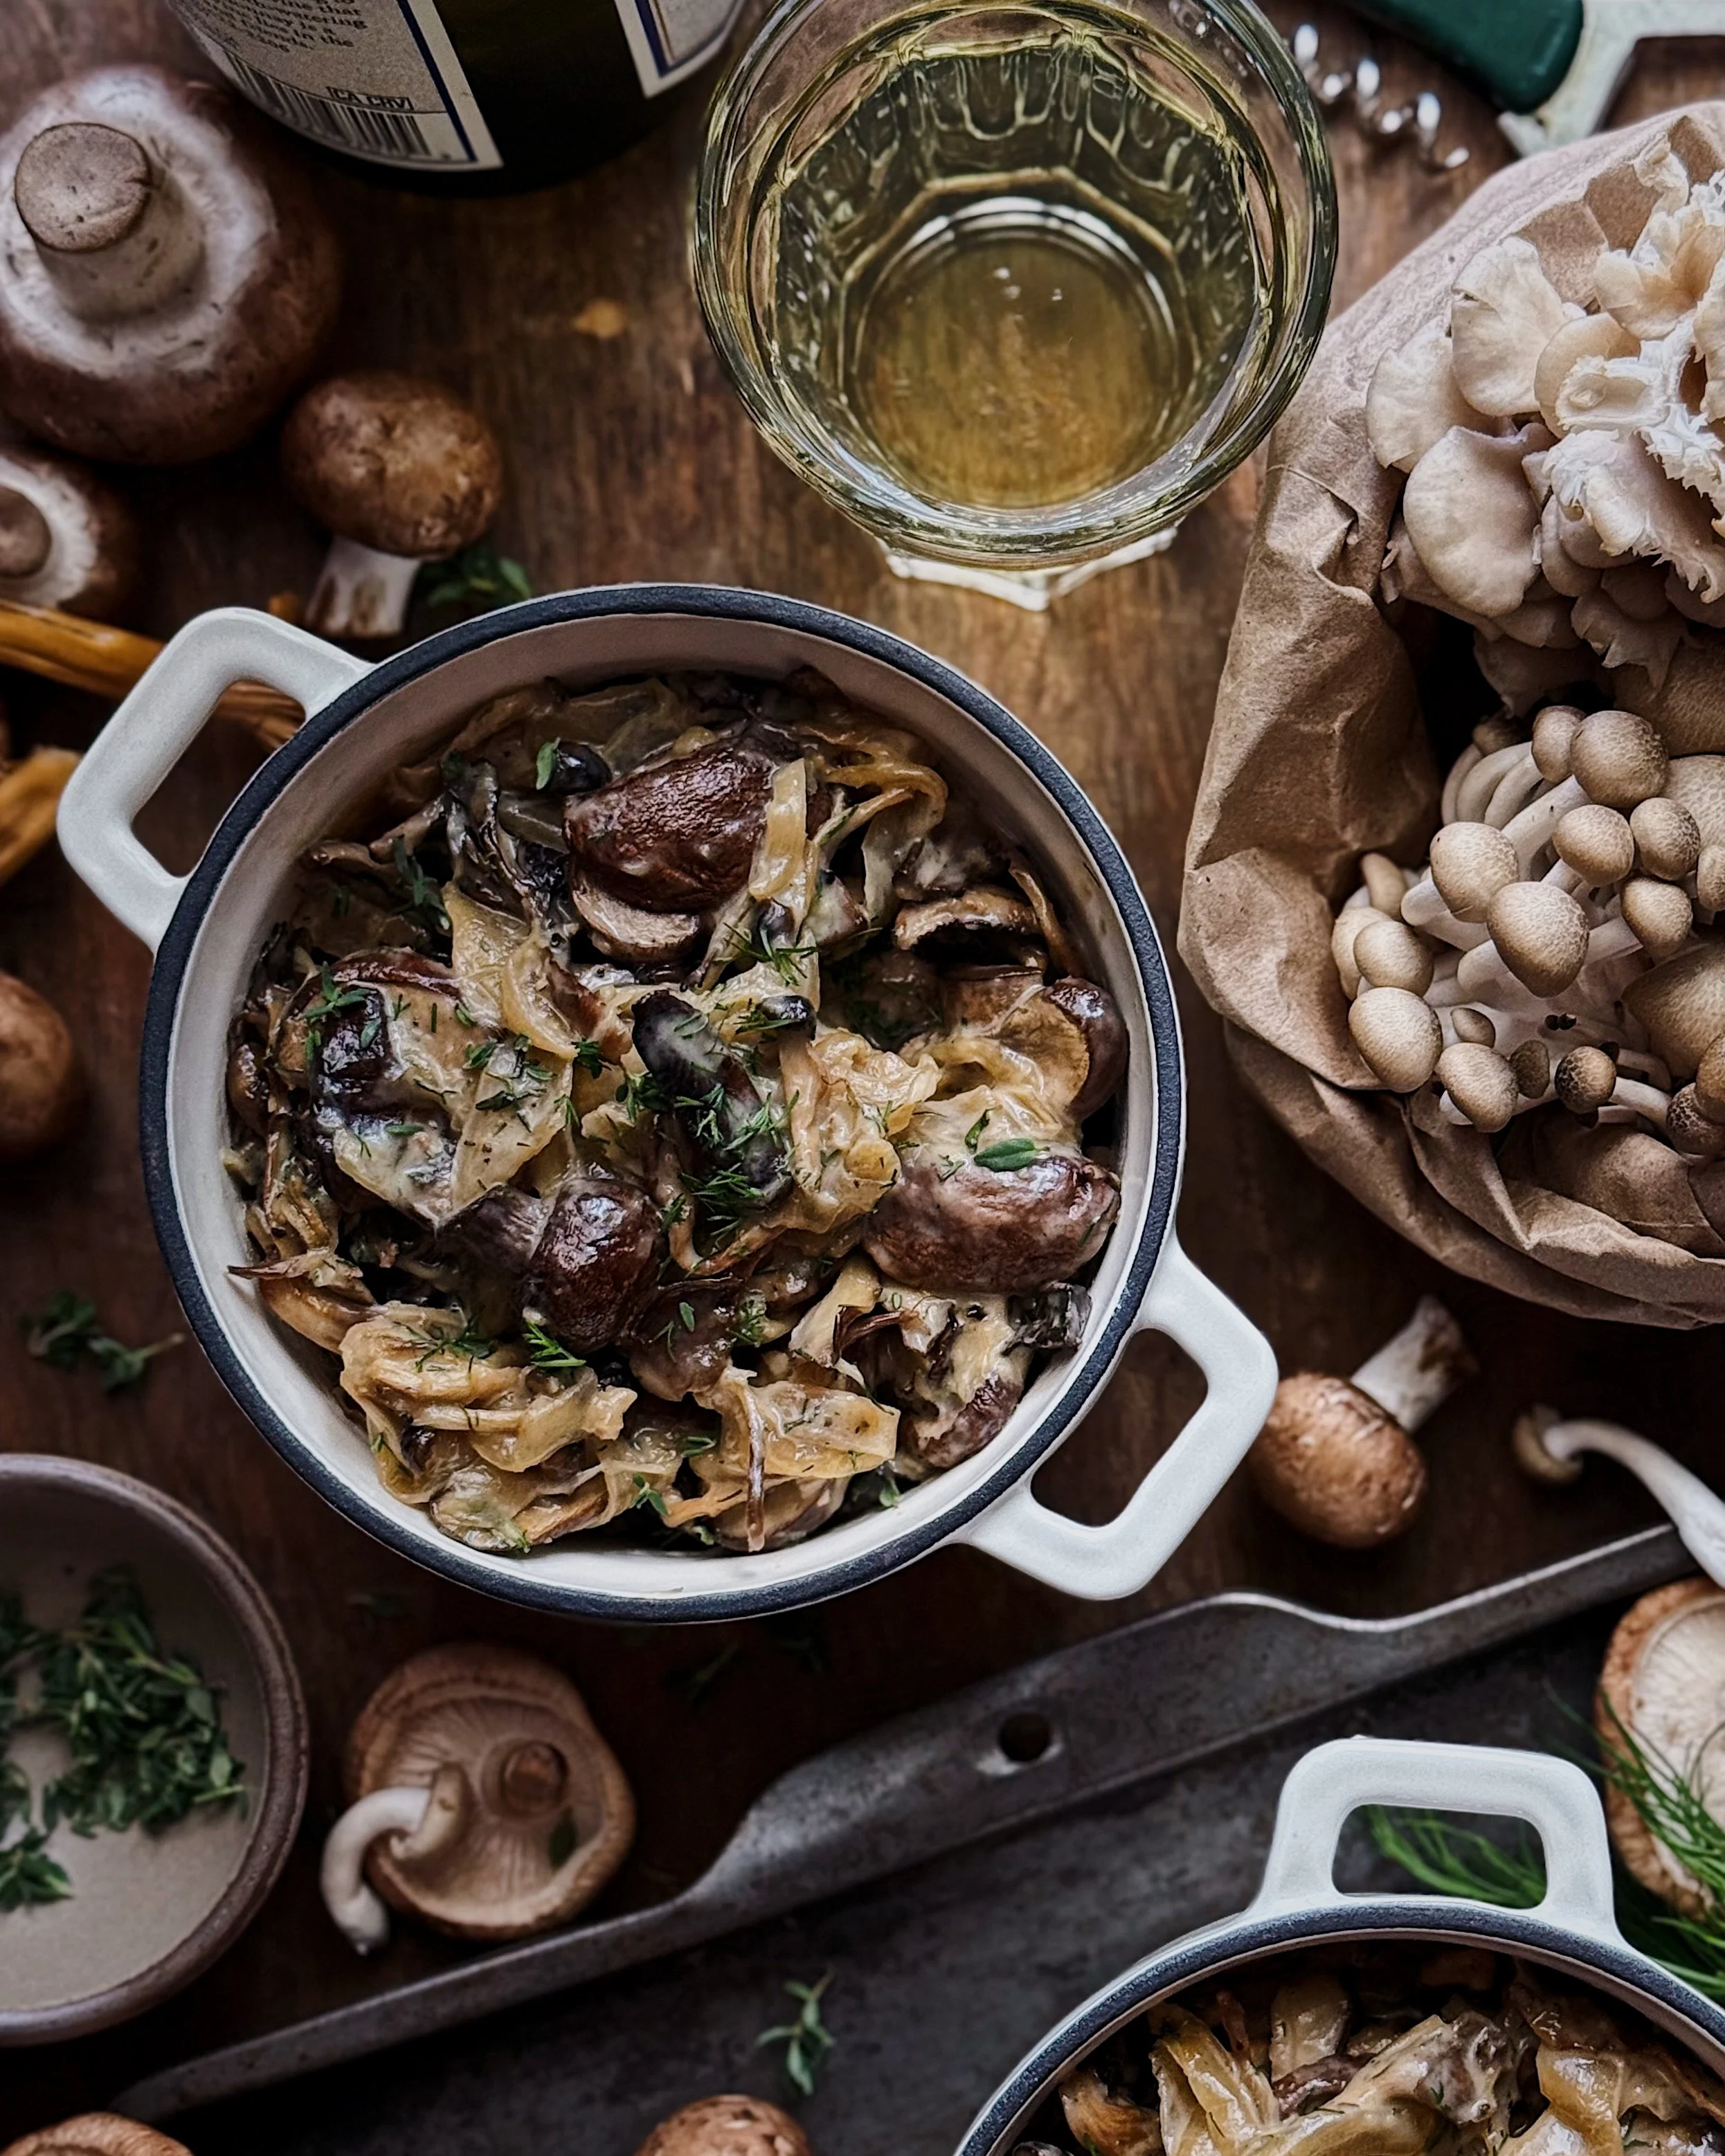
How To Make Perfect Jammy Eggs

turkish eggs tomato and cucumber salad

I am pretty sure the term “jammy eggs” is a term that only exists on Instagram. It is used to describe when the yolk of a boiled egg still has a ways to go before becoming the dry, chalky grossness called for in old-school deviled egg recipes, but it holds together much better than a completely runny or raw yolk. There’s a supple, gooey, almost gelatinous look and consistency to the yolks in this in-between zone, and that’s why they end up getting called jammy eggs.

But there is more to the perfect jammy egg (I’ve also seen them sometimes referred to as soft-boiled egg) than getting the texture of the yolk just right. There’s also the look of the egg as a whole when you cut into it. Even if your timing is perfect for cooking the egg to get that jammy yolk consistency, there are still things that can prevent your egg from being picture-perfect, such as a yolk that is completely off to one side, a big air bubble causing the shape to look completely wonky, or a bunch of the egg white getting stuck to the shell when you try to peel it.

I’ve made a lot of eggs for the ‘gram over the past few years. A lot of this is largely thanks to my ongoing partnership with Pete & Gerry’s who have been a wonderful supporter and sponsor of my work. (This blog post is NOT sponsored but I can honestly say their eggs are delicious and gorgeous, and that very lovely people work at the company.) But making eggs for sponsored work or a client shoot means even more pressure to get them to look perfect, which can be stressful for shooting a food preparation where so much can go wrong. So after cooking probably several dozen eggs in this style, I can share all that I have learned to set all the rest of you up for success in your future egg-making ventures too!

tamago sando closeup

Phase 1: Choosing What Eggs to Use for the Best Looking Jammy Eggs

  • Use good-quality eggs that are fresh from the grocery store. (I have not used eggs directly from the body of a chicken before so can’t attest to the nuances of eggs that fresh.) There is info online about how the shells will be harder to peel off when the eggs are fresher, but I’ll address how to overcome this in Phase 3.

    • What happens if you skip this tip: You want fresher eggs because the air bubble inside of them will be smaller, resulting in a nicer boiled egg shape. Over time, due to moisture loss within the egg, the air bubble at the wider end of the egg gets bigger. Using an old egg will result in the boiled egg having a big crater in the bottom, because the big air bubble prevents the egg white from fully taking on the shape of the egg shell.

Phase 2: Boiling the eggs

  • Step 1: Use a safety pin to poke a hole in the wider end of each egg. This allows airflow in and out of the egg and can also help mitigate the impact of the air bubble inside the egg on the shape of the final result. Keep the eggs out on the counter to bring them closer to room temp after this step.

    • What happens if you skip this tip: Pressure can build up as the contents of the egg get heated in the boiling water. This could cause the egg to crack and some of the white to leak out, ruining your perfect boiled egg shape.

  • Step 2: Bring a pot of water to boil on high heat. Make sure there’s enough depth to fully submerge the eggs. While you’re waiting, you could also get an ice bath ready for the end.

  • Step 3: Gently lower the eggs into the boiling water. Set your timer according to the guide below:

    • 6.5 minutes: Fully set whites and runny yolks. Perfect for ramen.

    • 7 minutes: Jammy yolk consistency on the outer parts of the yolk, liquid gold right in the middle

    • 7.5 minutes: Perfect jammy yolk consistency throughout

    • 8 minutes: Jammy yolks that aren’t going anywhere. Perfect for tamago sandos like the one shown above.

  • Step 4: Keep the eggs moving! Use a slotted spoon to continuously spin the eggs around their own axes as well as occasionally lift them out of the water and immediately lower them back in. Do this for the entire cook time. The centrifugal motion will keep the yolk positioned nicely as the egg white cooks, and lifting the egg in and out might help with reducing the impact of that pesky air bubble (if the eggs are relatively fresh).

    • What happens if you skip this tip: The yolk will settle in the egg before the egg white has had a chance to cook/solidify. When you cut it open, you will find that the yolk is in a weird spot and you have an ugly cross-section.

    • Credit to Eat With Your Eyes Closed for teaching me about egg yolk centrifuge.

  • Step 5: When the timer is up immediately transfer the eggs into an ice bath to stop the cooking. Move them around for a bit to really allow the heat to disperse and get the eggs to cool down.

Phase 3: Cooling and Peeling the Eggs

You could cook the eggs perfectly and still end up with ugly eggs if you don’t get this post-production phase right. If you followed Phase 1 correctly and used store-fresh eggs, they can be notoriously hard to peel, resulting in frustration and little bits of egg white (and all your hopes and dreams of a perfect-looking egg) being lost. Patience and cooling time are the keys to doing this phase right.

  • After your eggs are cool to the touch from resting in the ice bath, gently knock them against each other or a countertop to make little hairline fractures in the shells. I like to grasp the egg and encircle it with my palm when I do this, to help support the egg structure.

  • Especially concentrate on creating fracture lines at the wider bottom of the shell. Due to that air bubble, it will be easiest to start on this end anyway when you peel.

  • Place the unpeeled eggs in a bowl of cold water and put them in the fridge. Let them continue to chill for as long as you can, up to overnight! The cold temperature will cause things to shrink inside the shell and water will seep in between the cooked egg and the shell, creating separation.

  • When it is time to peel, start from that wider end and go gently and slowly, continuing to fracture the shell into little pieces as you go, rather than trying to peel off a big chunk at once.

    • What happens if you skip these tips: The egg white may stick to the shell!

Phase 4: Enjoying the Eggs!

Now you are ready to take photos of your eggs if you so choose, but more importantly, you are ready to eat them! Below is some inspiration for how to incorporate jammy eggs into your meals. I hope you found this blog post helpful, and I wish you eggcellent jammy eggs in your future!

brunch board
Spicy tomato noodle soup, hot pot inspired
eggsontoast

Melt-in-Your-Mouth Chili Garlic Eggplant Salad on Labneh

Eggplants, aubergines, brinjals. I never understood why people don’t like them. I think people who say it’s a texture thing are eating ones that are not cooked properly. People who say they are bitter must be eating ones that aren’t fresh. When cooked properly and at the right time, eggplants—especially Chinese and Japanese eggplants—shouldn’t be anything but silky flavor sponges. And this recipe features these long eggplants in their very best form, with a completely melt-in-your-mouth texture and a rich, tangy, fragrant, and numbing spicy sauce that is absolutely addictive.

Chili garlic eggplant—as in, the stir-fry kind found on many Chinese restaurant menus in the US—used to be the thing I’d make to treat myself when my anti-eggplant spouse was out of town. He has since come around to admitting that he actually does enjoy eggplant, just not in the crappy eggplant parms he had during his Italian-American upbringing. So I get to have stir-fried chili garlic eggplant a lot more often nowadays. But this is not a recipe for that dish.

I just got back from London where I had dinner at Ottolenghi and every single dish we ordered came with some pool of creamy dippable/scoopable yumminess beneath or next to wonderful soft vegetables, whether it was yogurt, labneh, toum, or whipped feta. It was all so good, and fueled my obsession for serving absolutely everything on a pool of labneh, as if it wasn’t maxed out already (see: here, here, here). So when I got home, I was determined to make my own eggplant-on-labneh dish, but I wanted to put a Chinese spin on it. This is the recipe for that dish.

One thing I was determined to do with this recipe was make sure that the beautiful purple color of the eggplant was preserved and the eggplant did not turn brown when cooked. I was so happy that this cooked eggplant turned out a shade that almost exactly matched the purples I have going on in my garden. Here are some useful resources I came across when I was researching how to preserve the purple color of eggplants after cooking:

I ended up going with an oil blanching technique because I wanted the eggplants to be ultra silky soft but also have a hint of caramelization from the cooking.

So what does this dish taste like? This dish combines my homemade numbing chili oil + my usual Chinese cold appetizer dressing + silky eggplant + an herby salad + creamy labneh. It’s like the smashed cucumber salad you get at a Sichuan restaurant but with much gentler textures and kicked up a few notches of luxury. It might be the best eggplant dish I’ve ever had and it’s definitely the best I’ve ever made. Note that for experimentation purposes I used a medley of all sorts of herbs (mint, cilantro, Thai basil, Italian basil, arugula, nasturtium, lemon balm) to build out the salad component of this eggplant salad—so that’s what’s in the photos—but I found that the bites with the cilantro tasted far better than the others, so that’s what’s reflected in the written recipe below.

This recipe was adapted from Brandon Jew of Mister Jiu’s.

Awkwardly Vague instructions for Melt-in-your-Mouth Chili Garlic Eggplant Salad on Labneh

Ingredients

2 Chinese eggplants cut into long wedges
4 cups water
2 tbsp kosher salt
vegetable oil, for frying
3 cloves garlic, finely chopped
1 tbsp extra virgin olive oil
2 scallions, thinly sliced, white and green parts divided
1 1/2 tsp sugar
2 tbsp rice vinegar
1 tbsp chinkiang vinegar
1 tbsp soy sauce
1 tbsp homemade mala chili oil, plus more to taste
labneh
cilantro

Procedure

In a large bowl or rectangular tub, dissolve the salt in the water. Add eggplant, and place a plate or something on top to make sure it’s all fully submerged. Let brine for 1 hour.

In the meantime, combine the garlic and olive oil in a small pan and fry gently on medium low, stirring continuously. Once the garlic starts to turn golden, remove from heat and keep stirring to allow the residual heat to cook the garlic through. Then, drain off the oil into a separate bowl and set both aside.

Heat enough vegetable oil to deep fry the eggplant in a Dutch oven. In the meantime, pat the eggplant dry.

Dry off your brining bowl and use it to make the dressing. Whisk together the garlic-infused olive oil plus the white parts of the scallions, sugar, both vinegars, soy sauce, and 1 tablespoon of chili oil. Set aside.

On another burner/hob, get a dry wok ready on very high heat.

Oil blanch all the eggplant by adding it at once to the dutch oven. Once you start to see some browning on the edges, remove the eggplant and allow it to drain well. Then, add it to the super hot dry walk, cut side down. As you start to see caramelization occurring, remove the pieces of eggplant from the wok and add it to the dressing bowl.

After all the eggplant has been caramelized and blistered, toss it around in the dressing.

Coat your serving platter with a thin, swoopy layer of labneh. Add the eggplant. Drizzle on extra chili oil to taste. Then sprinkle on the fried garlic, sliced scallion greens, and lots of cilantro.

Poached Eggs in Burrata and Sambal Butter

I don’t have an exact recipe for this but it is maybe my favorite breakfast that I have ever made for myself so I had to document it here, if anything so that I could remember what I did. This is another poached egg bowl born out of my obsession for çilbir, which is known in English as Turkish eggs. Çilbir is a dish of garlicky yogurt topped with poached eggs and then drizzled with a chili butter made with a Turkish chili. This one has those general components (creamy base, eggs, spicy melted butter) but done a little differently in favor of some of my other obsessions.

This post is not sponsored but it uses some of my favorite storebought products to bring together a most epic of flavor combos:

  • Toom garlic dip: I love this when I am too lazy to make Lebanese toum from scratch

  • BelGioioso black truffle burrata: My absolute favorite burrata, I’m obsessed! Great stracciatella action inside with a thin casing and the perfect amount of truffle flavor.

  • Azalina’s sambal: A Malaysian company local to me in SF! I feel grateful to have them around to stay connected to the flavors of my heritage.

  • Mizkan Sushi Seasoning: This is my cheat for when I want a simple salad vinaigrette and I am too lazy to make one.

This dish also includes a beautiful little salad that I made out of mostly things I “foraged” from my backyard garden. Now that my edible garden is well underway and in full bloom, I love being able to go out there and snip little bits of leaves from here and there to make an herbaceous salad whenever I want to bring some freshness to a dish. This would also be great with a salad of any tender herbs you have remnants of in your fridge, or mild cresses, or baby arugula.

Oh yes, and a delicious bread is an absolute must to serve with this dish, to spoon on all the creamy goodness and mop up the bowl. Here, I had it with slices of a garlic loaf from my favorite Bay Area bakery, Wild Flower Bread!

Awkwardly Vague instructions for Poached Eggs in Burrata and Sambal Butter (with a little herby salad)

Ingredients

2 eggs
white vinegar, for poaching eggs (optional)
scoop of Lebanese toum (garlic dip)
4 oz ball of black truffle burrata
1 persian cucumber, sliced into ribbons with a veggie peeler
4 tbsp salted butter
Malaysian sambal
a small handful of fresh tender greens
seasoned sushi vinegar
chopped dill
chopped chives

Procedure

Make the poached eggs. (I keep wavering between doing the whirlpool method vs not. In this case I thought the shape would be better for the dish without the whirlpool so here’s what I did instead:) Bring about 4 inches of water to boil in a pot. Crack the eggs into small bowls. Turn the heat down to low, add a small splash of vinegar, and slowly tip in the eggs. Turn the heat up to medium-low and allow eggs to poach for 3 minutes. Transfer eggs to an ice bath.

Smear a scoop of toum into the bottom of your bowl. Break up the burrata and add it evenly on top of the toum to form a base for the eggs.

Arrange the cucumber ribbons and poached eggs on top.

In a small pan, melt the butter on medium-low heat. When it starts to foam, add in as much sambal as is to your taste. Break down the sambal paste with a spatula and mix it in with the butter until fully incorporated.

Toss your little collection of greens with a splash of the sushi seasoning.

Pour the sambal butter over everything in the bowl. Add the salad to one side and then sprinkle dill and chives over everything.

Serve with some amazing bread.

Read My Latest Work on Storyloom - Cozy Sci-Fi and Spy Parodies

As I mentioned in an earlier blog post, when I am not shooting food or testing recipes, I’ve been writing interactive fiction on StoryLoom. I have been really loving this job. I suffer pretty bad imposter syndrome when it comes to my food photography; maybe because I shoot everything on my iPhone, or maybe because so much of whether I’m happy with my photos depends on things outside of my control like lighting and the weather. But I actually feel quite confident in my fiction writing skills! Which is why I hope you will check out my work.

On Storyloom, I write stories where you—the reader—get cast as the main character and you can choose your own adventure. It’s not quite like reading a novel because you’ll be prompted to make choices along the way that can impact how the story turns out. There’s also fun background and character art—so it’s part game, part graphic novel. It’s also great for people who appreciate the written word but don’t have the attention span for long form fiction (like me).

Important Note: If you are viewing this on your phone from a link I shared on Instagram, please note that links to StoryLoom are not accessible through the Instagram browser. You will need to copy+paste the links below into a browser on your computer. Or complete this form so I can send you all this info by email.

Here’s the quick info on how to get to my stories:

  1. Visit the StoryLoom website using a browser (Google Chrome strongly recommended) on your COMPUTER. (The team is working hard on a mobile-friendly version but right now the mobile experience is very buggy.)

  2. Sign up with your Google account. They are currently in open beta so it is free to sign up, and you’ll get access to play and read interactive stories from a variety of genres! (Note that open beta also means there might be some bugginess from time to time.)

  3. Visit one of the links to my stories below. OR click on “All Stories” and do a Ctrl+F or ⌘+F to search for the title.

  4. Enjoy reading and playing through the story for FREE!

My latest stories on StoryLoom:

The Light Between Skies

Genre: Cozy Sci-Fi

Link: https://storyloom.com/stories/lilybubbletea-the-light-between-skies?id=b2c3b952-4eef-d45c-4fd1-211835af1628

A story about the cutest and fuzziest little alien. This one is loaded with a bunch of pretty art I created on MidJourney and I was inspired by Studio Ghibli and Cowboy Bebop to tell a story of friendship and adventure. (This work is in progress, so I’ll be releasing more chapters next month!)

Tomorrow Never Spies

Genre: Spy Parody

Link: https://storyloom.com/stories/lilybubbletea-tomorrow-never-spies?id=fcc2f278-3f95-cba7-7f69-373e799b52ef

I tell people this is like the spy genre’s version of Star Trek: Lower Decks. You’ll play as an introverted data analyst who has to team up with a dashing intelligence agent to save the world! A silly comedy set in a fictional—but familiar—world of VR headsets, awkward tech billionaires, and contagious viruses.

There’s Been a Murder!

Genre: Murder Mystery Anthology

Link: https://storyloom.com/stories/lilybubbletea-theres-been-a-murder?id=94c32655-8b73-4c15-c8aa-5a1147ad462f

Each chapter is a new mystery where you’ll look for clues and interview witnesses to solve the crime!

Previous works:

Last year, I also wrote a cozy mystery called Tea with Scream and Sugar—a story about an Asian-American food writer from a small town that * coincidentally * really resembles me. You can read more about that piece here.

Having trouble with StoryLoom?

Accessing StoryLoom can be tricky if you found this blog post through the Instagram app. Shoot me a DM on Instagram or complete this form so I can reach you by email if you are interested in reading my work but are having trouble accessing the StoryLoom site.

Thanks for reading!!!

Recipe: Chili Cheese Scones

For this recipe, I partnered with Cabot Creamery to create my version of a baked goodie that I think gets totally overlooked: savory scones! I feel like sweet scones get all the love, but as a diehard member of Team Savory for life, what I like about savory scones is that they can be such a satisfying handheld snack or a way to round out a real meal. 

These scones are filled with a combo of green chilies, scallions, black pepper, and lots of high quality Cabot Vermont Sharp Cheddar. The inspiration for this flavor grouping comes from Indian-style chili cheese toast, which I first experienced at a Bombay-inspired restaurant in London called Dishoom. There, the pairing of chili cheese toast and eggs is called Eggs Kejriwal. I’ll still go to Dishoom whenever I’m in London, but at home, I was happy to find it was easy to replicate the chili cheese toast and was blown away by how good the simple combo of chopped green chilies, scallions, black pepper, and melted cheddar tasted together. It really is an example of the whole being more than just the sum of its parts and I think a lot of credit can be given to the power of a high-quality sharp white cheddar, when it is all gooey and melty, for bringing everything together.

So when Cabot Creamery asked me to come up with a recipe to show off one of their wonderful cheddars, I thought it would be tasty to put the flavors of one of my favorite toasts into the lovely portable format of a scone. But despite the inspiration coming from London, these aren’t going to be the dry, crumbly, or bland scones you might get with an afternoon tea service. These are flavor-packed American style scones and they are super tender and light!

I opted to use Cabot Vermont Sharp Cheddar for this recipe, which has such a nice bold sharp cheddar taste. Cabot is a co-operative owned by farm families throughout New England & New York and 100% of profits go back to the farmers, which I think is so cool for a brand that is so widely distributed. They are also the world’s first dairy co-op to get a B Corp certification. This particular cheese offering from them has a creamy texture and buttery richness to it, and is equally as good for just snacking on alone as it is getting baked into scones—which made it really hard for me to resist eating it while I was prepping the ingredients to shoot this recipe. 

These scones are nice and cheesy, with a little bit of kick from the chilies, and a unique spiced undertone from the coriander seeds and black pepper. I hope you’ll give them a try!

What you need to know about the key ingredients for this Chili Cheese Scone recipe:

  • Butter: Freezing the butter and then grating it is my go-to technique for any sort of baked pastry that I want to be airy and flakey. No one wants overly-dense, hard scones. In contrast, the frozen butter, and keeping everything as cold as possible in general, allows for the creation of steam inside the scones as they bake, which form air pockets that keep the texture light. I used Cabot Salted Butter for this recipe to add an extra note of rich savoriness.

  • Cheddar: The cheddar is really the star of these cheesy scones! I went for the Cabot Vermont Sharp Cheddar, which I think has a great classic sharp cheddar taste that really holds up nicely mixed into these scones. However, I think that Cabot Creamery’s Seriously Sharp Cheddar would also be great here. Be sure to grab one of their cheese bars and grate it fresh for this recipe.

  • Green Chilies: The green chilies are what give the scones a nice little spicy kick. I used a mixture of jalapenos and serranos here (2 very large jalapenos and 1 long serrano) but you could also choose one or the other. I removed the pith and seeds from the jalapenos because I don’t care for the texture but kept it all in for the thinner serrano and this brought a noticeable amount of heat to the scones. If you remove all the pith, the scones will be much milder.

  • Scallions: Chopped scallions add a nice savory and aromatic flavor to the scones. They get sweeter when the scones are baked and taste so good with the cheddar!

  • Black Pepper: This adds a zingy spiced component to the scones. Please do not use the ground pepper that comes out of a store-bought spice jar. Whole black peppercorns and a pepper mill on a coarser setting, and subsequently nice freshly-cracked pepper, is what will give you the flavor impact you want.

  • Coriander Seeds: Sometimes when I make chili cheese toast, I also include cilantro, or coriander. For my scones, I opted to include coriander seeds because I think they bring such a great mysterious and complex spice flavor without adding any extra spicy heat. I measured out the whole seeds first, then toasted them in a dry pan until they became fragrant, then pulsed them a couple of times in a spice grinder. If you have a mortar and pestle that would be even better. You want to crush them up and get them to release their aroma but you don’t need a fine powder.

A couple of other techniques to get the best scones:

  • Like I mentioned before, keeping everything cold is what gives you scones that are tender and airy instead of dense and firm. Popping the scones in the freezer while you wait for your oven to heat up will help the scones poof up instead of spreading out.

  • Creating letterfolds with the dough before cutting out the scones is what gives them those nice layers similar to an American style biscuit. You can definitely just gather the dough together and cut out the scones right away, but this extra step of flattening it out and folding the slab of dough a few times is a quick trick that makes them extra special.

How to Make Chili Cheese Scones

(Makes 8 scones)

Ingredients

2 cups AP flour, plus extra for dusting
2 1/2 tsp baking powder
1 tbsp sugar
1/4 tsp kosher salt
1 tsp freshly cracked black pepper
1 tbsp whole coriander seeds, toasted and then coarsely ground
2/3 cup heavy cream
1 egg
6 oz Cabot Vermont Sharp Cheddar, grated
1/2 packed cup scallions, chopped
1/2 cup jalapeno or serrano peppers, cut into 1/8” dice (see note*)
1/2 cup (1 stick) Cabot Salted Butter, frozen
1 tbsp Cabot Salted Butter, melted
Cilantro leaves, for decoration (optional)


Notes

* You can control the level of spicy heat in the scones by how much of the pith you choose to include. The majority of a chili pepper’s heat comes from the pith.

Procedure

Combine the flour, baking powder, sugar, salt, pepper, and ground coriander seed in a large mixing bowl and whisk together.

Set aside a few pinches of the grated Cabot Vermont Sharp Cheddar for topping off the scones later.

Into the dry ingredients, stir in the rest of the cheddar, plus the chopped scallions and chilies.

In a separate bowl, whisk together the heavy cream and egg.

Working quickly with cold hands, grate the stick of Cabot Salted Butter into the dry ingredient mixture, tossing together the ingredients along the way to ensure even distribution. 

Drizzle in about one-third of the wet ingredients. Incorporate gently with some of the dry ingredients. Continue gradually incorporating the wet and dry ingredients together, taking care to not overstir. (Mixture can be clumpy and uneven.)

Dump the mixture onto a work surface and gently press together with your hands until it all sticks together. Lightly flour a work surface, then shape the dough into a rough rectangle, about 6x9. Lightly flour the surface of the dough, then fold down the top third and fold up the bottom third (like you would fold a letter). Flip and rotate 90 degrees and repeat the shaping, rolling, and folding sequence. Flip and rotate again, then do the sequence one more time, for 3 sets of letter folds total.

Then, fold the dough in half and shape it into a flat circle, about 7-8 inches in diameter. Cut the dough into 8 equal wedges. Transfer to a parchment-lined baking sheet and place in the freezer for 15 minutes.

In the meantime, place an oven rack one-third from the top of the oven and preheat oven to 400°F.

Brush melted butter on the tops of the chilled biscuits. Sprinkle remaining cheddar on top. If desired, decorate with fresh cilantro leaves.

Bake for 25–27 minutes, or until tops begin to get golden.

Thank you so much to Cabot Creamery for sponsoring this recipe! Visit their website to find out where you can get their delicious cheeses, such as their naturally-aged cheddars, near you!
Recipe: Heart-Shaped Garlic Butter Parm Pretzels

These cuties are the texture of a soft American mall pretzel with the extra garlicky goodness of a garlic knot. When you typically make pretzels, you would cut slashes in the dough before baking to allow the dough to expand without cracking the dark brown malty exterior you get from boiling in an alkaline solution. However, I did not do that here. The result was this unusual crackled texture, which gave the garlic butter something to stick on to!

These are such a fun treat for your valentine, friend, or galentine, or anyone in your life who appreciates some freshly-baked carbs. And they are also great for when you are looking for a special baking project to do just for you!

Soft pretzel dough recipe adapted from Sally’s Baking Addiction.

How to Make Heart-Shaped Garlic Butter Parm Pretzels

Ingredients

3/4 cup warm water
1 tsp (slightly heaped) active dry yeast
1 tbsp honey
1 tbsp butter, melted and cooled
2 tsp brown sugar
1/2 tsp salt
2 cups AP flour, plus more for dusting
nonstick cooking spray
3/8 tbsp salted butter
2 garlic cloves, minced
garlic salt, to taste
finely grated parmesan, to taste
1–2 tsp parsley leaves, finely chopped

For the Water Bath

9 cups water
1/2 cup baking soda

Procedure

Combine warm water, yeast, and honey in the bowl of your stand mixer and stir gently. Allow yeast to bloom and foam up for 5 minutes.

Add butter, brown sugar, and salt, and stir together. Fit stand mixer with the dough hook and turn on to the lowest setting. Begin adding flour, 1/2 cup at a time, until a dough starts to come together. Use a rubber spatula to scrape everything together. If the dough is sticky, add a little bit more flour.

Turn the mixer to medium high and knead the dough for about 5 minutes until it feels smooth and bouncy. Turn the dough onto a clean worksurface and roll into a smooth ball. Grease the inside of the mixing bowl, and place the ball of dough back inside. Cover with a damp towel and allow to rest in a warm place for 20 minutes.

On a lightly floured worksurface, divide the rested dough into 8 equal pieces and roll each piece into a rope, about 16 inches long.

In a large pot, combine water and baking soda for water bath and bring to a boil. Preheat oven to 425°F.

While waiting for the water to boil, twist and pinch together the ends of each rope and shape into a heart.

Use a pancake turner/spatula to gently place one pretzel at a time in boiling water bath for 10 seconds on each side, then place on a parchment-lined baking tray with plenty of clearance around each. Adjust the shapes as needed. Make a small cut into the inner bottom tip of the heart shape, to help define the point better.

Combine butter, garlic, and garlic salt in a small bowl and heat for about 30 seconds in the microwave. Brush some of the mixture on to the pretzels. Sprinkle parmesan cheese on top. Bake for about 15 minutes, or until they are puffed and a rich golden brown.

While pretzels are baking, add parsley to the remaining garlic butter mixture. Brush more of this mixture on the pretzels when they come out of oven.

Easy Salmon Cakes Using Tinned Smoked Salmon

I wrote up a recipe for Kvarøy Arctic Salmon for these cute little salmon cakes, which I served on top of a bed of labneh, with a lightly dressed salad of tender herbs and pomegranate arils. One of those meals that is super easy (since the salmon in the tins is already smoked and flavorful) and yet looks special and fancy. Combining lovely delicate leafy herbs with pomegranate arils gives any dish an instantly festive look.

You can get the recipe for these easy salmon cakes on Kvarøy Arctic’s website.

Also, I just really love the packaging design of the Fishwife salmon tins…

Read My Interactive Cozy Mystery - Tea with Scream and Sugar on Storyloom

I haven’t been creating as much content for my Instagram lately, and it’s because I have been working on another exciting project instead!

If you love reading cozy mysteries, stories that involve many descriptions of food, or stories starring Asian-American women, I would love for you to check out the interactive story that I am writing on StoryLoom called Tea with Scream and Sugar.

Here’s the quick info on how to get to it:

  1. Visit the StoryLoom website

  2. Sign up with your Google account. They are currently in open beta so it is free to sign up, and you’ll get access to play and read interactive stories from a variety of genres!

  3. Click on this link to go directly to my story, Tea with Scream and Sugar. OR click on “All Stories” and do a Ctrl+F or ⌘+F to search for the title, Tea with Scream and Sugar

  4. Enjoy reading and playing through the story for FREE!

(Update for if you’re arriving to this blog post via Instagram: Sometimes Google does not like it if you are trying to view these links while still in the Instagram app. If you run into trouble logging in, please copy/paste this link into a browser app like Google Chrome instead: https://storyloom.com/stories/8ec26a08-cfd0-89a8-af3f-6d35141c1804 )

A little more about the platform:

StoryLoom is a platform for reading, creating, and sharing interactive fiction. Unlike reading a regular ol’ analogue novel, with interactive stories, you the reader can play as the main character, and you’ll be faced with choices along the way that will impact how the story unfolds. Do you remember the Choose Your Own Adventure book series? It’s a lot like that, but something you can play on your computer or phone.

StoryLoom is currently in open beta, so it is free to sign up (all you need to do is log in with your Google account) and free to play other creators’ stories (like mine!) or even create and publish your own. If you’ve been wanting to write your own fiction and have been seeking a place to share it with the world, this is an awesome platform to do so. (Plus, the people working on it are seriously super lovely!)

What is Tea with Scream and Sugar?:

The story I am working on is a cozy murder mystery starring an Asian-American woman named Iris (yes, a flower name), set in a small fictional town in the California’s Central Valley (which is, not coincidentally, where I grew up). As of the time of this blog post, there are 7 chapters available for you to play and I anticipate there will be 12 total chapters to complete the story. My goal is to finish it by the end of the year!

If you are unfamiliar with the cozy mystery genre, think of something like Murder, She Wrote or Agatha Christie’s Miss Marple character. It’s the opposite crime genre to a gritty hardboiled detective noir story. The main character is typically a woman who is smart and observant but not a professional detective. The setting is usually a small, quaint town where lots of people know each other. And often the main character’s identity revolves around some kind of cozy activity or interest, like writing, cooking, scrapbooking.

Here is the synopsis for Tea with Scream and Sugar:

Food writer Iris Hu returns to sleepy Appledale for the big opening weekend of her friend's quirky fusion cafe. She's looking forward to tasty treats and cozy cups of tea but she never expected a sinister mystery to be on the menu. When several cafe patrons end up ill—and in one case, dead!—it's up to Iris to save her friend, and herself, from the town's darkest skeletons.

True to my own form, you can expect lots of descriptions of yummy food, and I think the best compliments I have received so far on it are that reading my story has made people hungry!

But beyond that, I’ve really taken the saying “write what you know” to heart while working on this story, so there’s a chance you’ll get to know me more by reading it. Like myself in real life, the protagonist is a daughter of Chinese immigrants, who grew up among a predominantly conservative white population; the growth into someone who is prideful for their heritage after overcoming a childhood of struggling to fit in is very much a part of the story. It’s a topic I have covered a lot in the past through what I’ve shared on Instagram, and I am hoping the way I have depicted it in Tea with Scream and Sugar is genuine and relatable for other people who grew up in situations like mine. Furthermore, the story explores challenges that Asian immigrants face in the restaurant industry, how marginalized groups are treated in seemingly quaint Americana-vibey towns, and how (spoiler alert!) closed-mindedness is a villain that can live inside seemingly regular people.

If you’ve read this far, I am so grateful for your interest and support in my work, and I really hope you like the story! Here’s the info once again for how you can go play through it:

  1. Visit the StoryLoom website

  2. Sign up with your Google account. They are currently in open beta so it is free to sign up, and you’ll get access to play and read interactive stories from a variety of genres!

  3. Click on this link to go directly to my story, Tea with Scream and Sugar. OR click on “All Stories” and do a Ctrl+F or ⌘+F to search for the title, Tea with Scream and Sugar

  4. Enjoy reading and playing through the story for FREE!

Learning to Crochet in the Round

A couple of months ago, I decided to learn how to crochet. This blog post is about my journey as a beginner and some resources that I found to be incredibly helpful to me for completing my first project.

I had done some very basic crocheting back when I was in college, but being that my brain has very limited storage these days, I felt I had completely deleted any knowledge of how to crochet and was effectively going to need to start as a complete newbie. I’d also never learned how to read or follow a pattern, or how to “crochet in the round” (which I learned means to crochet round and round in a circle) and this time, I wanted to make things that were actually functional.

When I first began this endeavor, I started by looking at a written pattern for something I wanted to make. As someone brand new to reading crochet patterns, it felt as if I was trying to read a secret code! I was completely intimidated. But then I remembered that my old friend Google was always there to help me. I had jumped into things too quickly, but pulling back and getting an understanding of the basics quickly made everything feel much more accessible. These are the things that really helped me get started with making this jute and yarn basket!

Helpful YouTube Videos for Learning to Crochet

How to Read a Basic Crochet Pattern by Crochet with Tiffany

This video walks through the 5 most basic stitches: chain, slip stitch, single crochet, half double crochet, and double crochet. And for each one, the name, abbreviation, symbol, and a video demonstration of how to do the stitch is given in a way that is very easy to follow. After watching this video, I immediately had a clear idea of how to read a beginner pattern that used some combination of these stitches.

Reading Written Patterns by Simply Daisy

This video also walks through common abbreviations of stiches and other abbreviations found in written crochet patterns, and gives clear video demos on how to do each thing. This video included some more advanced information that the previous video did not, so I felt like it was a good follow-up while broadening my knowledge.

Some key things I learned in this video were the terms “front loops only”/”front post” and “back loops only”/”back post”. When you make a crochet stitch, it creates a V shape. When you make a new stitch on top of it, most of the time, you insert your crochet hook under the whole V. But sometimes you only go under one of the sides of the V. That’s what front/back loops are referring to. It will make more sense when you watch the video! (That being said, I realized after completing my first project that I did the entire thing wrong, using the “back loops only” process. Oops! But the project still turned out looking and functioning exactly how I wanted!)

Amigurumi Basics for Beginners by Ollie + Holly

Amigurumi is a term borrowed from Japanese that refers to the art of crocheting mini stuffed creatures. They usually have spherical heads and rounded bodies.

For my first project, I wanted to make a round basket to hold my crochet supplies—super functional and kinda meta! So, I wasn’t planning on making an amigurumi sphere, but I did need to learn how to “crochet in the round”. I found that watching the whole process of how to make a sphere in the video above allowed me to get a feel for what my own rounded project would entail. I found the manner and voice of the person in the video to be slow and pleasant to listen to.

This video also showed me how to make a “magic circle” which is the way you start many projects that are crocheted in the round.

How to Fasten Off by Red Heart Yarn

This is the video I watched to learn the term “fasten off” or tie a knot to end the project and detach it from the ball of yarn. The voiceover sounds a bit robotic but the video helped me clearly understand the step.

More Helpful Links for Learning How to Crochet

I still really like using step-by-step written instructions to learn stuff, rather than having to pause/replay videos. I basically just watched all the above videos once and then referred to written instructions when I needed help for each step of my project. I found the website sarahmaker.com to be easy to follow. Specifically, these links helped me with my project.

At the end of my project, I followed these instructions for an invisible seamless join by Crochet 365 Knit Too for what to do with the very last stitch of my round basket, to get a nice seamless finish. This one is not really a crocheting basic but I am including this here mostly for myself to get back to these instructions in the future!

Starter Kit for Crocheting Newbies

To get started on your first crochet project, you will also need the right tools! The most important things are yarn and needles, of course. Having a whole set of crochet needles in varying sizes is useful if you think you will stick with crocheting multiple projects; this way you will have what you need for any yarn size.

Here is the link to the starter kit that I bought** (affiliate)

At the time of this blog post, the kit is only $7 and it comes with a bunch of crochet needles in different sizes, plus tapestry needles and stitch markers. Honestly this is an incredible deal.

  • Tapestry needles are used to weave your yarn tail into your piece at the end of the project or to stitch crocheted things together; they are like blunt-tipped sewing needles with big eyes for threading yarn through. The ones from this kit feel sturdy enough and come in a cheap but useful little tube with a cap.

  • Stitch markers are for keeping track of a specific stitch and they work just like safety pins but not as sharp; the ones that came with this kit were pretty low-quality but this is the least essential tool in the kit anyway. If you end up hating these, you could use a paper clip or a safety pin.

  • I found the aluminum needles themselves to have a good weight to them and they are comfortable for me to use; in contrast, I found a super lightweight plastic crochet needle in my crafting box from college and did not like the feel of that one at all.

I definitely recommend this kit! I use one of those pink pouches from Glossier to hold everything together (thank you to my friend Taleen for gifting me the pouch).

My First Crocheting Project

And finally, here is the info on my first project.

I thought, what better way to start than to make something that I can use to hold all my crocheting supplies? I made this basket by following this pattern from Crochet 365 Knit Too, with some major caveats. The pattern uses two strands at a time to get a bulkier look, but I think that is too complicated for a beginner like me who is just getting used to making the stitches and understanding what they should look like. So for both the jute and yarn sections, I just used materials that were thicker than the ones noted in the pattern, and did everything as a single strand. Also, as I mentioned before, I was not a very good student to all the teaching materials I listed, because I was connecting the stitches completely wrong the whole time! I didn’t even realize until I started learning how to read the pattern for my next project that I was doing all my stitches through the “back loops only” instead of building the stitches wholly on top of one another. So there is pretty much no way I’ll ever be able to exactly replicate this basket again, but I am quite proud of how it turned out.

I think this basket took me about 4–5 sessions that were 1–1.5 hours each. They were just spaced out over a really long time because travel, other projects, and distractions of life really killed my momentum. Also, about halfway through I spilled an overly-sweet mango tea all over it and had to rinse it off, which relaxed the stiffness of the jute and for a while I was really disheartened by that. IMPORTANT LESSON: Don’t let your yarn get caught on the straw of your drink!!!

Anyway, I hope this is helpful to someone out there who wants to learn how to crochet. And even if no one reads down to this point, at least I have this blog post for myself to refer back to when I eventually delete all this information from my brain and want to learn how to crochet all over again.

Mini Salmon and Kabocha Squash Pot Pies

I wrote up a recipe for Kvarøy Arctic Salmon for mini pot pies filled with a creamy, hearty filling of salmon, kabocha squash, and corn. This was inspired by the herring and pumpkin pie from the Studio Ghibli movie Kiki’s Delivery Service. Ages ago, my friend Sandy gave me the idea to try to recreate the fish pastry design from the movie and I finally was able to do a version that I was really proud to share.

I am pretty late to watching all the Studio Ghibli movies. I watched Kiki’s Delivery Service for the first time last year. I happened to be in Stockholm when I watched it, and then found out the next day that the city in the movie was actually inspired by Stockholm! So I got to see one of the buildings that was recreated in the movie right after. Because the experience was so serendipitous, this movie will have a special place in my heart.

You can get the recipe for these pot pies on Kvarøy Arctic’s website.

Recipe: Brown Butter Sweet Potato Sage Streusel Muffins

For this recipe, I partnered with Danish Creamery to come up with a tasty fall treat. I love baking in the fall, warming up the house with the smell of cozy spices. But as you may know by now, I do not have the biggest sweet tooth, so I wanted to create a recipe for something that feels like a treat and has all the best of flavors that the season has to offer but is *not too sweet*. These muffins are made by first making brown butter with Danish Creamery European Style Sea Salted Butter to give it a wonderful nuttiness, before using it in a batter that’s loaded with sweet potato, fresh chopped sage, and Chinese five spice, sweetened with maple syrup. The streusel topping is also made with brown butter and I added a touch of salt and ground peanuts, giving it a little bit of a sweet-salty vibe that I think is quite addictive!

I’m calling these “muffins” but don’t expect the bready, crumbly kind—these are rich and moist from all that brown butter and fresh mashed sweet potato. The texture on the inside is going to be similar to a decadent carrot cake or banana bread but to provide a nice contrast, the streusel topping is crumbly and light, almost like the edges of a cookie.

With the brown butter being such a major ingredient in both components, you’re going to want to use a high-quality butter to start. Danish Creamery European Style Sea Salted Butter is made with just high-quality cream and a touch of sea salt and it is slow-churned in small batches for a velvety texture and rich flavor. It contains 85% butterfat, which beats out most other European style butters that contain 82%–83%. Browning butter is actually a good way to determine the richness of a butter; avoid butters that create a lot of splatter as they are melting, as that is an indication of their higher water to fat ratio. This butter, on the other hand, melted very smoothly and foamed up gently before turning the rich amber-colored liquid gold that is toasty brown butter!

Let’s get into the details of what you’ll need to do to get these lovely autumnal muffins.

Key ingredients for the brown butter sweet potato muffin base:

  • Brown Butter: What is brown butter? To make brown butter, all you need is good quality butter like Danish Creamery European Style Sea Salted Butter (and a pot and a spatula)! Nothing else goes into it; you are simply cooking the butter and toasting the milk solids in it to intensify the flavor. Bring the butter to room temp first, then cut it into a few smaller pieces and put it in a light colored pot or pan; you’ll want to be able to watch the color so a dark pan is not recommended. Cook the butter on medium-low heat, swirling or gently stirring occasionally until it starts to get foamy. Once it starts to foam up, stir constantly for 2–3 minutes, watching the color. Once the color starts to change, take it off the heat and keep stirring until all the foam subsides, and what you’ll be left with will smell amazing and resemble the color of amber; if you remember the color of the stuff they extracted the dinosaur DNA from in Jurassic Park, that’s the color you want! (But it’ll be way tastier.)

  • Mashed Sweet Potato: This recipe requires the real stuff: fresh mashed sweet potato. You will need about 1 large-ish sweet potato to get the 1 cup needed for this recipe. I have tested this recipe with both steamed and roasted sweet potato and both turned out great. I do not recommend cooking your sweet potato by microwave as that will probably dry it out. My favorite method is roasting. To roast sweet potatoes: Preheat the oven to 425°F. Wash the sweet potatoes and prick them all over with a fork. Place the sweet potatoes directly on the middle rack of the oven. Place a foil-lined baking sheet underneath them to catch anything that drips. Bake for 40–50 minutes or until they are completely soft inside. You should be able to scrape them easily from the skins and mash them up with just the slightest amount of pressure. You do not need a perfectly smooth purée for this recipe but there shouldn’t be big lumps. This can most definitely be done ahead; just bring it to room temp before using it in the batter.

  • Sage: I used 2 tablespoons of finely chopped sage for this recipe. I know that sage can be pretty divisive, but I love it. To me, it’s one of the flavors that makes Thanksgiving food special, even more so than the pie spices and the fall gourds. I actually felt that there could’ve been more sage flavor, but Spouse, who is not as much a fan of sage, thought that it was enough to notice it’s there without being at all bothered by it. I think that sage lovers could bump this all the way up to 3 tablespoons if they wanted. Conversely, if you hate sage, you can totally leave it out.

  • Maple Syrup: I used maple syrup as the only sweetener in the muffin batter because it brings a gentle sweetness and complements fall flavors so well. And ol’ maple syrup will do, as long as it’s the real stuff. 

  • Chinese Five Spice Powder: I wanted to do something a little different for fall baking here, so instead of a blend of classic American pie spices, I used Chinese five spice powder. What is five spice? It doesn’t always have only five spices, but the number five is called out because the ingredients are meant to represent the five elements in Chinese mythology. It typically has cinnamon, star anise, clove, fennel, and sichuan pepper. I opted for this because it is a pantry staple for me and I liked that it is a little bit more savory-leaning. You can substitute a pumpkin pie spice blend if you don’t have it, but I find that the heavy cinnamon content in those makes the blends a bit stronger than five spice, so I’d reduce the amount if making this substitution.

Things to know about making the streusel topping:

Once again, you’ll be making brown butter for the streusel that goes on top of the muffins, giving them that appealing, crackly mushroom top. You could brown all the butter for the recipe at once and then measure it out for each component; however, I found it was easier to do them separately and use the measurement markings on the butter wrapper. Either way, you will want to make the streusel first anyway to give it a little bit of time to chill. 

In addition to the brown butter, the other key ingredients for the streusel are a touch of five spice, dark brown sugar, regular white sugar, kosher salt, and unsalted roasted peanuts. 

Why roasted peanuts?  I included finely chopped peanuts in my streusel because I wanted the crumbly topping to have a salty-sweet quality to it, in the vein of kettle corn or salted caramel. The peanuts helped bring in a savory quality as well as nice texture to the streusel mixture, and combined with the kosher salt, the result is definitely a nice little touch of a salty balance for the maple and sweet potato muffin base. You can substitute in any nut you’d like for this. If you have a nut allergy, you could also sub in breadcrumbs, or finely crushed chicharrones!

How to get the most visually appealing muffins: 

To get bakery-style muffins that are nice and full with a mushroom top, there are a couple of special but easy tricks I used here that I will now share with you. (Note that in the photos, I used a vintage muffin tin that is proportioned a little differently but to actually test the recipe and bake the muffins shown, I used a modern, standard muffin tin and standard paper liners.)

You’ll notice that this recipe makes 9 muffins. I filled the muffin cups all the way to the top using an ice cream scooper to scoop out the batter into a nice domed shape. The amount of batter will rise and fill out the muffin cups nicely this way. You can certainly divide the batter into 12 muffin cups, but they just won’t have the muffin top you see in the photos, and you’ll want to test for doneness a couple minutes early.

Another major trick is to give the muffins a burst of high heat at first to get the tops to really rise up, and then lower the temp for them to bake evenly through the rest of the way. I start the oven at 425°F for the first 5 minutes, and then turn it down to 350°F for the rest of the time. You can skip this step if you don’t have time to watch the oven, and just bake them at 375°F for 20–25 minutes.

The last tip is to really pile on the streusel topping. Even if the top looks totally covered when you first put the muffins in the oven, keep in mind that as they rise, the surface area of the tops will increase, creating gaps in between the chunks of streusel. This recipe makes a very generous amount of streusel for if you are making 9 muffins; you might not end up using every single crumb of it, but get on them as much as the muffin tin will allow to get fully streusel-covered muffins in the end. 

Now that you know all my tricks for how to produce aesthetic muffins, happy baking!

How to Make Brown Butter Sweet Potato Sage Streusel Muffins

(Makes 9 muffins)

Ingredients for the Streusel

5 tbsp Danish Creamery European Style Sea Salted Butter, cut into chunks
1/3 (packed) cup dark brown sugar
2 tsp sugar
1/2 tsp Chinese five spice powder
2/3 cup all purpose flour
1/4 cup roasted unsalted peanuts, finely chopped
1/2 tsp kosher salt

Ingredients for the Muffin Batter

1/2 cup (1 stick)  Danish Creamery European Style Sea Salted Butter, cut into chunks
1 3/4 cup all purpose flour
1 tsp baking powder
1 tsp baking soda
1 1/4 tsp Chinese five spice powder
1/2 tsp kosher salt
1/2 cup + 1 tbsp maple syrup
1/4 cup milk or nut milk
1 cup sweet potato, cooked and mashed*
2 eggs, beaten
2 tbsp sage, finely chopped


Notes

* Recommended method for mashed sweet potato: Preheat the oven to 425°F. Wash the sweet potato(es) and prick all over with a fork. Place directly on the middle rack of the oven. Place a foil-lined baking sheet on the rack below. Bake for 40–50 minutes or until completely soft inside. You should be able to scrape the flesh easily from the skins and mash with slight pressure. Sweet potato mash can be made ahead. Measure 1 cup and allow to come to room temperature before using in the recipe.

Procedure

To make the streusel: 

Brown the butter: Cook the butter on medium-low heat, swirling or gently stirring occasionally until it starts to get foamy. Once it starts to foam, stir constantly for 2–3 minutes, watching the color. Once the color starts to change, take off the heat and keep stirring until all the foam subsides. The melted butter should now be the color of amber. Set aside.

Whisk together brown sugar, sugar, and five spice in a small bowl. Mix in brown butter. Add flour, chopped peanuts, and salt. Use a folding and pressing motion with a spoon or spatula to gently combine everything together; texture should be similar to a dry shortbread dough. Pack together into a disk and place in the fridge to chill for 5–10 minutes; it should feel slightly firmer but not be hard or solid.

To make the muffin batter:

Preheat oven to 425°F.

Follow the same instructions above to make brown butter. Set aside and allow to cool slightly.

In a medium bowl, whisk together flour, five spice, baking powder, and baking soda.

Once brown butter has cooled, transfer to a mixing bowl. Stir in salt, maple syrup, milk, sweet potato mash, eggs, and sage in that order. Gently fold in one third of the dry ingredients at a time. Combine until just homogenous. Batter should be thick but wet.

To assemble:

Line or grease 9 cups in a standard muffin tin. Divide the batter evenly among the 9 lined cups (using an ice cream scooper is recommended for this). 

Use your hands to crumble up the disk of streusel dough into mixed sized chunks ranging from the size of a pea to finer crumbs. Cover the tops of the muffin batter with the streusel and press in gently.

Bake at 425°F for 5 minutes, then reduce the oven temperature to 350°F and bake for an additional 15–18 minutes. Muffins are cooked through when an inserted toothpick comes out clean. Allow to set for about 3–5 minutes before transferring to a cooling rack. If desired, add a sage leaf on top of each to garnish. 

Once fully cooled, store leftover muffins in an airtight container. However, the streusel will soften over time.

Enjoy them on their own, or give them a swipe of some softened Danish Creamery European Style Sea Salted Butter for some extra indulgence.

Thank you so much to Danish Creamery for sponsoring this recipe! Visit their website to learn more about their legacy of carefully-crafted Old World-quality butter made with milk from family farms since 1895.
How to Turn Your Favorite Dinner Roll Recipe into Pumpkin-Shaped Buns

Cozy sweaters, the crunch of colorful leaves under your boots, and pumpkin spice everything—admit it, fall is a season that has a special place in your heart. Why else would you be reading this blog post? But if you are a lover of both hygge vibes and savory flavors, perhaps you don’t wish for every fall baking project to be flavored with sweet cinnamon and clove. Perhaps you’re looking for another way to create something yummy and pumpkin themed, that satisfies your savory cravings too?

In this blog post, I am going to walk you through how to turn your favorite dinner roll recipe into pumpkin-shaped buns that are perfect for hamburgers or decadent breakfast sandwiches.

These instructions should work with any gluten-based dinner roll recipe that typically makes 12 rolls in a 9”x13” baking dish (I have not tried it with alternative/gluten-free flours). We are instead going to divide that dough recipe up into 8 equal parts to make 8 pumpkin-shaped buns that are sized like a fluffy hamburger bun. For mine, I used @arjolee’s cheesy everything bun recipe, which is my go-to recipe for making the tastiest savory buns that are plenty full of flavor to eat just on their own. (You could also follow the same shaping steps with an existing favorite hamburger bun recipe.)

Most dinner roll recipes have you first allow the dough to rise until doubled in size, and then undergo a second proof in the baking dish after the individual rolls have been divided and shaped. However, in this case, it will realistically take a bit of time for you to do all the tying of twine that is needed to create those pumpkin shapes, so the dough effectively undergos that second proof in that time.

If you love pretzels and you’re looking for something to snack on with a little more chew while satisfying your autumnal obsession with all things pumpkin shaped, then I have a more precise recipe for pumpkin-shaped pretzel buns too, which you can check out here.

Here’s how to turn your favorite dinner roll recipe into pumpkin-shaped buns:

Start by making your batch of dough as you normally would. You can use whatever gluten-based 9”x13” bun/roll recipe you’d like and it should work, but I recommend using my pal Ariel Lee’s recipe, which is the one I used in the photos. Allow the dough to undergo the first proof.

While the dough is proofing, prep your twine so you can do all the shaping efficiently when the dough is ready. Tying twine around the balls of dough is what creates those indentations of the pumpkin shape as the dough expands in the oven. Cut thin, food-safe baker’s twine into about 10-inch pieces. You will need 4 pieces of twine per bun and we’re making 8 buns, so you’ll need to prep 32 pieces of twine.

Preheat the oven according to your recipe.

After the first proof, divide the dough evenly into 8 portions. As you work with each portion, leave the others covered under a damp tea towel. Dust your hands lightly with bench flour but don’t use too much on your work surface as you’ll need a bit of surface tension.

Roll each portion of dough into a ball gently using the method used for shaping a boule: Flip the ball over and pull all of the edges into the middle to form a little pouch. Then flip it over again. Cup your palm and fingers gently around the ball to form a cage and roll the dough in a circular motion, using the tension with the work surface to seal the seams on the bottom and create an even ball shape. This will result in a nice domed surface on top while gently handling the dough to keep it light and airy. Repeat with all 8 pieces of dough.

For each portion of dough, lay out 4 pieces of twine to form an asterisk. They don’t have to be perfectly symmetrical; if you wish for your pumpkins to be a little more wonky because that is part of their charm, go ahead. However, I tried both irregular criss-crossing of the twine and others where I tried to make them as neat as possible and I found that the ones where I tried to keep them even are the ones that turned out looking the most pumpkin-like. The uneven shapes were more reminiscent to me of heirloom tomatoes.

After laying out the twine on your work surface, place a ball of dough face-down in the middle and tie both ends of each individual length of twine into a double knot. Take care to have them just gently curving around the ball of dough; do not make a tight loop around the dough. The dough will expand significantly by the time it is done baking, so you don’t want the twine to be cutting in too deeply into the final shape.

When all 4 knots are tied, trim off the excess twine and flip the ball over. Make any adjustments needed.

Place your trussed dough baby on a parchment-lined tray and cover with a damp towel.

As you repeat the process with the other dough balls, give the buns at least 3 inches of space around them on the tray because they will expand! By the time I was done tying up all the dough, the earlier ones had already started to rise quite significantly, starting to form that pumpkin shape. Unless you’re working in a very cold place—or you’re exceptionally fast at typing knots—you probably won’t need much of a second proof.

Here’s what mine looked like by the time I was done tying them all and getting my eggwash ready. Let yours proof until they are starting to puff beyond the loops of twine, like you see below; it should just take a few minutes unless it’s super cold! (Note that after taking this photo, I divided them onto two trays so that there could be more space between them. Don’t overcrowd your trays!)

At this point I brushed a beaten egg yolk over the surfaces of the buns. Using just the egg yolk for the eggwash is what gave them their rich brown color and glossy finish so I definitely recommend it! The everything seasoning is optional, but tasty!

After brushing on the eggwash, bake the buns according to your recipe’s instructions. I found the baking time to be the same for these 8 larger buns as for making 12 smaller buns packed together in a baking dish.

When the buns have baked, allow them to cool a bit for safe handling. You’ll find that the twine is now embedded into the buns and they’ve baked up around it, and you of course need to remove all the twine before serving/eating. I do not own a bread lame, but that would be very useful here. Instead, I used a faux lame in the form of a stainless steel razor blade. I gently cut into the surface of the buns along the lines created by the twine, in order to free the twine cleanly without the bread getting torn up. Be sure to remove all the twine before eating!

To finish things off, I added a little pepita/pumpkin seed into each bun to resemble the pumpkin stem.

I hope these step-by-step instructions help guide you to making the pumpkin-shaped buns of your cozy fall baking dreams. If you found these instructions helpful in making your own, please be sure to tag me, @lilybubbletea, on Instagram so I can see your creations!

Recipe: Miso Garlic Butter Noodles with Lobster Tails

For this recipe, I partnered with Danish Creamery and created a dish that feels completely luxurious and indulgent, yet is actually simple and quick to make. A wonderful, umami-rich miso butter with a sweet undertone is infused with lots and lots of garlic and this forms the sauce that coats every strand of noodle before the whole lot is topped with pan-seared lobster tails slathered in the extra miso garlic butter. It’s good for when you want to make a home cooked meal that feels special but you don’t actually want to spend that much time on it. 

This noodle recipe combines two amazing and easy Asian-American dishes: Vietnamese-American garlic noodles and Japanese-American miso butter pasta. I make a lot of fusion food because often when I think about what I feel like cooking, I think of two things I’m craving and then explore what it would be like to combine them. And when I realized how well these dishes would overlap, it was way too obviously meant to be to pass up. 

Garlic noodles were actually invented by a Vietnamese chef right here in San Francisco and it was one of the first dishes I had after moving in to the city over 10 years ago (though not at the original restaurant). At the time, I was still terrified of driving downtown and still not all that into Asian food; I was still in my phase of wanting to binge on all the Western foods I didn’t get to have very much of when I was growing up. But my new landlady at the time recommended a Vietnamese restaurant right in our neighborhood and I fell in love with their garlic noodles. I think that was really a turning point in my exploration of food—especially Asian x Western fusion food.

This dish doesn’t require a whole lot of ingredients so it’s important that the ones that are in it are good. Ultimately the foundation for the sauce here is butter, and I used Danish Creamery European Style Unsalted Butter, which is slow-churned in small batches for a velvety texture and rich flavor. This extra time and extra care make the butter so extra delicious. As I folded it in with the mellow, slightly sweet miso, I knew things were gonna be good! And then allowing that miso butter to melt slowly over low heat with lots and lots of chopped garlic to get it infused with that garlic flavor—absolutely dreamy!

Here are some notes about the short list of key ingredients you’ll need to make this dish:

  • White Miso: White miso is the most mellow and mild of the types of miso you would find at a specialty foods store or Asian supermarket. It is made of fermented soybeans like other misos but also has rice and barley. It’s important to use the right miso here as the mellowness and sweetness of white miso is what you want to make that subtle but luxurious miso butter. I would not recommend substituting other types of miso, which may be too salty.

  • Butter: This recipe utilizes Danish Creamery European Style Unsalted Butter and the starchy water from parboiling the noodles to create a very simple emulsified sauce for the noodles. Danish Creamery’s European Style butters contain 85% butterfat (which is more than most other European style butters) and that’s what helps make  the sauce for this recipe rich and dreamy.

  • Garlic: This isn’t one of those recipes that just uses a couple cloves of garlic! When I say “garlic noodles” I mean it. This recipe uses a whole head of garlic—about 10–12 cloves—and gently infuses garlic flavor into the miso butter over low heat before the whole mixture is tossed with the noodles to coat them. Don’t worry about chopping them up super fine, I think being able to see the bits of chopped garlic is welcomed in this dish. 

  • Noodles: I used fresh Chinese style enriched egg noodles to make this dish. These noodles come in the refrigerated section of Asian supermarkets and they only need to be parboiled very quickly in boiling water to rinse off the excess starch before they can be incorporated into a stir fried noodle dish like this. You could definitely also use spaghetti; in that case I recommend cooking it until about 1 minute short of al dente.

I got the idea to top my miso garlic butter noodles with lobster from a night market that pops up in the SF Bay Area; one of the stalls served up a split open lobster on garlic noodles but I don’t really understand how you’re supposed to eat it with no shell cracker and when you’re at an event where most people eat standing. So instead of getting it there, I created my own version that I could enjoy in the comfort of my own home. I opted to just use lobster tails because I thought they’d be much less intimidating than working with a whole lobster; I wanted this recipe to be genuinely easy in hopes that you’ll try it!

Some alternative versions:

At the core of this recipe is delicious and easy miso garlic butter noodles! Feel free to leave out the lobster entirely, and the result will be a plate of the most flavorsome dream for lovers of carbs and garlic. Just reduce the amounts for the butter, miso, and garlic to about 75% if you decide to serve just the noodles alone. 

You could also substitute shrimp in place of the lobster tails. Skip the step of parboiling the lobster and instead cook them in a hot pan on each side, just until they change color and start to curl. Follow the rest of the recipe as written, then add the shrimp after the noodles are coated in the sauce and give everything a few extra tosses.

How to Make Miso Garlic Butter Noodles with Lobster Tails

Ingredients

1 stick Danish Creamery European Style Unsalted Butter, softened to room temperature
1/4 cup white miso paste
2 6–7 oz lobster tails, fresh or completely thawed
10–12 cloves garlic (about 1 head), roughly chopped
3 tbsp oyster sauce
8–10 oz fresh Chinese-style thin egg noodles
Thai basil, for garnish (optional)
2 tbsp tobiko, or other fish roe (optional)
4 lemon wedges, for serving (optional)

Procedure

In a small bowl, combine the butter and miso paste and mix together until smooth and homogenous. Set aside.

Use a sharp pair of kitchen shears to split each lobster tail lengthwise.

Bring a large pot of water to a boil. Add the lobster tail halves and boil for about 3 minutes or until shells are bright red and meat has started to firm (they should not yet be cooked through). Pull them out of the boiling water and carefully pat away excess water with paper towels. Set aside to continue to dry off.

Add noodles to the boiling water and parboil for 1 minute, or according to package instructions. Reserve about 3/4 cup of starchy water before draining the noodles. Rinse noodles thoroughly in cold water to remove excess starch and prevent overcooking. Set aside to drain thoroughly. 

Heat a large skillet or wok on medium heat. Add about a tablespoon of the miso butter mixture, swirl to coat the bottom of the pan, then add the lobster tails, cut side down. Sear for about 1 minute, or until lobster meat has some browning on the surface.  Turn off heat, flip tails over, cover, and allow the residual heat from the pan to cook the lobster tails through, about 1–2 minutes. Remove them from the pan. If there is charred residue inside the pan, safely wipe it off using tongs and a damp paper towel.

Add the remaining miso butter mixture into the pan and set heat on low. Once it starts to melt, add chopped garlic. Cook garlic on low heat, stirring constantly to allow it to infuse the butter, for about 5 minutes, or until the edges of the garlic start to turn golden. Turn up the heat to medium-high;  immediately add oyster sauce, stir to combine, then add noodles and about 1/4 cup of the reserved cooking water. Toss vigorously to combine, adding more water a little at a time if needed to help the sauce coat the noodles. Once sauce is distributed evenly, continue to stirfry until there is no longer excess water.

Use tongs to transfer noodles to a serving dish. Top with lobster tails, then scoop the remaining fried garlic mixture from the pan and spoon it on top of the lobster tails. If desired, garnish with Thai basil and scoop small mounds of tobiko over the lobster tails before enjoying immediately.

Thank you so much to Danish Creamery for sponsoring this recipe! Visit their website to learn more about their legacy of carefully-crafted Old World-quality butter made with milk from family farms since 1895.
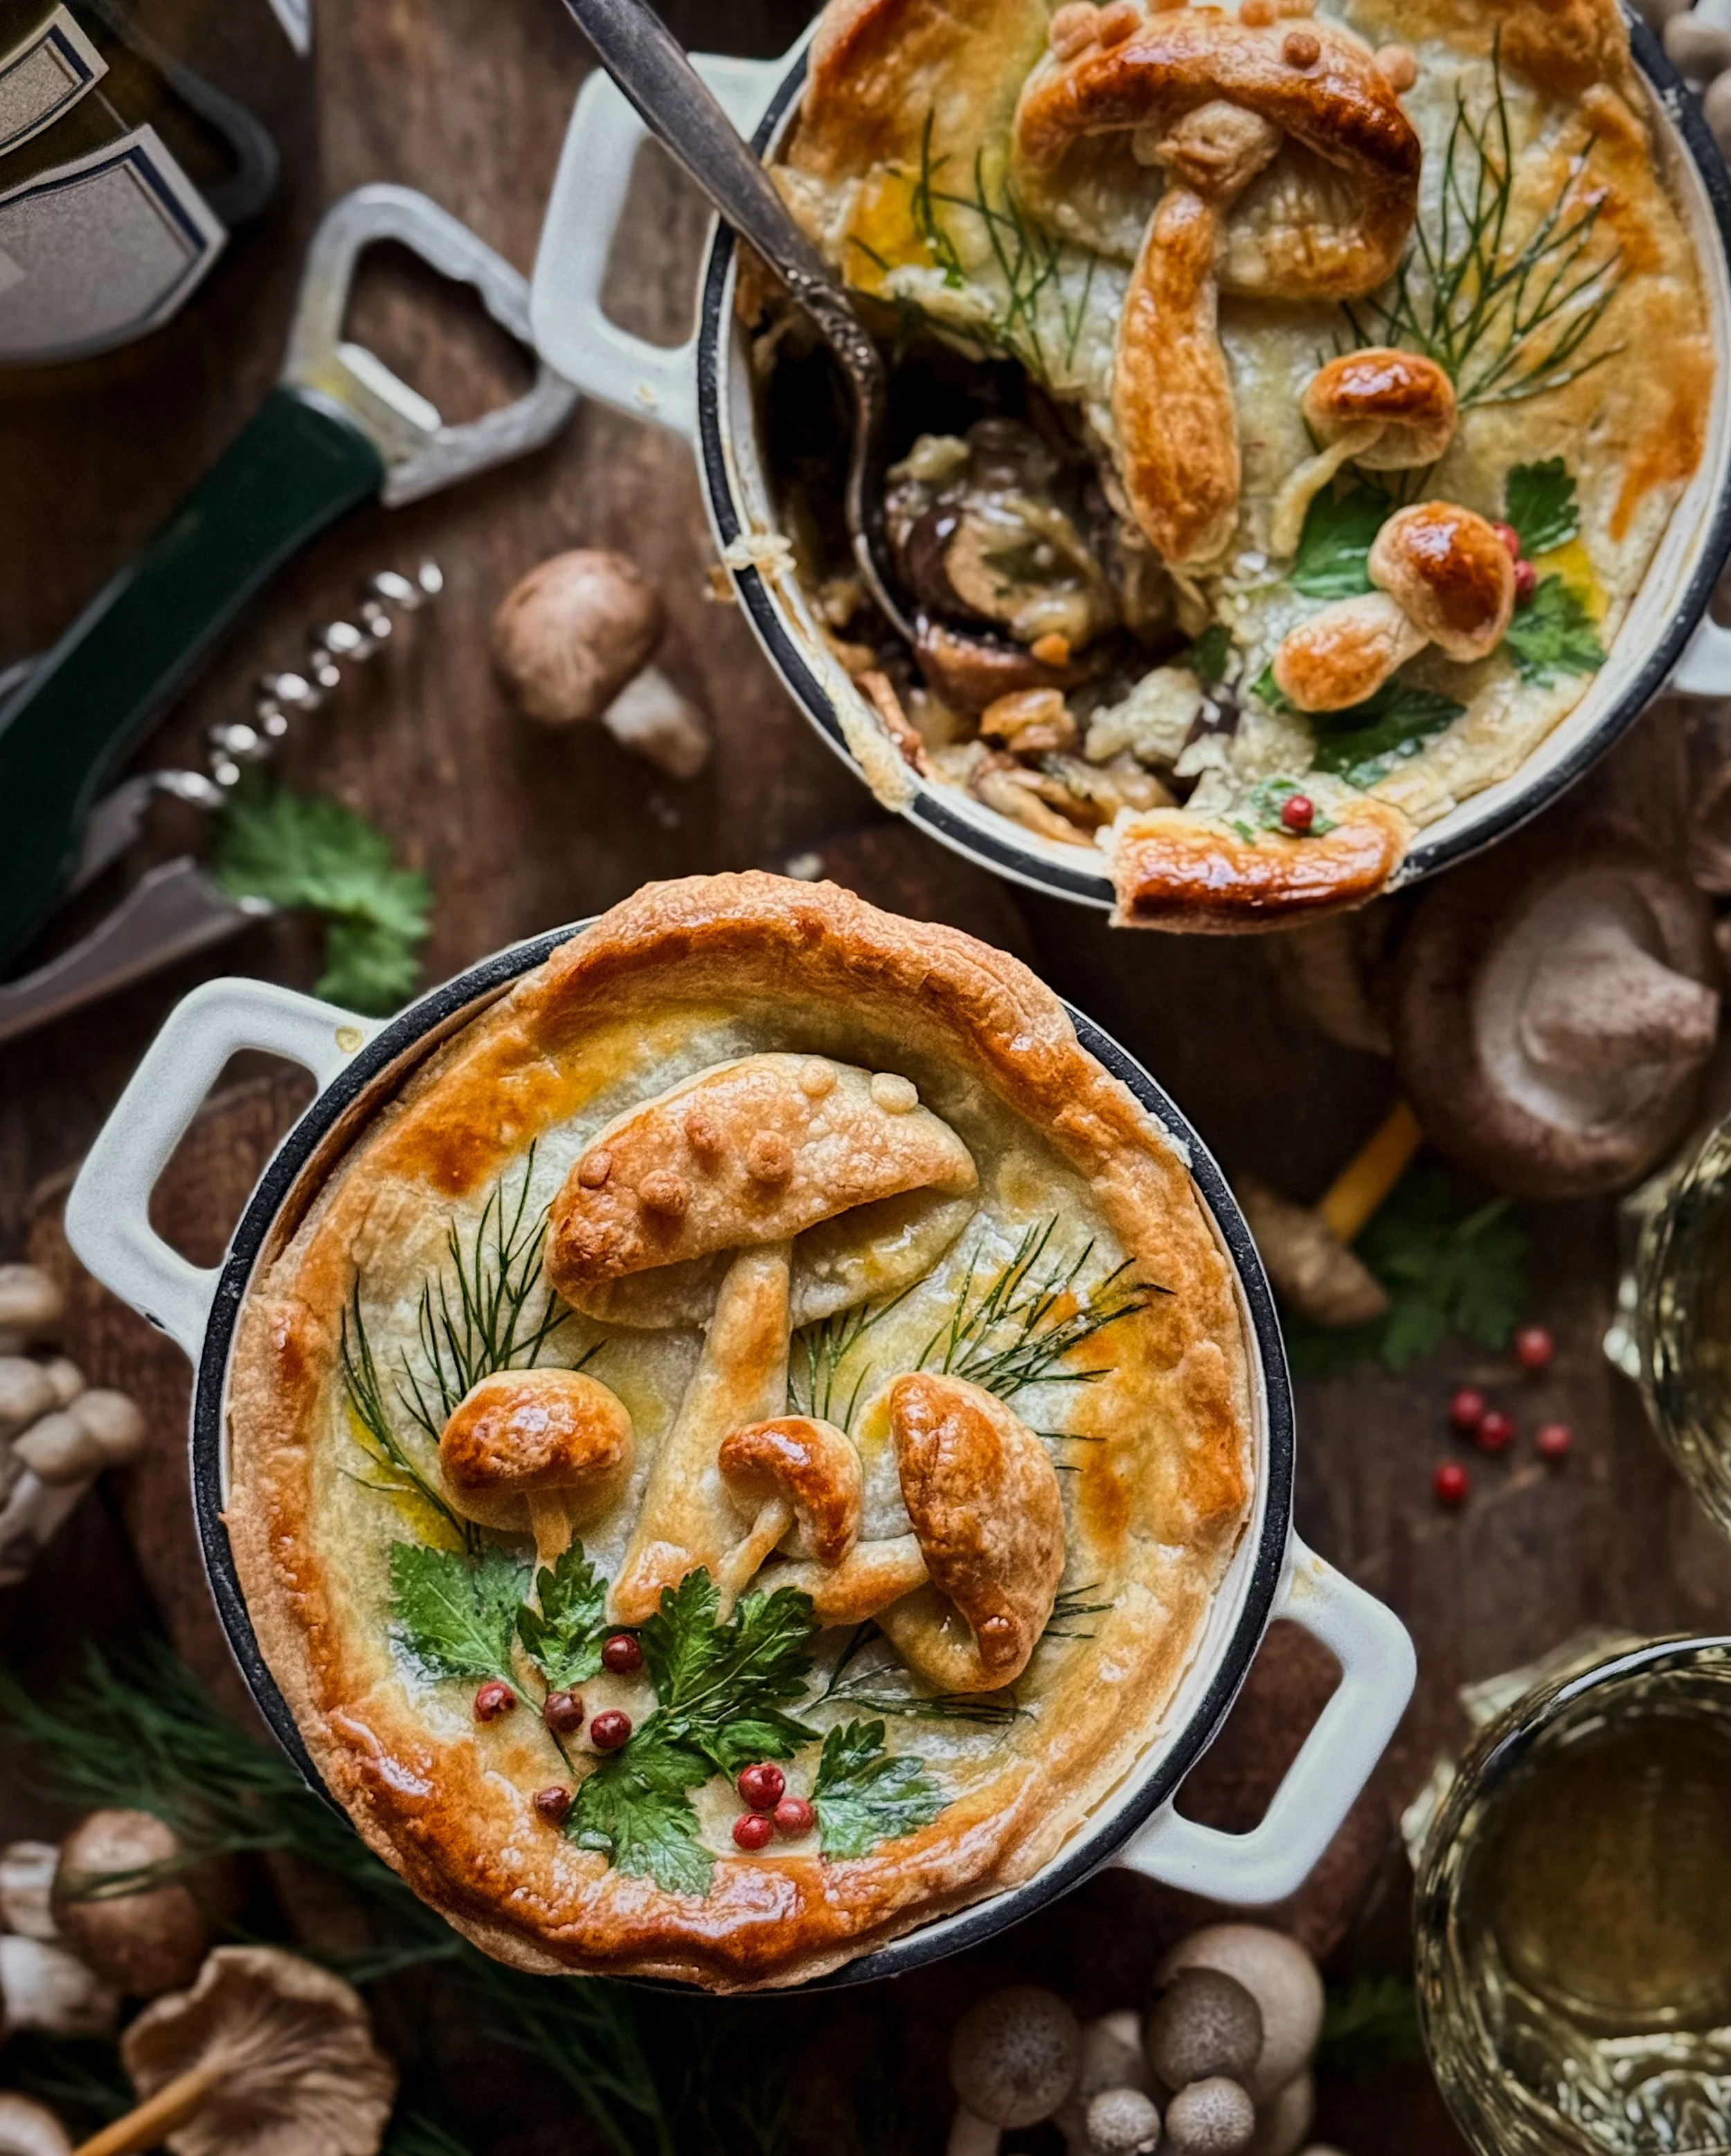
Downloadable Dahlia Wallpapers

I got such a great deal on some gorgeous dahlias at the Stonestown Farmers Market last Sunday. I wish I made a note of the name of the vendor but I think I will go back soon and look because it was such a great little farmers market with easy parking.

I got 4 bunches of dahlias for $20 total and they were exactly the colors I’d needed for an upcoming client shoot. I am guessing they were pesticide-free because I found quite a few teeny tiny snails hidden amongst the petals. Like, days later, I was still finding more.

Anyway, I shot some quick photos when I first brought home the flowers and turned them into some wallpaper images. You are welcome to save the images to your phone to use them as your wallpaper (these are sized for the iPhone X).

Please note that these are for personal use only and not to be used for any commercial purposes. All copyright of these images is retained by me, Lily Morello.

Recipe: Apricot and Brie Tart

I wanted to make a bunch of apricot rosettes and what better way to display them than in a sweet and savory tart?

Once I have finished working on a recipe I really am happy with, I try to get as much out of it by riffing on it and using it in different contexts. Recipe testing is time consuming, and I am determined to get my time’s worth by using that recipe over again. For this tart, I made the same cheesy, savory short crust shell that I developed for a sponsor for this mixed stone fruit and goat cheese tart here. I love this crust recipe because it’s cheesy and peppery and unlike what you’d expect for a fruit tart. It has a serious snap to it, and enough flavor that it could really stand alone, but it is also perfect for tarts that have a savory cheese filling. The dough comes together very easily in a food processor, though you do have to plan ahead a bit and freeze the cubed butter. The actual labor involved is low, though, so you can save your energy for rolling up those pretty apricot roses!
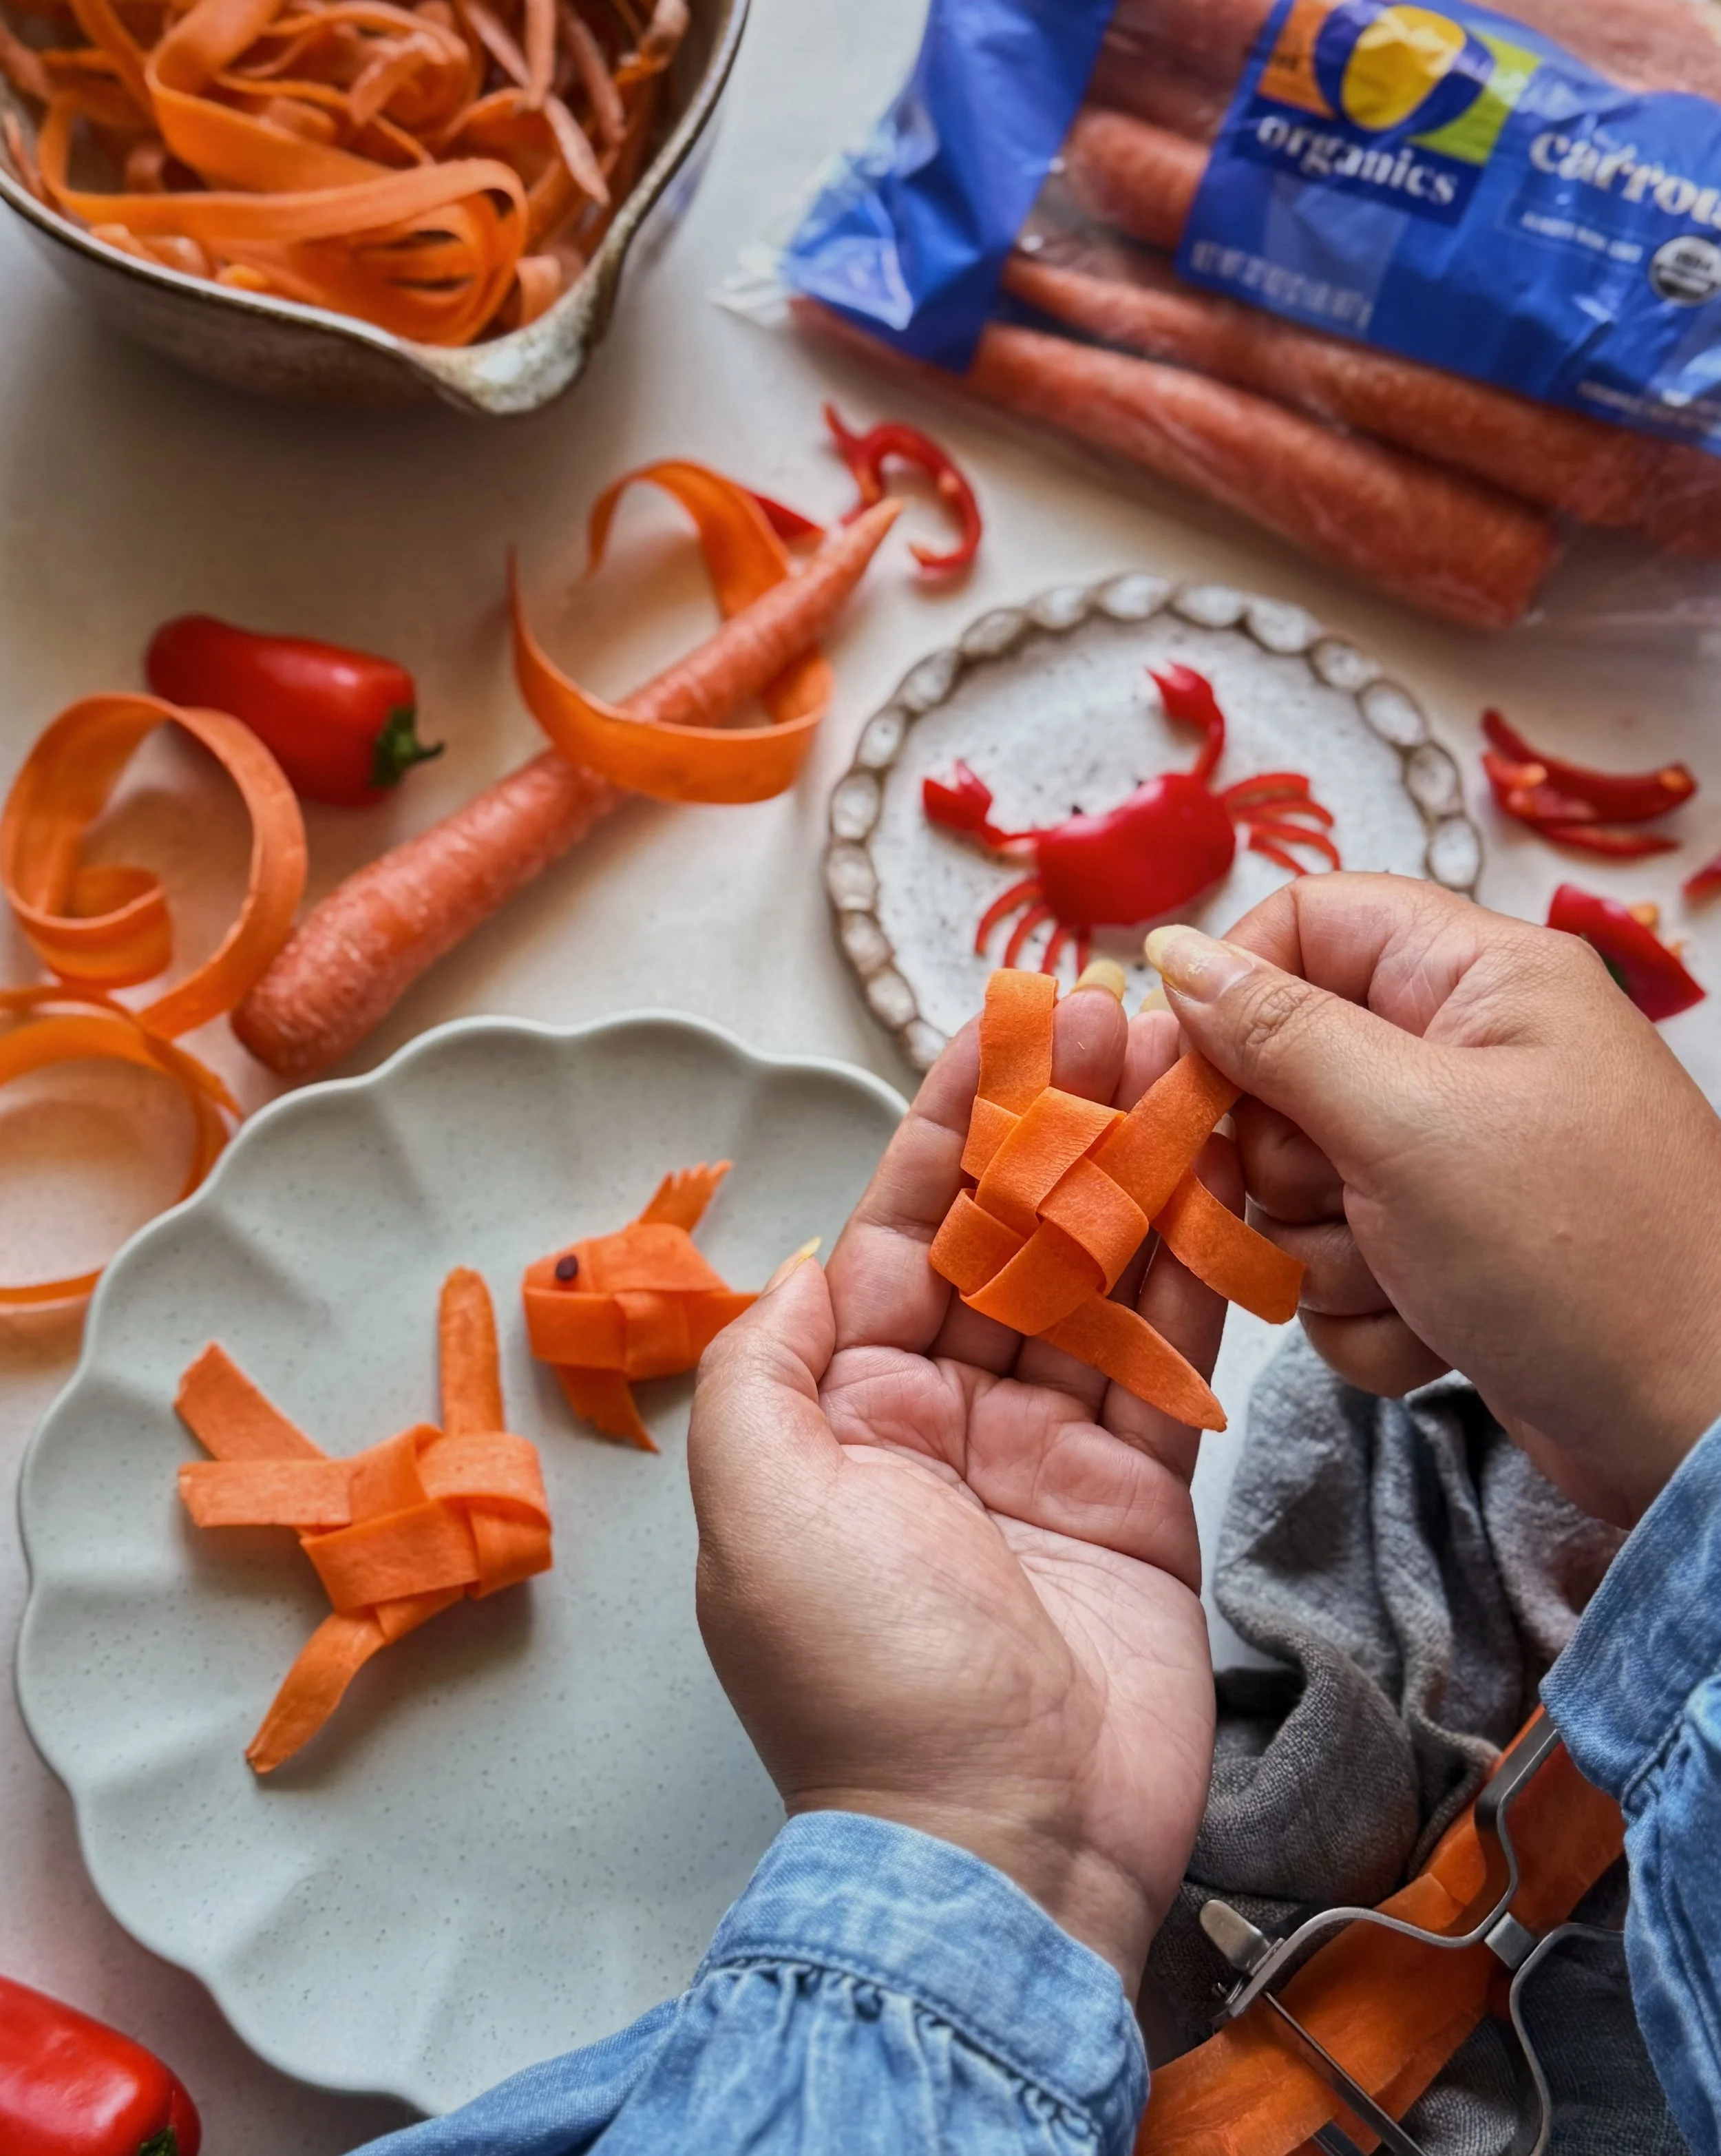
In reality though, this is still going to taste good if you just cut up your apricots into little pieces and dump them onto the tart. I am completely willing to admit that slicing up a bunch of apricots and then wrapping the slices round and round each other to form a bunch of rosettes is not a normal way for someone to spend a summer afternoon. But would you have clicked on this recipe if the tart didn’t look this pretty? I personally find it sort of therapeutic to focus on delicately handing tiny pieces of produce for a bit, and at this time of year, I’ll find any excuse to immerse myself in stone fruit.

Here is a detailed walkthrough of how to make this apricot and brie tart:

  • Make the tart shell/crust: You will need to plan ahead here, because you’ll need to cut butter into small cubes, freeze them, make the dough, press it into the tart tin, and then let that chill. This tart utilized the tart crust recipe found here. Follow the “ingredients for crust” section and the first step of the procedure and that will take you up to the point where you have your chilled raw crust that is ready for baking action. That’s where the story picks up over here with a different filling, this time celebrating the beautiful delicate combo of brie and apricots.

  • Bake the crust and brie: First, you will blind bake just the raw crust for 20 minutes with some sort of pie weights to keep its shape and prevent it from puffing up in the tin. (I line my crust with foil and then use dried beans as a cheap alternative to buying pie weights.) Then you will bake the crust until it is nearly golden brown and pretty much fully baked. For the last 5 minutes, you’ll add slices of brie to melt across the bottom. I used this goats milk brie, but a more traditional version will be just as tasty. Just make sure you are getting as even of a layer as you can when you are slicing and placing the cheese; it doesn’t matter if the pieces of cheese look weird because they will get fully covered.

  • Spread the jam: After the brie has been melted, it will cover the bottom of the shell more evenly. Then you’ll want to add a layer of apricot jam or preserves. Feel free to swap for a different flavor but I wanted to keep the flavors simple in this one so I stuck with apricot. This sticky jam layer is going to be what holds the apricot roses in place.

  • Make and place the apricot rosettes: To make the rosettes, I first cut the apricots lengthwise into thin slices. I’ll use the thinnest pieces for the centers of the rosettes, rolling them into as tight of a spiral as I can, and then I will wrap a few pieces around it before placing it into the jam layer. Then I will tuck a few more pieces around it until I am happy with the size and fullness of the rosette. Keep doing that until all the big gaps are filled.

  • Glaze the apricots: Whisk together a little honey and water to form a glaze; microwave the mixture a little if needed to help dissolve the honey. When the glaze is back to room temp, brush this over the apricots. It will give them a shiny look and prevent them from browning if you are making this a bit ahead of serving.

  • Fill in the gaps with herbs: If you wish to, you can fill in any gaps in between the rosettes with fresh herb leaves to give the tart a very full and finished look. I used oregano here because I had a lot in my garden, but small basil or mint leaves would honestly be a better flavor pairing. You could also fill the gaps with pitted cherries—I think that’d look lovely. I also sprinkled a little bit of lemon thyme on the tart, which added a nice herbal aroma.

  • Cut in with a very sturdy, sharp knife and enjoy!: The crust is quite short and snappy so you’ll need a good knife to press through for cutting clean wedges. It may feel like a shame to cut into it after making all those roses, but food—even pretty food—is meant to be eaten!

How to Make the Apricot & Brie Tart

Ingredients

1 chilled, unbaked cheesy shortcrust from this recipe
5 oz brie cheese, cut into 1/8"-inch slices
5–6 tbsp apricot jam or preserves
3–4 apricots, thinly sliced
1/2 tsp honey
1 tsp warm water
fresh herbs for garnish (optional)

Special Equipment

food processor
tart pan with removable bottom
dry beans or pie weights

Procedure

Preheat oven to 400°F. 

Dock chilled shell with a fork to prevent it from warping and puffing while baking. Line with parchment paper or foil and fill with dry beans or pie weights. Place the tart pan on a baking sheet and bake for 20 minutes.

Gently remove the lining and weights, then bake for an additional 15 minutes.

Add brie in an even layer over the bottom of the tart shell. Bake for an additional 5 minutes, or until brie is melted and crust is golden brown.

Spread apricot jam or preserves in an even layer over the brie.

Form rosettes with the slices of apricots and arrange them in the tart. The apricot jam will help hold them in place.

Whisk together honey and water and brush over the apricot rosettes to give them a shiny, glazed look.

Garnish with fresh herbs if desired. Oregano, mint, or basil leaves could be used to fill in gaps between the rosettes.