
Recipe: Toasts with Cottage Cheese Sheep and Blistered Scallion & Herb Whipped Butter
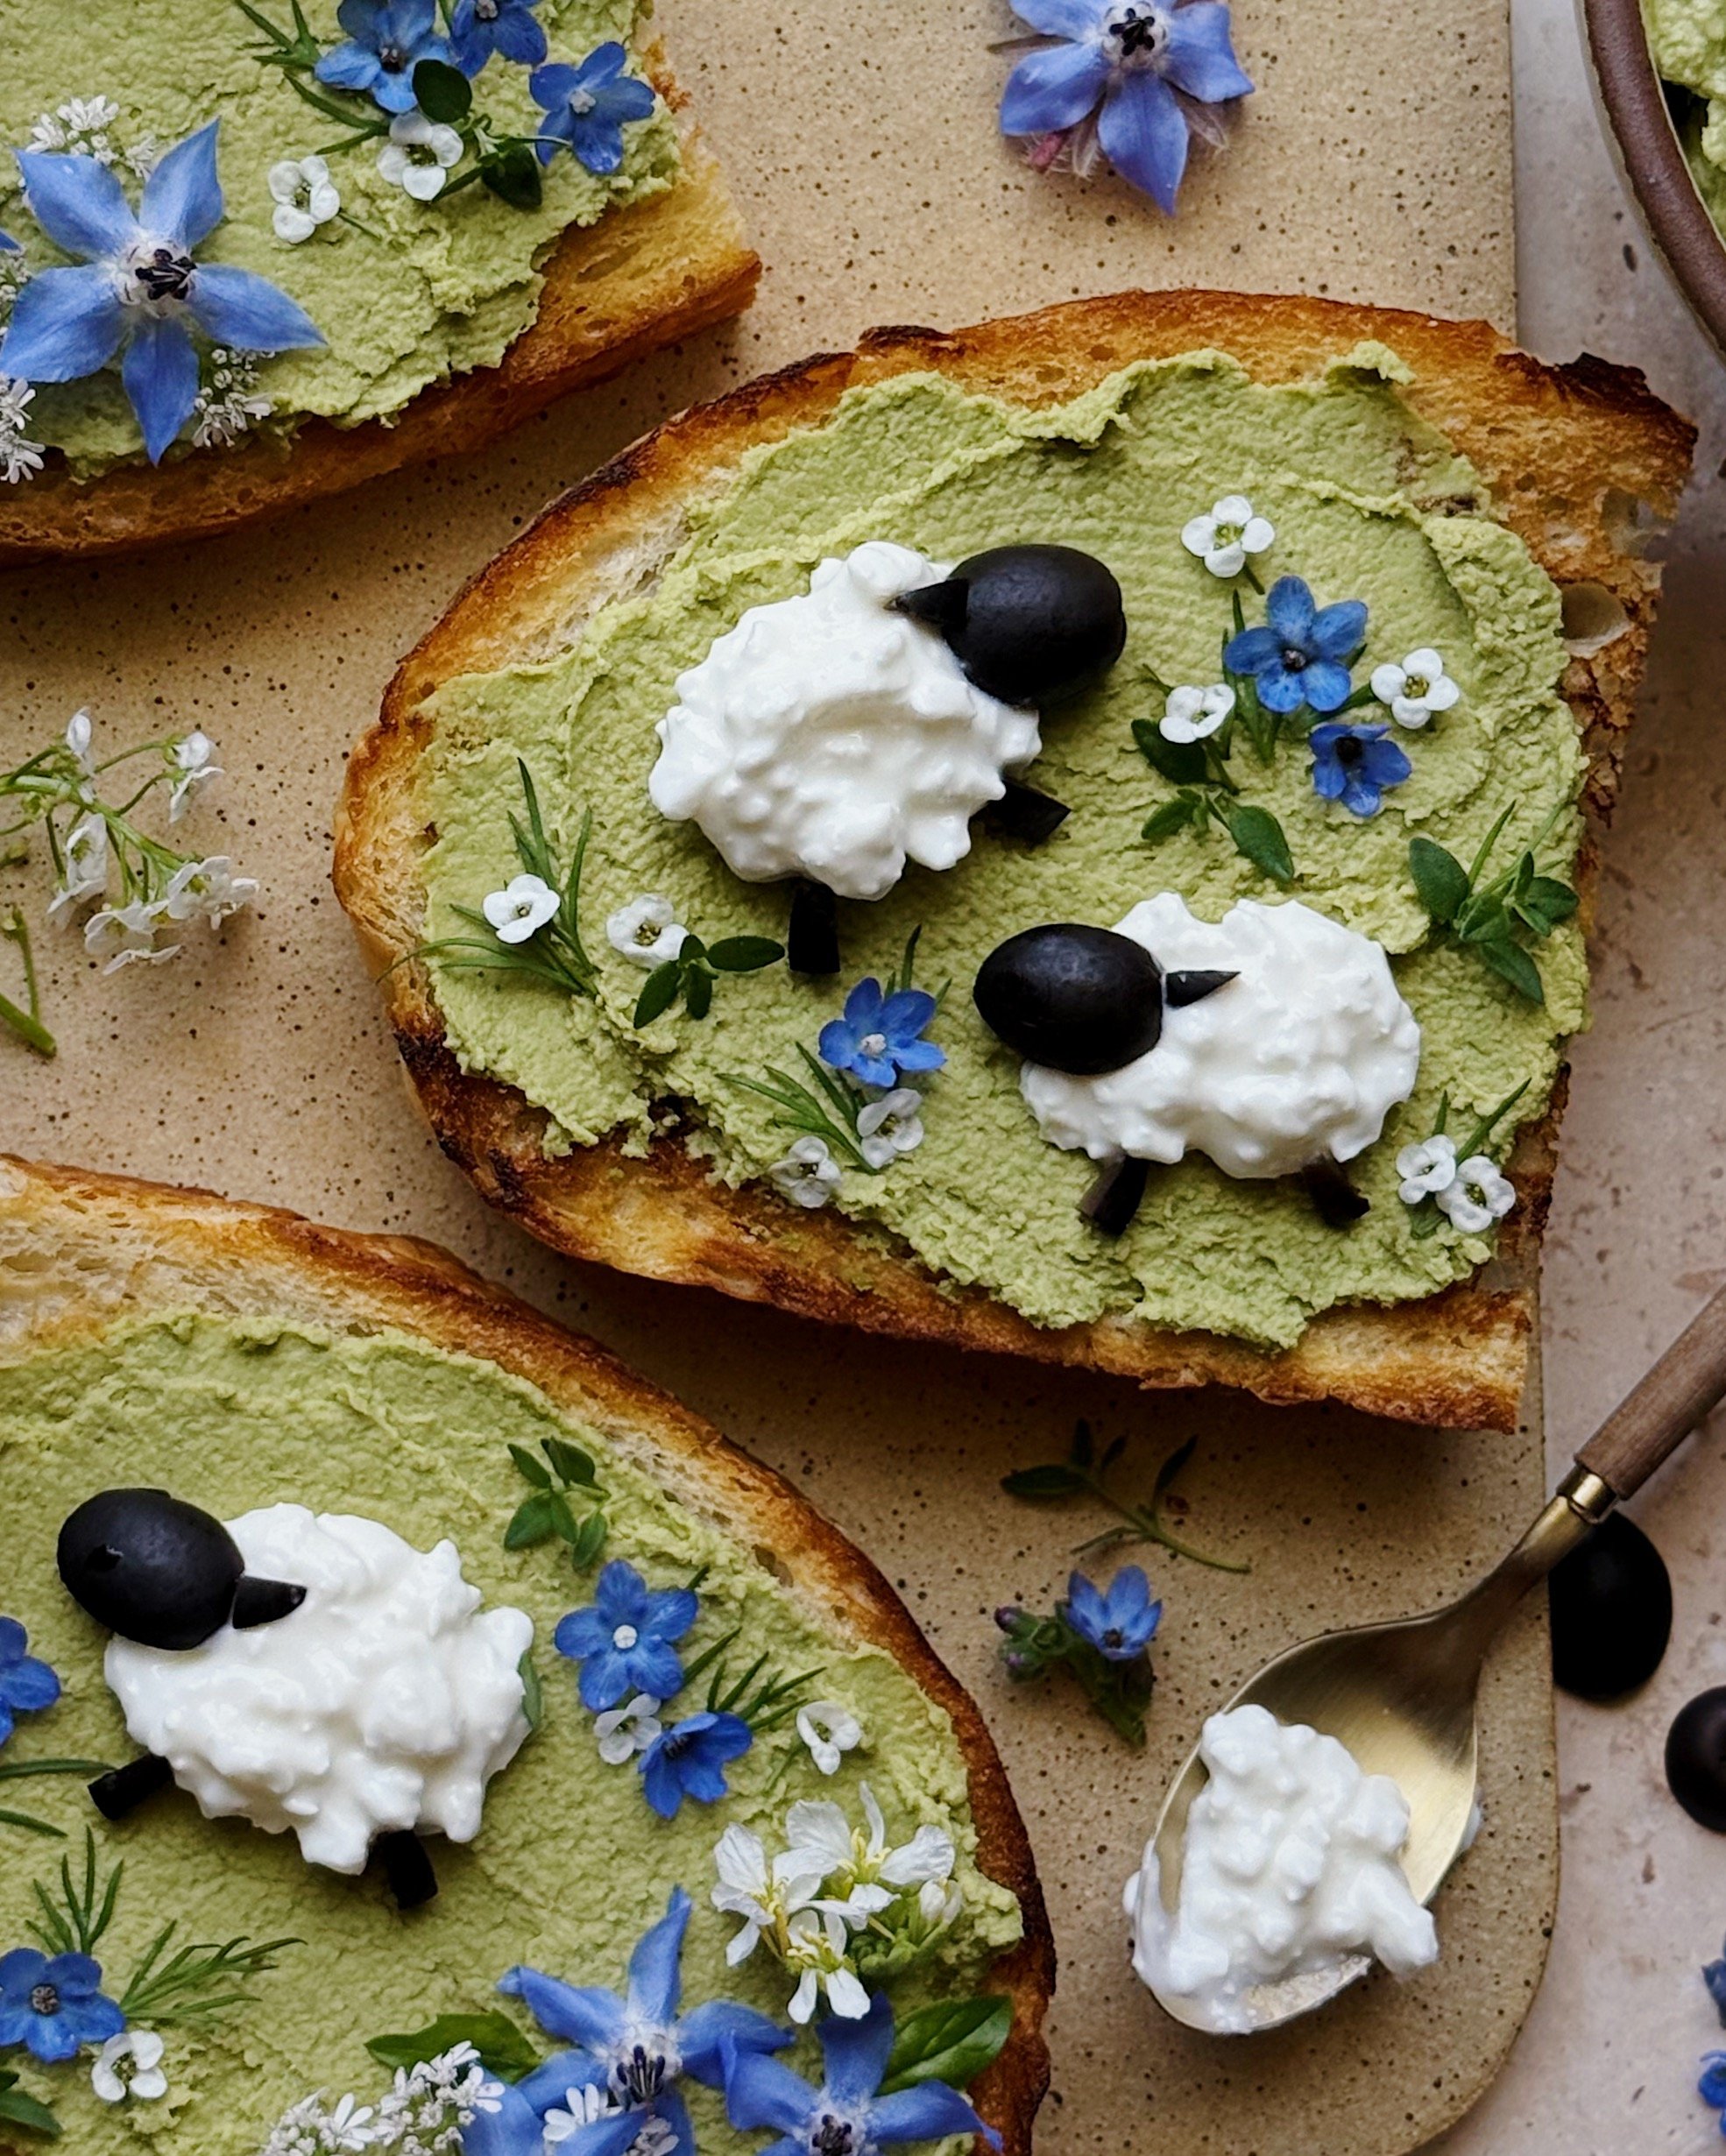
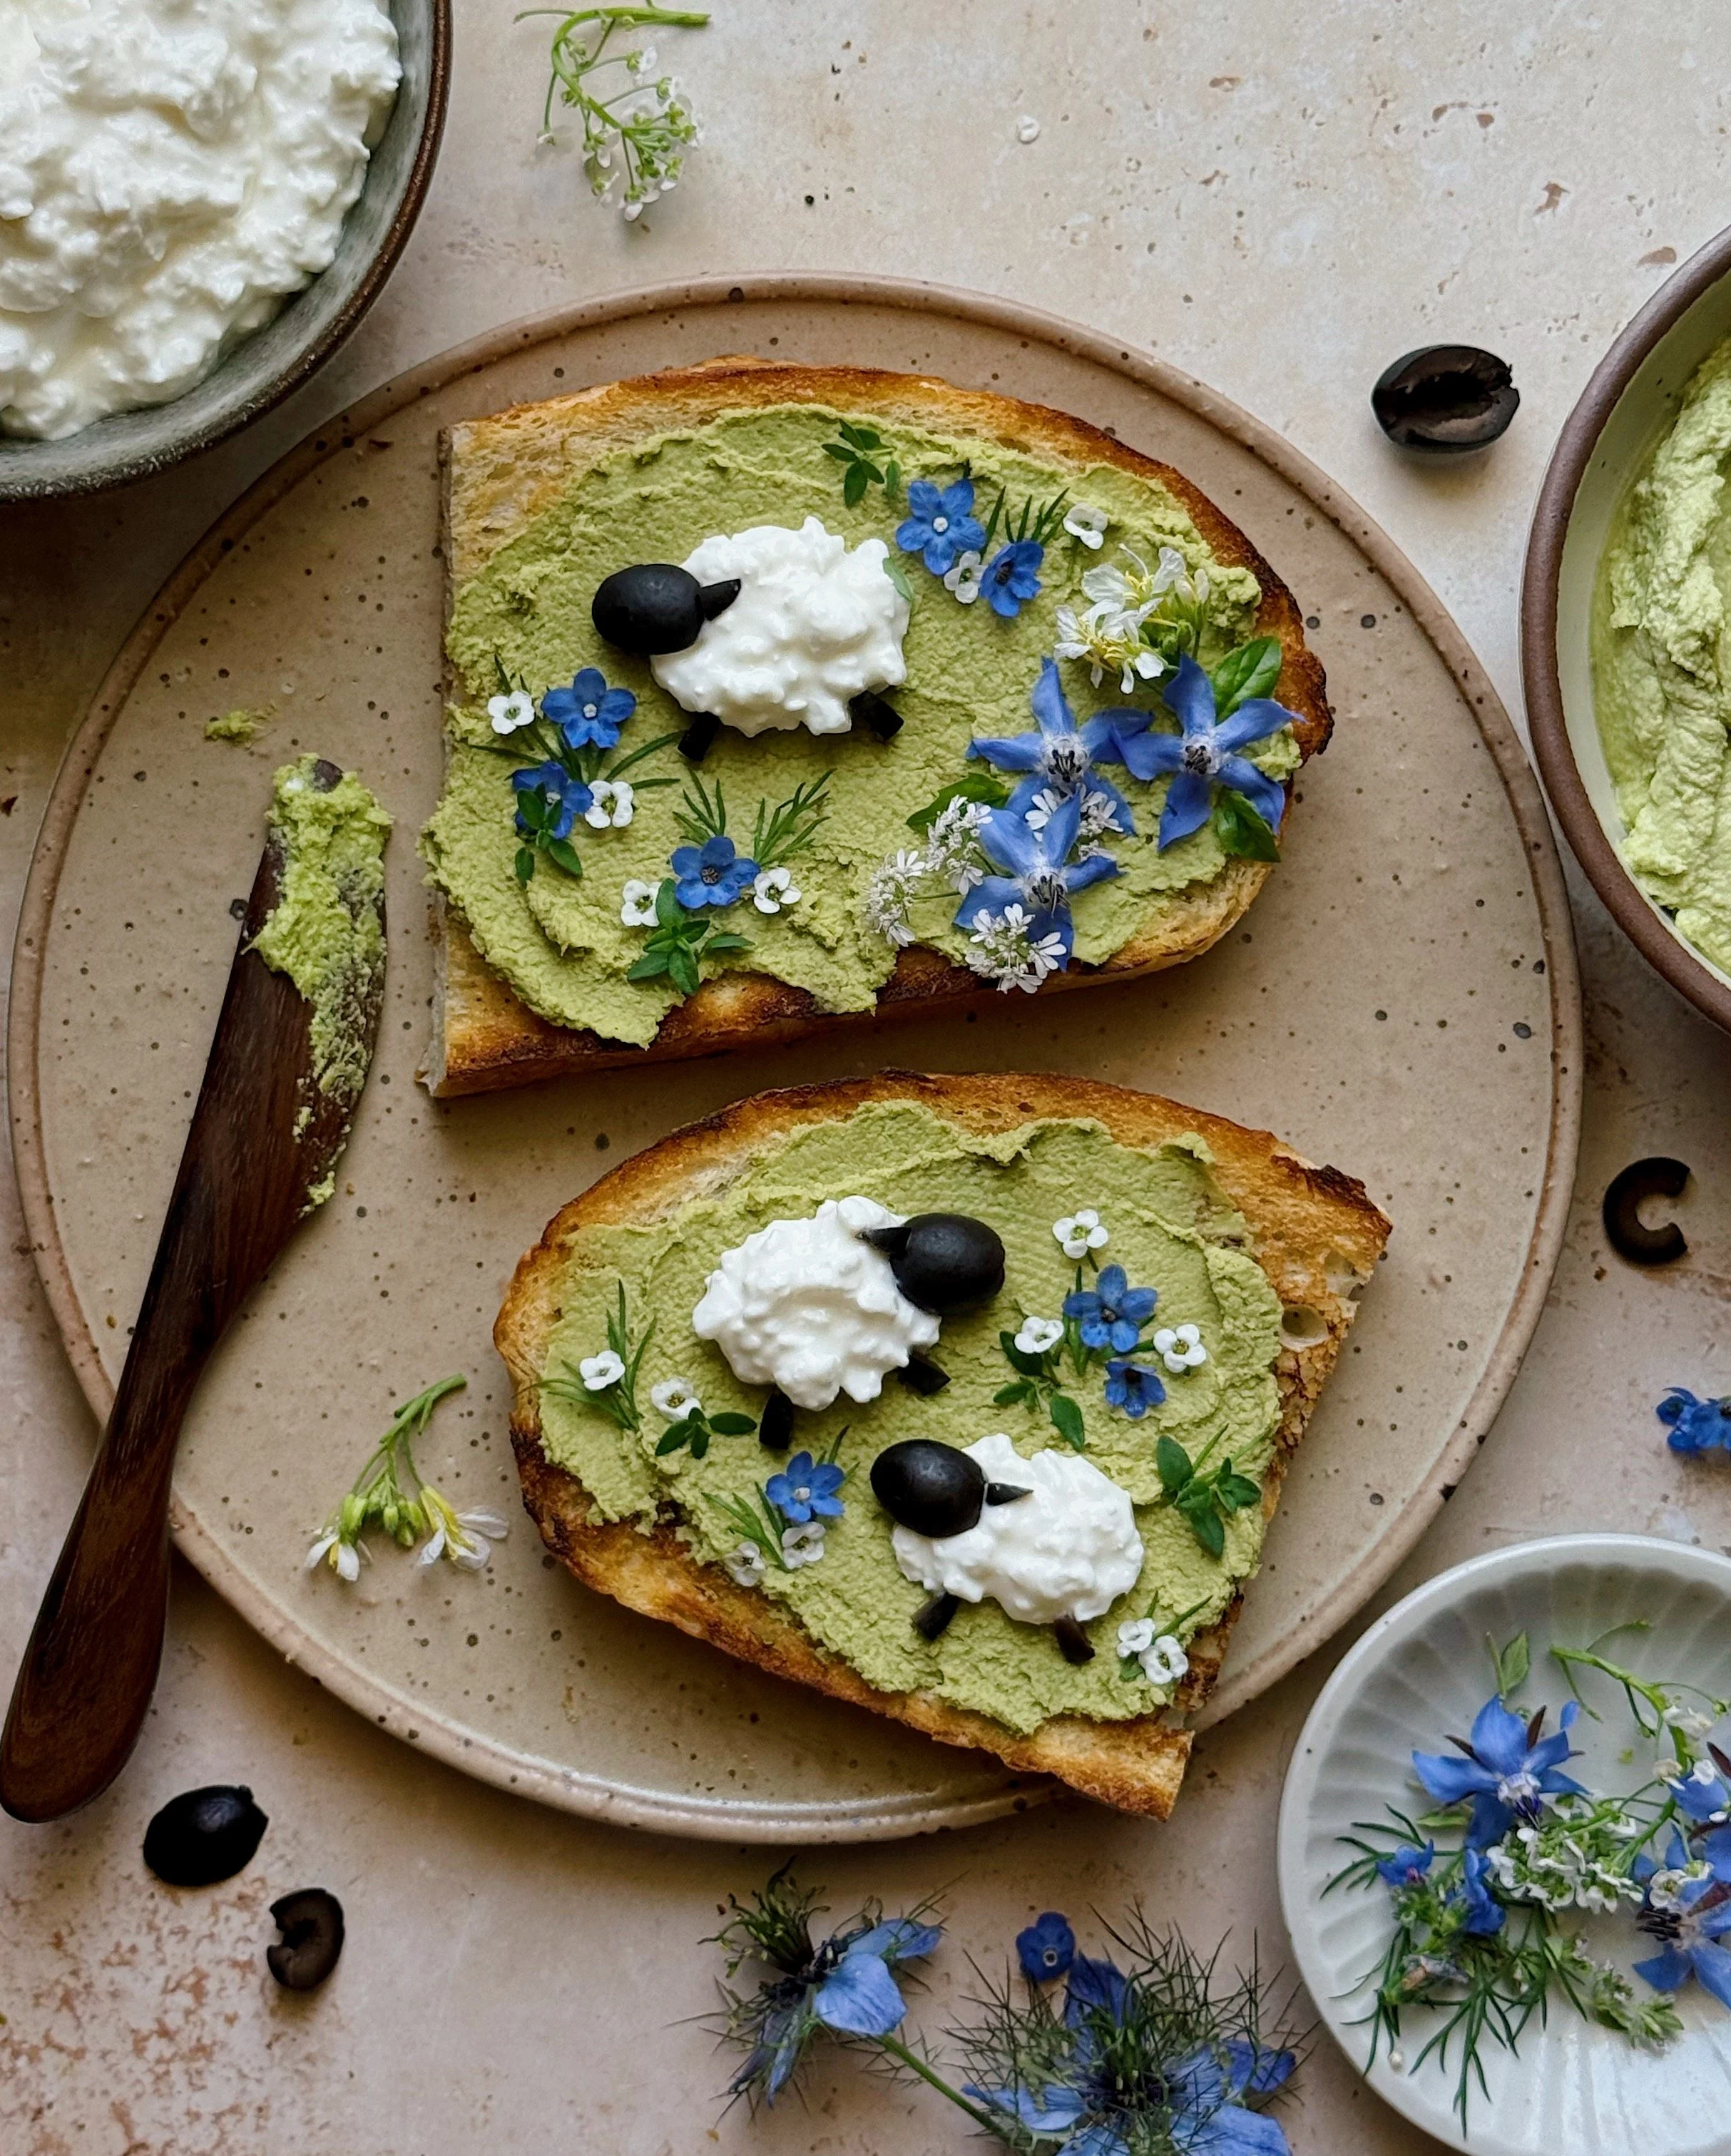
/These toasts feature little sheep made of dollops of protein-rich cottage cheese and a delicious aromatic whipped butter made with caramelized scallions and fresh herbs to give it that pretty grassy green shade for the sheep to graze upon. In this post, I am going to teach you how to create these adorable pastoral scenes of cottagecore edible art using toast as our canvas and Real California Milk dairy products as our paint.
This recipe was developed in partnership with Real California Milk. It feels like extra protein is getting sneaked into all sorts of foods lately but Real California Milk has always been a real source of protein—no filler, flavors or powders required. I’m not into chasing trends but I have been a longstanding diehard fan of naturally protein-rich, creamy dairy products like Greek yogurt and cottage cheese. So for this partnership, I wanted to share a fun, easy way to sneak a little extra real protein into a dish via some good old fashioned dairy.
Maybe it has to do with the fact that I had just watched the movie Sheep Detectives or that Spouse and I had just taken a weekend road trip driving past local dairy farms and fields of adorable sheep on our way to Bodega Bay…but when I looked at my tub of cottage cheese, those protein-rich curds immediately reminded me of fluffy sheep! And you guys know I am always craving a good buttered toast and that I love using toast as a canvas for creating edible art. With the help of a few black olives, making these little sheep out of cottage cheese is so easy; knock out a whole batch to include in an adorable brunch spread to impress your guests or just use this recipe to pop a little extra whimsy and protein into your morning toast routine.
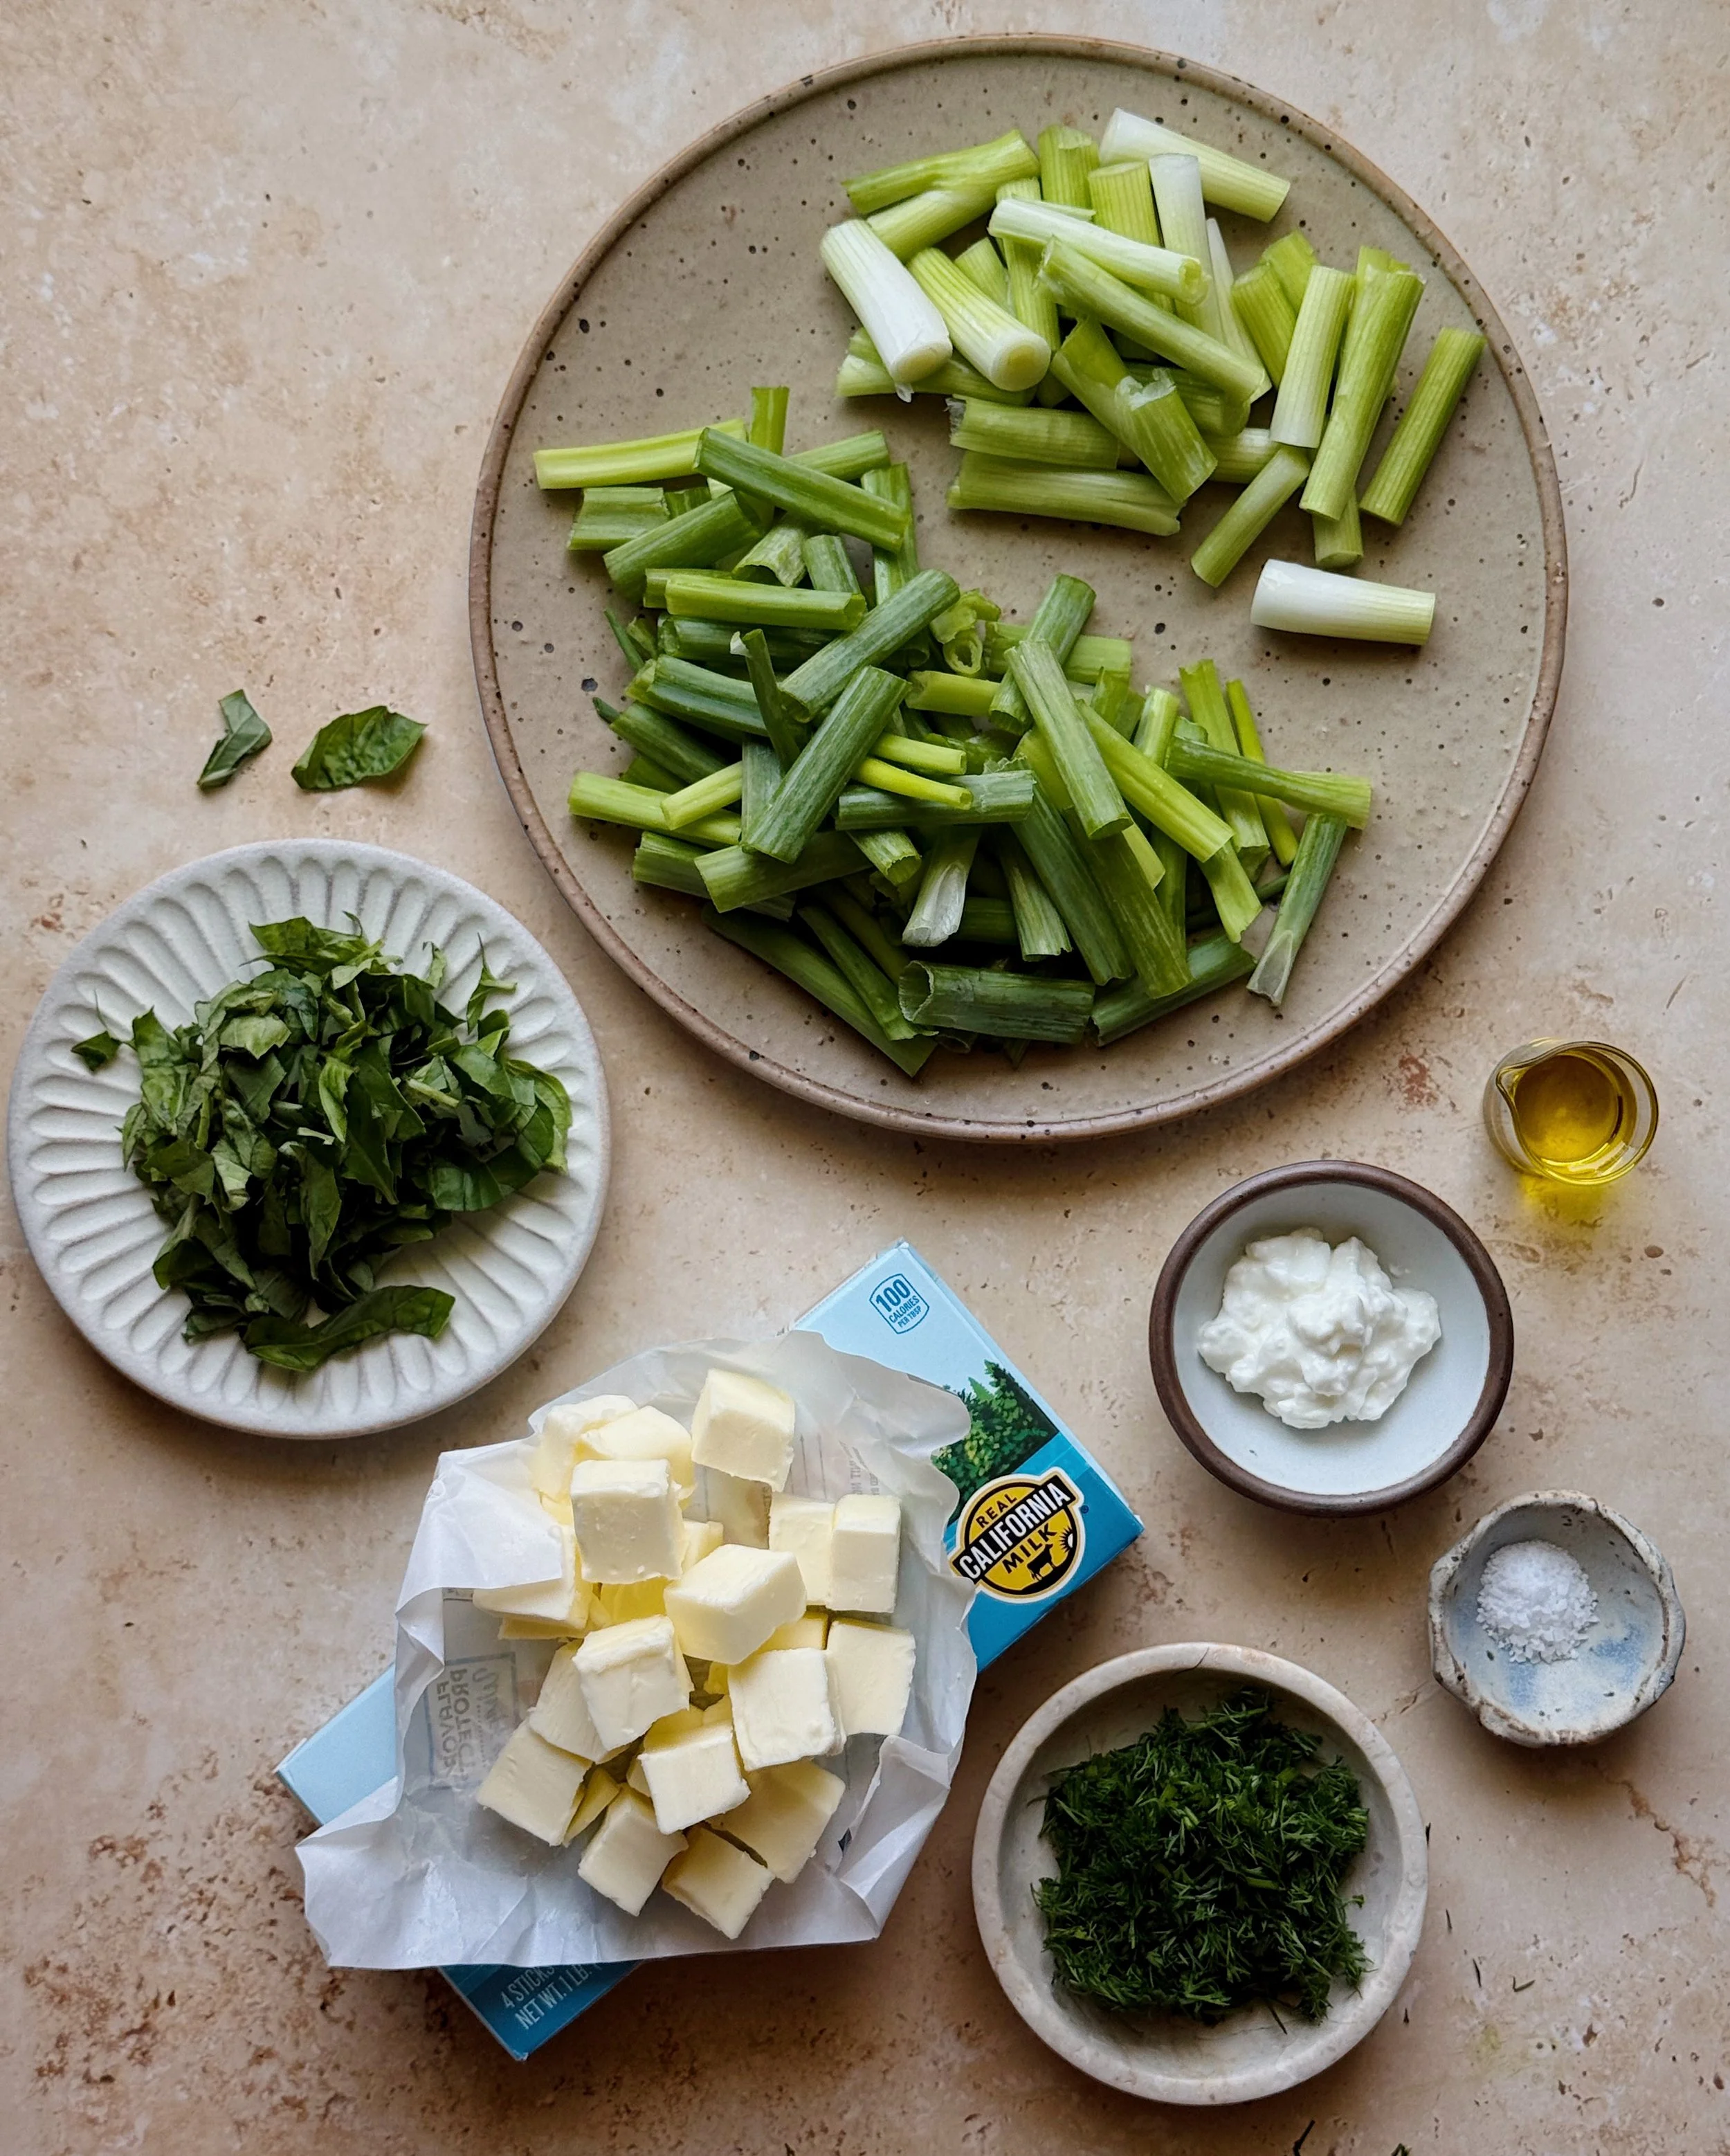
First, you’ll need to paint some nice green grass as a backdrop for the sheep. Whipping blistered scallions and fresh herbs like basil and dill into high-quality butter made with Real California Milk subtly transforms the butter into a tasty green spread that still allows the natural lovely cream flavor to come through. Make this whipped butter ahead of time to have it ready if you are preparing to host or if you plan to start your mornings with a cuteness boost; it’s smooth and spreadable right out of the fridge.
Notes About the Ingredients for the Blistered Scallion and Herb Whipped Butter
Real California Milk Unsalted Butter: Rich creamy butter made with Real California Milk will ensure that your toasts get slathered in something truly delicious. For best results, have this ready at room temperature when you bring together your whipped butter.
Real California Milk Cottage Cheese: This helps keep the whipped compound butter at a smooth, spreadable consistency directly out of the fridge, making it fun and easy to “paint” the toasts with it. This also sneaks a little extra protein into the recipe!
Scallions: We will be blistering and charring these to bring out their natural sweetness and this will be the main flavor component for the butter. Roughly chop these, keeping the firmer white and light green parts separated from the hollow, soft, dark green sections because they will require different cook times; we want to blister but not burn them. Once cooked, you will want to blend these with the other ingredients while they are still hot, as the residual heat will help smoothly incorporate everything with the butter.
Extra Virgin Olive Oil: We will just be using a small amount of this to cook the scallions.
Fresh Herbs: I recommend basil and dill to add some fresh herbaceous flavor to the whipped compound butter. You could experiment with other tender herbs but I thought that these flavors tasted delicious when paired with the blistered scallions. Just roughly chop them enough so they’ll easily incorporate when everything goes into the blender.
Salt: This really brings out the natural creamy flavor of that delicious butter as well as everything else that is going into the mix to make for a tasty spread on the toasts!
Special Equipment for Making Whipped Compound Butter
In order to turn these ingredients into a pretty, grassy shade of green whipped butter that we can spread like edible “paint” on our toasts, I used a mini 4-prong “wet” spice grinder, which pulverized everything together into a smooth, homogenous consistency. Any small batch or personal sized blender with a 4-prong blade would work well for this recipe, whether it is one marketed for smoothies or sauces.
Given the total volume of ingredients we are working with in this recipe to produce roughly 1 cup of the whipped butter, most full-sized blenders would not have enough here to catch on to the blades to blend as desired. If you wish to use a full-sized blender, I recommend doubling the recipe in order to blend everything into a smooth spread for your toasts. The spread kept well in the fridge for me for at least one week.
I also tested this recipe in my full-sized food processor since I know not everyone has a personal-sized smoothie blender or spice blender for small jobs like this. Stopping occasionally to scrape the sides of the bowl, this option produces a spreadable compound butter that is just as tasty as the recipe intended but does not look like a homogeneous pale green spread. Instead, there will be tiny flecks of green from the scallions and herbs embedded in the pale yellow butter and cottage cheese mixture. It will look more like a typical compound butter since the food processor is not designed to fully blend everything together to make one consistent color. It’s totally still a viable and delicious option, but your sheep will not have as stark of a contrast against a green backdrop as what you see in my photos.
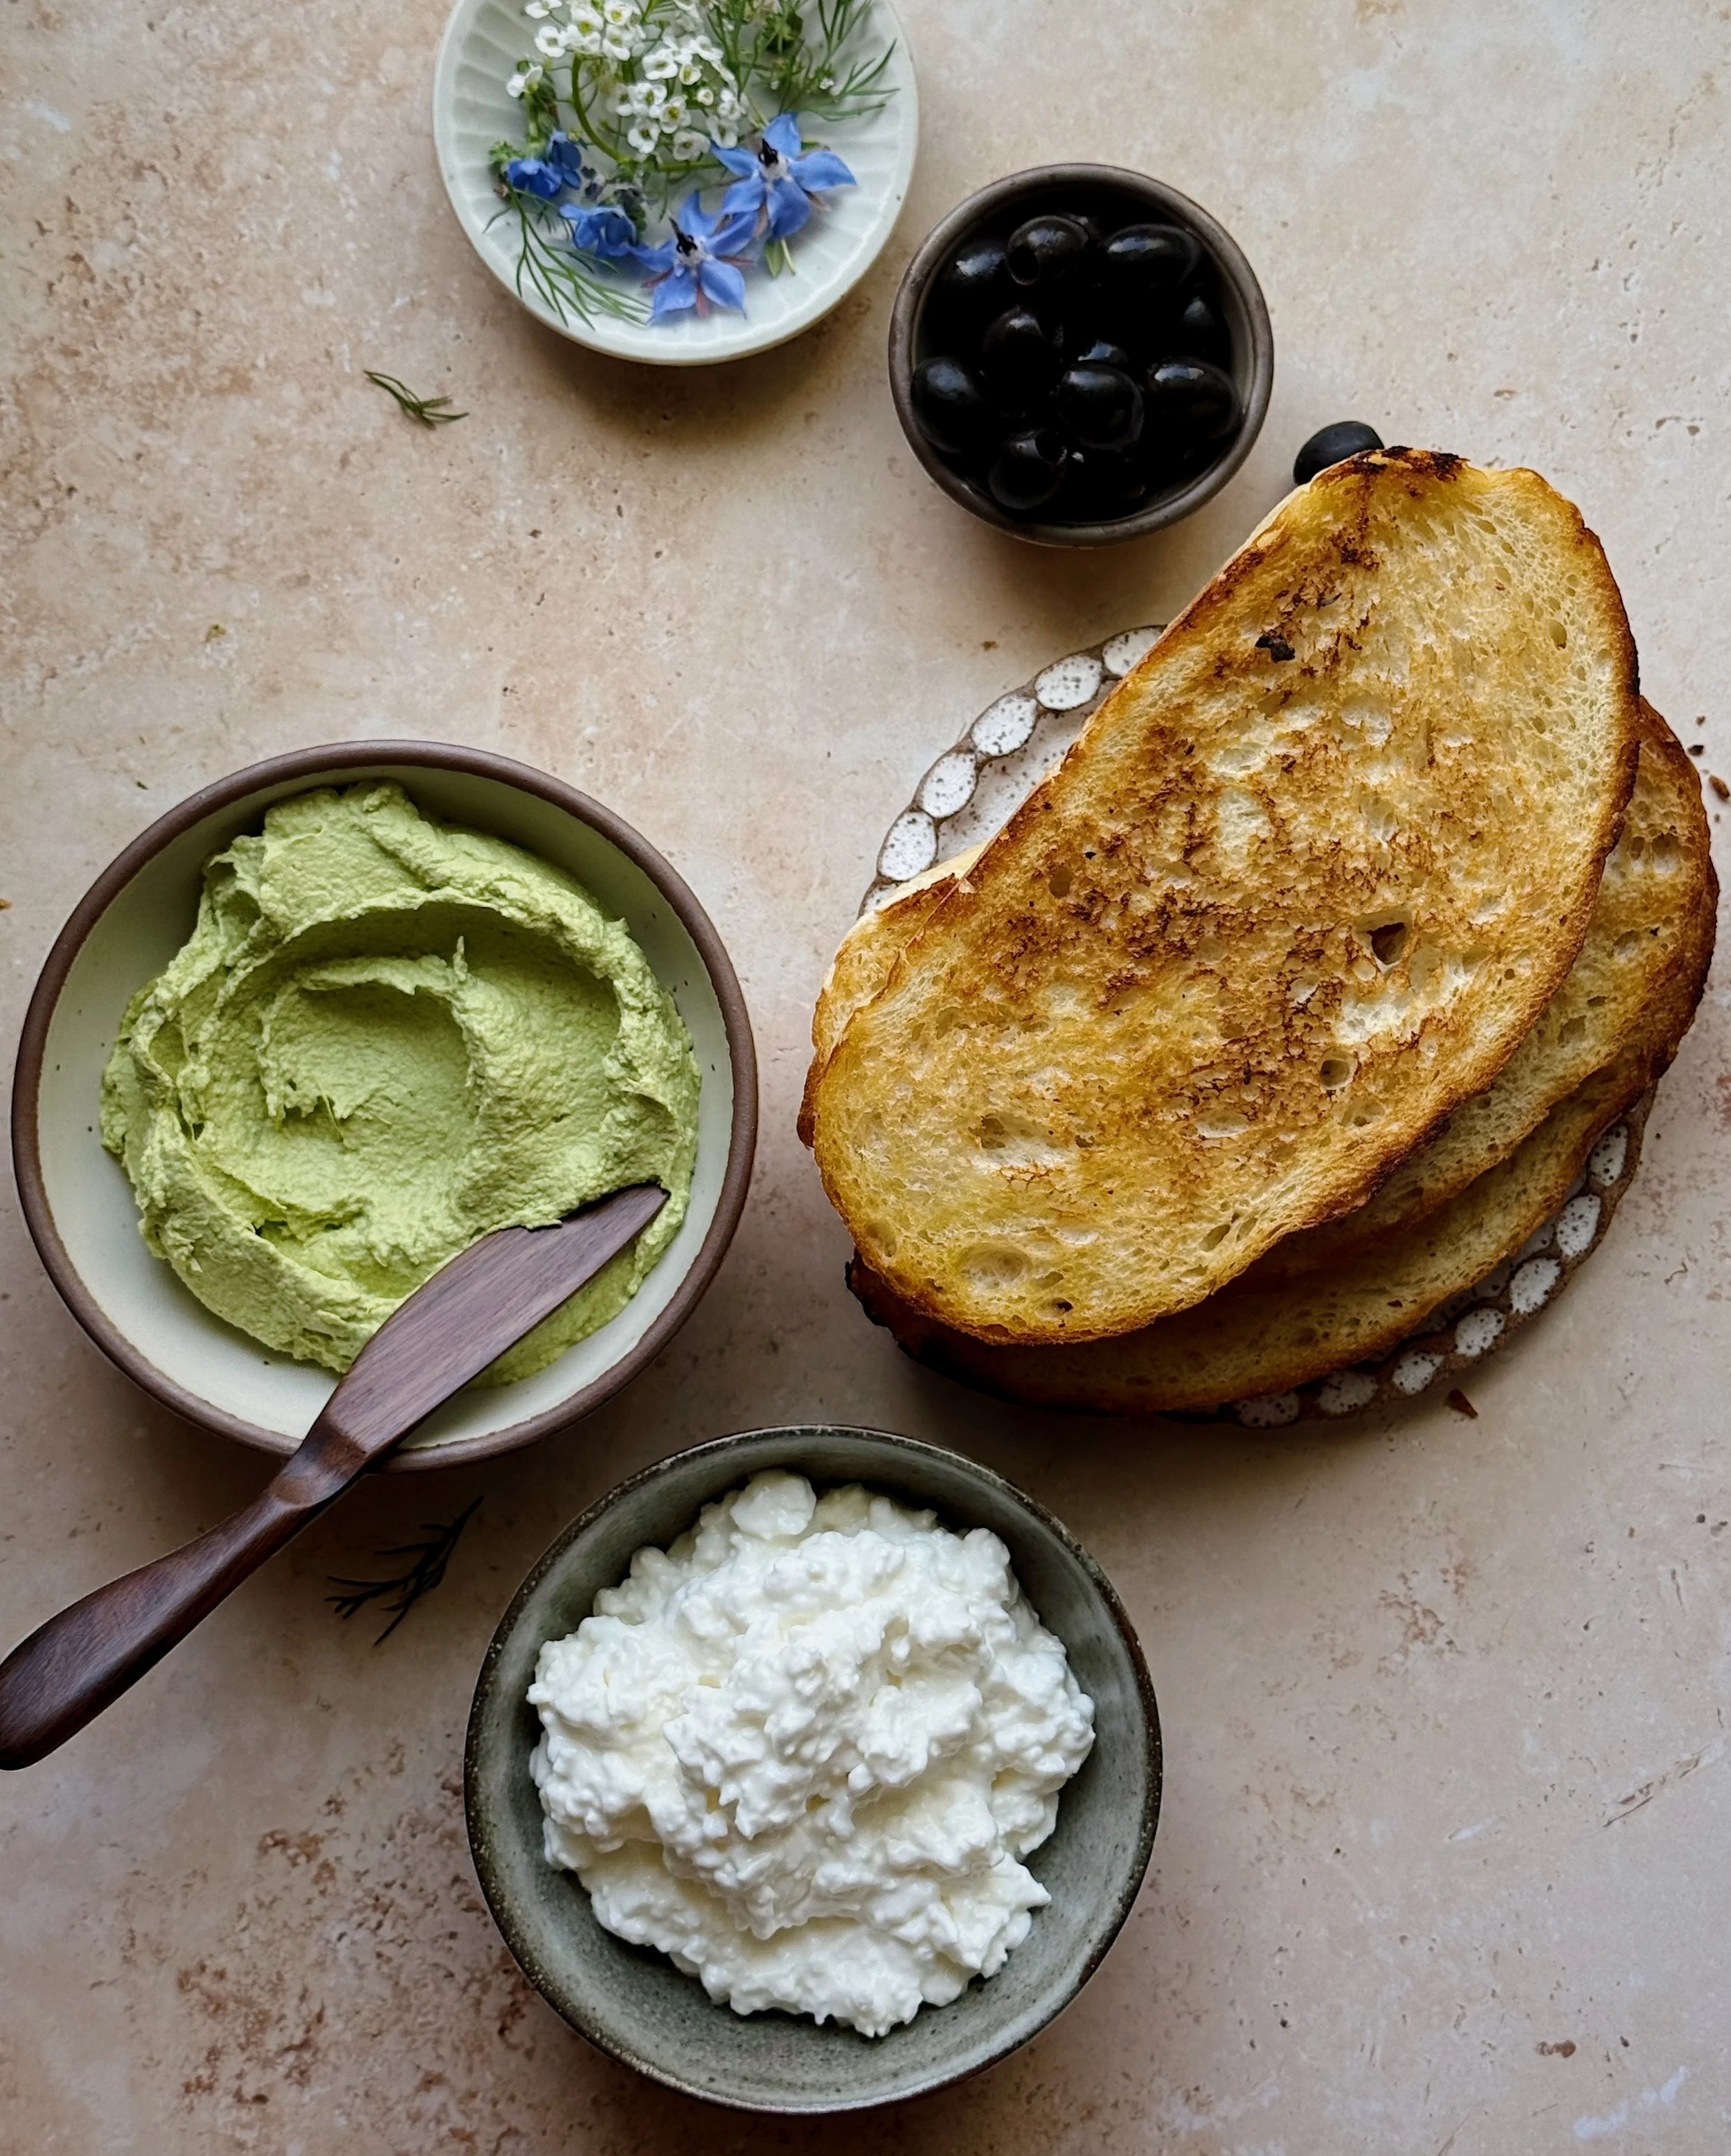
How to Make the Edible Sheep on Toasts
You will need to cut a few segments of black olive to help transform the dollops of cottage cheese into adorable sheep. I used small black California Ripe Olives to make my sheep. I recommend allocating 1 olive per sheep as you are gathering your ingredients, but you will be left with some scraps to snack on while you assemble your sheep.
The image below shows the pieces you will need to form each little sheep:
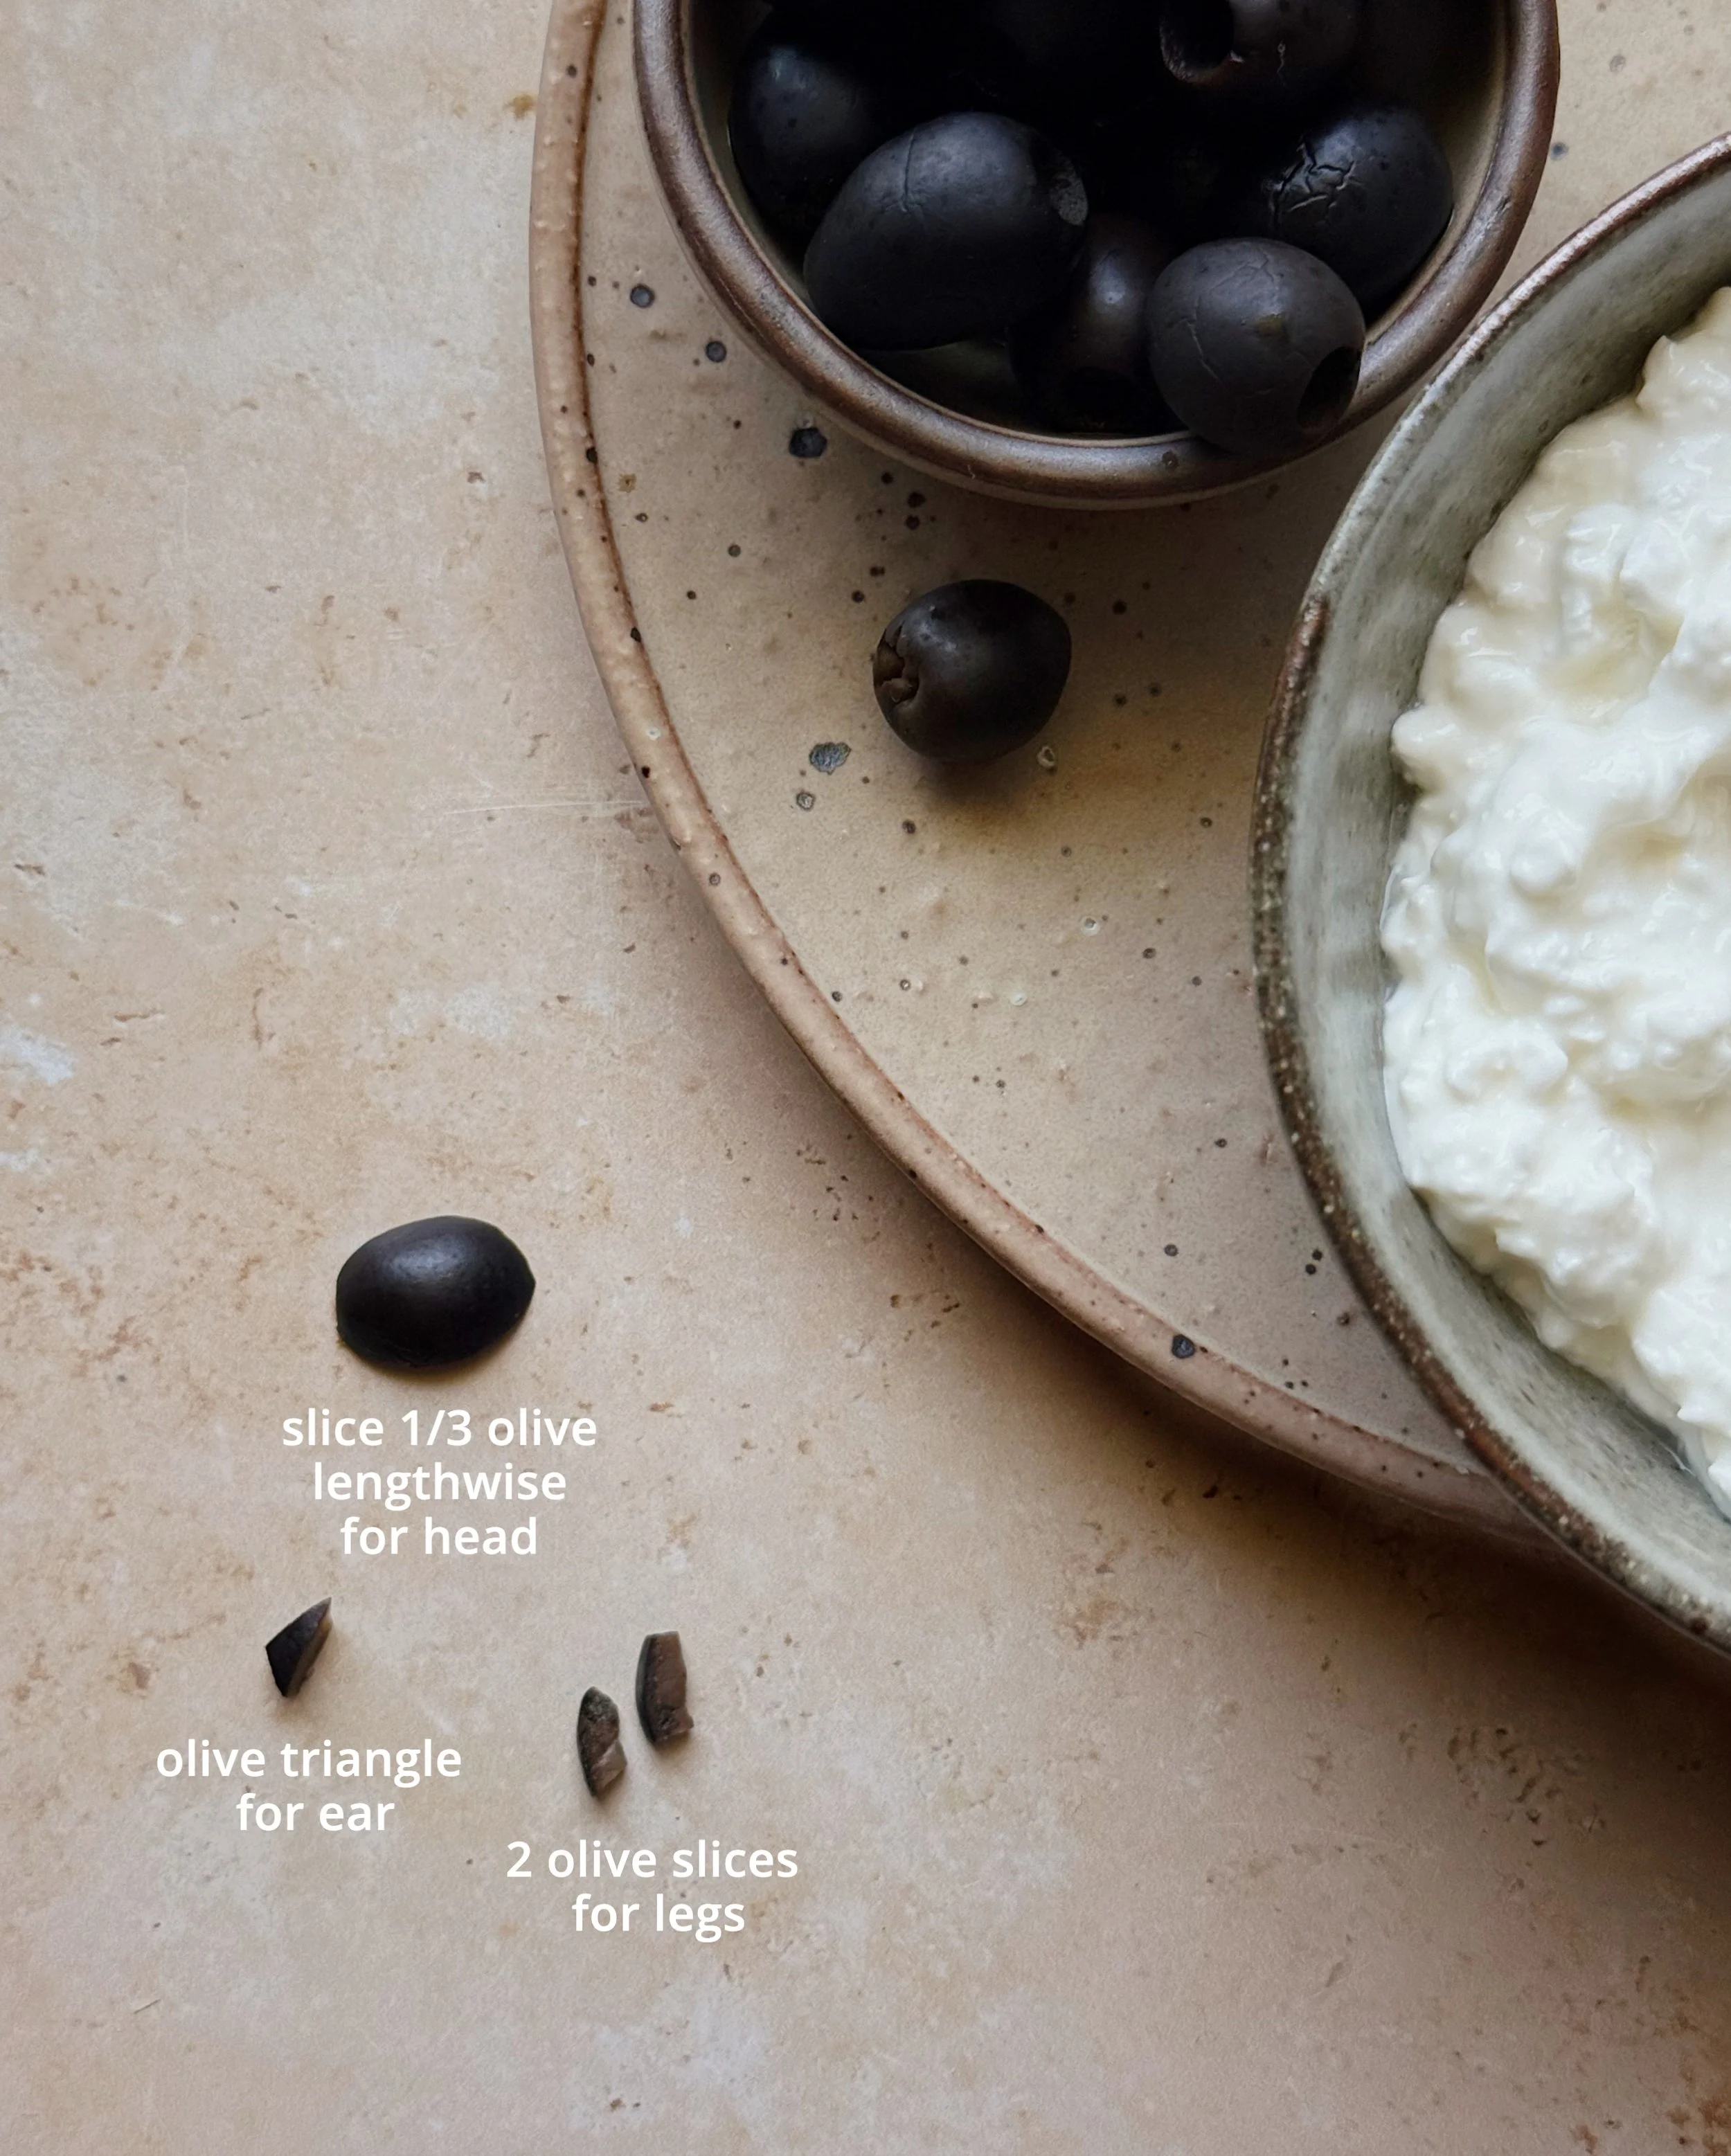
Head: Slicing lengthwise, cut 1/3 to half of the olive to form the head of the sheep.
Legs: From the remaining portion of olive, cut 2 slices that are each 1/16- to 1/8-inch thick. These will become the profile view of front and back sets of legs.
Ear: Cut a small triangle piece for the ear of the sheep.
When you are ready to assemble, toast up your slices of bread using your preferred method for making toast. When I have time, I like to pan-fry my bread in some extra virgin olive oil, but a toaster or oven is excellent too.
Then, start your edible artwork off with a nice even smear of the green whipped butter. The layer should be thick enough to appear opaque, covering the surface of the toast.
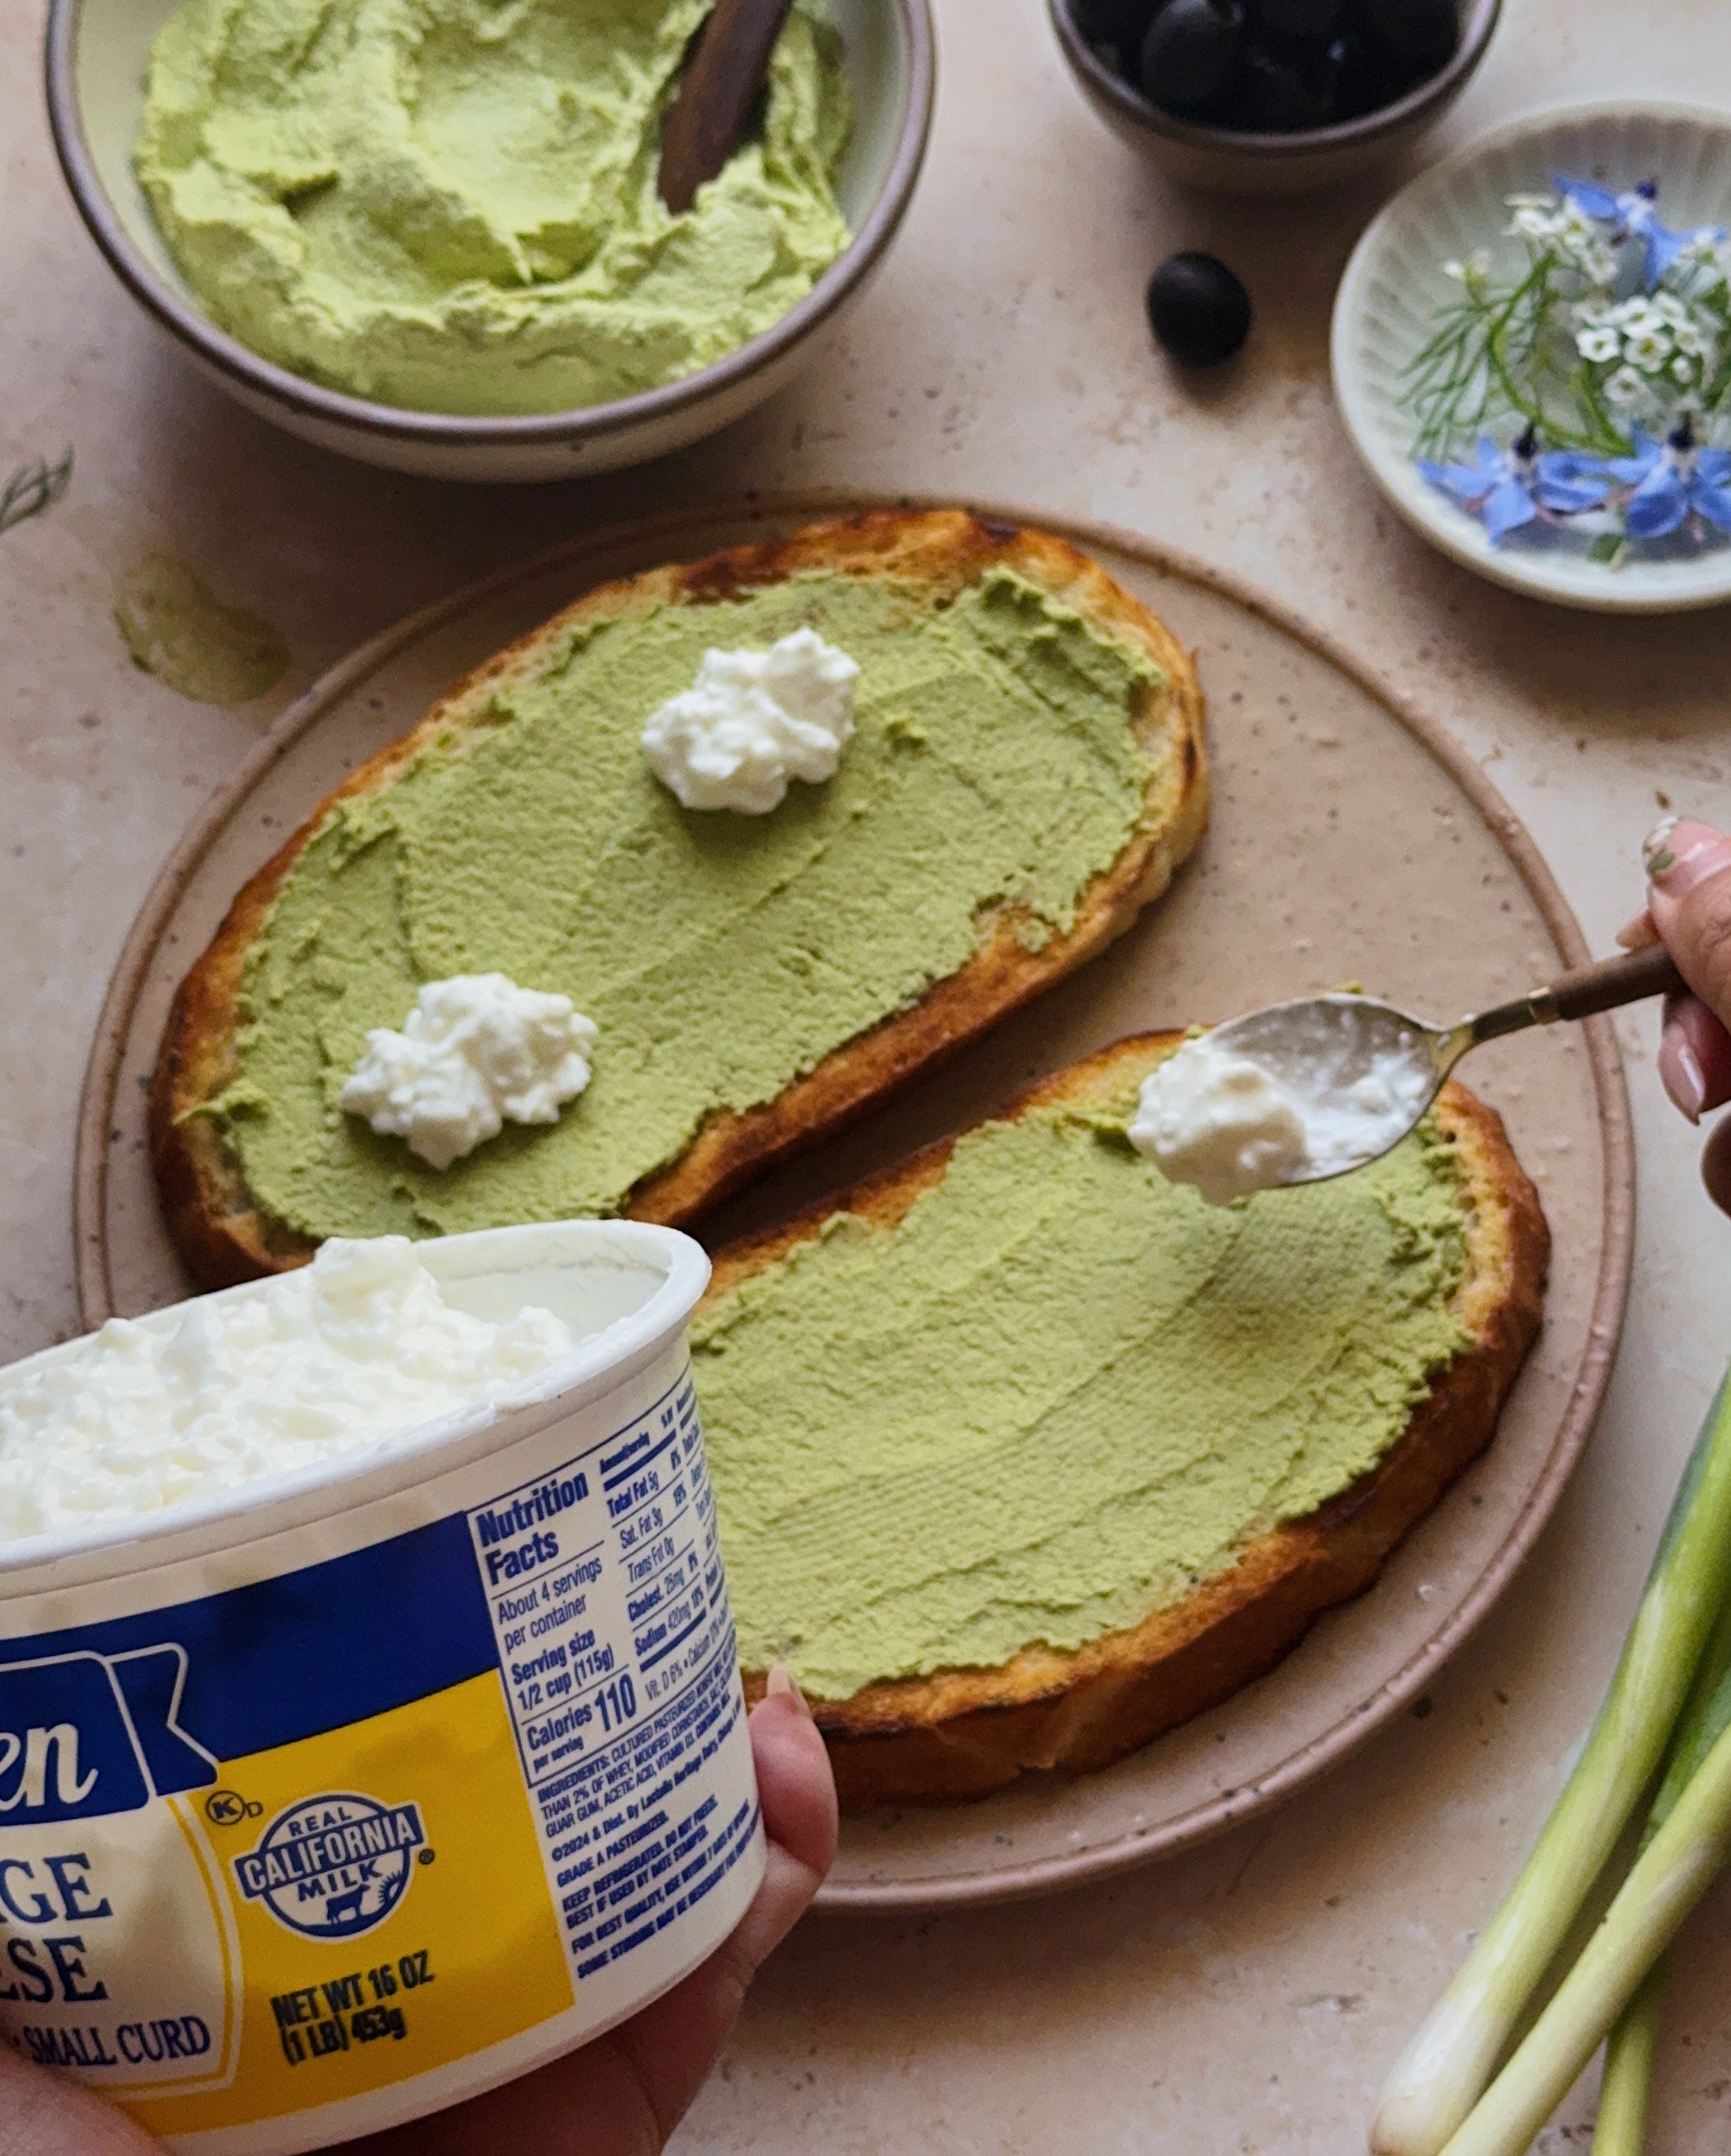
I recommend using small curd whole milk cottage cheese to make these sheep. For each sheep, use a tiny spoon to dollop about 1 to 2 teaspoons of small curd cottage cheese on top of the butter to form the fluffy body of the sheep; start with a conservative amount and then keep piling on the cottage cheese to build out the oblong shape you desire.
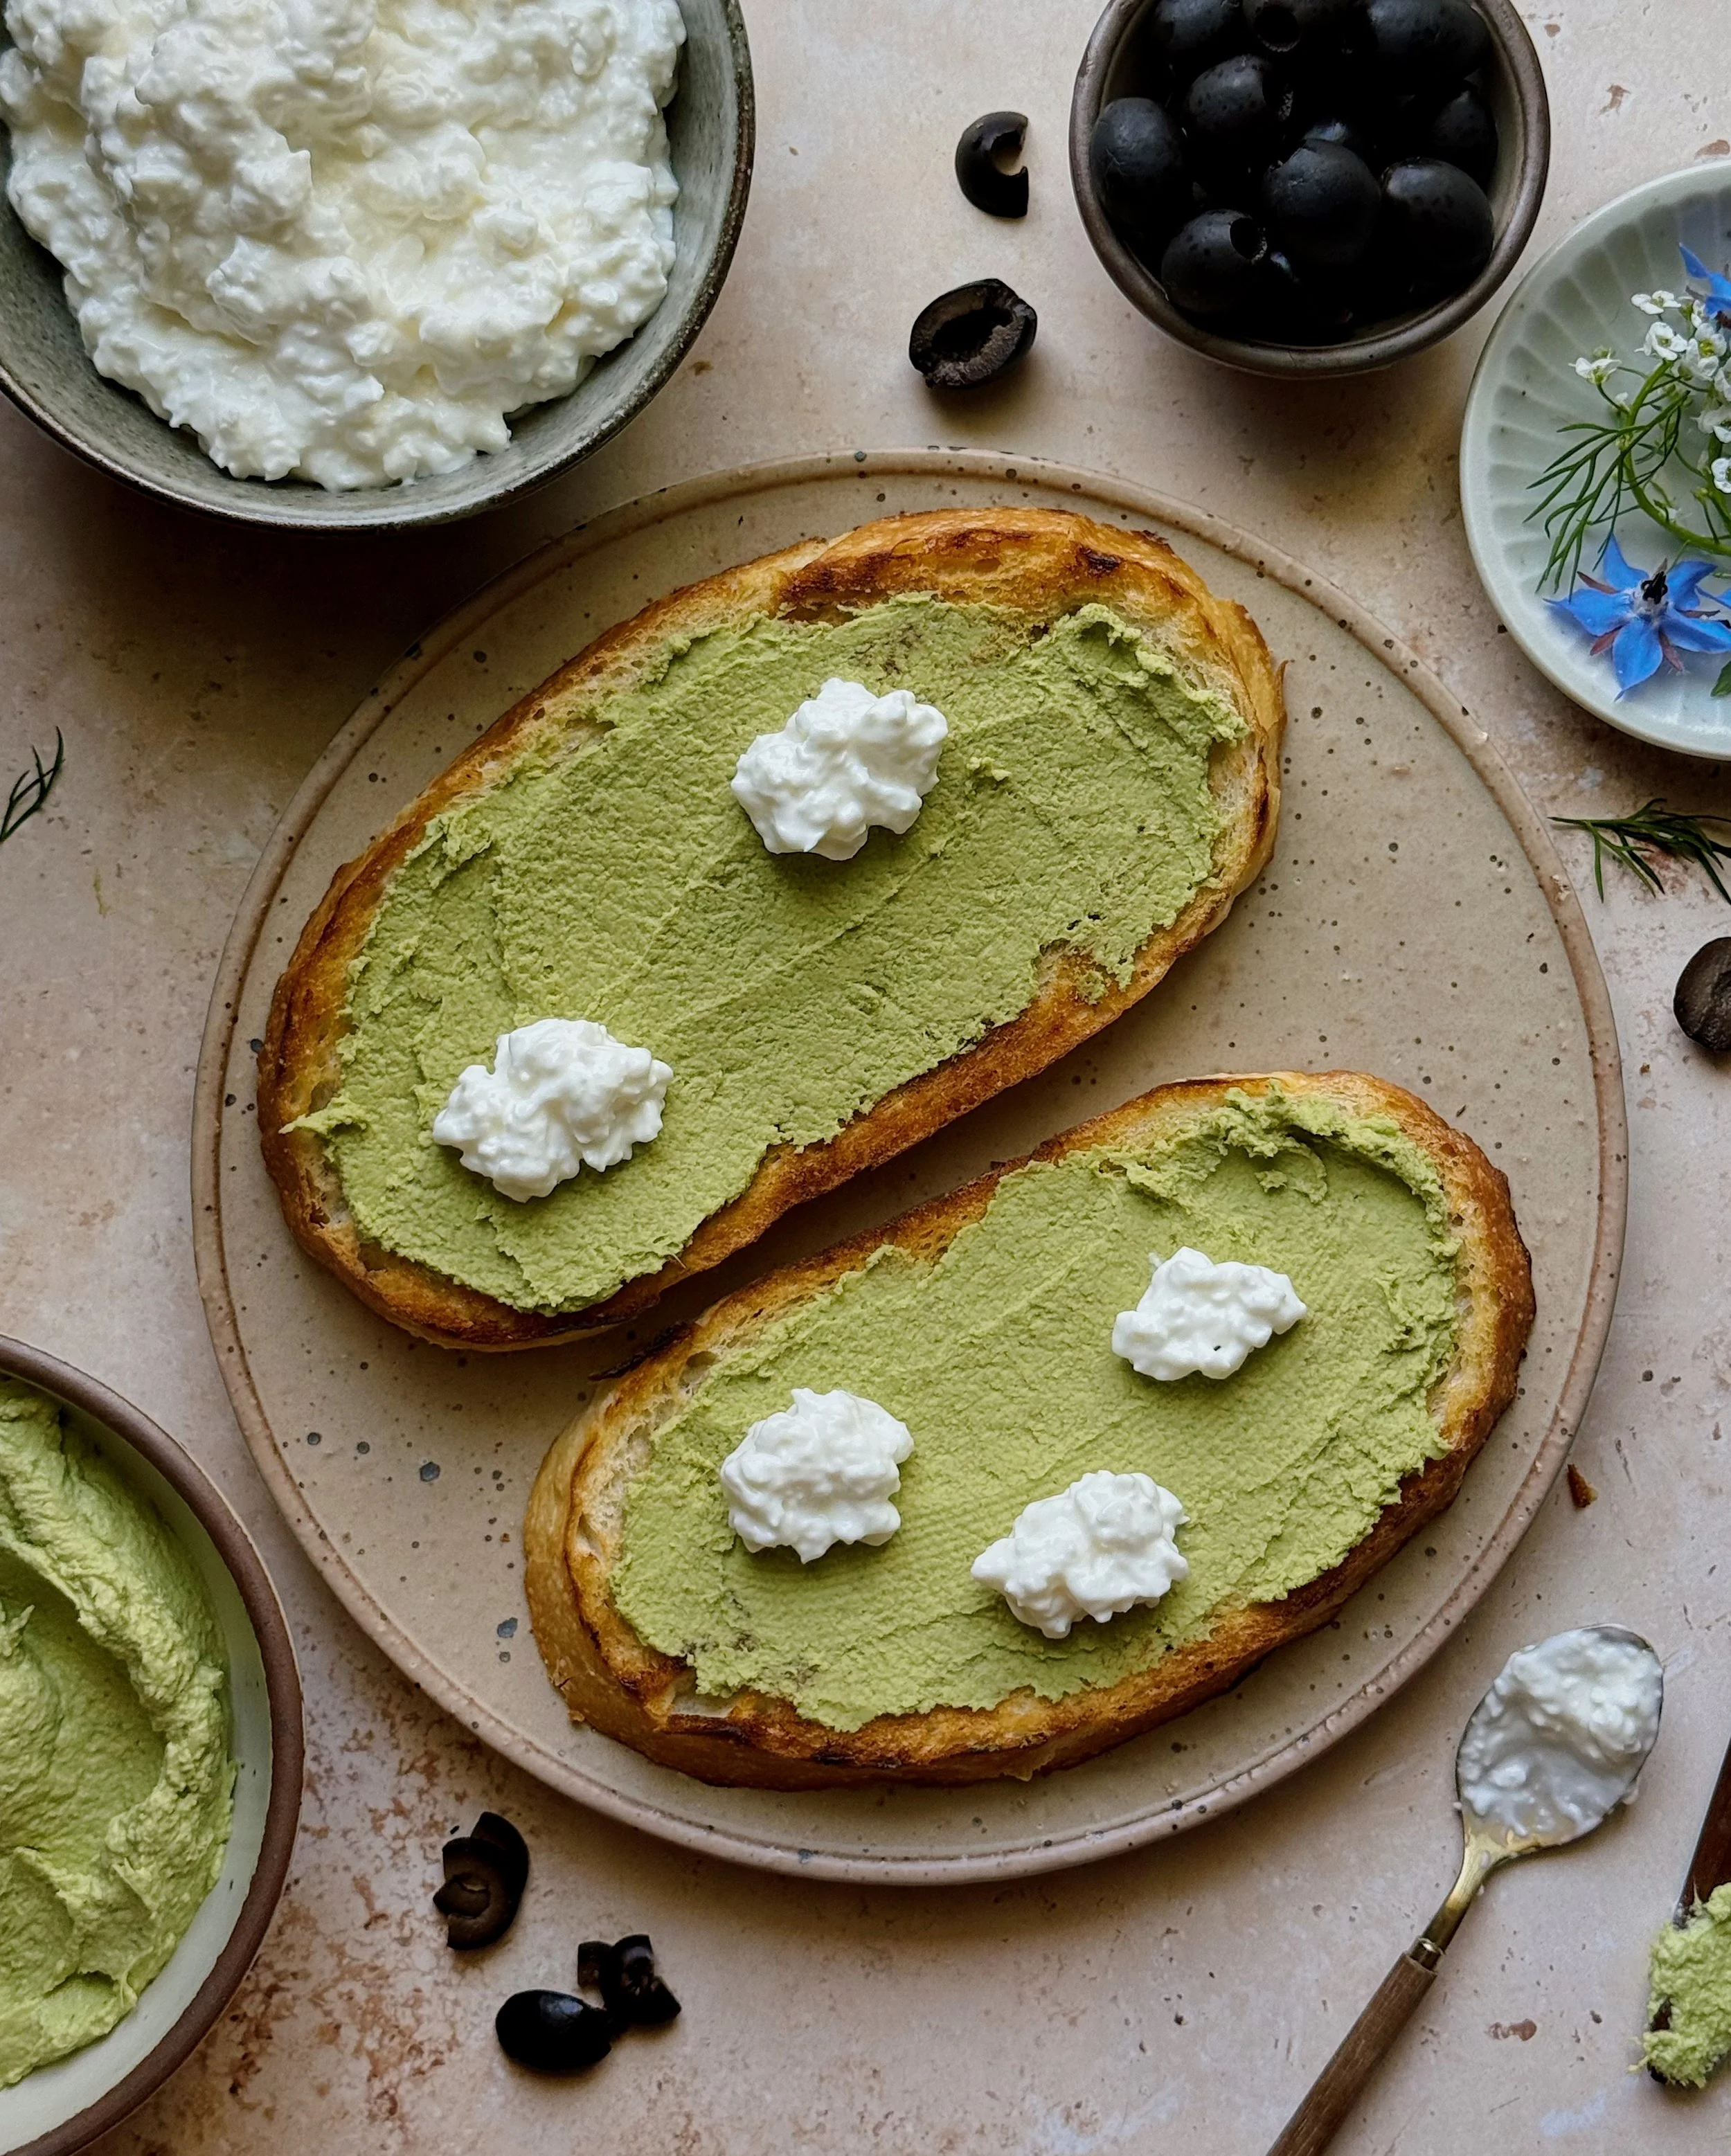
Place the prepared olive pieces for the head, ear, and legs, embedding them in the cottage cheese and whipped butter to hold them in place. Fancy restaurants make you believe you need tweezers for this but I used just my hands for the ones in the photos. Sometimes I will use chopsticks for this kind of task too.
Repeat to make as many sheep as you’d like to fit onto your toasts!
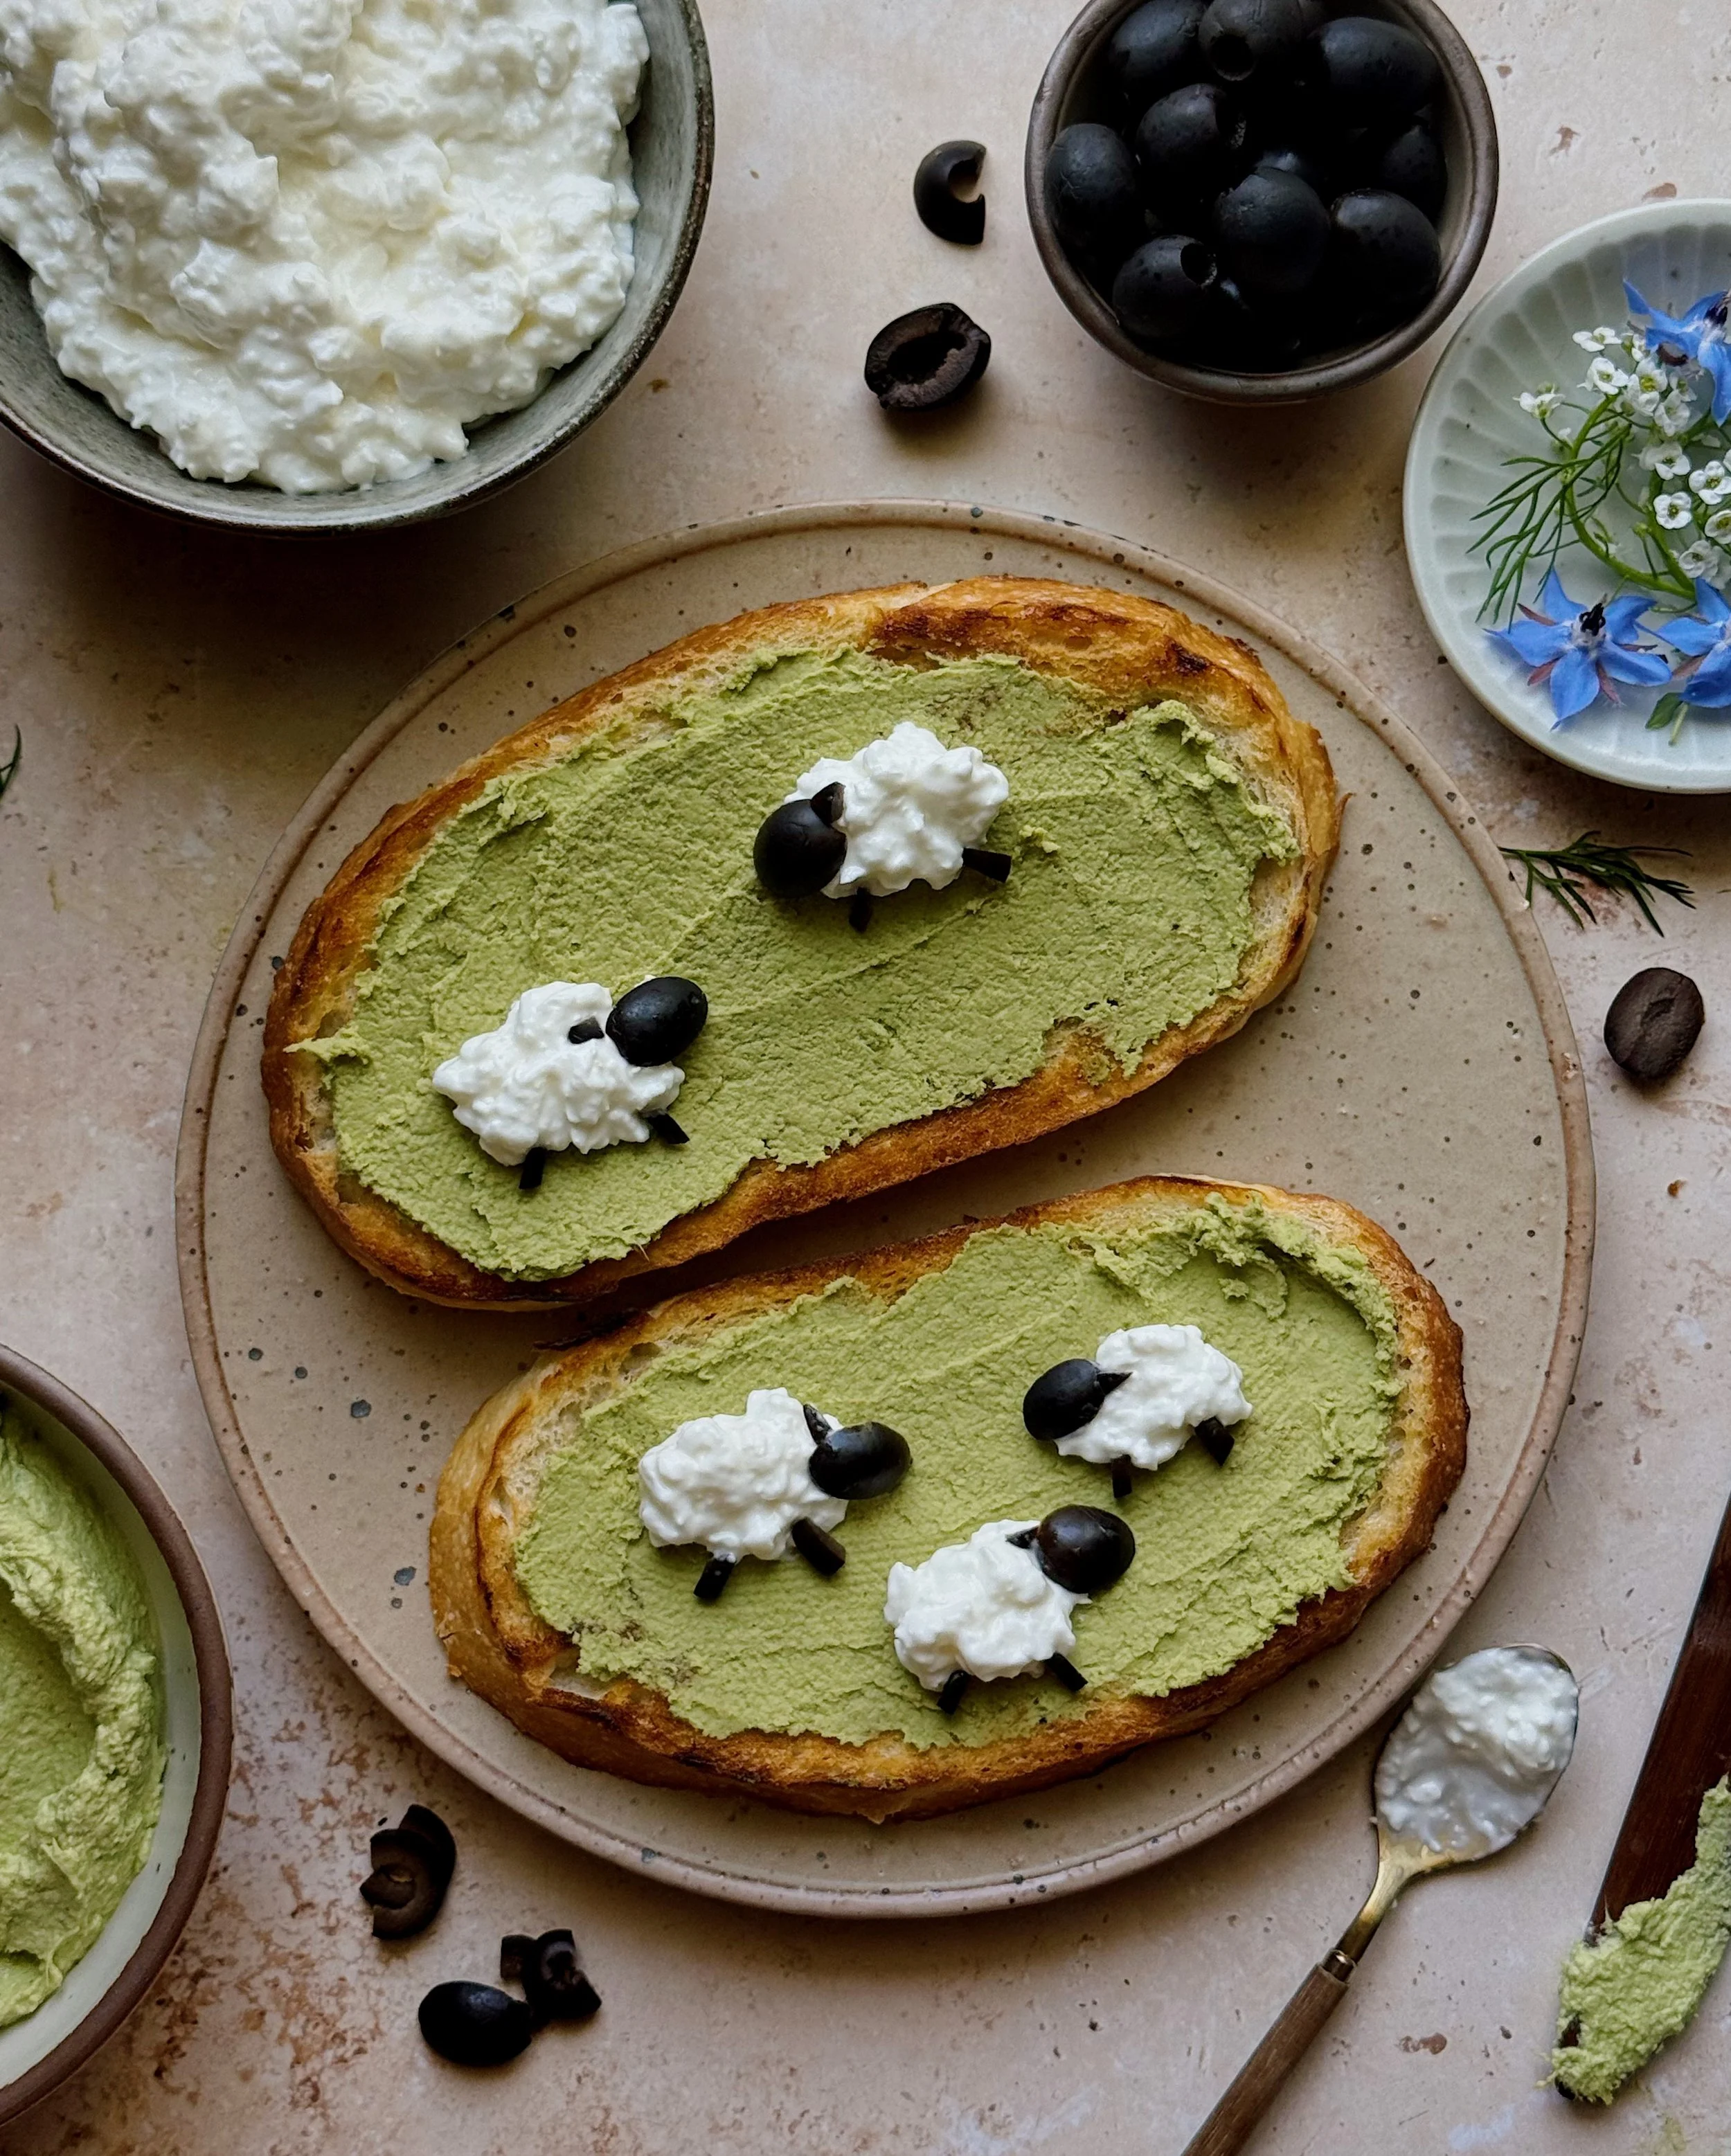
As you can see above, these cottage cheese and olive sheep look so cute on that green butter background all on their own! But if you so choose, you could add small leaves from herbs or some little edible flowers to truly create a cottagecore look. I used dill, lemon thyme, and tiny basil leaves for mine, and finished off the look with sweet alyssum, borage, summer forget-me-nots, cilantro blossoms, and wild radish flowers.
Now that you know how to make your edible green whipped butter paint and your olive and cottage cheese sheep, I hope you find joy in creating little pastoral countryside scenes of your own! These are such a whimsical and yummy way to take buttered toasts to a whole other level—all while adding a little boost of real protein along the way—and I can’t help but smile looking at how perfectly the cottage cheese transforms into fluffy little sheep. The recipe below will include approximate amounts for assembling a piece of toast with 3 sheep but definitely feel free to get creative with different toast sizes and arranging your sheep as you choose!
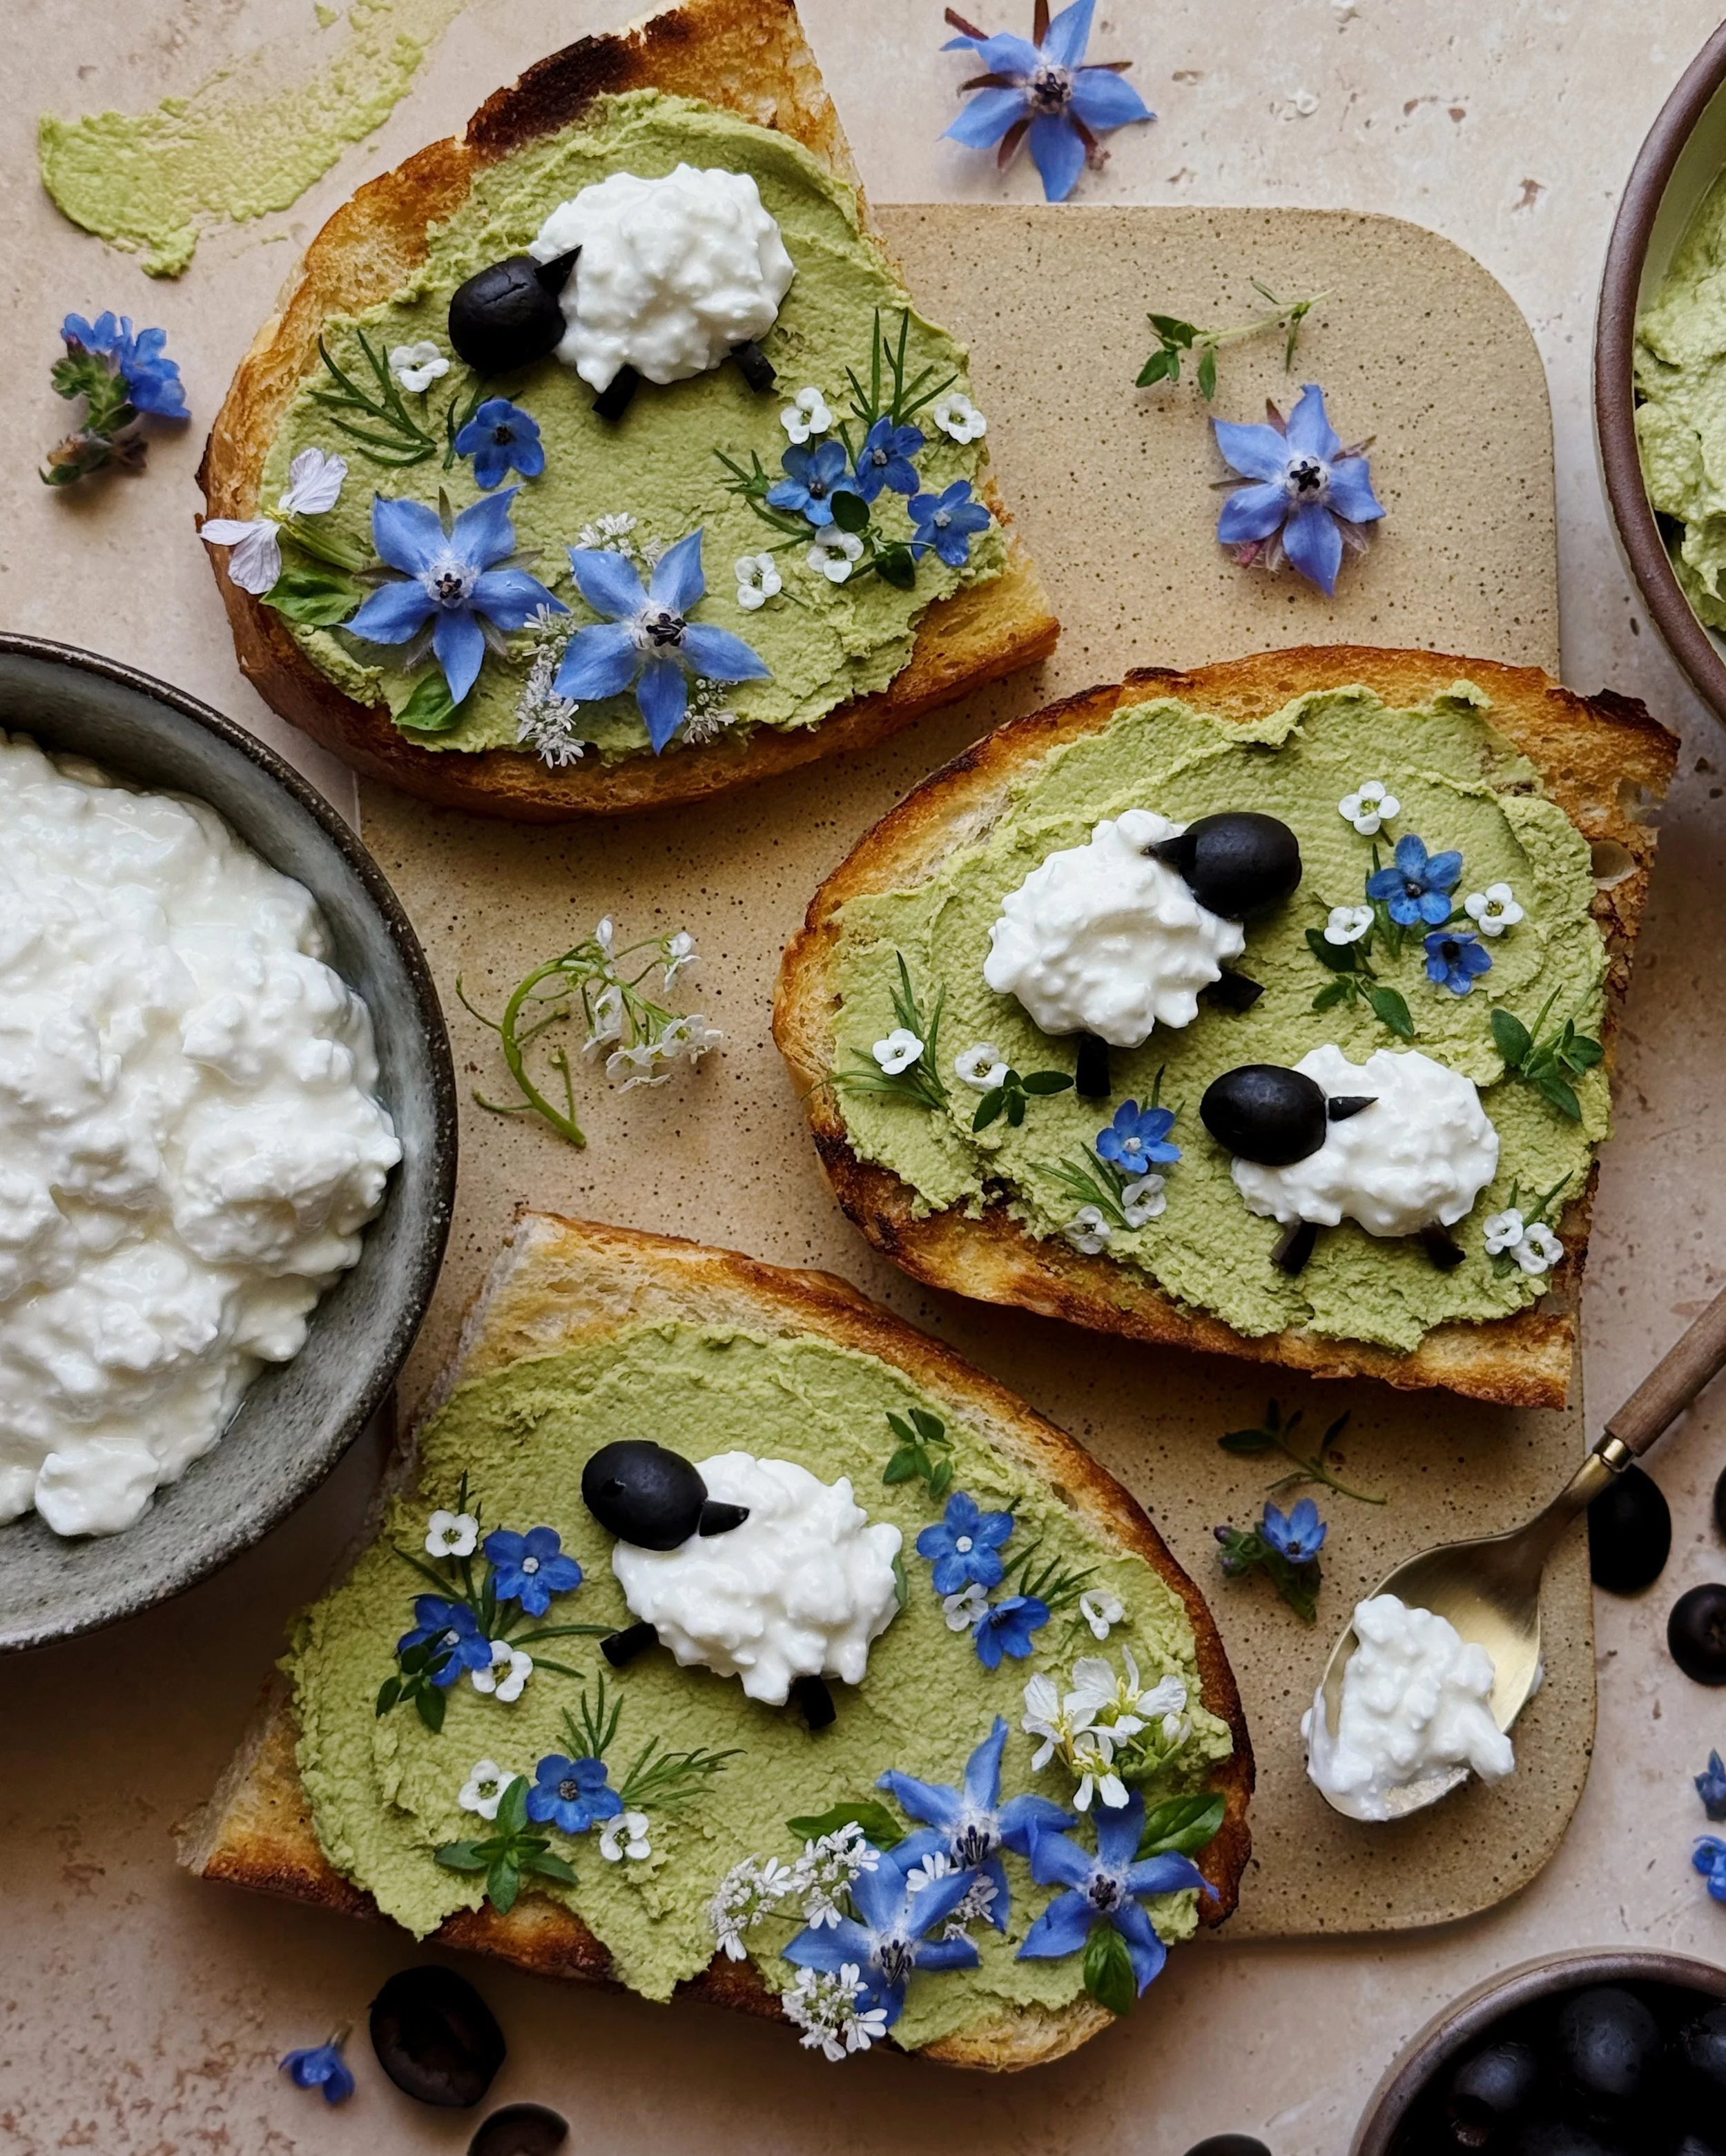
How to Make Toasts with Cottage Cheese Sheep and Blistered Scallion & Herb Whipped Butter
Ingredients for the Whipped Butter
8 scallions, trimmed
1 tsp extra virgin olive oil
1 stick Real California Milk unsalted butter, cut into small pieces and brought to room temp
1 tbsp Real California Milk cottage cheese
2 tbsp basil, roughly chopped
2 tbsp dill, roughly chopped
1/4 tsp kosher salt
Ingredients for 1 Toast with 3 Sheep (Multiply as Desired)
1 large slice of bread
3–4 tbsp Blistered Scallion & Herb Whipped Butter
3 small black olives
3–6 tsp Real California Milk whole milk small curd cottage cheese
Ingredients for Decorating (Optional)
small herb leaves such as thyme, basil, and dill
edible flowers
Procedure
To make the whipped butter:
Cut scallions into roughly 2-inch pieces, keeping the firm white and light green parts separate from the hollow dark green parts. In a small pan, heat the oil on high. Add the thicker light-colored pieces to the oil and cook for about 2 minutes so they start to char. Add salt and the remaining hollow dark green scallion pieces and cook for 1 minute more until the green parts are completely wilted.
Immediately combine the cooked scallions, cottage cheese, and herbs in a mini blender (see notes above about equipment). Blend until smooth. Add the butter in smaller batches, blending to fully incorporate until adding more. Continue until all the butter is blended in and the result is a smooth, homogenous consistency.
Transfer the whipped butter into a storage jar with a lid and refrigerate until needed; the mixture stays perfectly spreadable directly from the refrigerator, even after chilling overnight.
To make the toast:
From each olive, cut a head, an ear, and legs for a sheep: Slicing lengthwise, cut 1/3 to 1/2 of the olive to form the head of the sheep. From the remaining portion cut 2 slices that are each 1/16- to 1/8-inch thick to become front and back sets of legs, and a small triangle to be the ear. (You’ll be left with some remnants of the olive that won’t be used for the sheep.)
Prepare the slice of bread according to your crunch preference using your preferred method of toasting.
Spread an even layer of the green Scallion & Herb Whipped Butter over the toast to form an opaque background.
Using a tiny spoon, form 3 separate oblong-shaped dollops of cottage cheese to form the bodies for 3 sheep. Add the prepared olive pieces for the head, ear, and legs of each, embedding them in the cottage cheese and butter to hold them in place.
If desired, continue to decorate the toast with herbs and edible flowers to create a flowery pasture for your little sheep!
Thank you so much to Real California Milk for sponsoring this post! Find Real California Milk dairy products near you by visiting here, or look for the seal!