How To Make Perfect Jammy Eggs

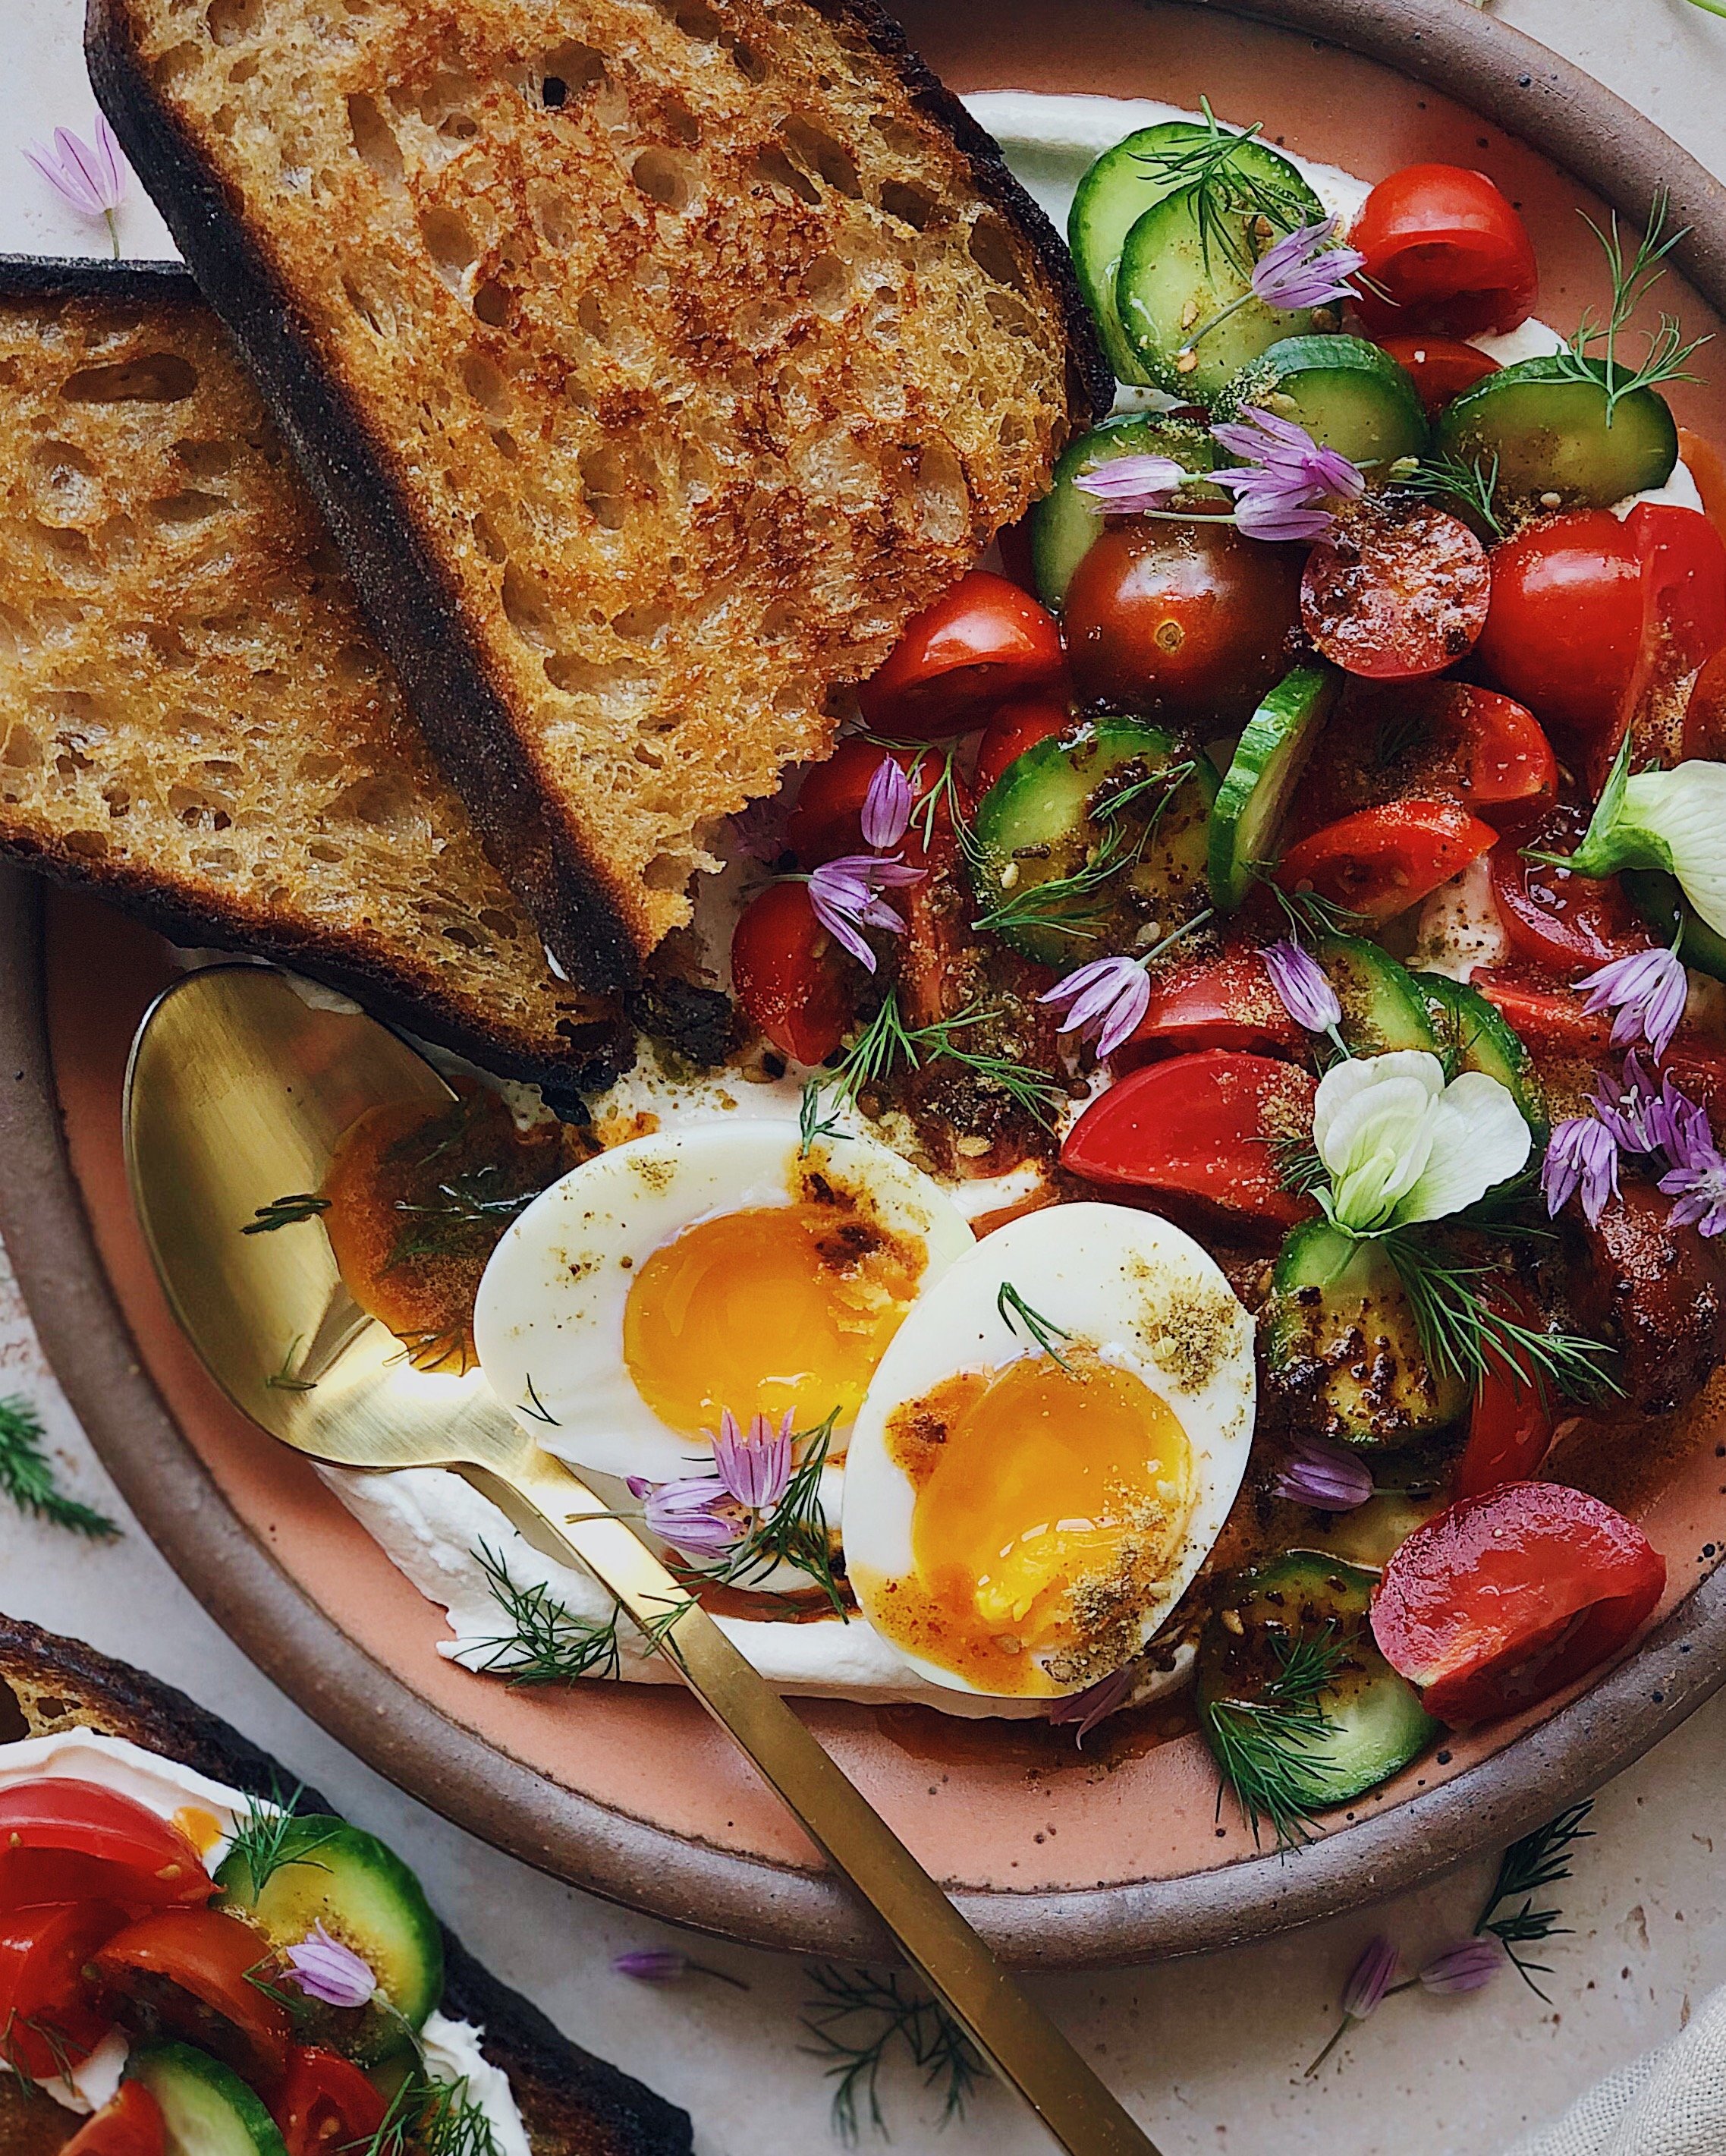
turkish eggs tomato and cucumber salad

I am pretty sure the term “jammy eggs” is a term that only exists on Instagram. It is used to describe when the yolk of a boiled egg still has a ways to go before becoming the dry, chalky grossness called for in old-school deviled egg recipes, but it holds together much better than a completely runny or raw yolk. There’s a supple, gooey, almost gelatinous look and consistency to the yolks in this in-between zone, and that’s why they end up getting called jammy eggs.

But there is more to the perfect jammy egg (I’ve also seen them sometimes referred to as soft-boiled egg) than getting the texture of the yolk just right. There’s also the look of the egg as a whole when you cut into it. Even if your timing is perfect for cooking the egg to get that jammy yolk consistency, there are still things that can prevent your egg from being picture-perfect, such as a yolk that is completely off to one side, a big air bubble causing the shape to look completely wonky, or a bunch of the egg white getting stuck to the shell when you try to peel it.

I’ve made a lot of eggs for the ‘gram over the past few years. A lot of this is largely thanks to my ongoing partnership with Pete & Gerry’s who have been a wonderful supporter and sponsor of my work. (This blog post is NOT sponsored but I can honestly say their eggs are delicious and gorgeous, and that very lovely people work at the company.) But making eggs for sponsored work or a client shoot means even more pressure to get them to look perfect, which can be stressful for shooting a food preparation where so much can go wrong. So after cooking probably several dozen eggs in this style, I can share all that I have learned to set all the rest of you up for success in your future egg-making ventures too!

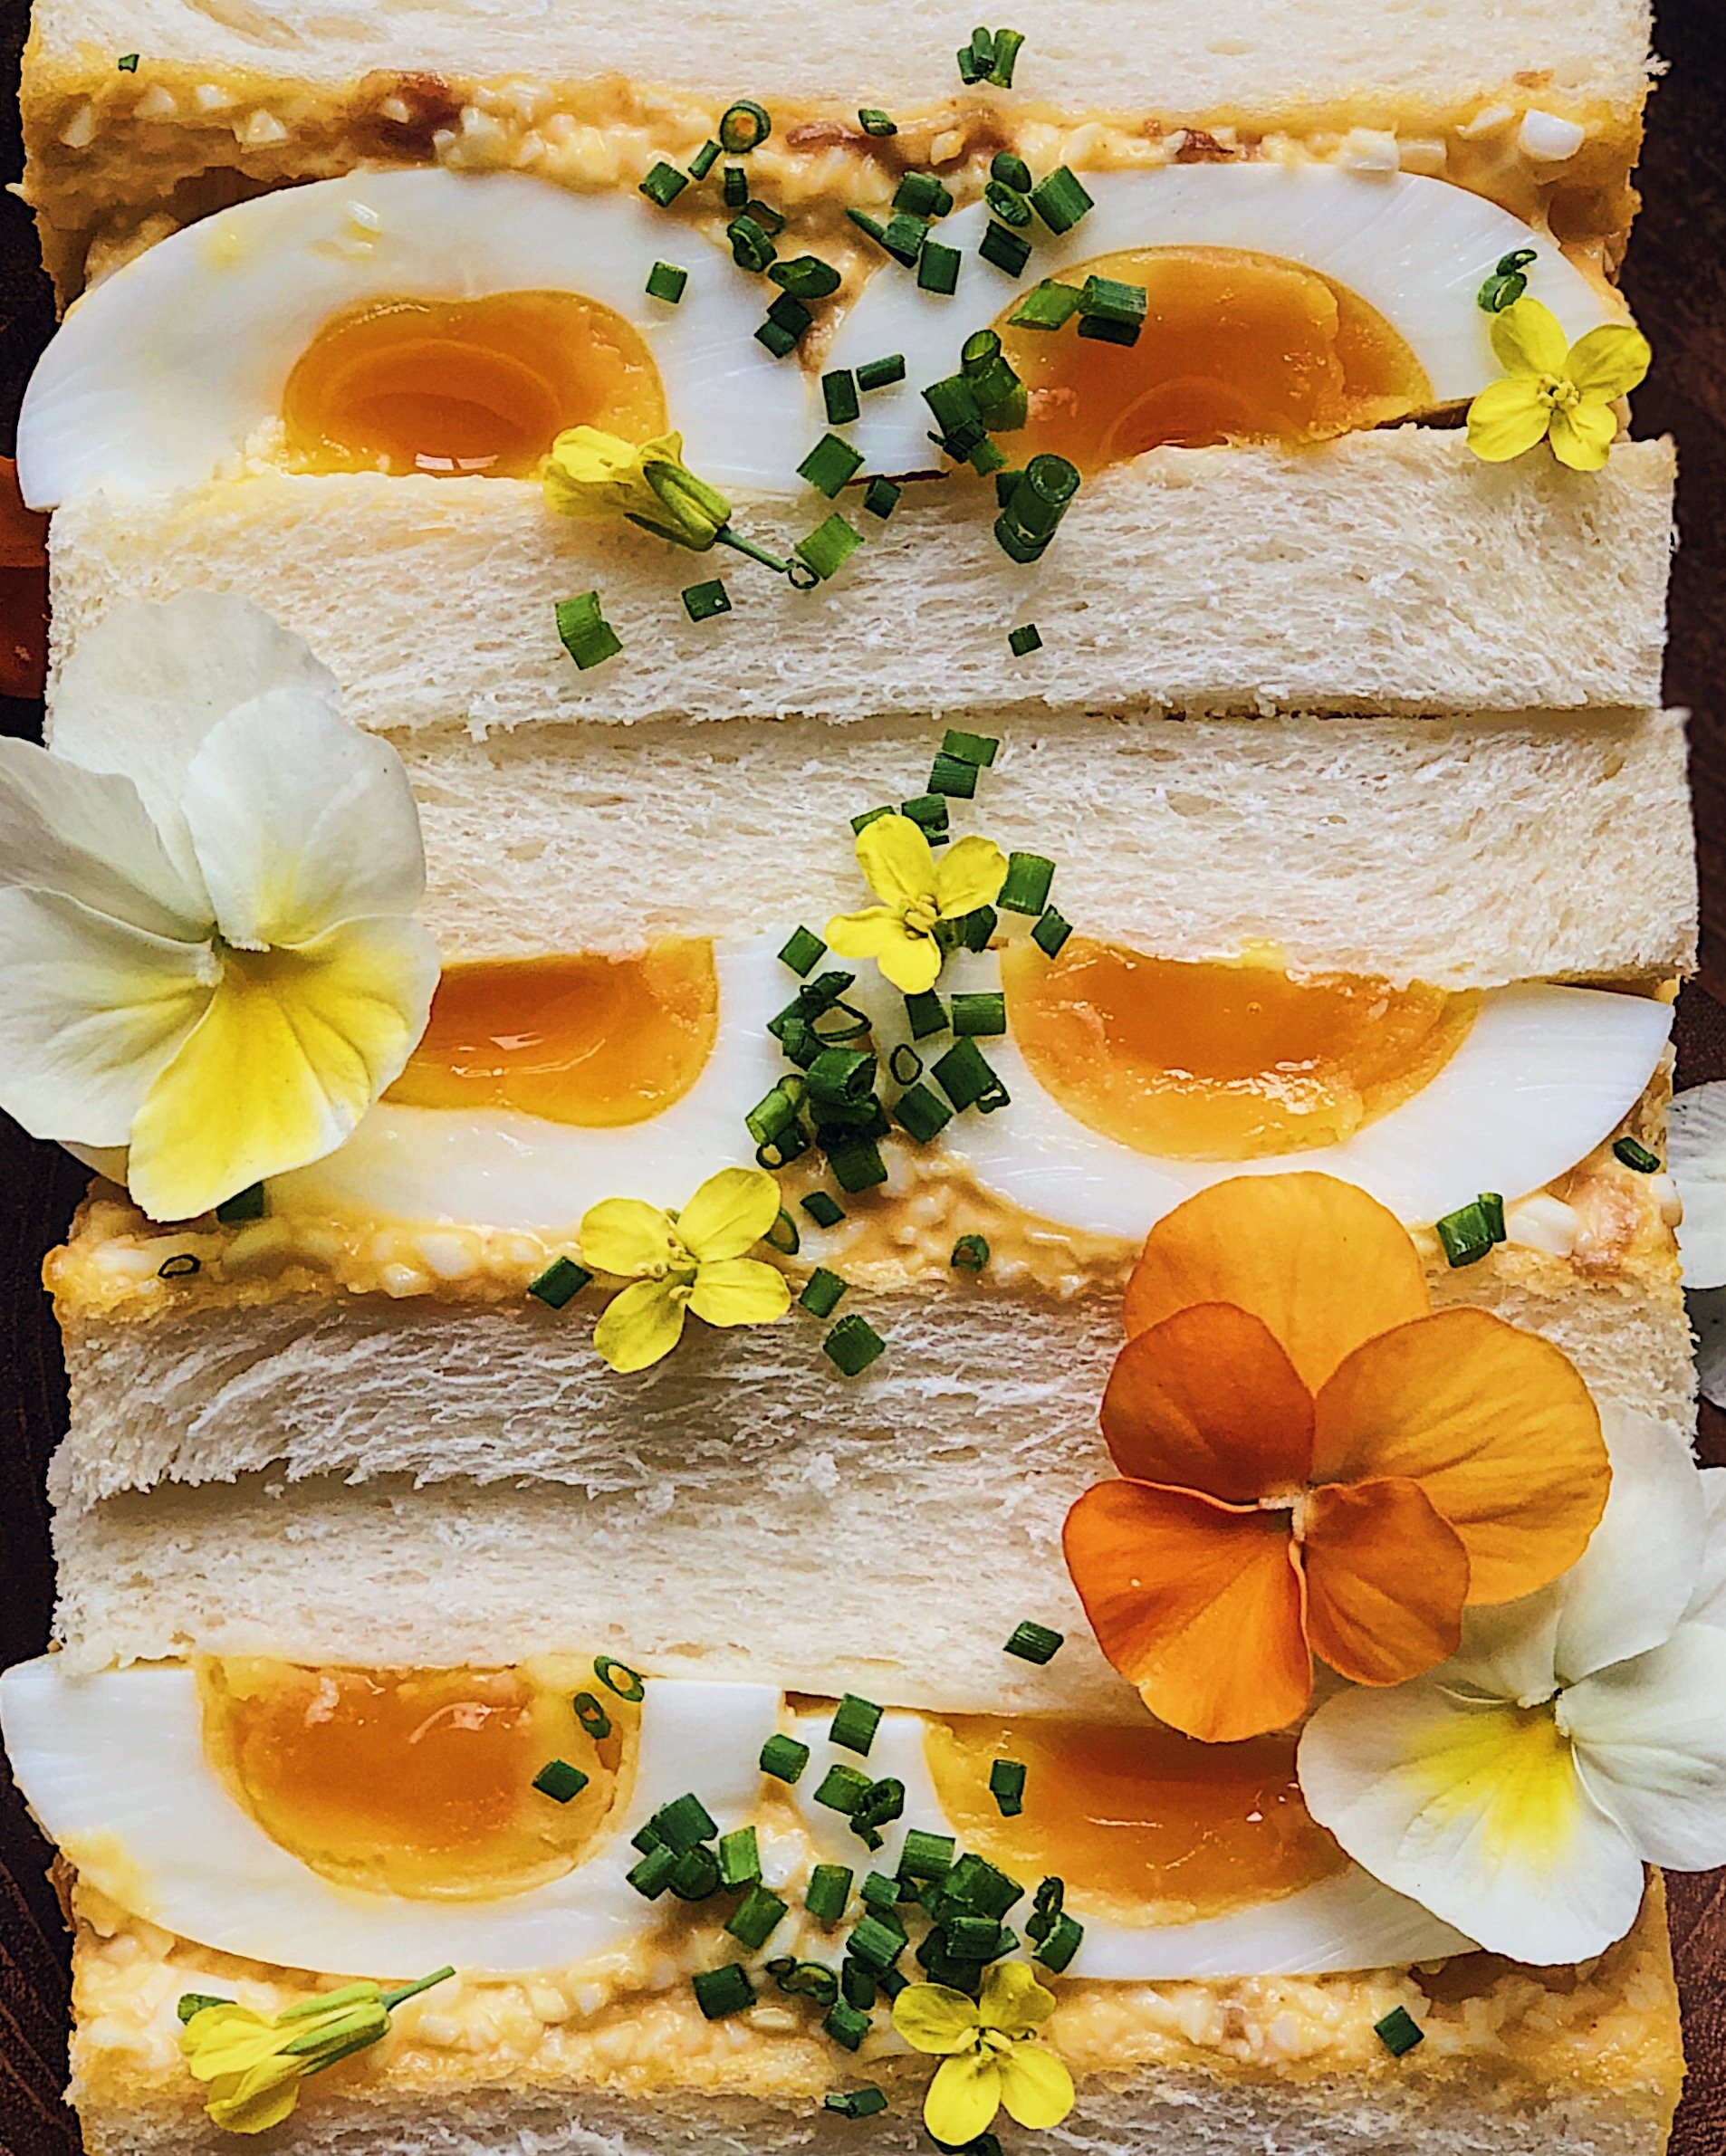
tamago sando closeup

Phase 1: Choosing What Eggs to Use for the Best Looking Jammy Eggs

  • Use good-quality eggs that are fresh from the grocery store. (I have not used eggs directly from the body of a chicken before so can’t attest to the nuances of eggs that fresh.) There is info online about how the shells will be harder to peel off when the eggs are fresher, but I’ll address how to overcome this in Phase 3.

    • What happens if you skip this tip: You want fresher eggs because the air bubble inside of them will be smaller, resulting in a nicer boiled egg shape. Over time, due to moisture loss within the egg, the air bubble at the wider end of the egg gets bigger. Using an old egg will result in the boiled egg having a big crater in the bottom, because the big air bubble prevents the egg white from fully taking on the shape of the egg shell.

Phase 2: Boiling the eggs

  • Step 1: Use a safety pin to poke a hole in the wider end of each egg. This allows airflow in and out of the egg and can also help mitigate the impact of the air bubble inside the egg on the shape of the final result. Keep the eggs out on the counter to bring them closer to room temp after this step.

    • What happens if you skip this tip: Pressure can build up as the contents of the egg get heated in the boiling water. This could cause the egg to crack and some of the white to leak out, ruining your perfect boiled egg shape.

  • Step 2: Bring a pot of water to boil on high heat. Make sure there’s enough depth to fully submerge the eggs. While you’re waiting, you could also get an ice bath ready for the end.

  • Step 3: Gently lower the eggs into the boiling water. Set your timer according to the guide below:

    • 6.5 minutes: Fully set whites and runny yolks. Perfect for ramen.

    • 7 minutes: Jammy yolk consistency on the outer parts of the yolk, liquid gold right in the middle

    • 7.5 minutes: Perfect jammy yolk consistency throughout

    • 8 minutes: Jammy yolks that aren’t going anywhere. Perfect for tamago sandos like the one shown above.

  • Step 4: Keep the eggs moving! Use a slotted spoon to continuously spin the eggs around their own axes as well as occasionally lift them out of the water and immediately lower them back in. Do this for the entire cook time. The centrifugal motion will keep the yolk positioned nicely as the egg white cooks, and lifting the egg in and out might help with reducing the impact of that pesky air bubble (if the eggs are relatively fresh).

    • What happens if you skip this tip: The yolk will settle in the egg before the egg white has had a chance to cook/solidify. When you cut it open, you will find that the yolk is in a weird spot and you have an ugly cross-section.

    • Credit to Eat With Your Eyes Closed for teaching me about egg yolk centrifuge.

  • Step 5: When the timer is up immediately transfer the eggs into an ice bath to stop the cooking. Move them around for a bit to really allow the heat to disperse and get the eggs to cool down.

Phase 3: Cooling and Peeling the Eggs

You could cook the eggs perfectly and still end up with ugly eggs if you don’t get this post-production phase right. If you followed Phase 1 correctly and used store-fresh eggs, they can be notoriously hard to peel, resulting in frustration and little bits of egg white (and all your hopes and dreams of a perfect-looking egg) being lost. Patience and cooling time are the keys to doing this phase right.

  • After your eggs are cool to the touch from resting in the ice bath, gently knock them against each other or a countertop to make little hairline fractures in the shells. I like to grasp the egg and encircle it with my palm when I do this, to help support the egg structure.

  • Especially concentrate on creating fracture lines at the wider bottom of the shell. Due to that air bubble, it will be easiest to start on this end anyway when you peel.

  • Place the unpeeled eggs in a bowl of cold water and put them in the fridge. Let them continue to chill for as long as you can, up to overnight! The cold temperature will cause things to shrink inside the shell and water will seep in between the cooked egg and the shell, creating separation.

  • When it is time to peel, start from that wider end and go gently and slowly, continuing to fracture the shell into little pieces as you go, rather than trying to peel off a big chunk at once.

    • What happens if you skip these tips: The egg white may stick to the shell!

Phase 4: Enjoying the Eggs!

Now you are ready to take photos of your eggs if you so choose, but more importantly, you are ready to eat them! Below is some inspiration for how to incorporate jammy eggs into your meals. I hope you found this blog post helpful, and I wish you eggcellent jammy eggs in your future!
brunch board
Spicy tomato noodle soup, hot pot inspired
eggsontoast

How to Turn Your Favorite Dinner Roll Recipe into Pumpkin-Shaped Buns

Cozy sweaters, the crunch of colorful leaves under your boots, and pumpkin spice everything—admit it, fall is a season that has a special place in your heart. Why else would you be reading this blog post? But if you are a lover of both hygge vibes and savory flavors, perhaps you don’t wish for every fall baking project to be flavored with sweet cinnamon and clove. Perhaps you’re looking for another way to create something yummy and pumpkin themed, that satisfies your savory cravings too?

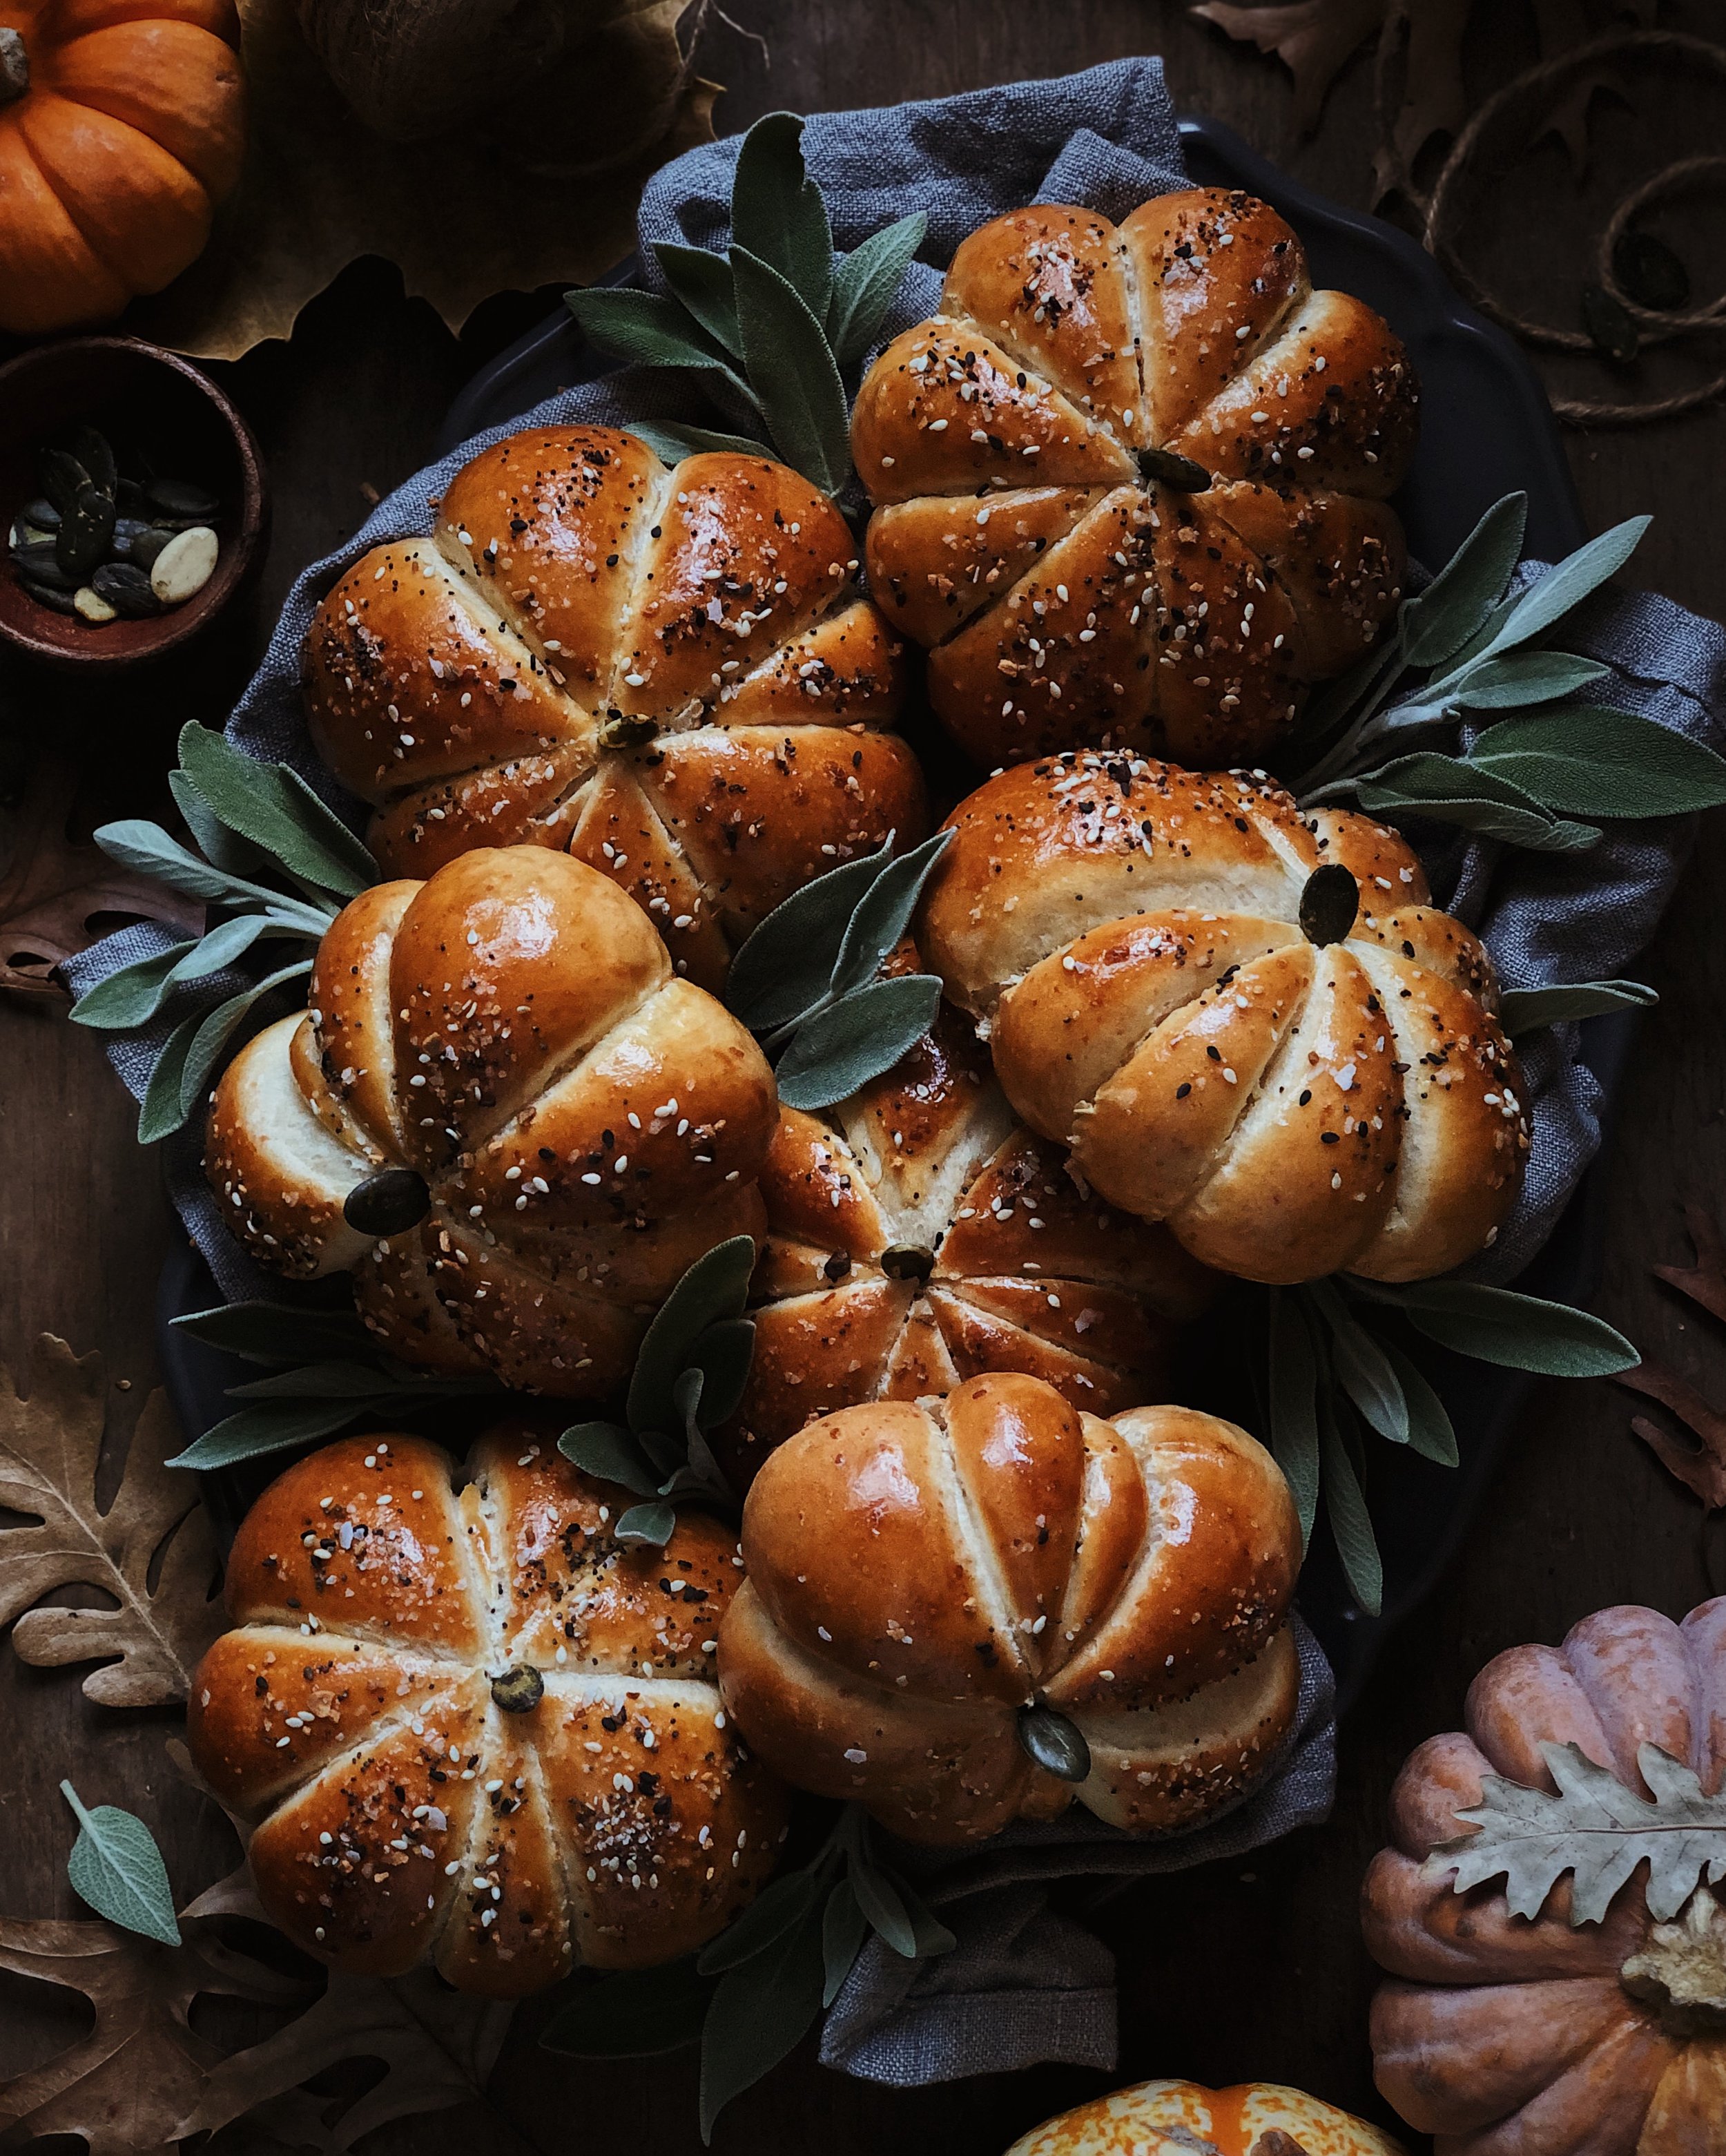
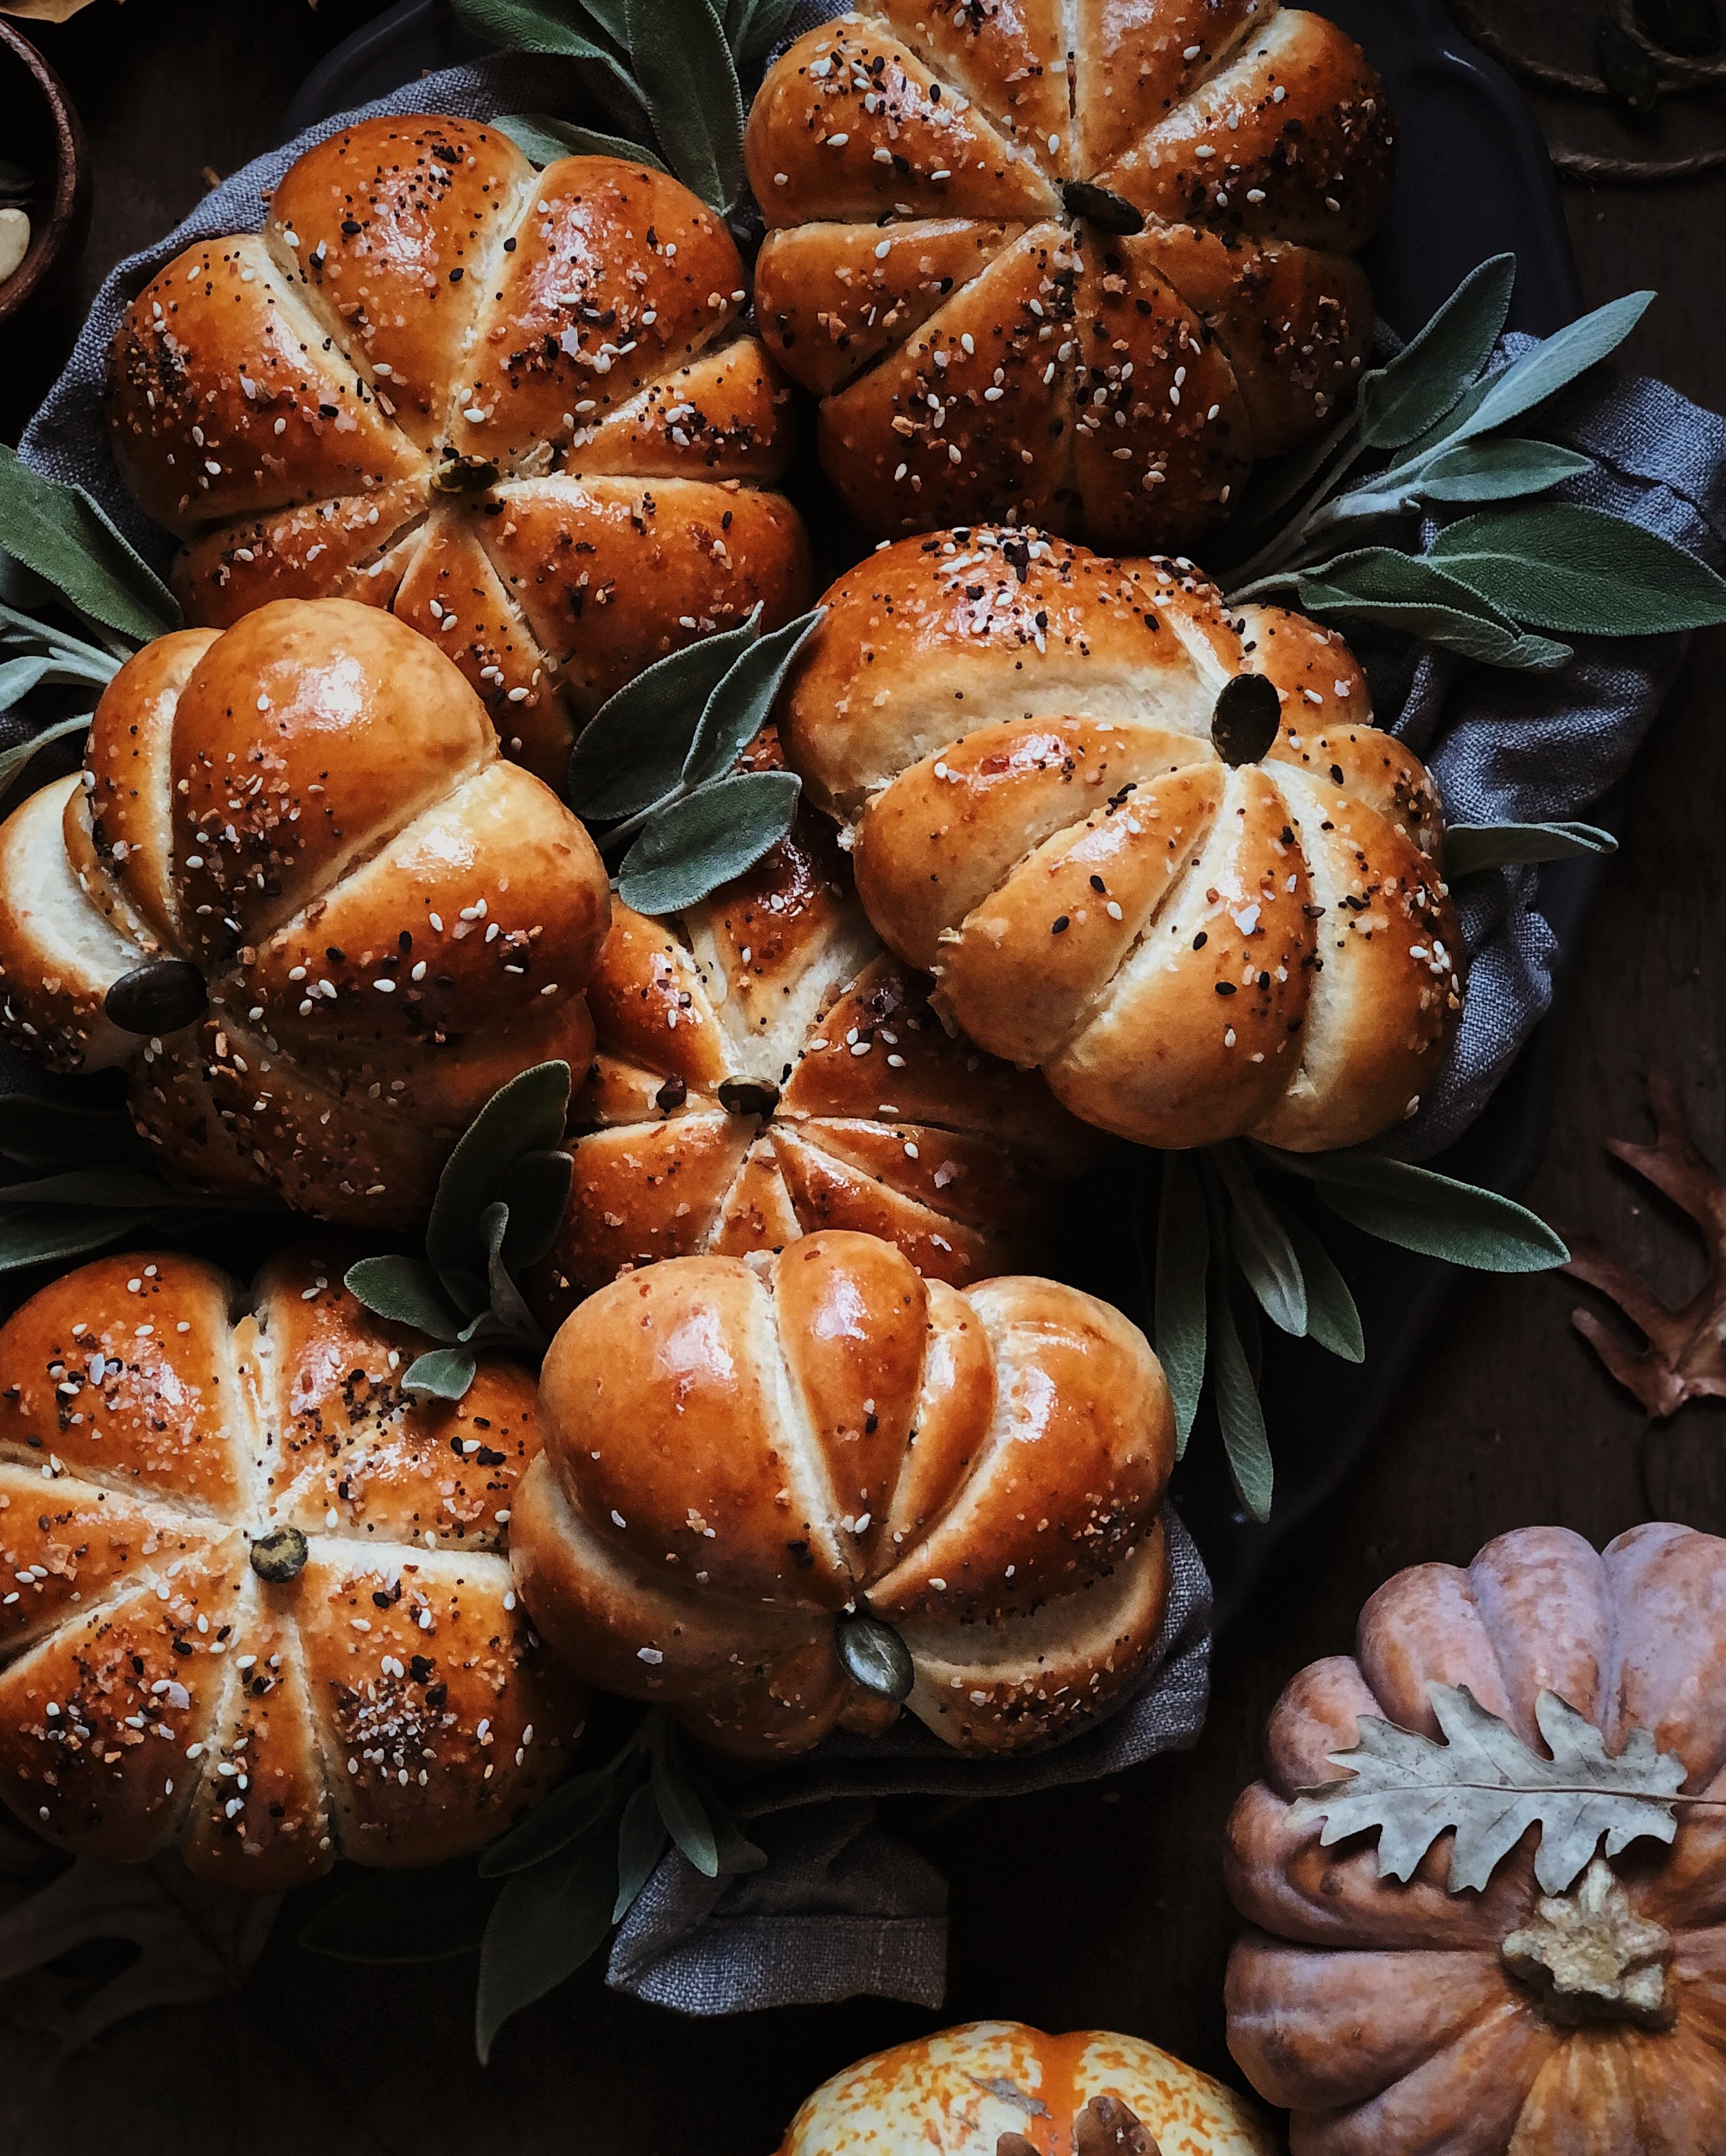
In this blog post, I am going to walk you through how to turn your favorite dinner roll recipe into pumpkin-shaped buns that are perfect for hamburgers or decadent breakfast sandwiches.

These instructions should work with any gluten-based dinner roll recipe that typically makes 12 rolls in a 9”x13” baking dish (I have not tried it with alternative/gluten-free flours). We are instead going to divide that dough recipe up into 8 equal parts to make 8 pumpkin-shaped buns that are sized like a fluffy hamburger bun. For mine, I used @arjolee’s cheesy everything bun recipe, which is my go-to recipe for making the tastiest savory buns that are plenty full of flavor to eat just on their own. (You could also follow the same shaping steps with an existing favorite hamburger bun recipe.)

Most dinner roll recipes have you first allow the dough to rise until doubled in size, and then undergo a second proof in the baking dish after the individual rolls have been divided and shaped. However, in this case, it will realistically take a bit of time for you to do all the tying of twine that is needed to create those pumpkin shapes, so the dough effectively undergos that second proof in that time.

If you love pretzels and you’re looking for something to snack on with a little more chew while satisfying your autumnal obsession with all things pumpkin shaped, then I have a more precise recipe for pumpkin-shaped pretzel buns too, which you can check out here.

Here’s how to turn your favorite dinner roll recipe into pumpkin-shaped buns:

Start by making your batch of dough as you normally would. You can use whatever gluten-based 9”x13” bun/roll recipe you’d like and it should work, but I recommend using my pal Ariel Lee’s recipe, which is the one I used in the photos. Allow the dough to undergo the first proof.

While the dough is proofing, prep your twine so you can do all the shaping efficiently when the dough is ready. Tying twine around the balls of dough is what creates those indentations of the pumpkin shape as the dough expands in the oven. Cut thin, food-safe baker’s twine into about 10-inch pieces. You will need 4 pieces of twine per bun and we’re making 8 buns, so you’ll need to prep 32 pieces of twine.

Preheat the oven according to your recipe.

After the first proof, divide the dough evenly into 8 portions. As you work with each portion, leave the others covered under a damp tea towel. Dust your hands lightly with bench flour but don’t use too much on your work surface as you’ll need a bit of surface tension.

Roll each portion of dough into a ball gently using the method used for shaping a boule: Flip the ball over and pull all of the edges into the middle to form a little pouch. Then flip it over again. Cup your palm and fingers gently around the ball to form a cage and roll the dough in a circular motion, using the tension with the work surface to seal the seams on the bottom and create an even ball shape. This will result in a nice domed surface on top while gently handling the dough to keep it light and airy. Repeat with all 8 pieces of dough.

For each portion of dough, lay out 4 pieces of twine to form an asterisk. They don’t have to be perfectly symmetrical; if you wish for your pumpkins to be a little more wonky because that is part of their charm, go ahead. However, I tried both irregular criss-crossing of the twine and others where I tried to make them as neat as possible and I found that the ones where I tried to keep them even are the ones that turned out looking the most pumpkin-like. The uneven shapes were more reminiscent to me of heirloom tomatoes.

After laying out the twine on your work surface, place a ball of dough face-down in the middle and tie both ends of each individual length of twine into a double knot. Take care to have them just gently curving around the ball of dough; do not make a tight loop around the dough. The dough will expand significantly by the time it is done baking, so you don’t want the twine to be cutting in too deeply into the final shape.

When all 4 knots are tied, trim off the excess twine and flip the ball over. Make any adjustments needed.

Place your trussed dough baby on a parchment-lined tray and cover with a damp towel.

As you repeat the process with the other dough balls, give the buns at least 3 inches of space around them on the tray because they will expand! By the time I was done tying up all the dough, the earlier ones had already started to rise quite significantly, starting to form that pumpkin shape. Unless you’re working in a very cold place—or you’re exceptionally fast at typing knots—you probably won’t need much of a second proof.

Here’s what mine looked like by the time I was done tying them all and getting my eggwash ready. Let yours proof until they are starting to puff beyond the loops of twine, like you see below; it should just take a few minutes unless it’s super cold! (Note that after taking this photo, I divided them onto two trays so that there could be more space between them. Don’t overcrowd your trays!)

At this point I brushed a beaten egg yolk over the surfaces of the buns. Using just the egg yolk for the eggwash is what gave them their rich brown color and glossy finish so I definitely recommend it! The everything seasoning is optional, but tasty!

After brushing on the eggwash, bake the buns according to your recipe’s instructions. I found the baking time to be the same for these 8 larger buns as for making 12 smaller buns packed together in a baking dish.

When the buns have baked, allow them to cool a bit for safe handling. You’ll find that the twine is now embedded into the buns and they’ve baked up around it, and you of course need to remove all the twine before serving/eating. I do not own a bread lame, but that would be very useful here. Instead, I used a faux lame in the form of a stainless steel razor blade. I gently cut into the surface of the buns along the lines created by the twine, in order to free the twine cleanly without the bread getting torn up. Be sure to remove all the twine before eating!

To finish things off, I added a little pepita/pumpkin seed into each bun to resemble the pumpkin stem.

I hope these step-by-step instructions help guide you to making the pumpkin-shaped buns of your cozy fall baking dreams. If you found these instructions helpful in making your own, please be sure to tag me, @lilybubbletea, on Instagram so I can see your creations!

Focaccia Garden

377E3F49-8ED4-490D-A76B-BFA302386EF4.JPG

Really quite proud of this “focaccia garden” that I made the other day. I gathered a little pile of clippings from my backyard garden to decorate it, which included crown daisies, violas, bachelors buttons, parsley, mint, sorrel, and anise hyssop.

Here is the recipe I used for the focaccia, but for this version I did the following modifications:

  • After the dough’s first proof, pour some olive oil onto a baking sheet. Shape the dough into an oval on the sheet, cover it with a damp kitchen towel, and let it proof for 20 minutes more.

  • After poking holes in the dough and drizzling with olive oil, decorate the dough with the edible flowers and herbs before sprinkling coarse kosher salt over the surface instead of everything seasoning.

Here’s what it looked like before baking:

D3D7FDC0-FE70-43C7-9CEB-26C2FCC5E8EF.JPG

Easy Chili Oil Noodles

Welcome to the first installment of a series I am going to call “Awkwardly Vague Recipes by Lily Morello”. Most of the time, I don’t measure when I am just cooking for myself/my household, so when anyone asks me how I made something, this generally sums up the nature of my trying to recall and explain what I did after the fact. Except now people actually want to recreate the dishes that I share on my Instagram account, so I know I really need to get better at, at least, taking notes while I cook.

The problem is, some recipes are really not meant to be confined to a strict recipe. At least not with measurements and a specific order of operations, or any of those details. A lot of cooking involves seasoning and balancing flavors to taste—to match the preferences of the chef, or the eater. I may like things spicier or more sour than the next person, and I’m not going to be the one to dictate how much seasoning to put in a sauce for someone with different seasoning preferences than mine. In these cases, awkwardly vague is the only way to go.

I put together this recipe as a last minute idea for a Lunar New Year themed dish. I happened to have Hokkien-style noodles already open in my fridge, so that is what ended up in the dish. I grew up eating noodles at celebrations to promote longevity, and golden-colored things for prosperity, so I think these noodles fit perfectly in the Lunar New Year spirit.

This time, I took photos to help visualize all the unmeasured ingredients (please ignore the reflection of my camera mount). But seriously, feel free to add more or less depending on what you like!

How to Make Super Easy Chili Oil Noodles

Get a pot of water boiling. You can use this for your noodles, and any vegetables you feel like blanching to include in the dish.

Select a bowl from which you’d like to eat your noodles. You’ll be able to mix the sauce and eat out of the same bowl, so there’s fewer dishes to be done! To that bowl, add some black vinegar, a scoop of chili oil, some sesame oil, and a drizzle of kecap manis (Indonesian dark sweet soy sauce).

4BE49FC7-B5CB-43F4-AA86-C9E5FD8E3931.JPG
C5D5186A-C095-4295-971A-F1D2C2E7CCEB.JPG

Mix everything together to make your sauce.

Add your piping hot noodles to the bowl, and mix everything together. You can really use any noodles you like, as long as you know how to cook them to the texture you desire. You could even use pasta!

0A409228-AFC3-48CD-864F-275D5D6C340E.JPG

That’s honestly it. At this point, you could add blanched vegetables (I used broccoli rabe), or a poached egg, or whatever toppings and mix-ins you desire. Maybe add a flourish of chopped scallions or herbs, or a dash of sesame seeds for garnish if you are plating it for the ‘gram, but otherwise, there are really no rules. Just yummy, spicy, tangy, sweet noodles.