How I Make My Mala Chili Oil

ChiliOil1.JPG

Here’s my recipe for mala chili oil. Mala means “numbing spicy” and it is the flavor and sensation that is iconic to Sichuan/Szechuan cuisine. This is my go-to process for when I want to make my own chili oil at home!

The ma, or numbing part, comes from what is commonly called “Sichuan peppercorns” in the States, but it is actually the husks that are used in cooking these types of dishes. Sichuan pepper husks are super unique in that they contain a molecule that causes a tingling sensation on your tongue. It is not at all like the feeling of eating a spicy chili, where it burns like your tongue is on fire. Instead, it is a tingling, numbing sensation like when your foot “falls asleep”.

The la, or spicy part, of mala usually comes from adding spicy chili peppers to the dish. I really like the emphasis on the numbing quality in mala dishes, and prefer to get the chili flavors without having it be flaming spicy. So for my chili oil recipe, I use Korean red pepper flakes, or gochugaru. I think these have a nice robust chili flavor but they don’t add that much heat.

I make my chili oil by first combining the gochugaru, salt, and aromatics into a heat-safe bowl. Then I basically steep the sichuan pepper husks in the oil gradually, until they impart their numbing quality into the oil. (Remember to keep in mind that I like mine really numbing!) Then, I pour the hot oil over the chili flakes and aromatics to awaken all of their flavors. The hot oil splatters and bubbles when you pour it on the other ingredients, so be sure to proceed with caution!

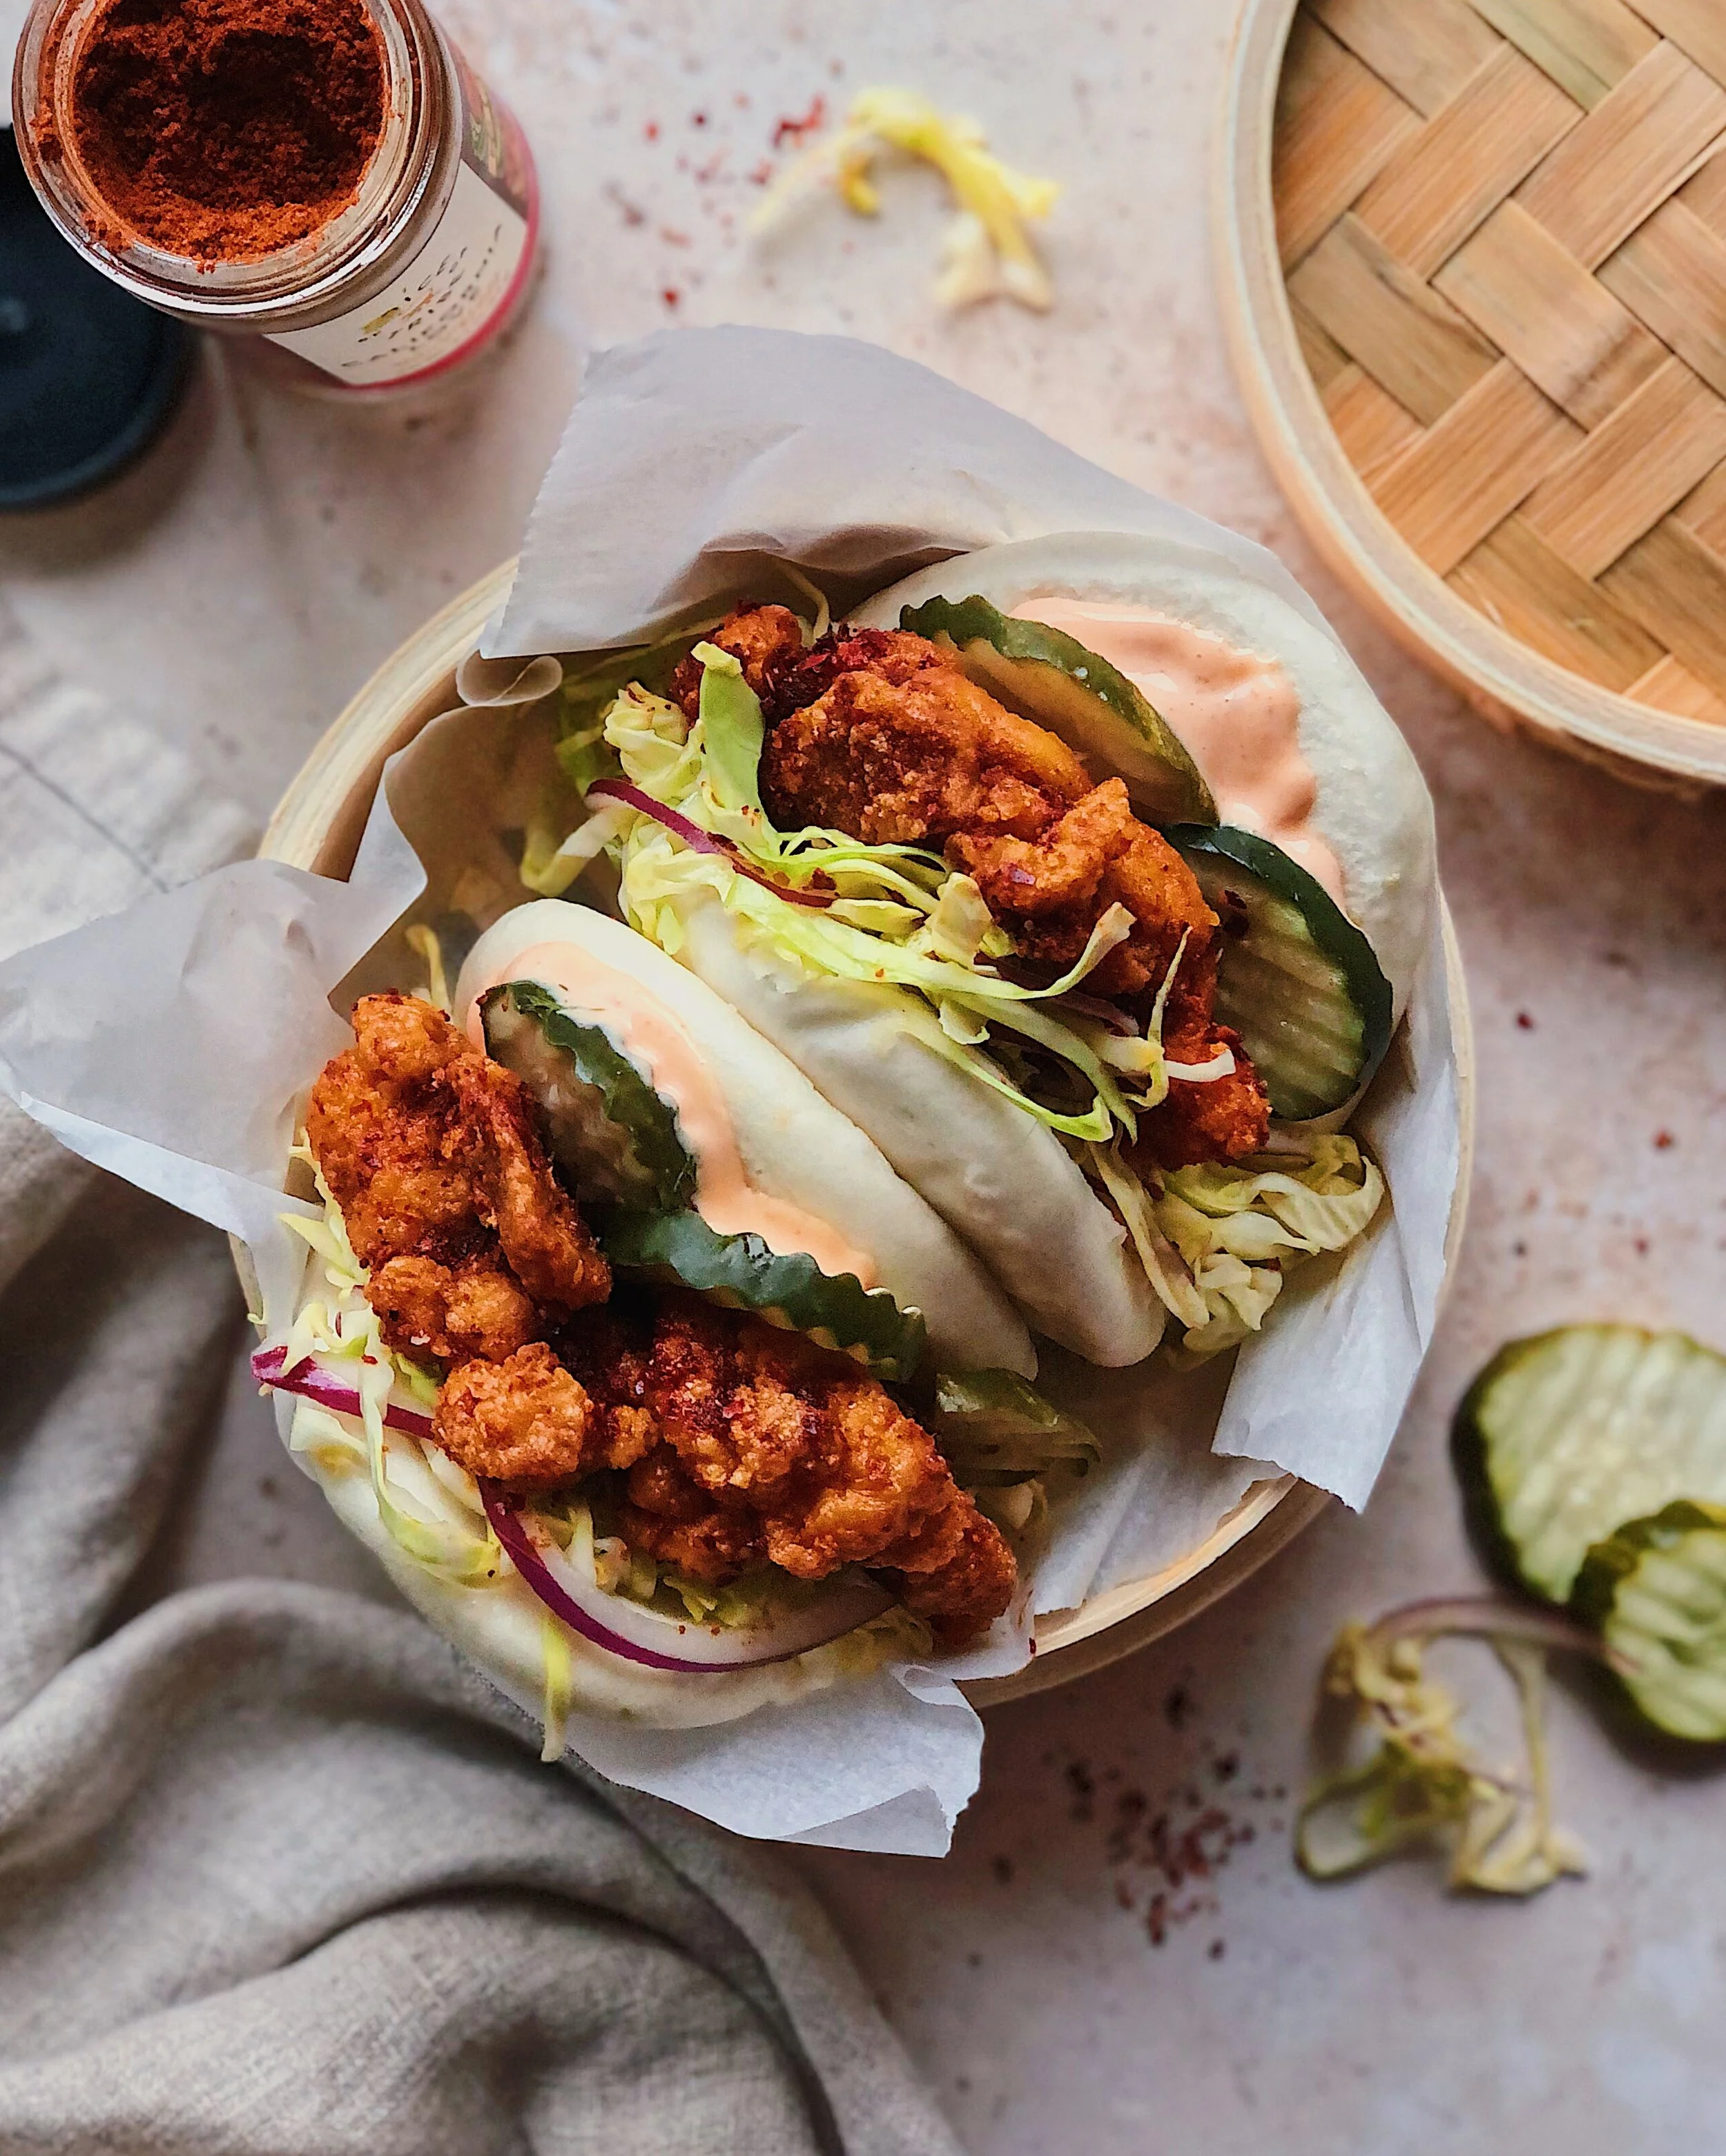
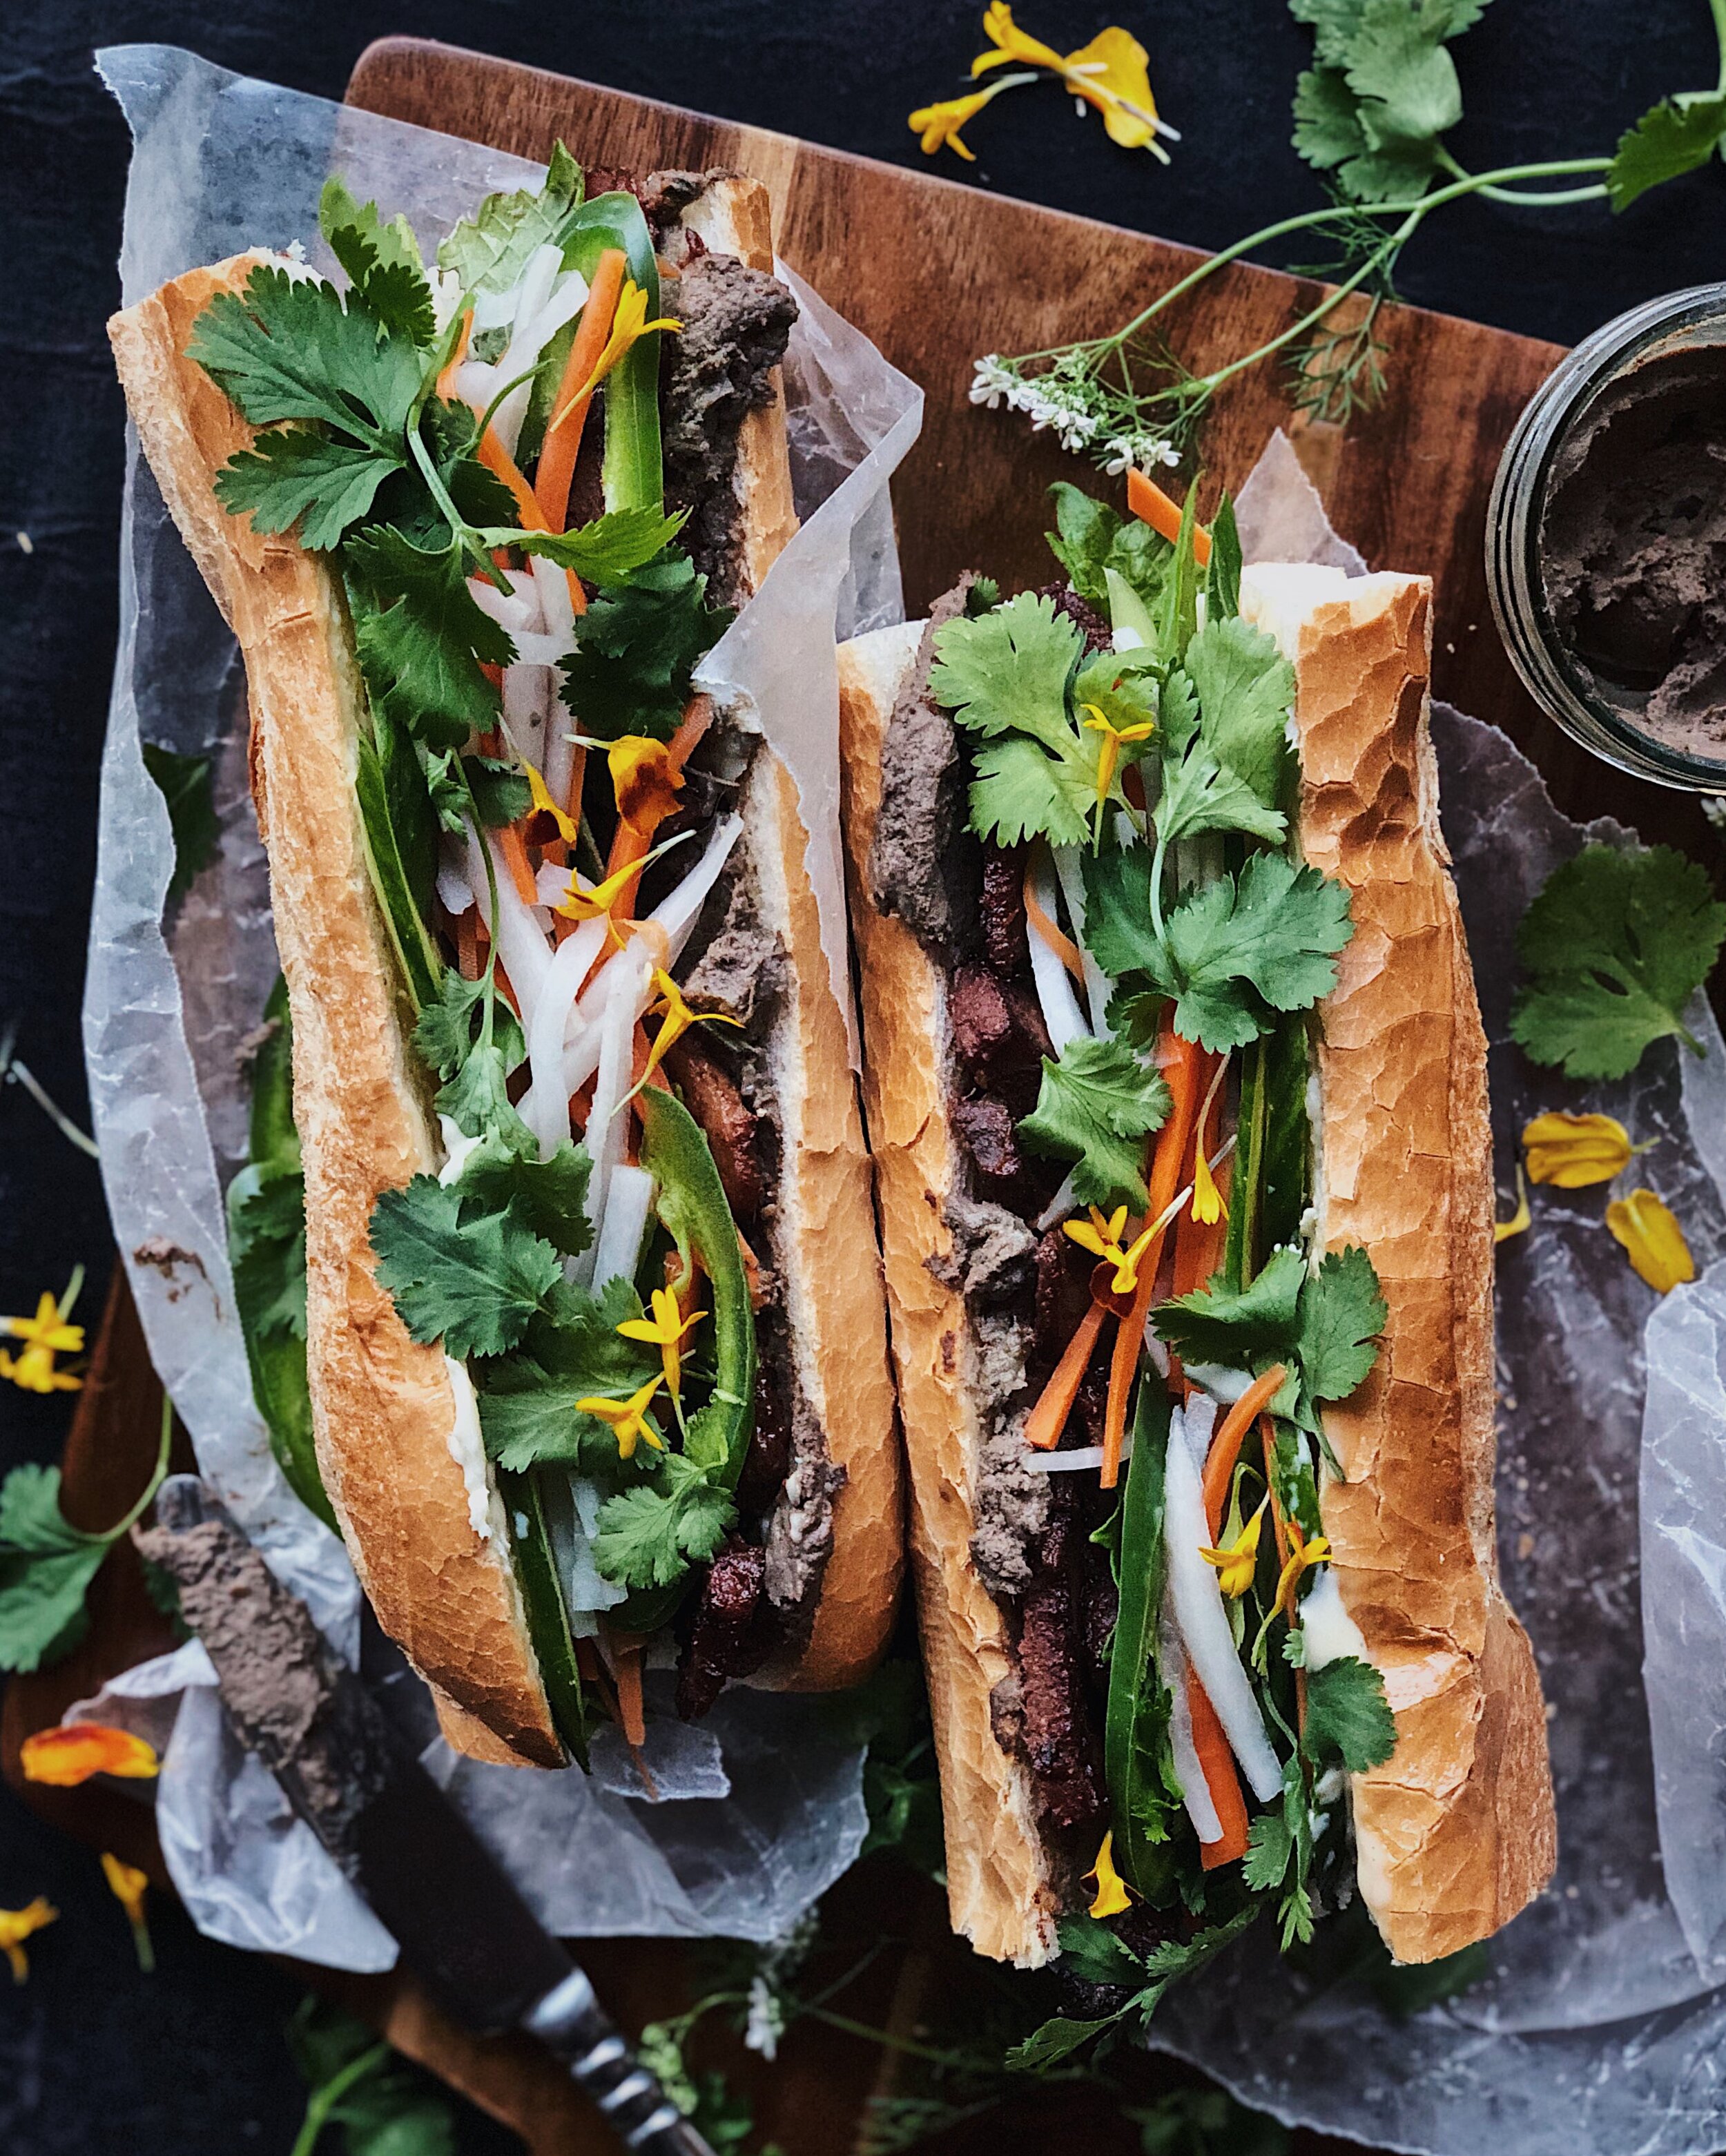
This numbing spicy chili oil is great on dumplings, eggs, noodles, and more! Combining it with a little soy sauce and black vinegar turns it into an awesome easy sauce for my hand-torn noodles, or you can see it in use in my Dan Dan Dumplings recipe. I will probably add to this list of recipes in the future, because this chili oil is the foundation of so many ideas I have yet to write down. I hope you love it as much as I do!

ChiliOil.gif
ChiliOil5.JPG

How to Make My Special Recipe for Numbing Chili Oil

Ingredients

2 tbsp coarse Chinese or Korean chili flakes
2 cloves garlic, minced
1 scallion, thinly sliced
4 tsp pink Sichuan pepper
2 star anise
1/2 tsp salt
1/2 cup high smoke point neutral oil

Procedure

In a heat-safe bowl, combine chili flakes, garlic, scallions, and salt.

In a small saucepot, combine oil, Sichuan pepper, and star anise. Heat on medium-low heat until the lighter interior parts of the peppercorn husks begin to turn brown, about 4 minutes. Turn off the heat and wait for the pepper to turn fully dark brown, about 1 more minute.

Carefully pour oil through a fine mesh strainer over the ingredients in the bowl. Stir everything in the bowl together and allow to sit for at least 10 minutes (more is recommended) to let the flavors integrate and the garlic cook through.

Recipe: Cheesy Curry Biscuits with Miso Honey Butter

currybiscuits1.jpeg

Not long ago, the concept of fusion baking was completely unknown to me. In my mind, there were distinctly “Western” baked confections—mostly too sweet for my taste—like cookies, scones, danishes, and then there were Asian style baked goods that were soft, fluffy, considerably less sweet and sometimes even savory. I loved going to Taiwanese bakeries and grabbing my tray and tongs to reach for hot dog buns or ham and cheese pastries and would steer clear of Western cafe offerings like brownies and blueberry muffins. Then, one day I visited a popular local Asian-owned cafe called Home, and something in their pastry case caught my eye: a “Japanese curry scone”.

Upon tasting this scone, my life was changed, and that is not an exaggeration. You see, this was a few years ago, when I was just starting my instagram account, and I really had very little exposure to if Asian-American people or Asian flavors were receiving any sort of recognition in the States (outside of bubble tea). I was still at my sad (and microaggressively racist) tech job where I often worked 12–14 hour days, so I didn’t have a lot of time to pick up my head and see what else was going on around me. But on that day, I was peacefully making time for myself in a cafe that was cute and sold high-quality treats without being kawaii or gimmicky or exotic, and having this scone—a super savory pastry that perfectly married the flavors of Japanese curry and cheese, had nice bits of corn, and a strip of nori on top for an elegant look—and it truly opened my mind to new possibilities. Somehow this became a clear signal for me that Asian-Americans could share their flavors in baked goods and reclaim fusion foods, but also that they could run businesses and create spaces that paid tribute to Asian heritage without being tokenized or orientalized.

After some sleuthing, I learned that Home served pastries from Third Culture Bakery, which at the time was just getting traction as well, I think, but has since grown hugely in popularity for their mochi muffins and donuts with Asian-inspired flavors (all of which are absolutely delicious). Though I am thrilled for their success with these not-too-sweet sweet treats, I was pretty heartbroken when they stopped making their Japanese curry scone—the pastry that had changed my perception of Asian-American pastries forever.

27C390E1-A99D-4CD8-8BFA-84E668CB5E24.JPG

I never forgot that joyful moment of first tasting Third Culture Bakery’s savory Japanese curry scone but since I can’t buy it from them anymore, this recipe is a loving tribute to that. I am not really into copycat recipes, so instead, this is an attempt to make something that is just in the spirit of the delicious flavor combination I experienced. I opted for biscuits instead of scones because I already know how to make biscuits anyway. (You can find my recipes for honey biscuits and cheddar scallion biscuits here).

I paired the biscuits with a miso honey butter because I wanted to continue to celebrate Japanese ingredients and you gotta serve biscuits with honey and/or butter. You should be able to split apart these biscuits without a knife due to their buttery layers, making perfect surfaces for slathering on that compound butter.

currybiscuits.JPG
currybiscuits2.JPG

Some notes about special ingredients:

  • Japanese curry powder: The flavor of these biscuits is meant to be similar to the flavor of curry that is served with katsu. There are lots of things out there that are generically labeled “curry powder” but the flavor of curry dishes varies so vastly from region to region. The one I used for this recipe is this S&B brand powder** which is a product of Japan. The amount of curry used in this recipe gives it a very obvious curry flavor without it being spicy or overwhelming. Fwiw, my white spouse taste-tester agreed it was the perfect amount. But feel free to dial back if you aren’t as accustomed to curry and want something more subtle.

  • furikake: There are a lot of different types of furikake out there too, but I prefer to the basic one with nori, salt, and sesame seeds as the main components. This is the one** I always use. The furikake design I made on the biscuits is a tribute to the strip of nori that used to be on the Third Culture Bakery scones; I cut a little stencil out of parchment paper to achieve this effect.

To make these mini biscuits, I used a 3-inch cutter. It made such a satisfying *whoosh* sound as I was pressing it into the dough! But if you’d prefer, you can simply cut the dough up to make square biscuits. I opted to make them the same shape and about the same size as the source of inspiration; you can see what those beloved scones looked like in my ancient Instagram post right here.

currybiscuits2.JPG

How to Make Cheesy Curry Biscuits with Miso Honey Butter

(Makes about 14 biscuits)

Ingredients for Miso Honey Butter

4 tbsp salted butter, softened at room temp
1 tsp red miso
5 tsp honey

Ingredients for Biscuits

10 tbsp butter, frozen
2 1/2 cups all purpose flour, plus extra bench flour
1 3/4 tsp baking powder
1/2 tsp baking soda
2 tsp sugar
5 tsp Japanese curry powder
kosher salt
1 1/4 cup plain Greek yogurt
1/3 packed cup grated pepper jack cheese (~3 oz)
1/3 packed cup grated gruyere cheese (~3 oz)
2–3 scallions, chopped

Ingredients For biscuit topping

1 tbsp water
1 tbsp honey
furikake

Procedure

To make the miso honey butter, whisk together the softened butter, miso, and honey. Transfer to a serving dish and keep at room temperature.

Combine flour, baking powder, baking soda, sugar, curry powder, and a pinch of salt in a large bowl and whisk together.

Use a box grater to grate in the frozen butter, tossing together with the dry ingredients as you go, to avoid clumps. Then toss the butter and dry ingredients together gently so each shaving of butter is separated and coated with the dry ingredients.

Stir up your Greek yogurt to be an even consistency. If it is super thick, add a teaspoon of water to thin it out.

In a small bowl, toss the cheese and scallions so they are evenly combined. Add these to the dough base and toss together until ingredients are evenly distributed. Create a well in the center. Pour yogurt in the well, then use a fork to slowly incorporate the flour mixture into the wet yogurt. Once all the yogurt is absorbed, use your hands to gather the dough together and fold it on itself a few times until it is a cohesive dough.

Preheat your oven to 425°F.

You will be creating layers in the biscuits by doing three sets of letter folds; you will also want to keep everything as cold as you can, so work quickly with cold hands. Dust your work surface with flour and do so generously throughout the process as needed to prevent sticking. Shape the dough into a rectangle with your hands then roll it out until roughly 9” wide by 12” tall. Fold down the top third and then fold up the bottom third (like you would fold a letter). Rotate 90 degrees and repeat the shaping and folding. Rotate again then do the process one more time, so you have done 3 sets of letter folds total.

Roll out your dough to a little larger than 9” x 12” one more time. Using a floured 3-inch biscuit cutter, cut out 12 biscuits by pushing the cutter firmly through the dough and then lifting it straight up each time—you should hear a satisfying *whoosh* as the cutter goes through the dough—and do not twist the cutter. (I was able to fold the scraps gently together and make an additional 2 square biscuits. Alternatively, you could also just cut the slab of dough into 12 square biscuits if you choose.)

Place biscuits on a parchment-lined baking tray and freeze them for 10 minutes. Combine the water and honey in a small bowl, microwave for 10 seconds, and mix together to form a thin glaze. Brush the glaze on the tops of the biscuits, then sprinkle furikake on top.

Bake for 15–17 minutes, or until the biscuits are golden and starting to brown on their tops. They should feel structurally sound and not deflate when removed from the oven; if you notice them doing so, quickly put them back in the oven for a couple more minutes.

Serve the biscuits fresh from the oven alongside the miso honey butter.

Palm Springs to Ojai Road Trip

74D4B532-8ACE-4AAA-81BD-5115DC1AB9C3.JPG

I got to get away from chilly San Francisco for a bit, on a little road trip through SoCal to celebrate mine and Spouse’s 11th wedding anniversary. It never ceases to amaze me how diverse the terrain and climates are within my home state, and on this trip I got to see some of the desert regions for the first time. We started off in Palm Desert for a friend’s birthday party and made our way back up north from there, stopping at Joshua Tree, LA, and Ojai along the way. Here’s a little photo dump and some highlights from the trip.

4522B406-5AD4-4442-B395-E7F4F4AD6160.JPG
95F926C2-3916-4A11-AD9D-D91C09276AD7.JPG
0C9624B1-E1C9-42F4-823C-0F7C3304B802.JPG

The town of Joshua Tree was this weird mix of big commercial business like a massive Walmart and then some quirky new age crystals stores. We stayed inside most of the time because it was so freakin hot! We only got to visit the Joshua Tree National Park at sunset and in the morning, because it was just so obnoxiously hot in the middle of the day. I would love to go back at a cooler time of the year to see more; there were so many interesting looking cacti and rock formations that I wish I had a chance to spend more time with without sweating out my entire body’s water content.

We stayed in the most perfectly decorated AirBnB in Joshua Tree that I did not take any good photos of but here is their Instagram. It was a millennial pink dream. We joked that it was haunted because a high pitched sound would emit from the hallway toilet at random times and the shower would start dripping in the middle of the night even though we never used it. Having a house ghost to keep us company in the middle of the desert somehow felt fitting.

8223669B-21D9-4F0A-91DE-1E9809DA9FFD.jpg
B5750E16-9487-4F10-8A73-E4EE53F79161.JPG

Having a couple of days in LA felt really nice after a wild weekend in Palm Desert with our friends and melting away in the barren landscape of Joshua Tree. Oolong was especially relieved to be in LA where there were lots of grass patches and interesting flowering shrubs, after totally hating her time in the desert (hot sand, no grass, and the plants were all out to stab her). We stayed in Silver Lake, which is my favorite neighborhood in LA. The Silverlake Pool & Inn was so aesthetic and such a great location for nearby cafes and restaurants; Spouse spotted Steven Yeun at the Erewhon Market next door!

As usual, our time in LA revolved around food, including ordering Howlin’ Ray’s for delivery through Postmates and finally getting to eat a Bestia after years of trying to get a reservation there. Our meal at Bestia was INCREDIBLE and exceeded expectations. For a shared main, we ordered a slow roasted lamb neck with creme fraiche and baby gem lettuce. It arrived as a whole big meaty, simply-seasoned hunk of neck at our table, which we were instructed to eat by making mini lettuce wraps (like ssam!). I just thought this was such a unique presentation that really allowed the natural flavors of the ingredients to shine.

If you are looking for a place to get boba in Silver Lake, I think that the teas at Pine & Crane are super underrated. A strong tea flavor and not too sweet!

743D443D-2BAA-42C7-8BA7-E5C6B5E85E9E.JPG

Ojai was so charming and everything I imagined it would be. A cute little town with lots of thrift stores, boutiques, and restaurants with beautiful patios; we spent an afternoon just walking around the main strip, popping into shops, and then getting some takeout to eat back in our Airstream. We stayed at Caravan Outpost, which is a collection of perfectly decorated Airstreams on lush grounds that feel like a desert oasis. I recommend staying here but I wish they provided some pots/pans and dishes to make use of the kitchens inside the caravans; I had packed dishes but not cookware so we had to look for a pan at a thrift store.

Do you have questions about Joshua Tree, Silver Lake in LA, or Ojai? Leave them in the comments below!

Polenta Bowl with Poached Eggs and Dressed Herbs

PolentaBowl_Vertical2.JPG

Poached eggs nestled in creamy polenta and a lightly dressed salad of fresh herbs is my springtime version of a comfort bowl. Polenta is like a warm hug for your belly but it still feels a little lighter and brighter than something like jook or mashed potatoes, and I think the color looks so cheerful. The little salad that you see here was mostly foraged from my backyard garden but you can use what you have or what looks the best at your local farmers market.

This recipe has 4 components:

  • polenta: Don’t worry about looking for something labeled “potenta” at the store; polenta actually refers to the finished dish made of medium or coarse ground cornmeal. Simmering slowly with regular stirring allows the cornmeal to become tender and break down, leaving you with a light but satisfying base. (Adding crème fraîche enhances the creamy taste and texture, and delays the process of it firming up into cakes.)

  • poached eggs: The oozy yolks make little streams and pools in the polenta, and are what make this dish such a joy to eat.

  • soft herb salad: This lightly dressed little salad made of soft greens is meant to celebrate the bounty of spring produce. I foraged a medley of parsley, mint, basil, red veined sorrel, red shiso, nasturtium, pea shoots, and chive blossoms from my garden, which I then supplemented with some upland cress. Use what you have! This is also a great way to use up odds and ends of extra herbs that you’ve accumulated in your fridge from other recipes.

  • cheese shavings: Pecorino romano shavings are the most flavorsome way to add a finishing touch!

Click here to get the recipe on the Pete and Gerry’s site!

PolentaBowl_Vertical1.JPG

Thank you so much to Pete and Gerry’s for sponsoring this recipe!

Recipe: Baked Feta with Roasted Strawberries

bakedfetastrawberries1.JPG

So we all know about baked feta from that baked feta and tomato pasta trend on TikTok. I tried it and I think it is perfectly tasty but one thing that confused me about it was why people’s minds were so blown. It’s warmed, creamy cheese and roasted tomatoes…OF COURSE those taste good together! But rather than fester on my confusion, I decided to take inspiration from the baked feta trend and make it a bit more interesting. We all know that roasted tomatoes are amazing…but have you tried roasting strawberries?

Think about when you are eating a charcuterie platter where there’s crostini, and spreadable cheeses, and jams, and how combining those things is like a party for your mouth. This is basically a sheet pan version of that!

Roasting tender fruits like strawberries makes them so lovely and jammy because it concentrates their flavors and makes them soft. Obviously baking the block of feta makes it warm and soft and spreadable, so it becomes perfect to smash on top of toast. I admit that this is not all that groundbreaking either, but a lot of people don’t think to roast sweet fruits like berries and grapes, so I thought this recipe was still worth sharing. It also makes your house smell amazing.

bakedfetastrawberries.JPG

How to Make Baked Feta with Roasted Strawberries

Ingredients

1 lb strawberries
8 oz feta (domestic is fine)
2 tbsp date syrup
freshly cracked pepper, to taste
1/2 a soft baguette, cut into 1/2-inch slices
extra virgin olive oil
1–2 sprigs basil, leaves picked

Procedure

Position one rack in the middle of the oven and another closer to the bottom. Preheat oven to 400°F.

Remove the stems and leaves of the strawberries. Slice smaller strawberries in half and cut larger ones into 1/4-inch slices.

Place the block of feta on a baking sheet and arrange strawberries around it. Drizzle date syrup and sprinkle black pepper over everything.

Bake the feta and strawberries for 20 minutes on the middle rack.

In the meantime, brush the baguette slices with some olive oil. When there are 3–5 minutes left for the sheet pan (depending on how crunchy you like your toast), add the bread onto the other oven rack.

Take everything out of the oven, then gently mix the strawberries around with the juices that released.

Roughly chop larger pieces of basil and leave the small leaves whole.

To serve, smear some of the soft feta on top of each toast, then spoon on some of the strawberry mixture. Top with the fresh basil.

Recipe: Meatball Loco Moco

MeatballLocoMoco_1.JPG

If it were up to me it would be socially acceptable to put gravy on everything: eggs, tacos, cake…everything and anything! It’s definitely not just for reviving dry turkey meat on Thanksgiving, that is for sure. And maybe one of the best uses of gravy out there is on loco moco.

I made a meatball loco moco recently and instantly regretted not writing down notes as I made it because I knew right away that it would be something that I would want to replicate again, as well as share the recipe with you guys. It just so happened around that time that SunFed Ranch agreed to partner with me, and they liked this recipe idea too! So, this recipe for meatball loco moco was developed in partnership with SunFed Ranch, who pride themselves in raising cattle that are 100% grass fed and treated with the highest level of care and dignity.

Loco moco is a classic Hawaiian plate lunch, meant to be a fast and casual meal that is oh so hearty. It usually consists of steamed rice, a hamburger patty, brown gravy, and a fried egg. However, I thought that shaping the beef into meatballs instead of a patty would help integrate the components of the dish together and be even more fun to eat. So, my version of loco moco has fluffy meatballs, made using 80/20 SunFed Ranch Natural Ground Beef and a mixture of egg, milk, and panko breadcrumbs that helps keep the texture light and airy. I also put my own Southeast Asian spin on the gravy using kecap manis (a caramel-y sweet dark soy sauce from Malaysia and Indonesia) and the results are a glossy, deep brown gravy with lots of umami and just a tiny hint of sweetness.

MeatballLocoMoco2.JPG
MeatballLocoMoco_2.JPG

Here’s what you need to know about the components of this dish:

  • Rice: Start cooking your rice before you start the rest of the recipe and keep it on warm in your rice cooker. This dish comes together pretty quickly aside from a little bit of time chilling the meatball mixture to firm it up.

  • Meatballs: I like using a very fine grind when I am making meatballs, because I think that lends to a smoother texture and a more spherical shape. That’s why SunFed Ranch Natural Ground Beef works really well for this recipe. I make a mixture of egg, milk, and panko that prevents the texture of the meatballs from getting too dense, and the fine grind of this beef incorporates with that really nicely. Don’t overwork the mixture, and you should end up with nice bouncy, light meatballs.

  • Mushrooms: I love using a mixed medley of mushrooms for the gravy. They make the dish look interesting and bring textural complexity. In this case, I used a mix of cremini, shimeji, and tree oyster mushrooms, but I have also made it with chantrelles and shiitakes—all delicious and beautiful! Use what you like, or what looks good in your local markets. Whatever you use, just cut them all down to relatively the same size so that they cook evenly.

  • Fried egg: It’s not loco moco without that sunny side up egg! I find that the less time my egg carton has been sitting around in my fridge, the more successful my fried eggs turn out. I usually drain some (but not all) of the loose egg white out before I pour my egg into a pan of oil heated on medium heat and hold the yolk in place in the middle for the first few seconds. Getting the temperature right is key, so I suggest practicing to figure out what’s the best for your stove. If the heat is too low, you won’t get the crispy edges and if the heat is too high, the whites will splatter too crazily and create weird bubbles around the yolk.

  • Gravy: The gravy is the most important part of the dish, in my opinion! After the fat renders out of the meatballs, I sauté the mushrooms in that beefy goodness and add beef stock to make the gravy in the same pan. But the thing that makes my version special is kecap manis—a thick, slightly sweet soy sauce that is common in Malaysian and Indonesian cooking. If you see “dark soy sauce” at the supermarket from a Chinese brand, that’s not the same thing. Be sure to look for something that is a product of Southeast Asia; this is the one that I use**.

  • Garnishes and enhancements: I love eating rice seasoned with furikake; I think the extra earthy flavor from the nori and the nuttiness from the sesame seeds goes so well with the steamed rice! But the gravy will be plenty flavorful for your rice if you don’t have it and want to skip this ingredient. The chives and cilantro will bring freshness and another layer of flavor too, but they are also not critical to the dish.

I hope this recipe brings your mealtime some chill island vibes and full bellies.

MeatballLocoMoco_3.JPG

How to Make Meatball Loco Moco
with Sweet Soy Mushroom Gravy

Ingredients for the meatballs

1 lb SunFed Ranch Natural Ground Beef 80/20
1 egg
4 tsp milk
2/3 cup panko breadcrumbs
1 tsp garlic powder
1 tsp soy sauce
1/4 tsp allspice
1 tbsp butter

Ingredients for the Gravy

1/2 lb mixed mushrooms, cut into equal bite-sized pieces
1/4 tsp salt, plus more to taste
1 tsp soy sauce
1 tsp worcestershire sauce
freshly ground pepper, to taste
4 tsp kecap manis
1 3/4 cup beef stock
1 tbsp cornstarch
2 tbsp water

For Serving

3 servings cooked jasmine rice
3 eggs, fried
furikake
3–4 tsp chives, chopped
cilantro leaves, for garnish

Procedure

To begin making the meatballs, beat together the egg and milk, then add the panko breadcrumbs. Let sit while prepping the other ingredients, so the panko absorbs the moisture. In a separate mixing bowl, combine SunFed Ranch Natural Ground Beef, garlic power, soy sauce, and allspice. Mix gently to combine, then add the panko mixture and gently mix to combine again. Chill in the refrigerator for at least 10 minutes.

Roll the chilled meatball mixture into 1-inch balls. (I get 16–18 meatballs.)

Heat a large skillet on medium heat and melt the butter. Add the meatballs and cook, rolling or rotating them often, until browned all the way around and just cooked through; about 8–10 minutes. Transfer meatballs to another plate.

Discard all but 2 tablespoons of the pan drippings, then add the mushrooms to the same skillet. Sauté the mushrooms until tender, about 2 minutes. Add 1/4 teaspoon salt, soy sauce, worcestershire sauce, and a pinch of pepper, and cook until the liquid has evaporated. Add kecap manis and beef stock and simmer on medium-low until the liquid starts to thicken and no longer feels watery, about 5–7 minutes. Stir together cornstarch and water in a small bowl to make a slurry, then stir into the skillet mixture. Return the meatballs to the skillet and mix gently. The gravy should be thick enough to thinly coat the meatballs without sliding off. Once it reaches that stage, remove from heat. Add salt and pepper to taste, if needed.

Plate the rice and top with a generous sprinkle of furikake. Divide the meatballs and gravy over the plates of rice, and top each with a fried egg. Sprinkle chives over each plate and garnish with cilantro.

Thank you so much to SunFed Ranch for sponsoring this recipe! Visit their website to learn more about their 100% grass fed, pasture raised cattle.

Recipe: Garlicky Whipped Feta Dip (with a Citrus Fennel Salad)

whippedfeta.jpg

I have been on a real feta kick lately. Maybe I have been brainwashed by that baked feta pasta that went viral on TikTok (which, by the way is tasty and also really nice on toast instead of pasta too.) But the crappy cheap stuff from Trader Joe’s is actually super versatile and I find that it’s a cheese that keeps remarkably well in my fridge even when it’s a small nubbin I forget about for a while. Sometimes I get real lazy and just microwave it a little bit to soften before attacking it with a tiny whisk and it becomes a pretty decent spread on toast, but recently I have also decided to bust out the food processor and make a proper whipped feta dip. And after enjoying it a couple of times, I admit that it is worth the extra effort and dishwashing (which, the latter is done by Spouse anyway).

So, here is my whipped feta dip recipe by way of the food processor. Like I think of all dip recipes, this is meant to be just guidelines. Your feta may be softer and more watery than mine. You may want something thicker than what you see in the photos. Like toast, I do not think dip recipes should lock you into the belief that you need to measure everything to get it right. The only thing I can confirm is that this is what worked very nicely for me on the day that I took these photos, topping my dip with my newfound and latecoming appreciation for citrus and serving with lots of crostini on the side.

The feta dip is also a great base for fancy toasts, or on bagels. Or with crudités. Obviously it is good with anything that creamy dips are good with, which is everything.

whippedfeta2.JPG

How to Make Garlicky Whipped Feta Dip (with a Citrus Fennel Salad)

Ingredients for the feta dip

8 oz feta (domestic is fine)
2–4 garlic cloves
1 tsp extra virgin olive oil
1/2 cup 2% Greek yogurt

Ingredients for the citrus salad

1 small blood orange
1 small cara cara orange
1 bulb of baby fennel, thinly shaved
some fennel fronds, to taste
3–4 kumquats, thinly sliced
1 sprig of basil leaves, thinly sliced
extra virgin olive oil
freshly cracked pepper

For Serving

toasts or crostini

Procedure

To make the feta dip, break the feta into chunks and add to the bowl of a food processor. Add garlic and olive oil. Process until a homogenous paste forms. Add the yogurt and process until smooth. Scoop into a serving bowl, using the back of a spoon to create some areas for oil to pool.

To make the salad, use a sharp knife to carefully slice off the peel and pith from both oranges. Then cut out the segments, leaving the skin that contains the segments behind.

Place the orange segments on top of the feta dip. Scatter the shaved fennel and kumquat slices on top. Garnish with the fennel fronds and the basil, then drizzle olive oil over everything and crack some black pepper on it.

Serve with your dippers of choice.

Recipe: Togarashi Lobster Rolls with Smoky Maple Butter

LobsterRoll_1.JPG

As a flatlay photographer, lobster rolls are a dream sandwich. That vibrant red from the lobster meat, the glisten of melted butter, and those split-top buns exploding with filling—how could that not catch your eye? But living over here on the West Coast, I have literally never seen one of those split-top brioche buns at the store. And a lobster roll just isn’t the same (it definitely does not photograph the same) without a bun that is stuffed from the top. Sure, you could use a hot dog bun. But one day, I thought of something even better: Hawaiian rolls.

Not only are Hawaiiian rolls the perfect soft texture, but their sweetness goes so perfectly with the naturally sweet, succulent meat of a crustacean. They usually come in packs of 12 all stuck together, so I view that as an invitation to choose my own bread eating adventure. Pulling off a row of 3 of them leaves you with the perfect sized bun for a lobster roll. Then, what you do is take a reliable bread knife and slice downward from the top to create that split-top bun, making sure to only slice halfway down so the bottom base stays all connected. Now that’s a lobster roll…roll!

But there’s still a way to make it even more awesome. I recently ordered from Michael Mina’s Tokyo Hot Chicken and saw that they have shichimi togarashi spiced Hawaiian rolls. I decided to make my own version using Spice Tribe’s Kissed by Binchotan Japanese Chili blend; it’s Spice Tribe’s take on the classic Japanese shichimi togarashi spice blend and the name is a reference to the blend of spices commonly being used on yakitori (grilled chicken skewers) after the meat had been kissed by the binchotan charcoal. Giving the tops of the Hawaiian rolls a little brush of egg white helps adhere all the seasoning nicely; then, popping the rolls in the oven for just a few minutes not only gets the rolls nice and warm, but it bakes on that spicy chili blend so it stays on until it gets to your mouth, instead of getting chili powder all over your hands. The end result is a bun that is not just a mere vessel for your delicious buttered lobster, but a complex flavor delivery of its own, contrasting the sweetness of the dough with some fiery, roasty heat.

After stuffing with lobster tossed in smoky maple butter, serve them up as a long roll and leave it up to the lucky eater to decide if they want to attack it whole or split it up into delightful mini lobster roll sliders.

LobsterRoll_4.JPG

As for this lobster filling, I know there are different styles on the East Coast like the Maine style that is cold with mayo and maybe celery, or the Connecticut style with plain butter served warm. Obviously this is not either of those and I am not trying to upset anyone over there but I really think people should keep an open mind and appreciate all the delicious ways to eat lobster rather than getting all caught up with which one is the “best” one. I will say though, my version is pretty dang good.

Some time ago, I had some grilled oysters from Hog Island Oyster Co that were filled with a chipotle bourbon brown sugar butter and my seafood eating life was changed forever. That combination of a smoky sweet butter with shellfish is so, SO good, and I have been replicating that idea at home in various formats ever since. So, this lobster roll is meant to capture that flavor combination that I love so much. Since I already made the buns of the lobster roll spicy from the togarashi chili blend, I opted to go with Spice Tribe’s super smoky Pimenton de la Vera paprika in the flavored butter. This is truly such a good smoked Spanish paprika—it has a nice fruity note to me and it does not shy away from the smokiness, and it’s got that chili flavor without the heat. Mixing it with the maple syrup and the butter, it becomes one of those condiments that I desperately wish was socially acceptable to drink on its own.

LobsterRoll_2.JPG

I recommend serving these lobster rolls with shrimp chips—an iconic snack for Asian American kids of my generation, for sure. They are quite mild in flavor but I think that their subtle shrimpiness goes great with these lobster rolls. Toss them in some furikake or shredded nori and some extra Spice Tribe Kissed by Binchotan blend to give them an extra kick. Now you’ve really got yourself a Pacific Coast lobster roll feast.

LobsterRoll_3.JPG

How to Make Togarashi Lobster Rolls with Smoky Maple Butter

(Makes 2 rolls)

Ingredients

6 Hawaiian sweet rolls, still connected
1 egg white, beaten
1–1 1/2 teaspoons Spice Tribe Kissed by Binchotan blend
8–10 ounces cooked lobster meat, cut into large chunks
2 tablespoons salted butter
1 tablespoon maple syrup
1/2 teaspoon Spice Tribe Pimentón de la Vera
2–3 drops liquid smoke (optional)
1 tablespoon chives, finely chopped
lemon wedges, for serving

Procedure

Preheat oven to 350°F.

Divide the Hawaiian rolls into two long sections of 3 rolls, to form the “buns” for the lobster rolls. Use a bread knife to partially slice each from the top to halfway down; take care to not slice all the way through, but create an opening in which to stuff the filling.

Place the buns on a baking sheet lined with parchment paper. Brush the tops of the buns with a thin layer of egg white. Sprinkle Spice Tribe Kissed by Binchotan blend onto the eggwashed tops until they are evenly coated in the spice blend. Bake for 5–7 minutes, or until the egg white is completely dried.

Place the lobster meat in a heat safe bowl.

In a small saucepan, add butter and heat on low. Once butter is melted, add maple syrup and stir together. When the mixture becomes completely foamy, stir in the Spice Tribe Pimentón de la Vera as well as the  liquid smoke, if using. Remove from heat and pour the butter mixture over the lobster meat. Gently fold the lobster and the butter mixture together.

Divide the lobster mixture between the two buns. Sprinkled chives on top and serve with lemon wedges.

Additional serving suggestion: Sprinkle furikake and additional Spice Tribe Kissed by Binchotan blend over shrimp chips and serve with the lobster rolls.

Thank you so much to Spice Tribe for sponsoring this recipe! Check them out on Instagram here or visit their website to purchase high quality spices and unique small-batch spice blends.

Citrus and Prosciutto Toast

avocadotoast.JPG

Welcome to another installment of my Toast Post series where I try to provide you vague guidelines for how I made a toast. For the record, I do not believe that toast requires a recipe, so I am only sharing these for those who could benefit from some added guidance. Fell free to make changes, use what you have, and treat toast as your own blank canvas for culinary expression and love for your tastebuds.

About this Toast

I made these toasts to commemorate the 3-year anniversary of my Instagram account. The color palette was strongly influenced by the colors of the flowers that were growing in my backyard at the time, and I actually chose the other ingredients for the toast based on the sunset color scheme I wanted to capture. Here are some shoutouts to some of the foods I used and love to use:

  • Sourdough: Country Bread by Josey Baker Bread

  • Chèvre: I LOVE the truffle chèvre by Laura Chenel; it has converted Spouse into a chèvre enthusiast

  • Burrata: I have tried various brands and BelGioioso is my favorite.

  • Prosciutto: If you like what is available at your local deli, get that by all means. But lately I have been loving the packaged version by Creminelli Fine Meats. It’s often on sale at Whole Foods and I like how nicely the slices stay intact as I pull them apart. You can tell they are paper thin yet structurally sound in the photo.

How to Make Citrus & Proscuitto Toast

Ingredients

3 slices of country sourdough
extra virgin olive oil for toasting
~ 3 oz truffle chèvre, room temp
1 cara cara orange
1 blood orange
2 oz sliced prosciutto
1 ball of burrata
purple radish microgreens
sumac
bee pollen
everything seasoning
edible flowers

Procedure

Slice the peels off of the oranges and slice them into cross-sections or segments.

Toast the bread to your preference. I heated olive oil in a skillet, toasted one side in the oil and then flipped over and turned off the heat. This allows the toasted side to withstand the toppings and provide crunch, but prevents the bread from becoming a gum-cutter.

Spread the goat cheese over the toast. Arrange the prosciutto and orange pieces on top however you like, then fill any empty spaces with burrata.

Top with the remaining ingredients as desired.

For more toast inspiration, check out all the posts with the “toast post” tag here.

Avocado and Burrata Toast with Pickled Carrot Ribbons

avocadotoast.JPG

The toast series: An Introduction

I never set out to be a toast account on Instagram but people seem to like the toasts I make. And I get asked all the time for recipes for my toasts. Personally, I do not think that toasts should require a recipe. Toasted bread is like a tasty blank canvas. Put whatever the hell you want on it, you don’t need me to tell you what to do. I am the kind of person that would find a toast recipe incredibly stifling, and I urge you to get to a point where feel confident enough in your abilities in the kitchen to feel the same way.

My spouse always is there to lend a different perspective, though. He can’t do anything in the kitchen without a recipe, and even then, I think he doesn’t have enough cooking experience to grasp the nuance of things; how time sensitive something cooking on the stove can be and that sort of thing. He reminds me that just because I have that confidence and intuition to cobble things together and make it taste good, doesn’t mean everyone does, and maybe that confidence can be built over time but it needs to start with the practice that comes from following a recipe first.

So, okay, I hear you. I’m gonna try to capture “recipes” for my favorite toasts, but I urge you not to depend on measurements (which won’t always be there) and rather use this as an ingredient list or a starting point. And don’t let getting caught up in precise details prevent you from enjoying the process of assembling your own toasts! Now, let’s get that bread, literally.

About this Toast

I made this toast as a celebratory post on the 2-year anniversary of my Instagram account. I think the curly scallions and the carrot ribbon swirls resemble party streamers. The flowers all came from my backyard garden (violas, marigolds, and chive blossoms) and the pea leaves and tendrils came from seeds that a neighbor planted in the communal area right outside my house.

How to Make Avocado & Burrata Toast with Pickled Carrot Ribbons

Ingredients for the Pickled Carrot Ribbons

1 carrot
4 tsp sugar
1/4 cup rice vinegar
1/4 cup hot water
salt

other ingredients for this toast

2 slices of sourdough
butter, for toasting
1 avocado
1 ball of burrata
1 scallion
everything seasoning
pea tendrils
edible flowers

Procedure

Prepare quick-pickled carrot ribbons. Using a vegetable peeler, remove rough outer skin of carrot and discard. Continue using the vegetable peeler to shave thin “ribbons” of carrot. Rotate as necessary until reaching the core of the carrot. (Feel free to snack on the carrot core!) In a small bowl, combine 1/4 cup hot water (does not need to be boiling; hot tap water is fine) and sugar; mix until sugar is dissolved. Mix in rice vinegar and a pinch of salt. Add carrot ribbons and allow to marinade for 15 minutes to (in the fridge) overnight. Note: You will have more than you need for this recipe.

Slice scallion lengthwise into thin strips. Place in a bowl with ice water, and place bowl in the fridge to allow them to curl up. This can also be done in advance of making the toasts.

Toast the bread to your preference. I like to melt some butter in a skillet, toast one side in the butter, and then flip over and turn off the heat. This allows the toasted side to withstand the toppings and provide crunch, but prevents the bread from becoming a gum-cutter.

Cut the avocado in half, remove the pit, and carefully peel off the skin. Thinly slice crosswise, and fan out one half over each of the pieces of toast. Grab small globs of burrata and arrange them over the avocado. Top with the remaining ingredients as desired.

For more toast inspiration, check out all the posts with the “toast post” tag here.

Recipe: Spiced Garlic Shrimp Over Coconut Rice

LilyMorello_GarlicShrimp_1.JPG

With international travel still being potentially a ways away, at the moment it seems like the most accessible tropical destination for those of us with U.S. passports is the beautiful state of Hawai’i. It feels like at any given time, someone I follow on Instagram is there and, of course, the thing I am most jealous about is the FOOD! The famous garlic shrimp trucks right along the water (the last one I visited in the before times was Geste Shrimp on Maui) are life changing, in my opinion! Still determined to travel virtually through food as much as I can right now, I whipped up a batch of my own version of those super buttery, garlic-loaded shrimp.

I have tried emulating those Hawaiian shrimp trucks before, but this time around, I decided to give it a slightly spicy, Southeast Asian-inspired twist. I seasoned the garlic butter with Spice Tribe’s Thai-inspired Long-Tail Sunset spice blend, which is made up of coconut, ginger, tamarind, Thai chili, coriander, cumin, and lemongrass. For a seasoned spicy-eater, I find this blend to taste more spiced than spicy from the chili, and overall there is a lovely tangy tropical flavor. It definitely gives the dish some nice flavor complexity, but with minimal extra effort. If you like spicy, garnishing the shrimp with fresh Thai chilies will more than make up for it!

You gotta have rice to capture all the extra butter and garlic, and since this tropical shrimp goes perfectly with my coconut rice, I went ahead and included it in this recipe. Coconut rice is the foundation of nasi lemak, the (unofficial) national dish of my parents’ home country of Malaysia, but I have found that it is so good with so many other things—pretty much anything with Southeast Asian flavors. (If you want a way to visually wow people with a super simple staple recipe, you can also learn how to make a blue version of my coconut rice using butterfly pea blossoms here.) I also opted to include cucumber as a suggested accompaniment to this recipe because it is a common accoutrement in nasi lemak. If you are wondering how I made those cucumber roses, I simply used a vegetable peeler to make thin cucumber “ribbons”, stacked 2–3 together, and rolled them up.

LilyMorello_GarlicShrimp_4.JPG
LilyMorello_GarlicShrimp_2.JPG

Some things to consider as you gather your ingredients:

  • Shrimp: One thing that bothered me about the garlic shrimp I ate in Hawai’i is that the shells were left completely on. I’m cool to deal with the mess, but I always felt like that garlic infused butter was going to waste simply coating the part of the shrimp that would get peeled off. One of the advantages of making it at home is getting to prepare the shrimp the way you like it! I like buying a big bag of frozen “E-Z peel" shrimp from Costco to keep in my freezer; they come deveined, and are super easy to peel off the shell entirely or peel off everything but the tails like I did for these photos. These were 10/13 sized shrimp—they were massive and super plump! You may want to reduce the cook times if you are using much smaller shrimp; use your visual cues.

  • Potato starch: You can definitely substitute with cornstarch if you don’t have potato starch. However, I find potato starch to fry up lighter and crisper when using it for a dredge like this. You can find it at Asian grocery stores, as it is common in Korean and Japanese cooking. Adding a thin crust to the shrimp makes a big difference in giving the butter and garlic something to cling to.

  • Garlic: Yes, there is a lot of garlic going on here because that is the whole point of this dish! I still clearly remember the big puddle of melted butter and fried garlic at the bottom of my takeout container when I ate from that shrimp truck in Maui. This recipe is actually more on the conservative side, relatively speaking, and should give you just enough butter and fried garlic to generously coat the shrimp without any left over. But it’s definitely for garlic lovers only!

  • Coconut milk: I find that the consistency of coconut milk varies drastically from brand to brand. You want something where you can thoroughly shake it to a homogeneous consistency in the can before opening. I find that Thai-based brands usually work well for this recipe. If you try shaking the can and you can’t hear or feel things mixing together, this means there is a big solidified glob of coconut fat stuck on one end that will be hard to fully integrate with the liquid without a blender; try to avoid these cans.

The intention is to serve the shrimp over a bed of the coconut rice, to capture the spirit of the Hawaiian plate lunch. However, it’s obviously also fun to serve it family style, where you and your dining companion can fight for the last shrimp!

LilyMorello_GarlicShrimp_3.JPG

How to Make Spiced Garlic Shrimp Over Coconut Rice

Ingredients For the Shrimp

1 1/2 lbs shrimp, peeled and deveined (10/13 size recommended)
1/2 cup potato starch
1/4 tsp fine salt
2–3 tbsp high-smoke point oil
6 tbsp butter
18 cloves of garlic, peeled and chopped
2 1/2 tsp Spice Tribe Long-Tail Sunset blend
1/2 tsp fish sauce
cilantro leaves, for garnish
3–4 Thai chilies, sliced (optional)

Ingredients for the Rice

1 cup jasmine rice, washed and drained
1/2 cup Thai coconut milk, shaken before measuring
1 cup water
pinch of salt

For serving

lime wedges 
cucumber slices

Procedure

To make the coconut rice, mix the jasmine rice, coconut milk, water, and salt in the pot of a rice cooker and cook as normal. When rice is done cooking, immediately fold together gently, and then cover and let rest until serving.

Combine potato starch and salt in a shallow bowl. Pat shrimp dry and toss to coat thoroughly in the potato starch mixture. Dust off the excess potato starch.

In a large skillet, heat 2 tablespoons of cooking oil on medium-high. Add shrimp in a single layer. Cook for 2 minutes, or until color becomes vibrant, then flip, add extra oil if needed, and cook for the same time on the other side. Turn off the heat and transfer shrimp out of the skillet.

To the same skillet with the heat off, add butter and garlic. Set heat on low and stir with a spatula as the butter melts. Keep stirring to evenly and gently fry the garlic and infuse the butter. When the butter is melted and becomes completely foamy, add the Spice Tribe Long-Tail Sunset blend. Keep cooking and stirring until the garlic becomes golden brown, about 5 minutes, then turn off the heat and add the fish sauce. Stir to combine, then add the shrimp and toss to coat.

Divide coconut rice onto plates and top with shrimp. Sprinkle cilantro leaves and Thai chilies (if using) over the shrimp. Serve with lime wedges and cucumber.

Thank you so much to Spice Tribe for sponsoring this recipe! Check them out on Instagram here or visit their website to purchase high quality spices and unique small-batch spice blends.

Photoshoot for Hanabi Cakes

Hanabi is a local bakery that makes really lovely Asian-style cakes that are so adorable and not too sweet. They offered to gift me some cakes in exchange for sharing some photos of them in my Instagram stories. I usually only agree to do this if it is a restaurant or product that I already love, or if the company agrees to send me the sample obligation-free, meaning I do not have to post anything about them if I don’t end up liking it. However, I had heard good things about Hanabi and wanted to help a local Asian-run business!

I ended up really genuinely liking the cakes. They are tiny and perfect for my household because we like to end the evening with a little sweet treat but are not hugely into cake. I also ended up really liking the photos I took; this romantic/hygge tea party vibe is my favorite kind of theme to style and photograph, and sadly I don’t get to do it very often!

Hanabi3.JPG
Hanabi5.JPG
Hanabi4.JPG
Hanabi2.JPG

Recipe: Scallion and Cheese Galette

scallion-galette.JPG

Lately I have been really into binge-watching old seasons of Guy’s Grocery Games on Hulu. The general premise is that Guy Fieri gives contestants a theme for a dish they have to create, and then some sort of challenging constraint that they have to work within (“I want you to make me a 5-star dinner, but you have to incorporate popsicles!”); they then have 30 minutes to race through “Flavortown Market”—a fantasy grocery story that seems to have everything from gas station to luxury grocery items—to grab their ingredients and make their dish for a panel of judges. I like thinking about what I would make if I were given those challenges, and I think it helps keep the culinary creativity juices flowing in my brain. In one episode, I saw a contestant make a cheat version of scallion pancakes with a frozen pastry dough, and that stuck with me as a great hack. That idea planted the seed for this scallion galette.

After my success with my Everything But the Bagel galette, I once again found myself with an extra sheet of Trader Joe’s pie crust dough in my freezer and thought about how I could turn it into something inspired by Chinese scallion pancakes. I started to think about other pastries that utilize an excess of scallions as a major flavor component too, and my thoughts drifted to those scallion and cheese buns at the Taiwanese bakeries, as well as shaobing—flatbreads encrusted with sesame seeds; at Taiwanese breakfast places I see them stuffed with scallions, pork floss, and other flavorsome delights. So, this galette is my fusion-y take on combining all those things into a fun brunch pastry.

scallion-galette-unbaked1.JPG
scallion-galette-unbaked2.JPG

The ingredient list for this is super minimal and it is so easy to put together! You will need:

  • a ready-to-go pie crust: I’m happy with the one from Trader Joe’s so that’s what I keep using. It comes pre-rolled into a nice circle that cracks and falls apart 100% of the time for me as I unroll it. But don’t worry—I squish it all together into a ball and roll it back out, and it still turns out light and flaky after baking.

  • lots of chopped scallions: I used 4 full scallions to stuff inside the galette, but sprinkled some more fresh ones on after baking as well. Feel free to go big; I think their flavor becomes quite mild after baking.

  • grated cheese: Use mozzarella if you want to call back to those Taiwanese buns from the bakery, but I used sharp white cheddar for a more complex flavor.

  • sesame seeds: Really pack them onto the crust for those shaobing vibes!

I think that this galette is simple and elegant as-is, but it can also be topped with what you would typically like to stuff inside your shaobing or other Taiwanese breakfast treats! After pulling it out of the oven, I topped mine with pork floss and some Lao Gan Ma chili crisp** before slicing up and serving.

scallion-galette-cut.JPG

How to Make a Scallion & Cheese Galette

Ingredients

1 sheet ready-made pie dough, room temp
6 oz mozzarella or white cheddar, grated
4 scallions, chopped
1 egg, beaten
~ 3 tbsp sesame seeds

Toppings (optional)

pork floss
chili crisp

Procedure

Preheat oven to 450°F. On a floured surface, roll out the pie crust to a 14-inch circle. Transfer to a piece of parchment paper.

Sprinkle the grated cheese evenly in the middle, leaving an empty 1-inch border all the way around. Top with chopped scallions.

Brush the border with beaten egg and fold small sections over the filling to form a galette-style crust. Brush the pleated crust thoroughly with egg, making sure to get it in all the folds and crannies. Generously sprinkle sesame seeds all over the crust. Slide parchment paper onto an inverted baking tray and bake for 20 minutes on the middle rack, rotating once halfway.

If desired, top with pork floss and chili crisp before serving.

Spam & Egg Fried Rice Tofu Pouches

SpamEggPouches_Vertical2.JPG

Aromatic garlic and scallion fried rice, creamy soft scrambled eggs, and savory fried Spam are stuffed inside sweet marinated aburaage pouches for a unique way to eat Spam and egg fried rice.

Spam and egg fried rice is very nostalgic to me; I even have memories of eating it on Thanksgiving. To me, it’s a comfort dish to be shared with family. Spam is one of those foods that seemed completely normal to me in my childhood and it wasn’t until I was older and had more conversations about food with Westerners that I learned that it was looked down upon. But then after that, I found out that many other Asian Americans felt that same nostalgia for it too; able to finally find our pride for those things that we were shamed for as children, I found a community that touted their love for their humble childhood foods and gratitude for what frugal immigrant parents put on the table. They all loved and grew up with Spam and eggs with rice.

So, I developed this recipe to try to change people’s perceptions about Spam and egg fried rice. To try to convince them that Chinese American food is not always the stuff that gets scooped into those 2-item combo takeout boxes. That even luncheon meat from a can is a meaningful ingredient to many. That many of the tropes that make them think of “elevated” food are just about presentation, and that any food can be presented that way and be worth appreciation. It’s Spam and egg fried rice—but made fancy.

This recipe has 4 components:

  • marinated aburaage pouches: These are deep fried tofu that have soaked up a sweet marinade. I have been able to find them at Asian supermarkets. This is the one I usually get.

  • fried rice: I kept this part really simple, seasoning with just a little soy sauce. white pepper, and salt, and adding just scallions and garlic as aromatics. I did not want to overwhelm the natural flavor of the eggs or have it be too salty when combined with the Spam.

  • fried Spam cubes: The flavor bombs of the dish. Lately I have been getting the Lite kind, but use your favorite variety.

  • soft scrambled eggs: I like to use the low and slow method, and gently push them into big curds for this recipe. I was genuinely impressed by the rich eggy flavor of Pete and Gerry’s Organic Eggs and definitely recommend their certified humane free range eggs for this recipe. These eggs will require no additional salt because they are naturally flavorsome on their own and have a nice creamy balance to the crisped salty Spam.

Click here to get the recipe on the Pete and Gerry’s site!

SpamEggPouches_Vertical1.JPG

Thank you so much to Pete and Gerry’s for sponsoring this recipe!

Recipe: Turkish Eggs with Charred Tomatoes & Sweet Peppers

LilyMorello_TurkishEggs_03.JPG

One of my favorite breakfast dishes of all time is çılbır—known in English simply as “Turkish eggs”. The first time I had this was not anywhere in Turkey, but in London, and I was in awe over how bold it was to combine three such indulgent things: creamy garlicky yogurt, runny poached eggs, spicy melted butter. I love all of those things individually, but together they were something else entirely—unapologetically, mindblowingly good.

For a while, I wasn’t sure if Turkish eggs was really a Turkish dish. My Kurdish friend who grew up in Turkey never heard of it. And, I had trouble finding it on menus when I was researching where to eat in the three different cities I visited in Turkey; (likely due to being unable to read Turkish,) the only place I was able to get it was at a super hipstery brunch place in Istanbul with major San Francisco vibes, where their riffed version came on a bed of wilted greens. But finally, I found this article by Maha Salah which talks about çılbır being considered a humble dish made from Turkish moms’ kitchen staples, and that’s why it’s not included in the flashy kahvalti spreads in the touristy areas I visited. (Although I also read that sultans of the Ottoman Empire enjoyed it for breakfast, too.)

Because çılbır is one of my favorite breakfasts, whenever I see Aleppo pepper or Halaby pepper, my mind immediately goes to the glorious spicy melted butter that spreads over the yogurt like lava in this dish. When I started working with Spice Tribe, one of the products I was most excited to receive was their Maras Chile Flakes, which are the same pepper variety but sourced right from Turkey. I knew I had to use it in some sort of riff on Turkish eggs.

To be clear, çılbır does not need riffing. Its beauty comes from its simplicity, so I love that it’s a dish born from what people always had on hand. But I wanted to show off Spice Tribe’s Maras Chile Flakes while contributing some ideas that went beyond the basic recipes that were already out there, and in a way that continued to celebrate the beauty of simple ingredients without a whole lot of effort.

LilyMorello_TurkishEggs_01.JPG
LilyMorello_TurkishEggs_05.JPG

So here’s what I added to the mix:

  • Cherry or grape tomatoes: Cooked in a hot skillet until they burst, the juices from these flavor bombs bring a little freshness, and acid to complete that holy quaternity of salt, fat, acid, heat.

  • Sweet peppers: Apparently these are mini bell peppers, but I buy them in bags that are generically labeled “sweet peppers” at Trader Joe’s; they are similar in size to a jalapeño pepper but completely different in taste. The natural sweetness of these becomes even more pronounced when they get all soft and charred, and they add another dimension of flavor indulgence when they are swimming in that yogurt and butter.

  • Wild black cumin seeds: Bloomed in the butter as it melts, Spice Tribe’s Wild Black Cumin Seeds add a fragrance of cumin to the dish and a little bit of a nutty texture. When cooked whole, I find these black cumin seeds to smell and taste like a milder version of the ground spice I use in curries.

  • Fresh herbs: I couldn’t resist garnishing with some fresh herbs—in this case, parsley and mint. But I admit the motivation was mostly aesthetic; the dish will be still delicious without them.

Served with some crusty toasts or charred flatbreads to mop everything up, this dish is a delicious paradox of humble yet indulgent ingredients. Those extra add-ons really turn it into a full meal, so I would recommend enjoying this not just for breakfast, but any time of the day.

LilyMorello_TurkishEggs_02.JPG

How to Make Turkish Eggs
with Charred Tomatoes & Sweet Peppers

Ingredients

1 cup Greek yogurt
1–2 cloves garlic, pressed*
1/6 cup extra virgin olive oil
12 ounces cherry or grape tomatoes
8 sweet peppers, stems removed, sliced into 1/4-inch pieces
1/2 tsp Kosher salt, or to taste
1/4 cup salted butter
2 tsp Spice Tribe Maras Chile Flakes
1 tsp Spice Tribe Wild Black Cumin Seeds
2 eggs, poached
Fresh herbs, such as mint and parsley (optional)
Toast or flatbread, for serving

* If raw garlic is too pungent for your taste, substitute with 2–4 cloves of garlic confit or roasted garlic, mashed well.

Procedure

Mix together yogurt and garlic. Set aside to allow flavors to incorporate.

In a large nonstick skillet, heat the olive oil on medium-high until shimmering. Carefully add the tomatoes and peppers in one layer and season with salt. Reduce the heat to medium if the oil starts to smoke, but leave the tomatoes and peppers to char on one side before flipping over. (Note: As the tomatoes start to burst, there will be some oil splatter.) Cook the tomatoes and peppers until lightly charred on two sides, about 5–7 minutes total.

Move the tomatoes and peppers gently to one side of the pan, reduce the heat to medium-low,  and add the butter to the other side. As the butter starts to bubble along the edges, add the Maras chile flakes and cumin seeds. Stir the spices into the pool of melted butter and continue to cook until the butter starts to foam. Fold all the contents of the pan together.

Swirl the yogurt mixture onto the bottom of the serving dish(s), creating channels for the melted butter to flow. Tuck the poached eggs into the yogurt, spoon on the tomatoes and peppers, then pour the spiced melted butter over everything. Garnish with fresh herbs if desired. Serve with bread to scoop everything up.

Thank you so much to Spice Tribe for sponsoring this recipe! Check them out on Instagram here or visit their website to purchase high quality spices and unique small-batch spice blends.

Everything But the Bagel Galette

everything-galette.JPG

I’ve flattered myself into believing that this is the kind of novelty family-style menu item that people would wait in line to order at a cute brunch place—you know, back when that was a thing. But look at it! Can’t you see it too, if you use your imagination to think of a time when people were gathered on cute restaurant patios on sunny Sunday mornings sipping mimosas? A light, flaky galette encrusted with everything seasoning, filled with two kinds of creamy cheese and then topped with cold smoked salmon, pickled red (purple) onions, fried capers, and fresh dill and chives.

My inspiration for this galette was this Martha Stewart recipe that takes bagel toppings and puts them on a big flatbread instead. I happened to have an extra frozen pie crust sheet from Trader Joe’s in my freezer, and thought I’d try the concept as a galette instead, and it turned out pretty dang awesome!

I find that with at least the TJ’s frozen pie crust, the dough completely falls apart when you try to unroll it, but do not be discouraged by this! I just ball the whole thing together and roll it out again and it is always still incredibly flaky and puffy when it bakes. I won’t be ditching my from-scratch galette pastry dough recipe any time soon (a galette with heavy fillings like fruit or vegetables would require something sturdier) but for light toppings like these, the storebought pie crust works in a pinch (or a bout of laziness). The result is something quite delicate and crispy—the opposite of a bagel but delicious with the smoked salmon and other bagel toppings nonetheless.

Awkwardly Vague instructions for the
Everything But the Bagel Galette

Ingredients for the base

1 sheet ready-made pie dough, room temp
5 oz Boursin cheese
4–5 slices fresh mozzarella
1 egg, beaten
everything seasoning

Ingredients for the Pickled Onions

1/4 large red onion, sliced lengthwise
~2 tbsp sugar
red wine vinegar
salt

Ingredients for the fried capers

capers
neutral oil

other toppings

lox or cold smoked salmon
chives, finely chopped
dill

Procedure

To make the pickled onions: Place onion slices in a small jar (as small as they will fit). Bring some water to a boil. Add sugar and a pinch of salt to the jar. Add boiling water to the jar until three-quarters of the height of the onions are submerged. Stir to dissolve the sugar. Add vinegar just until the onions are submerged. Stir everything together and refrigerate when cooled. Make this at least 1 hour beforehand, overnight recommended.

To make the fried capers: Drain capers and pat dry on paper towels as much as you can. Add enough oil in a small pan to match the height of the capers. Once oil it hot, carefully add the capers (they will likely splatter a bit). Fry until the capers are “bloomed” and the splattering sound is subdued, but before they turn brown. Drain on paper towels.

To make the galette base: Preheat oven to 450°F. On a floured surface, roll out the pie crust to a 14-inch circle. Transfer to a piece of parchment paper.

Spread Boursin cheese evenly in the middle, leaving an empty 1-inch border all the way around. Tear mozzarella and dot all over the filling area. Brush the border with beaten egg and fold small sections over the filling to form a galette-style crust. Brush the pleated crust thoroughly with egg, making sure to get it in all the folds and crannies. Sprinkle everything seasoning all over the crust. Slide parchment paper onto an inverted baking tray and bake for 20 minutes on the middle rack, rotating once halfway.

Slide the galette base onto your serving board and top with bagel toppings as desired.

February 2021 Favorites

dog_lioncostume.JPG

This month was emotionally challenging for me. Every day, I felt bombarded with articles about hate crimes against elderly Asian people. In my culture, we don’t call adults Mr. and Mrs. when we are young, we call them uncle or auntie, or the Chinese words for granduncle/grandauntie if they look hella old. Complete strangers are still uncles and aunties. Even when you are an adult, anyone who is obviously older than you is your auntie or uncle. So, when we see our elderly getting bullied—in some cases even being pushed to their deaths—because of anti-Asian xenophobia, it’s heartbreaking; it feels like the victim is a part of our collective family. It definitely put a dark cloud over Lunar New Year, which is normally our most festive time.

I’ve decided to use these monthly favorites posts as a time to also reflect on the month that has passed, and I couldn’t do that this month without touching upon the subject that was in my thoughts so much. I am grateful my parents are safe (they even got their first dose of the vaccine this month!) and that I am safe. But I know others who look like us haven’t been so lucky.

On a more optimistic note, I have started planting in my garden. For several years now, I have been planting tomatoes and veggies right before spring starts. I am starting early this year because I have nothing else to do and because SF has had a crazy mild winter—which feels all the more insane in contrast with the winter storms in the rest of the country. I am not an expert about when to plant so please don’t ask me questions. But I’ll probably share more about this topic next month.

Random Product Favorites

Vinyl Backdrop from Club Backdrops in Sandstone

toast_soldiers_kejriwal.JPG

I found myself reaching for this Club Backdrops Sandstone backdrop a lot this past month. It looks tan/sand colored on their site but with my edits it often ends up subtly peachy-pink. I try not to spend a lot on my backdrops; my earlier photos were shot with either a cheap-ass foamboard from the craft store or some abandoned wooden crates I salvaged from a parking lot. I just started investing in “nicer” props as of Black Friday last year but I am still really frugal about my backdrops. Club Backdrops has a great 3 for 2 deal so I bought three and this is the one I love the most. They are definitely not the most ideal; the material is stiff so it doesn’t lie flat without the corners being weighted down but they do wipe clean pretty nicely and the printing is nicer than vinyl backdrops I have purchased elsewhere.

Stoneware Planter by Opalhouse for Target

7302219E-00A1-4FF8-AB91-BF2281CDEC6A.jpg

Bought this little planter from Target and I just love how it is the same color as my skin—something that is Very rare to find as a tan Asian. They come in other different sizes and shades too! Mine is the 4-inch in “light brown”. There is a kind soul in my neighborhood who puts out a box of cuttings and seedlings outside of his house on Fridays, so I picked up this little bb pothos seedling from him. I hope I don’t kill it.

Oolong’s Lunar New Year Lion Dance Costume

dog_lioncostume1.JPG

The dog costume I never knew I needed until I saw it! I am not really into dressing up my dogs but Lunar New Year felt different this year and I decided to indulge. Seeing my dog Oolong bop around erratically while running around in this (because the hood went over her eyes and she couldn’t see where she was going!) really did remind me of the playfully jerky movements of a lion dance and it was just too funny. The costume was surprisingly detailed and durable feeling. You can get one for your dog or cat here**! Oolong is a shih tzu-yorkie-generic terrier mutt mix of about 13 pounds and I got her a size 16, which fits her length and torso perfectly. I found that reading the reviews was very helpful for determining what size to buy.

Favorite Rejects

This section is dedicated to memorializing the photos that won’t be making it to my feed.

mandarin-oranges.JPG

I snapped this as a really quick photo for my Insta stories but I ended up really liking it so I want to hold onto it here, too. Mandarin oranges/satsumas/tangerines are a really big part of Chinese New Year. Their name in Cantonese sounds the same as the word for gold, and plus they kind of resemble gold coins in appearance, so these are usually exchanged among friends as wishes for luck and prosperity.

big-flatbread.JPG

I might still post this on Instagram. I’m on the fence. Please share your opinion in the comments! I was inspired by Ethiopian and Eritrean family style meals, and how there is a giant piece of injeria at the bottom of the platter with all the stews on top. I wanted to apply that concept to a fluffier flatbread (I used a naan recipe here) with other delicious toppings and dips piled on top for a really hands-on meal, but I think it ended up being too much chaos the way I styled it. I love how the colors and textures turned out though, so maybe this will be rescued from its reject status someday.

mini-kikis-fish-pie.JPG

Another one that I am still very on the fence about. A while back my friend Sandy challenged me to make a pie that looked like the fish pie from the movie Kiki’s Delivery Service. I decided to make a mini salmon pot pie version, but I have never made an individual pot pie before and forgot to account for the major shrinkage of the crust dough after baking. I also underestimated how long this simple and cute fish design would take me relative to more elaborate pastry art I have done in the past so I was really stressing about losing the light from the sun and had to take it out for photos before it was the right shade of golden brown. I think my fish is pretty accurate to the movie, but I wish the photo was sharper and that the overall pie looked a little more polished. Let me know what you think in the comments—is it still insta-worthy?

other Random Favorites

Favorite Netflix Binge: American Horror Story: 1984. Definitely not my favorite season of AHS but in general I adore this show (if it is possible to adore something filled with truck-tons of gore) so much so this was still my favorite thing that I watched this month. The progression was similar to the prior season, Apocalypse, in that there are two very distinct acts. I didn’t find the characters as lovable or compelling this season and it was weird to have an AHS without Evan Peters. But the ‘80s fashion and music throwbacks were pretty rad. If you are an AHS fan, please let me know below! My favorite seasons are Murder House, Coven, and Hotel.

Favorite Video: This footage of an adorable Chinese baby and their makeshift dim sum cart.

Thanks for reading! Let me know in the comments what were the highlights of your February 2021!

Recipe: Ginger Scallion Garlic Oil

chineseducktacos.JPG

Ginger scallion oil is something I remember my mom making to serve with her chicken rice. I don’t want to call it Hainanese chicken rice because her version was a lot more casual and homestyle and she did not follow the precise poaching method for Hainanese chicken rice. But she would basically boil the whole chicken and cleaver it into smaller pieces for serving with chicken rice and the broth on the side. Occasionally she would make a ginger scallion oil sauce as a condiment and that make the meal so much more exciting. The sharp bite of raw ginger was cooked away but what remained was its fresh spicy flavor; that plus the scallions added just enough flavor boost to the boiled chicken without taking away from the fact that the dish was a celebration of simple flavors.

I tried making my mom’s recipe for her ginger scallion paste, which I, at some point in college, wrote on a little grocery list notepad paper and tucked into my notebook of other handwritten recipes I collected from my mom’s cookbook collection. For some reason, when I made this recipe it didn’t turn out how I remembered. The recipe said to fry the ginger until it was dry, and the result ended up being a bunch of fibrous clumps.

Eventually I experimented with another technique that I had learned while researching how to make chili oil, and encountered again when learning how to make simple sauces for biang biang noodles. In both cases, spices or aromatics are piled up in a bowl and then almost-smoking hot oil is poured on top to bloom them and bring their flavors to life. I tried this approach with the ginger scallion oil idea (adding garlic along the way because damn do I love garlic) and it totally gave me the consistency I wanted. Something you could drizzle over jook, spoon over a plate of chicken rice, or toss with noodles.

In the photo above, my ginger scallion garlic oil is an accompaniment to duck tacos I made from a roast duck that I bought at Yung Kee Restaurant in Oakland Chinatown. Other accompaniments are Asian pear slices tossed in sushi rice seasoning and gochugaru, crispy fried rice noodles, scallions, and cilantro.

How to Make Ginger Scallion Garlic Oil

Ingredients

a big fat 4-inch finger of ginger, peeled and grated*
3 scallions, thinly sliced
3–4 cloves garlic, minced or pressed
2 generous pinches coarse Kosher salt, or to taste
1/2 cup avocado oil, or some other neutral high smoke point oil

*Do not include the long fibers that get stuck to the grater. The texture of your grated ginger should look pulpy but not stringy.

Procedure

Place the ginger on a paper towel and gently squeeze out most of the liquid. You do not need to wring tightly, but squeeze until the ginger looks like a moist paste with no excess moisture.

Combine the ginger, scallions, garlic, and salt in a heat-safe bowl.

Heat the oil until it is almost smoking. (The oil is hot enough if you toss in a small piece of scallion and it sizzles up right away.) Carefully pour the hot oil over the aromatics (there will be some bubbling). When the sizzling stops, stir everything together. Make this at least 20 minutes in advance to allow time for the flavors to infuse into the oil. It keeps fine in the fridge for a few days.

Recipe: California Love Fried Chicken Bao

LilyMorello_FriedChickenBao_05.JPG

Hot chicken bao is a concept that I’d been experimenting with for some time now. It started with me wanting to take the components of a Nashville hot chicken sandwich (from the likes of Howlin’ Ray’s, for example) and stuff them all into fluffy, Chinese style steamed buns for no other particular reason than that a fully loaded bao is one of the best food formats. While the most famous version is probably the pork belly gua bao that are popular in Taiwan, these “lotus leaf” bao have become a popular receptacle for all kinds of fillings and I’ve personally also developed a compulsion to stuff all my favorite food combinations inside them (e.g. pastrami sandwiches, Korean-style egg drop breakfast toasts, spicy KFC). For a while, though, I was trapped in the headspace of wanting to perfectly recreate the very best restaurant-quality Nashville hot chicken sandwich where the only thing different was the bun…and that’s when I hit a big block. After all, I haven’t even been to Nashville before! How could I capture such an iconic food when the only place I’ve ever had it was in California?

And that’s when I realized, I needed to make it my own. Make it less about imitating something that already existed and more about the flavor combination that I wanted to capture inside these little bao. What were the ingredients that made sense to me?

LilyMorello_FriedChickenBao_01.JPG
LilyMorello_FriedChickenBao_04.JPG

One day, while I was looking at Spice Tribe’s pretty California Love bottle, it somehow clicked that this spice blend was exactly what I needed for my backburnered fried chicken bao idea. I didn’t grow up eating a lot of cayenne-heavy Southern spice blends (cayenne is what gives Nashville hot chicken its spicy heat) but the California Love blend felt a lot more familiar to me—probably because it was based on Spice Tribe founder Trent’s own upbringing in California. Though I must still give huge credit to every Nashville hot chicken joint I’ve ever ordered a sandwich from (Howlin’ Ray’s and Starbird are my faves) for the inspiration, the recipe now feels very me.

I really wanted these bao to celebrate how the diverse population of California has had a huge impact on how I create in the kitchen. These are the pieces that you’ll be bringing together to make my California Love Fried Chicken Bao recipe:

  • Lotus leaf bao: These can be found in the frozen section of an Asian supermarket. You want the ones that are folded, that you can stuff things into; I’ve seen them called “lotus leaf bao” but they probably won’t be labeled that in English. I keep them in my freezer until it is time to steam them and it does not take long in a bamboo steamer to transform them into fluffy pockets.

  • Fried chicken: I used a very simple technique for battering and frying the chicken, similar to the way I make Chinese-American takeout dishes like sweet and sour pork. You are not going to get a really thick crunchy crust like you would with Southern fried chicken because I thought that would overwhelm the delicately soft texture of the steamed bao; instead, expect a light yet crisp exterior.

  • The seasoning: The technique I used for applying seasoning to the chicken is taken directly from how Nashville hot chicken is made: a dry spice blend is mixed together and after frying the chicken, some of the hot oil is added to the spices; that seasoned oil paste is then brushed on to the fried chicken. However, instead of the cayenne-heavy seasoning used for Nashville hot chicken, I used Spice Tribe’s California Love all-purpose chile blend as the main component; I loved that it was a tribute to founder Trent’s own memories of growing up in California and cooking with his dad. The blend features California chilies and to me it celebrates the big presence of Mexican cuisine here. To that, I added Korean gochugaru for color and another chili component, but overall these are meant to be mild and approachable, not too spicy.

  • Cabbage slaw: Here, I once again tapped into Chinese-American cuisine for inspiration—the dressing for this is based on a “Chinese chicken salad” that my dad was really into at a Cantonese-American restaurant we frequented when I was a kid.

  • Sriracha mayo: A holy unity of practically every Asian-American kid’s two favorite condiments (sriracha + Japanese mayo) to form the ultimate sandwich spread.

  • Pickles: Because you can’t have a good fried chicken sandwich without pickles.

These satisfying fried chicken bao have a little bit of everything—a little sweetness and just a hint of spiciness in the seasoning blend, a little crunch from the pickles and the chicken batter, creaminess from the mayo, sweet-sour tang from the slaw—all hugged together by those fluffy, pillowy bao.

LilyMorello_FriedChickenBao_03.JPG
LilyMorello_FriedChickenBao_02.JPG

How to Make California Love Fried Chicken Bao

For the Slaw

4 tsp rice vinegar
1 tbsp honey
2 tsp sesame oil
1/2 tsp soy sauce
Pinch of kosher salt
1/2 small cabbage, finely shredded
1/8 red onion, thinly sliced

For the Chicken

3 boneless skinless chicken thighs
1 egg, beaten
2 tsp soy sauce
1/2 – 2/3 cup cornstarch
oil for frying

For the Chicken Seasoning

1 1/2 tsp Spice Tribe California Love blend
2 tbsp gochugaru*
1 tbsp brown sugar
1/2 tsp sugar
1 tsp kosher salt
1/3 cup hot frying oil

To assemble

8 frozen lotus leaf bao
1/4 cup Japanese mayo
4 tsp Sriracha (or to taste)
Dill pickle chips

*Note: If you want to make these more spicy, substitute in cayenne powder, to your taste.

Procedure

To make the slaw, whisk together rice vinegar, honey, sesame oil, soy sauce, and salt. Toss together with the cabbage and onions until everything is coated. Store in the refrigerator until ready to assemble the bao. (Can be made up to 4 hours in advance.)

Cut chicken thighs crosswise into 1 1/2-inch pieces. Beat together egg and soy sauce. Combine chicken pieces with egg and soy sauce mixture until everything is coated and allow to rest for 10 minutes.

In the meantime, in a dutch oven, heat enough oil to submerge the chicken pieces.

Pour 1/2 cup cornstarch into a rimmed plate. Remove one of the chicken pieces and allow the excess liquid to drip off, then dredge the chicken in the cornstarch until completely coated. Set aside and repeat until all the chicken is coated in cornstarch, adding more cornstarch to the plate if needed.

The oil is hot enough when you insert a wooden chopstick or spoon into the oil and small bubbles appear. Working in batches and adjusting the heat as needed, deep fry the chicken until golden brown and cooked, about 5–8 minutes.  Let fried chicken drain on a rack or paper towels.

While chicken is draining, set up a bamboo steamer lined with parchment paper and place the frozen bao inside, using pieces of parchment paper to keep them from touching. Steam the bao over a wok with simmering water until soft, about 5 minutes. (Or, if you do not have a bamboo steamer, wrap them in damp paper towels and microwave in 30-second increments until soft.)

Transfer chicken to a large tray. Combine all the dry seasoning ingredients in a heat-safe bowl. Then, add the frying oil while it is still hot. Stir together then brush the seasoning mixture onto the chicken until fully covered.

In a small bowl, mix together the Japanese mayo and the sriracha. 

To assemble, spread some sriracha mayo on the inside of a bao, then stuff with slaw, 1–2 pieces of chicken, and pickle chips. Repeat with the remaining ingredients.

Thank you so much to Spice Tribe for sponsoring this recipe! Check them out on Instagram here or visit their website to purchase high quality spices and unique small-batch spice blends.

Recipe: How I Make Char Siu

CharSiu_WontonMee.JPG

Char siu is a Cantonese BBQ classic! Most Americans probably know it from char siu bao/bbq pork buns, one of the more common dim sum items at Chinese-American restaurants. But char siu has so many other uses! In addition to the steamed rice + blanched vegetables combo at the BBQ joints in Hong Kong, you can cut it up and toss it into fried rice, stuff it into bánh mì, serve it up with fried eggs for breakfast, or make it for Chinese New Year in combination with my golden salted egg rice to represent red and gold—the most auspicious color combo! In Malaysia (where my parents are from) they are part of a popular hawker dish called kon loh wonton mee (dry mixed wonton noodles)—noodles are tossed in dark Southeast Asian style sweet caramel soy sauce/kecap manis and served with blanched veggies, boiled wontons, and pickled chilies. (My photo above is a variation on this dish.)

This recipe is my version of how to make char siu at home. It involves my favorite method of making marinade, which is to chuck everything in a blender and pour it in a bag; no chopping! While most of my recipes I consider to be pretty low-maintenance, I will say that the roasting process does require some love at the end to get that good layer of glaze going. That is why this recipe makes such a big quantity of meat; I like to make a big batch if I am going to go through the effort at all! After cooling, stash the extras in the fridge; I keep it in whole pieces and slice it up when I need it, then pan-fry the slices. It really loses its luster after a few days in the fridge and the sauce becomes a dull paste, but heating it up in a nonstick pan will really bring it back to life, I promise! All the photos of prepared dishes you see in this post were made from week-old char siu.

CharSiu1.JPG
CharSiu2.JPG
CharSiu3.JPG

Some notes about the ingredients:

What makes it red? Red fermented bean curd is what gives char siu is signature natural red color. You may encounter commercial versions of char siu that are very bright red; this is done with the use of food coloring. My version simply uses this more traditional ingredient to get a more mellow red, but it is a little tricky to find. In San Francisco’s Chinatown, I found it at ABC Supermarket and I have seen it in the big Asian grocery stores too. You can also order it on Amazon**, though it’s more expensive there. You can substitute with a little red food dye if you don’t want to purchase this special ingredient; the overall flavor will lose some of its depth of umami, but it will still generally taste like char siu.

What cut of pork is best? You are going to want to have at least some fattiness in your char siu because fat = flavor, and plus Cantonese BBQ is not at all about that lean meat life. I like to use pork belly, and use the resulting char siu as an alternative to bacon in my breakfast sandwiches. A lot of the grease renders out as the pork belly is roasting, and you are left with beautiful striated char siu that is moist and flavorsome. A well marbled piece of pork shoulder or Boston butt is another good option that will be less fatty but still stay moist when roasting. Since Spouse is not as into the super fatty cuts as I am, I make my recipe with half Boston butt and half pork belly.

Here are a couple more photos to give you some inspiration for what to do once you’ve made your batch of char siu! Recipe below!

CharSiu_GoldenRice.JPG
CharSiu_BanhMi.JPG

How to Make Char Siu (Cantonese-Style Sweet Red BBQ Pork)

Ingredients For the Marinade

4–5 pieces of red fermented tofu
2 tbsp liquid from the red fermented tofu
1/4 cup brown sugar
1/4 cup hoisin sauce
1 tbsp black vinegar
1 tbsp sesame oil
3 tbsp shao xing wine
1 finger of ginger, peeled
3 cloves of garlic
1/4 onion, peeled
1 tsp five spice powder
a couple dashes of white pepper
1 tsp smoked paprika (for color, optional)

You’ll also Need

2 1/2 – 3 lbs pork belly, marbled pork shoulder, or Boston butt
2 tbsp honey

Procedure

To make the marinade, combine all the ingredients for the marinade in a blender and blend until smooth.

Cut the pork into large strips, about 2–4 inches wide. If using pork belly, slice off the firm outer skin and discard (or use for something else). Place the pork in a large zip-top bag and pour in the marinade. Make sure all the surfaces are coming in contact with the marinade and seal the bag. Marinade overnight.

When ready to roast, place a rack in the middle of the oven and preheat to 420°F. Line a large baking tray with foil and place a small metal rack inside (I use the one from my toaster oven). Remove strips of pork from the bag and allow the excess marinade to drip off into a saucepot, then place on top of the small rack with as much space between the strips as possible. Pour the remaining marinade into the saucepot.

Roast the pork for 20 minutes, flip, and roast for another 20 minutes. In the meantime, add honey to the saucepot. Place pot on medium heat and cook until it starts to bubble, then turn heat down to low and simmer, stirring often, until a thick, maroon-colored sauce forms (about 5–7 minutes).

After the pork has roasted for a total of 40 minutes, take it out of the oven, flip, and brush on the sauce. Return to the oven for 3 minutes, flip, brush sauce on the other side, and roast for 3 minutes. Repeat this cycle 2 more times. In the end, each side should have been brushed with sauce 3 times, and put back in the oven for 3 minutes after each brushing.

Take pork out of the oven and allow to rest for 15 minutes before slicing.