Recipe: Lobster Bao with Ginger and Garlic Butter

lobster bao

Here’s an easy recipe idea for if your Chinese New Year celebrations are on the smaller scale this year. I took the idea of combining lobster with melted butter from a Connecticut style lobster roll and put an Chinese-inspired twist to it by adding aromatics such as ginger, garlic, and scallions into the butter. I stuffed the fragrant lobster meat into steamed bao, which can be bought from an Asian grocery store and stashed in your freezer.

I think of lobster as a celebratory food. It is often a part of Chinese New Year menus and other celebratory banquets where expensive seafood is served as a sign of prosperity. It is also red, a lucky color in Chinese cuisine. As I was researching Lunar New Year foods and customs, though, I learned that some believe lobster to be unlucky for the new year because they can crawl backward. This was my first time learning such a contradiction among different cultures that celebrate this holiday and I thought it was super interesting that this contrast existed. If you plan to make this recipe as part of your own celebration, please do proceed with caution that some consider lobsters a lucky part of a Lunar New Year meal while others might consider it less auspicious.

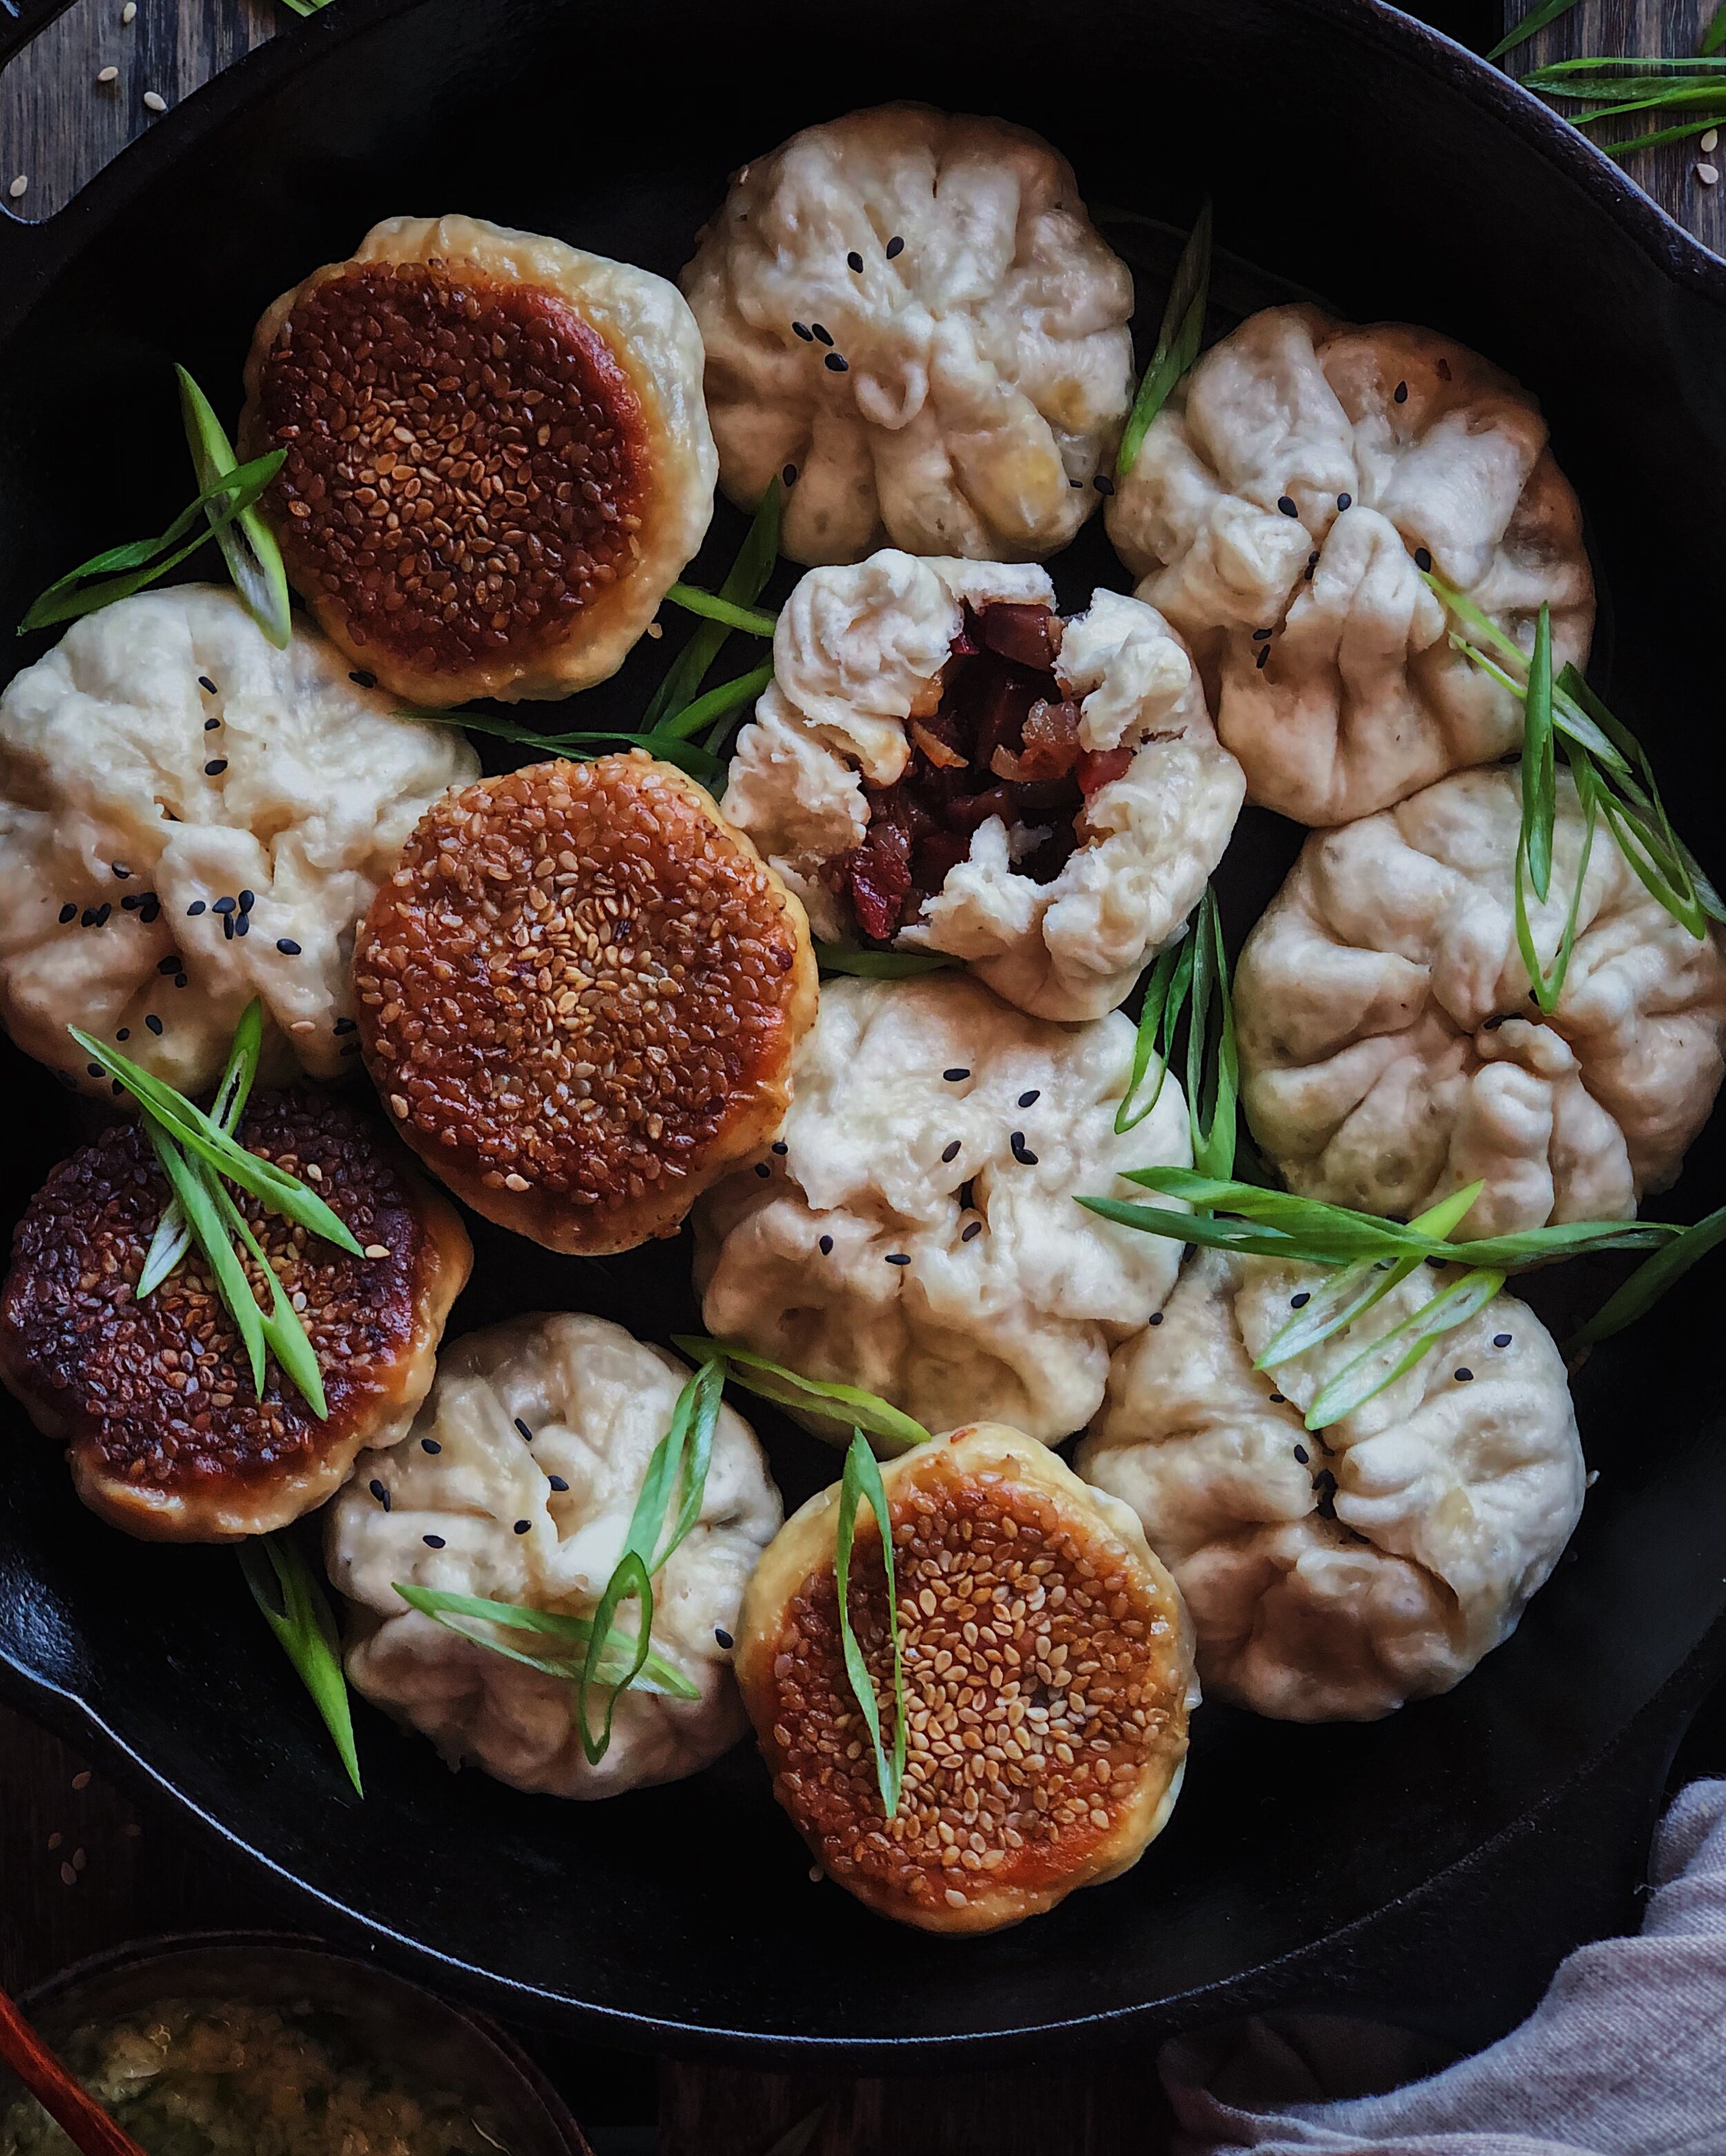
Stuffed bao represent little purses and are also considered a lucky food in Chinese culture. Many of the foods with good symbolism for the new year are meant to represent something having to do with wealth and prosperity. The more luxurious the ingredients, the better to welcome in the new year, but I wanted my more modern recipe to be more accessible, too. I used precooked lobster and tobiko for the bao you see in the photos but you could certainly upgrade to more high end ingredients if you wish.

How to Make Lobster Bao with Ginger and Garlic Butter

Ingredients

8 oz pre-cooked lobster meat*
2 frozen storebought baos
1/4 cup salted butter
2 inches of ginger, peeled
2–3 cloves garlic, minced
white parts of 2 scallions, thinly sliced
2 tsp chives, chopped
2 tsp tobiko or caviar
yellow edible flowers, for garnish (optional)

*I used a thawed frozen pack of cooked knuckle and claw meat. Alternatively, you could blanch a couple of lobster tails, discard the shells, and chop the meat into chunks.

Procedure

Drain any excess liquid from the lobster meat and set meat aside.

Finely grate the ginger, then gently squeeze out the excess water. You do not need to wring out all the moisture; the ginger should feel like a damp clump.

Prepare the bao. Place them in a parchment paper lined steamer, and place the steamer over simmering water in a wok or pan. Steam until the bao are soft and fluffy and heated through, about 5 minutes. Shut off the heat.

Melt the butter in a small saucepan on medium-low heat. Add the ginger and the scallion whites and allow to fry gently, stirring continuously, until the aromatics just start to color. Add the garlic and turn down the heat to low; continue to stir, allowing the garlic to slowly cook and infuse the butter. When the garlic just starts to color, add the lobster meat. Toss together to coat the lobster in the butter then remove from the heat.

Stuff the lobster pieces equally in the bao and serve the extra butter on the side. Top the lobster with chives and fish roe (tobiko or caviar).

Optionally, decorate with some edible yellow flower petals to complete that lucky red and gold color combo before serving.

Recipe: Eggs in Easy Red Pepper Sauce with Chili Butter

I love myself some shakshuka but there is just one problem: every time I think about making it, I am hit with anxiety over how the eggs will turn out. Either I make the wells in the sauce too small and the egg whites end up running away all over the surface of the dish or the yolk ends up breaking or getting overcooked. I have tried maybe over a dozen times and getting those perfect sunny-side-up eggs poached in the shakshuka tomato sauce has felt completely impossible (I am now convinced that all those photos online of perfect shakshuka were photoshopped).

So, I started brainstorming ideas for shakshuka-adjacent recipes that are just as big on flavor and runny egg deliciousness without the anxiety. I feel confident in my ability to make regular poached eggs, so this recipe involves making the sauce and eggs separately and then plating them together at the end to form a low-stress dish that you won’t be able to resist scooping into with a nice crusty piece of toast.

For the sauce, I thought I’d go for something as easy as possible, which is one of those sauces where you literally just throw everything in a blender and blitz it together. Since it is not tomato season at the moment and I have been feeling rather uninspired by the winter produce that is in season, it was a good time for me to play around with just using up pantry items. Whether you are still burnt out from cooking up a storm during the holidays or you are just feeling lazy about venturing out to the grocery store in the cold, this is the recipe for you. The sauce is inspired by romesco sauce, a Catalonian roasted tomato and pepper sauce, but it utilizes jarred bell peppers and tomato paste instead. To make up for the sort of one-note flavors of the jarred ingredients, seasoning is everything in a blender sauce like this! I reached for my go-to all purpose seasoning blend—Spice Tribe’s Haitian-inspired Mama Manje—and it instantly transformed the sauce from tasting rather flat and bland to having incredible depth of flavor. I’ve found in general that this seasoning blend is capable of rescuing anything from blandness with its unique combination of green bell pepper, onion, thyme, cinnamon, garlic, ginger, habanero, and star anise.

And then to add a little something extra to the dish, it all gets finished off with my favorite recipe for chili butter. The dish has plenty of flavor already with the romesco-like sauce and the perfectly poached eggs nestled into it, and a sprinkle of fresh herbs and cheese, but a finishing touch of melted butter infused with Spice Tribe Maras chile flakes takes the whole thing from a casual breakfast affair to an indulgent brunch for kicking off a gorgeous lazy Sunday. There is just something about the flavor that blooms out of bubbling together some salted butter and those chile flakes that is so good with those luscious runny egg yolks. It’s the kind of melted chili butter you’d typically find on top of Turkish eggs or çılbır and I started making it when I developed this recipe for Spice Tribe but I find myself finishing off many dishes this way.

This dish is simple to make but it certainly won’t taste like it! It’s also pretty flexible as long as you capture the basic ideas. Here are the different components that make up the dish:

  • The sauce: Kind of inspired by Spanish romesco sauce but way way easier because you just throw jarred bell peppers, almonds, tomato paste, good quality spices, garlic, olive oil, and vinegar into a blender and blend until smooth. You can use whatever almonds you have on hand as long as they are unsalted, and you might even be able to get away with salted almonds and just not add more salt. Don’t skimp on the Spice Tribe Mama Manje blend though, or you’ll end up with something that tastes rather flat and boring.

  • Eggs: The soft poached eggs with runny yolks that ooze into the yummy sauce are what make the dish, in my opinion. But if you don’t feel confident in your ability to poach eggs, fried eggs would also work great for this dish. Soft-boiled eggs, boiled for 6–7 minutes, would also be amazing. It’s meant to be low-stress so do what is easiest for you.

  • Fresh herbs and cheese on top: A little bit of freshness from some green herbs and some extra creamy umami from cheese are not critical, but they do much to enhance the dish in terms of taste, texture, and visual impressiveness. You can definitely use whatever herbs and crumbly cheeses you have on hand.

  • Melted chili butter drizzle: The finishing touch, this is what takes the dish to another level of brunch luxury, to see the spicy butter flow and pool in all the swirls of the sauce. And this extra little step is super easy too—just melt some butter, add the Spice Tribe Maras chile flakes, and allow the flavor the bubble and bloom for a bit before spooning it over your masterpiece.

How to Make Eggs in Easy Red Pepper Sauce with Chili Butter

Ingredients For the Red Pepper Sauce

12 ounces jarred roasted red bell peppers, drained
1/3 cup unsalted roasted almonds, roughly chopped
3 tablespoons tomato paste
3 garlic cloves
1 1/2 teaspoons Spice Tribe Pimentón de la Vera
1/2 teaspoon Spice Tribe Mama Manje Haitian Blend
2 tablespoons extra virgin olive oil
2 teaspoons red wine vinegar
1/2 teaspoon kosher salt (or to taste)

Ingredients For the Chili butter

1/4 cup salted butter
2 teaspoons Spice Tribe Maras Chile Flakes

Ingredients to Assemble the Dish

4 eggs, poached
1/4 cup queso fresco or feta, crumbled
Fresh herbs, such as parsley or dill, for garnish
Black pepper, to taste
Toasts, for serving

Procedure

Combine all sauce ingredients in a blender and blend until smooth. Transfer to a small pot and simmer on low until heated through and slightly thickened, about 5–10 minutes.

In a separate small saucepan, melt butter on low. Just as butter starts to bubble, add the Spice Tribe Maras chile flakes. Stir gently and continuously until foamy and fragrant. Remove from heat.

Spoon sauce into serving bowl(s). Nestle poached eggs into the sauce and top with cheese, herbs, and pepper as desired. Briefly warm up spicy butter again if needed, then pour over the plated ingredients. Serve with toasts on the side.

Thank you so much to Spice Tribe for sponsoring this recipe! Check them out on Instagram here or visit their website to purchase high quality spices and unique small-batch spice blends.

Recipe: Cheesy Prosciutto and Pesto Puff Pastry Tarts

For this recipe, I partnered with Filippo Berio to share an idea for an unfussy snack or appetizer that is perfect for last-minute gatherings during the holidays. These little handheld tarts capture all the elements of a nibble board—two kinds of cheeses, salty prosciutto, a nice savory condiment, sweetness from the pomegranate arils, and herbaceous basil leaves for freshness—but everything is encased in a lovely, elegant looking puff pastry. 

In no way am I trying to knock nibble boards or charcuterie boards, but have you ever tried actually enjoying one of these at a party? You wait for that break in the conversations when someone else is sharing an anecdote so you don’t have to talk, and—excited to seize the opportunity to enjoy some delicious cheese and charcuterie piled onto a delicious crispy cracker—you take that long awaited bite, only for the cracker to shatter embarrassingly as it makes contact with your teeth, causing all its precariously-placed toppings to fly everywhere. Perhaps I can only speak from personal experience but if so, I am saving you from ever meeting that terrible fate by telling you to make this recipe instead.

I always keep a stockpile of Filippo Berio pestos on hand because they are so super convenient. They are great for when I am too busy to make dinner and need something to toss together with the frozen ravioli I always keep in the freezer and I also find them so useful for when I need a bold tasting condiment for things like toasts, snack or salad platters, and sandwiches.

Much like putting together a nibble board or charcuterie board is choosing your own eating adventure, so are these tarts. Each component could be swapped out for something else in the same category that better suits your tastes. Only one of the cheeses gets baked into the puff pastry tart shells, and then everything else gets added after baking. We’re kind of treating the pastry as a slice of toast, but the delicate buttery layers will feel so much more like a special occasion. These tarts are a great way to upcycle what you happen to have in your fridge, and the pesto will really help to bring all the elements together.

Here’s what you’ll need:

  • Frozen puff pastry dough: Having a stash of this in your freezer will allow you to make elegant and impressive baked delicacies with minimal effort. I usually thaw mine in the fridge overnight but in a pinch, a brief stint on the countertop should be enough. For this recipe, you just need to be able to easily score the dough, so even partially thawed would be fine if you have surprise holiday visitors; you may just need to add a couple minutes to the baking time.

  • Freshly-grated fontina: I love the way the savory, nutty flavors of fontina work in this savory tart, but any smooth semi-hard cheese would work here. Always remember to grate it yourself instead of using pre-grated stuff, for the right kind of melty goodness!

  • Burrata: I am obsessed with burrata! There is something about those loose, creamy cheese curds that just feels like such an indulgence to me. If you have trouble finding burrata I would suggest substituting a fresh ricotta, but even a creamy soft chevre would be yummy here!

  • Prosciutto: Sliced so thin that you can almost see through it, prosciutto is a go-to charcuterie choice in my household. I think its delicate appearance contributes to the appeal of these tarts. 

  • Filippo Berio Classic Pesto: I find that having some kind of tasty herbaceous condiment really helps tie everything together when combining elements of sweet and savory, so this convenient version of traditional Genovese pesto really hits the spot.

  • Pomegranate Arils: I love how these let out a nice, juicy, slightly tart burst as they pop in your mouth. Not only are these the sweet component of the tarts, but I also think that adding these plus leafy herbs to any dish instantly makes it look festive, kind of like holly. However, I think swapping in kumquat slices or even thinly sliced pears or apples would work well here if that’s what you have.

How to Make Cheesy Prosciutto and Pesto Puff Pastry Tarts

Ingredients

1 sheet frozen all-butter puff pastry, thawed
flour, for dusting
1 egg, beaten, for eggwash (optional)
1 packed cup fontina cheese, freshly grated
4 oz burrata
2–3 oz thinly sliced prosciutto
4–6 tsp Filippo Berio Classic Pesto
3–4 tbsp pomegranate arils
fresh basil leaves, for garnish

Procedure

Preheat oven to 400°F and line a large baking sheet with parchment paper.

Dust worksurface with flour and unfold puff pastry sheet. Gently roll out puff pastry dough to smooth out any creases and create an even rectangle about 1/6-inch thick. Cut sheet into 4 equal pieces (about 4” x 5 1/2”). Place puff pastry pieces on prepared baking sheet, at least 1 inch apart.

Using the tip of a sharp knife, score a rectangle into each piece of puff pastry, about 1/4 to 1/2 inch inward from the edges. If using eggwash, brush a small amount onto the outer frames only, taking care to avoid excess eggwash from dripping over the edge of the dough or inside the scored line (which would seal the pastry layers together and prevent them from puffing); discard or store remaining egg.

Divide the grated cheese onto the centers of each piece of puff pastry. Bake for 10–14 minutes, or until tarts are puffy and golden. 

Immediately tear up burrata and divide evenly among the baked tarts, allowing the residual heat to melt it slightly. Roughly tear prosciutto and place onto the tarts, then drizzle pesto over each. Top with pomegranate arils and garnish with fresh basil leaves.

Thank you so much to Filippo Berio for sponsoring this recipe! Visit their website to learn more about their authentic olive oils, made to the highest quality standard of excellence and craftsmanship.

Recipe: Tomato Soup with Pepperoni and Cheese Toast Tops

So we all know that the very best part of French onion soup is the bread and cheese topper that goes over the soup: that delicious gratinated crostini that forms a lid for you to push through to get to the rest of the contents of the bowl, where the top is covered in a very generous layer of melted cheese and the underside is soaked through with the cozy, soul-warming broth. I learned a new word as I was researching for this recipe, and that word was gratinated—which, according to ol’ Merriam and Webster means “to cook with a covering of buttered crumbs or grated cheese until a crust or crisp surface forms”. Well, why can’t other soups have gratinated toasts as blankets to keep them warm?

They obviously, surely, can and may—and I thought there was no more deserving soup than a simple tomato one. We all already know that tomato soup pairs perfectly with toasted bread and melted cheese, seeing as a grilled cheese sandwich and a bowl of tomato soup has long had a honorary place in the Culinary Couples Hall of Fame. So I decided to take this union to the next level by taking my trusty, amazingly easy tomato soup recipe and give it a melted cheese toastie top. But then my mind went to how tomato soup is basically like a brothy tomato sauce, and how tomato sauce + bread + melted cheese = pizza toast, and how pepperoni and cheese is the ultimate pizza combo…and that is how we ended up here: tomato soup with pepperoni and cheese toast tops.

And it is every bit as good as you might dream it would be.

Some notes about the ingredients for my tomato soup with pepperoni and cheese toppers:

  • The base of this recipe is whole peeled canned tomatoes. There are a lot of varieties out there and I have found quite a vast difference in salt content and the natural sweetness of the tomatoes. Therefore, this recipe has lots of notes about tasting along the way and seasoning according to your tastes. You might also notice that whole peeled canned tomatoes sometimes come in purée and other times come in a thin liquid. You will want to add more liquid to the soup if you are using ones that come with a thick purée. Do they really have to be San Marzano style? No. But it is typically what I look for because…just because.

  • My go-to way of seasoning any tomato-based sauce or soup is with fish sauce. Trust me on this one. There is something about the acidity of the tomatoes and the salty, funky fish sauce umami that works so well for bringing out the best of tomato flavor. I promise that it won’t actually taste like fish, but instead like tomatoes that have been cooked with love and with some sort of flavorsome mystery ingredient. I am a diehard fan of the Three Crabs brand of fish sauce, by the way.

  • Check the size of your bread. You will want something that can lie flat against the surface of the soup inside the soup crock, so that it forms a nice topper over the soup without the edges getting burned. You will also want something nice and crusty, so that it doesn’t completely disintegrate the moment it is placed on top of the soup. You’ll be toasting it first, and then putting it on top of the soup, and then melting the cheese over it under the broiler.

  • Use the type of cheese that works for you but make sure it’s freshly grated. Any semi-hard white block cheese should work well for this; I used a young gouda but you could go with mozzarella or pay homage to the French onion soup inspiration with gruyere. Any cheese you associate with melting. But be sure to grate it yourself instead of using the pre-grated stuff in order to get a nice cohesive consistency.

  • And finally, how do I turn pepperoni into those iconic, inviting little cups of grease? I get a whole stick of pepperoni in natural casing and slice it myself. This article on Serious Eats goes into detail about what type of pepperoni gets cuppy when cooked. I used Boar’s Head Natural Casing Traditional Pepperoni and it has always served me well. (Shoutout to my friend Peggy for pointing me in the right direction on this.)

That all being said, this recipe is so dang flexible. Skip the pepperoni if you want. Use a few tiny baguette slices instead of one slice of toast covering the whole top. Use a damn boxed tomato soup if you really must. At the end of the day you are talking about tomatoes, bread, cheese, and some fire magic to melt it all together, and (as long as you are being safe about that fire bit) you’re gonna end up with something good.

How to Make Tomato Soup with Pepperoni & Cheese Toast Tops

Ingredients for Soup

1/4 cup butter
1 medium sweet onion, peeled and cut into wedges
6–8 garlic cloves, peeled and smashed
1 28-oz can of whole peeled San Marzano tomatoes*
1–2 tsp fish sauce
1–2 tsp sugar (optional)
cracked black pepper, to taste (optional)

Ingredients for Toast Toppers

2 small slices crusty bread**
1+ cup freshly grated cheese, such as young gouda, gruyere, monterey jack, or mozzarella
8–12 slices pepperoni with natural casing
herbs for garnish, such as basil, thyme, or oregano

*If using “tomatoes in purée”, see extra note in Procedure.
**Check that the bread slices fit within your soup crocks in order to form a “topper” over the soup

Procedure

In a medium dutch oven or pot, melt butter on medium-low heat. Add onions and sweat until they turn translucent and edges are beginning to caramelize. Add garlic, turn heat down to low, and stir regularly until garlic is fragrant and starts to turn golden. Add can of tomatoes.

Scrape up any bits stuck to the pot and carefully transfer contents of pot to a blender. Add 3/4 cup water (or, if using “tomatoes in purée” add 1 1/4 cup water). Blend until liquified, then pour back into pot.

Stir in 1 teaspoon of fish sauce. Check for seasoning. If soup tastes a bit weak in tomato flavor, add 1 to 2 teaspoons of sugar.

Simmer uncovered on low, stirring occasionally, until soup is heated through and starts to bubble or simmer. Check for seasoning again and add additional fish sauce or sugar as needed. Season with black pepper if desired. Cover and keep warm.

Lightly toast slices of bread with your preferred method of toasting.

Spoon soup into 2 oven-safe soup crocks. Top each with a piece of toast. Divide cheese between the two toasts.

Position an oven rack so crocks can be close to the broiler flame. For easy transportation, place crocks on a sturdy sheet pan before positioning under broiler. Watch carefully while broiling. Broil until cheese just starts to melt, then top cheese toasts with pepperoni and continue to broil until cheese is completely melted and pepperoni has curled up to form cups. (Alternatively, you could follow these same steps using a kitchen blowtorch instead of a broiler if you make sure to move the torch around to distribute heat evenly.)

Remove soup crocks and garnish with fresh herbs before serving.

One last reminder about safety…I consider this recipe to be pretty easy but it does involve FIRE. Whether you choose to use your oven’s broiler setting or a blowtorch, keep a close watch on your precious soup toppers. Once the cheese starts to melt, you’ll be surprised how quickly it can die a charred death under an unsupervised broiler. Use oven-safe containers. Don’t let your bread catch on fire. Basically, you don’t want yourself or your culinary creation to end up like Andy:

Image via @foone on Twitter, from Apple’s Oregon Trail

Recipe: Chicken and (Chinese) Dumplings

Having grown up in a household where at least 4 different languages/dialects were randomly slung around, it is no wonder that I was linguistically confused throughout my childhood. My parents were young kids when Malaysia got its independence from the British, so the English I learned from them at home was the British English (with a Malaysian twist) they learned there, and there were always random words from Cantonese, Hokkien, and Bahasa Malaysia sprinkled in. So imagine my confusion as a child going to school for the first time in America; I thought  “airplane” and “aeroplane” were two different forms of aircrafts and I spent my childhood being a rather quiet kid because I was just so worried about saying the wrong words all the time. Fortunately, I eventually learned enough American English to earn a degree in it, and those days of me being quiet are long over!

Even so, these semantic quirks seemed to continue well into my adulthood. Back when I had a sad job as a textbook editor with no time to go out for lunch breaks, I bought some cans of chicken and dumplings to bring to the office. I guess the image on the can was not enough to inform me otherwise, and I excitedly pictured myself microwaving a nice cozy bowl of creamy American style soup (which I loved) loaded with the wontons from the dumpling soup of my childhood. Up until that point, the only dumplings I knew of were Asian dumplings. So boy was I surprised when out of the can plopped some lumps of solid dough in place of the meat-stuffed purses I imagined.

I grew to appreciate those strange (to me) dough globs bobbing in what I learned was a classic comfort food of the American South. But I always thought that my interpretation of chicken and (Chinese) dumplings needed to exist too! I love having partners like Filippo Berio who are willing to entertain my weird personal stories and support me in turning them into reality. Since we were already breaking away from the norm, I decided to use Filippo Berio Extra Virgin Olive Oil to sauté my veggies and cook flour into a sort of roux-like base that gives this winter warmer its body and heartiness. Olive oils may be associated with Mediterranean cooking, but they can be used to create a variety of dishes from around the world; Filippo Berio offers a whole range of high quality olive oils with different properties and flavor profiles, depending on what type of cooking you are doing. I used their extra virgin olive oil because I knew it would bring a richness to the dish as well as a beautiful golden color; if my soup looks a little more glowy and inviting than the typical pale chicken and dumplings, that’s why!

Some notes about the ingredients:

  • Boxed broth is absolutely fine for this recipe, but I encourage you to save up your produce scraps, chicken bones, and leftover Thanksgiving turkey carcass and make your own delicious no-waste broth! You can read about how to do that in my previous post with Filippo Berio right here.

  • Filippo Berio Extra Virgin Olive Oil is fruity and grassy and I love it for sautéing vegetables. Though this recipe does not involve making a traditional roux, sautéing the vegetables in this oil and then adding a little bit of flour to the mix is what helps give this soup body and adds to its complexity of flavor.

  • I’m calling this recipe “chicken and dumplings” but in this case, the chicken is actually IN the dumplings! Ground chicken and mild leeks are the main ingredients in the dumpling filling. If you can find it, go for ground chicken thigh meat which is more moist. And be sure to only use the tender white and light green portions of the leek.

  • I use shaoxing wine and soy sauce for this recipe, not just in the dumplings but to season the soup as well. It is a fusion dish, after all! If you do not have shaoxing wine, you can sub in dry sherry in a pinch.

  • If you go to an Asian grocery store for your dumpling wrappers, you may be spoilt for choice. Since these dumplings are going to be boiled, most options will work for this recipe no problem. I usually get the ones that are for potstickers.

How to Make Chicken and (Chinese) Dumplings

Ingredients for the Dumplings

1/2 lb ground chicken
1 cup leeks (light tender parts only), finely chopped
4 cloves garlic, minced
2 tbsp fresh parsley, chopped
1 sprig (1–2 tsp) rosemary leaves , finely chopped
1 tbsp shaoxing wine
1 tbsp soy sauce
1/8 tsp white pepper
1/4 tsp salt
18–20 round dumpling wrappers

Ingredients for Soup

1/3 cup Filippo Berio Extra Virgin Olive Oil
1 small yellow onion, diced
2 carrots, cut into 1/4-inch slices
2 celery stalks, cut into 1/4-inch slices
4 cloves garlic, minced
1/2 tsp salt, plus more to taste
2 tbsp AP flour
1/4 tsp cracked black pepper
3 cups unsalted or low sodium chicken or turkey broth
1 tbsp shaoxing wine
1 tsp soy sauce
2 dried bay leaves
1/2 tsp dried oregano
1/2 cup frozen peas, thawed
3/4 cup evaporated milk
fresh herbs (such as oregano, rosemary, or thyme), for garnish (optional)

Procedure

To make the dumplings, combine all of the listed dumpling ingredients (except the wrappers!) in a mixing bowl and mix thoroughly. Scoop about 1 tablespoon of filling into the middle of a wrapper. Dip a finger into water and paint a wet ring along the edges of the wrapper. Fold the wrapper in half to seal in the filling, taking care to press out air bubbles. If desired, bring the two sides of the semicircle together and overlap to form a loop, using water to help stick the dough together; or, fold to your desired dumpling shape. Place on a tray lined with parchment paper. Repeat until all the filling is secured into dumplings. Refrigerate dumplings until ready to use.

Add Filippo Berio Extra Virgin Olive Oil to a soup pot on medium-high heat. Add onion and when it starts to sizzle, sauté until it begins to turn translucent. Add carrots and celery and sauté for 1 minute, then add garlic and salt. Sauté until the garlic begins to color and carrots and celery start to soften, about 4–5 minutes. Sprinkle flour and pepper into the pot and cook, stirring, until the flour at the bottom of the pot begins to turn golden, about 2 minutes. 

Gradually stir in the broth, scraping the bottom of the pot with a wooden spoon to scrape up the flour and make sure it incorporates with the broth without clumping. Stir in shaoxing wine, soy sauce, bay leaves, and dried oregano. When the soup begins to bubble, turn heat to the lowest setting and simmer, uncovered, for 10 minutes or until carrots are almost the desired tenderness. 

Add peas and evaporated milk. Stir together and season with salt to taste. Turn up heat to high and gently add the dumplings, making sure they are fully submerged in the liquid. Allow the dumplings to cook through, about 4–5 minutes.

Spoon into bowls, making sure everyone gets enough of all the goodies, especially the dumplings. Optionally, garnish with fresh herbs before serving.

Thank you so much to Filippo Berio for sponsoring this recipe! Visit their website to learn more about their authentic olive oils, made to the highest quality standard of excellence and craftsmanship.

Loaded Sweet Potato Breakfast “Toasts”

For this recipe, I’ve swapped out my usual beloved toasted bread for autumnal slabs of roasted sweet potato and topped them with twists on all the goodies from a big savory breakfast.

  • roasted sweet potato slices: These serve as the main carb here, and the vehicle for transporting all the other delicious toppings to your main face hole. Sweet potatoes have that subtle natural sweetness that is in all good fall recipes. Roasting them turns them into soft comfort food, yet they stay sturdy enough to act as “toasts”.

  • crispy prosciutto: Crisping up the prosciutto on the same sheet pan while you’re roasting the sweet potatoes turns them into these super savory chips that are like a dainty version of bacon.

  • cheddarized scrambled eggs: This is what I call my favorite way to make scrambled eggs. They’re based off Gordon Ramsey’s low and slow method but at the very end before the eggs are fully cooked, some sharp cheddar gets folded in so there’s also gooey, melty cheesiness in the mix.

  • crème fraîche: Inspired by the sour cream that tops a perfect loaded baked potato, I finished these off with a dollop of crème fraîche to pull everything together before sprinkling on a little bit of fresh thyme and microgreens for freshness, and some smoky paprika.

Click here to get the recipe on the Pete and Gerry’s site!

Thank you so much to Pete and Gerry’s for sponsoring this recipe!

Recipe: Cheddar Scallion Black Pepper Biscuits with Pressed Flowers

flowerbiscuits1.jpeg

Here is another version of (what I think is) my relatively unfussy biscuit recipe. People tend to get lured in by the flowers and I don’t blame them—flowers are pretty and it brings me great joy to be able to spend some time focusing on making something pretty with them. But I always make sure that my pretty, flowery, insta-worthy food actually tastes good. That’s the important part, the part that is worth using the ingredients and spending the time to put them together. You can definitely skip the flowers entirely for this, and what you will end up with instead is a really tasty biscuit with lots of lovely visible layers. The kind you can split open in half without a knife because the layers are so nicely defined—that’s when you know it’s good. And what all my biscuit recipes try to teach you is the easiest way I’ve found to accomplish that.

You guys, I’m pretty lazy when it comes to baking. I definitely don’t have the patience for lamination, for taking my baked goods on multiple trips in and out of the freezer or refrigerator, etc. So the way I create layers in my bakes is based on the “rough puff” method of making puff pastry where cold butter gets mixed right into the dough. I’ve found that this can be done even more efficiently by freezing all the butter (just pop it all in the freezer the night before) and then grating it on a box grater. No “cutting into pea-sized crumbs”. Just get your hands as cold as you can and then grate as fast as you can before the butter softens. It’s a little messy, but easy. And you get your layers.

Here are a couple other recipes that use the same base biscuit recipe:

flowerbiscuits3.JPG
flowerbiscuits4.JPG

All the decorations you see are from my backyard garden. I used mostly violas here, but there is also lemon balm, parsley, thyme, and clover. Be sure to consult multiple reputable sources before determining if something is safe to eat. I get asked a lot about where to buy edible flowers; I think farmers’ markets are probably your best bet.

flowerbiscuits2.JPG

How to Make Cheddar Scallion Black Pepper Biscuits

(Makes about 14 biscuits)

Ingredients for Biscuits

10 tbsp butter, frozen
2 1/2 cups all purpose flour, plus extra bench flour
1 3/4 tsp baking powder
1/2 tsp baking soda
2 tsp sugar
3–4 tsp freshly cracked black pepper
kosher salt
1 1/4 cup plain Greek yogurt
2/3 packed cup grated sharp cheddar cheese (~6 oz)
3–4 scallions, chopped
edible flowers and herbs, for decoration
olive oil, for brushing the tops

Procedure

Combine flour, baking powder, baking soda, sugar, black pepper, and a pinch of salt in a large bowl and whisk together.

Use a box grater to grate in the frozen butter, tossing together with the dry ingredients as you go, to avoid clumps. Then toss the butter and dry ingredients together gently so each shaving of butter is separated and coated with the dry ingredients.

Stir up your Greek yogurt to be an even consistency. If it is super thick, add a teaspoon of water to thin it out.

In a small bowl, toss the cheese and scallions so they are evenly combined. Add these to the dough base and toss together until ingredients are evenly distributed. Create a well in the center. Pour yogurt in the well, then use a fork to slowly incorporate the flour mixture into the wet yogurt. Once all the yogurt is absorbed, use your hands to gather the dough together and fold it on itself a few times until it is a cohesive dough.

Preheat your oven to 425°F.

You will be creating layers in the biscuits by doing three sets of letter folds; you will also want to keep everything as cold as you can, so work quickly with cold hands. Dust your work surface with flour and do so generously throughout the process as needed to prevent sticking. Shape the dough into a rectangle with your hands then roll it out until roughly 9” wide by 12” tall. Fold down the top third and then fold up the bottom third (like you would fold a letter). Rotate 90 degrees and repeat the shaping and folding. Rotate again then do the process one more time, so you have done 3 sets of letter folds total.

Roll out your dough to a little larger than 9” x 12” one more time. Using a floured 3-inch biscuit cutter, cut out 12 biscuits by pushing the cutter firmly through the dough (it should make a satisfying *whoosh* sound) and then lifting it straight up each time. Do not twist the cutter. (I messed up in the photos and only cut 11, but you should definitely be able to do 12!) After cutting out 12 round biscuits, you can fold together the scraps until you get a rectangular slab and cut that into 2 square biscuits too.

Place biscuits on a parchment-lined baking tray. Gently press edible flowers and herb leaves on top of the biscuits for decoration if you desire. The flatter they are pressed directly against the surface of the biscuit, the more likely they will keep their shape when baking. Brush a thin layer of olive oil over the flowers and herbs, which will help preserve them as they bake too. Freeze the biscuits for 10 minutes.

Bake for 15–17 minutes, or until the biscuits are golden.

Recipe: Turkey and Sun-Dried Tomato Stuffed Shells in Butternut Squash Sauce

When the weather starts to cool, I feel this uncontrollable compulsion to buy and roast a butternut squash. I know it is totally basic but my brain feels like it has been hard-wired to crave fall squashes with their subtle natural sweetness once it finally starts to feel like fall in San Francisco. Luckily, butternut squash purée is so versatile! Roasted in the oven with a bit of good olive oil, salt, and pepper and then whizzed up in the blender with some boxed broth and nutmeg, it can then be used for so many different dishes just by tweaking the amount of liquid added. A thick purée makes for a lovely spread on toast, a slightly thinner one becomes wonderful fall pasta sauce, and an even thinner consistency gives you a nice butternut squash soup with just those six ingredients.

This year, for my first roasted butternut squash purée of the season, was the first time I incorporated real, freshly grated nutmeg into the mix. Instead of the ol’ spice jar of powdered nutmeg I’ve had in my cupboard for almost a decade, I reached for a real life nutmeg nut from Spice Tribe and it smelled so incredible as the fine shavings were released into the blender. A little bit goes a long way with nutmeg, but it is truly the secret ingredient that puts the fall vibes in the butternut squash purée, and using a high quality version really does make it feel like something special.

I think I have been making a butternut squash lasagna every fall for almost my whole adult life, but this year, I learned of the joys of stuffed pasta shells and I have clearly been missing out until now. I don’t know why but I am utterly fascinated by the concept of a pasta that is shaped just like a seashell being stuffed with loads of cheese, herbs, and other goodies. Whoever first came up with this idea was so creative! I know the classic way to do them is with a tomato sauce but I think that my butternut squash sauce is the perfect base for a fall version.

This version of stuffed shells has smooth butternut squash purée with a hint of nutmeg for the base, and they are filled to the brim with seasoned ground turkey, sun-dried tomatoes, ricotta, mozzarella, and a bunch of herbs reminiscent of a good Thanksgiving stuffing. You’ll be surprised how much filling one of these pasta shells can hold, and biting into one of these is quite a feast of flavor!

When I make savory fall dishes, I find myself reaching for Spice Tribe’s Masa Mole blend. It contains ancho chile, guajillo chile, cumin, cinnamon, garlic, onion, allspice, oregano, chipotle and I think of this blend of warming chile powders and spices as a savory equivalent to “pumpkin spice” when it comes to bringing out all the flavors that I want to enjoy with my fall vibes. I used it to season my ground turkey in this recipe, and it instantly transformed the mince into a cozy, flavorful base for my pasta shell filling.

The making of this hearty autumnal dish has the following stages:

  • Roasting the butternut squash: I like to do this the night before since it is safer and easier to run things through the blender when they are cooled. Make sure to roast it until the edges get a little browned and caramelized. That’s what gives the sauce so much good flavor with so few ingredients.

  • Making the sauce: Blending up all the roasted squash with freshly grated Spice Tribe Island Nutmeg and some boxed chicken broth transforms it into a smooth autumnal pasta sauce.

  • Making the filling: Cooking up the ground turkey with some Spice Tribe Masa Mole seasoning blend brings warm spices and the flavor of smoky chilies into the mix. Lots of herbs help give this filling its robust flavors. The sun-dried tomatoes bring a nice little tartness to balance out the creamy cheeses.

  • Stuffing the shells: Par-boiling the pasta shells and stuffing them with the turkey, sun-dried tomato, and cheese mixture is the most fun part (aside from eating, of course). Unlike with dumplings, there’s not a lot of downside to really packing the filling in there; I was amazed at how sturdy the shells were and how much I could cram in them.

  • Baking until bubbly and melty: Giving the cheese some time in the oven to melt is what transforms this dish into a completely indulgent, gooey skillet of fall pasta goodness. This dish is not exactly light, but it is delicious!

How to Make Turkey & Sundried Tomato Stuffed Shells in Butternut Squash Sauce

Ingredients For the Sauce

about 2 lbs butternut squash, peeled and seeded
1 1/2 tbsp extra virgin olive oil
1/2 tsp kosher salt
1/4 tsp pepper
1/8 tsp Spice Tribe Island Nutmeg, freshly grated
3/4 – 1 cup chicken broth

Ingredients For the Filling

1 tsp extra virgin olive oil
1/4 small yellow onion, finely diced
3 cloves garlic, chopped
6 oz ground turkey
2 tsp Spice Tribe Masa Mole blend
1/2 tsp kosher salt
1/4 tsp pepper
1 tbsp brown sugar
1 cup ricotta, excess water drained
~ 1 tbsp thyme, leaves picked
1 tbsp sage, finely chopped
1 handful basil leaves, roughly chopped
1/2 cup sundried tomatoes*, chopped into 1/4” pieces
1 egg, beaten
1 cup mozzarella, freshly grated

Ingredients For the Stuffed Shells

18 jumbo pasta shells, plus extra for backup
3/4–1 cup mozzarella, freshly grated
~8 sage leaves
1 sprig thyme
cooking spray
fresh herbs for garnish, such as basil and oregano

*Look for sundried tomatoes that are packed in oil with minimal additives.

To make the butternut squash sauce, preheat the oven to 425°F. Cut butternut squash into chunks, about 10–12 pieces. Add squash pieces to a baking dish and add olive oil, salt, and pepper. Toss until the pieces are evenly coated. Bake for 30 minutes, flip over squash pieces, and bake for an additional 15 minutes or until very tender. Allow to cool slightly. (Note: Squash can be roasted the night before.)

Transfer roasted butternut squash and any oil from the baking dish into a blender. Add nutmeg and 3/4 cup chicken broth and blend on high until smooth. Sauce should be similar in thickness to marinara sauce; if needed, add more broth and blend again. Set sauce aside. 

To make the filling, heat oil in a nonstick skillet on medium heat, then add onions. Start sautéing and turn heat down to low once onions start to brown. Continue to allow the onions to caramelize, stirring occasionally, until golden brown, about 4 minutes. Add garlic and sauté for 1 minute, or until fragrant. Turn heat back up to medium and add turkey, salt, pepper, Spice Tribe Masa Mole blend, and brown sugar. Sauté mixture until turkey is just cooked through, about 5 minutes. Transfer to a large mixing bowl and allow to cool slightly.

To the cooled turkey mixture, add ricotta cheese, chopped herbs, sundried tomatoes, and 1 cup mozzarella. Mix together, pour beaten egg on top, and mix thoroughly.

Boil pasta shells according to package instructions for stuffed shells.

Set oven to 385°F.

Add 1 1/2 cups of butternut squash sauce in an even layer to the bottom of a 10-inch cast iron skillet.

Scoop filling into pasta shells. (Be generous; you should be able to fit 1 to 1 1/2 heaping tablespoons in each.) Arrange filled pasta shells in the skillet. Top with remaining sauce, a thin layer of additional mozzarella, a few sage leaves, and a bit of thyme.

Spray a sheet of foil with cooking spray on one side to prevent the cheese from sticking and cover the skillet. Bake for 20 minutes, then remove the foil and bake for an additional 10 minutes, or until the sauce is bubbly and the cheese is melted and gooey. If desired, place under the broiler for 2–3 minutes to brown the top.

Garnish with fresh basil and oregano and enjoy.

Thank you so much to Spice Tribe for sponsoring this recipe! Check them out on Instagram here or visit their website to purchase high quality spices and unique small-batch spice blends.

Recipe: Cheesy Curry Noodle Soup with No-Waste Broth

For this recipe, I partnered with Filippo Berio to share an easy idea for how we can reduce food waste when cooking at home. Filippo Berio is committed to learning more about sustainability in production practices (including protection of olive trees, olive groves, enhancing olive biodiversity and enhancing production efficiency when creating oil) and they are also committed to helping cooks at home reduce waste in their own kitchens. 

The pandemic and last year’s lockdown definitely changed the way that I grocery shop but I feel very lucky and privileged to say that I was able to develop some positive new habits from it. One of the things I continue to do is hold on to my food scraps and use them to make a flavorful broth. I always saved the roasted chicken or duck carcasses to make into soup (something I learned from my parents, who would usually use them to make a Cantonese soup with pickled mustard greens) but now I also hold on to things like onion peels, bones, herb stems, and any tops and bottoms of veggies that I typically trim off. I keep adding them to a container in my freezer and because of my job, it really does not take long to accumulate enough to make a big pot of broth. The container fills up so quickly after a couple of big shoot days that it really makes me realize how wasteful I was when I wasn’t saving my scraps before; they truly still have so much flavor left in them that would have otherwise been discarded.

The food scraps broth that I made for this recipe works as a fantastic base for anything your heart desires for soup season, but one tip I will share with you is that stirring in one of Filippo Berio’s incredible pestos is an easy way to bring complex flavor to the broth and transform it into a unique soup. I don’t think a lot of people think to use pesto in soup, but there is a ramen place in the SF Bay Area that does it to make a great fusion ramen, and I’ve been so inspired from that to make various fusion-y noodle soups. 

This particular recipe is special because it is a fusion of my and my spouse’s cultures. One of the things that he and I bond over is our love for noodles—coming from an Italian American family, he grew up eating lots of pasta with tomato sauces and pestos while I grew up in my Malaysian Chinese family having stir-fried noodles and noodle soups such as wonton mee and curry laksa. This recipe is sort of like a curry laksa with an undercurrent of homestyle Italian cooking. I used Filippo Berio Grilled Vegetable Pesto in place of a Malaysian laksa paste to bring robust umami to the soup and because of the puréed grilled veggies and the Grana Padano cheese in it, the soup gets a satisfying creaminess that we Malaysians know as lemak, without the use of the traditional coconut milk found in curry laksa. The result is cheesy, spiced (but not that spicy, imo), and very slurp-worthy.

Making this fusion curry noodle soup can be broken down into three phases:

Making the broth: All those food scraps that have been accumulating in the freezer get another chance to give you their wonderful flavors by simmering into a lovely broth. I always make this when I have a roast duck or chicken carcass on hand but if you don’t have one, you can boost the umami by adding a handful of dried shiitake mushrooms. This recipe will yield more that you need to make the two servings of noodle soup described, and you can also prepare the broth in advance. Keep it in a jar in the fridge for a couple of days or reuse a ramen takeout container and freeze it for longer storage.

Transforming the broth into tasty curry soup: Whisking the broth together with Filippo Berio Grilled Vegetable Pesto immediately gives it homestyle Italian flavor and some creaminess. Then, adding curry powder, fish sauce, and sambal oelek brings in some Southeast Asian flavors to make it into a wonderful fusion soup. For the curry powder, I used an Indian curry powder recommended for chicken but even the generic curry powder in the spice section of a Western grocery store would work fine. 

Preparing the toppings: I used Filippo Berio Extra Light Olive Oil to fry some shallots and pan-sear some big shrimp to top my laksa-inspired curry noodle soup. There are so many variations of laksa in Malaysia and there’s no hard rule on what to put on top or even what noodles to use. In fact, many hawker stalls that serve laksa will have big vats of simmering broth and let you choose from a selection of noodles and toppings to add. Whatever you choose to top your cheesy curry noodle soup, Filippo Berio Extra Light Olive Oil is great for quickly pan-frying at high heat to crisp things up for good texture.

Curry laksa is all about cramming as many flavors as possible into a bowl of noodle soup and this fusion version is no exception!

How to Make Cheesy Curry Noodle Soup with No-Waste Broth

Ingredients for No-Waste Broth 

about 1 gallon of food scraps, such as vegetable ends, onion peels, and chicken bones
10 cups water

Ingredients for Soup

2 cups no-waste broth
1/2 cup Filippo Berio Grilled Vegetable Pesto
1 tbsp curry powder
2 tsp fish sauce
2 tbsp sambal oelek, or to taste

Ingredients for Noodle Bowl

1–2 tbsp Filippo Berio Extra Light Olive Oil
1 large shallot, thinly sliced*
6 shrimp, 13/15 sized, peeled and deveined*
1/4 tsp fine chili flakes
pinch of salt
12 oz cooked rice noodles
1–2 boiled eggs, peeled and halved
fresh herbs, such as cilantro and Vietnamese coriander
1–2 bird’s eye chilies, sliced (optional)
1 makrut or conventional lime, sliced into wedges (optional)

* Save these peels for the next batch of broth, or prep these ingredients in advance to use them in this one!

Procedure

To make the broth, combine the food scraps and the water in a stock pot and bring to a rapid boil. Reduce to a minimal simmer and continue to cook, uncovered, for 1 hour. Allow to cool slightly before using a fine sieve to remove the scraps, squeezing out as much liquid as possible before composting them. Cool and store the broth if making in advance, otherwise measure out the amount needed for the soup.

Combine all the soup ingredients in a small pot on low heat. Whisk together until fully incorporated and allow the soup to come to a simmer. Cover and keep warm while preparing the noodle bowls.

In a small skillet, combine 1 tablespoon oil and the shallots. Cook on low heat, stirring constantly, until the shallots are lightly browned and crisp. Place fried shallots on a paper towel to drain. 

In a small bowl, toss together shrimp, chili flakes, and salt. Use the same skillet for frying the shallots and add extra oil if needed. Heat the skillet on medium-high heat, then add the shrimp and cook for 1 minute on each side or until seared and cooked through.

Divide the noodles into two bowls. Pour over the hot soup, then top with shrimp, eggs, fried shallots, and fresh herbs. Serve with extra herbs, bird’s eye chilies, and lime wedges at the table, if desired.

Thank you so much to Filippo Berio for sponsoring this recipe! Visit their website to learn more about their authentic olive oils, made to the highest quality standard of excellence and craftsmanship.

Recipe: Whipped Feta Dip and Chili Butter Burst Tomatoes

whippedfeta_tomatoes.JPG

I have been lucky to have a fantastic crop of cherry tomatoes in my backyard garden this year. Even as the weather is beginning to cool here, there are still tons of little tomatoes on the vine! And I think the best way to enjoy sun-ripened, homegrown tomatoes is to keep things simple, so I have been using them raw in caprese-ish salads or giving them just a little bit of time in the skillet, just until they char or burst and turn into something jammy and wonderful.

tomato_flatlay.JPG

In my household, a big bowl of tomatoes, something creamy, and some flatbread to scoop it all up is perfectly acceptable as a meal. This recipe pulls from a couple of my existing recipes to make this garden-grown celebration:

  • If you are coming to this recipe in the winter, check out my recipe for Garlicky Whipped Feta with a Citrus Fennel Salad. It’s my original blog post for this same whipped feta dip but at the time I paired it with the more wintery flavors of bright juicy citrus segments and earthy, spice-like fennel.

  • If you love tomatoes and want to make a more substantial meal with this idea, check out my recipe for Turkish Eggs with Charred Tomatoes and Sweet Pepper. This was originally where I developed this idea for combining burst tomatoes and chili butter, inspired by a Turkish egg dish called çılbır. I use Maras chili flakes from Spice Tribe for the chili butter (the original recipe was sponsored by them but this one is not).

How to Make Whipped Feta Dip and Chili Butter Burst Tomatoes

Ingredients for the feta dip

8 oz feta (domestic is fine)
2–4 garlic cloves
1 tsp extra virgin olive oil
1/2 cup 2% Greek yogurt

Ingredients for the Burst Tomatoes

about 1 pint of cherry tomatoes
1/4 cup salted butter, divided in half
2 tsp Maras Chile Flakes*
salt to taste

For Serving

herb oil, pesto, or chimichurri (optional)
fresh herbs, such as thyme and basil
toasts, crostini, or flatbread

*This is one of my favorite products from my friends at Spice Tribe but if you are looking for an alternative I have found that harissa chili blend works well.

Procedure

To make the feta dip, break the feta into chunks and add to the bowl of a food processor. Add garlic and olive oil. Process until a homogenous paste forms. Add the yogurt and process until smooth.

In a skillet, melt half of the butter on medium-high. Add the tomatoes and season with a bit of salt. Reduce the heat to medium if the butter starts to brown. Cook the tomatoes until about half of them have burst.

Reduce the heat to medium-low, and add the rest of the butter. As the butter starts to bubble along the edges, add the chile flakes. Stir the contents of the skillet gently. Cook until the butter starts to foam and the chili becomes fragrant

Scoop the feta dip into a serving bowl, using the back of a spoon to create some areas for the chili butter to pool. Pour the tomatoes and chili butter on top.

Add a drizzle of herby oil, if desired. Top with fresh herbs and serve with toasts, crostini, or flatbread.

Recipe: The Easiest Char Siu Bao

charsiubaohack1.jpeg

This is the easiest way to make char siu bao ever. Folks in the US might know char siu bao, or Cantonese sweet bbq pork buns, from dim sum or from a Chinese bakery. When you just say char siu bao in America, it is usually referring to jing char siu bao, which is the steamed variety. That is the kind that has a fluffy white exterior and comes in the bamboo steamer basket on the dim sum cart. But char siu bao actually comes in a different forms—some are baked with a glazed sheen on top and sometimes you can get char siu wrapped in puffed pastry. In all cases, you are referring to char siu—which is Cantonese style sweet roasted pork—wrapped inside some dough.

These little bao are a hybrid between char siu bao and sheng jian bao. Sheng jian bao are Shanghai pan fried dumplings. If you’ve ever had the popular soup dumping xiao long bao where the soup bursts out of the dumpling wrapper, sheng jian bao are a more doughy pan-fried version of that. The filling is stuffed in raw dough and then placed in a skillet to crisp up the bottoms, and then steam is trapped in the same pan to steam the rest of the dough until it is cooked through. Instead of the soupy or juicy pork filling that is common to sheng jian bao, I filled mine with the filling you would find in a char siu bao. That’s why I am calling them a hybrid between the two; it’s the filling of char siu bao and the cooking method of sheng jian bao.

charsiubaohack5.JPG

Despite the long-winded explanation of what they are, these bao are super easy to make. For this idea, I must give credit to @dumplingclubsf on Instagram; I once shared a story about how my mom would make donuts with canned biscuit dough, and she told me about how her mom used to make bao out of it! How brilliant! I was so very intrigued by this hack that I had to try it for myself.

charsiubaohack2.JPG
charsiubaohack3.JPG

These are the key ingredients you will need to make these easy char siu bao:

  • char siu: This is Cantonese style sweet bbq pork. I have a recipe for how I make mine here; this would be a great way to use the leftovers. However, I crave char siu plenty more often than I feel like making it, so buying is perfectly fine and intended for this hack of a recipe. You can get it at most Cantonese bakeries and restaurants—anywhere where you see a roast duck hanging in the window. You can also get it at Asian supermarkets which have a hot deli section inside; it’s typically sold by weight.

  • canned biscuit dough: You guys know the ones; the kind where you have to peel off some of the cardboard can and then press a spoon along the crack to get it to explode open. The plainer the dough the better; don’t get one of those new fancy varieties if you can avoid it. However, the one I got when I shot the photos for this ended up being one with little pieces of butter dispersed throughout the dough so it looked a little unsightly when rolled out and raw but it still worked perfectly fine.

Please don’t ask me how to pleat these dumplings though! I think you can tell from the photos that I didn’t really know what I was doing. I tried watching and following some YouTube videos and I just haven’t gotten the hang of it. But they will taste so good and their crispy bottoms will look so impressive that I think it won’t really matter much if you suck at pleating just as much as I do. Just try to gather the dough around the filling and create a seal. Don’t stress—this recipe is meant to be easy and fun!

And by the way, these taste great with my ginger scallion garlic oil. You can find the recipe for that here!

charsiubaohack5.JPG

How to Make the Easiest Char Siu Bao

(Makes 16 bao)

Ingredients

1/2 lb char siu bao, diced
1 tbsp hoisin sauce
1 tbsp date syrup or honey
1 tsp shao xing wine (or dry sherry)
1 16oz can biscuit dough
flour for dusting
1 tbsp cooking oil
~1/4 cup white sesame seeds
black sesame seeds, for garnish (optional)
1 scallion, sliced, for garnish (optional)

Procedure

To make the filling, mix together the char siu, hoisin, date syrup, and wine. Set aside.

Separate the canned dough into the individual biscuit pieces, and then split each piece in half. Then, working one at a time, roll each piece of dough on a floured surface into a 4-inch circle; try to get the edges thinner than the center. Scoop about 1 tablespoon of filling in the middle and then gather the dough up around the filling and pinch closed at the top. Dip the bottom in a little saucer of water and then dip in a plate of white sesame seeds so the entire bottom of the bao is covered in sesame seeds. Repeat with the remaining dough and filling.

Use a skillet large enough to avoid crowding. Heat the oil on medium heat. Place the bao in the skillet (sesame side down) and cook until the sesame seeds and bottoms are golden brown. Add 3/4 cup water into the skillet and cover. Allow to steam for 8 minutes, or until the water has almost evaporated. Remove the cover and leave on the heat just a little bit longer to allow the bottoms to become dry and crispy.

Garnish with some black sesame seeds and scallions, if desired.

Easy Spicy Chicken Congee

LilyMorello_Post_Sept21_1.JPG

Today I’ve partnered with RightRice and Nona Lim to share an easy congee or jook recipe. Many of us remember our parents making congee or jook or rice porridge as a cure-all for us when we were sick—but now that we are adults, we have to make it for ourselves when we are feeling under the weather.

Traditional jook takes time but my easy hack will get you a nourishing bowl of comfort much quicker. The trick is using RightRice’s fast and nutrient-packed “rice” and a broth that is already super full of flavor.

Click here to get the recipe on RightRice’s site!

Thank you so much to RightRice for sponsoring this recipe!

Jammy Eggs in Sambal

SambalEggs_Vertical2.JPG

This recipe was inspired by Malaysian sambal telur (eggs in chili sauce) which I associate with nasi lemak, the national dish of my parents’ home country. However, I altered the idea in a couple key ways:

  • tomatoes in the sambal: I don’t think of tomatoes as being common in Malaysian cooking and when I think of Malaysian sambal, it does not using contain tomatoes. However, I find spicy tomato sauces to be so addicting, and I wanted the sauce for this dish to be something that heat lovers would want to keep coming back to, scooping up over and over with their roti or naan. So my version is a tomato-y sambal. If you leave a lot of the chili seeds in, it will definitely pack a punch, but the acid from the tomatoes makes it even more pleasing.

  • jammy eggs: With typical sambal telur you tumis or fry/sauté hard boiled eggs, so not only are the yolks fully cooked but the outside of the whites have a unique, firm brown skin from the frying. I prefer soft and gentle eggs that have a luxurious mouthfeel so I opted to nestle jammy 6.5-minute eggs into my tomato sambal for this dish.

Click here to get the recipe on the Pete and Gerry’s site!

SambalJammyEggs_Horizontal1.JPG
SambalJammyEggs_Horizontal2.JPG

Thank you so much to Pete and Gerry’s for sponsoring this recipe!

Recipe: BLT Salad with Crispy Smashed Potatoes

BLTPotatoSalad_1.JPG

BLT sandwiches seem to be having a moment right now—I recently saw Kenji post one on Instagram and Munchies did a short video on Youtube. I mean, it makes sense for everyone to be wanting a BLT at this time because it is after all peak tomato season, a.k.a. THE MOST WONDERFUL TIME OF THE YEAR! But for me, a little BLT sandwich is still not enough tomato. My obsession with the produce bounty of late summer is so strong, that it can only be satiated with an entire platter of tomatoes! And that, dear reader, is where the BLT Salad comes in.

Imagine a scenario where, instead of biting into your favorite ingredients of a BLT and having those precious sweet peak-season tomato juices running down your hands, a civilized fork allows you to assemble the perfect bite without the sticky mess. That is the beauty of the BLT Salad. I thought of doing this as a panzanella with nicely seasoned croutons to continue to honor the sandwich origins of this flavor combo, but I realized I was too proud of my smashed potatoes recipe to not want to share it with you all. And there is something about the creamy fluffiness of those potatoes that goes so well with the juicy tomatoes and the salty bacon. Hence, I now present to you my BLT salad with crispy smashed potatoes and, of course, burrata.

LilyMorello_BLTSaladPotatoes_4.JPG

These crispy smashed potatoes are so good as part of a breakfast platter, as a side dish with whipped feta and herbs, and—obviously—as a way to bring heartiness to a salad. I use Spice Tribe’s Mama Manje Haitian-inspired seasoning blend whenever I make them, and these seasonings blooming in the oven as the potatoes roast makes my whole house smell so, so good. The blend was inspired by Spice Tribe founder Trent’s visit to Haiti with the non-profit Every Mother Counts, and is meant to capture a combination of the ingredients in epis, a foundational seasoning blend for Haitian cuisine, and the tea that is commonly drank by Haitians. To me, the combination of green bell pepper, onion, thyme, cinnamon, garlic, ginger, habanero, and star anise works so well as an all-purpose seasoning, and in addition to this smashed potatoes recipe, I have been using it whenever I want to imbue a dish with a complex blend of flavors and not have to think too much about it.

You can read more on the story behind Spice Tribe’s Mama Manje Haitian blend from Trent here. While working on this recipe, the recent devastating earthquake in Haiti was on my mind, as well as how much of a privilege it is for me to do things like recipe testing for my job. If I was going to be earning income from a product inspired by a humanitarian visit to Haiti, it felt important to me to pay it forward. I decided to donate 5% or my rate from this sponsored recipe to World Central Kitchen and Spice Tribe has kindly agreed to match my donation too. I chose this charity because it was founded by José Andrés—a chef that I respect and admire—in response to sending aid for the 2010 earthquake in Haiti, but they have since expanded their relief efforts globally. They are currently working to provide food to those experiencing homelessness as a result of Hurricane Ida, facilitate hot meals for refugee families fleeing Afghanistan, and mobilizing their already-well-established teams in Haiti to provide assistance in response to the recent earthquake. You can join me in donating to these efforts and read more about World Central Kitchen here.

BLTSalad_4.JPG

Going back to the recipe, here is a bit about what you’ll need to bring it all together:

  • bacon (the B): I used a center cut, thick cut bacon that was nice and meaty by bacon standards. The bacon gets crisped in the oven on the same tray as the smashed potatoes, so that rendered bacon fat is surely not going to waste as it spreads across the pan. I kept the bacon in big chunks because this is a big chunky salad! No gum stabbing bacon bits here.

  • frisée “lettuce” (the L): I took some creative liberties here in representing the L in BLT by using frisée, which is technically not a lettuce but a type of chicory. Frisée (also known as curly endive) and other chicories work well in this salad because they are sturdy enough to not get sogged down by the juicy tomatoes or the warmth of the roasted smashed potatoes, and their slight bitterness is a nice contrast to the salty fatty bacon. But you could also use your choice of baby lettuce leaves.

  • tomatoes (the T): I used a combination of heirloom tomatoes from the store and cherry tomatoes I grew myself in the backyard. Try to use the most flavorful tomatoes you can get your hands on because the whole point of the dish is to celebrate their gorgeous natural flavor. In the recipe, I suggest drizzling a little dressing over the salad platter and then adding more to taste, because you may or may not need more dressing depending on how flavorful your tomatoes are.

  • mini potatoes: Instead of croutons, I opted to make crispy smashed potatoes to bring some heft and heartiness to this late summertime salad. I have found that creamer potatoes with thin skins and a waxy consistency work best for this. First I boil the little potatoes until they are almost breaking apart, then I gently smash them down on a baking pan with a fork to expose some of the soft, fluffy interior and create lots of craggy edges to crisp, then I roast them until the house smells amazing and those edges turn golden. Though there’s a multi-step process to making these, it’s well worth it.

  • burrata: I couldn’t resist bringing a lusciously creamy element to this salad, much like how a BLT would not be complete without mayo. I opted for burrata because I am obsessed with how this softest of cheeses pairs with the tomatoes. But if you can’t find burrata, some fresh mozzarella would work great here too.

BLTPotatoSalad_3.JPG

How to Make a BLT Salad with Crispy Smashed Potatoes

For the Smashed Potatoes

1 pound mini creamer potatoes
1 1/4 tsp kosher salt, divided
2 tbsp extra virgin olive oil, divided
1/2 tsp Spice Tribe Mama Manje blend
4–6 strips center cut thick bacon

For the Dressing

2 tbsp fresh orange juice
4 tsp white wine vinegar
1 tbsp honey
1/4 tsp Spice Tribe Mama Manje blend
1/4 tsp kosher salt
2 tbsp extra virgin olive oil

For the Salad

3–4 heirloom tomatoes, sliced
1 cup frisée or baby lettuce leaves
4 oz burrata or fresh mozzarella
cherry tomatoes (optional)
microgreens (optional)
kosher salt and pepper, to taste

Procedure

In a medium pot, combine potatoes with 6 cups of water,  or enough to completely cover the potatoes in 2 inches of water. Bring to a boil and add 1 teaspoon of salt. Continue boiling potatoes until very soft and a fork pokes through with no resistance, about 20–25 minutes.

In the meantime, preheat oven to 450°F and make the dressing. Combine all dressing ingredients except olive oil in a bowl and whisk together until the honey dissolves. (Microwave for 10 seconds if needed to soften the honey.) Then, slowly whisk in the olive oil. Set dressing aside.

Drain boiled potatoes well and allow to cool slightly. Add to a large mixing bowl along with 1 tablespoon olive oil, 1/4 teaspoon salt, and Spice Tribe Mama Manje blend. Toss until potatoes are evenly coated, then dump everything onto a large baking sheet. 

Move potatoes to the sides, then press each one gently with a fork until it cracks open and flattens sightly. Drizzle another 1 tablespoon olive oil over smashed potatoes. Place strips of bacon in the middle of the same baking sheet, in a single layer. 

Place baking sheet on the middle rack of the oven. Bake for about 8 minutes, flip the bacon, then continue baking until the bacon is crisp, an additional 7–12 minutes (for 15–20 minutes total). Transfer bacon onto a plate to cool slightly (bacon will become a bit more crispy while cooling). Continue baking potatoes until the fluffy edges begin to turn golden brown, about 5–7 minutes more.

Break up bacon into bite-sized pieces. Arrange frisee or lettuce leaves, tomato slices, bacon, and crispy smashed potatoes on a serving platter as desired. Season tomatoes with salt and pepper to taste. Top with torn up pieces of burrata or mozzarella, and additional cherry tomatoes and microgreens (if using). Lightly drizzle some dressing over everything and serve the rest of the dressing on the side.

Thank you so much to Spice Tribe for sponsoring this recipe! Check them out on Instagram here or visit their website to purchase high quality spices and unique small-batch spice blends.

My Basic Brined Party Wings Recipe

saltandpepperwings.JPG

I am now a wing brining covert.

I have been making wings for a long time now, especially getting into it when I noticed that Costco sells these packs of “party wings”. Party wings are the drumnette and flat parts of the chicken wings served as individual segments. It is super convenient for everything to already come as these snackable pieces and not have to deal with the wing tips that most people aren’t that into. In the spirit of these already convenient party wing packs, my past approach had been to keep the whole wing making process as simple as possible, and I thought that surely brining was not worth the hassle.

Recently though, my friend Taleen and I had a crazy impulse-buy moment where we decided to take on the Hot Ones challenge. “Hot Ones” is an interview webseries by First We Feast where celebrities are asked questions while eating progressively spicier wings. Every season involves a different hot sauce lineup for the wings and we bought one of these collections of hot sauces to challenge our spice tolerance. I volunteered to cook the wings, and then our plan was to follow the Covid Era format of the show where everyone participating would dip the wings into the sauce or pour it on to their discretion as we moved down the gauntlet. I really wanted the wings to taste good on their own since I wouldn’t have control over how much sauce everyone at the party would be adding, so I decided to try brining…and wow! I was amazed at how good the wings tasted even without any added sauce or seasoning. I immediately became convinced that the brining made a big difference.

I had looked at a bunch of brining recipes online before trying out the process and they all seemed to involve a horrific amount of salt. I know it becomes totally diluted, but I had had a bad experience with a dry brining recipe before in the past, so I was operating with an abundance of caution. I trusted my instincts and used an amount of salt that did not make me feel uncomfortable, and the wings turned out plenty moist, savory, and flavorful. You can (and probably will) add seasoning or sauce after the wings are cooked, and keep in mind those will add salt to the equation too! Having tested this recipe more since my initial brining revelation, I really am not sure why other recipes need so much salt.

So am I going to be brining my wings from now on? Truthfully, no. If I am planning to immediately coat the wings in something really strong in flavor like a bottled bbq sauce or buffalo wings sauce, these tend to be high in sodium already and my laziness will outweigh the benefits of brining on the juicy interior texture of the wings. But if I’m going to be using a lighter dry seasoning blend or am planning to serve the wings relatively plain with dipping sauces, I’ll definitely be using this brining recipe!

The wings in the photo are salt and pepper wings—inspired by a combination of the Taiwanese popcorn chicken that you get at boba shops and salt and pepper tofu or squid that is found at Cantonese restaurants. After following the steps in the recipe below, I tossed the wings in a seasoning combination of ground Sichuan peppercorns, white pepper, salt, and Chinese five spice (to taste). I then combined the seasoned wings with jalapeño slices, scallions, and fried Thai basil and served them with gochujang crema.

What’s your favorite way to season or sauce up your party wings? Let me know in the comments below!

How I Make Brined Fried Party Wings

Ingredients

~2.5 lbs wing segments, cleaned
2 cups water, room temp
1/4 cup sugar
scant 1/4 cup kosher salt
2 cups water, cold
1/4 cup apple cider vinegar
~1 cup cornstarch
3+ cups frying oil (e.g. canola or vegetable)

Procedure

In a small sauce pan, combine 2 cups regular water, sugar, and salt and begin to heat on low. Stir gently until the sugar and salt are completely resolved. Remove from heat. And pour into a very large non-reactive bowl. Add cold water and—if needed—allow to rest until cool to the touch.

Stir in apple cider vinegar and carefully add the wings to the bowl. Place bowl in the refrigerator and allow to brine for at least 3 hours or overnight.

Drain the brined wings and squeeze each one gently with a paper towel to remove excess liquid.

Place 1/2 cup cornstarch in a wide, shallow bowl and coat wings one at a time thoroughly in the cornstarch, making sure each is completely covered, including all the nooks and crannies. Dust off excess cornstarch and place on a dry tray. Continue to add cornstarch to the bowl as needed, and repeat process until all the wings are coated.

Turn on oven to 175°F (or warming setting).

In a Dutch oven, heat 2 inches of oil on high; oil is ready when a tiny pinch of cornstarch sizzles immediately when added. Add a small batch of wings to the hot oil and cook until golden brown, turning occasionally (about 8–10 minutes). Place cooked wings on a large tray in the oven to keep warm. Continue working in small batches to fry the wings.

Once wings are fried, they can be tossed in dry seasoning or sauced to your desire.

Mala Glass Noodle Salad with Steak, Smashed Cucumbers, and Egg Ribbons

Chinese salads are not big bowls loaded with leafy greens like what you think of with Western salads. They are more often cold appetizers featuring just one marinated crunchy veggie. (Btw, “Chinese chicken salad” is not really a Chinese salad, it’s Chinese-American!) Smashed cucumber salad may be the most iconic example of these crunchy veggie cold dishes that we have instead of salads. It can sometimes be found with mala chili oil and other times without, but either way, it is incredibly refreshing for summer. I wanted to take this classic salad and turn it into a full meal that would be perfect for a hot summer evening (even though it is cold and gloomy in SF), and this is what I came up with!

This salad has:

  • smashed cucumbers, marinated in the classic rice vinegar based dressing with lots of zingy garlic

  • glass noodles for a satisfyingly bouncy texture

  • egg ribbons for airiness and savoriness

  • Chinese five spice-rubbed steak

  • cilantro and radish microgreens for freshness and herbaceousness

  • toasted sesame seeds for the finishing touch

  • mala chili oil for that numbing spicy heat that I am obsessed with!

Not a boring salad by any means! Click here to get the recipe on the Pete and Gerry’s site!

MalaGlassNoodleSalad_Vertical1.JPG

Thank you so much to Pete and Gerry’s for sponsoring this recipe!

Recipe: Galbi Fajita Platter

GalbiFajitas_1.JPG

One of my best purchases during the pandemic was a Korean-style tabletop grill pan. I was missing that indoor dining experience of Korean barbeque and one of the things I tried to do regularly to make up for being unable to travel was do themed dinners at home, so being able to cook KBBQ definitely became a highlight. Unlike what we think of as a “grill” in the States, which usually involves flames coming up through a grate, cooking Korean barbeque at home can be done on a special nonstick pan that is contoured to allow excess rendered fat to slide away from the meat. But if you don’t have one of these special pans, you can also easily replicate the experience with a griddle or a nonstick pan.

The idea behind this platter was to combine two different dishes that involve lots of different ingredients being served separately at the table to then get wrapped together right before eating. I realized that Tex-Mex fajitas and Korean ssam have a lot of things in common.  Ssam means “wrapped” in Korean, and usually involves making little wraps at the table with a leafy veggie and a small piece of meat inside, often with garlic, peppers, and spicy ssamjang. Fajitas usually involve a mix of meat and peppers, with salsa on the side and tortillas for wrapping everything together. So, they both involve some kind of meat cut into small pieces, served with peppers and some kind of spicy sauce, all wrapped up in something flat by the eater in a sort of choose-your-own-adventure experience at the dining table. I decided to take components from both of these dishes to make a fusion fajita platter where everything can be cooked on my Korean grill pan.

GalbiFajitas2.JPG

I used Filippo Berio Extra Virgin Olive Oil in three different ways to prepare this galbi fajita spread:

The marinade: In my opinion, good Korean BBQ is all about good quality meat and a great marinade! This bulgogi-inspired sweet-savory marinade is super easy to come together because everything gets thrown in a blender. I used Filippo Berio Extra Virgin Olive Oil in the marinade because I thought its rich, almost fruity flavor would go better with the other fajita ingredients than the sesame oil typically used for ssam. 

Sautéed peppers and onions: For this fusion fajita platter, I used a mix of sweet and spicy peppers instead of just the usual bell peppers. Using Filippo Berio Extra Virgin Olive Oil helped with getting a good sear on these veggies to bring out their natural flavors. In general, this is my go-to oil for sautéing because it has less saturated fat, and more monounsaturated fat (otherwise known as healthy fats) than many other cooking oils.

Gochujang crema: Filippo Berio Extra Virgin Olive Oil brings such richness to condiments and dressings, so I used it to get the mouthfeel I was looking for with my gochujang crema. This mixture of Korean red pepper paste and crème fraîche is so tasty for fans of anything spicy and creamy, and I am definitely going to be using it on more than just tortillas.

You’ll see that I pulled accoutrements from both of the inspiration dishes—fajitas and ssam—to make up the platter, but this idea is super customizable to your taste. I used LA-style galbi for the meat because it’s very iconic to my personal experiences having Korean BBQ in California—it is flanken-cut short ribs typically cooked as strips and then cut with kitchen shears before eating. If you can’t find this, strips of steak or pork belly would also work great (if you adjust cooking times accordingly). You could also go the ssam route and use leafy greens as your wrap instead of tortillas for a more fresh, healthy option. That’s why I think of this as a choose-your-own-adventure meal!

GalbiFajitas_3.JPG

How to Make a Galbi Fajita Platter

Ingredients for Galbi

1/2 apple*, peeled and cut into chunks
1/4 small red onion, cut into chunks
2 cloves garlic
3 tbsp mirin
5 tbsp soy sauce
2 tbsp dark brown sugar
1/4 tsp black pepper
1 1/2 tbsp Filippo Berio Extra Virgin Olive Oil
1 – 1 1/4 lb LA-style (flanken cut) galbi

Ingredients for Gochujang Crema

1 tbsp gochujang
4 tsp crème fraîche
1/2 tsp Filippo Berio Extra Virgin Olive Oil
1/2 tsp honey

Ingredients for Fajita Platter

1 tbsp Filippo Berio Extra Virgin Olive Oil
1/2 small red onion, cut into 1/4” strips
1/2 lb peppers (mix of sweet and spicy), seeded and cut into 1/4” strips
2–4 cloves garlic, thinly sliced
1 scallion, thinly sliced
1 jalapeno, thinly sliced
1 avocado, peeled and thinly sliced
1 lime, quartered
cilantro, for garnish
8–10 small tortillas, warmed
salt, to taste

* honeycrisp, pink lady, or fuji apple recommended

Procedure

To make the galbi marinade, combine the apple, onion, garlic, mirin, soy sauce, brown sugar, black pepper, and Filippo Berio Extra Virgin Olive Oil in a blender and blend until liquified. Place the galbi in a large zip-top bag or shallow dish and pour the marinade over it. Make sure all galbi pieces are in contact with the marinade and seal. Place in the fridge and allow to marinade for at least 1 hour, overnight recommended.

To make the gochujang crema, whisk together the gochujang, crème fraîche, Filippo Berio Extra Virgin Olive Oil, and honey until smooth. Set aside until ready to serve.

Heat a Korean-style indoor grill pan or stovetop griddle on medium-high. Add Filippo Berio Extra Virgin Olive Oil, then onion and pepper strips. Salt to taste, and continue to cook, flipping occasionally, until edges begin to brown. Move to the edges of the grill pan where there is less heat. Add garlic slices and cook until slightly golden on each side, then move away from direct heat as well. 

Drain excess marinade from the galbi and place on the grill pan. Cook until slightly charred on one side, flip, and cook the other side (2–4 minutes per side). 

Transfer pepper and onion mixture to a serving platter, as well as garlic. If desired, use kitchen shears to cut galbi into smaller pieces and remove bone pieces. Arrange galbi on the serving platter and garnish with scallions. Add jalapeno slices, avocado, and lime. Garnish with cilantro. Serve alongside warmed tortillas and gochujang crema, and enjoy family style.

Thank you so much to Filippo Berio for sponsoring this recipe! Visit their website to learn more about their authentic Italian olive oils, made to the highest quality standard of excellence and craftsmanship.

Recipe: Chili Makrut Yellowtail Ceviche

LM_DutchYellowtail_Pt2_Post2.JPG

One of my favorite food memories of all time is from a ceviche tostadas stall in Mexico City called Tostadas La Chaparrita in the Mercado de Coyoacán. We had spent several hours waiting in the heat to get into Casa Azul (a.k.a. Frida Kahlo’s old home turned museum) and were desperate for a good bite to eat after a disappointing museum experience. A quick Google search led me to this well-reviewed place but what we got when we arrived exceeded expectations—a wide bar lined with mounds and mounds of all varieties of ceviche, ready to be piled on to crispy tortillas. They were piled up the way spices are heaped in the markets in Turkey or Morocco, but the piles were fresh seafood in every combination imaginable, marinated in lime juice. 

I often daydream about those mountains of ceviche but I never thought to try making my own until I learned about The Kingfish Company’s Dutch Yellowtail. It recently became available in the frozen section at Whole Foods Markets and because of the way it is raised and frozen, it is safe to eat raw as a high-grade sashimi when properly thawed. Dutch Yellowtail is sustainably raised in indoor basins on land using pristine water from a marine estuary. It is also a “Green Choice” as recommended by the Good Fish Foundation in the Netherlands. This means that it is raised specifically to be clean to eat and clean for the planet as well! When I took the thawed pieces out of the packaging, I found the fish to be firm and bouncy, with a clean smell. Since Dutch Yellowtail has a mild flavor and firm texture, it is so perfect for ceviche! 

Instead of replicating those exact memories of ceviche in Mexico or a traditional recipe from Peru, I wanted to come up with my own take on it, using Southeast Asian ingredients. I took inspiration from the aromatics used in the Malaysian food of my heritage, but I also was inspired by Thai and Vietnamese dipping sauces as I was developing the recipe for my ceviche marinade. I think that a little bit of funk from fish sauce, a little spice from fresh chilies, and bright, aromatic flavors like ginger and makrut lime leaves put such a great spin on ceviche that is distinctly Southeast Asian and therefore, distinctly me!

SEAsianCeviche_4.JPG

What you should know about the ingredients:

  • Dutch Yellowtail: This sustainably raised fish comes from farms run on 100% green energy and with no hormones or antibiotics. Its taste is similar to the hamachi you would find at a sushi restaurant. It absorbs the flavors of the marinade really well, and the longer you keep it in the marinade, the more “cooked” the texture will seem. I enjoyed it both with a brief (30 minute) rest, where the texture was more similar to sashimi, as well as after it soaked overnight. Look for this at Whole Foods Market!

  • bird’s eye chilies: These are also known as Thai chilies or I grew up calling them chilli padi. I love the instant spicy zing that they impart on Southeast Asian dipping sauces, but I personally find biting into a fresh piece to feel too much like a tiny fireball on my tongue. I picked them out before mixing the marinade with the fish but leave them in if you prefer!

  • makrut lime leaves: To me, this is what gives this ceviche recipe a unique flavor that is distinct from the ceviches of Latin American countries. (You can read more about alternative names for finding it here.) The leaves are quite hard, so slice them as finely as you can; I like to kind of crush them up a bit with my hand before rolling them tightly to cut a fine chiffonade. Of course, it is okay to leave this ingredient out if you can’t find it, but the dish will not have as much of a unique Southeast Asian flavor.

SEAsianCeviche_1.JPG
LM_DutchYellowtail_Pt2_Post1.JPG

In the photos here, you can see that I’ve served this ceviche a couple different ways:

  • Tostadas, inspired by my experience in Mexico City—You can often buy ready-made tostadas in the tortilla section of a grocery store, or you can simply make your own by deep frying corn tortillas in corn oil until they are nice and crunchy.

  • Toast, my all-time favorite carb based food vehicle—Use whatever is your favorite method for making toast; spreading on a layer of the avocado mash first before piling on the ceviche will help prevent the bread from getting soggy

This ceviche would also be great in little single-serving glasses, or served family style with tortilla chips for scooping. However you choose to serve it, I hope these ideas inspire you to make your own fresh yellowtail ceviche at home!

SEAsianCeviche_3.JPG

How to Make Chili Makrut Yellowtail Ceviche & Mashed Avocado

Ingredients for the Marinade

3/8–1/2 cup lime juice (about 4 limes)
2 tsp fish sauce
1 tbsp brown sugar
1–2 bird’s eye chilies, sliced
2 tsp ginger, finely grated
1 clove garlic, finely grated

Ingredients for Ceviche

8 oz Dutch Yellowtail, cut into small cubes (about 1/4”–1/2”)
2 makrut lime leaves, very finely sliced
1/2 shallot, finely chopped
2 sprigs Thai basil leaves, torn
5 stalks cilantro, leaves picked

Ingredients for Mashed Avocado

1 ripe avocado
1/2 lime, juiced
pinch of salt

For serving

prepared toasts, tostadas, or tortilla chips
microgreens, radish slices, or edible flowers (optional)

Procedure

Combine the ingredients for the marinade and let stand for 1 hour. Then, optionally, remove the chili pieces.

Combine the Dutch Yellowtail cubes, makrut lime leaves, shallot, and Thai basil leaves with the prepared marinade. Mix together and let the ceviche marinade in the fridge for at least 20 minutes, or up to overnight, depending on preference. (Over time, the fish will take on more flavor from the marinade and have more of a “cooked” texture.) Add the cilantro leaves after the ceviche has rested to the desired doneness. 

Just before serving, slice open the avocado, remove pit, and scoop flesh into a bowl. Add lime juice and salt and mash together to the desired consistency.

Serve the ceviche on top of avocado mash on toast or tostadas, or serve both components with tortilla chips on the side.


Thank you so much to The Kingfish Company for sponsoring this recipe! Visit their website to learn more about how they raise their sustainable fresh Dutch Yellowtail!

Disclaimer: consuming raw or undercooked meats, poultry, seafood, shellfish, or eggs may increase your risk of foodborne illness, especially if you have certain medical conditions.

Recipe: Chicken Skewers with Seared Summer Fruit and Burrata

ChickenSkewers_1.JPG

It’s my favorite produce season of the year! I love every season for different reasons, but when it comes to the celebrating the joy of what’s actually IN season, harvest-wise, I get soooo excited for summer. All the stone fruits, berries, and especially getting to harvest the tomatoes in my backyard! I have been loading up on way too many peaches, nectarines, and apricots when I hit up the grocery store, but I just can’t help it when I see piles and piles of stone fruits in the produce aisle.

Fortunately, I have come to realize that stone fruits go so well in savory dishes. I am obsessed with the combination of fruit and burrata these days (and let’s be real—I’m obsessed with burrata every day) but stone fruits also go really well with chicken. If you are one of those people who is on the fence about mixing sweet and savory then I am hoping this recipe will sway you.

ChickenSkewers_4.JPG

Lately my meals have been revolving around an idea for a salad I want to make, and then thinking about how to turn that salad idea into a more robust dinner for me and Spouse. When I started planning for this recipe, I knew I wanted to pair a stone fruit and burrata salad with some sort of chicken skewers. What I love about making chicken skewers is that if you cut up chicken thighs into little pieces, they are so nice and juicy and they are able to take on flavor so quickly just with a little seasoning—no need to plan ahead and marinade for a long amount of time beforehand.

I know that all of Spice Tribe’s travel-inspired seasoning blends are so good, so I couldn’t decide which one I wanted to use in my chicken skewers recipe. So one evening I did a little taste test where I cooked up 3 different chicken thighs, each one seasoned with just a little kosher salt and one of these blends: Mama Manje, Mombacho Cafe, and Marrakesh Sitar. Spouse and I tried tasting each one really carefully, but we honestly loved them all! When we really forced ourselves to nitpick, we concluded that the Mama Manje was the least exciting by a hair—tasty, but felt the most like a typical rotisserie chicken flavor; no wonder I have been reaching for it often as an all-purpose seasoning. Mombacho Cafe and Marrakesh Sitar were still completely tied—both had a depth of flavor that made the very simply-cooked chicken feel special. I ended up going with Marrakesh Sitar because Moroccan cuisine happens to have some gorgeous examples of sweet fruits getting incorporated in savory dishes.

This is often my thought process when coming up with a recipe. It’s about what ingredients and flavor combos I am excited to put together, but equally important is whether there is a story I can tell about the reason I put these things together. I have not been to Morocco and I am not the least bit knowledgable about the food there, but I have enjoyed whatever Moroccan food I have had access to. I love the preserved lemons, and I love the tagines that incorporate apricots and raisins into meaty stews. Thinking about Moroccan food really helped me flesh out my ideas for this recipe, and what I ended up with is a sort of fresh and quick version of the ingredients you might find in slow cooked Moroccan tagines. I added grapes to the salad as a counterpart to the raisins, as well as olives for a savory balance. I decided to use fresh mint for the dressing; even though mint appears most typically in Moroccan cuisine in the form of tea, using it as a fresh herb felt fitting for building on the theme.

The end result is a fantastic meal for weeknights when you want something quick and easy but still super fun to eat. If you can’t be bothered to skewer up the meats, you could just cook boneless chicken thighs whole—not as fun to eat but still incredibly tasty! I cooked everything on my big flat stovetop griddle, so there also wasn’t a ton of cleanup to do after, which is definitely another big perk of the way this recipe works. It is perfect for summer days when you want that grilling vibe without the hassle of firing up the grill, or when it is too hot to eat something heavy and you just want an excuse to eat a bunch of stone fruit.

ChickenSkewers_3.JPG

How to Make Chicken Skewers with Seared Summer Fruit and Burrata

Ingredients for the Mint Dressing

1/2 tsp dried oregano, finely crushed
1 clove garlic, microplaned
1/4 tsp Spice Tribe Maras Chile Flakes
1/2 tsp salt
4 tsp red wine vinegar
1/4 cup mint leaves, chopped
1/4 cup extra virgin olive oil

Ingredients For the Chicken Skewers

2 large chicken thighs, deboned and cut into 1-inch chunks*
1/4 – 1/2 teaspoon kosher salt
1 1/2 tsp Spice Tribe Marrakesh Sitar blend
1 tbsp extra virgin olive oil, plus extra for cooking
1 lemon, halved

Ingredients For the Salad

2 peaches or nectarines, cut into eighths
2 apricots, cut into halves or quarters
1/2 cup seedless grapes, halved
1/2 cup castelvetrano olives 
4 oz burrata
Fresh mint leaves, for garnish

* Feel free to use skin-on or skinless, according to preference. I used skin-on because I love crispy chicken skin!

Procedure

Begin preparing the mint dressing. In a heat-safe bowl, combine dried oregano, garlic, Spice Tribe Maras Chile Flakes, salt, and vinegar. Mix together and let stand for at least 15 minutes to allow the flavors to combine.

Prepare the chicken skewers. Combine chicken pieces, salt, Spice Tribe Marrakesh Sitar spice blend, and olive oil in a small bowl and mix so the chicken is evenly coated in the spices. Allow to rest for at least 5 minutes, then divide the chicken among 4 skewers.

In a small saucepan, heat olive oil for the dressing until it starts to ripple. Add the mint on top of the dressing mixture, and then carefully pour the hot oil on top of the mint. (There will be some splatter.) Stir dressing together and set aside.

On high, heat a griddle pan or a cast iron skillet large enough to accommodate the skewers. Drizzle a small amount of olive oil into the pan and use tongs and a folded piece of paper towel to spread a thin layer of oil over the whole cooking surface. Turn heat down to medium-high and add the chicken skewers. Cook for about 12 minutes, rotating a quarter turn every 3 minutes; if necessary, place a pot lid or grill press on top of the skewers to weigh them down and ensure even contact with the cooking surface. (Chicken is cooked through if a toothpick is inserted and juices run clear.) Transfer cooked skewers to a plate, squeeze half the lemon over them, and cover tightly with foil to keep warm.

Add the peach/nectarine and apricot slices to the griddle cut side down. Sear until there is slight browning, then flip and lightly sear the other cut side.

Scatter the peach/nectarine and apricot slices on a platter, along with the grapes and olives. Tear burrata into a few chunks and add them to the platter. Add skewers. Drizzle mint dressing over everything and scatter fresh mint leaves for garnish. Cut the remaining lemon half into 2 pieces and serve with the platter.

Enjoy with flatbreads or couscous.

Thank you so much to Spice Tribe for sponsoring this recipe! Check them out on Instagram here or visit their website to purchase high quality spices and unique small-batch spice blends.

Recipe: The Easiest Strawberry Galette

strawberry-galette.JPG

This is for sure the easiest strawberry galette recipe because the very first time I made it was under pretty stressful circumstances, and I still managed to pull it off on the fly; it turned out so well despite my totally just winging it that I decided to make it again to write the recipe down and share it with you guys.

The first time I made this strawberry galette was for my friend’s big 30th birthday bash in Palm Springs. His husband had gone all out organizing a gorgeous multi-casita private resort rental for our group of 10 for a long weekend and it was everyone’s first post-vaccination group outing so we were all a little giddy with the culture shock of spending time with other humans again. Prior to the event, all the planning was coordinated through a group chat on Instagram and during our first meal all together, I learned that most of the party had already checked out (stalked) each other’s Instagram accounts, and were very intrigued as to why one of the party members (ME) had thousands of followers. Everyone was incredibly kind and curious to learn about my career as a food blogger, but of course in my mind the pressure was on for the brunch that I had planned to contribute to a couple days later. THEN, I learned that the plan for the entire group to contribute to said brunch was scrapped and that there was no backup plan other than my enthusiasm (which, thankfully, was shared by one other party-goer who wanted to cook too). My original plan has been to make my Everything But the Bagel Galette for the group cookout, but since no one but myself and one other person would be cooking, I knew I had to make another dish, and I tried to come up with something as easy as possible that would still look beautiful on a brunch table. And this is what I came up with!

Despite the ease with which I can describe myself cooking, I get pretty dang nervous cooking for anyone but my spouse and my family. So when I found myself in an AirBnB kitchen I had never used before, cooking for more people than I had ever cooked for before at any one time, and with a reputation to uphold—can you see why I said the circumstances were stressful? And yet, I was still really happy with how the galette turned out! If I could pull it off then, I think you can pull it off now.

strawberry-galette-unbaked1.JPG
strawberry-galette-unbaked2.JPG

This recipe is also super riffable (I hate that word) in that you can follow the same steps but switch up the fruit or the cheese for completely different flavors. You can change up the toppings for the crust, or add nothing at all if you want it keep things the absolute simplest. Strawberries are in season now and that is something I get very excited about, but I am eager to try this out with other fruits too.

Here are the simple steps to fruit and cheese galette glory:

  • Prep the ingredients: Move a ready-made frozen pie dough sheet to the fridge the night before to thaw, and then leave it on the kitchen counter to warm up for 30 minutes before rolling it out. (Or, if you didn’t plan ahead, leave the frozen pie crust out for 1–2 hours until it’s malleable.) You’ll also want to macerate the strawberries for that same amount of time. Macerating means adding sugar to the berries to draw out some of the liquid and sort of marinate in the sugar at the same time.

  • Roll out the dough: I use the frozen pie dough from Trader Joe’s and they crack 100% of the time when I unroll them. But this is no big deal! I just ball it all up together and roll it out again.

  • Spread the cheese: This tart is such a crowd pleaser because it’s a little sweet and a little savory at the same time. But on a practical level, the cheese layer helps protect the pastry, preventing the juices of the strawberries from making the crust soggy. I recommend chèvre (young goat cheese) for this, and you can even get a flavored one if you want to add another note to the galette—here I used this black truffle chèvre and it was soooo good! Other spreadable cheeses could work here too, like a well-strained ricotta or some feta. Whatever you use, you can pop it in the microwave for a few seconds first to get it to spread easily.

  • Add the fruit: Strain out the excess liquid that you don’t want to make the crust soggy, then pile the fruit in the middle.

  • Fold the crust: Galettes are meant to be rustic as far as I can tell, so don’t worry about making a perfect circle or anything. Just fold up little sections of dough all the way around.

  • Add finishing touches to the crust: You will want to eggwash the crust to get it to look golden brown but it’s not even close to the end of the world if you don’t have an egg and want to skip that. I think it is always nice to add a little something to the crust of a galette for more flavor and texture too, but it will still taste good if you choose not to add the sliced almonds and extra sugar like I did.

  • Bake: The pastry is so thin that it doesn’t take long but you will want to look out for it being golden brown on the top and crispy on the bottom.

Since the dough is meant for pies and the fruit is packed in there, don’t plan on being able to toss this gal like a frisbee, but other than that, I think it is a pretty unfussy recipe. The next time I find myself spontaneously having to cook brunch for a crowd, I know I’ll be making this again.

strawberry-galette.JPG

How to Make a Strawberry & Cheese Galette

Ingredients for the Galette

1 sheet ready-made pie dough, thawed in the fridge overnight*
1 pint strawberries, stems and leaves removed
2 tbsp granulated sugar (white or raw turbinado)
1/2 tsp flour, plus extra for dusting
5+ oz goat cheese, at room temp
1 egg, beaten

InGredients for the Optional Parts

a few sprigs of thyme, leaves picked
1/3 cup sliced almonds
1 1/2 tsp turbinado sugar
1 tbsp honey
1/2 tsp water

* If unable to plan the night before, leave the frozen crust out on the counter until malleable, about 1–2 hours

Procedure

Remove the pie dough from the fridge and allow to come to room temperature for about 30–40 minutes.

In the meantime, slice the strawberries—halve small ones and cut larger ones into slices so that everything is about equal thickness. Combine the sliced strawberries and granulated sugar in a bowl and toss gently to combine. Allow the strawberries to macerate until the sugar is completely dissolved and a noticeable amount of liquid has been released, about 30 minutes.

Preheat oven to 450°F.

Form a round disk with the pie dough. On a floured surface, roll out the dough to a 12-inch circle. Transfer the dough circle to a piece of parchment paper.

If needed, microwave the cheese in a small bowl for 10 seconds to get a spreadable consistency. Spread the cheese in the middle, leaving an empty 1-inch border all the way around. Optionally, sprinkle thyme leaves over the cheese.

Drain the excess liquid from the strawberries. Add the flour and toss to coat. Pile the strawberries in the middle of the cheese layer, leaving an empty 1-inch border of cheese all the way around (see image above).

Brush the dough border with beaten egg and fold small sections over the filling to form a galette-style crust. Brush the pleated crust thoroughly with egg, making sure to get it in all the folds and crannies.

Optional step: Combined sliced almonds with about 1 tbsp of the remaining beaten egg (or more as needed for all the almond slices to be very thinly coated in egg). Gently pat the almonds onto the crust. Then, sprinkle the turbinado sugar evenly over the crust.

Slide parchment paper onto an inverted baking tray and bake the galette on the middle rack for 20–25 minutes, rotating once halfway.

Optional step: Combine honey and water in a small bowl and microwave for 10 seconds. Stir together to make a glaze, and brush the glaze over the fruit when the galette comes out of the oven.

Allow the galette to rest for 10 minutes before cutting and serving.